Hello Colleagues!
Welcome once again to another content of my authorship. Today I will be sharing with all of you the second part of my experience with the Samsung NP300E5C Laptop. In the first part I shared how I managed to access the BIOS after having many problems with it, since for some reason it would not let me access by any of the access keys.
¡Qué tal Colegas!
Sean bienvenidos una vez más a otro contenido de mi autoría. El día estaré compartiendo con todos ustedes la segunda parte de mi experiencia con la Laptop Samsung NP300E5C. En la primera parte compartí la manera de como logre acceder a la BIOS después de haber tenido muchos inconvenientes con la misma, ya que esta por algún motivo no se dejaba acceder por ninguna de las teclas de acceso.
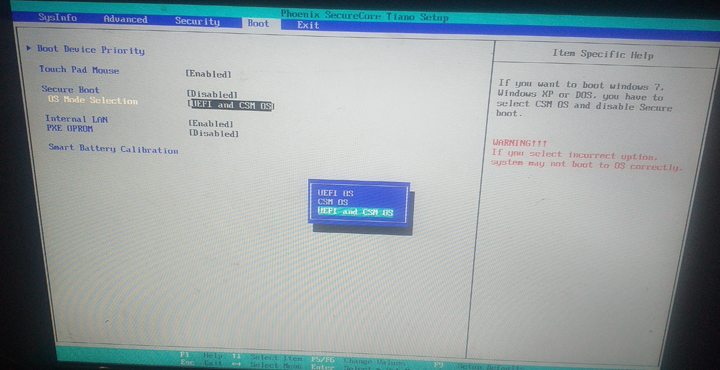
After having achieved the goal, I thought that everything would be much easier, but in reality there were a few problems which got me out of my mind. When I managed to enter the BIOS I set out to configure it, the first thing I did was to enable the option for the system not only to recognize "UEFI Systems", but also to recognize the "BIOS/LEGACY System".
Después de haber conseguido el objetivo, pensé que todo sería muchísimo más fácil, pero en realidad aparecieron unos cuantos inconvenientes los cuales llegaron sacarme de mis casillas. Cuando logre entrar a la BIOS me dispuse a configurarla, lo primero que hice fue habilitar la opción para que el sistema no solo reconociera “Sistemas UEFI”, sino que también pudiera reconocer el “Sistema BIOS/LEGACY”.

For the configuration I did it correctly, I went directly to the "Boot" option, then in its options I went to "Secure Boot" and unchecked it, by doing this it gave me the option to "OS Mode Selection" to then be able to make the selection I was looking for which in this case was "UEFI and CSM OS". With this the system was going to allow booting into any of the above mentioned partition systems.
Para la configuración lo hice de forma correcta, entre directamente a la opción de “Arranque”, luego en sus opciones me ubique en “Arranque Seguro” y lo desactive, al hacer esto me dio la opción a la “Selección del Modo del SO” para luego poder hacer selección que buscaba que en este caso era “UEFI and CSM OS”. Con esto el sistema iba a permitir el arranque en cualquiera de los sistemas de partición antes mencionado.
Up to this point everything was going quite well, now I had to make the configuration to boot the system directly from the USB, which already had Windows 7 ready. I did the configuration without further ado and before saving the changes I did the installation of the Hard Disk again, I saved the changes and let the system start again, but my biggest surprise was that it did not boot from the USB, I tried several times and even spent hours trying all kinds of configurations and nothing.
After many unsuccessful attempts I took a moment of respite and then went back to investigate a little about the model of the laptop, I must say that deciding this was the best thing I could have done, because thanks to that I could realize the problem. The information I managed to get did not go beyond a BIOS update problem, as these types of Samsung laptops come from the factory with the first version of the BIOS and that was what was creating so much conflict. Now by this time I knew that by doing a BIOS update, the problems would be gone for good.
Hasta este punto todo iba bastante bien, ahora me tocaba hacer la configuración para que al arrancar el sistema lo hiciera directamente por el USB, el cual ya tenía listo el Windows 7. Hice la configuración sin más y antes de guardar los cambios hice la instalación del Disco Duro nuevamente, al hacerlo guarde los cambio y deje que el sistema iniciara nuevamente, pero mi mayor sorpresa fue que no arranco por el USB, lo intente varias veces e incluso pase horas intentando configuraciones de todo tipo y nada.
Después de muchos intentos fallidos me tome un momento de respiro para luego volver a indagar un poco sobre el modelo de la portátil, debo decir que al decidir esto fue lo mejor que pude haber hecho, ya que gracias a eso pude darme cuenta del problema. La información que logre obtener no iba más allá de un problema de actualización de BIOS, ya que este tipo de portátiles Samsung vienen de fábrica con la primera versión de la BIOS y era eso lo que estaba creando tanto conflicto. Ahora para ese momento sabía que haciendo una actualización de la BIOS, desaparecerían los problemas para siempre.

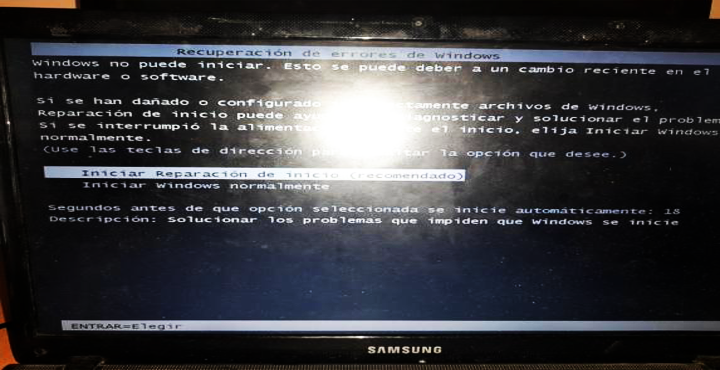
Now I had the solution. I already had the solution, but I needed to format the Hard Disk to be able to do the BIOS update, so I came up with the idea of taking out the Hard Disk, connect it to my PC and format it from there. So I did it, I took advantage of the fact that I had Windows 7 ready on the USB and I did it. I had to wait about an hour and a half, since for some reason the formatting was a little slow. Finally it finished, and without doing any type of update to the Software, I took off the Hard Disk of My Computer PC and I put it again in the Laptop, when turning it on everything flowed well, but another inconvenience was presented when it was going to load the logo of Windows, it stayed to the half and then it threw me the famous blue screen of the death. At that moment I thought that the Hard Disk could also be damaged, so I immediately took it out and tested it again in My Computer PC, my surprise was that it ran Windows normally. When I saw this the first thing I thought was a compatibility error of Windows 7 with the laptop.
Ahora bien! Ya tenía la solución, pero necesitaba si o si formatear el Disco Duro para poder hacer la actualización de la BIOS, así que se me ocurrió la idea de sacar el Disco Duro, conectarlo en mi PC Ordenador y hacerle un formateo desde ahí. Así fue que lo hice, aproveche que tenía el Windows 7 listo en la USB y lo hice. Tuve que esperar un aproximado de hora y media, ya que por alguna razón el formateo iba algo lento. Finalmente termino, y sin hacerle ningún tipo de actualización al Software, despegue el Disco Duro de Mi PC Ordenador y lo volví a poner en la Laptop, al encenderla todo fluía bien, pero otro inconveniente se presentó cuando iba a cargar el logo de Windows, se quedaba a la mitad y luego me lanzaba la famosa pantalla azul de la muerte. En ese momento pensé que el Disco Duro también podía estar dañado, así que inmediatamente lo saque y lo volví a probar en Mi PC Ordenador, mi sorpresa fue que ahí si se ejecutó el Windows con normalidad. Al ver esto lo primero que pensé fue en algún error de compatibilidad del Windows 7 con la Portátil.
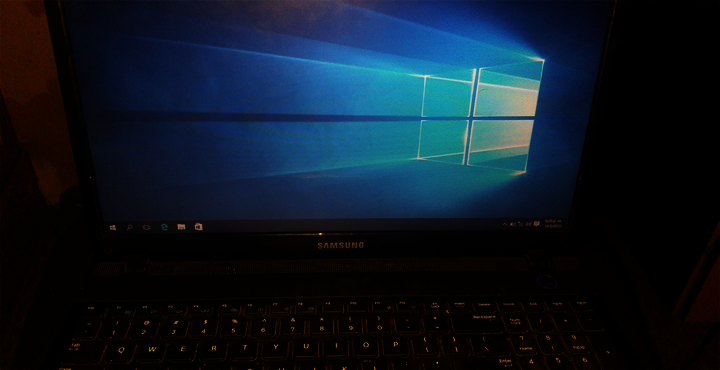
By that time I was very tired, both mentally and physically, but I decided to do the rest, so I got down to work. It is important to say that at the time I didn't have a more modern operating system and I didn't have a USB device with the amount of storage to do the installation, so I had to contact a few friends to get what I needed. To my luck one of them had a "Windows 10 ISO image" and another one had an 8GB USB that he could provide me without any problem, without thinking too much I went in search of it. Having everything ready, I did the same procedure again from my PC Computer and did the Windows 10 installation from there using the "Rufus" program. I must say that this process was much faster than the previous one, when I finished the installation of Windows 10 on the Hard Disk I took it out again to connect it immediately to the Laptop and it was at that moment where I would start to arrive from happiness =) The operating system ran and started without any problem. At that moment I felt a lot of satisfaction for the simple fact of having been right in many things I thought during this whole process.
Para ese momento tenía un gran cansancio, tanto mental como físico, pero decidí echar el resto, así que me puse manos a la obra. Es importante decir que para el momento no contaba con un Sistema operativo más moderno y tampoco tenía algún dispositivo USB con la cantidad de almacenamiento para hacer la instalación, así que me toco contactar a unos cuantos amigos para conseguir lo que necesitaba. Para mi suerte uno de ellos tenía una “Imagen ISO de Windows 10” y otro tenía una USB de 8GB que podía facilitarme sin problema, sin pensarlo mucho me dispuse a ir en busca de ello. Al tener todo listo, volví hacer el mismo procedimiento desde mi PC Ordenador e hice la instalación del Windows 10 desde ahí usando el programa “Rufus”. Debo decir que este proceso fue mucho más rápido que el anterior, al terminar la instalación del Windows 10 en el Disco Duro volví a sacarlo para conectarlo inmediatamente a la Laptop y fue en ese momento donde empezaría a llegar de felicidad =) El sistema operativo se ejecutó e inicio sin ningún problema. En ese momento sentí mucha satisfacción por el simple hecho de haber estado en lo correcto en muchas cosas que pensé durante todo este proceso.
I had 90% ready and I just needed to do the BIOS update to see if I was right. When I was investigating I found the exclusive program for Samsung Laptops "BIOSUpdate", this program allows to make the BIOS updates to these Samsung models.
Ya tenía un 90% listo y solo me faltaba hacer la actualización de la BIOS para ver si estaba en lo correcto. Cuando estuve indagando encontré el programa exclusivo para Laptops Samsung “BIOSUpdate”, este programa permite hacer las actualizaciones de BIOS a estos modelos de la Samsung.
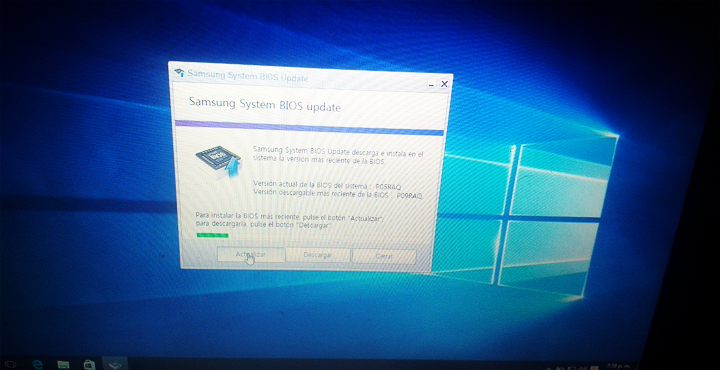
Once I downloaded it I proceeded to install it, the program automatically searches for the most current BIOS version for the Samsung model and then gives you the option to update =)
After updating the system enters a reboot point which starts the installation of the new BIOS version. Once it is ready, the system will tell you that it is finished.
Una vez lo descargue procedí hacer la instalación, el programa de forma automática te busca la versión más actual de BIOS para el modelo de la Samsung y seguidamente te da la opción para actualizar =)
Después de actualizar el sistema entra en punto de reinicio por el cual empieza hacer la instalación de la nueva versión de la BIOS. Una vez lista el mismo sistema te indicara que ya ha finalizado.
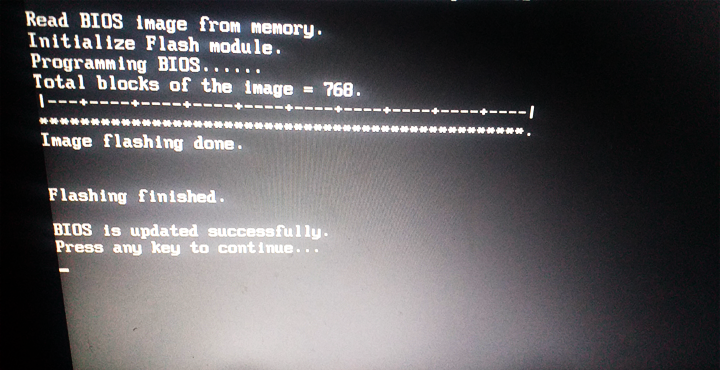

After finishing this process I took the opportunity to test the access keys and it was at that precise moment where I took another big breath accompanied by a great satisfaction and happiness. Already the system recognized the access keys without any problem and in the same way it also respected the boot positions, I tried placing the USB again and now it entered directly to the installation of the operating system.
Al terminar con todo ese proceso aproveche para probar las teclas de acceso y fue en ese preciso momento donde tome otro gran respiro acompañado de una gran satisfacción y felicidad. Ya el sistema reconocía las teclas de accesos sin ningún problema y del mismo modo respetaba también las posiciones de arranques, probé colocando nuevamente el USB y ahora si entraba directo a la instalación del sistema operativo.

Now I can say that my goal with this laptop was 100% achieved and I could solve the BIOS problem in its entirety. My great effort was rewarded (Satisfaction in pure state).
Ahora si se puede decir que mi objetivo con esta laptop se logró en un 100% y pude solucionar el problema de la BIOS en su totalidad. Mi gran esfuerzo obtuvo su recompensa (Satisfacción en estado puro).

All the images that I showed in this content are of my total authorship. Thanks for visiting and reading my content, see you soon!
Todas las imágenes que mostré en este contenido son de mi total autoría. Gracias por visitar y leer mi contenido, hasta pronto!


 |  |  |
It's nice that you solved your BIOS problem. It's been a while since I touch BIOS and because I am procrastinating a lot while I have to solve my own BIOS. It must be frustrating.
Hi @macchiata =) Nice to see you here... The truth is as you say at the end, it was very frustrating not being able to do anything because of the access problem that the BIOS had.
Disassembling and assembling the hard disk was exhausting, mentally I was about to give up, but thanks to persist I managed to solve it in the end.
Thanks for your comment =) Greetings and blessings!