Hola amigos, bienvenidos a mi rincón creativo| Hello Hivers
Hoy estoy súper feliz de compartir con ustedes uno de mis últimos proyectos, que está relacionado con este post, donde los invitaba a descubrir de qué se trataba, tomando en cuenta los materiales que había comprado, y debo decir que nadie acertó, solo @floreudys79 estuvo un poco cerca, pero no sé si había leído la segunda pista que dejé en comentarios 🤣, pero ha llegado la hora de mostrarles lo que hice con ellos, y fue restaurar y darles un cambio mis envases de cocina.
Today I am super happy to share with you one of my latest projects, which is related to this post, where I invited you to discover what it was about, taking into account the materials I had bought, and I must say that no one got it right, only @floreudys79 was a little close, but I don't know if she had read the second clue I left in comments 🤣, but the time has come to show you what I did with them, and it was to restore and give them a change my kitchen containers.
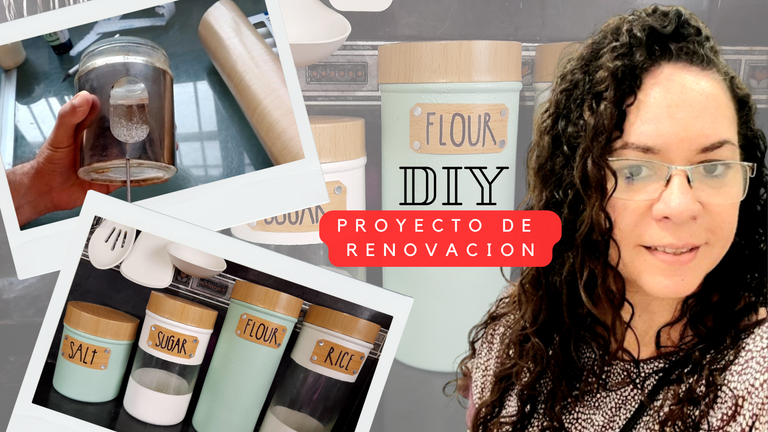
Como saben tengo rato activada con algunos cambios en casa, que se han ido extendiendo a los distintos espacios, y aunque hasta ahora sólo les he compartido proyectos navideños, no es todo lo que he estado haciendo, porque dentro de poco (como en marzo 🤣) retiro la navidad, y con el cambio de paleta de colores y estilo en casa, muchas cosas no combinan, pero lo que pueda transformar sin necesidad de comprar cosas nuevas lo haré, y ese es el caso de los envases que utilizo para colocar la sal, el azúcar, la harina de maíz y el arroz.
Estos, eran deacero inoxidable, como casi todo lo que tengo en casa tienen bastante tiempo conmigo, muchísimos años la verdad, pero aún seconservaban bastante bien, solo las tapas, especialmente la de la sal se estaba comenzando a dañar, pero en vista del cambio de aires en casa,y tomando en cuenta que al estar contra un salpicadero negro no resultaban en lo absoluto decidí cambiarlos. Y la verdad es que estuve buscando, pero a mi ojo de niña rica (solo el ojo) todo lo que le gustó estaba bastante caro, y la verdad solo vi dos juegos que me gustaron y los 4 envases sobrepasaron los 40$ y tampoco tenían los tamaños que necesitaba, así que mi opción fue la restauración. Y por aquí les comparto cómo lo hice.
As you know I have been active for a while with some changes at home, which have been spreading to different spaces, and although so far I have only shared with you Christmas projects, it is not all I've been doing, because soon (as in March 🤣) I'm retiring Christmas, and with the change of color palette and style at home, many things do not match, but what I can transform without buying new things I will, and that is the case of the containers I use to put the salt, sugar, corn flour and rice.
These were made of stainless steel, like almost everything I have at home, they have been with me for a long time, many years actually, but they were still quite well preserved, only the lids, especially the salt one, were starting to get damaged, but in view of the change of air at home, and taking into account that being against a black backsplash they were not at all, I decided to change them. And the truth is that I was looking, but to my rich girl eye (only the eye) everything I liked was quite expensive, and the truth is that I only saw two sets that I liked and the 4 containers exceeded the 40$ and neither had the sizes I needed, so my option was the restoration. And here I share with you how I did it.
Materiales
Pintura a la tiza blanca y menta
Esponjas
Pinceles
Finishcolor acrílico mate
Papel contac con diseño de madera
Tijera
Regla
Lápiz
Cartulina sulfatada
Lata de refresco
Materials
White and mint chalk paint
Sponges
Brushes
Finishcolor acrylic matte
Contact paper with wood design
Scissors
Ruler
Pencil
Sulfated cardboard
Soda can
Paso a Paso
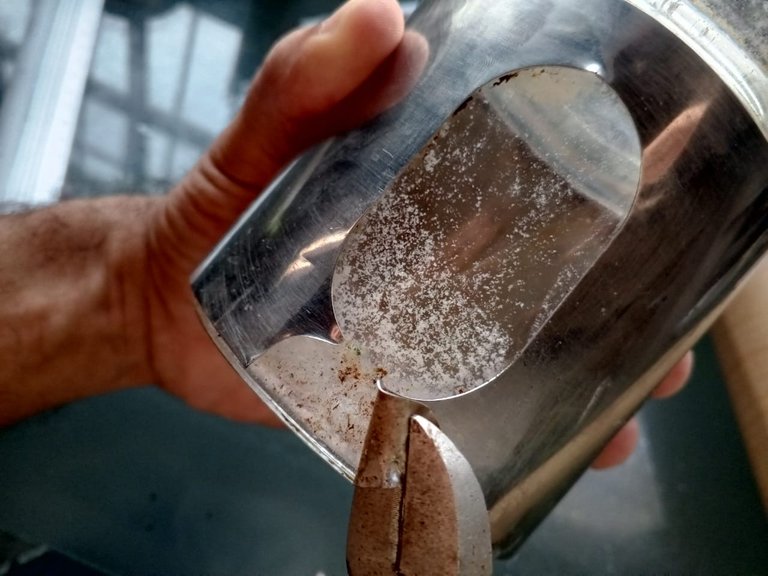
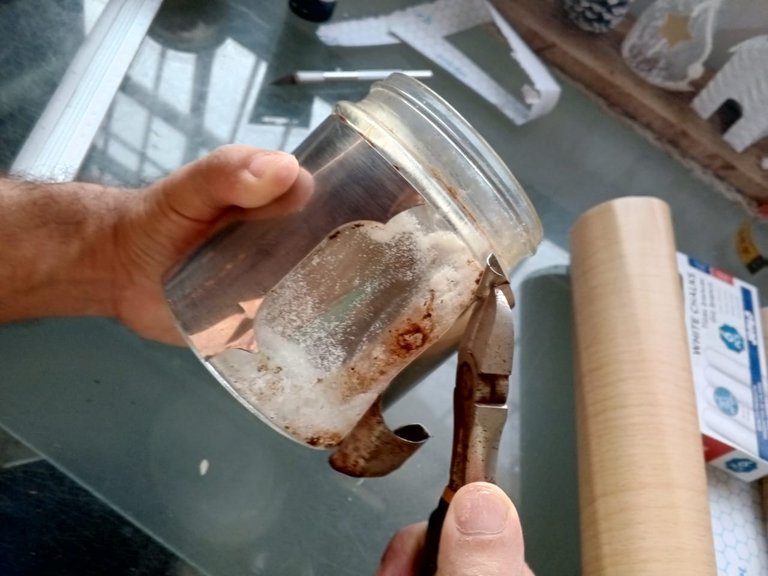
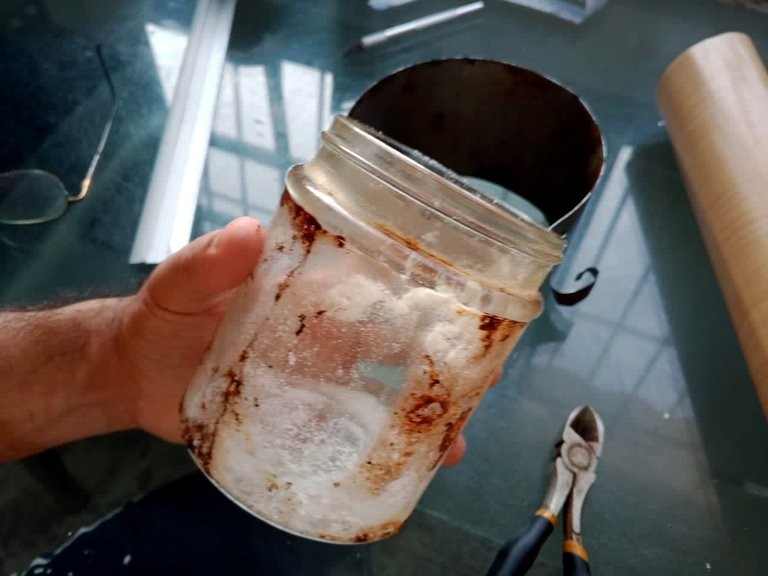
Lo primero que había que hacer era retirar la lámina de acero inoxidable, y ese trabajo y el de limpiarlas se lo dejé ami esposo ya que me daba miedo lastimarme las manos o cortarme, así que con ayuda de una tenaza lo retiró, pero sólo a la parte de vidrio porque a la tapa sería imposible quitárselo sin dañarlas, y una vez lo hizo con una esponja de metal retiró todo el óxido de los envases y las tapas y yo tenía todo listo para trabajar.
Y como se trataba de 4 envases decidí hacer dos en color blanco y dos en color menta, pero los blancos tendrían un espacio sin pintura y los menta estarían pintados por completo.
Step by Step
The first thing to do was to remove the stainless steel sheet, and I left that job and cleaning them to my husband because I was afraid of hurting my hands or cutting myself, so with the help of a pliers he removed it, but only the glass part because it would be impossible to remove the lid without damaging it, and once he did it with a metal sponge he removed all the rust from the containers and lids and I had everything ready to work.
And since there were 4 containers I decided to make two in white and two in mint color, but the white ones would have a space without paint and the mint ones would be painted completely.
Para los envases verdes, les cuento que fue toda una locura pues como les dije no encontré pintura a la tiza, así que me tocó hacerla siguiendo un turorial, y lo que tenía que hacer era bastante sencillo, mezclar cantidades iguales de pintura acrílica verde y tiza rallada por lo más fino del rallador y luego colarla.
Yo usé tres cucharadas pequeñas de pintura y tres de tiza, mezcla muy bien y agregué unas gotitas de agua.
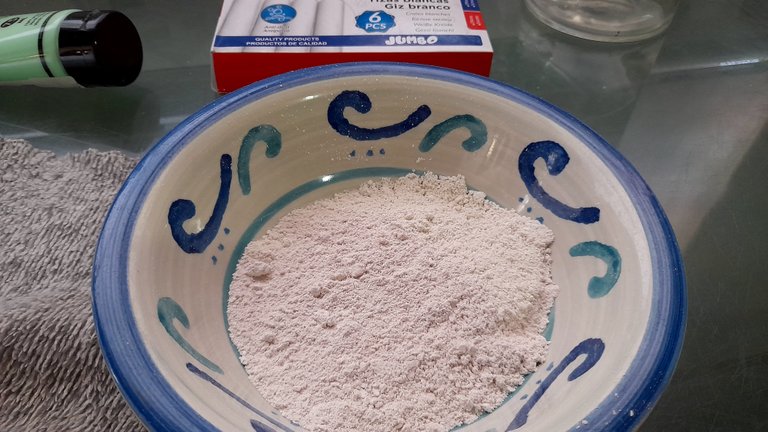
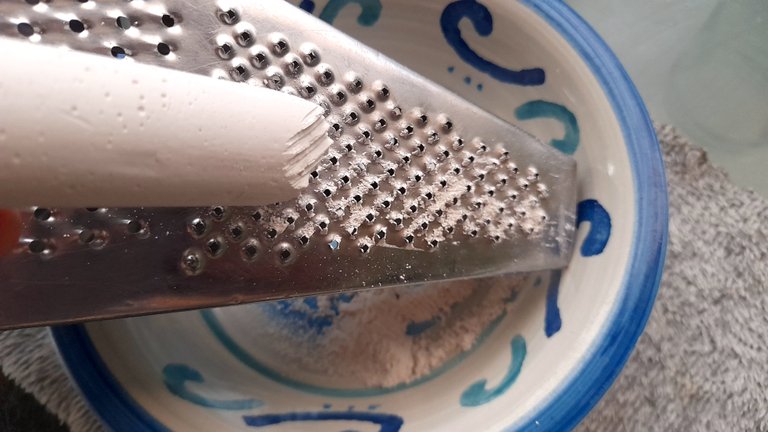
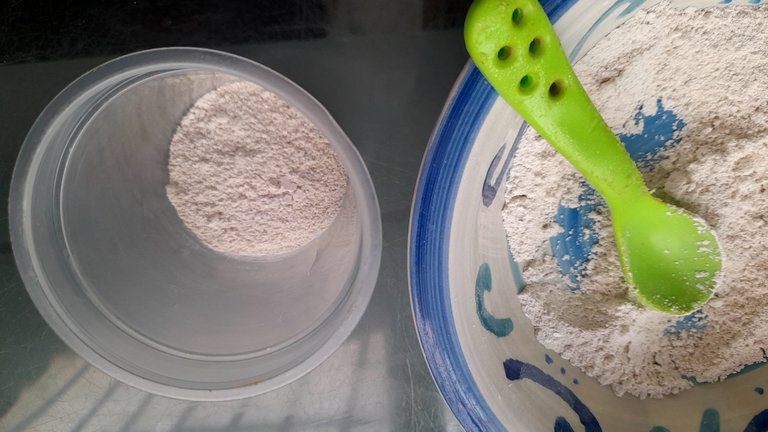
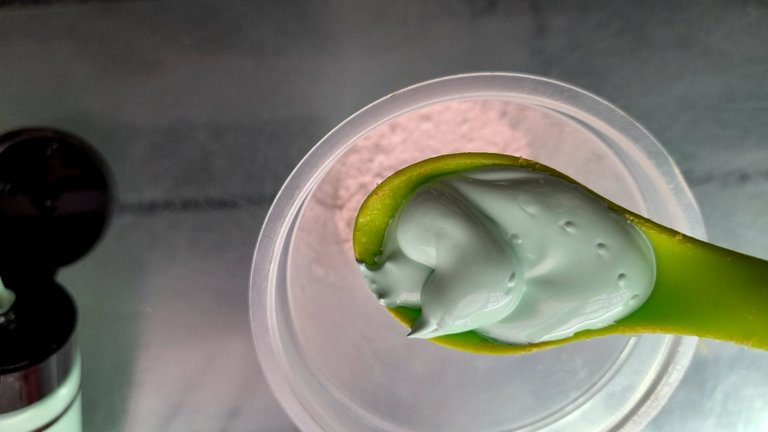
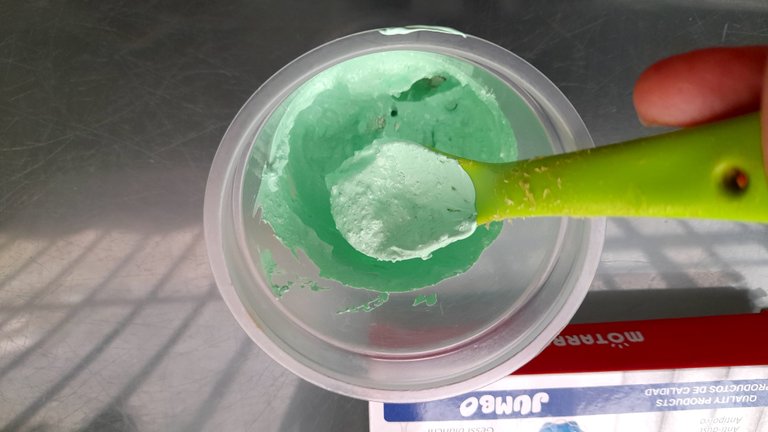
For the green containers, I tell you that it was crazy because as I said I did not find chalk paint, so I had to make it following a tutorial, and what I had to do was quite simple, mix equal amounts of green acrylic paint and grated chalk through the finest part of the grater and then strain it.
I used three small spoonfuls of paint and three spoonfuls of chalk, mixed very well and added a few drops of water.
El siguiente paso fue pintar los envases para lo que utilicé un trocito de esponja, solo basta mojar un poco y dar golpecitos por toda la superficie y como pueden ver se notan algunos grumitos, pero la verdad es que a mí no me molestan, y de hecho le dan un toque especial.
Con dos tandas de pintura dejando secar muy bien estaría suficiente, pero yo no sería yo si eso fuese tan fácil pues después de la primera capa el color no me gustó, lo veía muy oscuro, así que lo mezcla con blanco, le retiré toda la pintura al envase y volví a comenzar y terminé los dos envases que en este caso son el más pequeño y el más grande.
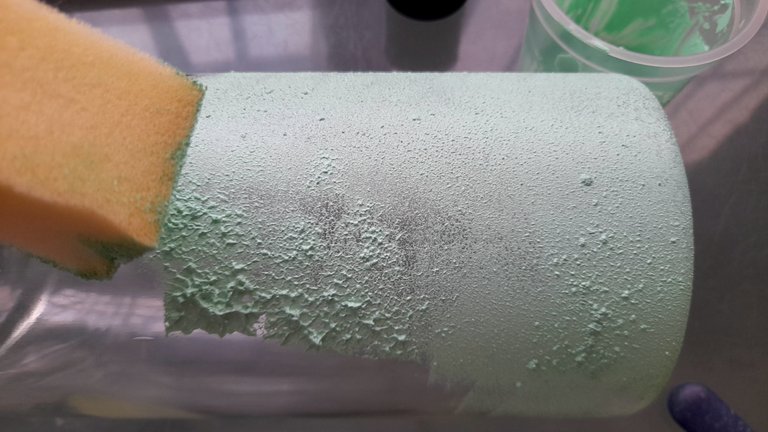
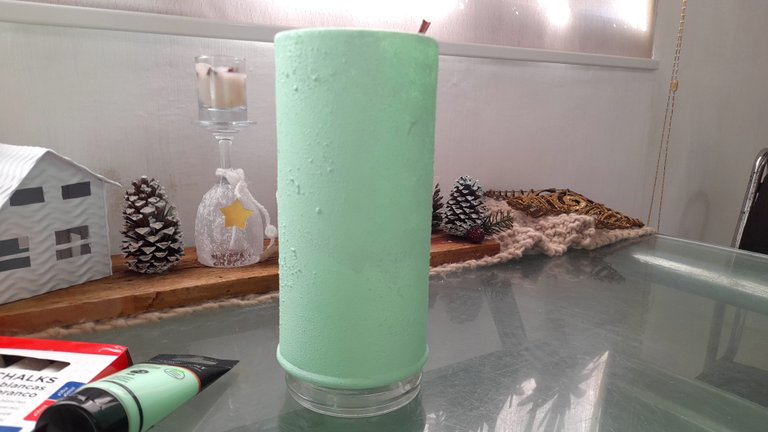
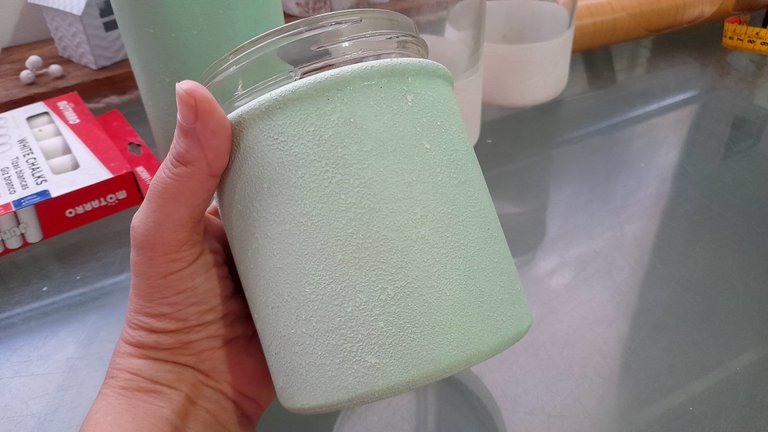
The next step was to paint the containers for which I used a small piece of sponge, just wet a little and tap the entire surface and as you can see there are some lumps, but the truth is that I do not mind, and in fact they give a special touch.
With two batches of paint letting it dry very well would be enough, but I would not be me if that was so easy because after the first coat I did not like the color, I saw it too dark, so I mixed it with white, I removed all the paint to the container and started again and finished the two containers which in this case are the smaller and the larger one.
Listos los envases verdes era el turno de los blancos y al no tener pintura a la tiza blanca, hice lo mismo que con la anterior, y como los envases tendrían un espacio en el centro sin pintar, usé cinta adhesiva para poder dejar este espacio y luego de colocarla, también con ayuda de la esponja pinté ambos envases, dando dos capas a cada uno.
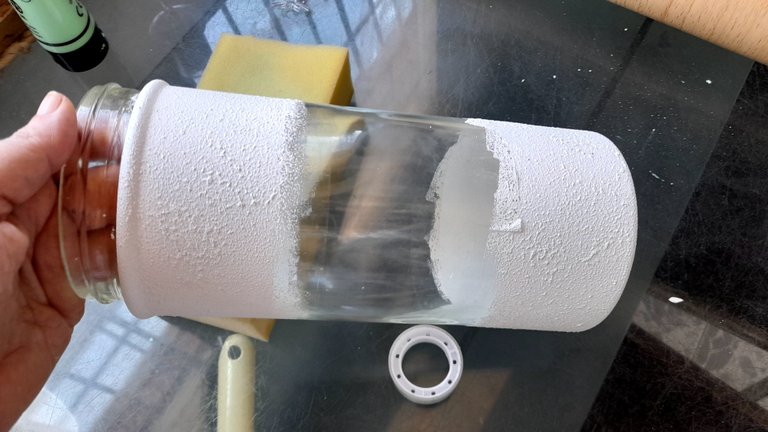
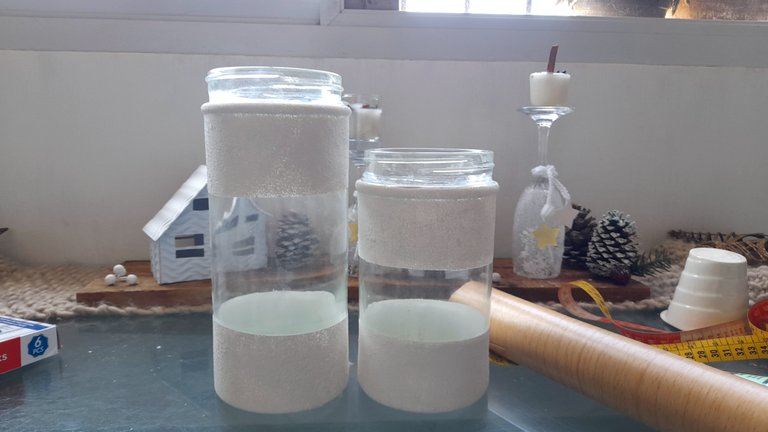
Once the green containers were ready, it was the turn of the white ones and since I didn't have white chalk paint, I did the same as with the previous one, and as the containers would have a space in the center unpainted, I used masking tape to leave this space and after placing it, also with the help of the sponge I painted both containers, giving two coats to each one.
El siguiente paso es colocar el finishcolor, que es un líquido para proteger nuestro trabajo, y al tratarse de envases que son de uso diario necesito poder limpiarlos sin dañar la pintura, y el que yo compré es de acabado mate porque me parece se ve mejor, y al igual que con la pintura, también lo coloqué con ayuda de la esponja. Dejando secar como mínimo entre cada capa, en mi caso decidí dar tres capas ya que en la cocina cualquier salpicadura puede dañarlos, así que quise protegerlos muy bien.
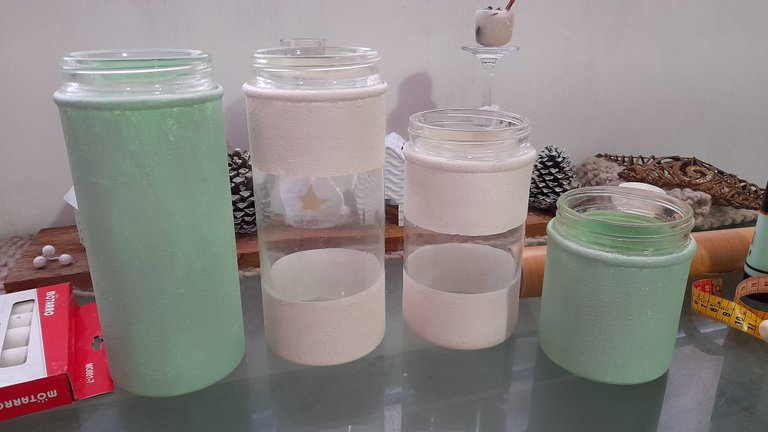

The next step is to apply the finishcolor, which is a liquid to protect our work, and being containers that are of daily use I need to be able to clean them without damaging the paint, and the one I bought is matte finish because I think it looks better, and as with the paint, I also applied it with the help of the sponge. Letting dry at least between each coat, in my case I decided to give three coats because in the kitchen any splash can damage them, so I wanted to protect them very well.
A continuación seguían las tapas, y aquí entra mi súper descubrimiento del papel contact que parece madera, de hecho al tacto lo es, cosa que me encanta. Y la verdad este paso no tiene mayor complicacion, pues lo que hice fue medir el borde de la tapa y recortar un listón de papel contac dejando un centímetro más de la medida, y lo pegué por todo el borde de la tapa.
Con el excedente utilicé otro truco que vi en Instagram, y es usar un secador de cabello que hace que el papel se doble hacia adentro y quede fijado súper bien por la acción del calor.
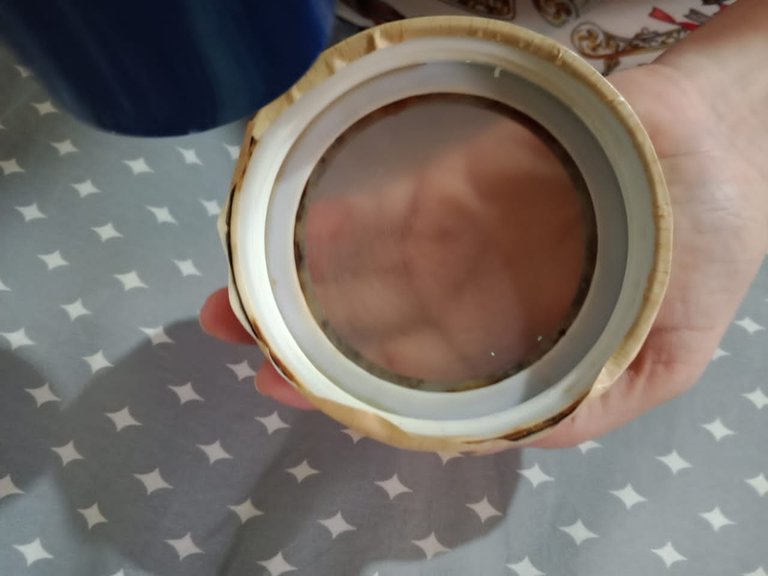
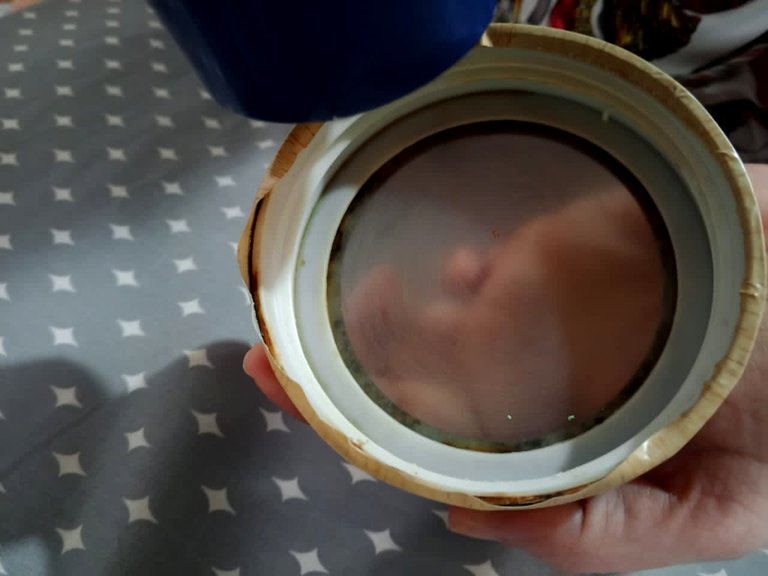
Next came the lids, and here comes my super discovery of contact paper that looks like wood, in fact to the touch it is, which I love. And the truth is that this step is not very complicated, because what I did was to measure the edge of the lid and cut a strip of contact paper leaving a centimeter more than the measure, and glued it around the edge of the lid.
With the excess I used another trick I saw on Instagram, and that is to use a hair dryer that makes the paper fold inward and is fixed super well by the action of heat.
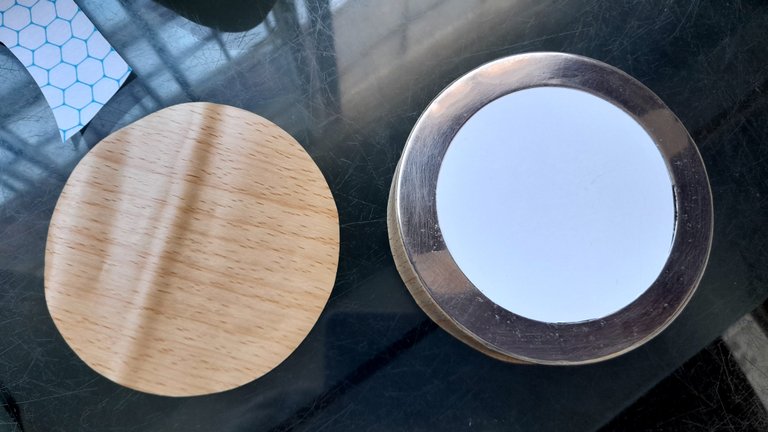
El siguiente paso fue cubrir la parte superior de la tapa, y para esto marqué la circunferencia de la tapa en el papel contact y lo pegué con mucho cuidado, aplicando también calor por el borde. Y de esta forma estuvo lista la tapa.
https://img.inleo.io/DQmXv19vu8XZ45h27vWxGgZZTmuUVLnU8D1iMzrgdrFZYEy/20250109_202414.heic
https://img.inleo.io/DQmUXNbp7T5iHsWtV9GDJtyG1DMkRkrbBYV16JaGqbVZr4R/20250109_202420.heic
The next step was to cover the top of the lid, and for this I marked the circumference of the lid on the contact paper and glued it very carefully, also applying heat around the edge. And this way the lid was ready.
Ya en este punto los envases estaban listos, pero quise agregar una etiqueta, así que con cartulina sulfatada recorté un rectángulo con un pequeño corte diagonal en las puntas, lo cubrí con el papel contact y con un marcador permanente escribí el contenido de cada envase.
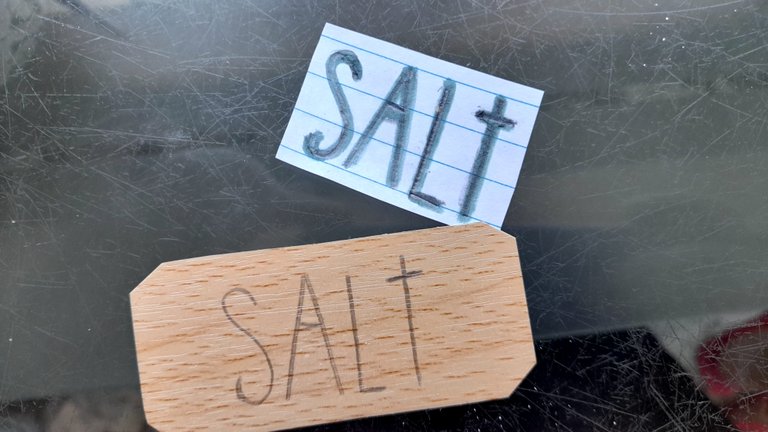
Para que las letras me quedaran del mismo tamaño las hice primero en una hoja y las marqué con el lápiz sobre la etiqueta, finalmente pasé el marcador negro sobre las líneas trazadas y estuvo casi lista porque quise agregar un detalle más, una especie de remache que hice con el aluminio de una lata de refrescos y la ayuda de un abre huecos, los pegué con silicón caliente en cada esquina de las etiquetas y finalmente las ubiqué en cada envase.
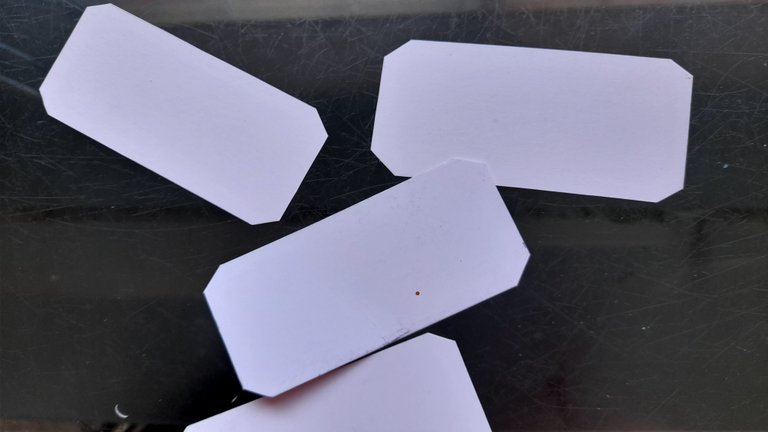
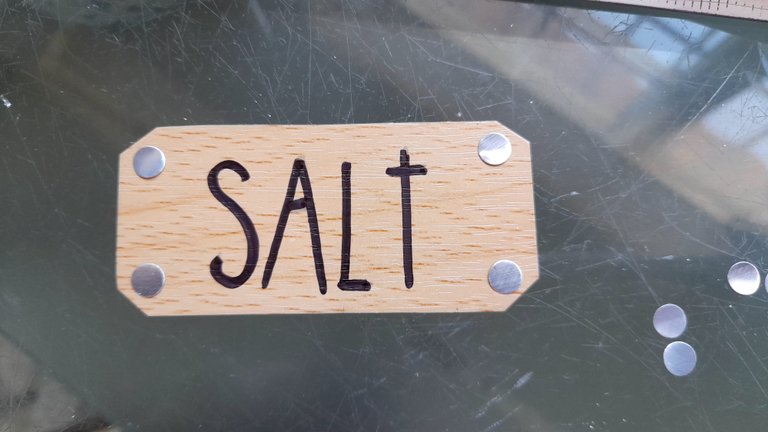
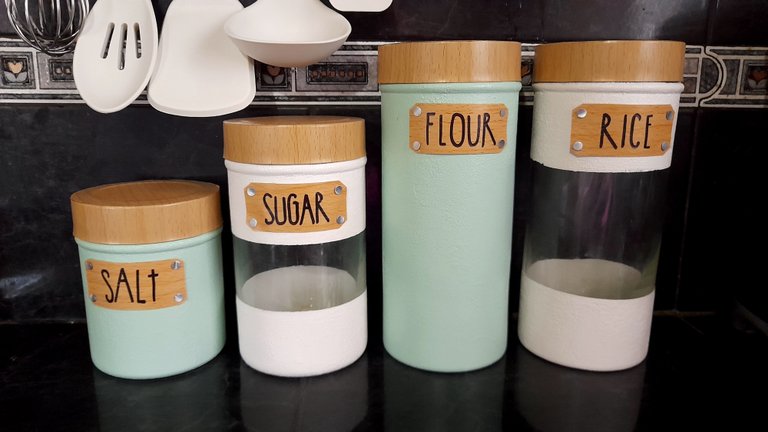
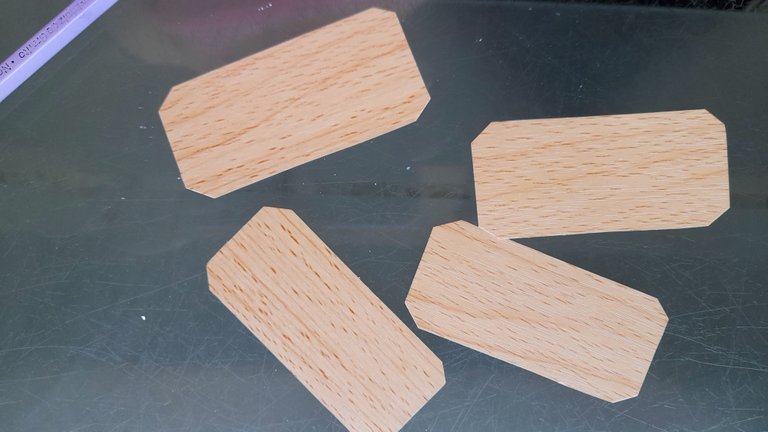
At this point the containers were ready, but I wanted to add a label, so I cut out a rectangle with a small diagonal cut at the ends, covered it with the contact paper and with a permanent marker I wrote the contents of each container.
To make the letters the same size I first made them on a sheet of paper and marked them with a pencil on the label, finally I ran the black marker over the drawn lines and it was almost ready because I wanted to add one more detail, a kind of rivet that I made with the aluminum of a soda can and the help of a hole opener, I glued them with hot silicone on each corner of the labels and finally placed them on each container.
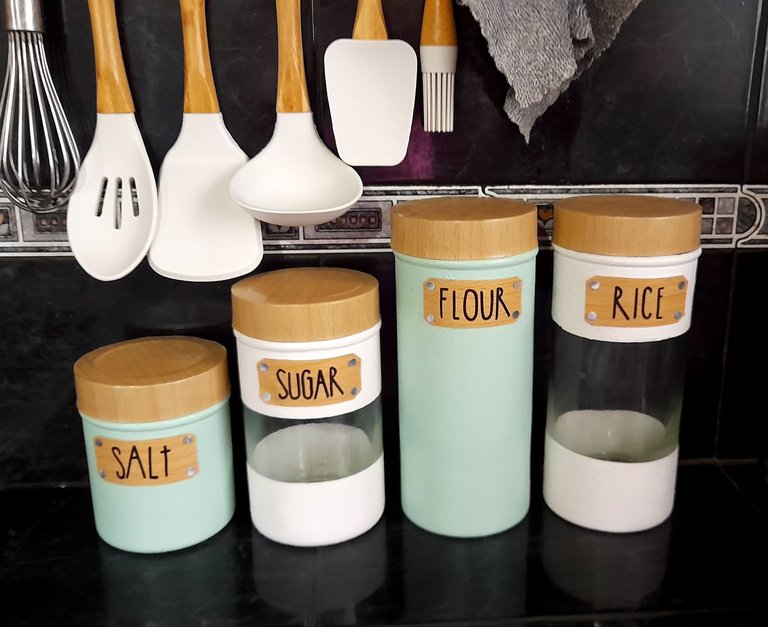
Yo no diría que es un proyecto difícil, pero sí que toma su tiempo, sobre todo porque yo soy demasiado perfeccionista y si no me gusta algo lo vuelvo a hacer las veces que sea necesario, de hecho, luego que mezclé el verde con el blanco y le di las dos capas a los envases siguió sin gustarme, así que ayer fui hasta el Sambil a comprar una pintura a la tiza, color menta estilo vintage, retiré toda la pintura a los dos envases y los volví a pintar, pero la verdad valió totalmente la pena, porque es justo el tono que yo quería. Pero ¿adivinen? Creo que los cuatro en blanco tendrían mayor impacto visual. ¿Ustedes qué piensan?.
Los leo en los comentarios.
I wouldn't say it's a difficult project, but it does take time, especially because I'm too much of a perfectionist and if I don't like something I redo it as many times as necessary, in fact, after I mixed the green with the white and gave the two coats to the containers I still didn't like it, so yesterday I went to the Sambil to buy a vintage style mint chalk paint, I removed all the paint from the two containers and painted them again, but the truth was totally worth it, because it is just the tone I wanted. But guess what? I think the four in white would have more visual impact, what do you think?
I'll read you in the comments.

Posted Using INLEO
https://img.inleo.io/DQmXv19vu8XZ45h27vWxGgZZTmuUVLnU8D1iMzrgdrFZYEy/20250109_202414.heic
No bueno, ni un poquito la pegué 🤣. Te quedaron preciosos Ami!! Quiero los míos así de bellos.💕
🤣🤣🤣 no estabas cerca jajaja.
Gracias ami, pero creo los pondré todos blancos a riesgo de que José me guinde por hacerlo ir dos veces a comprar pinturas y terminar usando las que tenia aquí JAJAJAJA
Amiga la restauración quedó excelente. Que bueno que te guste el reciclaje ♻️. En blanco sería más impactante. Pero el diseño con el color menta está atractivo. 👍
Gracias amiga, es eso, creo que el blanco sería como ufff jaja pero lo dejaré un tiempo así porque mi esposo me va a guindar después de hacerlo comprar dos pinturas verdes distintas para después quedarme con los blancos jajaja me mataaaaa
Es que ni lo sospeche jajajaja, que increíble y una hermosa idea ami.
Me encantó😍😍
Jajaja estaba difícil adivinar, debí dar la pista de la cocina.
Gracias mi Yage
Bellísimo de verdad, manita pero es que tú tienes paciencia, tu crees que yo hago después de ese trabajo y gasto y no me gusta y lo voy a volver hacer, noooo, lo dejo así, lo disfrutamos un rato y luego bueno puede ser que lo cambie. Pero si te soy sincera prefiero ir y comprar lo que necesito 🤭 te quedó todo hermoso Rosita como siempre. Gracias por compartir, saludos
Jajajaja bueno tu sabes como soy yo un poco loca manita.
Es que no vi nada que me gustara y que fuese lo que necesitaba y lo bueno de hacerlo es que lo hago justo como yo quiero y es algo que nadie tiene, aunque eso no importa porque solo oo veré yo jajs
Abrazos manita
Definitivamente tu y tus creaciones me dejan wow, parecen comprados, están lindos los colores, las etiquetas, pero como eres tú, ya mañana le cambias los colores sino estás totalmente convencida. Fue un bonito proyecto Ami 🤗🤗🤗
Gracias amiga, voy a aguantar un poco para cambiarlos porque José se va a atacar Jajaja
Amiga esos potes de cocina te quedaron espectacular y los colores bellos.
Siempre eres. Muy buenas con las manualidades, de verdad que todo lo qué haces con tus manos te queda muy bonito. Dios te las bendigas.
Te ahorraste unos verdecitos uy 40$ o algo más es bastante para el bolsillo.
Saludos
Amén amiga bella, yo quedé contenta pero tengo entre ceja y ceja todos blancos jajaja pero José me mata si los cambio ya porque fuimos dos veces al sambil por la pintura verde Jajajajajs se muere
Te quedaron bellísimos, amiga. Así me encantan, es un trabajo lleno de mucha creatividad y dedicación. Un abrazo.
Gracias amiga bella, todos opinan que están bien los dos colores, quizás al verlos varios días me acostumbro jaja yo tengo muchas mañas Auro 🙈🤣🤣
Te quedaron demasiado bellos, súper aesthetic 🤭 y combinan perfecto con los otros utensilios de cocina, me encanta como la falta de algunos materiales no te impidió hacer lo que tenias planeado, resolviste con otras opciones.
Hace tiempo que estaba buscando pintura a la tiza y no había conseguido, gracias a ti ya sé como resolverlo.
Gracias amiga, yo la verdad que cuando no tengo alguna cosa para una manualidad busco cómo resolver porque no me doy por vencida fácilmente jajaja
están geniales! muy lindos!
Gracias amiga
Buen trabajo de restauración, dedicaste bastante tiempo a este proyecto. Lo más importante es que quedes satisfecha, la combinación de colores es armónica. Saludos.
Muchas gracias amigo, no había visto tu mensaje.
Yo soy un poco exigente con todo y por ahí ya los cambié un poco jajsja
Mi esposo mirándome con cara de "me hiciste ir a comprar pintura DOS veces" jajajaha