ilustración isométrico
isometric illustration
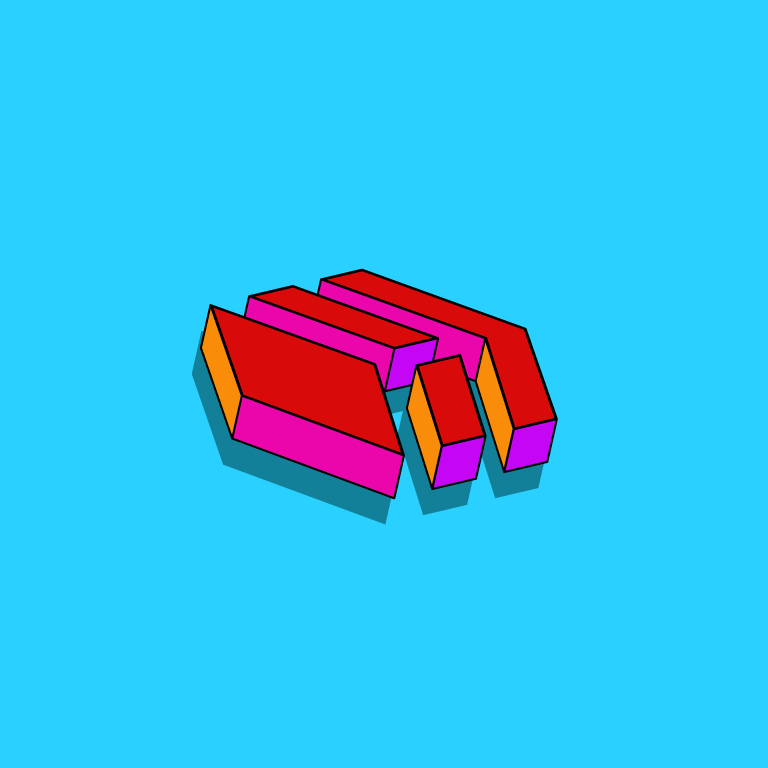
Saludos queridos amigos de la comunidad @hive, En esta oportunidad quiero compartir con todos ustedes, el paso a paso de la ilustración de un logo isométrico, quise tomar el logo de hive a ver que tal quedaba, espero les guste .
Greetings dear friends of the community @hive, This time I want to share with all of you,the step by step illustration of an isometric logo, I wanted to take the hive logo to see what it looked like, I hope you like it.
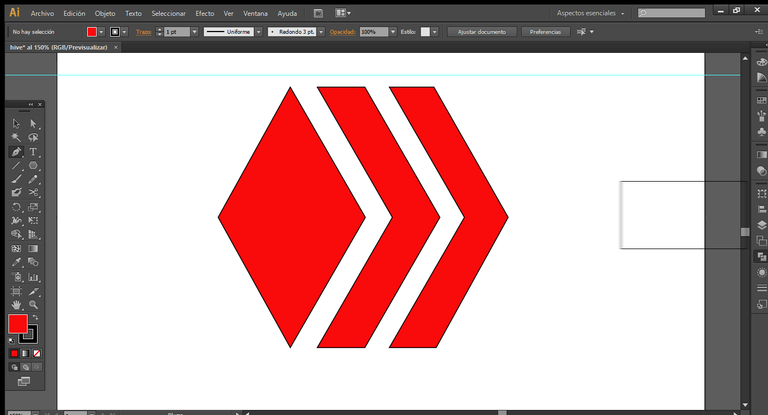
Ya abierto nuestro programa y haber creado un documento nuevo, creamos un polígono con el color de relleno que queramos, yo elegí rojo
.
Once we opened our program and created a new document, we created a polygon with the fill color we wanted, I chose red.
Y con la herramienta pluma trazamos dos líneas para cortar la figura.
And with the pen tool we draw two lines to cut the figure.

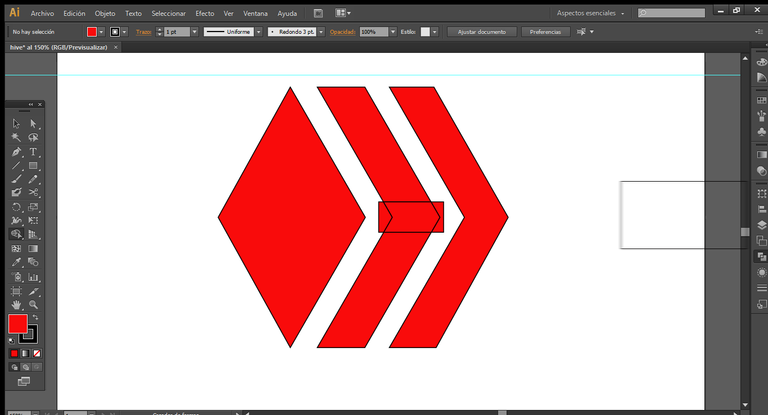
Luego seleccionamos todo y en la ventana busca trazos, le damos la opción cortar y des agrupamos para separar las partes .
Then we select everything and in the window look for strokes, we give it the option to cut and we group to separate the parts.
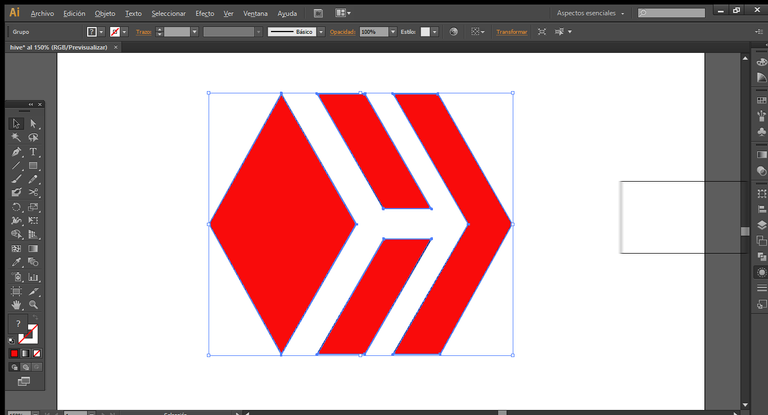
Luego hacemos un rectángulo para cortar la figura del centro a la mitad para terminar de formar el logo.
Then we make a rectangle to cut the figure in the center in half to finish forming the logo.
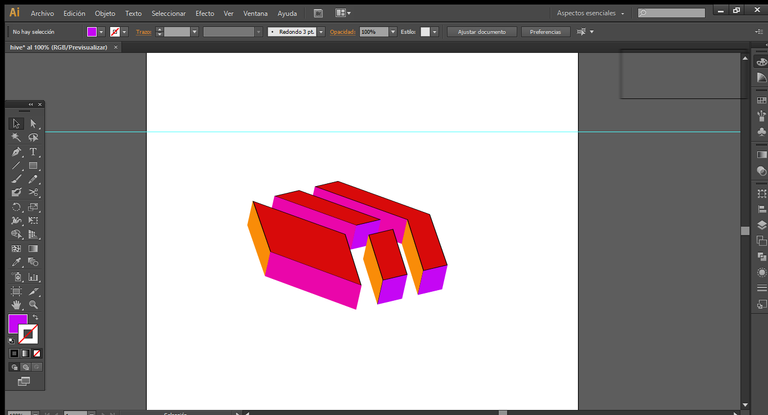
Para el efecto isocromático o 3D, seleccionamos todo, expandimos y agrupamos, vamos a la ventana de apariencia, seleccionamos fx, 3D, opciones de extracción y biselado.
For the isochromatic or 3D effect, we select everything, expand and group, go to the appearance window, select fx, 3D, extraction and beveling options.
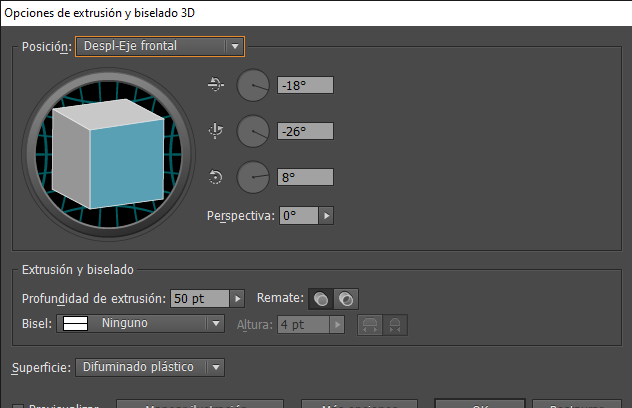
Le damos a la opción de previsualizar, y con el recuadro que está dentro del círculo movemos y colocamos en la posición que queramos.
We give the option to preview, and with the box that is inside the circle we move and place in the position we want.
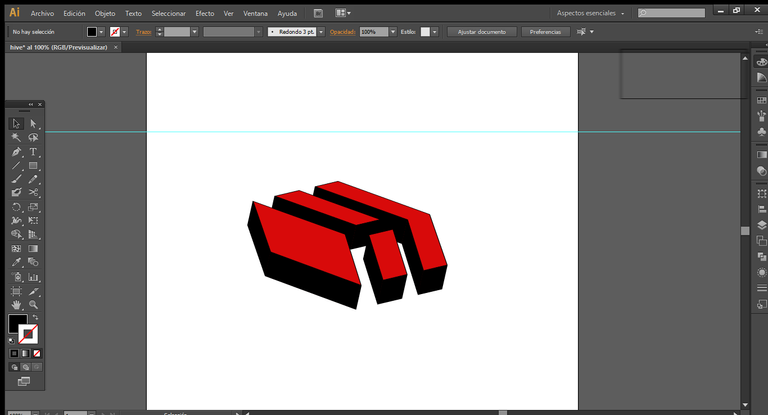
Seleccionamos toda la forma, vamos a objeto y expandimos para fijar nuestra forma.
We select the whole shape, go to object and expand to fix our shape.
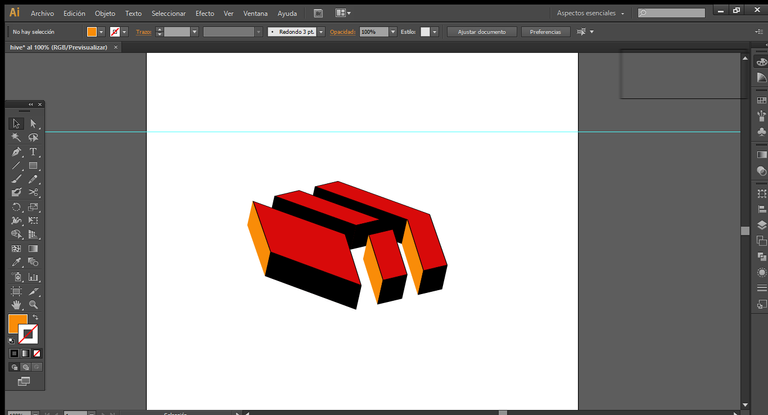
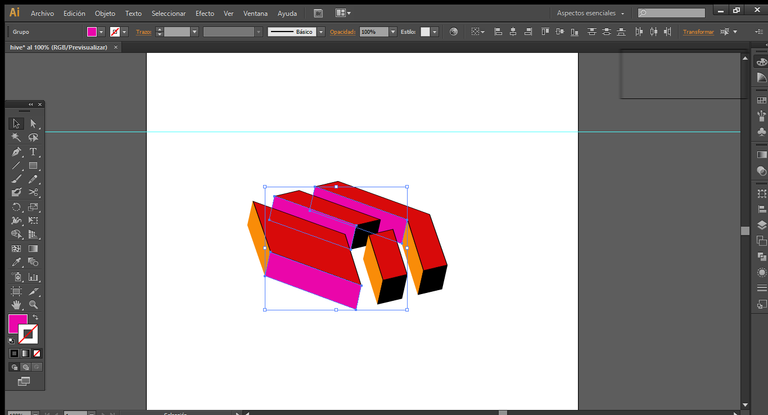
Luego viene la parte divertida de todo que es darle color a nuestra forma.
Then comes the fun part of it all which is to give color to our shape.
Ya casi está todo listo. Creamos otra capa y la posicionamos debajo de esta con el nombre fondo. En esta capa creamos un rectángulo del tamaño de la mesa de trabajo con el color que queramos.
Almost everything is ready. We create another layer and position it below it with the name background. In this layer we create a rectangle the size of the work table with the color we want.
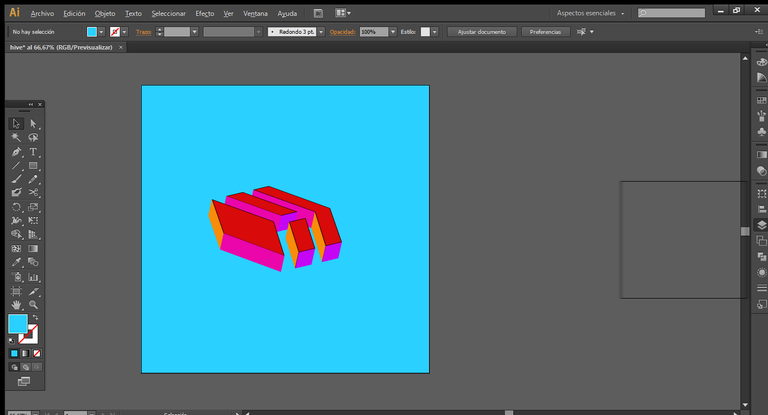
Regresamos a la capa del logo y seleccionamos todo, expandimos y agrupamos, en edición copiamos y pegamos detrás, le cambiamos el color a un poco más oscuro que el fondo y la posicionamos para hacer el efecto de sombra.
We return to the logo layer and select everything, expand and group, in editing we copy and paste behind, we change the color to a little darker than the background and position it to make the shadow effect.
Y listo tenemos nuestra ilustración muy, este mismo método lo podemos aplicar a texto u otras formas creadas, todo dependerá de nuestro ingenio al momento de crear ilustraciones.
And ready we have our illustration very, this same method can be applied to text or other forms created, everything will depend on our ingenuity when creating illustrations.
Hive
#Hive.io
Communities without borders. A social network owned and operated by its users, powered by Hive.
The rewards earned on this comment will go directly to the person sharing the post on Twitter as long as they are registered with @poshtoken. Sign up at https://hiveposh.com.
Congratulations @jesusgp! You have completed the following achievement on the Hive blockchain and have been rewarded with new badge(s):
Your next target is to reach 200 upvotes.
You can view your badges on your board and compare yourself to others in the Ranking
If you no longer want to receive notifications, reply to this comment with the word
STOPSupport the HiveBuzz project. Vote for our proposal!