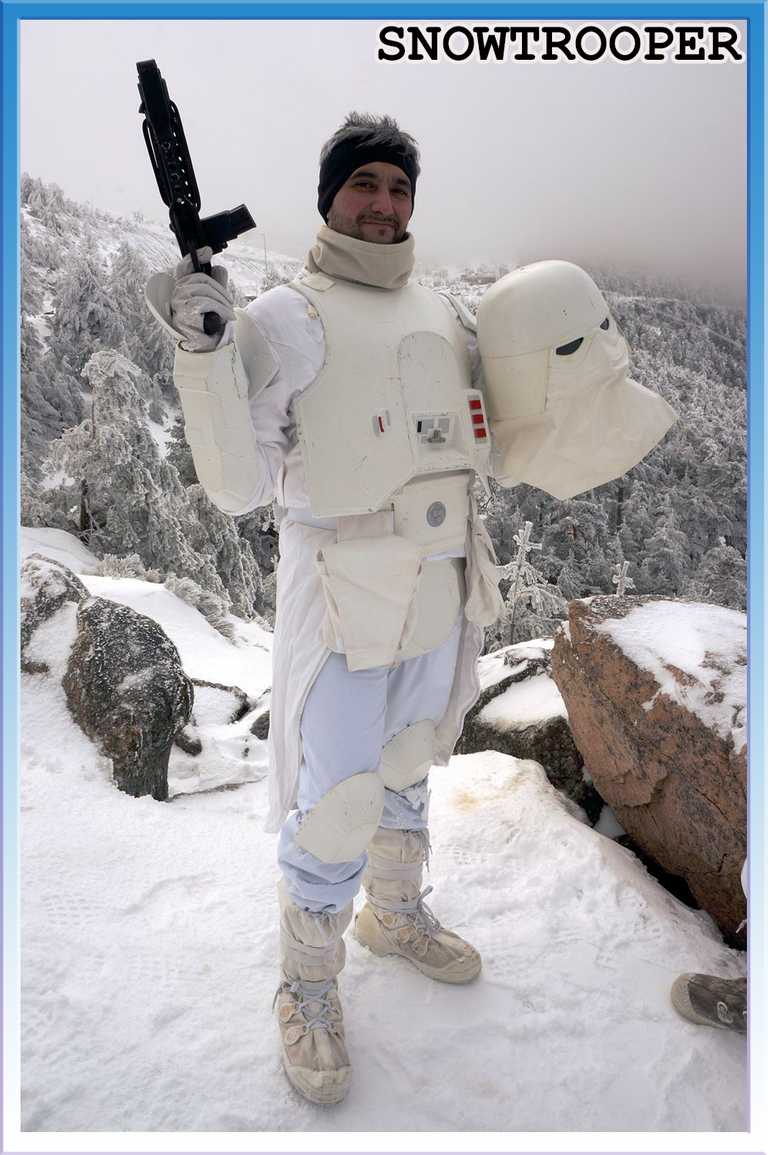
Hola Hivers y en particular un saludo a la comunidad de Aliento. Hoy quiero compartir el tutorial mas detallado que he realizado sobre un cosplay hasta la fecha. Tiempo atrás una versión muy reducida estuvo en un antiguo foro pero desconozco si sigue operativo así que voy a compartirlo por aquí con varias actualizaciones y bastante mas detalle por si alguien le puede dar uso. Este tutorial puede venir muy bien como una guía para el montaje y ajuste de otros tipos de cosplays donde haya partes rígidas y partes blandas.
En este tutorial vamos a aprender todo lo necesario para el montaje de la armadura y todos los accesorios ya sean rígidos o no como telas y correas.
Las fotos se tomaron en la sierra de Madrid en Navacerrada después de una copiosa nevada. No hubo problema porque este cosplay abriga pero si te lo pones con mucho calor que alguna vez he tenido que hacerlo puede ser un poquito horrible😄.
Todas las imágenes han sido tomadas por mi pareja y yo mismo excepto las que quedan atribuidas a sus respectivos dueños.
Hello Hivers and in particular a greeting to the Aliento community. Today I want to share the most detailed tutorial I've done on a cosplay to date. Some time ago a very reduced version was in an old forum but I don't know if it's still operative so I'm going to share it here with some updates and a lot of detail in case someone can make use of it. This tutorial can come in handy as a guide for the assembly and adjustment of other types of cosplays where there are rigid and soft parts.
In this tutorial we are going to learn everything needed to assemble the armor and all the accessories whether they are rigid or not like fabrics and straps.
The photos were taken in the mountains of Madrid in Navacerrada after a heavy snowfall. There was no problem because this cosplay is warm but if you wear it when it's very hot I've had to wear it and it's a little bit horrible😄.
All images were taken by myself and my partner except those attributed to their respective owners.

Materiales:
- Armadura
- Abrigo
- Guantes
- Pantalones blancos
- Camiseta blanca
- Botas Mucklucks
- Blaster E-11
- Elástico blanco de 3cm (2m)
- Correa blanca de 5cm (2m)
- Vinilo blanco para el casco
- Sujeción casco-cabeza
- Visor verde para el casco
- Tela blanca para los bolsos
- Adhesivos
- Piezas decorativas
- Velcro
Materials:
- Armor
- Coat
- Gloves
- White pants
- White T-shirt
- Mucklucks boots
- E-11 Blaster
- 3cm white elastic (2m)
- White 5cm strap (2m)
- White helmet vinyl
- Helmet-head restraint
- Green visor for helmet
- White fabric for the bags
- Stickers
- Decorative parts
- Velcro

SOFTPARTS👖👕👢
🔸BOTAS / BOOTS🔸
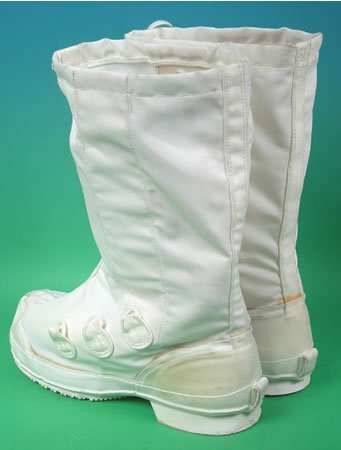
Second hand Mucklucks boots and inner socks
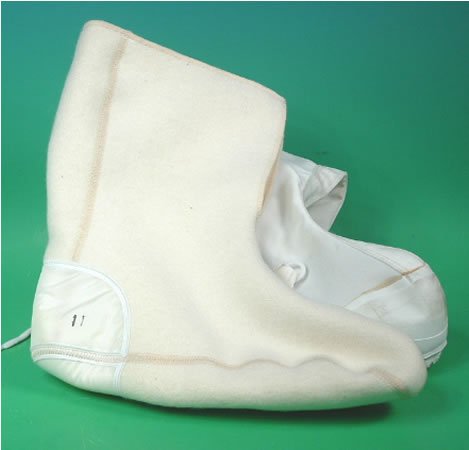 Botas y calcetines interiores Mucklucks de segunda mano.

🔸ABRIGO / TRENCHCOAT🔸
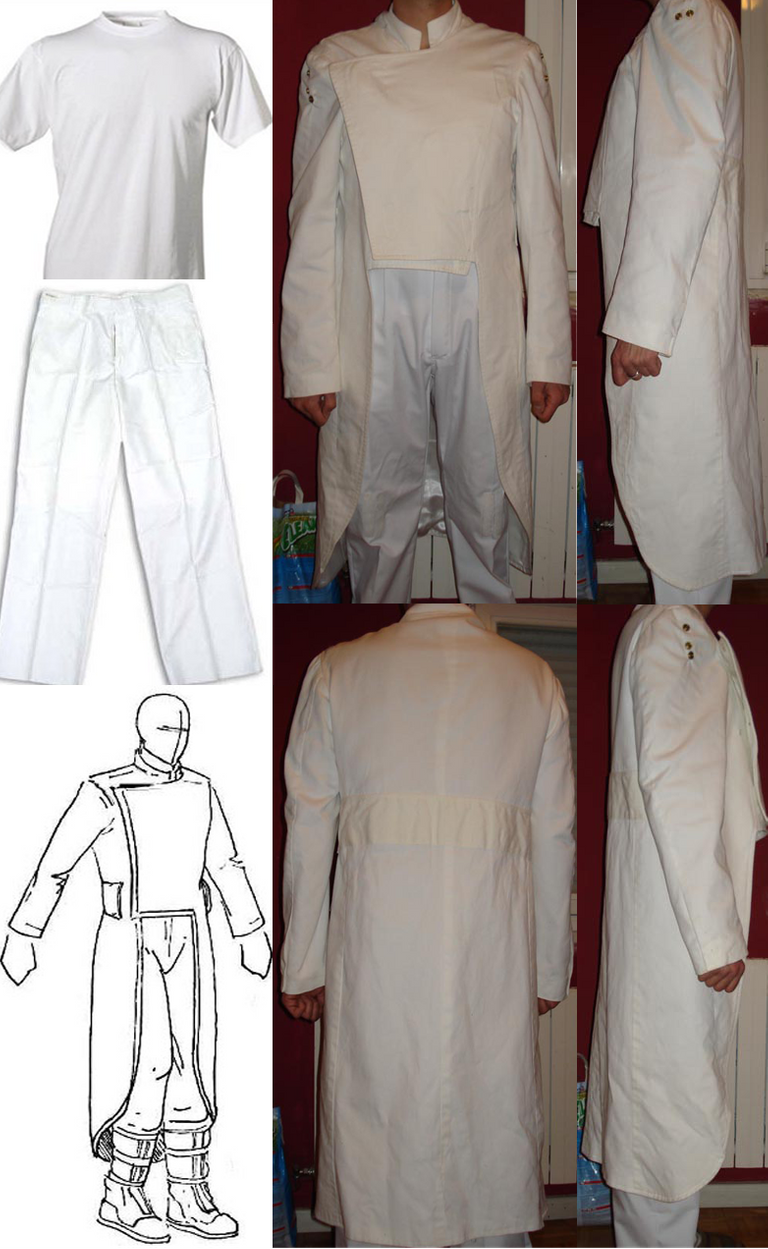
El abrigo debe llegar veinte centímetros por debajo de las rodillas y la manera de cerrarlo por delante será con velcros. En los hombros tendremos que poner snaps para poder fijar las hombreras.
The coat should reach twenty centimeters below the knees and the way to close it in front will be with velcro. On the shoulders we will have to put snaps to be able to fix the shoulder pads.
Esquema e imágenes abrigo, pantalones y camiseta
Scheme and images coat, pants and t-shirt
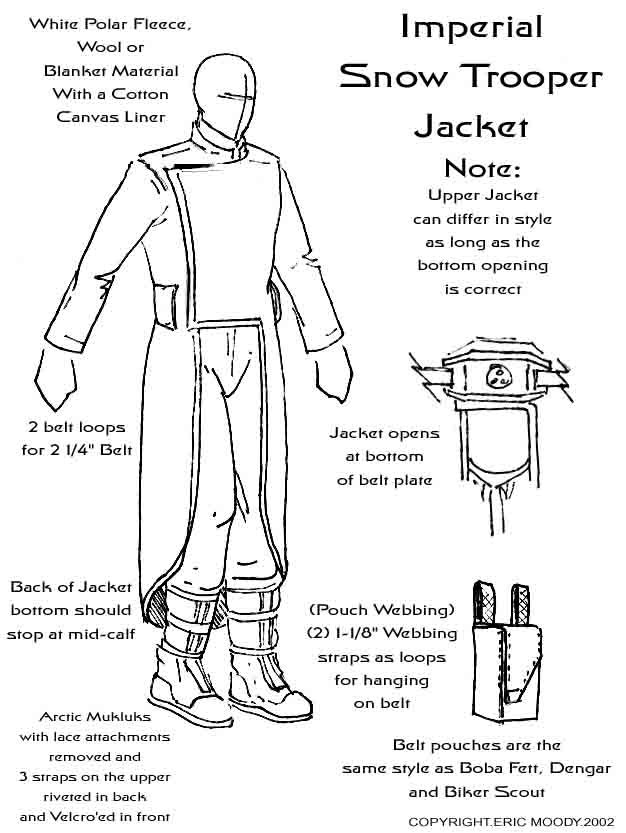
by Eric Moody source

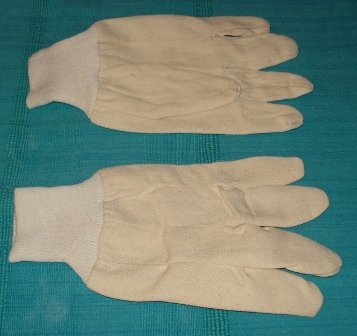
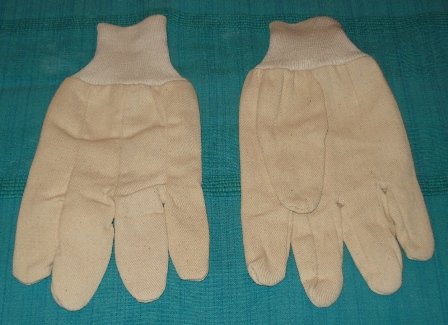
🔸GUANTES / GLOVES🔸
-Amazon, Wallmark, etc
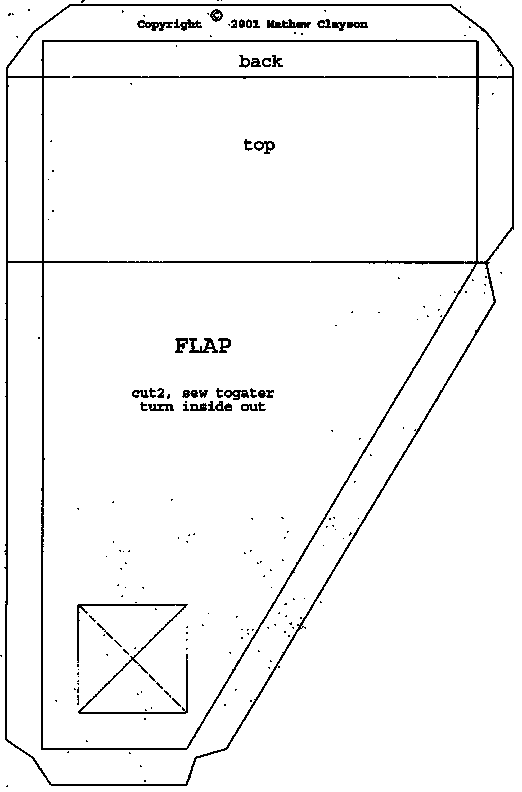
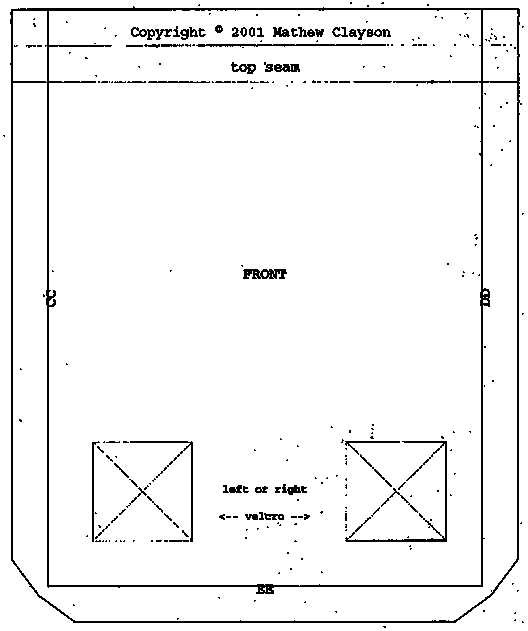
 Bolsos, correa, cierre y pieza rígida cinturón / Bags, strap, zipper and rigid belt piece.
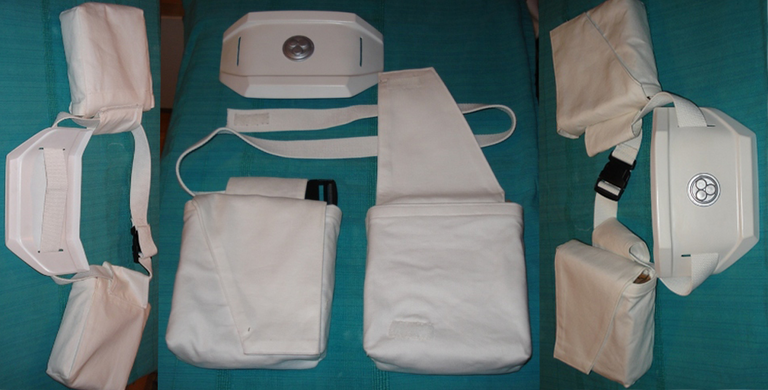
We will use a white strap of about eight or ten centimeters and we will pass it through the bags finishing both sides with a black clap clasp. Below is the pattern for the bags courtesy of Mathew Clayson.
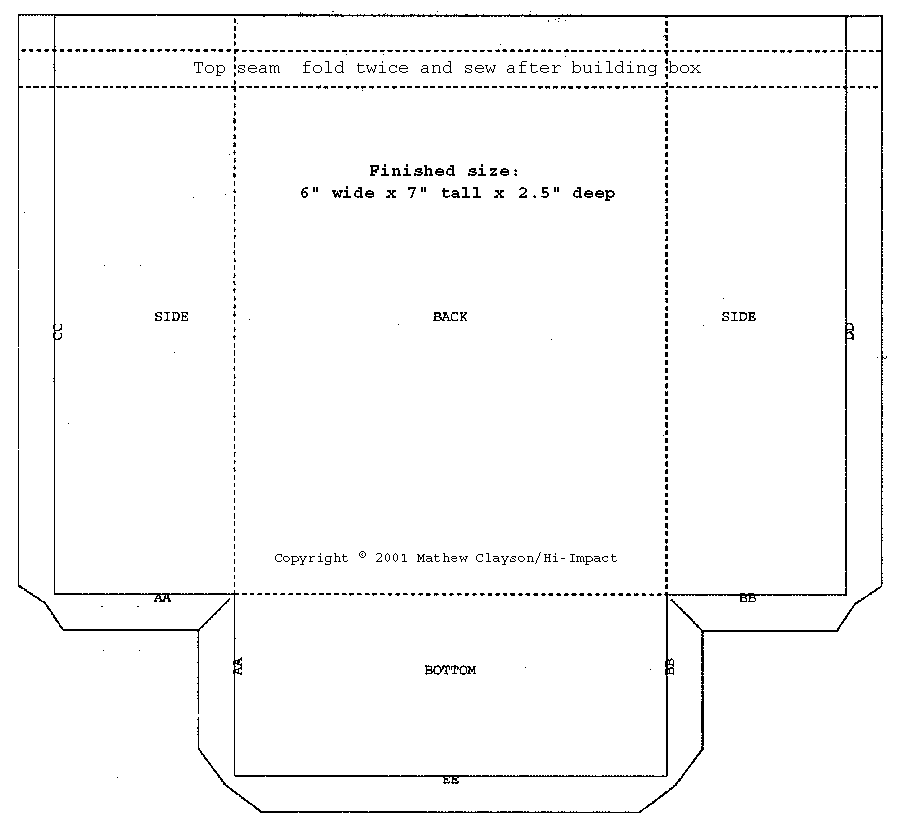
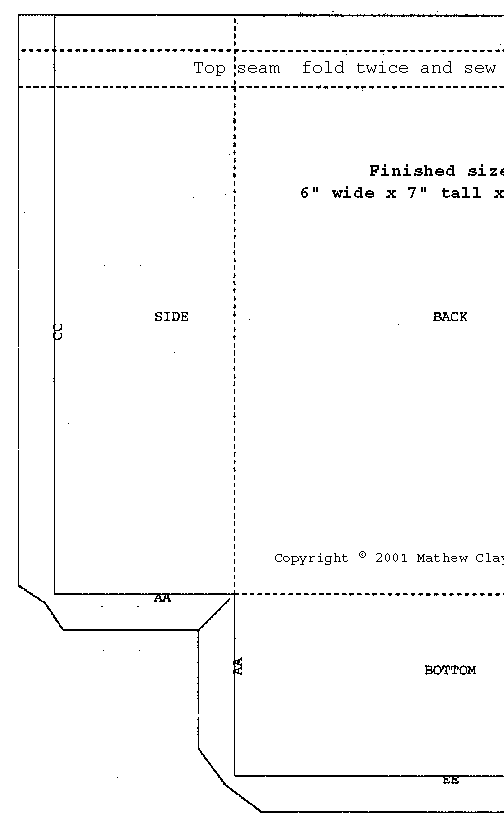
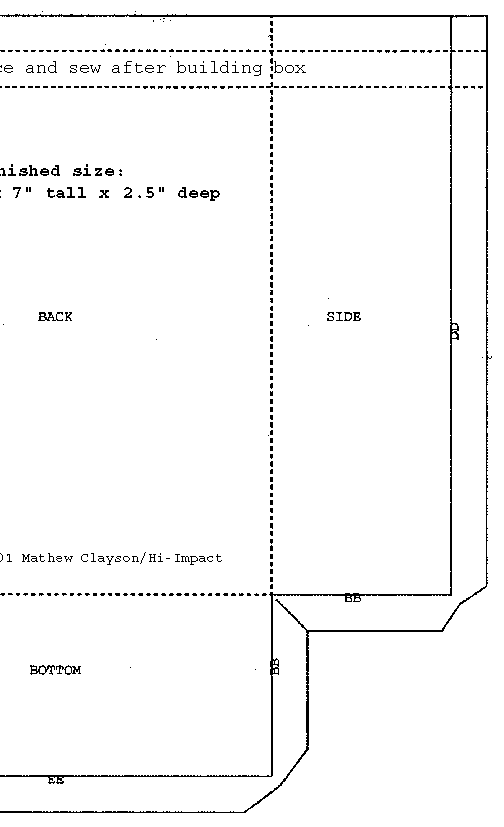
By Mathew Clayson source

HARDPARTS💎
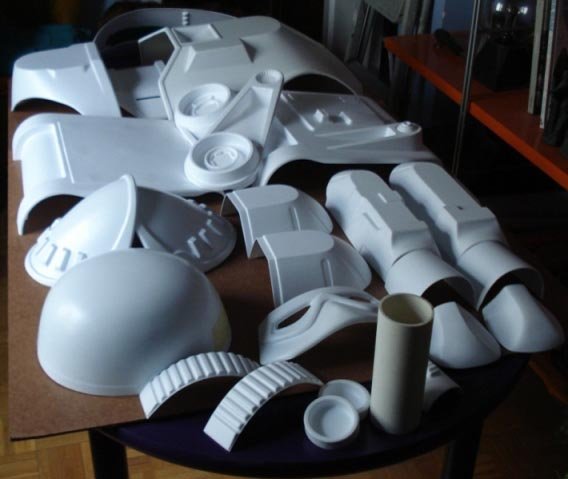
Unassembled armor polystyrene (HIPS)

🔸CASCO / HELMET🔸
-Esponjas o similar para dentro del casco
-Casco y cubrecaras de vinilo
-Elástico blanco para sujetar
-Sujeción casco-cabeza
-Visor verde
-Green visor
-Helmet-head restraint
-White elastic for fastening
-Vinyl helmet and mask covers
-Sponges or similar for inside of the helmet
Visor source
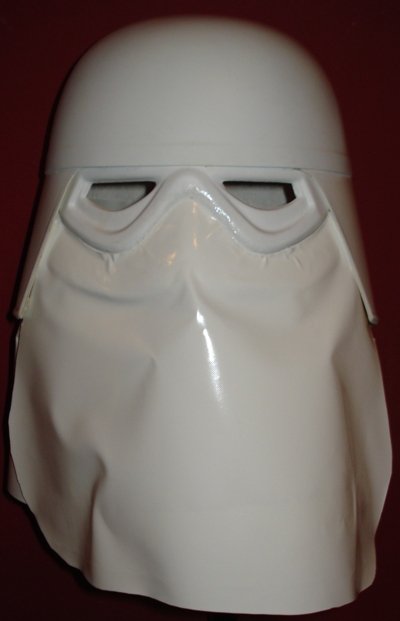
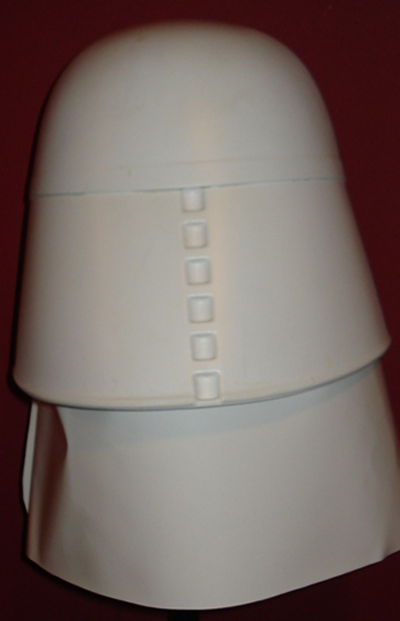
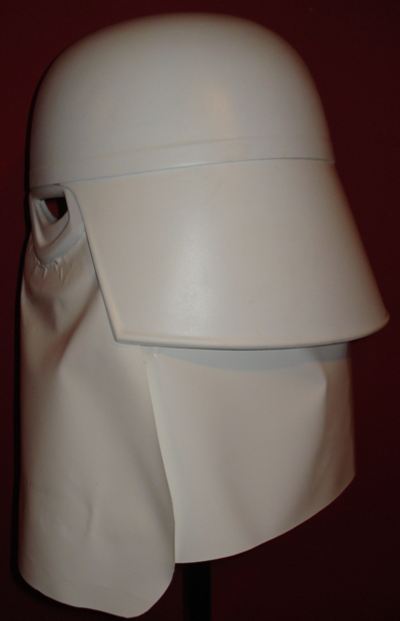
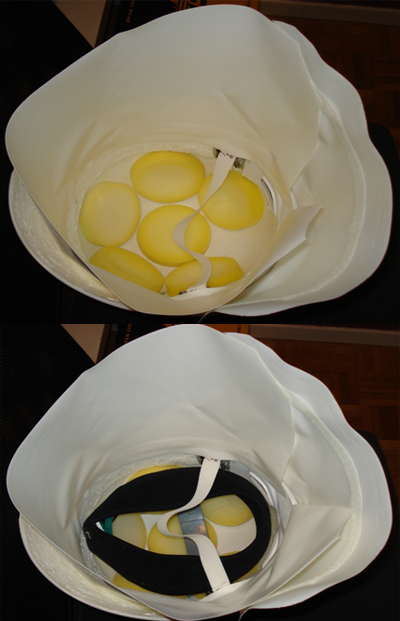
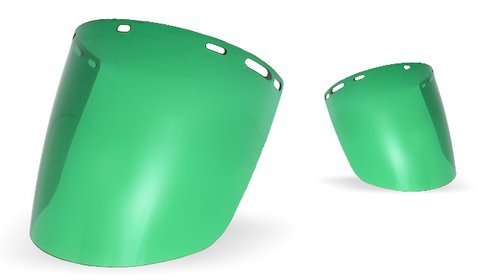
El casco esta compuesto de tres partes que son el domo, la mascara y el cubrecaras de vinilo. Lo primero que haremos es unir las piezas rígidas con pegamento y a continuación pegaremos el vinilo con mucho cuidado. Antes de pegar el vinilo deberíamos colocarlo en el casco para ver como quedaría y después poco a poco lo iremos pegando rectificando la posición del vinilo cuando sea necesario. El visor lo pegaremos por dentro con cola caliente y lo fijaremos con cinta americana. En el interior del casco debemos poner material acolchado para ir cómodos. Por ultimo pondremos la sujeción para la cabeza, en Amazon la encontrareis a la venta como sujeción de casco de obra.
The helmet is composed of three parts which are the dome, the mask and the vinyl mask cover. The first thing we will do is to join the rigid parts with glue and then glue the vinyl very carefully. Before gluing the vinyl we should place it on the helmet to see how it would look and then little by little we will glue it rectifying the position of the vinyl when necessary. The visor will stick it inside with hot glue and fix it with duct tape. Inside the helmet we must put padding material to be comfortable. Finally we will put the fastening for the head, in Amazon you will find it for sale as a helmet fastening work.

🔸RODILLERAS / KNEES🔸
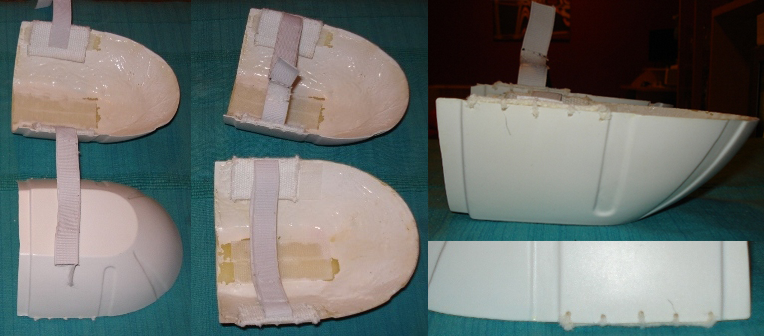
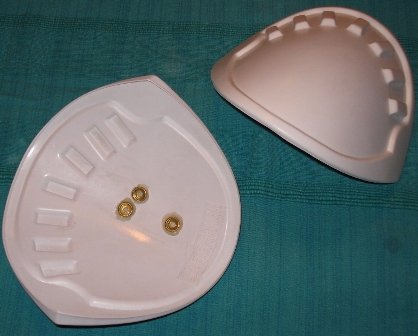
Para las sujeciones de las rodilleras tendremos que usar un taladro dremmel o similar con una broca muy fina y haremos varios agujeros a las rodilleras como podéis ver en la imagen adjunta. Después usaremos un trozo de cinta de tela blanca y usaremos aguja e hilo blanco para fijar el trozo de tela a la rodillera para así poder poner los elásticos y el velcro.
For the knee pads fasteners we will have to use a dremmel drill or similar with a very fine drill bit and we will make several holes in the knee pads as you can see in the attached image. Then we will use a piece of white fabric tape and we will use needle and white thread to fix the piece of fabric to the kneepad so we can put the elastic and velcro.
🔸COQUILLA / CUP🔸
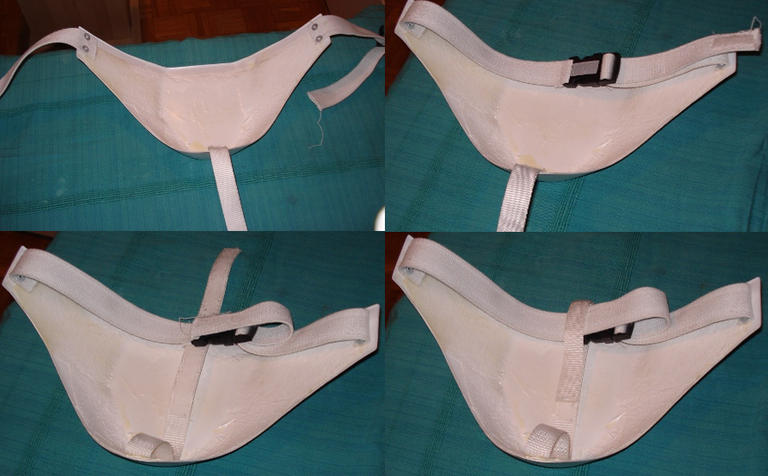
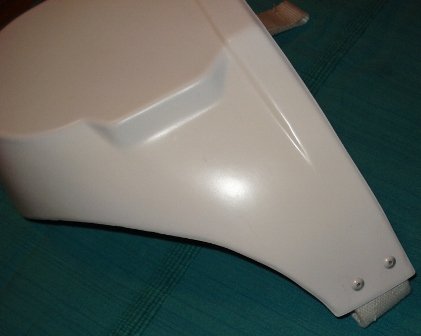
Para esta pieza tendremos que usar una remachadora para poder fijar las correas como se puede ver en la imagen. Haremos pruebas para ver el largo necesario de la correa y pondremos un cierre clap.
For this piece we will have to use a riveting machine to fix the straps as shown in the picture. We will make tests to see the necessary length of the strap and we will put a clap fastener.

🔸PIEZA DE LA CINTURA / WAIST PIECE🔸
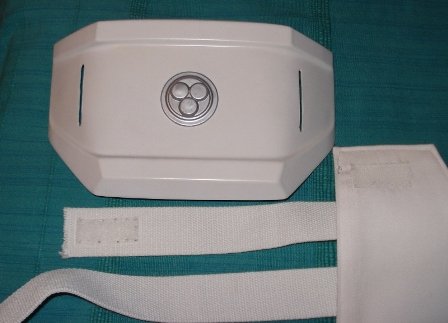
En la pieza de la cintura va una pieza pegada que podeis imprimir en 3D a traves de este enlace o tambien comprarla a traves de ETSY.
In the waist piece there is a glued piece that you can 3D print through this link or buy it through ETSY.

🔸ANTEBRAZOS / FOREARMS🔸
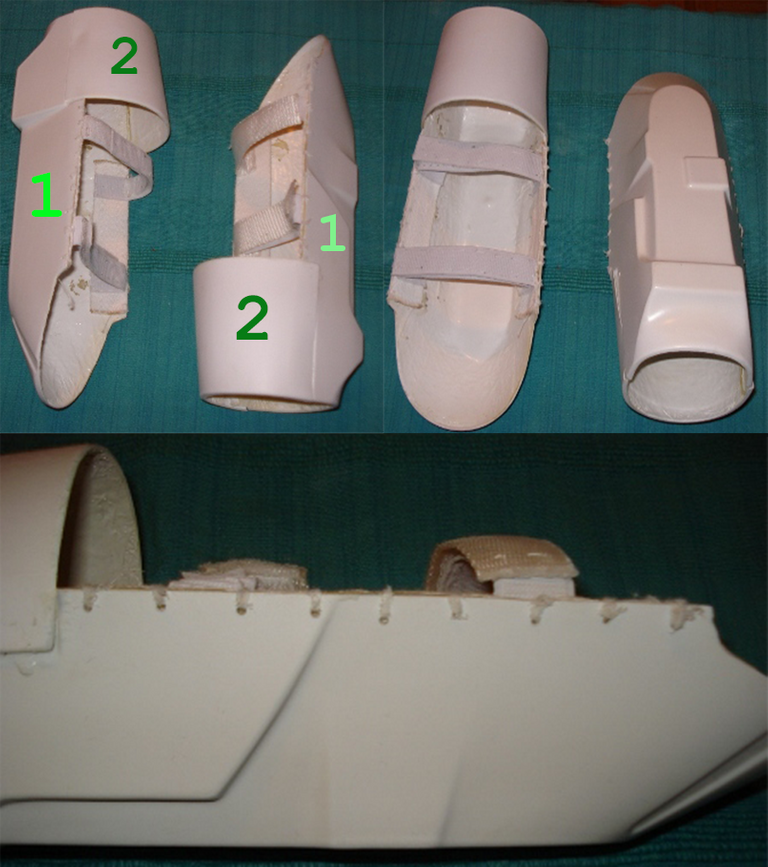
Para esta pieza también haremos unos agujeros con el taladro para fijar un trozo de correa blanca y así poder poner los elásticos y los velcros. Los antebrazos están compuestos por dos piezas que son la 1 y la 2 que pueden verse en la imagen. Estas dos piezas hay que pegarlas con un buen adhesivo. Yo recomiendo una mezcla de cola de contacto y superglue (cianocrilato)
For this piece we will also make some holes with the drill to fix a piece of white strap and thus be able to put the elastics and velcro. The forearms are composed of two pieces, 1 and 2, which can be seen in the image. These two pieces must be glued with a good adhesive. I recommend a mixture of contact glue and superglue (cyanoacrylate).

🔸HOMBRERAS / SHOULDERS🔸
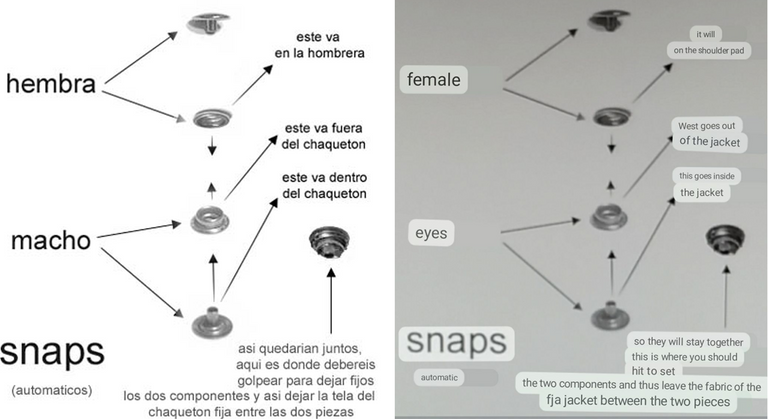
Para las hombreras usaremos unos snaps de buena calidad que pegaremos con cola caliente por la parte interior de la hombrera. La pareja de estos snaps deberán ir montados en el abrigo prestando atención por que son macho y hembra.
For the shoulder pads we will use some good quality snaps that we will glue with hot glue on the inside of the shoulder pad. The pair of these snaps should be mounted on the coat paying attention that they are male and female.

🔸CORAZA PECTORAL/ CHEST ARMOR🔸
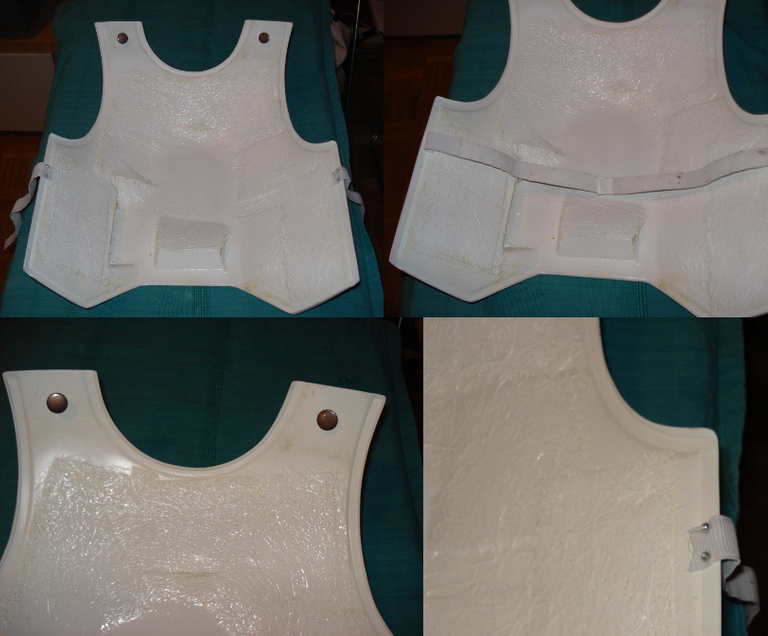
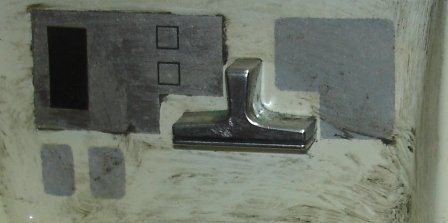
Para esta pieza usaremos la remachadora para fijar los elásticos a ambos lados que nos sujetaran esta pieza al cuerpo. Con el taladro haremos dos agujeros en la parte de arriba a ambos lados y pondremos la pieza que podéis ver a continuación. Esta pieza nos servirá como enganche a la mochila con una cinta que reposara en nuestros hombros.
For this piece we will use the riveting machine to fix the elastics on both sides that will hold this piece to the body. With the drill we will make two holes in the upper part on both sides and we will put the piece that you can see below. This piece will serve as an attachment to the backpack with a strap that will rest on our shoulders.
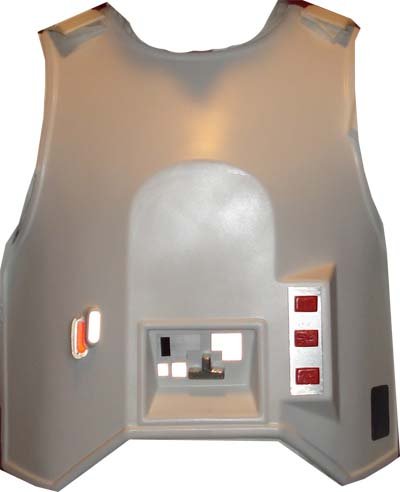
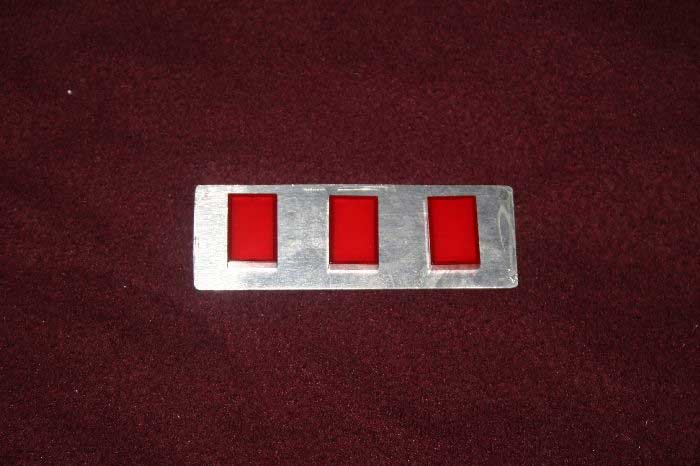
Coraza delantera con las pegatinas y la chapa del rango puesta. El rango es un trozo de chapa y tres trozos de metacrilato rojo. La pieza T puedes hacerla con foam, madera, impresión 3D, etc.
Front armor with the stickers and the plate of the range put on. The range is a piece of sheet metal and three pieces of red methacrylate. The T piece can be made with foam, wood, 3D printing, etc.

🔸MOCHILA / BACKPACK🔸
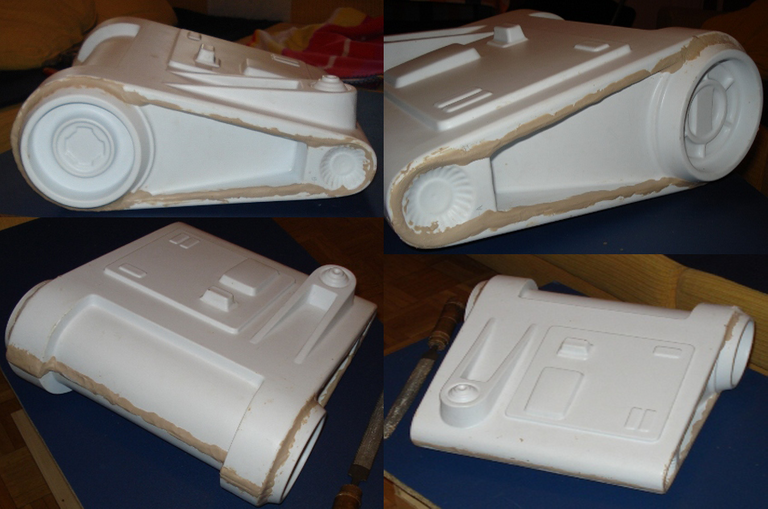
La mochila viene en cuatro partes y estas las fijaremos con adhesivo unas con otras hasta que todo quede unido. Después usaremos masilla de carrocero por todas las juntas, dejaremos secar y lijaremos hasta que quede bien liso. A continuación tocara pintarla de blanco completamente para después pintar los detalles y poner las pegatinas. En las siguientes imágenes se pueden ver todos los detalles de pintura y las pegatinas.
The backpack comes in four parts and we will fix them together with adhesive until everything is united. Then we will use body putty for all joints, let dry and sand until it is smooth. Then we will paint it completely white and then paint the details and put the stickers. In the following images you can see all the details of paint and stickers.
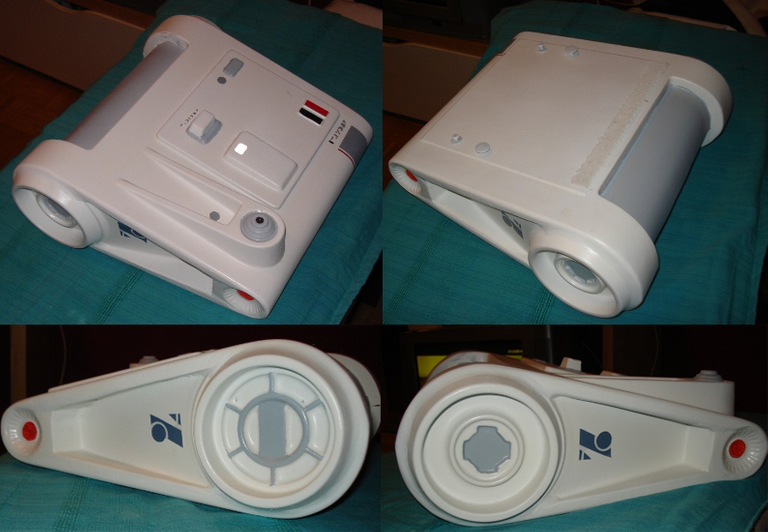
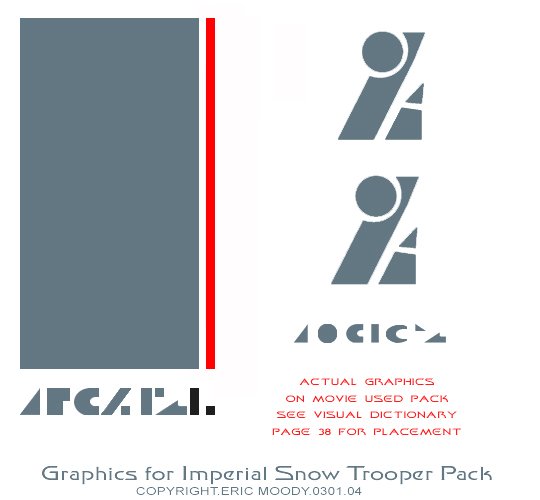

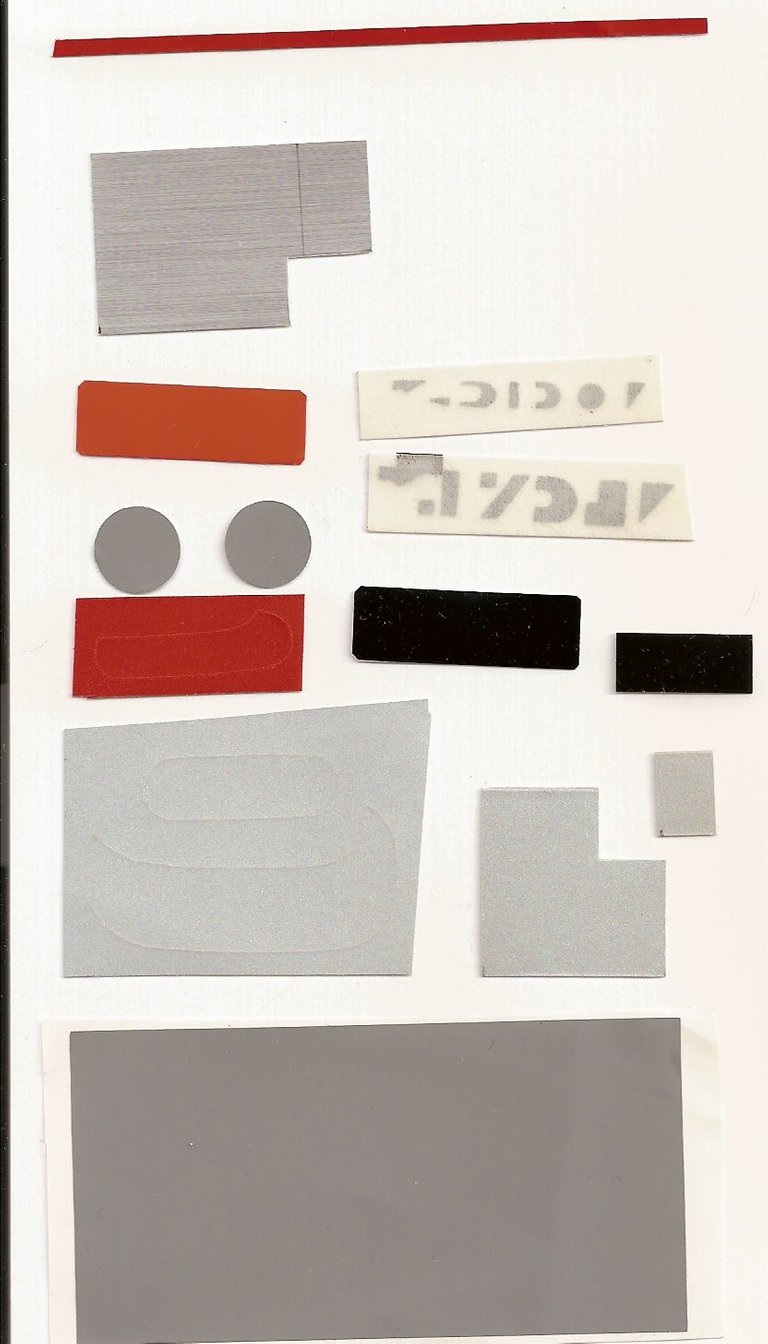
Pegatinas/decals/stickers by Eric Moody
Puedes encontrarlas a la venta en ETSY
You can find them for sale at ETSY
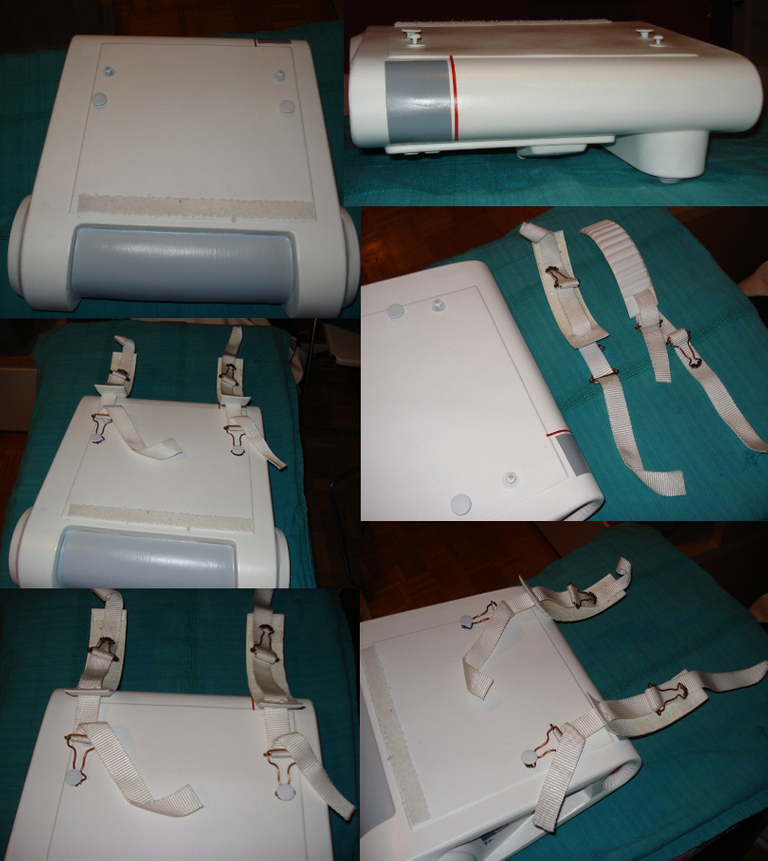
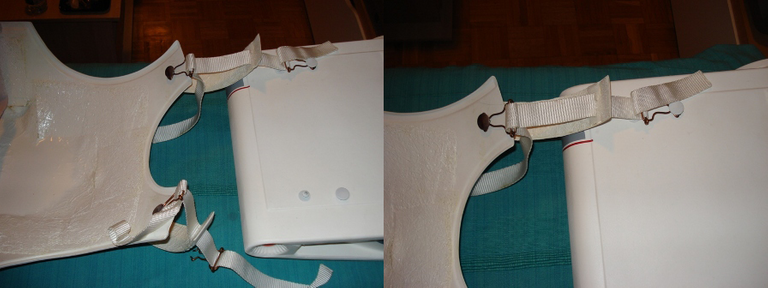
Para las sujeciones usaremos las mismas piezas que usamos en la coraza del pecho. Pasaremos una correa por estas piezas y la pasaremos por los agujeros que habremos hecho previamente por las dos partes rígidas que irán apoyadas en nuestro hombros y de estas a la mochila. En las imágenes puedes verlo todo al detalle. Las sujeciones hay que ponerlas antes de montar la mochila.
For the clamping we will use the same pieces that we used in the chest armor. We will pass a strap through these pieces and pass it through the holes that we have previously made in the two rigid parts that will be supported on our shoulders and from these to the backpack. In the images you can see everything in detail. The fasteners must be put in place before assembling the backpack.

🔸PIEZAS DE LAS MANOS / HANDPLATES🔸
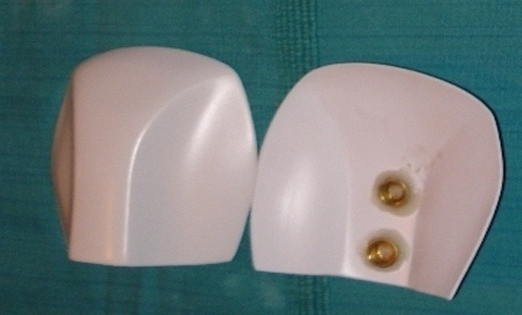
En estas piezas pondremos dos snaps con cola caliente y la pareja la pondremos en el dorso de los guantes.
On these pieces we will put two snaps with hot melt glue and the pair we will put on the back of the gloves.

🔸DETONADOR / DETONATOR🔸
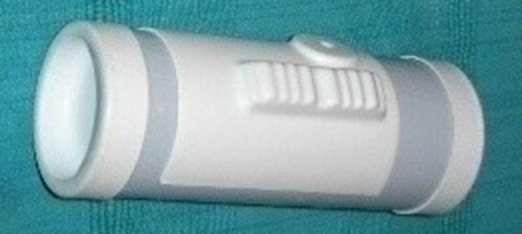
El detonador va sujeto al cinturón por detrás quedando justo debajo de la mochila. Esta compuesto de tres piezas termoformadas y un tubo de PVC todo pegado con superglue.
The detonator is attached to the back of the belt just below the backpack. It is composed of three thermoformed pieces and a PVC tube all glued with superglue.

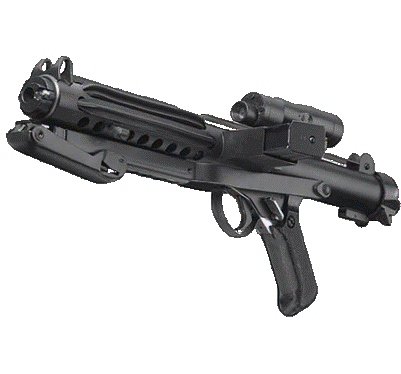
BLASTER E-11 source replica en resina no oficial / unofficial resin replica

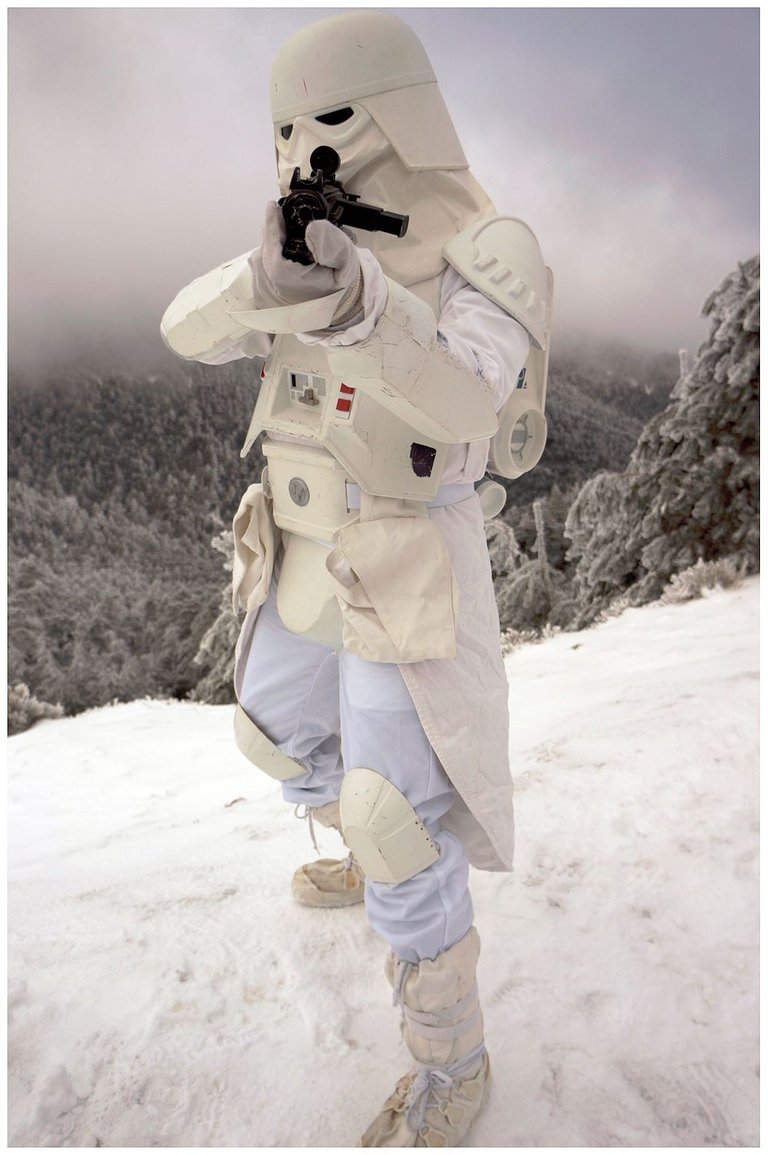
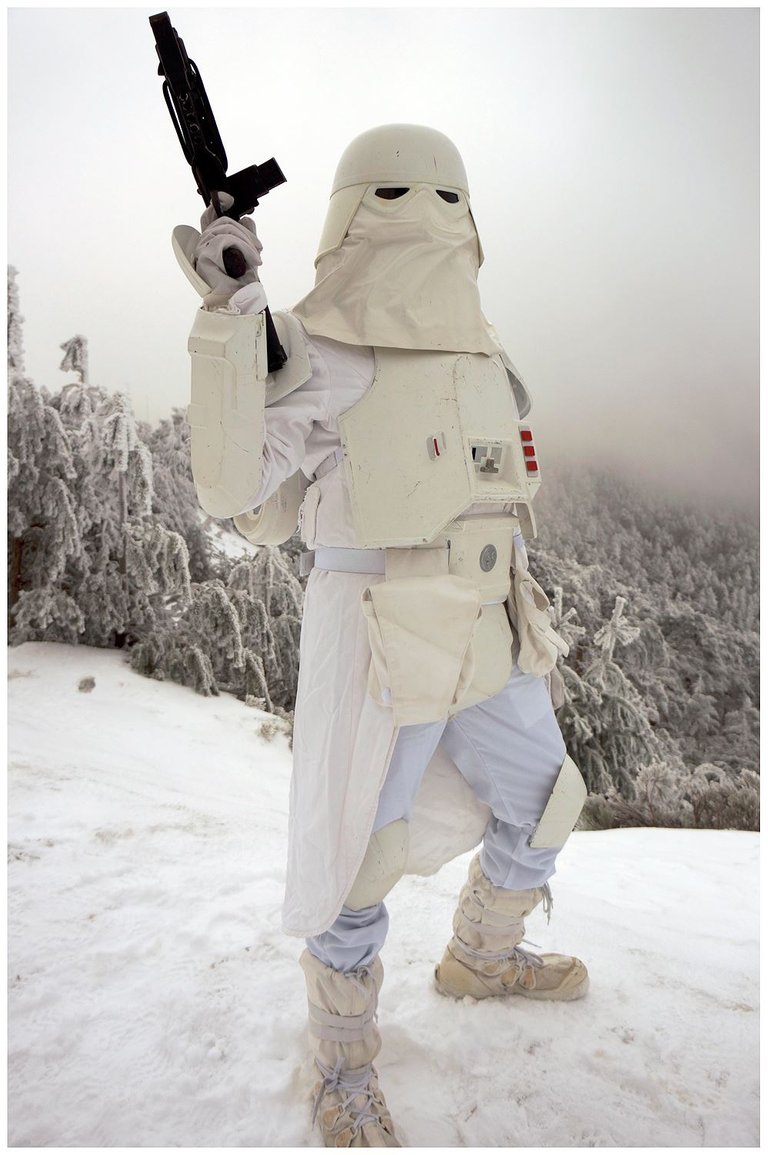
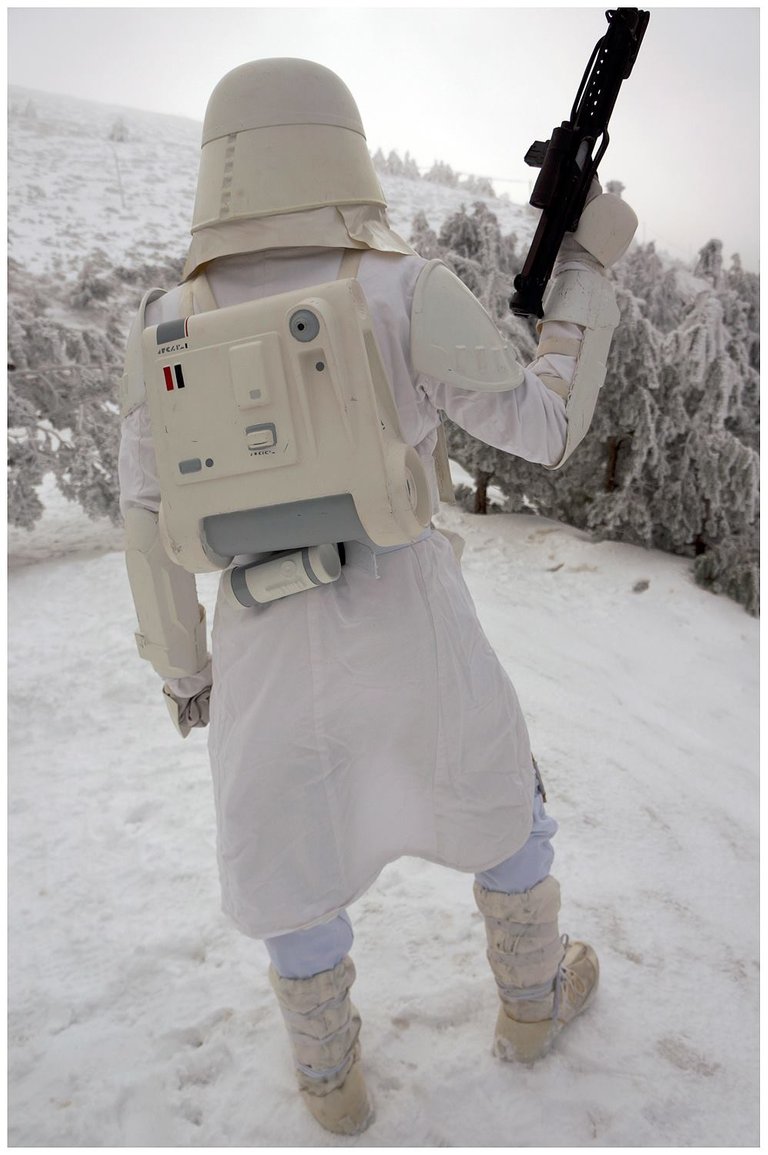
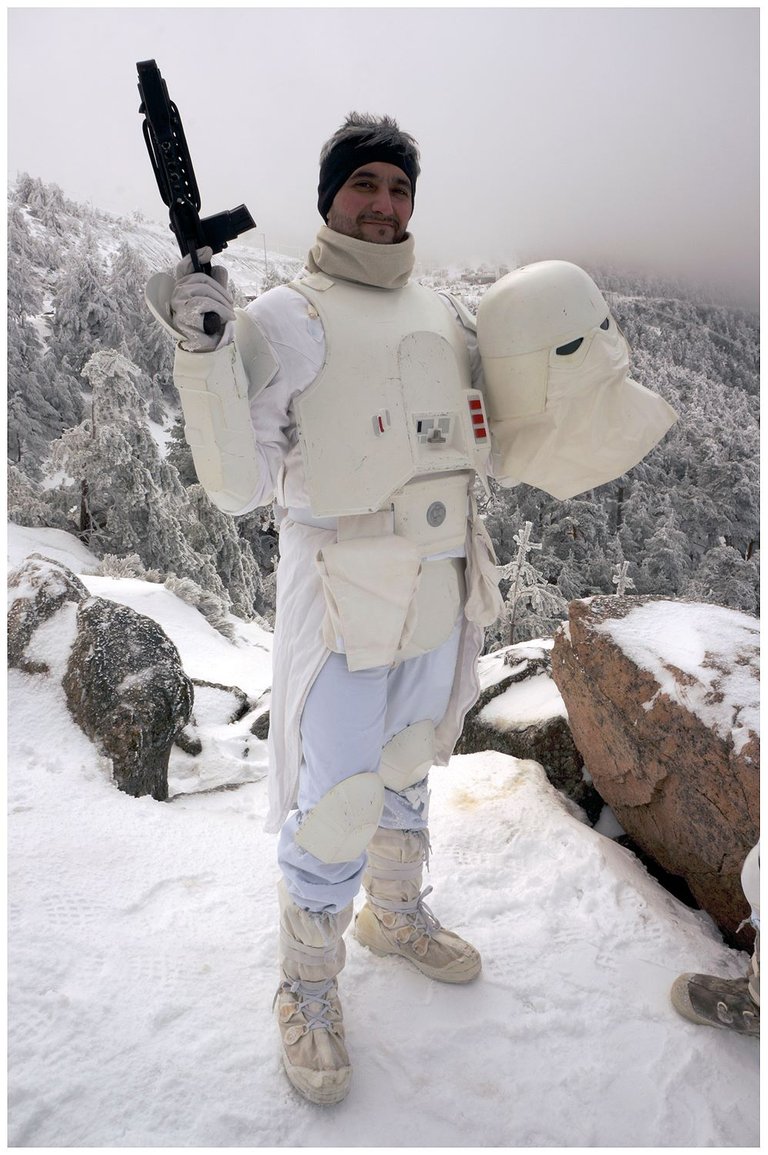
Aquí podéis ver el resultado final de como queda el traje y que mejor que sacarse unas fotos en un lugar nevado. Espero que os guste y así alguien tiene alguna duda aquí me tiene. 🙋♂
Here you can see the final result of how the suit looks like and what better than taking some pictures in a snowy place. I hope you like it and if anyone has any questions here I am.🙋♂

 Diseño original/Original design

This post was written listening City Pop music and New Retro Wave🎼
May we be governed by a DAO
Este post a sido redactado escuchando música City Pop y New Retro Wave🎼
Que nos gobierne una DAO


Esto genuinamente me interesa, siempre he querido hacer un cosplay de algún personaje de Star Wars. Está increíble el detalle en todo tu tutorial. 🤙🤙🤙
Muchas gracias @mtzrene! Tengo dos trajes mas, tengo los tres blanquitos de las clásicas, mas adelante subiré el tutorial para el bikerscout.
Un gran trabajo, buenísimo. Enhorabuena
Muchas gracias!😊
Good equipment ☺
You are well prepared)
lol looks fun) 😄
Have a nice weekend 💗
Ey thank you, yes is fun😀
You could have spent time and money making real functional snow armor
This was not the purpose. I belong to a customing group that we are fans of the star wars world and we make replicas of the original costumes. Just that😉.
but you will need armor when real aliens arrive
jajajajajajajaja That's true! I hope it won't be too cold when they come!
i wish you could make custom hive trooper armor thats all red and hexagonal! with hive logo as the imperial symbol!!!!!!!!!
Believe it or not, I was thinking of doing something similar. THE HIVE SOLDIER😎
but if you type in "red army Uniform" you get soviet uniforms not the color red lol
Hive soldier would be liek a radio man with laptop and a starlink backpack
I'm already designing it hahahaha, with or without wings?
The rewards earned on this comment will go directly to the people(@thorsito) sharing the post on Twitter as long as they are registered with @poshtoken. Sign up at https://hiveposh.com.
I never thought about cosplaying a snow trooper. 🤣 now i know. thank you!
never too late jejeje