Hello, dear friends Hivers.
I'm Zulay Pulido, Painter Apprentice, with Philosophical Thought.
" Inspiration exists, but it has to find you working.” - Pablo Picasso (1881-1973) Spanish painter.
All the drawings in this publication are my own.
Today is Thursday, November 11, 2021.

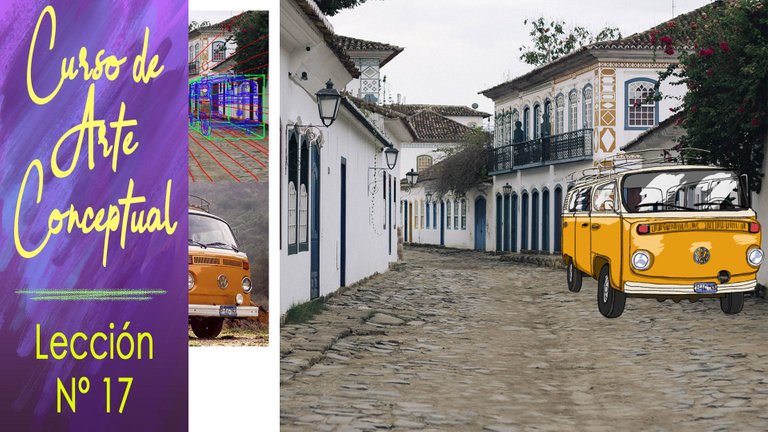
Curso de Arte Conceptual: Lección 17 (Español – Inglés)
Hola, queridos amigos Hivers.
Soy Zulay Pulido, Aprendiz de Pintura, con Pensamiento Filosófico.
“ La inspiración existe, pero tiene que encontrarte trabajando.“ - Pablo Picasso (1881-1973) Pintor español.
Todos los dibujos de esta publicación son de mi autoría.
Hoy es jueves 11 de noviembre del 2021.
Let's go to Lesson N° 17, with my works of the Conceptual Art Course that I am doing virtually.
I offer you the assignments I did to continue with the topic: Drawing Perspective.
In this opportunity I am going to copy different objects with different levels of complexity, to apply what I have seen so far.
It is about mixing the understanding of the knowledge acquired about Perspective with the Ability to Observe and Copy things.
These exercises are intended to perform Mental Gymnastics, which will allow us to reach a higher level of understanding and we will be able to see, with greater ease, the 3D side of everything we observe.
To perform the tasks of this course, I recommend using free downloadable photographs (without copyright), obtained from web pages, such as https://www.pexels.com/ https://pixabay.com/ https://unsplash.com/ and other similar ones, since they have a huge amount of images and are of great quality.
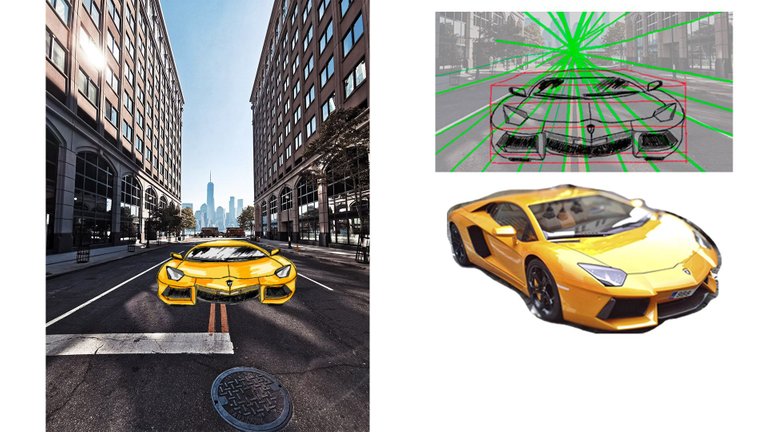
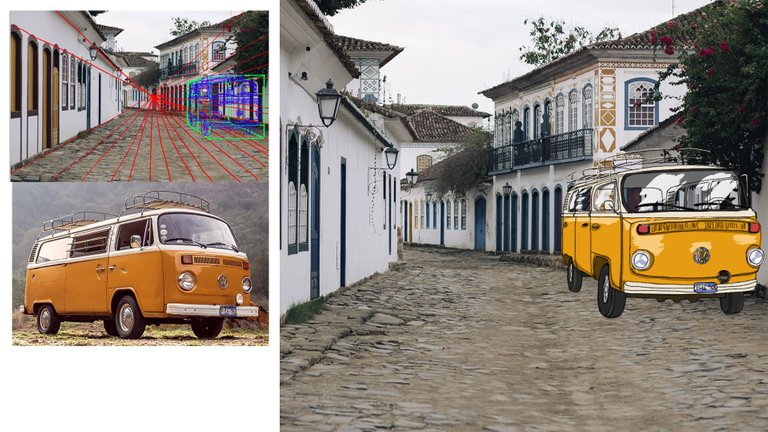
Task N° 1: Insert an Object in a photo with Perspective.
Step 1: Place the selected images on a blank canvas in Photoshop.
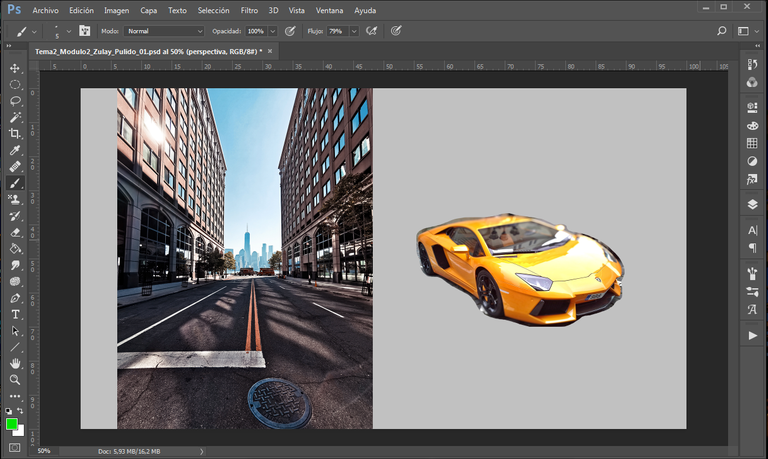
Photo from BOA.vision on Pexels
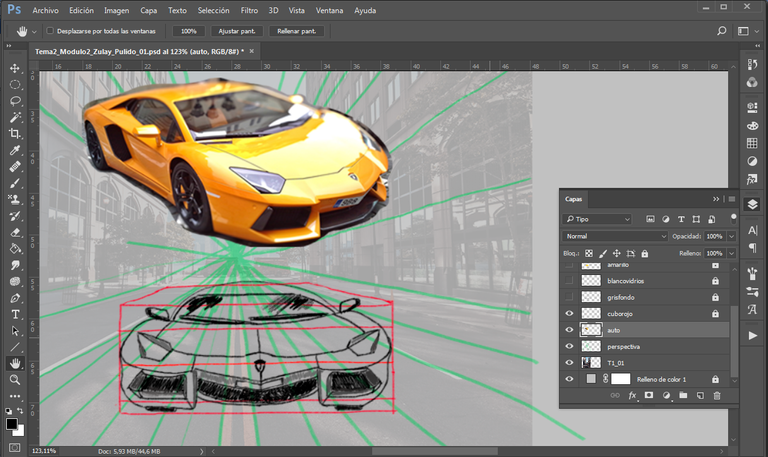
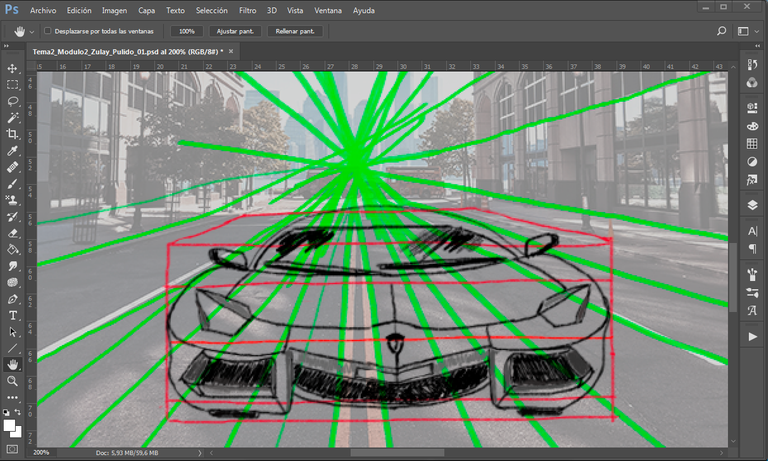
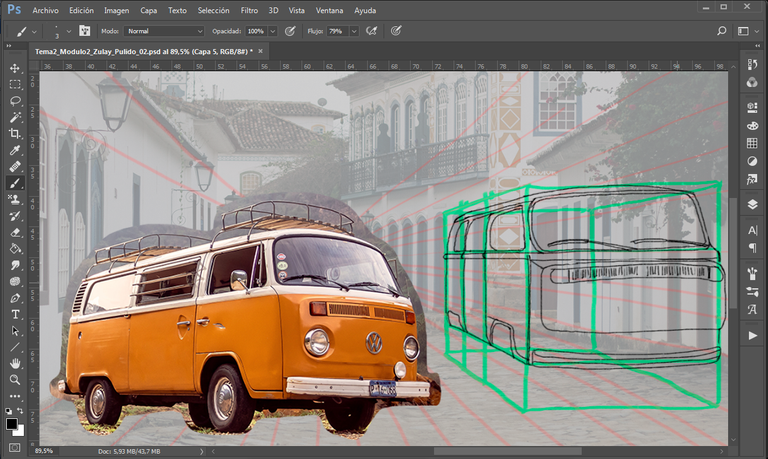
Step N° 2: Find the Horizon and the vanishing points and create the perspective mesh.
Step N° 3: Analyze the volumes and create cubes containing the drawing to copy.
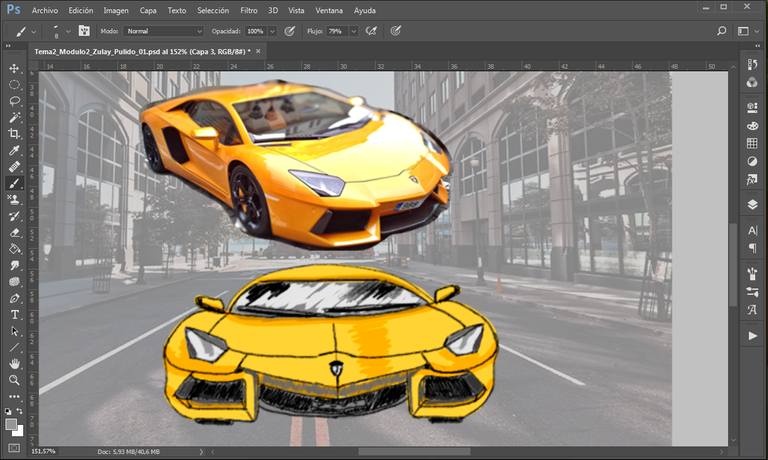
Step N° 4: Trace the object.
Step N° 5: Add shadows and basic colors.
Final work
Task 2: Insert an object in a photo with Perspective.
Step N° 1: Place the selected images on a blank canvas in Photoshop.
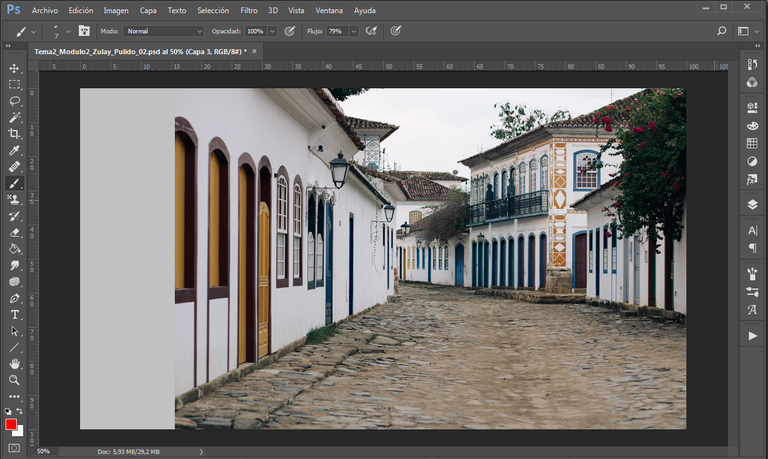
Photo by Diego Rezende on Pexels
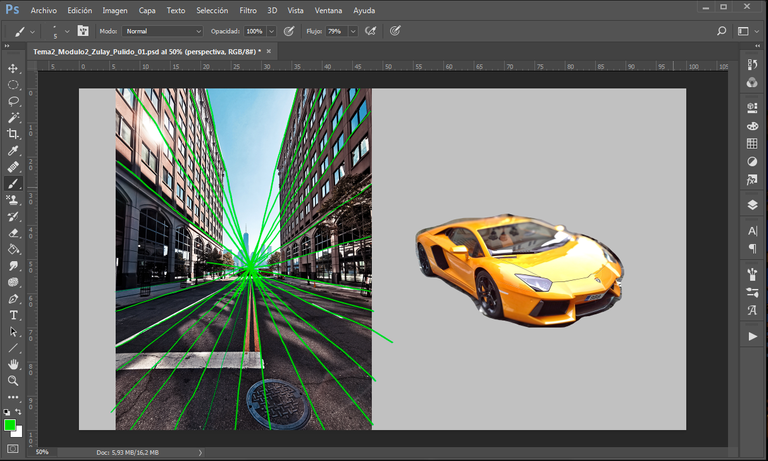
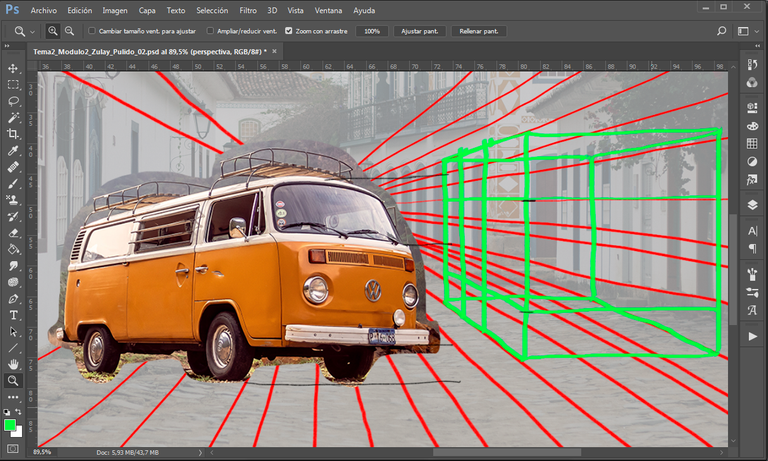
Step N° 2: Find the Horizon and the vanishing points and create the perspective mesh.
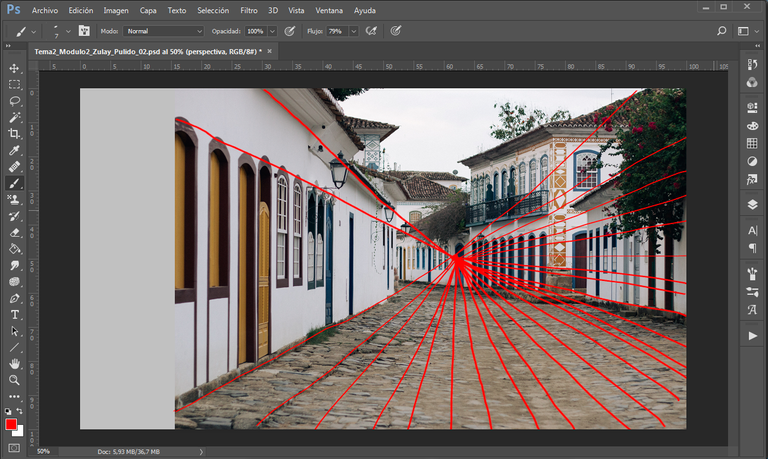
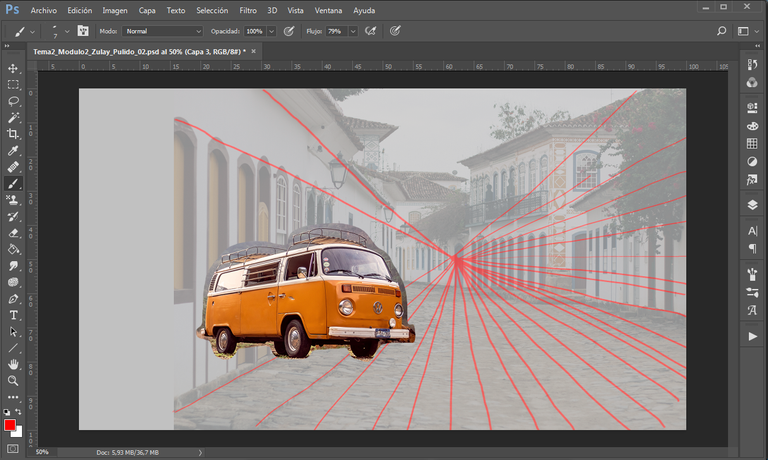
Photo by Alfonso Escalante on Pexels
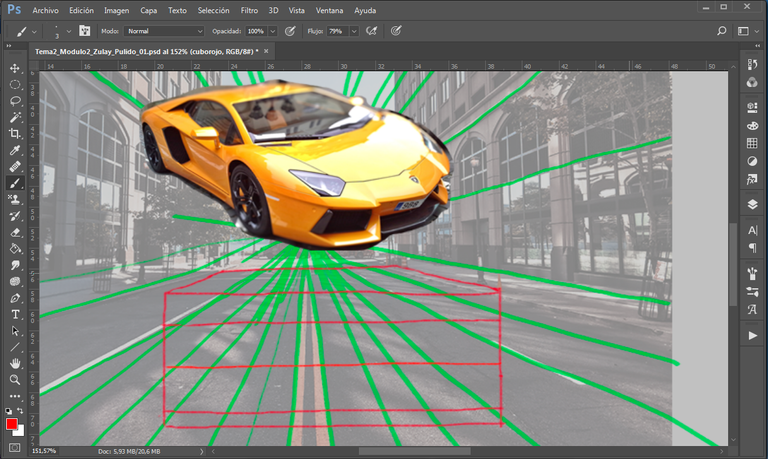
Step N° 3: Analyze the volumes and create cubes containing the drawing to be copied.
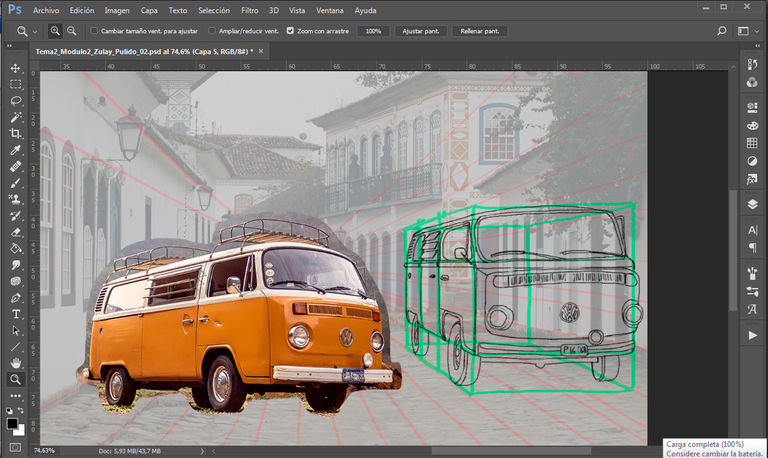
Step N° 4: Trace the object.
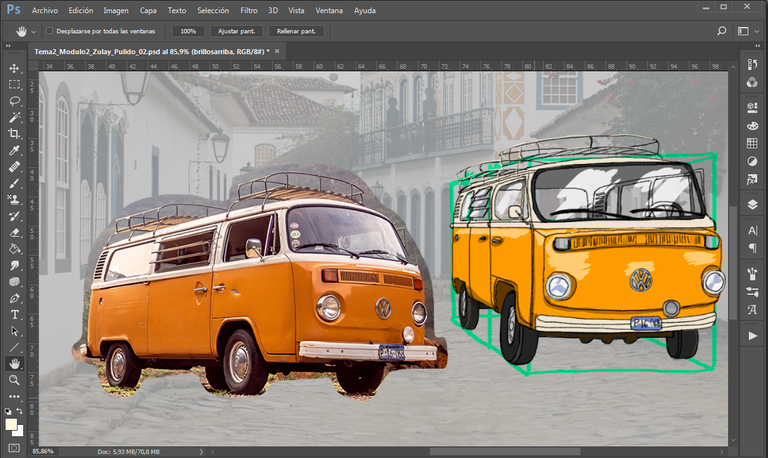
Step N° 5: Add shadows and basic colors.
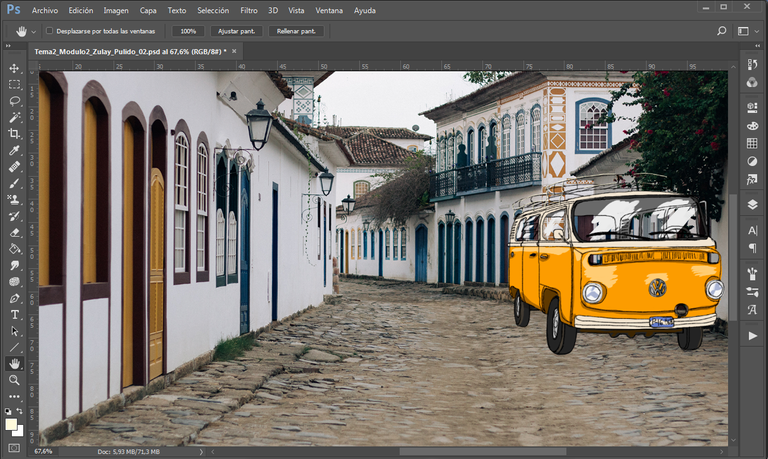
Final work
It took me six (6) hours to do this work.
This task was done in Photoshop 2017 with my Star 03 V2 XP-PEN Graphics Tablet.
I hope it is of interest and benefit.
If you would like to visit the above lesson, you can use the following link: Go to Lesson N° 16.
Vamos a la Lección N° 17, con mis trabajos del Curso de Arte Conceptual que estoy realizando de forma virtual.
Les ofrezco las tareas que hice para continuar con el tema: Perspectiva del Dibujo.
En esta oportunidad voy a copiar diferentes objetos don distintos niveles de complejidad, para aplicar lo visto, hasta ahora.
Se trata de mezclar el entendimiento de los conocimientos adquiridos sobre Perspectiva con la Capacidad de Observación y de Copiar las cosas.
Estos ejercicios tienen la intención de realizar Gimnasia Mental, que nos permitan alcanzar un nivel mayor de comprensión y podamos ver, con mayor facilidad, el lado 3D de todo lo que observamos.
Para efectuar las tareas de este curso, recomiendo utilizar fotografías de descarga gratuita (sin derechos de autor), obtenidas de páginas web, tales como: https://www.pexels.com/ https://pixabay.com/ https://unsplash.com/ y otras similares, ya que tienen una inmensa cantidad de imágenes y son de gran calidad.
Tarea N° 1: Introducir un Objeto en una foto con Perspectiva.
Paso N° 1: Colocar la imágenes seleccionadas en un lienzo en blanco en Photoshop.
Paso N° 2: Buscar el Horizonte y los puntos de fuga y crear la malla de perspectiva.
Paso N° 3: Analizar los volúmenes y crear cubos que contengan el dibujo a copiar.
Paso N° 4: Trazar el objeto.
Paso N° 5: Agregarle sombras y colores básicos.
Trabajo final
Tarea N° 2: Introducir un Objeto en una foto con Perspectiva.
Paso N° 1: Colocar la imágenes seleccionadas en un lienzo en blanco en Photoshop.
Foto de Diego Rezende en Pexels
Paso N° 2: Buscar el Horizonte y los puntos de fuga y crear la malla de perspectiva.
Foto de Alfonso Escalante en Pexels
Paso N° 3: Analizar los volúmenes y crear cubos que contengan el dibujo a copiar.
Paso N° 4: Trazar el objeto.
Paso N° 5: Agregarle sombras y colores básicos.
Trabajo final
Hacer este trabajo me tomó seis (6) horas.
Esta tarea fue realizada en Photoshop 2017 con mi Tableta Gráfica Star 03 V2 XP-PEN.
Espero que sea de tu interés y beneficio.
Si deseas visitar la lección anterior, puedes utilizar el siguiente enlace: Ir a la Lección N° 16
Mis Redes Sociales personales son:
Facebook: https://www.facebook.com/zupulido,
y Twitter: https://twitter.com/zupulido, pero no las uso con frecuencia.
Sin embargo, las de la FAVTachira,
Facebook: https://www.facebook.com/FAVTachira/,
Twiiter: https://twitter.com/favtachira
e Instagram: https://www.instagram.com/favtachira/,
sí se actualizan constantemente.
If you liked this post, I thank you for leaving your kind comment and some recommendations to improve my work.
Remember, you can find me at https://hive.blog/@librepensadora
Greetings from Venezuela, a country with Great Drawers.
Si te gustó esta publicación, te agradezco dejar tu gentil comentario y algunas recomendaciones para mejorar mi trabajo.
Recuerda, puedes encontrarme en https://hive.blog/@librepensadora
Un saludo desde Venezuela, un país con Grandes Dibujantes.
Welcome dear friend.
Community, the best option that exists in Hive, specialized in teaching the most advanced techniques and methods of creating quality articles. That will undoubtedly serve you throughout your journey through this important Blockchain.I recommend you join the @theterminal
If you want to be part of this great initiative, you just have to contact via Discord to @brittandjosie or @justclickindiva
Bienvenido, querido amigo.
Te recomiendo unirte a la ComunidadHive, especializada en la enseñanza de las más aventajadas técnicas y métodos de creación de artículos de calidad. Eso te servirá, indiscutiblemente, en todo tu trayecto por esta importante Blockchain. @theterminal , la mejor opción que existe en
Si deseas formar parte de esa grandiosa iniciativa, solo tienes que contactar, a través de Discord, a @brittandjosie o @justclickindiva


Excelente técnica, pero el acabo de la furgoneta de verdad que me gusto mucho esta demasiado adorable <3
Hola, amiga @shoutingmirror
Bienvenida a Hive.
Muchas gracias, por el piropo a mi carrito. También lo adoro.
Espero que tengas muchos éxitos en esta bella plataforma.
Un abrazote
Excelente post. Muy buena clase. Me encantó. Esperando la siguiente clase. Gracias por compartir.
Hola, amiga @chacald.dcymt
Me da mucho gusto verte por mi blog y que dejes tu lindo comentario.
Las clases se están poniendo cada día más complicaditas, pero eso significa que estamos mejorando en el trabajo artístico.
Muchas gracias.
Un abrazo
Holaaaa, amigos @mayvileros
Me encanta verlos por aquí.
Agradezco muchísimo su visita, comentario y voto.
Me hacen feliz.
Besos
The rewards earned on this comment will go directly to the person sharing the post on Twitter as long as they are registered with @poshtoken. Sign up at https://hiveposh.com.
Thank you very much, friends from @poshtoken
Excelente lección amiga, gracias por compartir con nosotros. Saludos
Hola, amigo @estebanuto
¿Cómo te ha ido en Hive? Espero que my bien.
Me agrada mucho verte en mi blog.
Gracias, por tu gentil comentario.
Un abrazo