Canning Chicken Broth
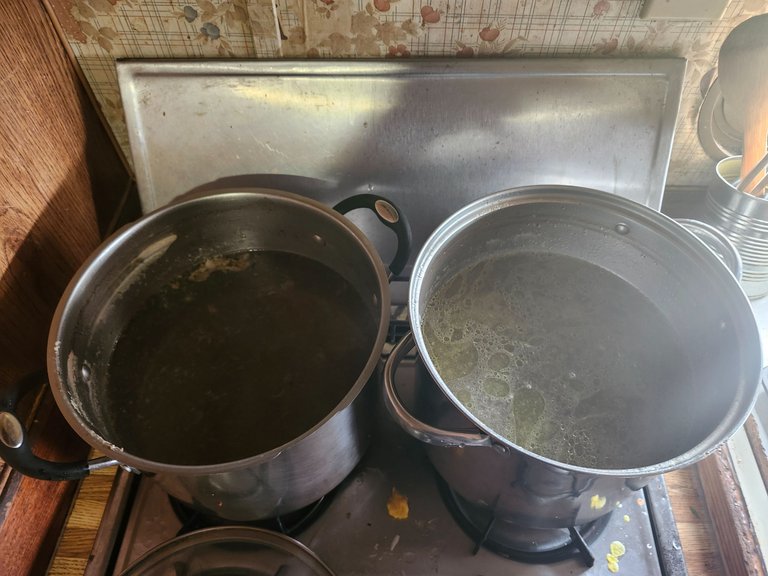
Canning Chicken Broth
Earlier I showed very basically how to make chicken broth. You can check that out here
Once you have some broth you want to can, you'll need canning jars, lids, and a pressure canner.
I'm using a 21 qt presto. Presto is the cheapest brand I know of. The prices on these has risen quite a bit. I used to be able to find used ones for next to nothing but these days I'm finding them harder to aquire at reasonable prices.
To buy one new is just over 100 usd. I see essentially no reason to buy the all American super canner. It's so expensive and really doesn't add much benefit. If you want to show off or have a freaking point or something great but this level of canner really cannot justify its price. My parents have used the same presto canners for decades without issue at all. All Americans do not can faster, better, or even more safely. They are just expensive. The only thing they offer is the screw tight lid. If there's an issue with your canner lid sealing, you'll notice right away because steam will shoot from the rim off the canner.
You can buy replacement rings. You can buy replacement parts for anything on a canner that goes out unless you break the canner itself. You can find 100 year old canners and often also find the parts to them.
So, the biggest trick to canning is to make sure everything is hot before sealing anything up. This will prevent your jars from breaking in the canning process and spilling everywhere. It's no fun, trust me lol. You want your jars hot, the material you intend to can hot (in this case broth) and some will say that you want your lids hot. You also want the water in the canner hot. These days the average lid is made so that you really don't have to boil them. However, older lids you did. So your grandma or mom might tell you this. It's still good practice but not essential these days.
Place the metal piece that comes with it in the bottom first.
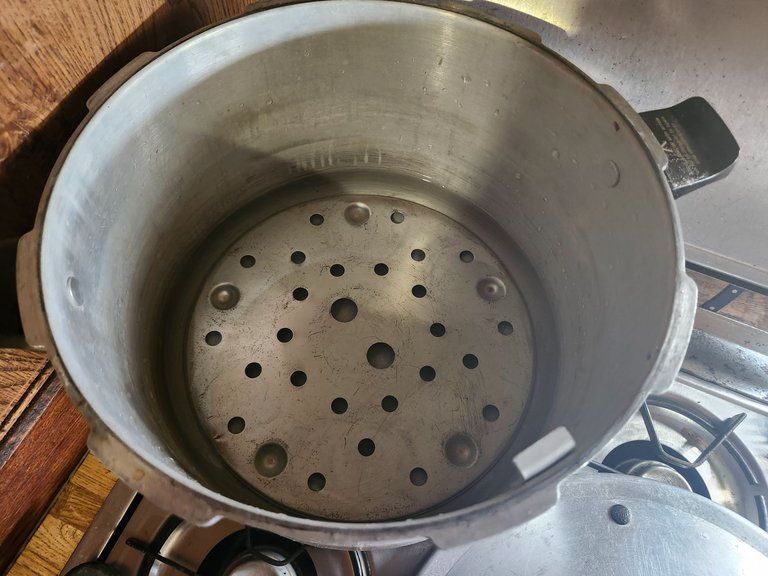
For a 21 qt canner, add 3 quarts of water to it. The metal piece on the bottom is to keep the glass off of the direct heat. Again, this is also to prevent the jars from breaking. If you're canner does not have the metal piece for the bottom then place a piece of cloth, spiraled up rope, some other metal piece that gets the jars off of the bottom buy around 1/4 inch so they don't touch. You won't burn that cloth so long as you have water in the canner. This method has been used for eons for other things so don't discredit a canner missing this piece.
After adding something to the bottom to keep your jars from touching, and adding the water, add the empty jars. This can be tricky with water in there due to the buoyancy of the empty jars but once you have all of them in there, they will hold like in the picture below.
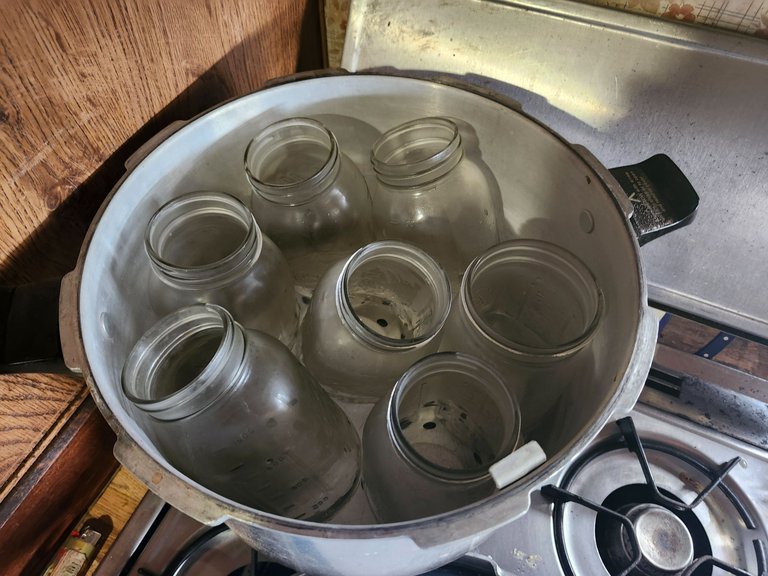
This can be a juggling act so if one falls over and gets water in it don't worry. If the water is clean then who cares, you're about to boil the shit out if it. So dump it back and move on. If that water is not clean, well just do better to make it clean lol.
At this time start heating up your broth also.
About the time you notice the water in the canner boil, your jars will be hot, or almost hot. It may take a bit of learning to get your timing right here. You just want to be sure that your broth, canner water, and the jars are all hot before adding the broth to the jars.
Ok, sometimes I'm the guy with the fancy tools. These days I'm the guy barely surviving lol. There's a clear distinction between the two in terms of how you do things. When you're barely surviving you often won't have all the cool tools to use. As is the case for me.
This said, there is one tool you never want to do this without. Trust me.
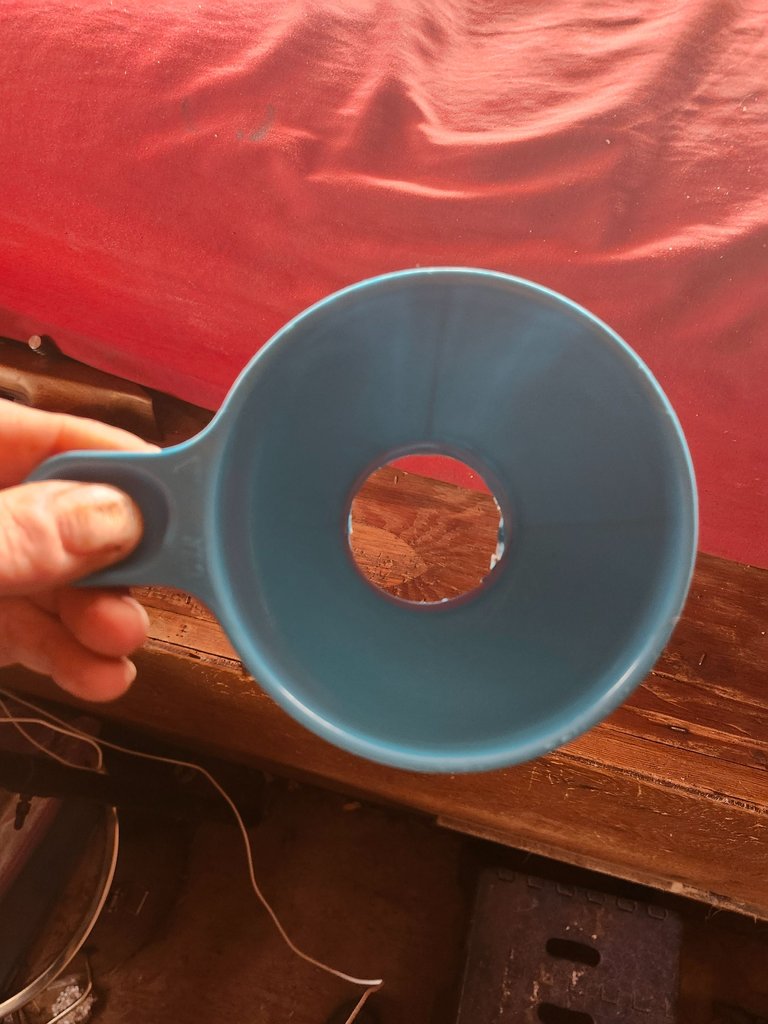
The canning funnel.
You don't want to be doing this without the funnel. You'll make a horrific mess. So, if you don't have enough money for all the tools and your wondering what tools you can cut from your budget, then be sure to get this tool and forgo the tool that picks up the jars. You can pick them up hot by using a towel or pot holder.
Actually, I bought one from Walmart a while back and the thing had all this plastic junk on it that made it to wide to even fit between the wide mouth jar necks. Rendering it completely useless. I'm not sure how so many things made today literally don't function for their intended purpose but this can be one of them if you're not careful. The old types that were all metal are far superior to the junk I found at Walmart recently. So when buying that tool, also be mindful of how much plastic they've added to the bottom of the thing and whether it will fit between your jar heads.
Alright, you've got both your broth and the jars all heated up. I usually fill the jars right there where they sit in the canner. Yes, this can allow you to spill some broth into the canning water. Just be careful. If you do spill, wash the jars after they cool. Alternatively you could remove the jars to fill them, but that buoyancy issue I mentioned earlier may give you issues, plus they are hot now.
You want to fill them to right where the ring below the threads starts. They always say 1 full inch gap but if you were to measure one inch you would be filling the jars to light. Even the funnel marks the spot I'm talking about with it's bottom once sitting on the jar.
Don't fill over this mark!
Seriously, don't. If you do, the jars may still seal but you'll have a freaking mess. Every jar you fill to much will spit when you pull them the whole time they are still hot. It will spit your boiling liquid contents all over the place every time it burps. Not pretty. Not fun. Not safe.
Once they are all full, use a towel, paper towel, whatever you have that's clean... to wipe the rim of the jars. You don't want anything on that rim as it can prevent proper seal.
Then add the lids and rings.
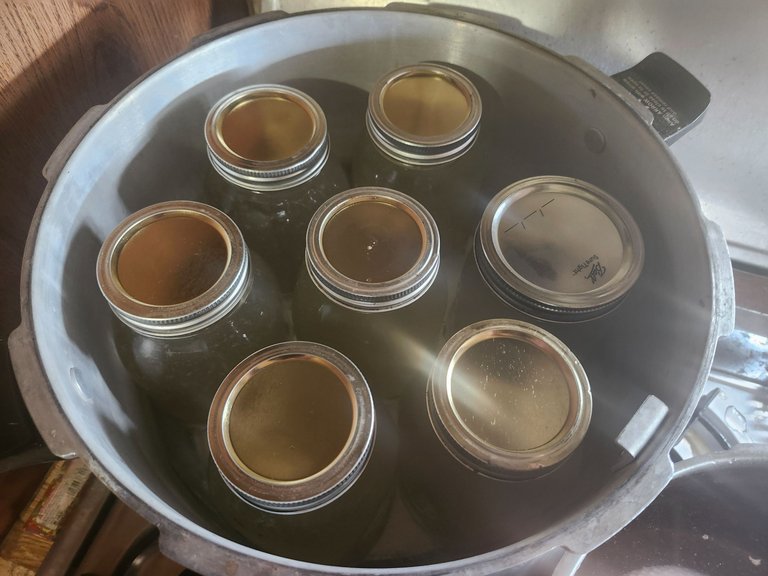
Hand tight, don't go crazy. Just snug.
Remember, these are hot. Once they are all full you won't have the buoyancy issue anymore and you can lift them with a towel, or tool, sit one on top the other and spin the ring on is need be without them tipping over.
Once they are all full and lids and rings are on then put the lid on and let it start.
Next is the weight.
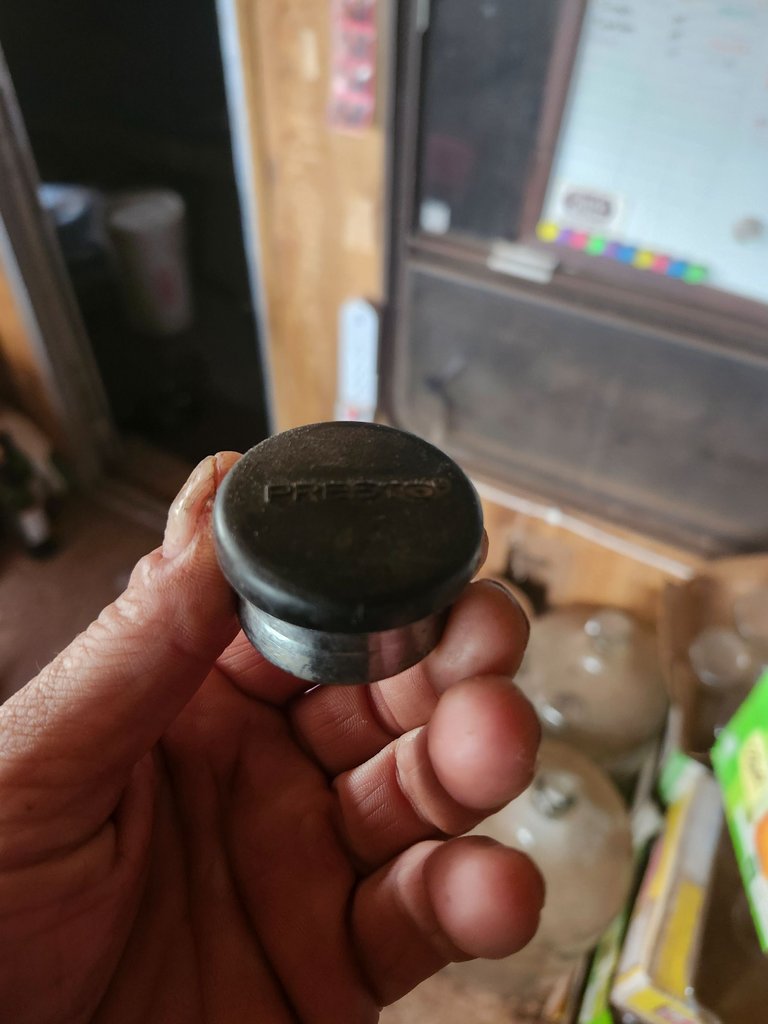
Many people say that you should leave the weight off of the steam spout for a minute before putting it on. It's on most instructions.
I've personally never done that until recently when I saw a YouTuber doing it. Clearly, in all that time I had no issues. I've now done it both ways and see no issue between them. I will say this though. If you leave it off for a while you might forget it and let to much of your water boil. (With my stove at home it takes a long time ty reach the temp.) If you've forgotten it then you're in trouble. If you've let to much water boil off, then during the run, your jars could go dry and break. And better yet, you will now have to open the canner (don't worry, it's not under pressure but I would let the steam stop first though so it doesn't shoot into your face) and then you'll need to get more water hot to add it. Do not add in cold water, you can break all the jars you have in there.
So, if you can't tell, I like to just put the damn weight on right away. As I might walk away onto another project, waiting for that canner to come to temp and totally forget it's there, boiling off. (You can't hear the steam shoot out from the steam spout as easily as you can hear the weight rattle) You may not be busy and forgetful like me lol.
Anyway, eventually you'll hear this thing start to make noise. I've used canners so much that I don't even look at the Guage anymore really. I just listen to the rattling of the weight. However, until you get that you want to try to keep it at about 12 psi.
People will tell you equations about what elevation you're at also. I still just listen to the rattle. After doing those equations you'll notice, even at high elevation that you're only of by one or two marks. In truth, you won't regulate your heat this closely anyway, especially when first heating it. So to me the difference between 11 psi and 12 is of no concern. Frankly this isn't rocket science. It will go up and down until you reach the right temperature under it and get used to where to put your flame. I would say keep it from reaching 15.
Remember, if it gets to high it could be dangerous. However there's a plug on these that blows if you totally forget. Just don't stake your life on it. Pay attention. If it's to low you're sort of starting over.
For me though, I just wait until it starts rattling, then try to keep it only rattling a little. If it's rattling a lot you've got to much pressure. Lower the heat until it's barely rattling and keep it there.
Once it starts rattling start a timer for 40 minutes. People will say different times. I like 40 minutes. It's what my parents do for broth, they have been canning for nearly 70 freaking years and chicken broth was a family favorite.
When the timer goes off, kill the heat.
If you're new to this, listen close to this next part.
Do not, under any circumstances, be stupid enough to open this pot. Honestly, you won't be able to with all that pressure but if you get in a hurry here and force that lid open... you're done. In reward for your stupidity, you'll receive wonderful 3rd degree burns over most of your body. So don't be an idiot. Be patient and let this thing cool. Also, don't remove the weight thinking you can speed up the cool. This will break all the jars inside.
When I'm doing a lot, I like to use 2 canners. I'll start heating the next one while the first is cooling. By the time it's hot the other will be cool and you can switch between.
Anyway, wait until there is no more steam coming out. To test this, when you think it's cool enough, lift up the weight for a split second and see if steam comes out. If so, leave it. If not, open the lid.
Once no more steam comes out, and you open it, you can remove the jars safely.
Set them on a counter with a couple inch gap between them to cool fully.
You will hear popping. This is good, it means that your lids are sealing.
Once fully cool push on the top of each lid and see if it moves. If it does then that jar didn't seal. Either use that right away or change the lid and run it in the next batch. You can keep the rings on our take them off. All up to you. Many people take them off so they can use them to seal other jars. I do.
Side note.
Sometimes you'll feel, when trying to remove a ring, that it is wanting to pull the lid up. It's common with older rings that aren't really shaped right anymore. Just leave these rings on and when you want to use that jar, finally, the ring will pull the lid off for you.
How long will broth last in the jar?
Ok this is a debatable topic. However, after growing up with home canned food making over half of our families diet, I can answer this objectively and with reason.
Most things you read say 5 years. So my parents used to have a cycle of throwing things out if they make it 5 years. However, we also missed a ton of things and let them go much further because my parents stock of canned food was immense and hard to navigate. There's also no such thing as a sell by date lol.
I have personally had meat, broth, fruits, vegetables, soup, you name it, after up to 15 years. Not kidding. I've eaten chicken, beef, pork, everything, that was 15 years old in the jar and it was still just fine.
My 2 cents is this:
If that seal isn't broken, assume it's good unless it looks or smells fucked up. Smell it after opening it. (Everything in a jar will smell odd, rotten though, is very obvious.) If you really need food then eat it no matter the age, unless it smells or looks rotten.
Last thing
The average canning lid is sold to be used one time and thrown away. There are reusable lids available for more cost. I haven't used these lids yet but I assume they work fine. However, if you're poor, like us, and can't afford 5 bucks for every dozen again and again. You can indeed reuse non reusable lids. I have 1 year old cat food right here on my shelf that was canned with lids I already used before.
I cannot tell you it will work with every lid and i can't tell you how many times you can reuse them. Some don't seal when you try a second or third time. Most will, nearly all actually will.
Here is why:
They are made using the same rubber that the reusable ones are. It's just much less of that rubber. Meaning you can't do this forever.
Reusing lids is not my first choice. We do this only when I can't afford the 5 bucks for a new dozen and I'm in a pinch. However, it's working and it's standing the test of time. I have tons of things in my stock that have reused lids. I've had essentially no issues. I do try to be sure I'm using the freshest ones though. If they don't seal (so far every one I've tried has) I'll just switch the lid and run again.
Congratulations @michaeldavid! You have completed the following achievement on the Hive blockchain And have been rewarded with New badge(s)
Your next target is to reach 35000 upvotes.
You can view your badges on your board and compare yourself to others in the Ranking
If you no longer want to receive notifications, reply to this comment with the word
STOPCheck out our last posts: