Colorful Morning
Today was Arts and Crafts Day with Little Miss. She's been nagging me about some arts with colored papers, so here we go.
Her dad bought her some colored paper cardboards so we checked out some activities we can do with them. We found this video and used it as our reference.
Materials for this activity:
- colored paper
- glue
- scissors
- pencil
- ruler
- a drawing compass
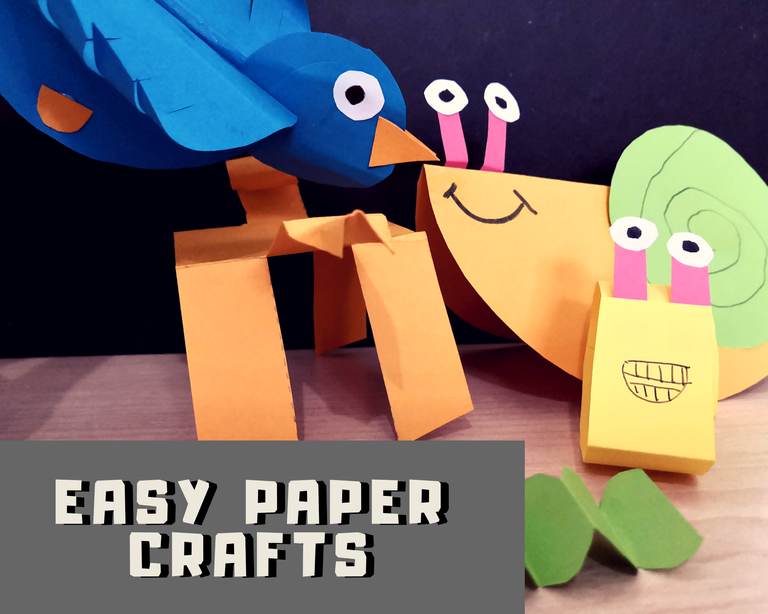
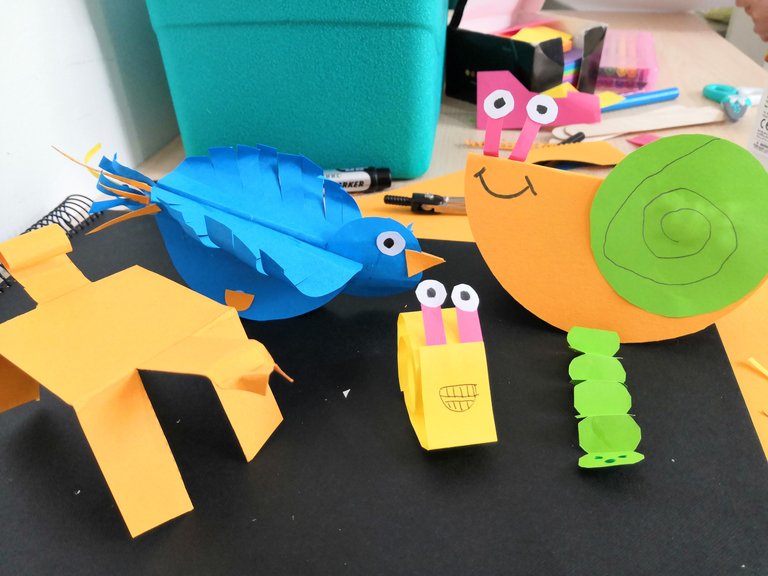
Meet the Crew
Ooopss! Sorry, they have not yet rehearsed their blocking for this pictorial. Everyone was in a hurry and wanted to get the best angle. Huh.
They still have to learn how to work together and it was really a struggle to put them in one frame. Guys, you need to do better next time, okay?
Moving on, I reckon we just give each of them a part of the limelight because they rightfully deserve so. Do you agree?
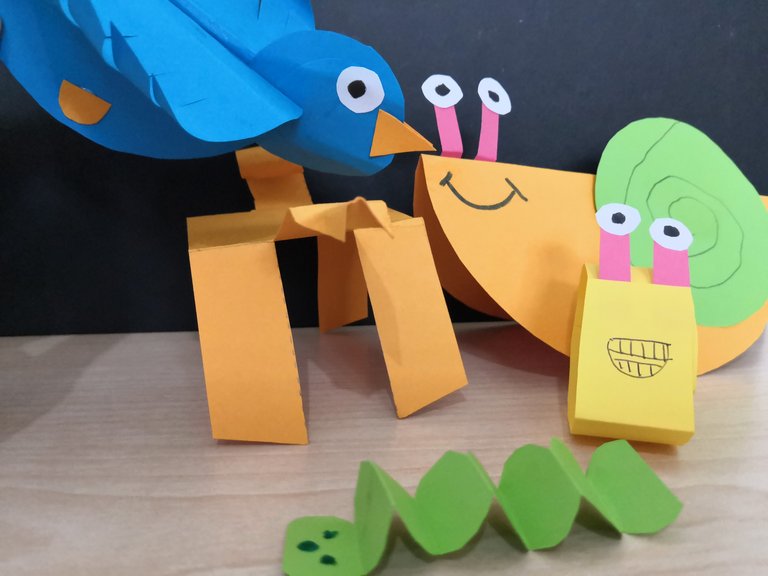
"Silky" the Caterpillar
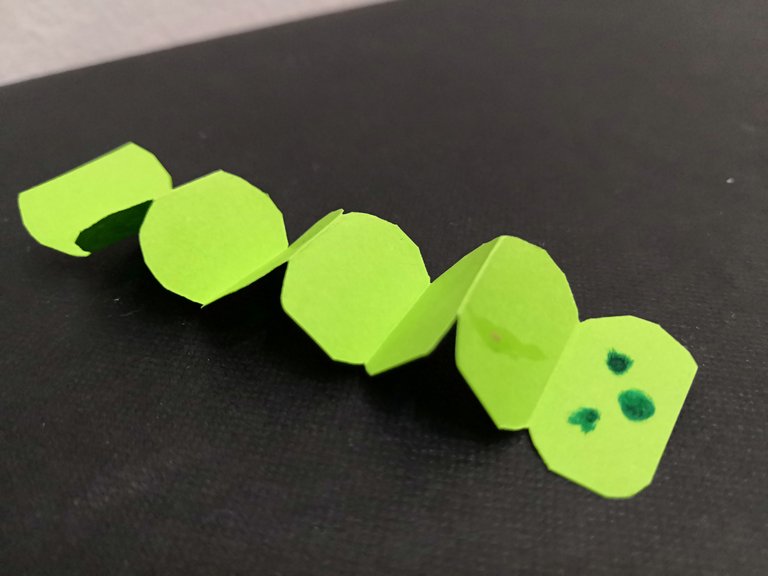
You know what they said,
just when the caterpillar thought the world was over, it became a butterfly!
So this little one, is pretty simple to achieve. Just get a strip of green paper and fold it into eight parts. Cut the sides to form a curve, and there you have it - your caterpillar.
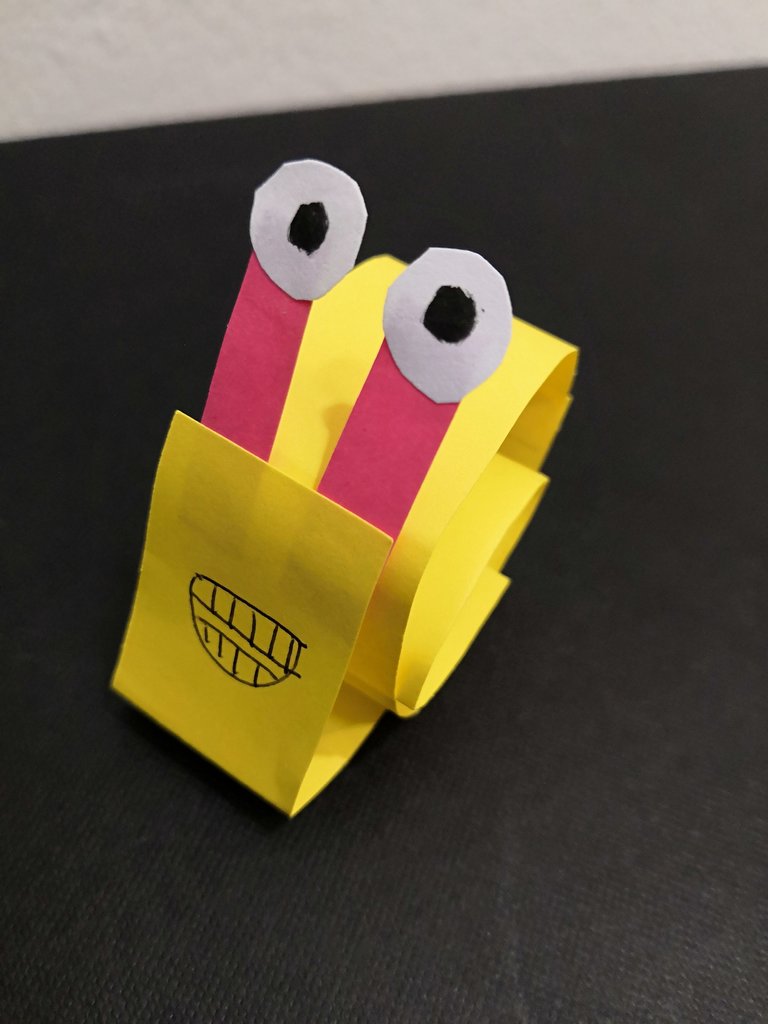
Gary.
Gary is a happy snail. Do you agree? Unlike what we saw in a Spongebob Squarepants episode (or movie?) where he turned into a monster, Gary is generally a happy little guy.
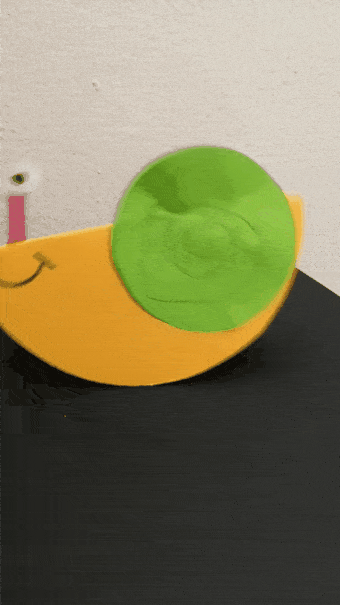
How to make Gary?
Cut a cardboard into a circle, 9cm in diameter, then fold in to half. Cut another smaller circle and paste in onto the bigger circle. Don't forget to draw those swirls! For the eyes, cut 2 1-inch thin strips and 2 small round eyeballs, and paste it as above.
Slimy the Slug.
Nah. don't be fooled by this little guy. He may look cute, but he is quite nasty and grumpy! He always gets in the way of Gary, and likes to push him to the limits.
It's easy to reproduce Slimy!
Cut a strip of paper and fold one end at around 1.5 inch mark. Paste 2 thin strips with eyeballs to this end and draw that angry mouth. Wrap the other end to a pencil to create a coil.
"Gi-Raffy!"
Hey, what's with all thos "-ey" names? Oh, well. Let's just get it on, shall we?
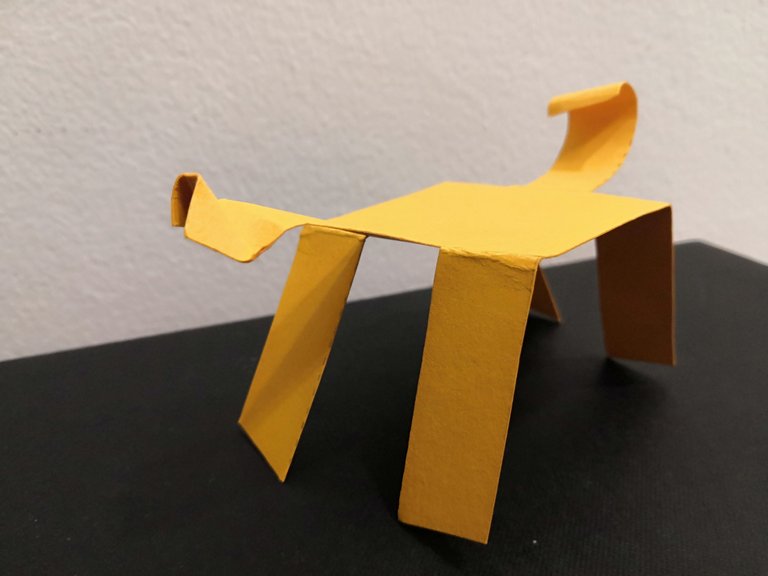
To make "Gi-Raffy", cut a 15cm x 6cm rectangle. Divide it into three (5cm) then cut 2cm wide strips on both ends. Pull the middle strip up then coil to become the tail, while fold down the other two sides to become the hind legs. Do the same for the other side, but make a small fold at the middle strip to become the head.
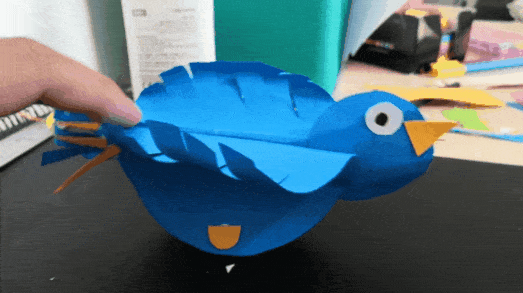
Flappy the Bird.
Flappy is a parrot. Err, a bald parrot. It also has quite a temper because of its heavy head.
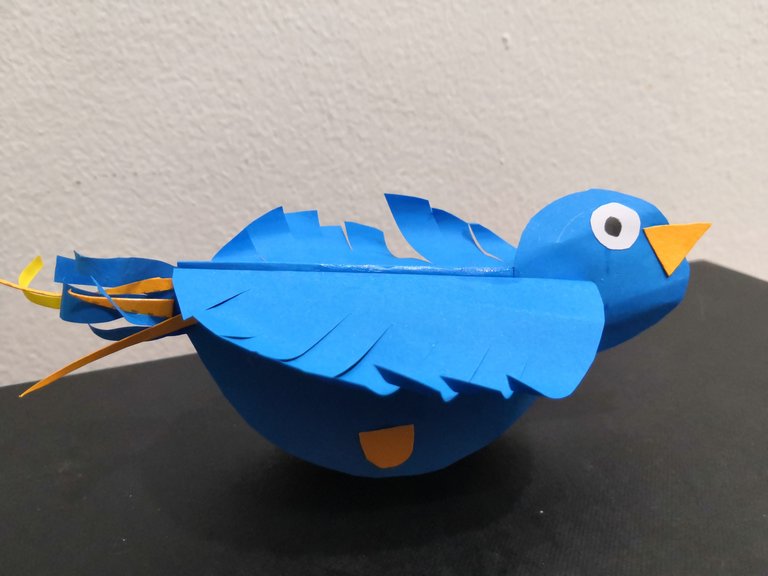
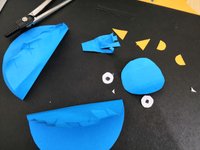
Cut a smaller circle to become the head, and paste eyeballs at both sides. Paste small triangles at both sides of the circle and this shall be the beak. Paste the wings and tail together.
Slightly open the bottom part so that the bird can "stand" on it's own.
Glad to meet you.
There! I hope you enjoyed the mini-meet up with these guys. My Little Miss and I had great fun making them. I hope you find this activity useful with your little ones too.
All right, one more try for a group picture!
Click!
Meh, you guys need to talk to each other more often. 🙄


Aww so cute! I could make 1000 of those and stick them all over my room!