Podemos realizar muchas modificaciones creativas a nuestras fotografías con tan solo un conocimiento básico, y aunque nos haga falta uno que otro curso, siempre bueno experimentar y obtener el mayor información a través de esa curiosidad.
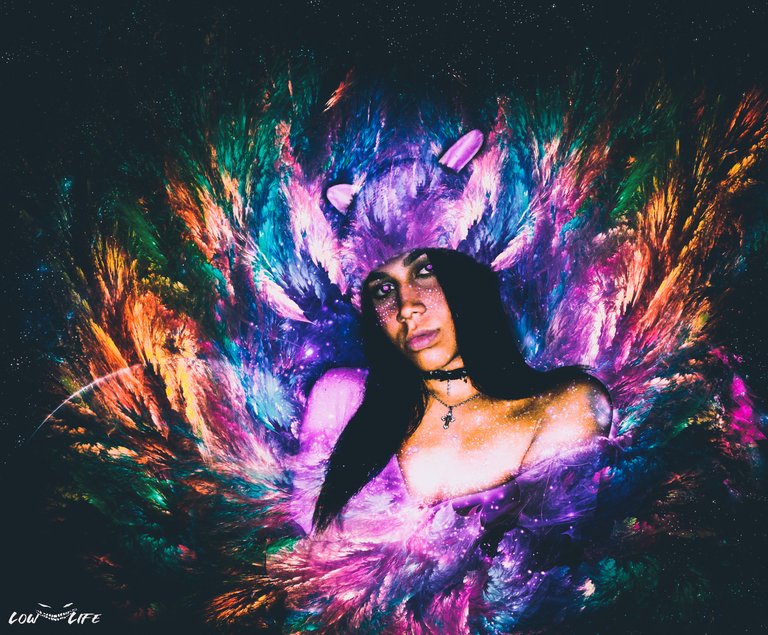
Hoy quiero compartir con ustedes otra edición fotográfica de la hermosa modelo @hivemania, así también con el procedimiento y los recursos que utilice para hacerla.
We can make many creative modifications to our photographs with only a basic knowledge, and although we need one or another course, always good to experiment and get the most information through that curiosity.
Today I want to share with you another photographic edition of the beautiful model @hivemania, as well as the procedure and resources I used to make it.
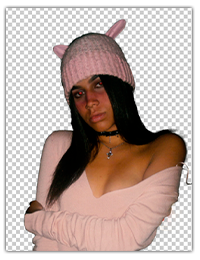
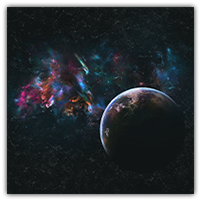
Para esto utilice los siguientes recursos:
For this, use the following resources:
Clic en las imágenes para ir a sus respectivas fuentes.
Click on the images to go to their respective sources.
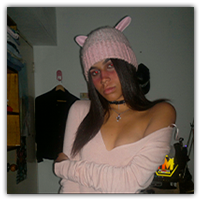
El primer paso como en la mayoría de montajes que realizo es hacer un recorte completo y preciso de la persona, luego de eso la agregue al nuevo fondo espacial donde ajuste su tamaño para emparejarla a su nuevo fondo. También invertí la imagen de fondo no mas por puro capricho.
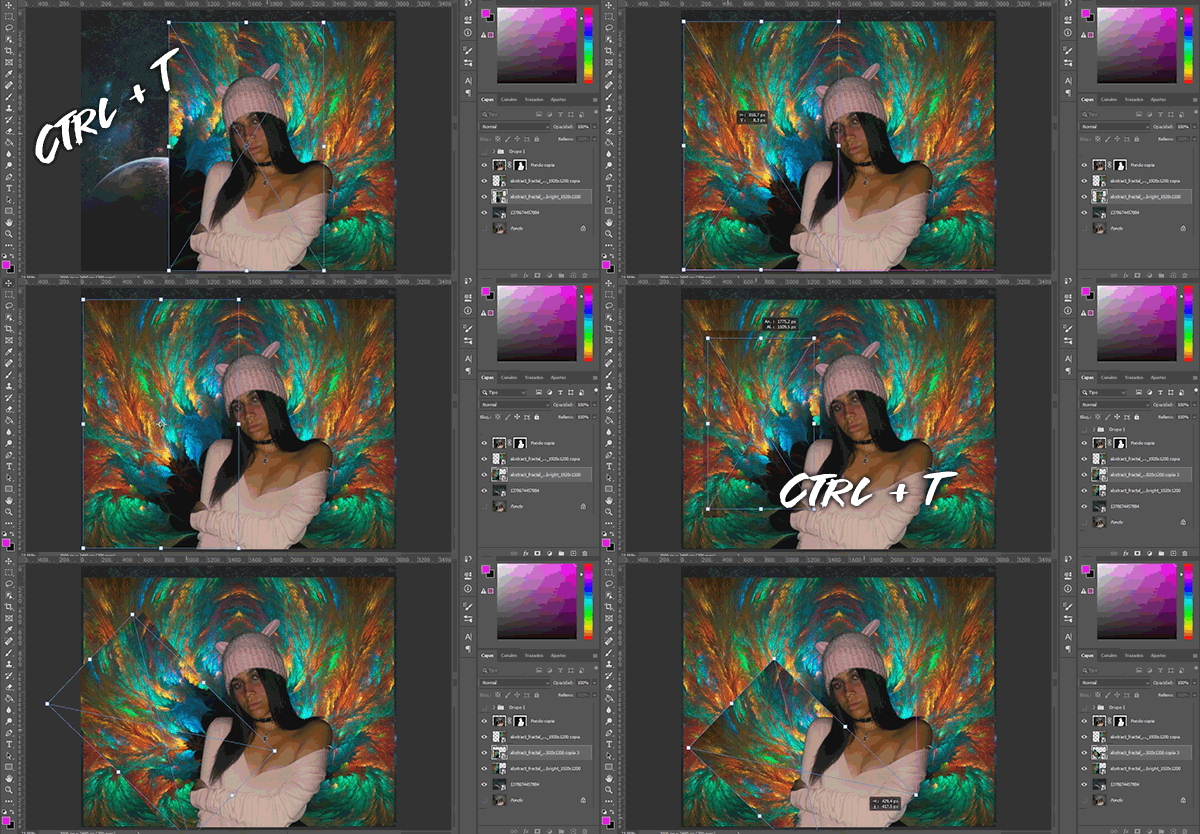
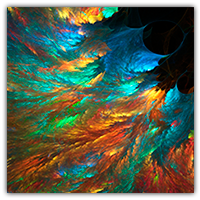
Luego de eso procedí a agregar el segundo recurso que es la imagen abstracta, debajo de la capa de la imagen recortada, esta vendría siendo el fuego que saldrá de ella y para esto la duplique 3 veces con Ctrl + J, luego pace a modificar su tamaño y su posición con Ctrl + T de manera que quedara que las formas emanan detrás de ella.
The first step, as in most assemblies I do, is to make a complete and precise cut of the person, after that I add it to the new space background where I adjust its size to match the new background. I also inverted the background image just on a whim.

After that I proceeded to add the second resource that is the abstract image, under the layer of the cut out image, this would be the fire that would come out of it and for this I duplicated it 3 times with Ctrl + J, then I proceeded to modify its size and position with Ctrl + T so that the forms would emanate behind it.
Una vez terminado de posicionar las capas nuevas, quise volverla una sola entidad y quitarle sus bordes, para esto fue necesario crear una mascara en cada capa para poder borrar sus bordes sin tener que dañar la imagen.
Once I finished positioning the new layers, I wanted to make it a single entity and remove its edges. To do this, I had to create a mask on each layer so that I could erase its edges without having to damage the image.

Con el pincel negro, sobre la mascara de la capa para eliminar los bordes, esto es importante porque podemos corregir cualquier detalle gracias a esto y si nos pasamos y borramos algo que no queremos simplemente cambiamos al pincel blanco y volvemos a pintar la parte que borramos. (ojo esto solo sobre mascara de la capa)
With the black brush, on the mask of the layer to remove the borders, this is important because we can correct any detail thanks to this and if we go too far and erase something we don't want we simply change to the white brush and repaint the part we erased. (note this only on the mask of the layer)
Luego de durar al rededor de 20 minutos corrigiendo y cambiando el tamaño y la posición de la imagen abstracta que utilizare para el fuego multicolor, logre ponerlo como quería y combinar todas las capas en una para volverla un objeto inteligente con clic derecho, después de eso baje la capa de la fotografía recortada abajo de la imagen abstracta, para así con una nueva mascara de capa y con el pincel negro sobre la imagen abstracta, poder borrar parte de ella y lograr el efecto que verán a continuación.
After about 20 minutes of correcting and changing the size and position of the abstract image I used for the multicolor fire, I managed to put it as I wanted and combine all the layers into one to make it a smart object with right click, after that I lowered the layer of the cut out photograph below the abstract image, so that with a new layer mask and with the black brush on the abstract image, I could erase part of it and achieve the effect you will see below.
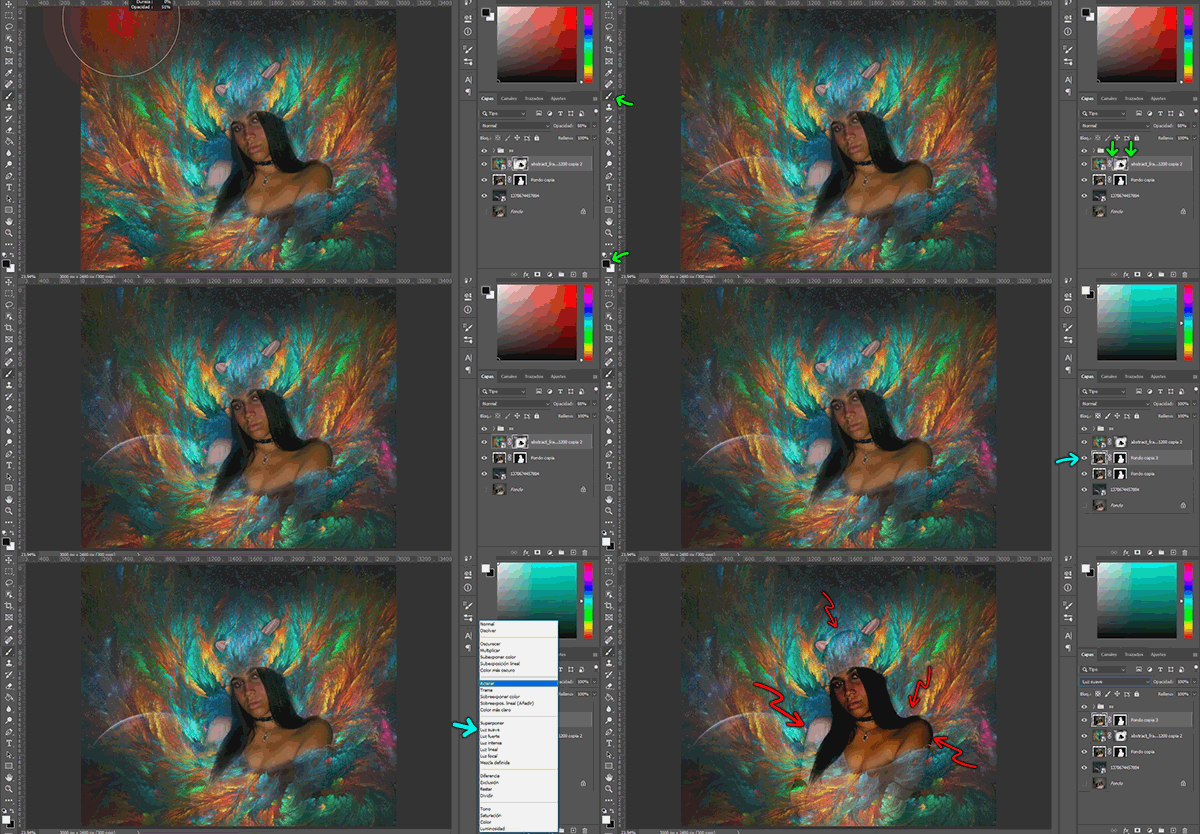
Duplique la fotografía recortada para colocarla sobre la capa abstracta, cambie el modo de difusión de la imagen clonada a Luz Suave para que resalte mas el contorno de la imagen recortada sin alterar las modificaciones, después con el mismo pincel negro sobre la mascara de la imagen clonada borre algunos detalles para que no se viera tan oscura.
Duplicate the cropped photo to place it on the abstract layer, change the diffusion mode of the cloned image to Smooth Light to make the contour of the cropped image stand out more without altering the modifications, then with the same black brush on the mask of the cloned image erase some details so that it does not look so dark.
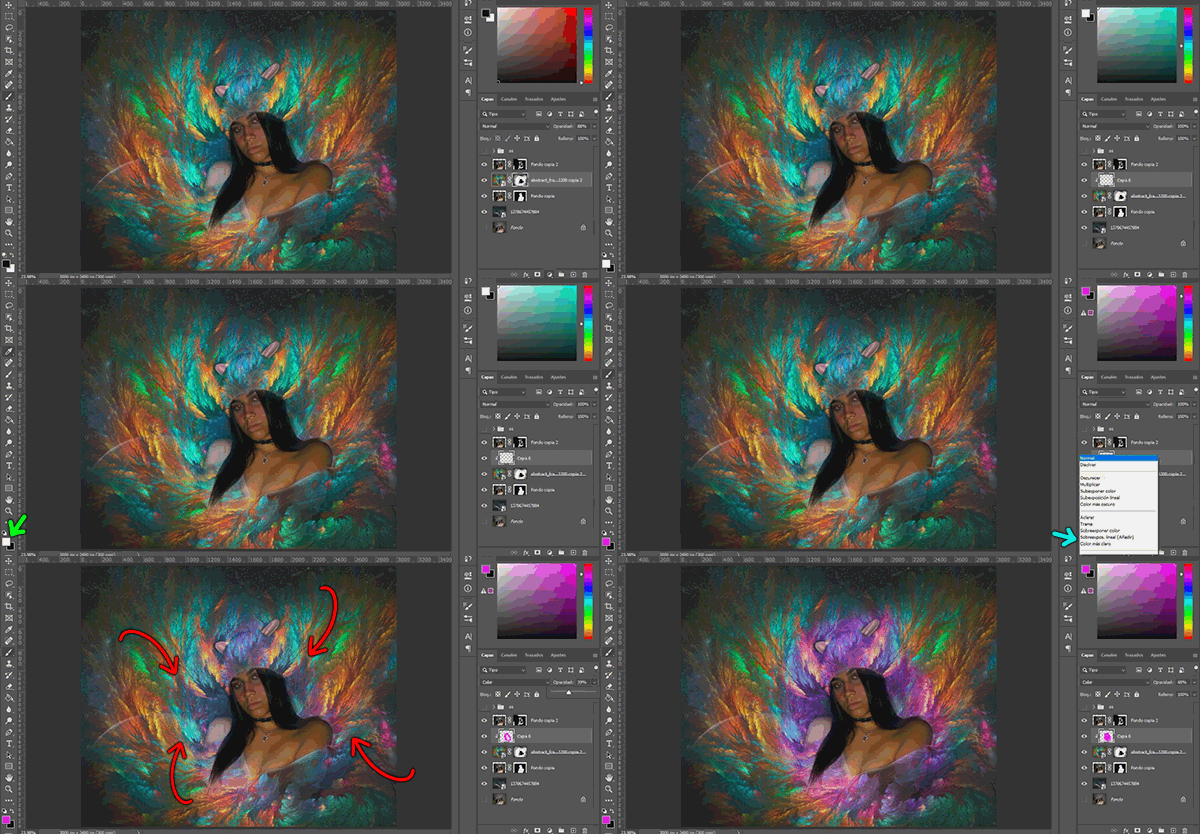
Después quise darle un detalle mas llamativo y para esto cree una nueva capa en blanco la cual la posicione sobre la capa del supuesto fuego y con Ctrl + Clic Derecho entre las dos capas hice un recorte de mascara para que las modificaciones de esta capa solo afecten a la de abajo, luego de esto agregue un pincel rosado y colore al rededor de ella, con el modo de difusión en Color y un 60% de opacidad logre lo siguiente.
Then I wanted to give a more striking detail and for this I created a new white layer which I positioned on the layer of the alleged fire and with Ctrl + Right Click between the two layers I made a mask cut so that the modifications of this layer only affect the bottom, then I added a pink brush and colored around it, with the mode of diffusion in Color and 60% opacity achieve the following.
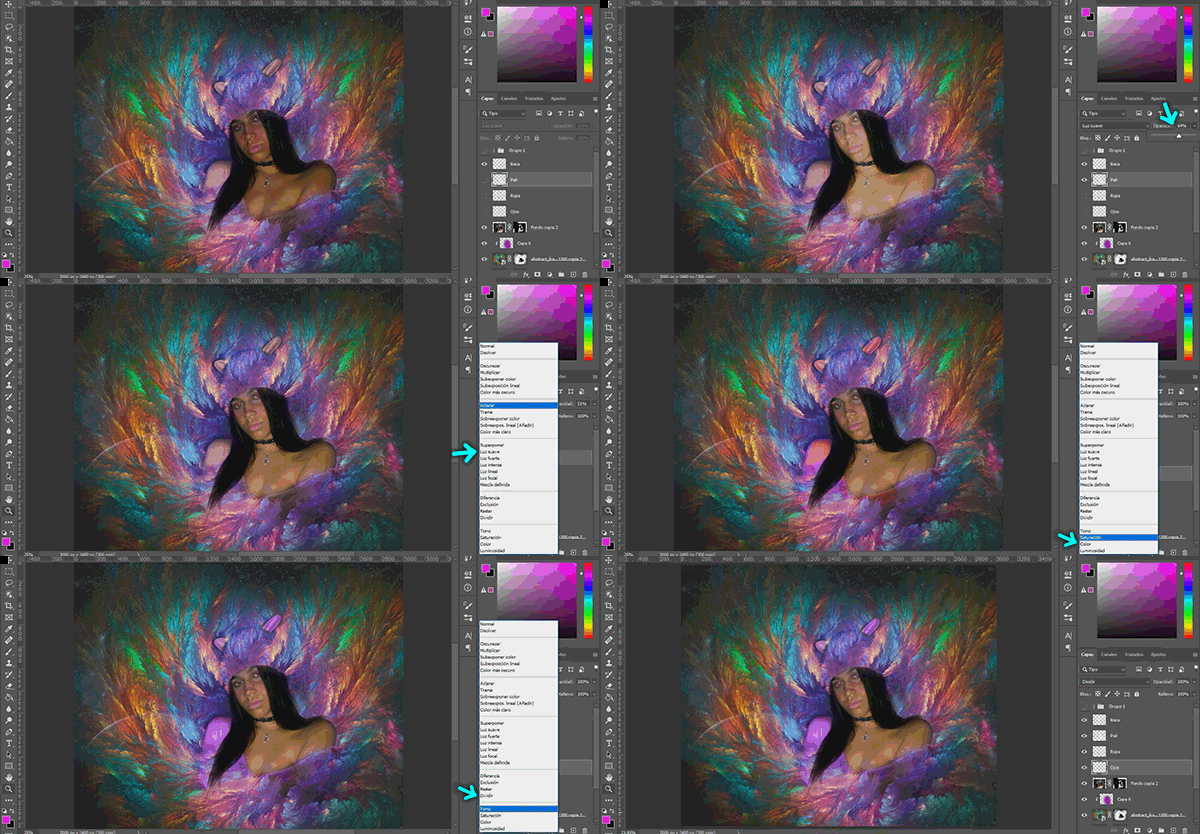
Luego procedí a darle unos cuantos detalles surrealistas a la fotografía recortada, y para esto cree varias capas en blanco nuevas para enfocarme en distintas partes de su cuerpo, como los ojos, la boca, la piel y la ropa, con distintos colores de pinceles y varios cambios de modo de difusión y opacidad en las capas de cree y en los lugares que pinte logre lo siguiente.
I then proceeded to give a few surreal details to the cut out photograph, and for this I created several new white layers to focus on different parts of your body, such as the eyes, mouth, skin and clothes, with different brush colors and several changes of diffusion mode and opacity in the creator layers and in the places I painted I achieved the following.
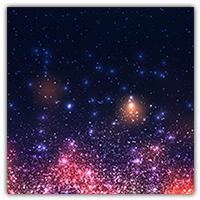
Después agregue el tercer recurso que vendrían siendo las partículas, para esto duplique la capa de las partículas Ctrl + j con Ctrl + T las posicione y cambie el modo de difusion de estas a Sobreponer color para ocultar el fondo de estas sin que desaparezca el color de las partículas, luego de nuevo con una mascara nueva y con el pincel negro elimine los bordes.
Then add the third resource that would be the particles, for this duplicate the layer of particles Ctrl + j with Ctrl + T position them and change the mode of diffusion of these to Overlay color to hide the background of these without the color of the particles, then again with a new mask and with the black brush remove the borders.
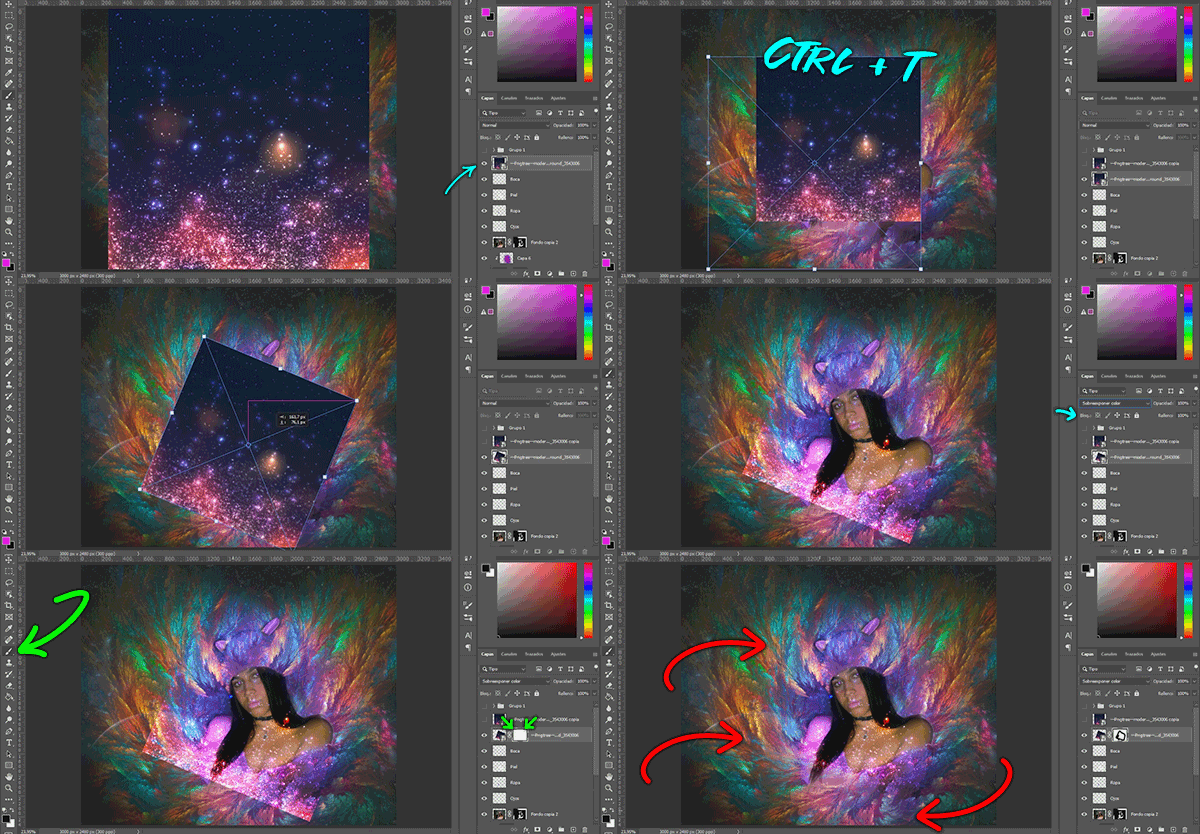
Recuerden que el pincel negro sobre la mascara es para eliminar información y el blanco para mostrar. Luego de hacer lo mismo con la segunda capa duplicada pero mas pequeña en el rostro de ella resalte mas el color de las partículas pequeñas con una capa nueva de color rosado y un recorte sobre ella.
Remember that the black brush over the mask is for removing information and the white brush is for displaying. After doing the same with the second duplicate but smaller layer on the face of the mask highlight more the color of the small particles with a new layer of pink color and a cut out over it.
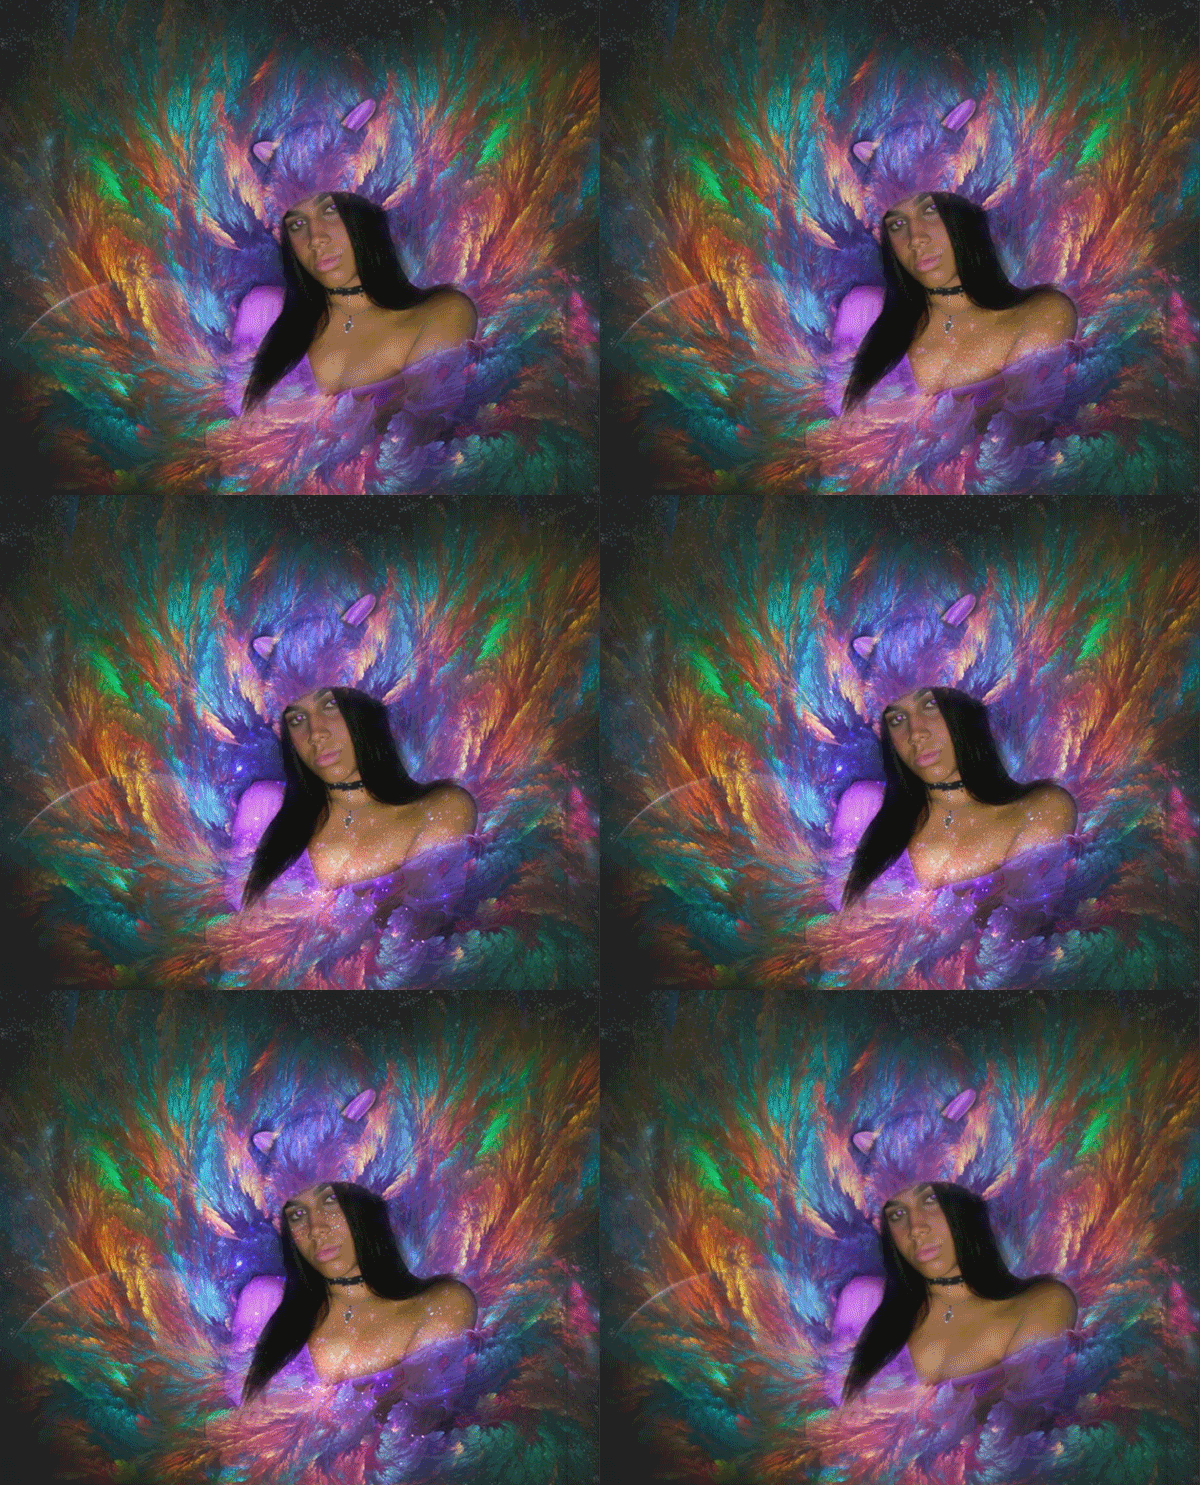
El resultado fue este.
The result was this.
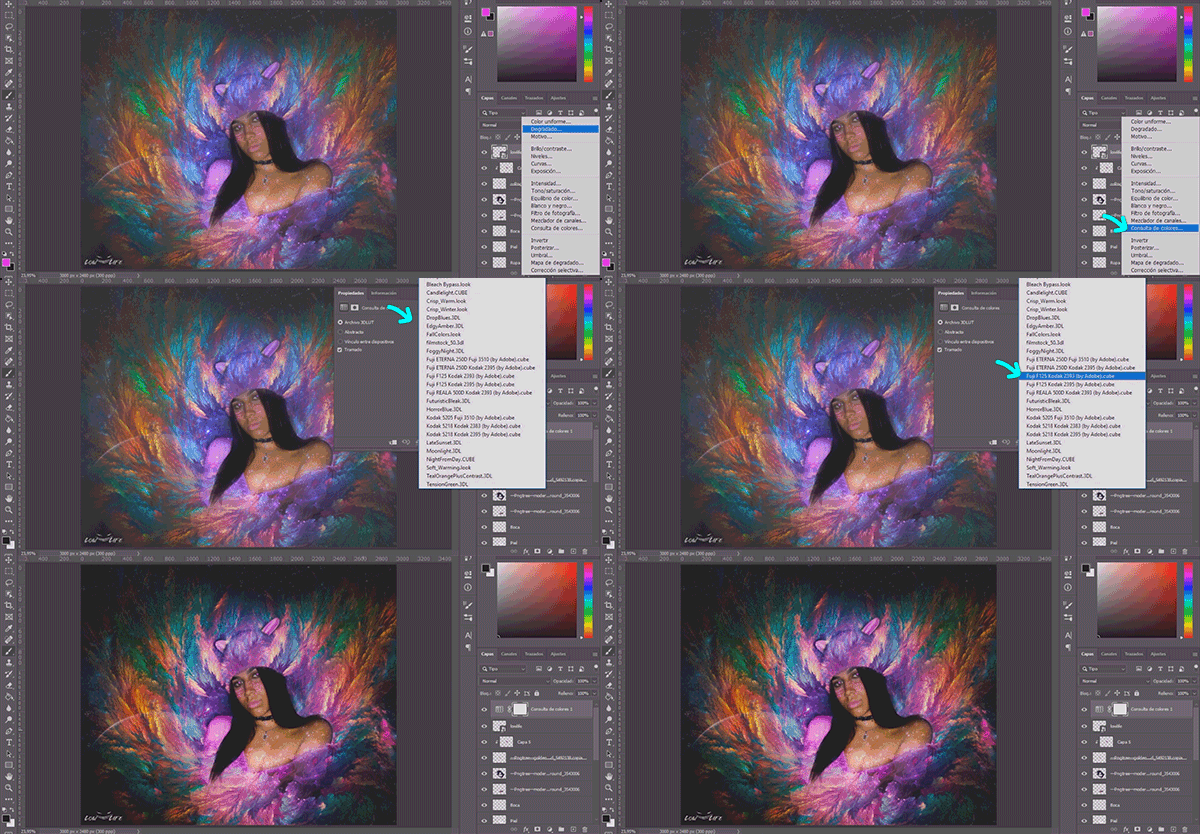
Por ultimo le agregue un filtro kodak, con una nueva capa de Consulta de Colores esto para darle el efecto de que esta todo en un solo plano y poder modificarla mas mejor en Lightroom.
Finally I added a kodak filter, with a new Color Lookup layer to give the effect that everything is in one plane and to be able to modify it better in Lightroom.
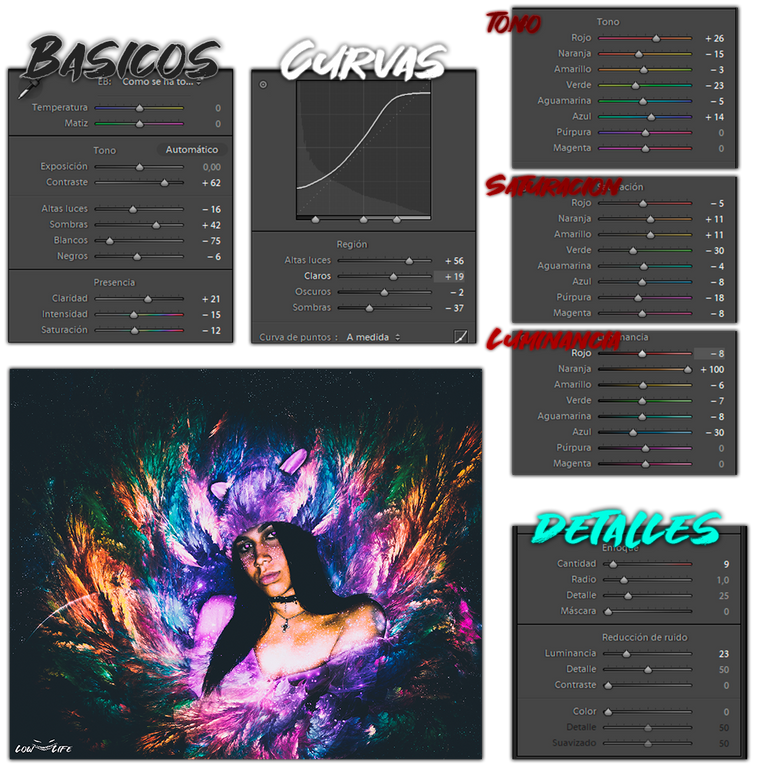
Para finalizar avive todo mas en Lightroom, desde los colores hasta las sombras, para darle mas surrealismo a la imagen, para eso agregue los siguientes parámetros.
Finally, add the following parameters to Lightroom, from the colors to the shadows, to give more surrealism to the image.
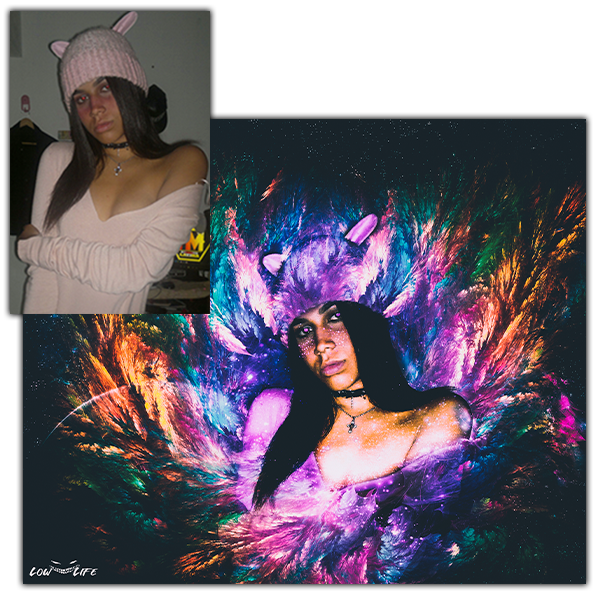
Y bueno amigos eso es todo, espero les haya gustado este foto montaje, que les haya servido de ayuda si quieren realizar uno igual a este, sin mas que tengan un excelente semana y hasta la próxima!!
And well friends that is all, I hope you liked this photo montage, that it was helpful if you want to make one just like this one, just have an excellent week and see you next time!!!


Agradecido con su apoyo ♥
QUE HERMOSISIMA TE QUEDOOOOO 😍😍😍... GRACIAS, GRACIAS, GRACIAS🙈👏🏻...
Eres un real artista😌, mil felicitaciones, me siento muy alagada y contenta de ser parte de tus increíbles diseños, parezco estar en llamas o desintegrandome en multiples colores llenos de vida y luz, sencillamente hermoso, aparte es divertido y tierno las orejitas aparte jajaja 😂🐱, las pinticas en mis mejillas😊, el detalle, el contraste que tiene la imagen, Wuao 🙈, ¿Que puedo decir que no este tan claramente reflejado en tu talento?, agradecida contigo cariño.
Mi máximo e infinito apoyo para ti, te mando mil besos😘, mil aplausos👏🏻 y mil abrazos🤗.
🐝
Me encanta te haya encantado 🤗 siempre es un placer resaltar mas tu hermosa belleza ♥ jaja, agradecido infinitamente con tu apoyo y te mando dos mil abrazos y besos para ti tambien 😁😁💖
El fotomontaje te quedó muy impresionante! Te felicito
Muchas gracias me alegro que te haya gustado c: