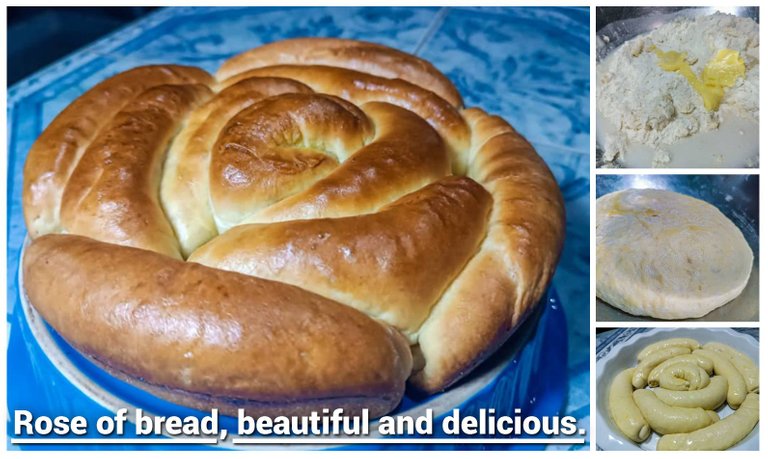
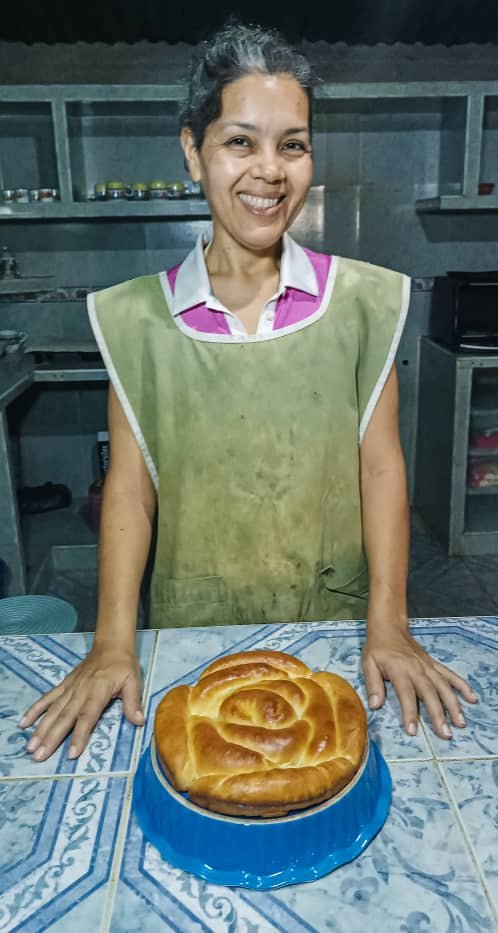
A loving greeting to all my Hive friends, I am pleased to be once again sharing with you one of my recipes in the beautiful community Foodies Bee Hive. This time I am very excited because I bring you one of my favorite recipes, this is a super soft, delicious and visually beautiful bread rose, I am sure you will enjoy it.
Here are the ingredients and the step by step to make a ten petal bread rose, which will be enough for four people.
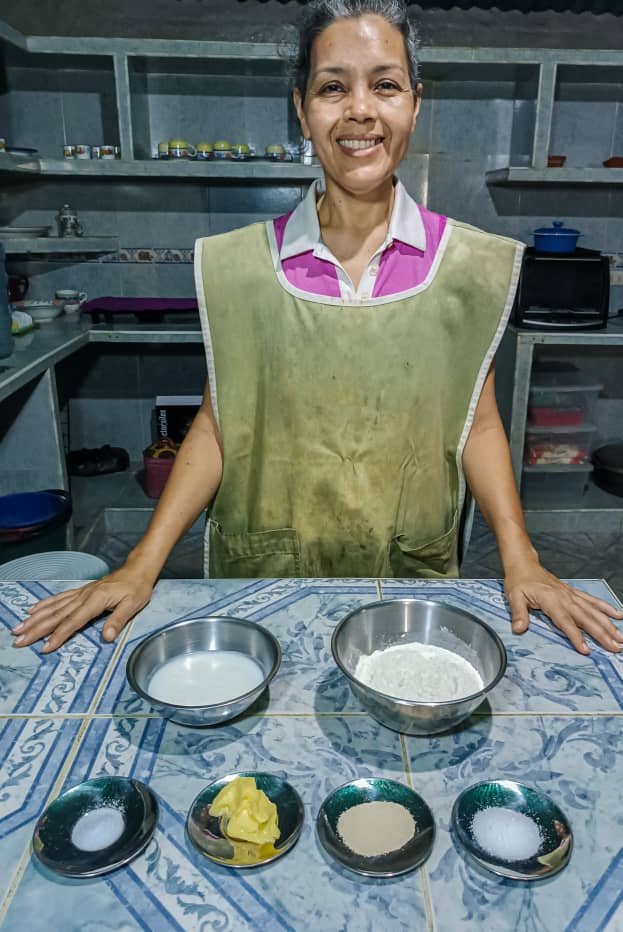
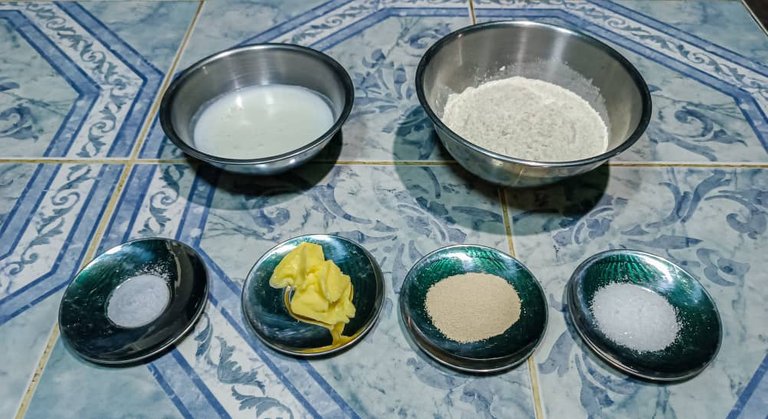
Ingredients
- 250 gr flour
- 175 ml of milk
- 8 gr of yeast
- 25 gr butter
- 5 gr salt
- 2 tablespoons sugar
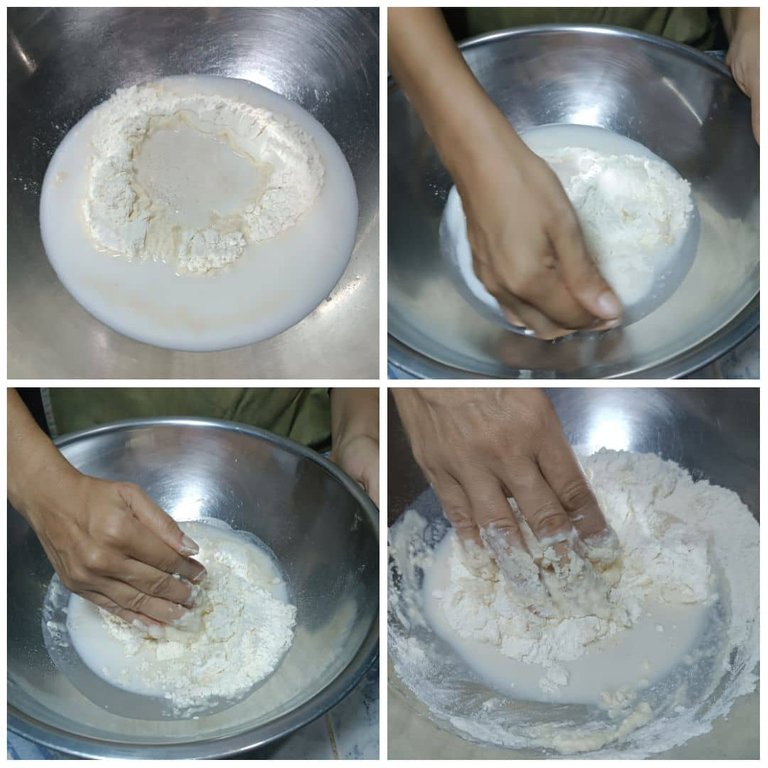
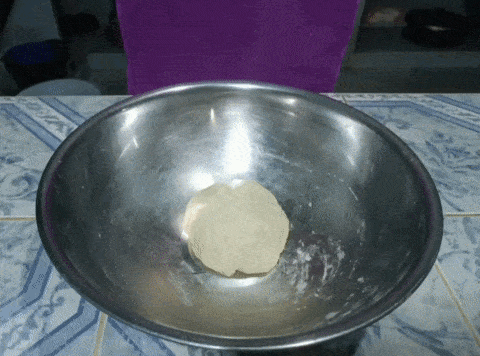
The first thing we will do is to heat the milk, it is important that it is not hot or cold, the temperature should be warm, because with it we will activate the yeast. Meanwhile we will be able to pour the flour in a bowl and with the help of our hand to make a hole in the center, trying that it takes the form of a volcano. In the hole we will throw the yeast and around it (on the flour) we will sprinkle the sugar.
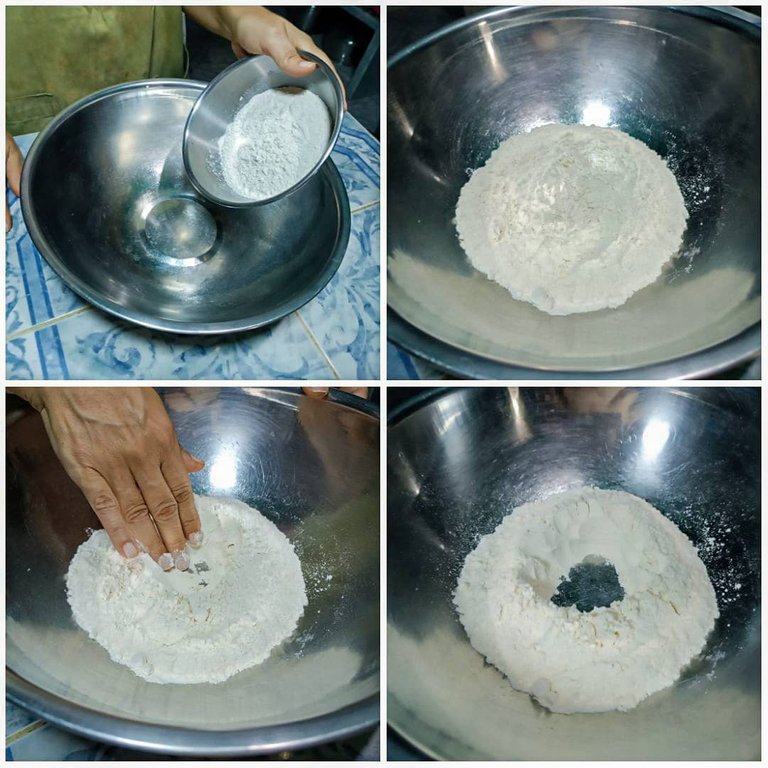
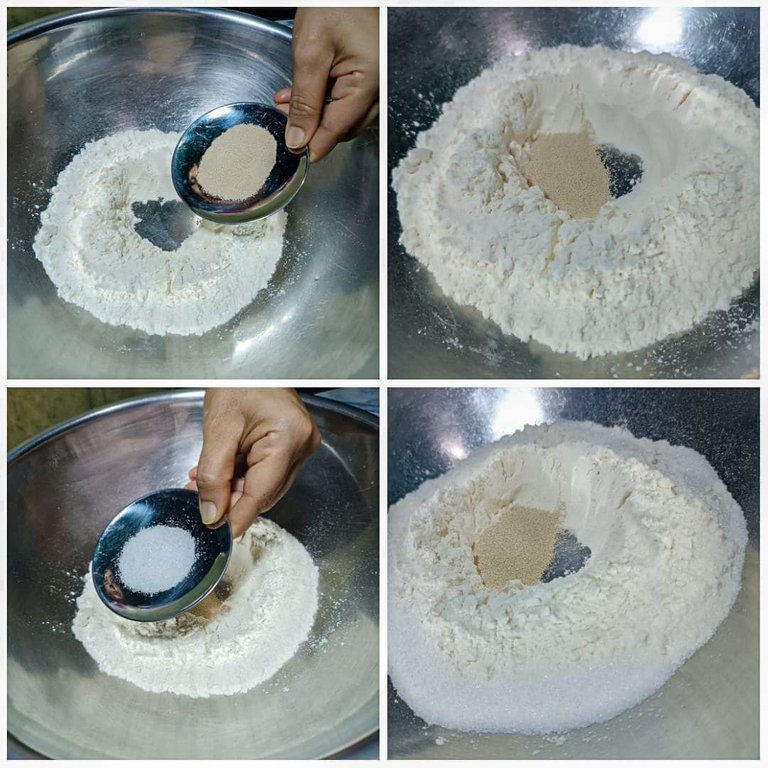
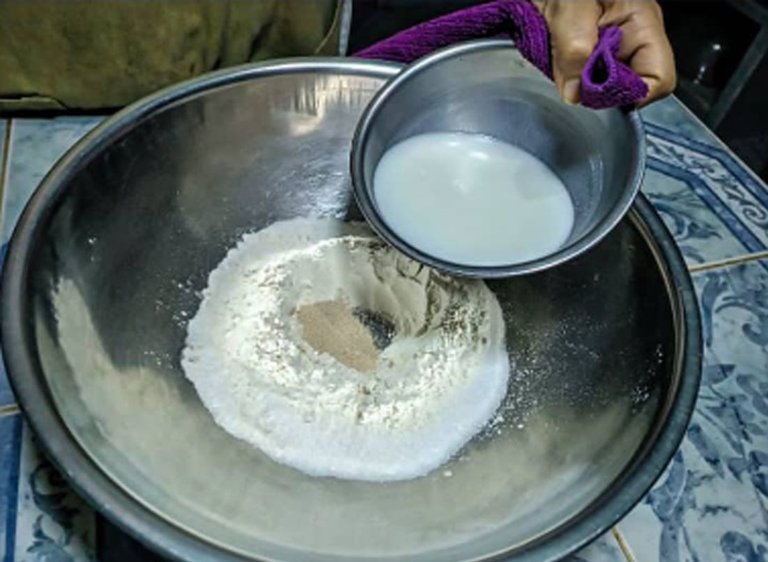
At this point the milk should already be warm, so we will pour it over the yeast and cover it with a cloth, there we will let it stand for 15 to 20 minutes for the yeast to activate well.
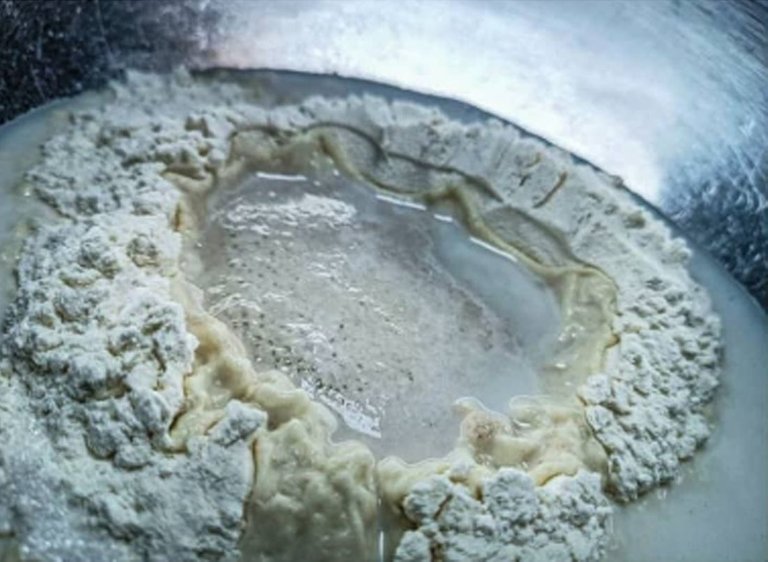
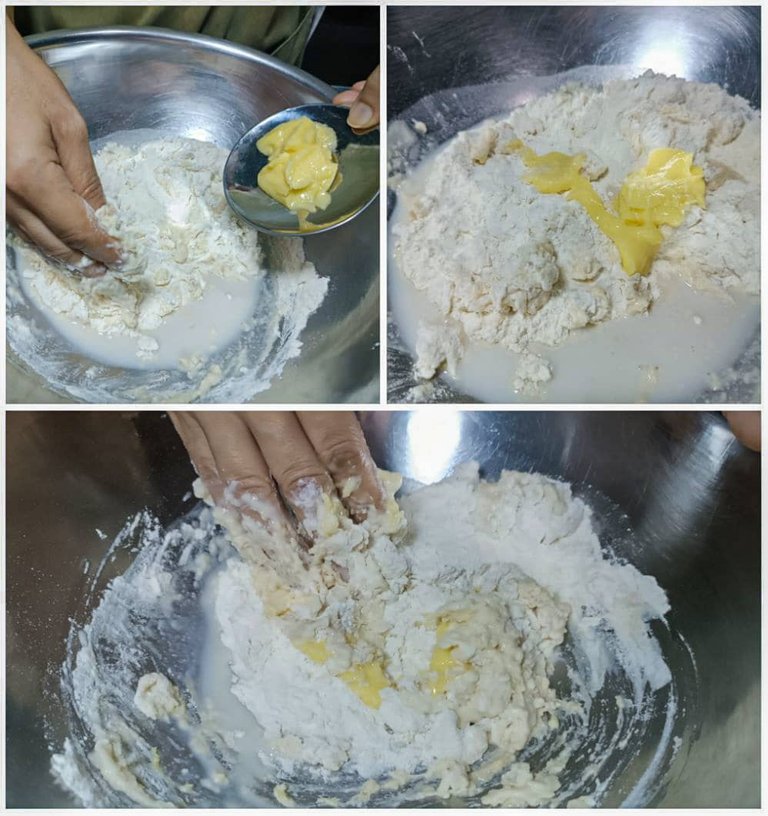
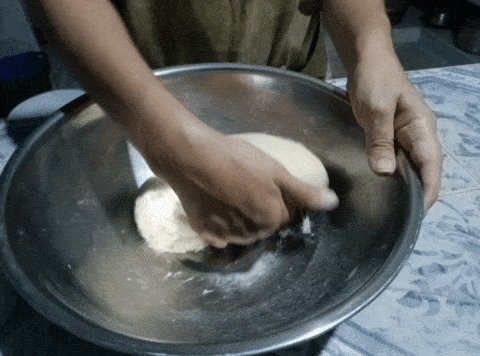
The time has come to knead, and with one of our hands we will begin to do it in an enveloping way until everything begins to integrate. We will add the butter shortly after starting to knead, so that it also begins to form part of the dough and when the ingredients form a whole we will add the salt and continue kneading until it is also integrated.
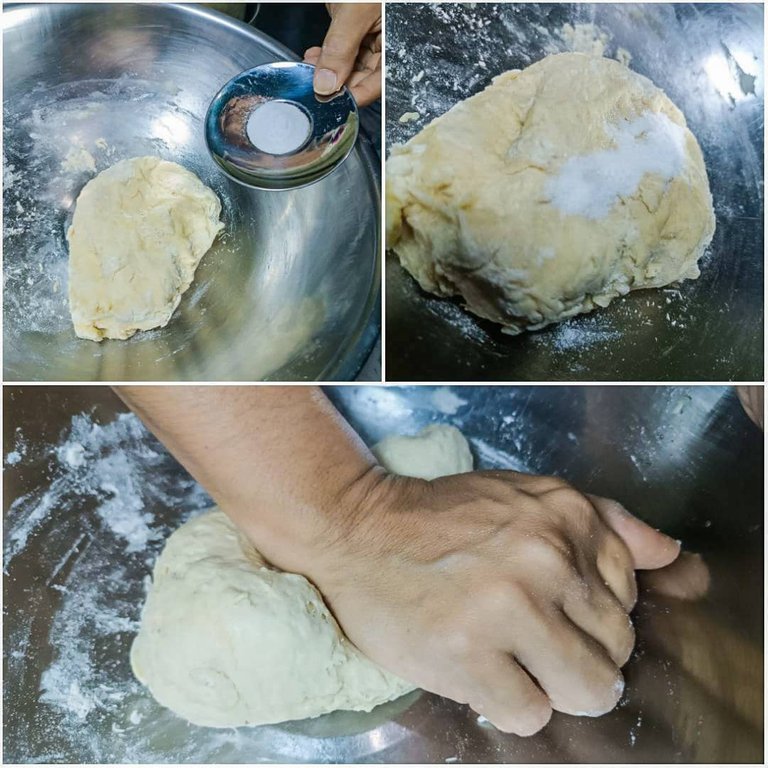
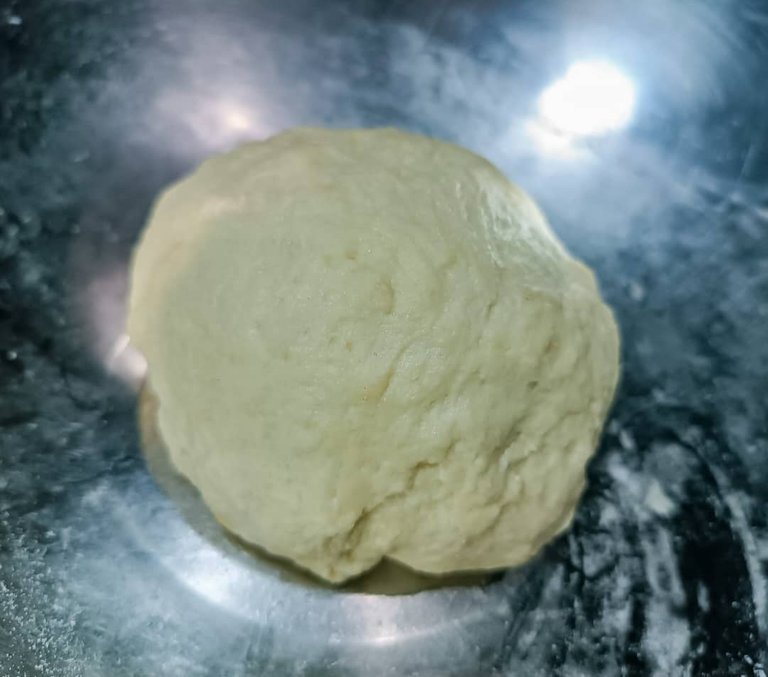
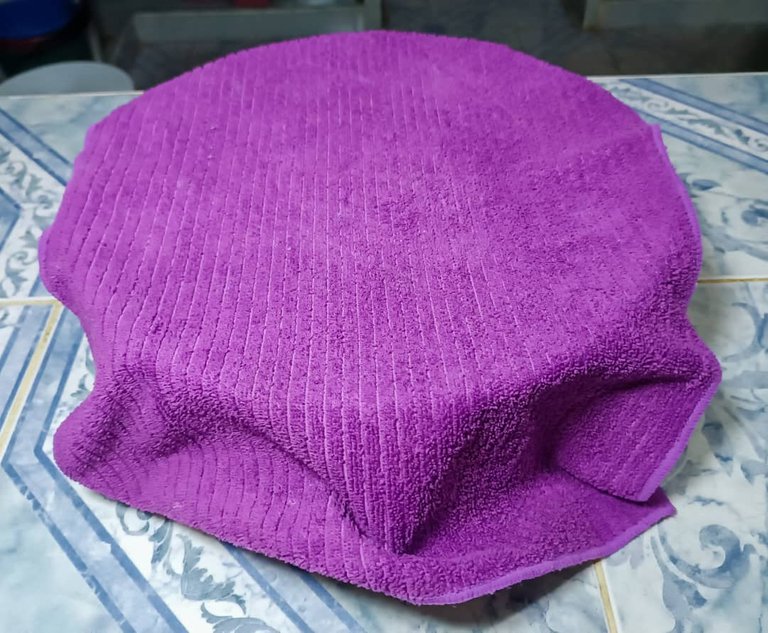
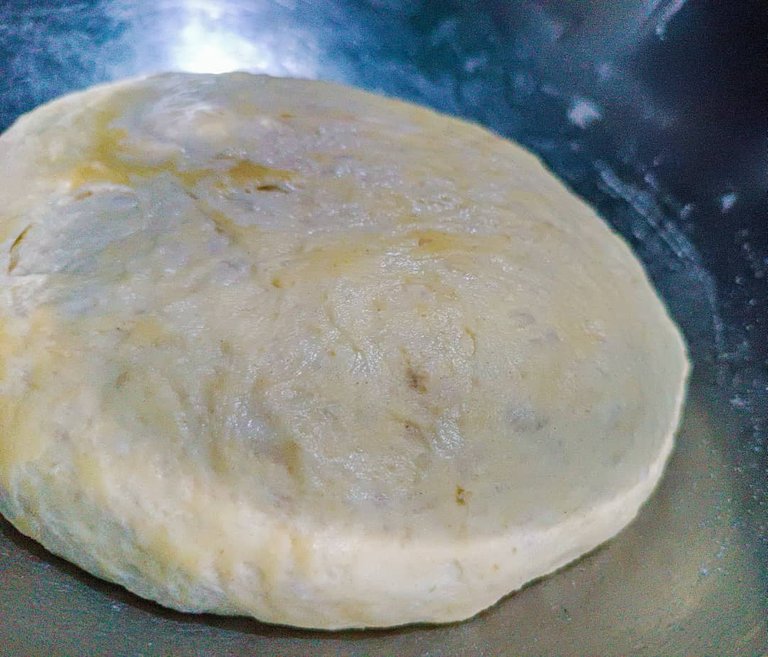
Form a ball with the dough and cover it with a cloth, and let it rest for 1 hour, after this time the dough should double in size.
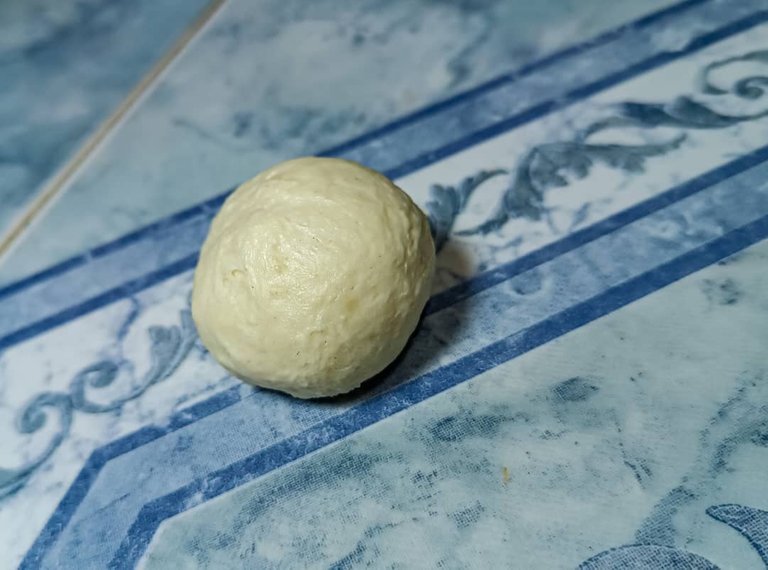
We will put our hands back into the dough to remove the air with a brief kneading. We are going to weigh it to know what size will be the petals of our rose. This time the dough weighs 469 gr, this means that we will divide it into 10 portions of 46.9 gr approximately.
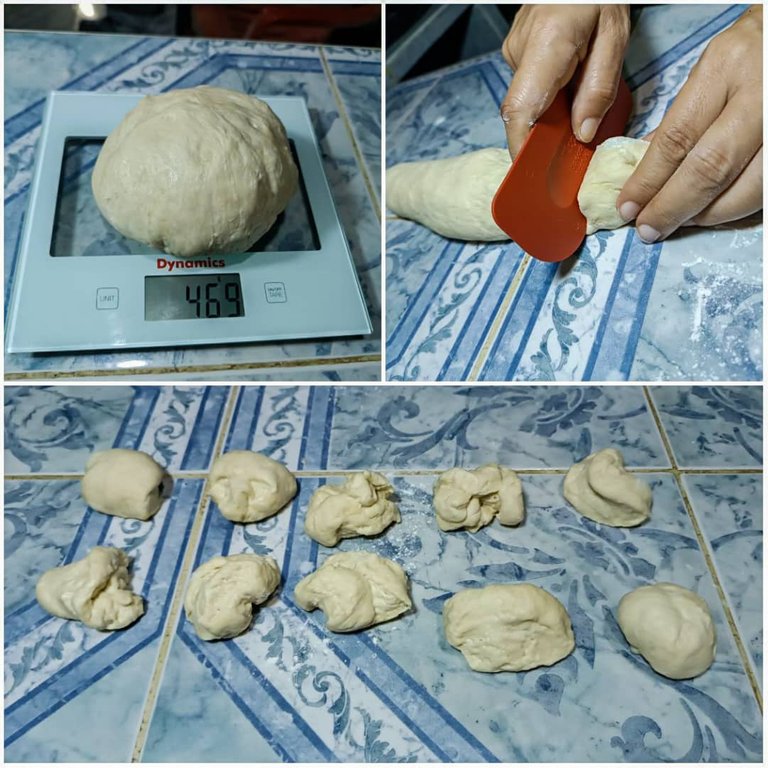
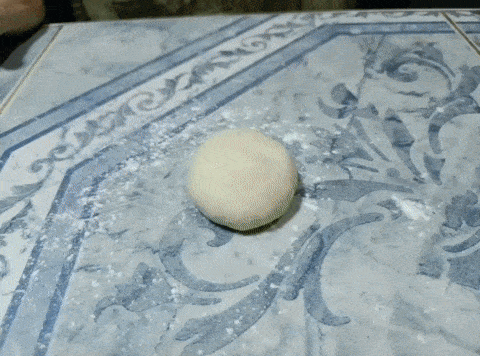
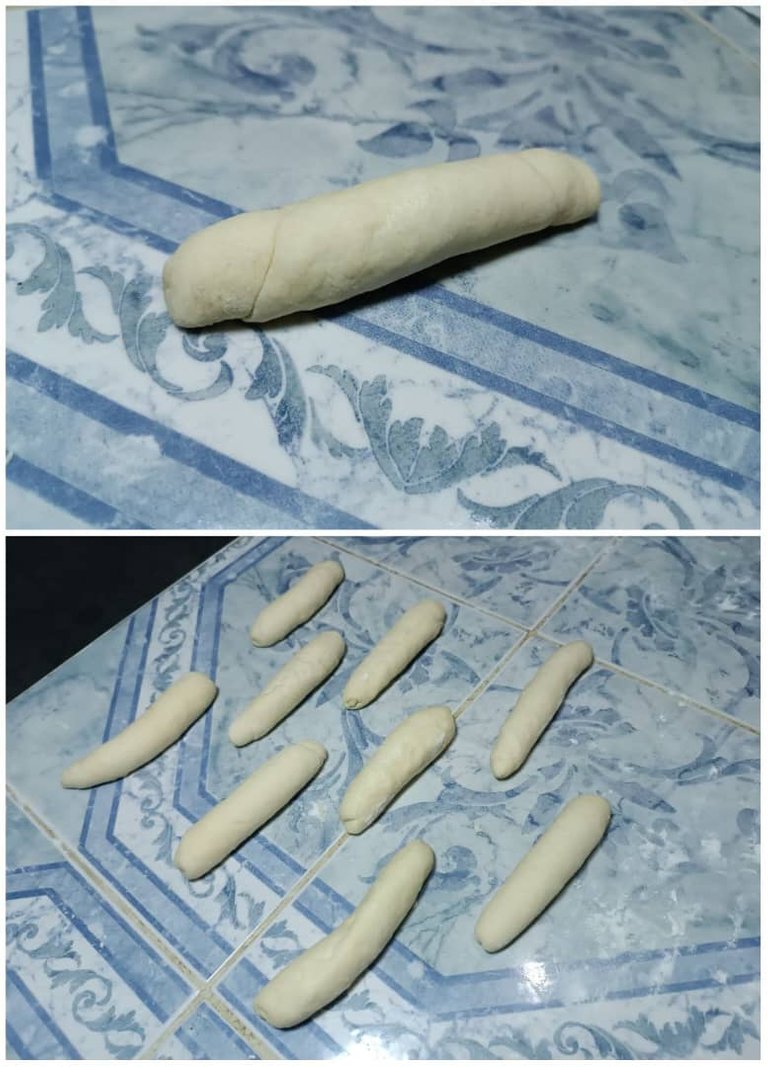
We will take each portion and we are going to bowling, putting our hand in the form of bowl and pressing the portion against the table while we are turning, until this one takes the form of a ball, you will be able to see it better in the images. This is how we will do it with the 10 portions.

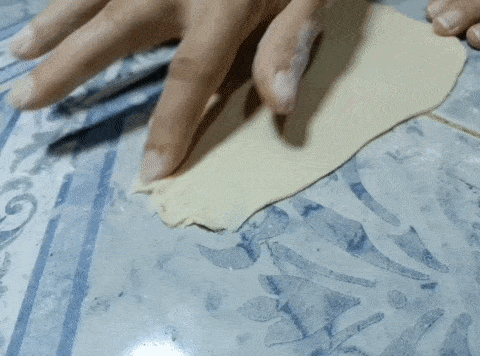
Then take one of the balls, flatten it a little with your hand and stretch it with the help of the rolling pin, until it is 2 millimeters.
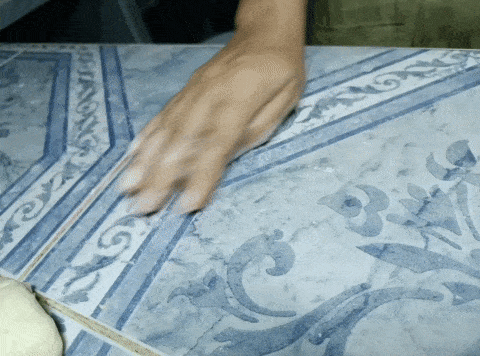
Then we will crush with our finger the edge of the dough that is farther away from us, we will do it only with the edge until it sticks to the table. Then with the edge that is close to us we will start to roll it, when we get to the end, the edge that we crushed will stick to the roll that we made and this way we will avoid it to open. We already have a roll of approximately 10 centimeters, we will roll it against the table so that it has a better shape and molds on the sides, we will do it this way with each of the balls.
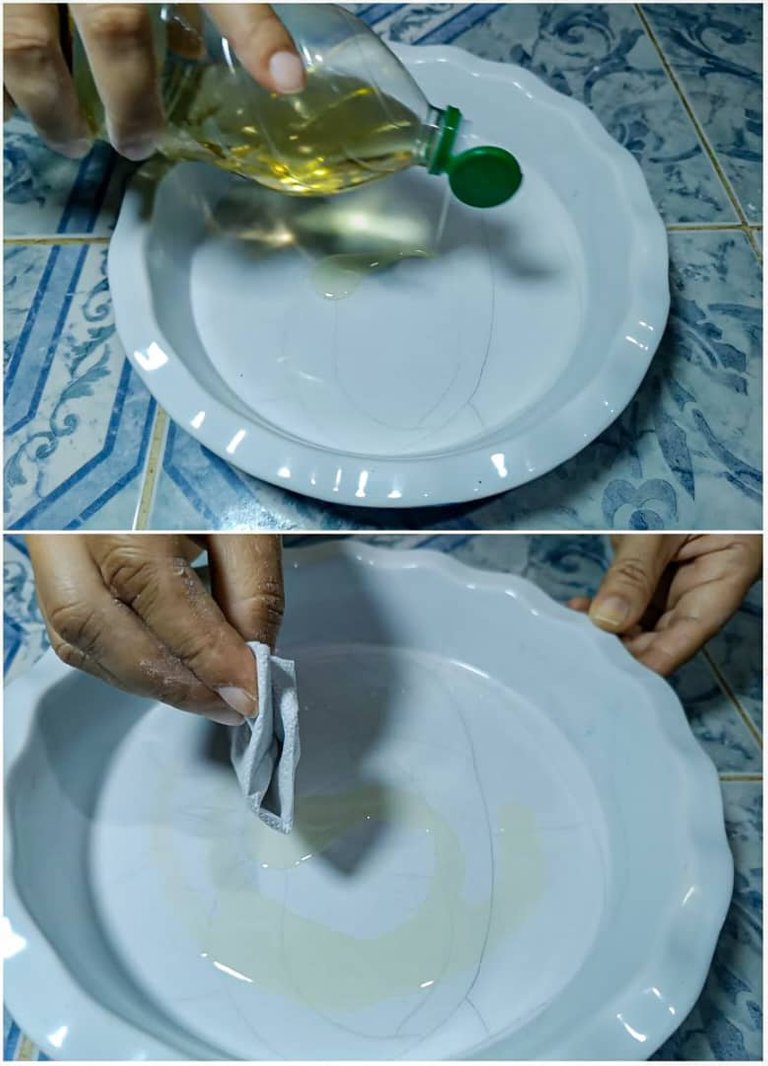
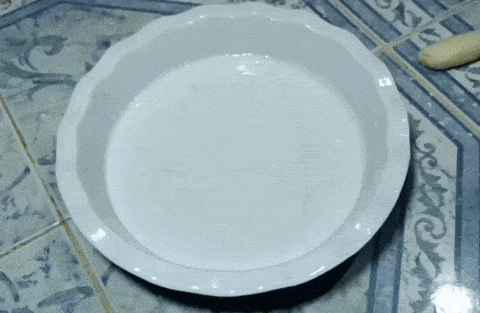
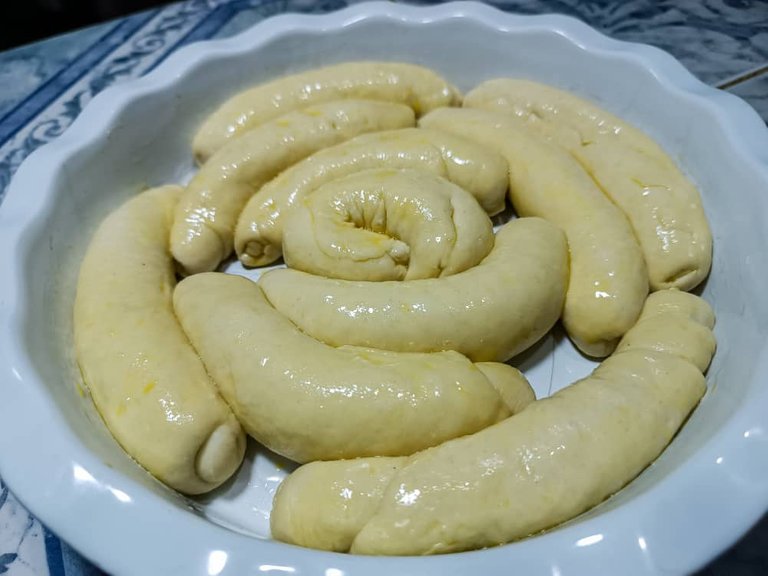
Now we just have to assemble our rose, but first we will grease with a little oil a mold of 24 centimeters in diameter. We will place inside the mold, in radial form, each one of the rolls that we made, we will put four stuck to the edges of the mold, inside these we will put 3, inside 2 and the last one we will have to roll it a little. You will see it perfectly in the images.
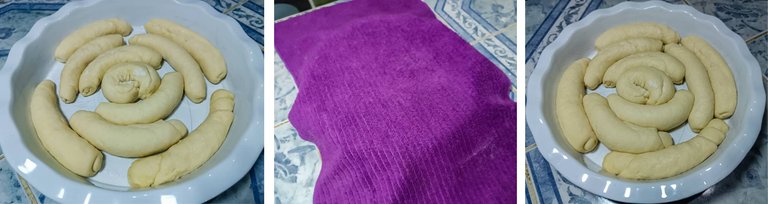
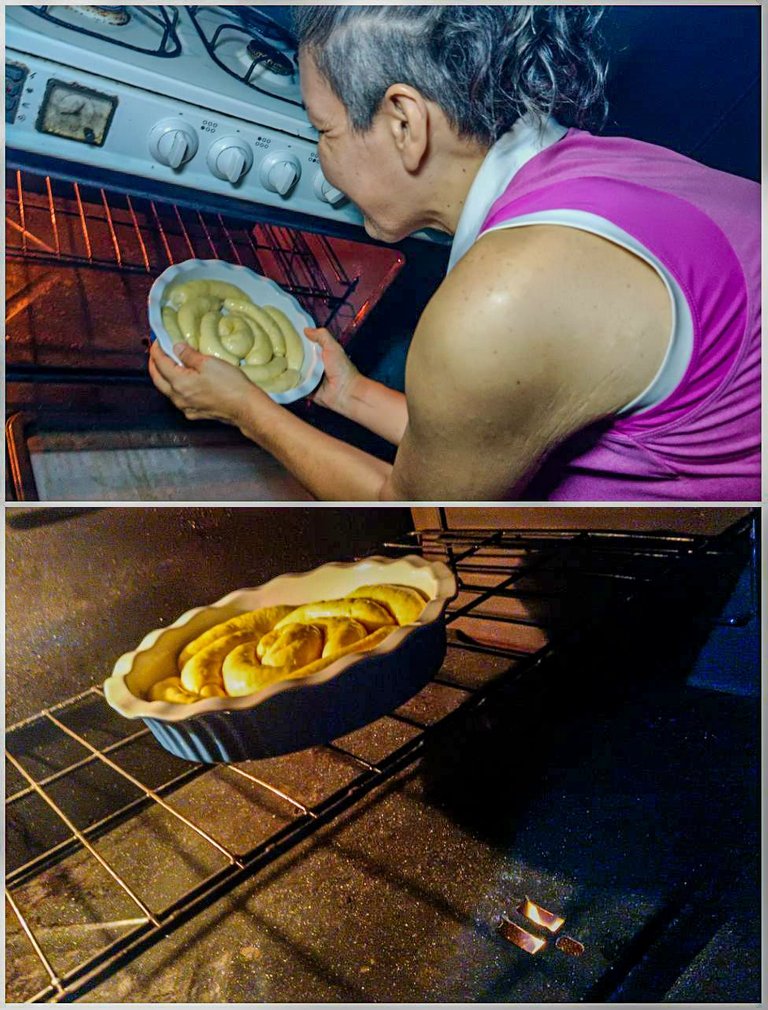
We are going to cover the mold with a cloth and we will let it rest for 20 minutes more. When this time has elapsed we will remove the cloth and we will be able to notice that each roll is much fluffier and they have already begun to stick to each other. At this point we will beat an egg in a bowl and spread them over our rose with the help of a pastry brush.

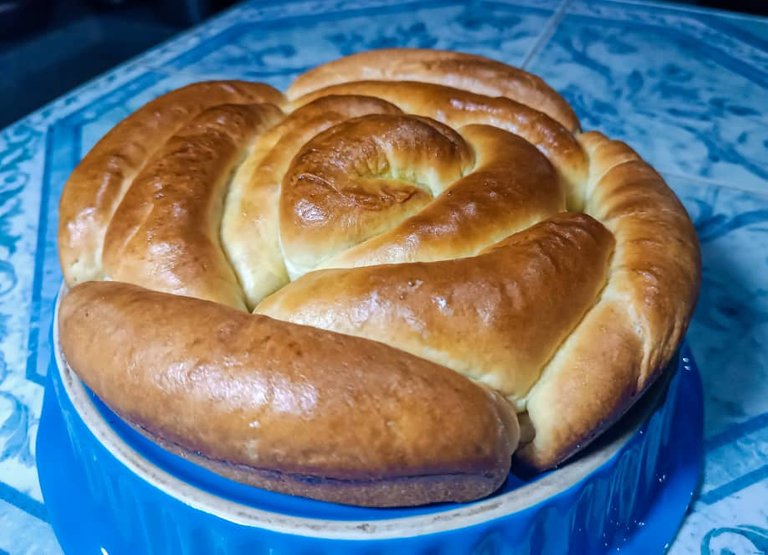
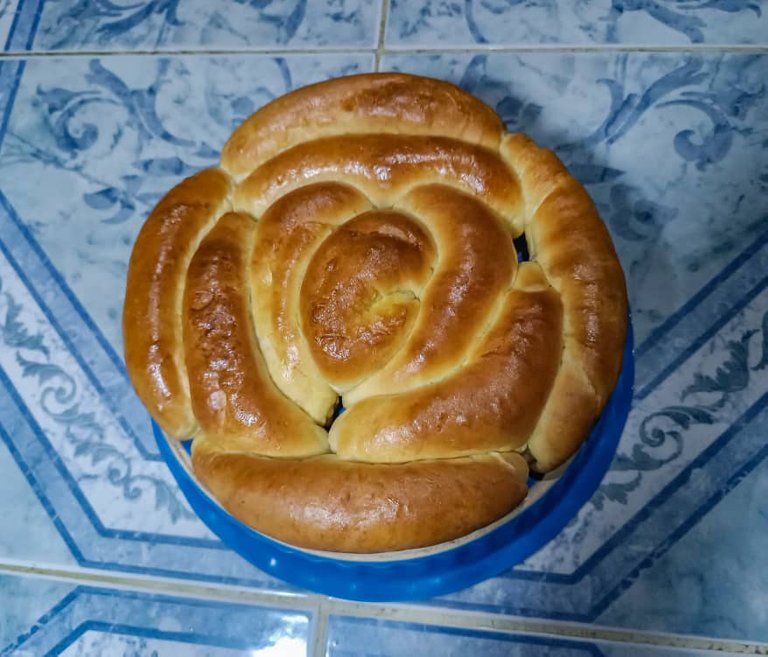
Immediately we will take it to the oven for 30 minutes at 180 °C and at the end of this time we will have our beautiful bread rose ready.
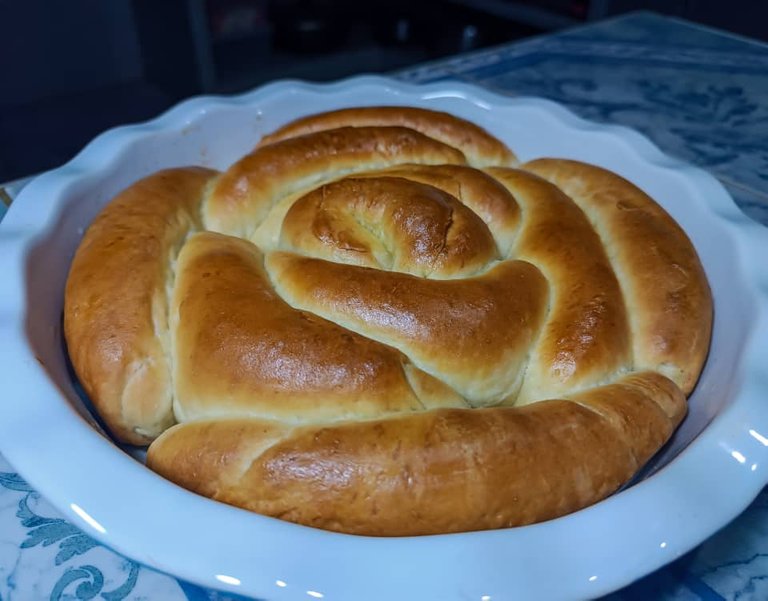
It has an incredible color and a softness that melts in your mouth. It is easy to unmold and very beautiful to give as a gift or to share. I hope you liked the recipe and enjoyed this wonderful process, I had a lot of fun, thank you for reading and joining me in this preparation. See you next time.
Original content by the author.
Resources: Xiaomi redmi note 11s
Own photos
Translated with Deepl.com
All rights reserved || @jetta.amaya// 2023
Rosa de pan, hermosa y deliciosa (Ingles/Español)
Un saludo amoroso para todos mis amigos de Hive, me complace estar una vez más compartiendo con ustedes una de mis recetas en la hermosa comunidad Foodies Bee Hive. Esta vez estoy muy emocionada porque les traigo una de mis recetas favoritas, se trata de una rosa de pan súper suave, deliciosa y hermosa visualmente, estoy segura de que la disfrutaras.
A continuación les dejare los ingredientes y el paso a paso para realizar una Rosa de pan de diez pétalos, que será suficiente para cuatro personas.
Ingredientes
- 250 gr de harina
- 175 ml de leche
- 8 gr de levadura
- 25 gr de mantequilla
- 5 gr de sal
- 2 cucharadas de azúcar
Lo primero que haremos será poner a calentar la leche, es importante que no esté caliente ni fría, la temperatura debe ser tibia, ya que con ella activaremos la levadura. Mientras tanto podremos verter la harina en un bol y con ayuda de nuestra mano hacer un agujero en el centro, procurando que tome la forma de un volcán. En el agujero arrojaremos la levadura y por alrededor (sobre la harina) esparciremos el azúcar.
En este punto ya debe estar tibia la leche, así que la verteremos sobre la levadura y la cubriremos con un paño, allí la dejaremos reposar entre 15 y 20 minutos para que la levadura se active bien.
Ha llegado el momento de amasar, y con una de nuestras manos empezaremos hacerlo de manera envolvente hasta que todo comience a integrarse. Agregaremos la mantequilla poco después de empezar a amasar, para que esta también empiece a formar parte de la masa y cuando los ingredientes formen un todo agregaremos la sal y seguiremos amasando hasta que esta también se integre.
Formaremos una bolita con el amasado y la cubriremos con un paño, y la dejaremos reposar por 1 hora, después de este tiempo la masa deberá duplicar su tamaño.
Volveremos a meter nuestras manos en la masa pasa sacar el aire con un breve amasado. Vamos a pesarla para saber de qué tamaño serán los pétalos de nuestra rosa. Esta vez la masa peso 469 gr, esto quiere decir que la dividiremos en 10 porciones de 46,9 gr aproximadamente.
Tomaremos cada porción y vamos a bolear, poniendo nuestra mano en forma de cuenco y presionando la porción contra la mesa mientras vamos girando, hasta que esta tome la forma de una bolita, podrás verlo mejor en las imágenes. Así lo haremos con las 10 porciones.
Después tomaremos una de las bolita la aplastaremos un poco con la mano y nos dispondremos a estirarla con ayuda del rodillo, hasta que quede de 2 milímetros.
Enseguida trituraremos con nuestro dedo el borde de la masa que está más alejado de nosotros, lo haremos solo con el borde hasta que se peque a la mesa. Después con el borde que está cerca de nosotros empezaremos a enrollarlo, cuando lleguemos al final, el borde que trituramos se pegara al rollo que hicimos y así evitaremos que se abra. Ya tenemos un rollito de aproximadamente 10 centímetros, lo rodaremos contra la mesa para que tenga una mejor forma y se moldee en los laterales, lo haremos así con cada una de las bolas.
Ahora solo nos queda montar nuestra rosa, pero antes engrasaremos con un poco de aceite un molde de 24 centímetros de diámetro. Vamos a ubicar dentro del molde, en forma radial, cada uno de los rollitos que hicimos, pondremos cuatro pegados a los bordes del molde, dentro de estos pondremos 3, en su interior 2 y el ultimo tendremos que enrollarlo un poco. Lo veras perfectamente en las imágenes.
Vamos a cubrir el molde con un paño y lo dejaremos reposar durante 20 minutos más. Cuando transcurra este tiempo retiraremos el paño y podremos notar que cada rollo está mucho más esponjoso y ya han comenzado a pegarse unos contra los otros. En este punto batiremos en un recipiente un huevo y los esparciremos sobre nuestra rosa con ayuda de una brocha de repostería.
De inmediato lo llevaremos al horno por 30 minutos a 180 °C y al culminar este tiempo tendremos lista nuestra hermosa rosa de pan.
Tiene un color increíble y una suavidad que se deshace en la boca. Es fácil de desmoldar y muy hermosa para dar de obsequio o repartir en un compartir. Espero les haya gustado la receta y disfrutaran de este maravilloso proceso, yo me divertí mucho, gracias por leerme y acompañarme en esta preparación. Hasta la próxima.
Contenido original del autor.
Recursos: Xiaomi redmi note 11s
Fotos propias
Traducido con Deepl.com
Todos los derechos reservados || @jetta.amaya// 2023
The rewards earned on this comment will go directly to the people ( chacald.dcymt ) sharing the post on LeoThreads,LikeTu,dBuzz.https://leofinance.io/threads/chacald.dcymt/re-leothreads-fjc6ofir
Hola, @jetta.amaya
Que maravillosa y creativa forma de comerse un delicioso pan.🤤🤤🍞🌹
Me encantó lo bien explicado y detallado del paso a paso.
De verdad, que quedé impresionada con tu hermosa creación.
Te felicito!👏👏👏👏👏
Gracias por compartir tu talento y tu receta!
Saludos!🤗
Me alegro que te gustará, lo hice con mucho amor y espero que te animes a realizarlo. Mil gracias por visitarme y por tan hermoso comentario. Un abrazo
Perfect results, your bread is so fresh they must be so good!
This recipe is delicious, thank you for visiting me. Greetings
Wow! I love it, my friend. For you, it seems so easy huh? I'm gonna try this one too soon. Thanks for sharing this one. God bless.
Please try it and tell me how it turned out. If you follow the steps, it will surely be easy for you. Thanks for visiting, I'm glad you like it. Blessings and regards.
This post was shared and voted inside the discord by the curators team of discovery-it
Join our Community and follow our Curation Trail
Discovery-it is also a Witness, vote for us here
Delegate to us for passive income. Check our 80% fee-back Program
Gracias por el apoyo
Se ve muy bien y debe quedar muy sabroso. El tutorial está muy bueno. Gracias por compartir estimada @jetta.amaya. Un fuerte abrazo desde Maracay.
~~~ embed:1669897431377494018?t=PGeysKUKcoESjcL--HniBw&s=19 twitter metadata:aXJ2aW5jMXx8aHR0cHM6Ly90d2l0dGVyLmNvbS9pcnZpbmMxL3N0YXR1cy8xNjY5ODk3NDMxMzc3NDk0MDE4fA== ~~~
El pan es suave y delicioso. Me alegro que te gustará mi post. Un gran abrazo desde el Táchira
Join the foodie fun! We've given you a FOODIE boost. Come check it out at @foodiesunite for the latest community updates. Spread your gastronomic delights on and claim your tokens.
Yum! You have been curated by @sirenahippie on behalf of FoodiesUnite.net on #Hive. Thanks for using the #foodie tag. We are a tribe for the Foodie community with a unique approach to content and community and we are here on #Hive.Thank you for your support.
Woo! Se ve hermosa la rosa de pan..... Me encanta.
Me llevo esta receta tengo que prepararla. Gracias por compartir.
Amé las fotos
!discovery 40
!VSC
@chacald.dcymt has sent VSC to @jetta.amaya
This post was rewarded with 0.1 VSC to support your work.
Join our photography communityVisual Shots
Check here to view or trade VSC Tokens
Be part of our Curation Trail
@chacald.dcymt ha enviado VSC a @jetta.amaya
Éste post fue recompensado con 0.1 VSC para apoyar tu trabajo.
Únete a nuestra comunidad de fotografía Visual Shots
Consulte aquí para ver o intercambiar VSC Tokens
Se parte de nuestro Trail de Curación
Me alegro que te gustará, anímate a hacerla queda realmente deliciosa. Gracias por visitarme y comentar. Saludos