
Hola amigos!! Espero estén muy bien!!
No busco hacer dietas estrictas ni nada parecido, pero si mejorar mi metabolismo y sentirme mejor por lo que he pensado mucho en formas de ayudarme a cambiar mis hábitos por unos más sanos que me ayuden a aportar más nutrientes a mi organismo de una forma rica y para nada aburrida adaptado a mis gustos y necesidades por lo que tuve la idea de usar legumbres tostadas para dar un toque crunchy a muchas de mis comidas.
No hay nada más sabroso que comer algo rico y oír el "crunch crunch" cuando masticas y si sabe sabroso, mejor.
En mi casa no se comen muchas arvejas (también llamadas chicharos o guisantes verdes) porque no soy muy fan de comerlas cocidas pero decidí intentar hacerlas tostadas para probar su sabor y textura y pues: ¡SON ESPECTACULARES! Y Muy fáciles de hacer, y se pueden usar como acompañante de ensaladas o como snack.
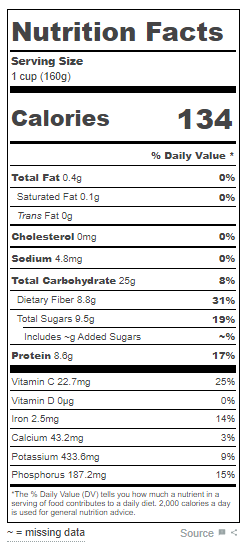
Decidí compartirles esta receta debido a que muchas veces he oido a personas decir que las legumbres son aburridas o solo se pueden comer cocidas, además de que ignoran el gran contenido nutricional de las mismas. De hecho si revisamos la tabla nutricial de las arvejas es impresionante que contengan tanta fibra, macronutrientes, minerales y proteínas, siendo 8,6 gr por una taza cocida.
Fuente
!Pongámonos manos a la obra!
Ingredientes:
1 taza de arvejas
Agua potable
Aceite de tu preferencia
Comino
Ajo liquido o en polvo
Sal
Paso 1
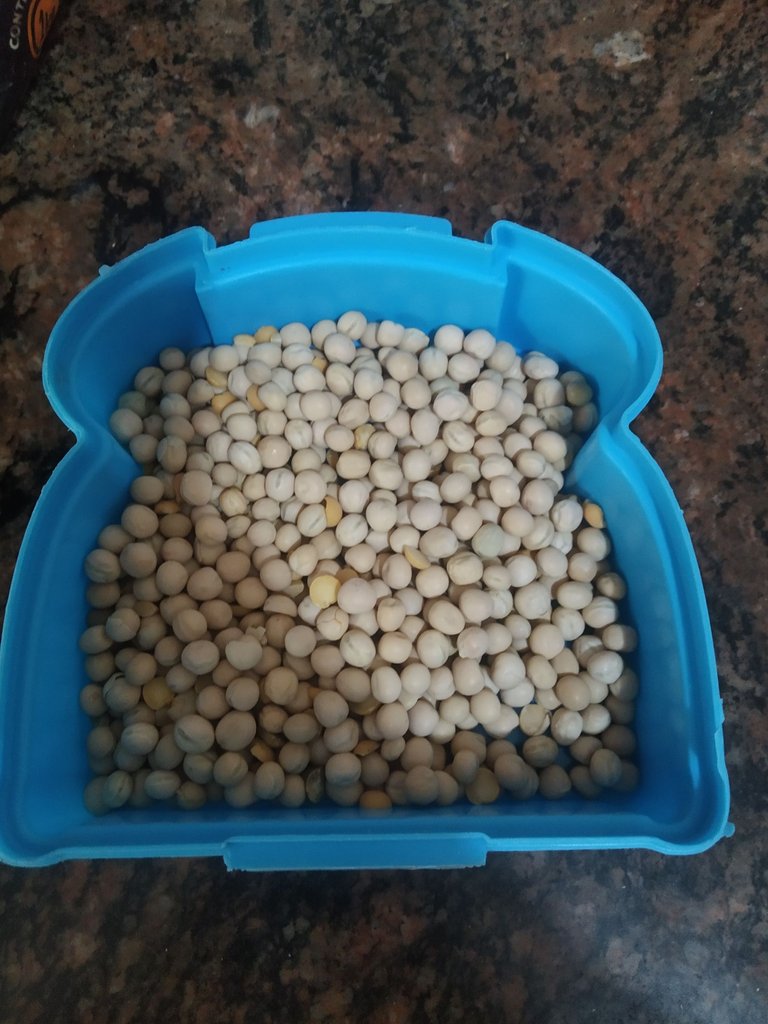
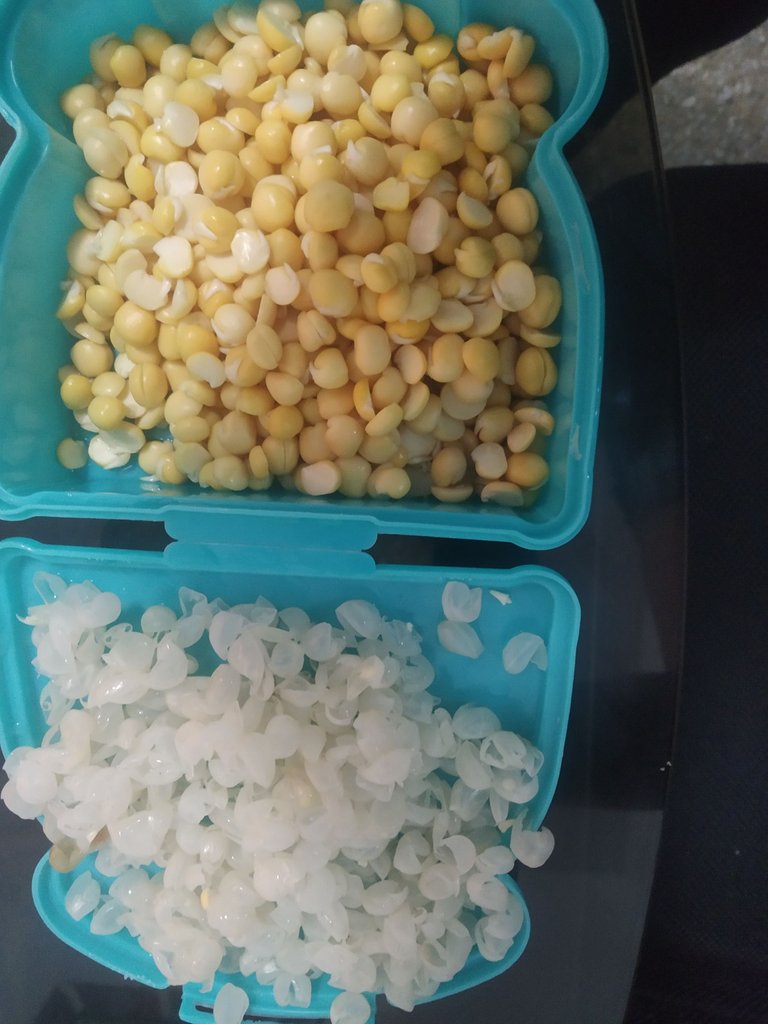
Lo primero que hacemos es seleccionar las arvejas y sacar las conchas o las piedritas que a veces traen los paquetes, de forma muy cuidadosa, cualquier grano que veamos de alguna forma defectuosa debe desecharse.
Paso 2
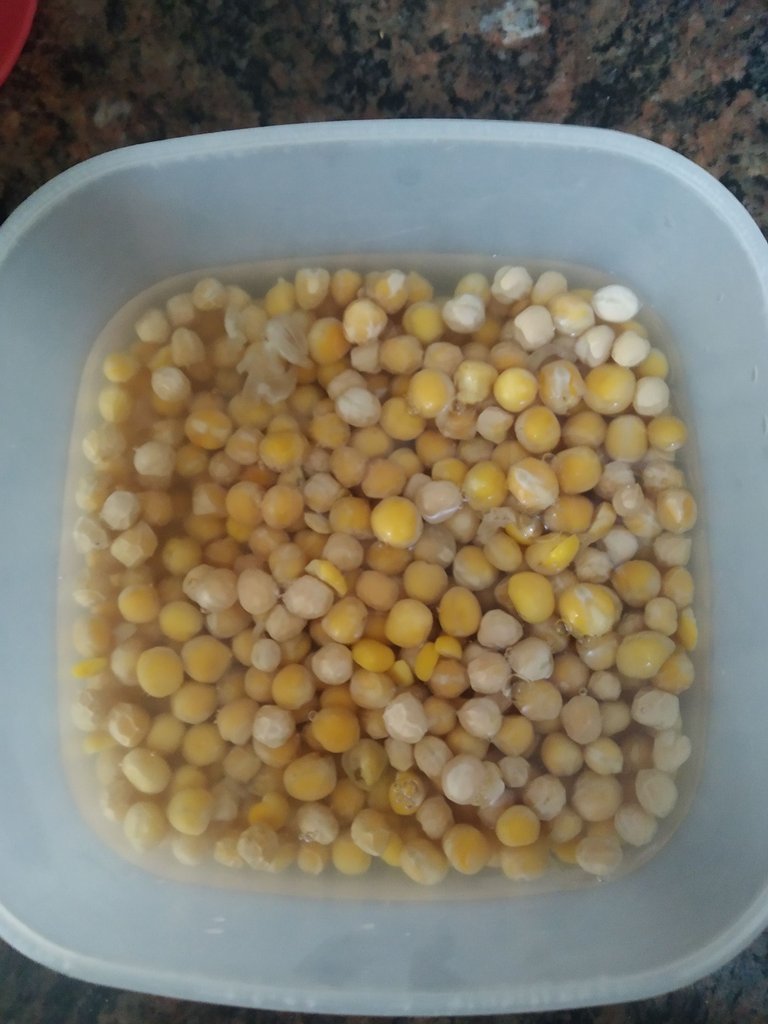
Lavamos bien nuestras arvejas desechando esa agua y luego ponemos a remojar las arvejas en agua potable por al menos una noche, si completamos las 24 horas mejor, porque estarán más hidratadas y absorberán mejor las especias.
Paso 3
Por el mismo proceso de hidratación las arvejas soltarán su concha, la cual debemos retirar utilizando nuestros dedos como pinzas para presionarlas y que vayan saliendo, no importa si las arvejas se parten.
Este procedimiento lo hacemos con la intención de que no nos de gases ni inflamación al consumirlas.
Paso 4:
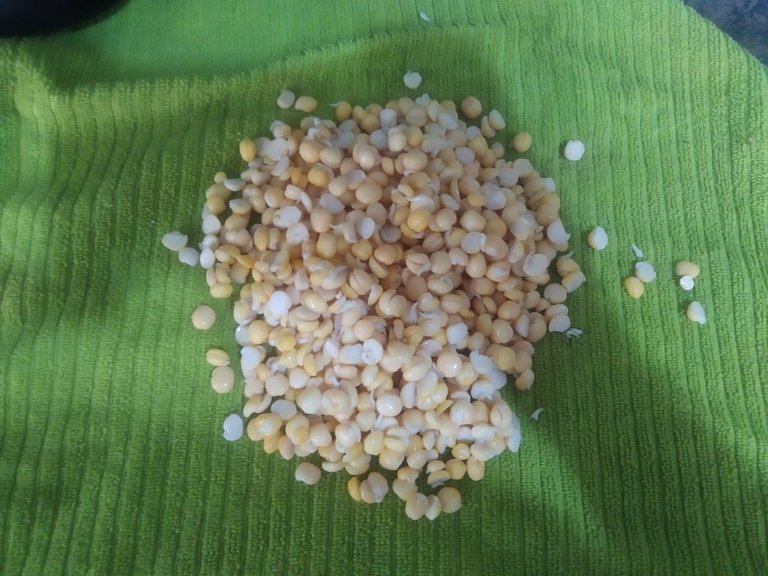
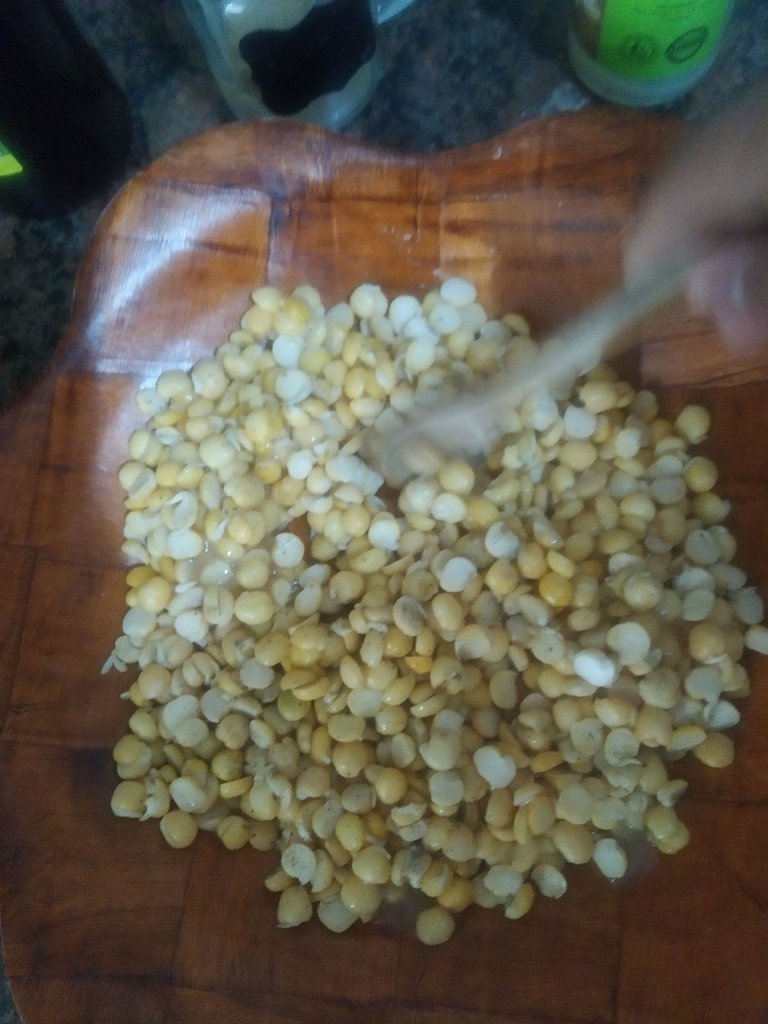
Colocamos las arvejas ya peladas en un pañito o servilleta para que absorba la mayor cantidad de humedad y queden lo más secas posible, este paso es muy importante ya que es lo que permitirá la fijación de las especias para el momento de la cocción.
Paso 5:
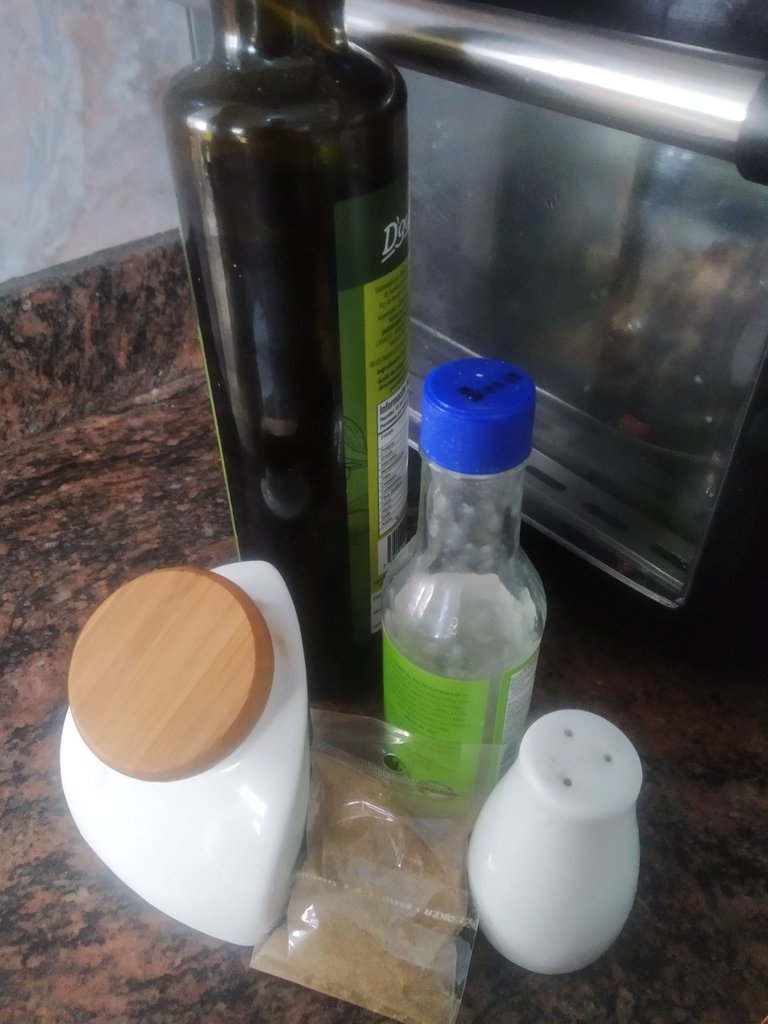
Aqui tenemos nuestros ingredientes para condimentar nuestras arvejas, en este caso yo quería que quedaran un poco picantes así que le utilicé: Aceite de oliva, ajo liquido (puede ser en polvo), sal, pimienta y comino.
Tu puedes usar las especias que quieras: Paprika, orégano, albahaca, cebolla en polvo... las combinaciones son infinitas siempre que como base para las especias debe usarse aceite y sal, que serán quienes le den sabor y harán que las especias se adhieran a la legumbre.
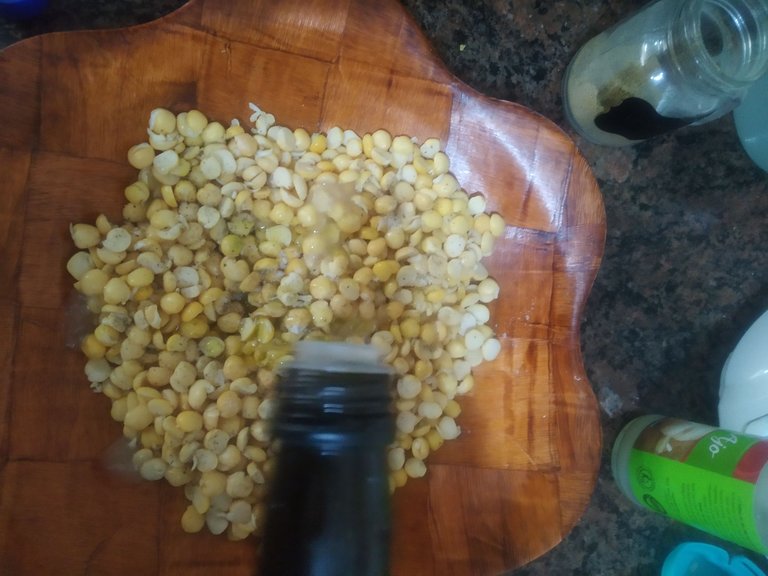
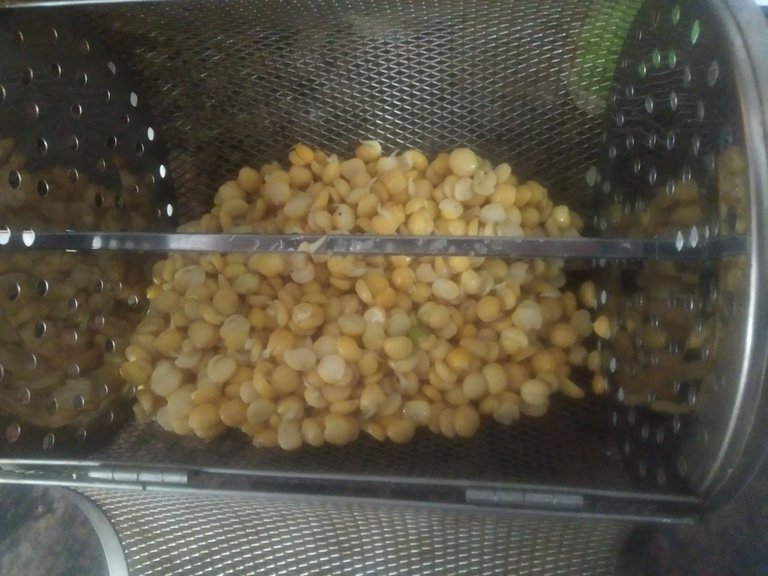
Echamos todas nuestras especias y las arvejas en un bowl y revolvemos bien hasta que veamos que todas las especias están bien distribuidas entre los granos.
Paso 6:
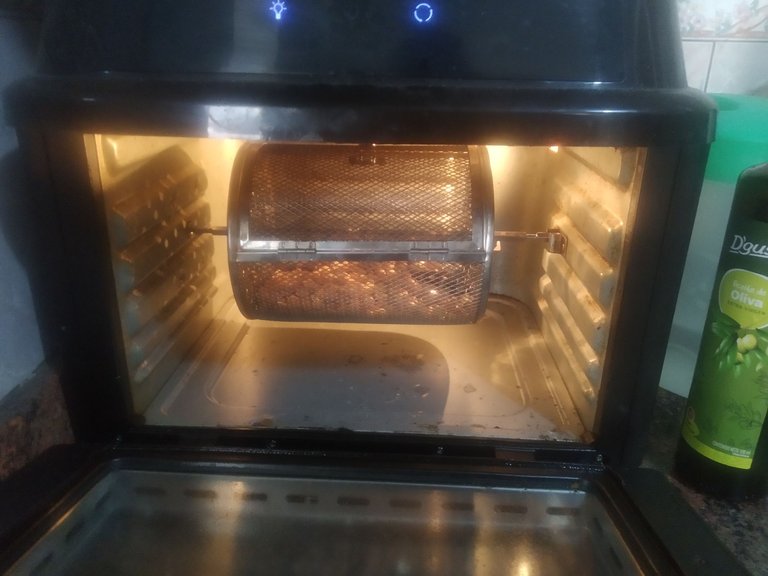
Aquí te doy 3 opciones para poder hacer el horneado/tostado, mi horno es un air fryer por lo que tuve que ir probando poco a poco cuál era la temperatura y el tiempo de cocción, usualmente para los hornos convencionales se toma un poco mas de tiempo y en sartén igual, dependerá mucho de tu gusto y que tu mismo pruebes la receta.
1. Air Fryer,
Colocarás las arvejas a 180º por 25 minutos, fijandote cada 10 minutos de que queden doraditas y crujientes, sin exagerar, deben quedar crujientes mas no duras, si es que no quieres perder un diente 🤣 También deberás moverlas para que se cocinen por todos lados.
2. Horno convencional
30 - 45 minutos a 200º, Igual que con el Air Fryer, deberás revisar el tostado cada 10 minutos y moviendolas para su correcta cocción.
3. En Sartén
En un sartén echarás aceite para evitar que se peguen y colocarás las arvejas allí, moviendo con un cucharon de madera a cada rato y tostándolas a fuego medio hasta que se pongan crujientes, este método tarda más pero te prometo buenos resultados.
En mi caso yo tengo rostizador en el air fryer por lo que no tuve que interrupir la concción para moverlas, solo para verificar el tostado.
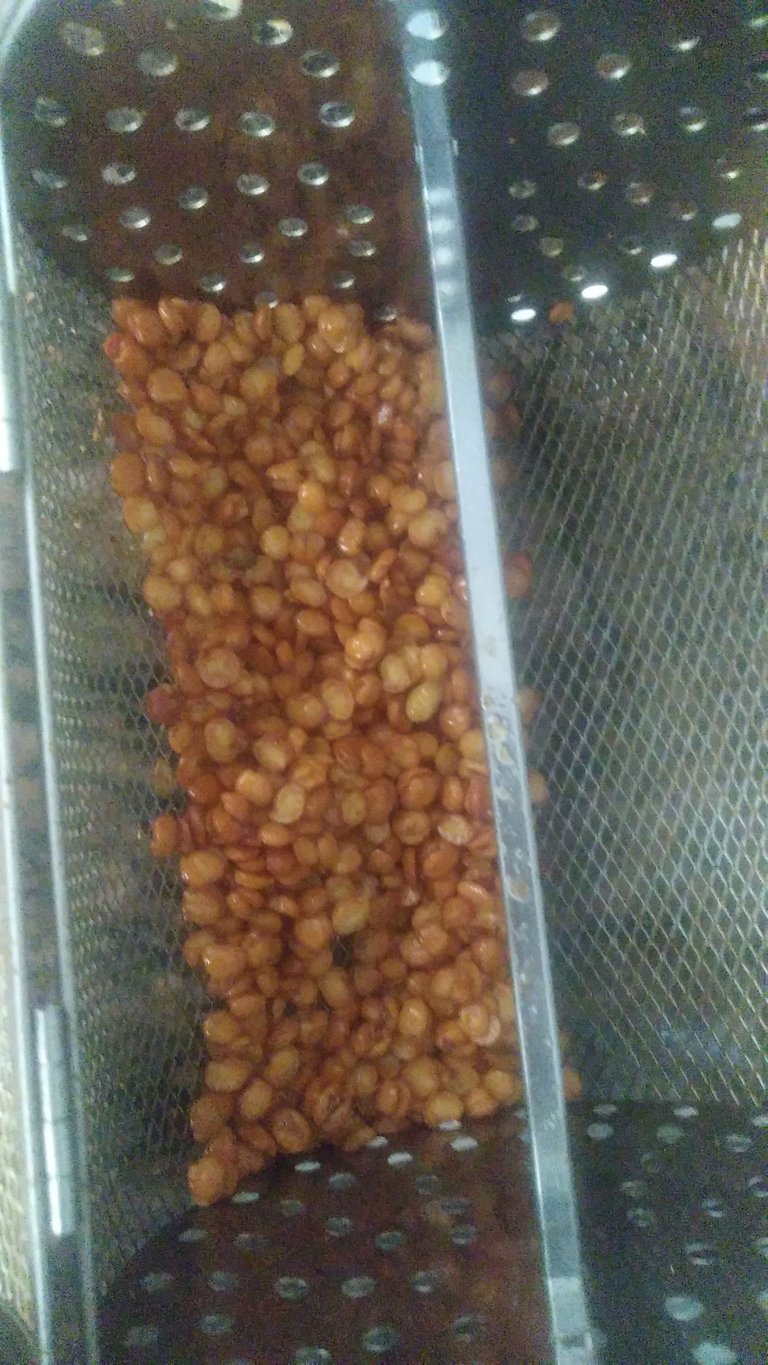
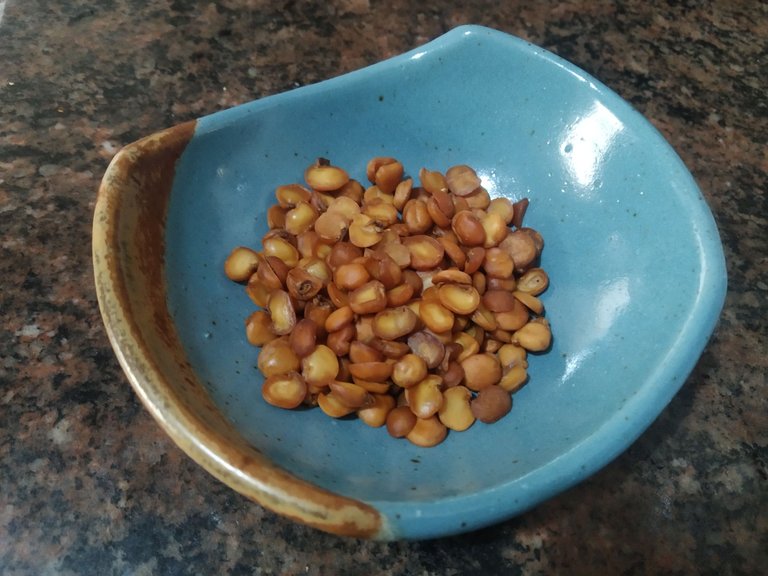
Recien salidas del horno, fijate su color que paso de pálido a tostadito.
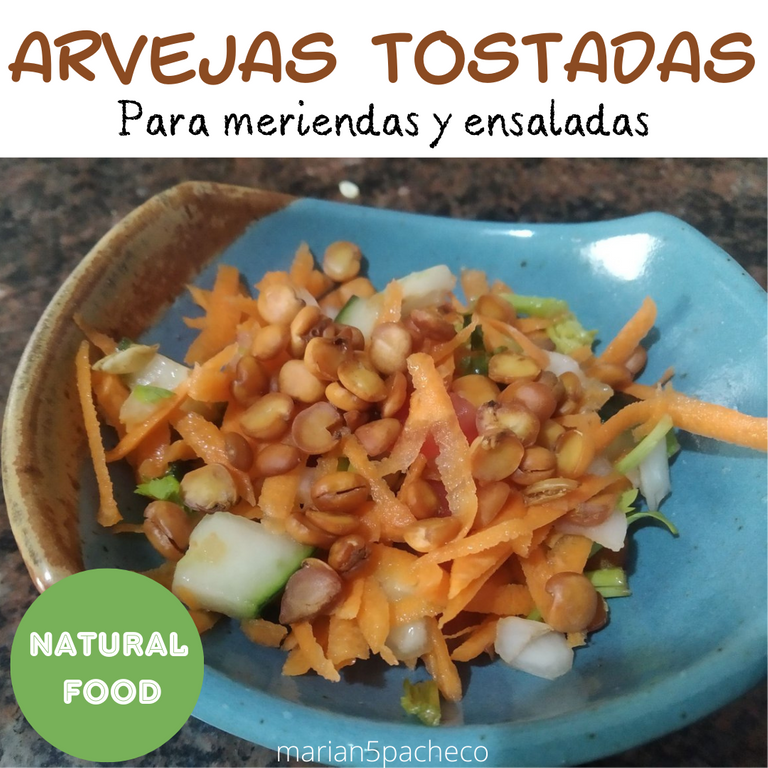
Resultado final!
¡Perfecto para un snak natural cargado de energía y proteínas!
Aquí te muestro una opción de uso, le agregué a mi ensalada de pepino, zanahoria, cebolla y cilantro un puñito de arvejas lo que hacen a la ensalada ser aún mas nutritiva y apetitosa.

Con esta preparación puedes preparar snacks saludables, ensalada césar, aderezo para sandwiches y ¡mucho más!
Espero te haya gustado mi receta!

Hello friends! I hope you are doing great!!!
I'm not looking for strict diets or anything like that, but I am looking to improve my metabolism and feel better so I have been thinking a lot about ways to help me change my habits for healthier ones that help me provide more nutrients to my body in a rich and not boring way adapted to my tastes and needs so I had the idea of using roasted legumes to give a crunchy touch to many of my meals.
There is nothing tastier than eating something tasty and hearing the "crunch crunch" when you chew and if it tastes tasty, even better.
In my house we don't eat many peas (also called green peas) because I'm not a big fan of eating them cooked but I decided to try making them roasted to try their flavor and texture and well: they are SPECTACULAR! And very easy to make, and can be used as an accompaniment to salads or as a snack.
I decided to share this recipe with you because many times I have heard people say that legumes are boring or can only be eaten cooked, and they ignore their great nutritional content. In fact if we review the nutritional table of peas it is impressive that they contain so much fiber, macronutrients, minerals and protein, being 8.6 grams per cup cooked.
Source
Let's get to work!
Ingredients:
1 cup peas
Drinking water
Oil of your choice
Cumin
Liquid or powdered garlic
Salt
Step 1
The first thing we do is to select the peas and remove the shells or pebbles that sometimes come in the packages, very carefully, any grain that we see in any way defective should be discarded.
Step 2
We wash our peas well discarding that water and then we put to soak the peas in drinking water for at least one night, if we complete the 24 hours better, because they will be more hydrated and better absorb the spices.
Step 3
By the same process of hydration the peas will release their shell, which we must remove using our fingers as tweezers to press them and that they go out, it does not matter if the peas are broken.
This procedure is done with the intention of not giving us gas or inflammation when consuming them.
Step 4:
We place the peas already peeled in a cloth or napkin to absorb as much moisture and be as dry as possible, this step is very important because it is what will allow the fixing of the spices for the time of cooking.
Step 5:
Here we have our ingredients to season our peas, in this case I wanted them to be a little spicy so I used: olive oil, liquid garlic (can be powdered), salt, pepper and cumin.
You can use any spices you want: Paprika, oregano, basil, onion powder... the combinations are endless as long as you use oil and salt as a base for the spices, which will give flavor and will make the spices adhere to the legume.
We throw all our spices and peas in a bowl and stir well until we see that all the spices are well distributed among the beans.
Step 6:
Here I give you 3 options to be able to do the baking/toasting, my oven is an air fryer so I had to test little by little what was the temperature and cooking time, usually for conventional ovens it takes a little more time and in pan the same, it will depend a lot on your taste and that you yourself test the recipe.
1. Air Fryer,
Place the peas at 180º for 25 minutes, checking every 10 minutes that they are golden brown and crispy, without exaggerating, they should be crispy but not hard, if you don't want to lose a tooth 🤣 You should also move them so that they cook on all sides.
2. Conventional oven
30 - 45 minutes at 200º, Same as with the Air Fryer, you will have to check the toasting every 10 minutes and moving them for proper cooking.
3. In Frying Pan
In a frying pan pour oil to prevent them from sticking and place the peas there, moving them with a wooden spoon every so often and roasting them over medium heat until they get crispy, this method takes longer but I promise you good results.
In my case I have a rotisserie in the air fryer so I didn't have to interrupt the cooking to move them, just to check the toasting.
Just out of the oven, look at their color, from pale to toasted.
Final result!
Perfect for a natural snack full of energy and protein!
Here I show you an option of use, I added to my cucumber, carrot, onion and cilantro salad a handful of peas which make the salad even more nutritious and appetizing.
With this preparation you can prepare healthy snacks, caesar salad, sandwich dressing and much more!
I hope you liked my recipe!
Nos vemos en un próximo post!
Fotos con mi Redmi Note 7
Edición: Canvas
Traductor DeepL

ttps://i.imgur.com/wu6B5TK.gif
Gracias por pasar por acá!!
The rewards earned on this comment will go directly to the person sharing the post on Twitter as long as they are registered with @poshtoken. Sign up at https://hiveposh.com.
Congratulations @marian5pacheco! You have completed the following achievement on the Hive blockchain and have been rewarded with new badge(s):
Your next target is to reach 3000 upvotes.
You can view your badges on your board and compare yourself to others in the Ranking
If you no longer want to receive notifications, reply to this comment with the word
STOPAmigaaaaaa esta genial 😜
Me habían comentado que se podía hacer pero no había visto el paso a paso, lo intentare.
Me parece super para las tardes cuando da ansiedad por comer cualquier cosa 😂 ademas es saludable.
Congratulations @marian5pacheco! You received a personal badge!
You can view your badges on your board and compare yourself to others in the Ranking
Check out the last post from @hivebuzz: