Mein erstes Airbrush-Set – Mein Einstieg ins Lackieren
My First Airbrush Setup – My First Steps into Painting
Ich gebe es zu: Ich bin kein Profi, wenn es ums Airbrushen geht.
Bisher habe ich immer mit Pinsel und Sprühdosen gearbeitet, aber das wollte ich ändern.
Nach meinem letzten Blog bekam ich viele hilfreiche Tipps aus der Community. Ein Kommentar hat mich besonders angesprochen:
"Ich würde mich für den Harder & Steenbeck Evolution 2 in one entscheiden. Als Einsteiger...
Ich habe 2011 mit dieser Airbrush-Pistole angefangen... sie ist gut zum Ausprobieren, wenn man Airbrush mag.
Ich denke, Sie brauchen einen besseren Kompressor. Nicht ganz sicher, was Ihr Setup ist auf, dass man..."
Dieser Tipp kam von @littlebee4 und hat mich neugierig gemacht – also habe ich mir meine erste richtige Airbrush-Ausrüstung gekauft!
💡 Wichtig: Ich nutze die Airbrush ausschließlich zum Bemalen von 3D-Druck-Modellen.
Ich male keine Bilder oder Leinwände, sondern verwende sie nur für meine gedruckten Objekte.
I admit it: I'm not a professional when it comes to airbrushing.
So far I've always worked with brushes and spray cans, but I wanted to change that.
After my last blog I got a lot of helpful tips from the community. One comment particularly appealed to me:
"I would go with the Harder & Steenbeck Evolution 2 in one. As a beginner...
I started with that airbrush gun in 2011... it is a good one to test out if you like airbrushing.
You do need a better compressor I think. Not fully sure what your setup is on that one... ‘
This tip came from @littlebee4 and made me curious - so I bought my first proper airbrush kit!
💡 Important: I use the airbrush exclusively for painting 3D printed models.
I don't paint pictures or canvases, I only use it for my printed objects.
Translated with DeepL.com (free version)
(AI image)
Meine Airbrush-Pistolen – 3 Modelle im Vergleich
My Airbrush Guns – 3 Models Compared
Da ich ein absoluter Anfänger im Airbrushen bin, habe ich mir verschiedene Pistolen angeschafft, um herauszufinden, was für mich am besten funktioniert.
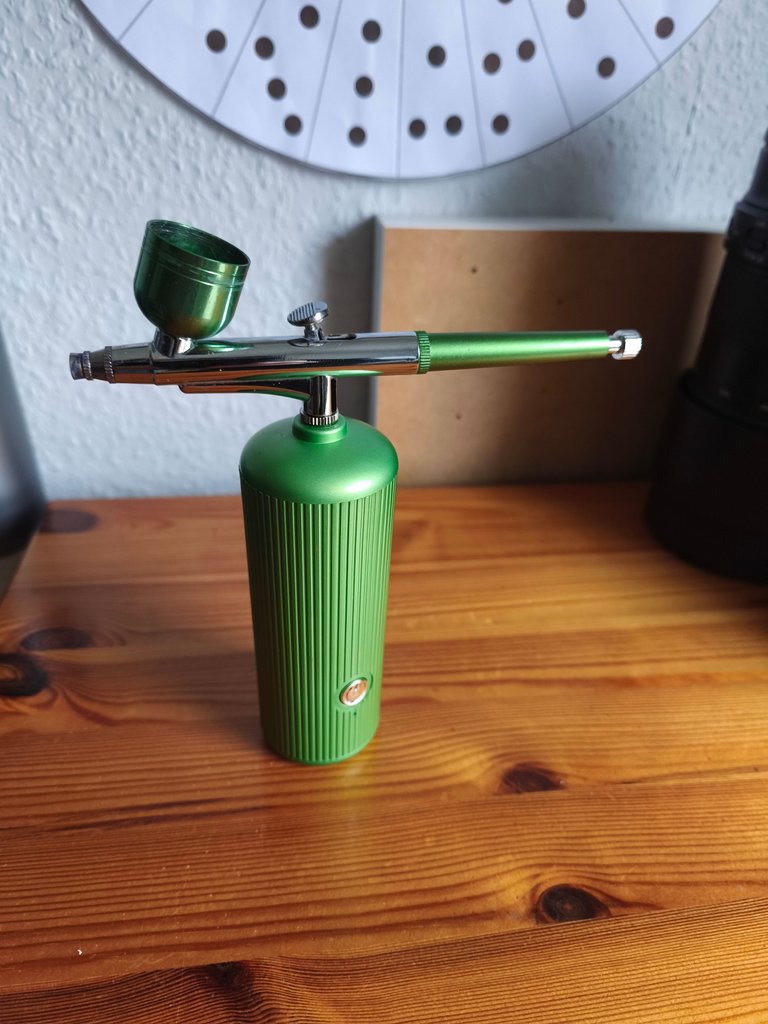
🔹 1. Akku-Airbrush mit Mini-Kompressor
- Vorteil: Kein großer Kompressor nötig, mobil einsetzbar
- Nachteil: Wenig Druck, daher nur für kleine Flächen geeignet
- Fazit: Perfekt für kleine Arbeiten, bei denen ich nicht das ganze Equipment herausholen muss.
🔹 2. Günstige China-Doppelaktionspistole
- Vorteil: Ideal zum Üben ohne großes Budget
- Nachteil: Schwerer zu reinigen, nicht so präzise wie teurere Modelle
- Fazit: Gute Einsteiger-Pistole, aber nicht für feine Details
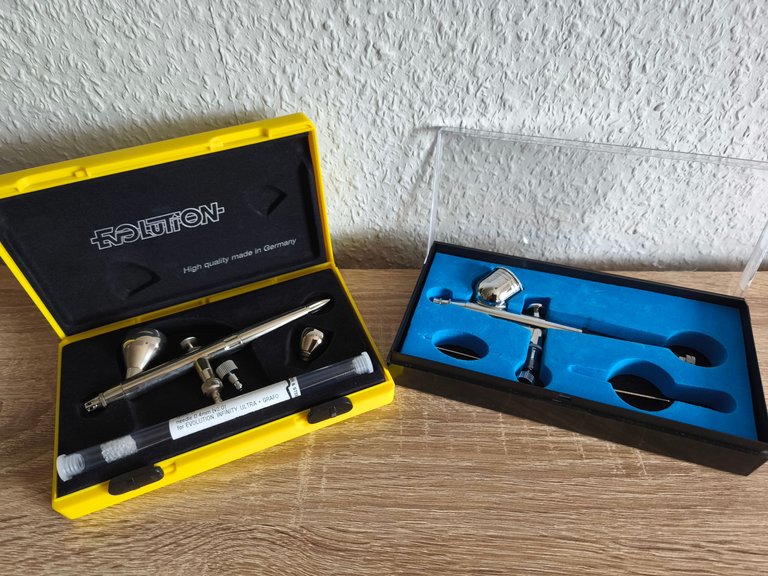
🔹 3. Harder & Steenbeck Evolution 2 in 1 (Empfohlen von @littlebee4)
- Vorteil: Hochwertige Verarbeitung, austauschbare Düsen (0,2 mm & 0,4 mm)
- Nachteil: Teurer als Einsteiger-Modelle, aber lohnt sich für bessere Ergebnisse
- Fazit: Meine Haupt-Airbrush für ernsthafte Projekte!
Since I am a complete beginner in airbrushing, I got different airbrush guns to find out what works best for me.
🔹 1. Cordless Airbrush with Mini Compressor
- Pros: No need for a big compressor, portable
- Cons: Low pressure, only good for small areas
- Conclusion: Perfect for small tasks, when I don’t want to set up the full equipment.
🔹 2. Cheap Chinese Dual-Action Airbrush
- Pros: Great for practicing without spending much money
- Cons: Harder to clean, not as precise as higher-end models
- Conclusion: Good for beginners but not ideal for fine details.
🔹 3. Harder & Steenbeck Evolution 2 in 1 (Recommended by @littlebee4)
- Pros: High-quality build, interchangeable nozzles (0.2 mm & 0.4 mm)
- Cons: More expensive than beginner models, but worth it for better results
- Conclusion: My main airbrush for serious projects!
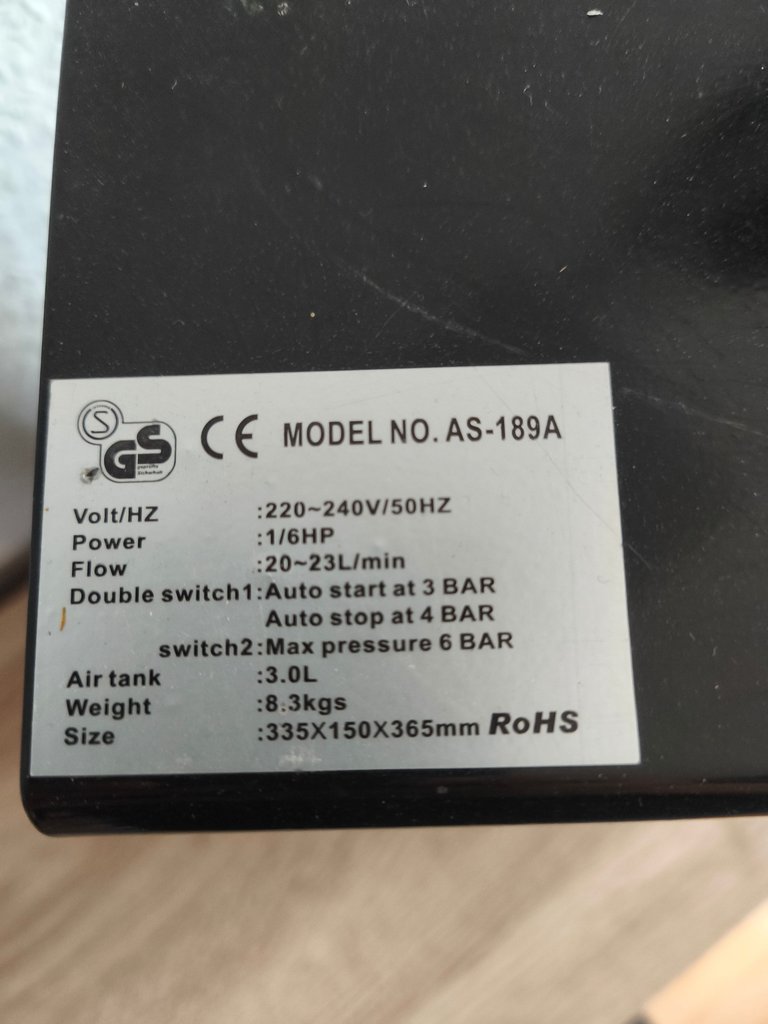
Der Kompressor – Warum ich mich für einen mit Tank entschieden habe
The Compressor – Why I Chose One with a Tank?
Beim Airbrushen ist gleichmäßiger Luftdruck wichtig.
Ich habe gelesen, dass kleine Kompressoren ohne Tank oft pulsieren oder an Druck verlieren.
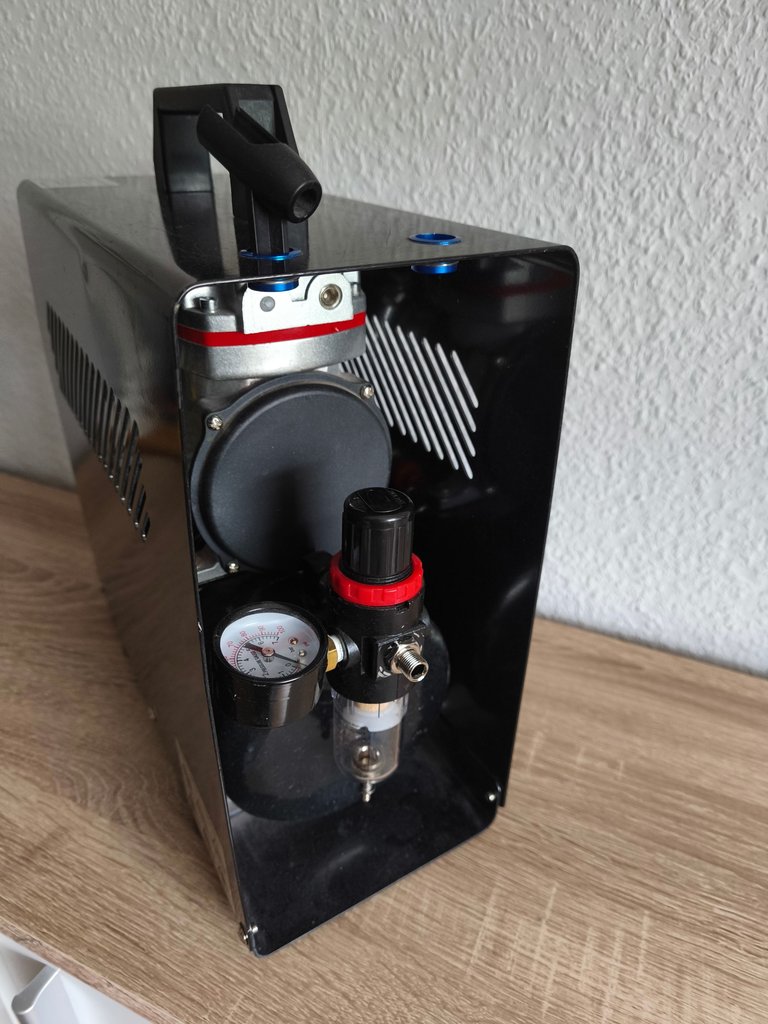
Da ich nicht frustriert auf halbem Weg aufgeben wollte, habe ich mir direkt einen Kompressor mit Lufttank geholt:
🔹 3-Liter-Kessel: Hält genug Luft für gleichmäßiges Arbeiten.
🔹 4 Bar Abschaltdruck: Der Kompressor schaltet sich automatisch ab, wenn genug Druck im Tank ist.
🔹 Leiser als kleine Billig-Kompressoren: Ich will ja nicht die Nachbarn erschrecken. 😅
While airbrushing, consistent air pressure is crucial.
I read that small compressors without a tank often cause pulsation or inconsistent pressure.
🔹 3-liter air tank: Stores enough air for steady operation.
🔹 4-bar shut-off pressure: The compressor turns off automatically when enough pressure is reached.
🔹 Quieter than cheap small compressors: I don’t want to scare my neighbors. 😅
Absauganlage – Noch ein Projekt vor mir
Fume Extraction – Another Project Ahead
Beim Airbrushen entstehen Farbnebel und feine Partikel, die sich überall absetzen.
Da ich nur 3D-Druck-Modelle bemale, möchte ich mir eine eigene Absauganlage mit Filter bauen.
🔹 Ziel: Farbnebel und Partikel sicher abführen
🔹 Geplant: Eine selbstgebaute Absaugbox mit Aktivkohlefilter
Sobald ich die Absauganlage fertig habe, werde ich natürlich einen neuen Blog schreiben!
While airbrushing, paint mist and fine particles settle everywhere.
Since I only paint 3D-printed models, I want to build my own extraction system with a filter.
🔹 Goal: Safely remove paint mist and particles
🔹 Plan: A DIY spray booth with an activated carbon filter
Once I finish this setup, I’ll definitely write a new blog about it!
Mein Fazit – Jetzt kann es losgehen!
My Conclusion – Now It’s Time to Start!
Jetzt, da ich meine erste richtige Airbrush-Ausrüstung habe, kann ich endlich loslegen!
Ich werde definitiv viel üben müssen, bevor ich saubere Ergebnisse bekomme.
Aber genau darauf freue ich mich!
Und wer weiß? Vielleicht probiere ich irgendwann doch noch das empfohlene Modell Harder & Steenbeck Evolution CRplus aus.
Now that I have my first proper airbrush setup, I can finally get started!
I will definitely have to practice a lot before getting clean results.
But that’s exactly what I’m looking forward to!
Community-Frage: Welche Airbrush nutzt ihr?
Community Question: What Airbrush Do You Use?
🎨 Welche Farben nutzt ihr am liebsten?
🔧 Was sind die häufigsten Fehler, die ich vermeiden sollte?
Lasst es mich wissen – ich freue mich auf eure Tipps! 😊
🎨 What paints do you recommend for starters?
🔧 What are the most common mistakes I should avoid?
Let me know – I’d love to hear your advice! 😊
Bis zum nächsten Blog – und vielen Dank für eure Hilfe!
See you in the next blog – and thanks for your help!
Dein Hornet on Tour
Your Hornet on Tour
Instagram: hornet_on_tour
Twitter: OnHornet
Photo: Hornet on Tour
Awesome setup! That will do just fine for yearsssss to come 😎
I would look into the following paints Createx airbrush paints acrylic. They are very durable and take well a topcoat / clear coat.
I used myself for plastic undergrounds like a wheel cover on cars the Auto Air version of the createx airbrush paints. They can be hardened “harder” by heating them up with a hairdryer. Better for clear coats than the above.
But for a start the first ones are fine. ( they both are a thicker paint, than the following paint… but you can get used to it. If you start with createx, you can airbrush with anything hahaha)
Next look into Schmincke AERO COLOR Professional. Waterbased but a very good paint.
Also you can seal it with a top coat if desired.
I leave you the links:
Createx airbrush colours and
Createx autoair
Schmincke
I am sure you find a lot of information about them on-line.
I like both of them and use them interchangeable.
I have transparent and opaque colours and the in between ones semi.
You can get great started sets of all of them. You can also mix colours in your cup with a wooden toothpick (carefully) and add some water until the desired colours and thickness of the paint to spray.
Thanks for the tag 😁 great to be part of it.