Hola Makers de Hive, soy Nitsu y hace bastante no público porque me había ido de vacaciones por una semana así que cuando volví no tenia contenido ni nada interesante para contarles, pero ya hace un tiempo tenía mi Prusa genérica parada debido a que le cambié el motor del extrusor y tuve que configurar los steps tocando el Marlín lo cual me trajo algunos problemas, pero gracias a una persona de un grupo de impresión 3D en discord pude solucionar toda la configuración del Marlín.
Hi Makers of Hive, I'm Nitsu and it's been a while since I last posted because I went on vacation for a week so when I came back I had no content or anything interesting to tell you, but some time ago I had my generic Prusa stopped because I changed the extruder motor and I had to configure the steps by touching the Marlin which brought me some problems, but thanks to a person from a 3D printing group on discord I could solve all the Marlin configuration.
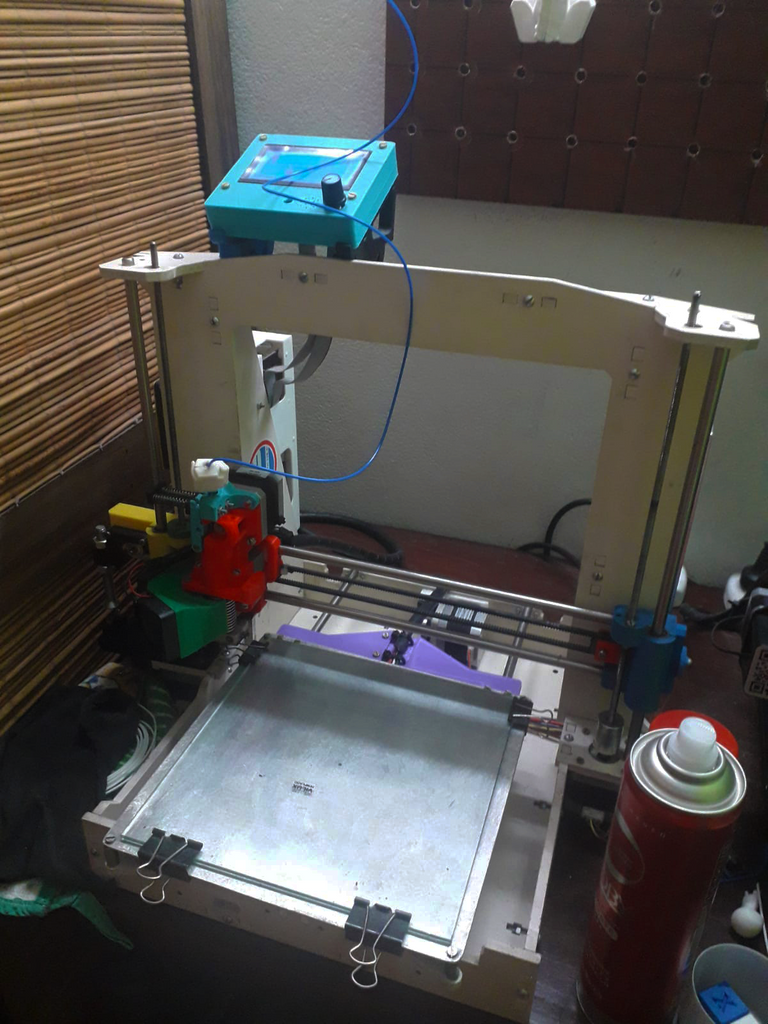
Así que después de haber modificado tanto mi impresora me tocaba armar nuevamente un buen perfil en Cura ya que mi idea es vender esta maquina para comprarme una con mejores prestaciones. Personalmente los perfiles de ambas maquinas que tengo los arme sobre la marcha, iba imprimiendo y cada vez que encontraba algún error o detalle que podía mejorar iba modificando el perfil, esta no es la mejor forma de hacerlo, pero me funcionaba. Ahora intenté seguir un orden así que comencé haciendo unas pruebas de retracciones, muchos del grupo seguro sabrán que son las retracciones, pero para los que no saben les cuento. Las RETRACCIONES son los movimientos que hace nuestra impresora hacia atrás con el filamento, de esta manera cada vez que el cabezal de la boquilla se desplaza debe realizar una retracción para que no queden pelos de plástico o yendo más al lenguaje técnico, exudaciones.
So after having modified my printer so much I had to build again a good profile in Cura since my idea is to sell this machine to buy one with better features. Personally I built the profiles of both machines that I have, I was printing and every time I found some error or detail that could be improved I was modifying the profile, this is not the best way to do it, but it worked for me. Now I tried to follow an order so I started doing some tests of retractions, many of the group will surely know what retractions are, but for those who do not know I will tell you. The RETRACTIONS are the movements that our printer makes backwards with the filament, in this way every time the nozzle head moves it must make a retraction so that there are no plastic hairs or going more to the technical language, exudations.
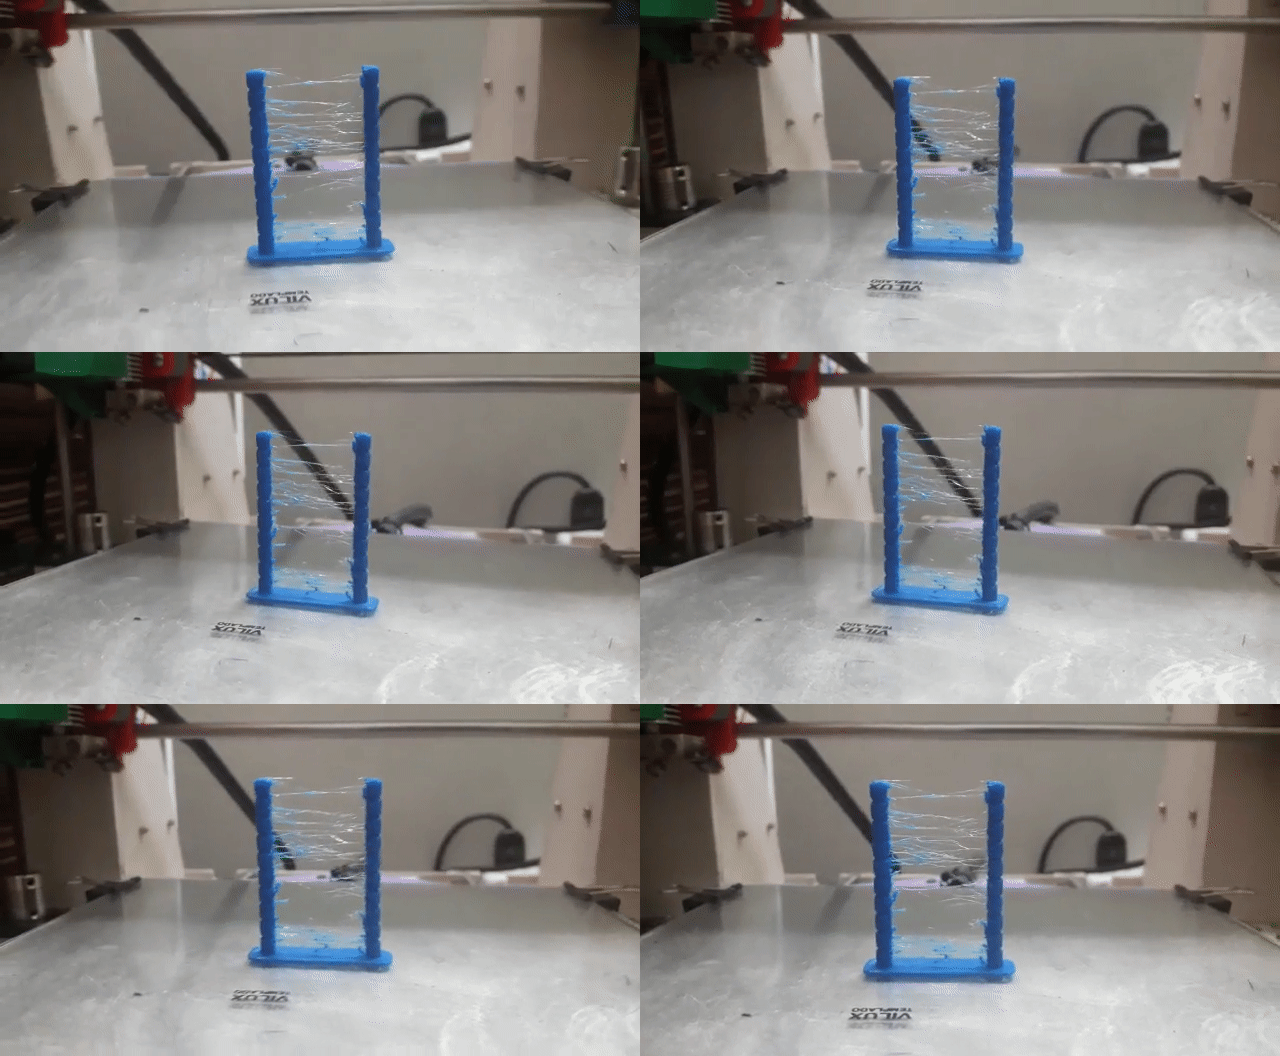
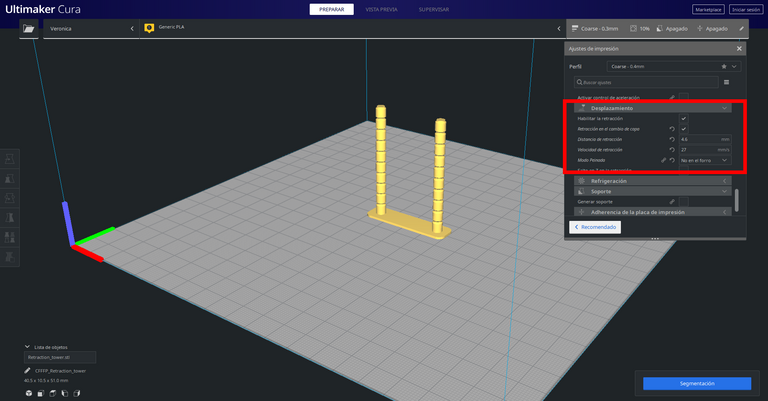
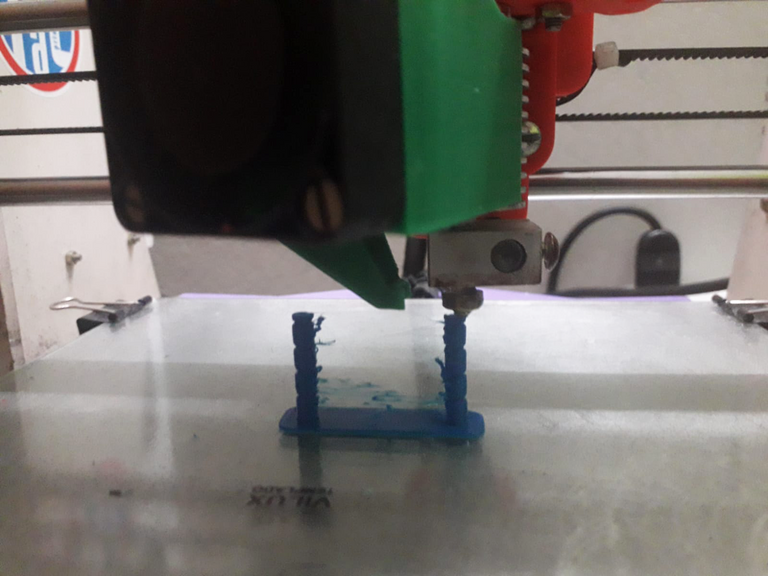
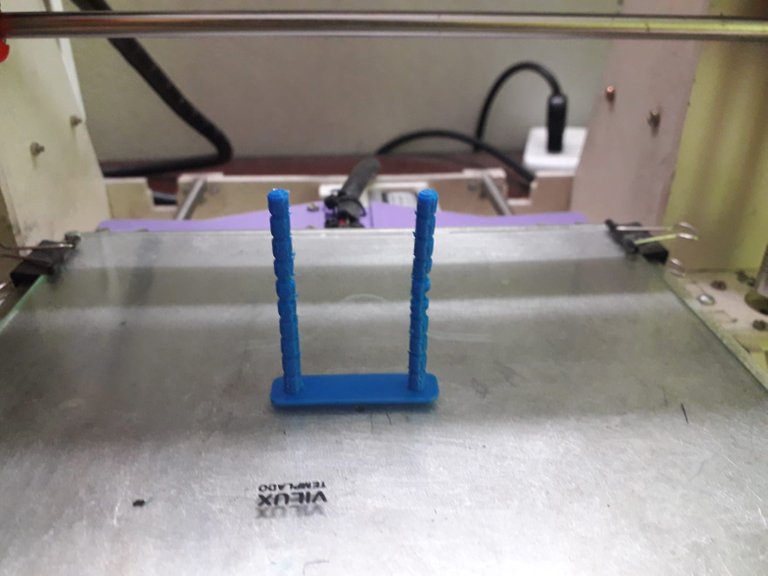
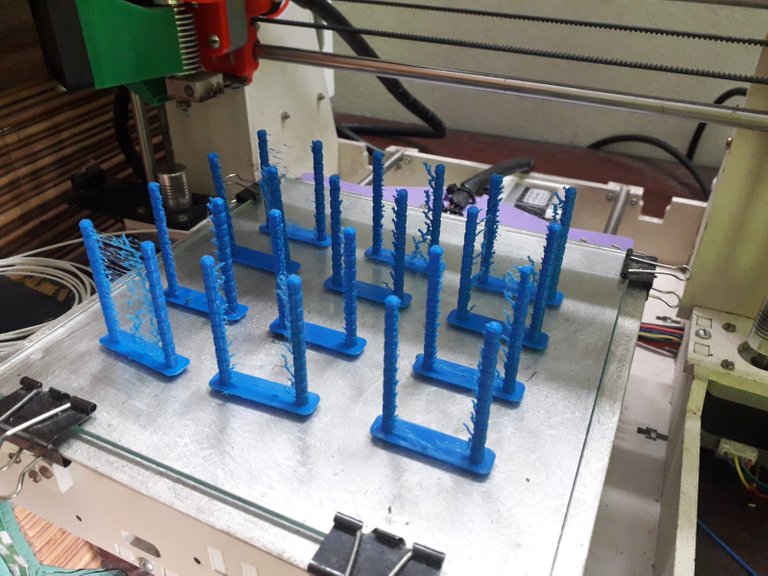
La idea es imprimir un test de retracciones y utilizar el método científico para ir ajustando y solucionar el problema, como pueden ver esta es la configuración que yo tenia en mi laminador y el resultado del test fue el siguiente. Se pueden ver muchos hilos de plástico, el objetivo es hacerlos desaparecer y que quede una impresión limpia.
The idea is to print a shrinkage test and use the scientific method to adjust and solve the problem, as you can see this is the configuration that I had in my laminator and the result of the test was the following. You can see a lot of plastic threads, the goal is to make them disappear and get a clean print.
¿Por qué se busca mejorar las retracciones? Si nosotros imprimiéramos una pieza más compleja, algo para un cliente o una pieza con necesidades técnicas esos restos podrían traer grandes complicaciones, así que por este motivo es bueno tener refinada las retracciones.
Why do you want to improve the shrinkage? If we were to print a more complex part, something for a customer or a part with technical needs, those remnants could bring great complications, so for this reason it is good to have refined shrinkage.
Comencé modificando los siguientes valores en el Cura (Recuerden que cada maquina es un mundo y ni de casualidad mis retracciones van a ser iguales que las de sus máquinas). Claramente hay que activar las retracciones y tocar los parámetros de DISTANCIA DE RETRACCION, VELOCIDAD DE RETRACCION y DESPLAZAMIENTO MINIMO DE RETRACCION. Lo que les recomiendo es que cada vez que hacen una prueba a esta le coloquen un número.
I started by modifying the following values in the Cura (Remember that each machine is a world and not even by chance my retractions are going to be the same as those of your machines). Clearly you have to activate the retractions and touch the parameters of RETRACTION DISTANCE, RETRACTION SPEED and MINIMUM RETRACTION DISPLACEMENT. What I recommend is that every time you do a test you put a number on it.
Tras varios intentos vi una cierta mejoría, pero todavía no alcanzaba el punto justo que necesitaba así que también probe tocando un poco la TEMPERATURA DE EXTRUSION, el FLUJO, la VELOCIDAD DE DESPLAZAMIENTO y la DEPOSICION POR INERCIA de esta forma buscaba que el desplazamiento al punto donde el extrusor debía colocar material fuera más rápido para evitar el goteo de plástico.
After several attempts I saw some improvement, but it still did not reach the right point that I needed so I also tried touching the EXTRUSION TEMPERATURE, the FLOW, the SPEED OF DISPLACEMENT and the INERTATION DEPOSITION so that the displacement to the point where the extruder should place material would be faster to avoid the plastic dripping.
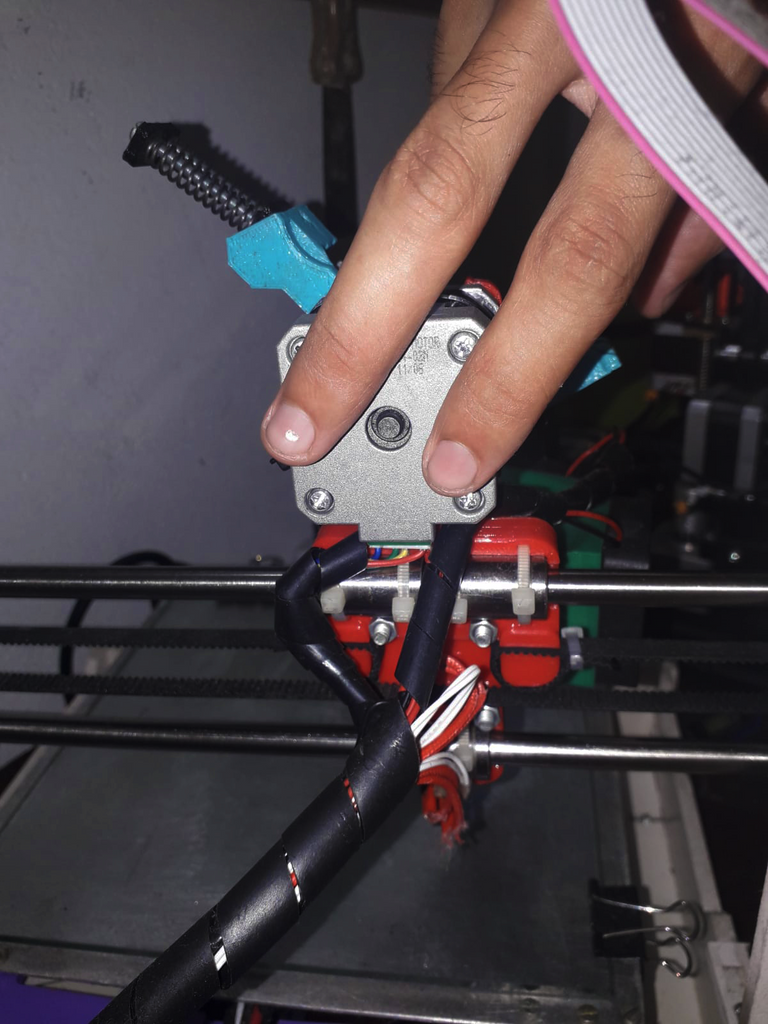
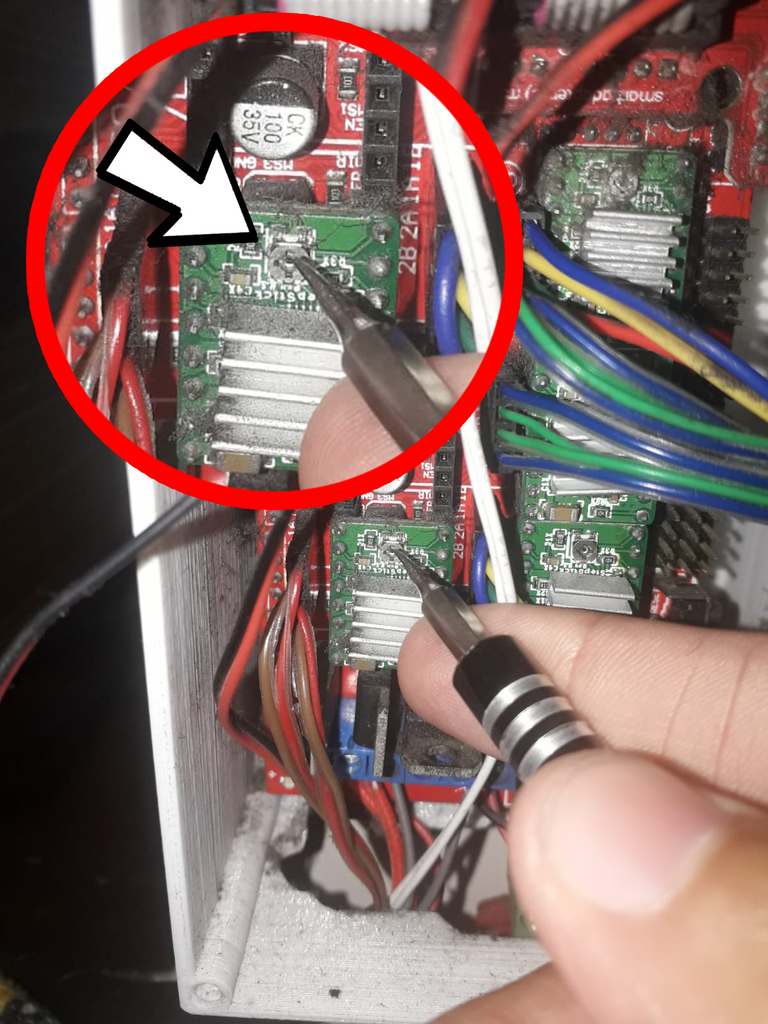
Note que luego de 15 o 30 min de impresión el motor del extrusor calentaba exageradamente, es normal que calienten un poco y mas en verano una forma de verificar esto es colocar la palma de la mano en la parte trasera del motor, si no soportas la temperatura es porque algo anda mal, en este caso revise y el motivo era que el driver estaba suministrando un voltaje muy alto así que con un pequeño destornillador gire un tornillo para disminuir el voltaje, lo fui haciendo de a poco para no pasarme porque si no, no llega la suficiente energía y el motor deja de andar.
I noticed that after 15 or 30 min of printing the extruder motor was overheating, it is normal to heat up a little and more in summer a way to verify this is to place the palm of your hand on the back of the motor, if you can not stand the temperature is because something is wrong, in this case I checked and the reason was that the driver was supplying a very high voltage so with a small screwdriver turn a screw to decrease the voltage, I was doing it slowly to not overdo it because if not, not enough energy arrives and the motor stops running.
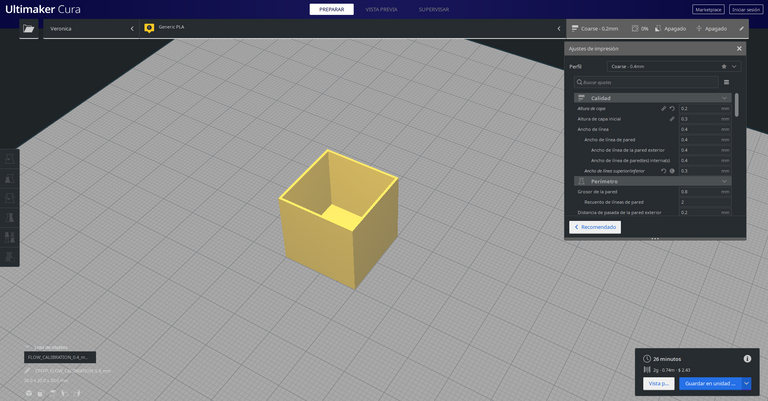
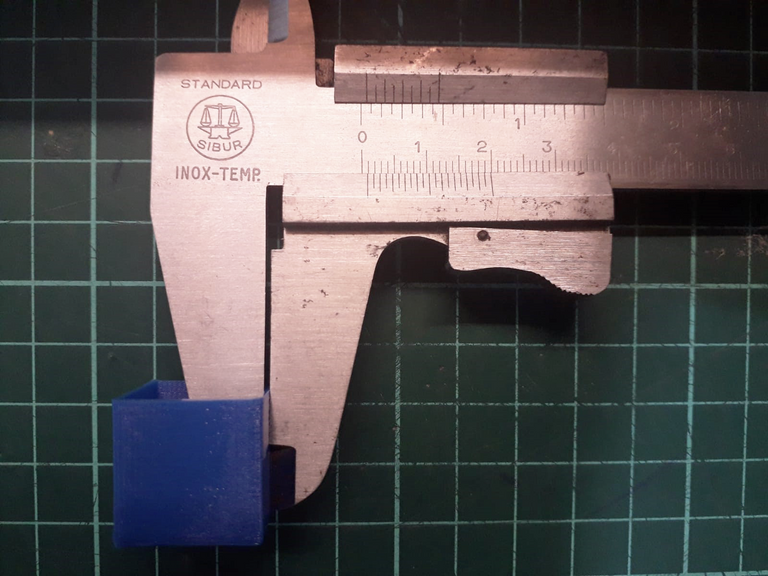
Y esto todavía no terminaba, mas tarde me di cuenta que el ventilador que se encarga de enfriar las capas impresas no estaba andando, tras revisar los cables note que se había cortado en la conexión que tiene con la placa madre, lo conecte y seguí haciendo las pruebas. Hubo una notable mejoría, pero me di cuenta que el flujo de material era excesivo así que realicé una calibración en el flujo. Consiste en imprimir un cubo sin tapa con dos perímetros de espesor, ese espesor debería medir 8 mm y lo recomendado seria medirlo con un calibre digital, en este caso yo no contaba con esa herramienta pero utilice un calibre normal, aproximadamente la pared de mi cubo media unos 0.9 mm lo que tocaba ahora era realizar una regla de tres en donde el 100% del flujo eran 0.9 mm de espero y tenemos que averiguar que porcentaje es el necesario para realizar perímetros de 0.8 hice las cuentas y lo configure en mi laminador.
And this was not over yet, later I realized that the fan that cools the printed layers was not working, after checking the cables I noticed that it had been cut in the connection it has with the motherboard, I connected it and continued testing. There was a noticeable improvement, but I realized that the material flow was excessive so I performed a flow calibration. It consists of printing a cube without lid with two perimeters of thickness, that thickness should measure 8 mm and it would be recommended to measure it with a digital caliper, in this case I did not have that tool but I used a normal caliper, approximately the wall of my cube was about 0.9 mm what I had to do now was to make a rule of three where 100% of the flow was 0.9 mm and we have to find out what percentage is necessary to make perimeters of 0.8 I did the math and set it in my laminator.
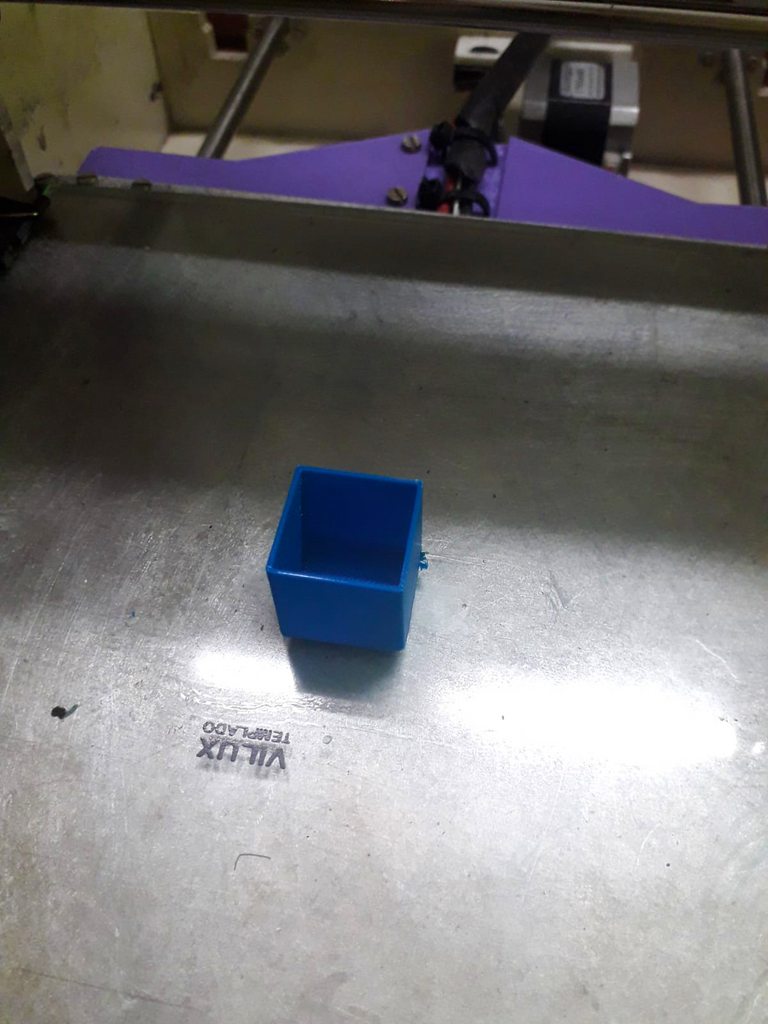
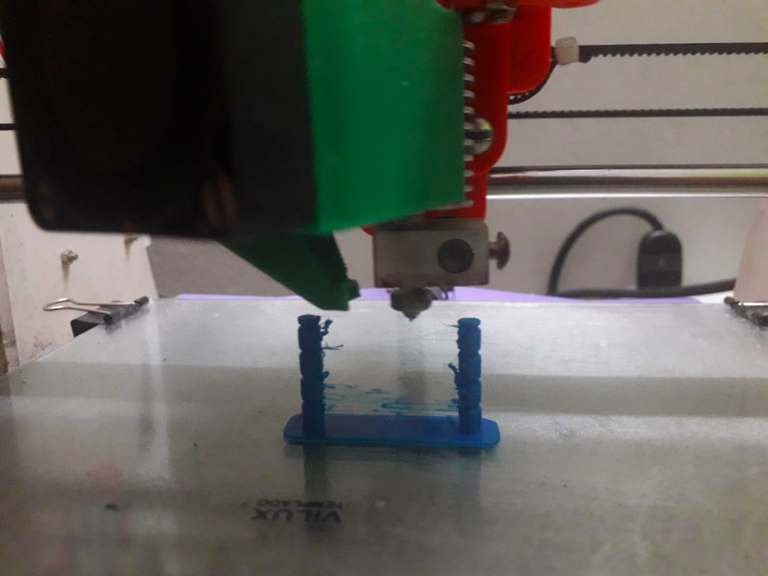
Procedí a realizar la ultima prueba de retracciones para al fin llegar a mi objetivo, una pieza final limpia y libre de pelos de plástico. Me hubiera ahorrado muchas pruebas si desde un principio notaba que el ventilador de capa estaba apagado, pero de todas formas logre mi objetivo. Bueno como verán ser Maker y operar con este tipo de impresoras consiste la mayoría de veces ir resolviendo los problemas sobre la marcha y en especial tener mucha paciencia y buen ojo, espero que les haya sido de utilidad y puedan aplicar alguna de las cosas que les comente.
I proceeded to perform the last retraction test to finally reach my goal, a final piece clean and free of plastic hairs. It would have saved me a lot of tests if I had noticed from the beginning that the layer fan was off, but anyway I achieved my goal. Well as you can see being a Maker and operating with this type of printers consists most of the time to solve the problems on the fly and especially to have a lot of patience and good eye, I hope it has been useful and you can apply some of the things I told you.
Wow, some nice troubleshooting and getting right in there. How do things change if you use different filliment? I mean different manufacturers of PLA? Would it change much?
Es muy probable que diferentes marcas necesiten otras retracciones pero armar un perfil para cada marca es una locura. Conviene encontrar una buena y manejarse con eso.
Thanks yes, I would agree. Makes sense find a good brand and stick with it.