
Buenas querida comunidad Hive, el día de hoy aprenderemos a darle forma a nuestros posts, para que estos luzcan de una mejor manera. Para esto usaremos el lenguaje de marcado “Markdown”, que previamente en nuestro blog “Como crear un post en Hive.blog” explicamos, al final de este post encontraras el link y también utilizaremos algunos códigos CSS (Cascading Style Sheets).
Good dear Hive community, today we will learn how give a better shape to our posts. For this we will use the "Markdown" language, which previously in our blog "How to create a post in Hive.blog" we explained, at the end of this post you will find the link. And also, we will use some CSS codes (Cascading Style Sheets).
En este post te enseñare una manera eficiente que utilizo para darle forma a los posts... Para ello, primero te explicare para que sirve la sintaxis presentada y en el orden respectivo a ser usado.
In this post I will show you an efficient way that I use to give a shape the posts... For this, I will first explain the use of the presented syntax and in the respective order to be used.
Primero que todo, justifico el post completo, con el siguiente código CSS:
First of all, I justify the entire post, with the following CSS code:
Coloco al iniciar el post el código
<div class=text-justify>
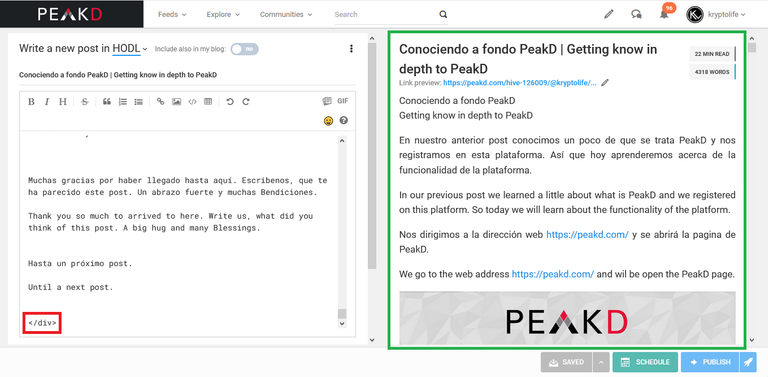
Puedes observar que en el área derecha “demarcado con verde” aún no está justificado el post, porque aún está abierto el código.
I put at start of the post the code
<div class = text-justify>You can see that in the right area "demarcated with green" that the post is not justified yet, because the code is still open.

Y para cerrar el código, colocamos al final de todo el post
</div>
puedes observar en el área derecha, que al cerrar el código, el texto ya está justificado.
And for close the code, we put at the end of the entire post
</div>and you can see in the right area, that when closing the code, the text is already justified.
Lo siguiente que hare, será colocar en negrita y centrado los títulos, subtítulos e imágenes.
The next thing I will do is to place the titles, subtitles and images in bold and center.
Para colocar en negrita los títulos, usaremos los asteriscos (*) abrimos el código con dos asterisco y cerramos con dos asterisco, de la siguiente manera
**Titulo**
como lo veras en el siguiente ejemplo.
To place the titles in bold, we will use the asterisks (*), we open the code with two asterisks and close with two asterisks, as follows
**Title**how you as will see in the following example.

Y para centrar los títulos y las imágenes, usaremos el siguiente código, el cual es bastante similar al de justificado pero lo utilizaremos para centrar, lo colocamos antes del título, abrimos el código con.
<div class=text-center>
Y para cerrar usamos
</div>
And for center the titles and images, we will use the following code, which is quite similar to the justified, but we will use it for center, we place it before the title, we open the code with.
<div class=text-center>And to close we use
</div>

Para mejorar el flujo de trabajo y darles forma a los posts de manera más eficiente, haremos lo siguiente. Colocaremos en negrita los títulos, copiaremos el código de apertura para centrar los títulos e imágenes y citaremos los textos en inglés al mismo tiempo.
For improve the workflow and shape the posts more efficiently. We will do the following, put in bold the titles, copy the opening code for center the titles and images, and cite the English texts at the same time.
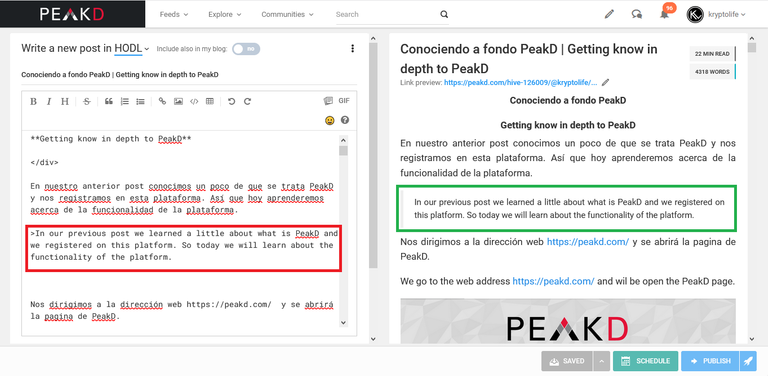
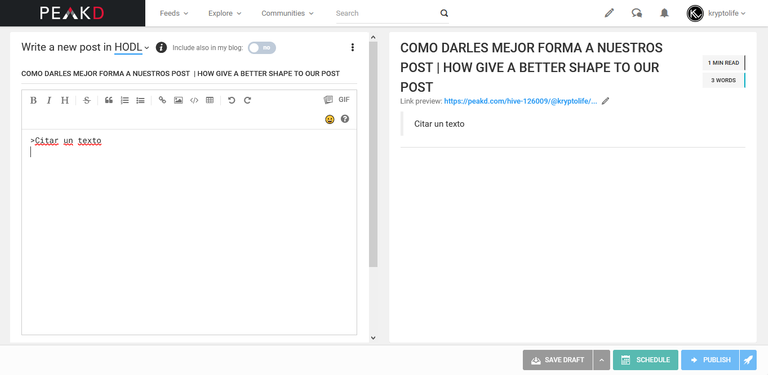
Para citar los textos usaremos el siguiente carácter (>) este se encuentra al lado de la tecla (z) y lo activamos con (Shift) y al colocarlo, quedara de la siguiente manera.
For cite the texts we will use the following character (>) this is located next to the left side of (z) key and we activate it with (Shift) as follow.
Asi, iremos bajando a los largo del post e iremos colocando en:
Thus, we will go down throughout the post and we will place in:
1 Negrita los títulos y subtítulos.
1 Bold the titles and subtitles.
**Textos**
2 Centrando los títulos, subtítulos e imágenes.
2 Centering the titles, subtitles and images.
<div class=text-center>
3 Y citaremos el texto en ingles.
3 And we will quote the text in English.
> Texto
Para centrar las imágenes y los textos, copiaremos el código.
<div class=text-center>
Y lo pegaremos al inicio del enlace y cerraremos el codigo al final del enlace de la imagen o el texto que deseamos centrar. De la siguiente forma.
For center the images and texts, we will copy the code.
<div class=text-center>and paste it at the beginning of the link and for close the code at the end of the link of the image or the text that we want to center. In the following way.

Y el código de cierre lo acomodamos a su sintaxis correcta para que cumpla su función de manera adecuada.
And we adapt the closing code to its correct syntax so that it fulfills its function properly.

No se aprecia mucho que está centrada la imagen, porque la imagen posee dimensiones mayores a las que posee el área de visualización, pero centrar las imágenes ayuda a evitar que esta se salga del cuadro de lectura cuando son muy grandes o cuando son muy pequeñas estas se mantienen centradas.
It is not much appreciated that the image is centered, because the image has dimensions greater than those of the viewing area, but centering the images helps to prevent it from leaving the reading frame when they are very large or when they are very small they stay centered.
Una vez que hayamos colocado en negrita todos los títulos, subtítulos, de haber centrado todas las imágenes, títulos, subtítulos y de haber citado el texto en inglés, le daremos espacios entre párrafos para que estos sean mas legibles y le colocaremos la sangría a cada párrafo con los siguientes códigos.
Once we have placed all the titles, subtitles in bold, having centered all the images, titles, subtitles and having cited the text in English, we will give spaces between paragraphs so that they are more legible and we will indent each paragraph with the following codes.
Para dar la sangría, usaremos el siguiente código:
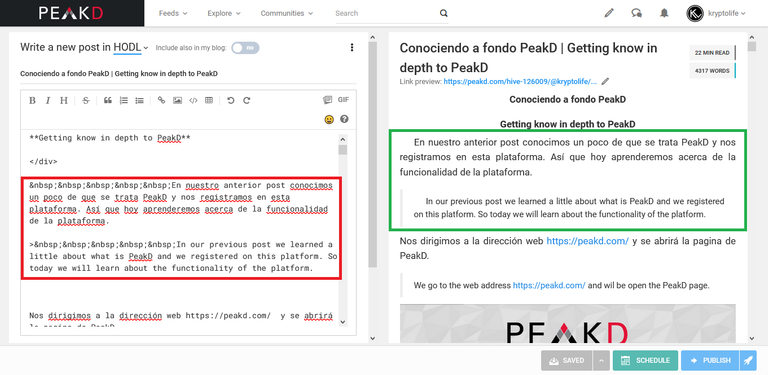
Usaremos cinco al iniciar cada párrafo y los colocaremos de la siguiente manera:
To indent, we will use the following code:
We will use five at the beginning of each paragraph and we will place them as follows:
En los textos citados colocamos el codigo después de (>)
In the cited texts we place the code after (>)
Y para dar espacios entre párrafos usaremos el código
<br>
Lo colocaremos debajo de cada párrafo, siempre debajo de cada codigo de cierre, de la siguiente manera.
And to give spaces between paragraphs we will use the code
<br>We will place it below each paragraph, always below each code close, as follows.
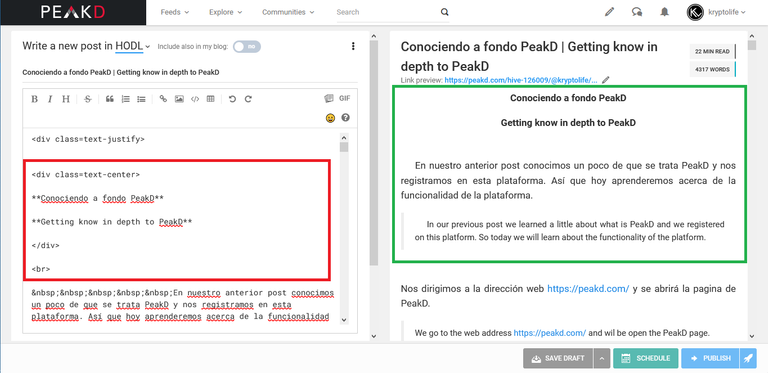
En la primera imagen veras que no está el código de salto de línea y en la segunda imagen al colocarlo cumple su función.
In the first image you will see that the line break code is not there and in the second image when placing it, it fulfills its function.
Y para darle forma a nuestro post más rápido, copiaremos los códigos
<br> ( para salto de línea)
y
(para dar espacio),
Asi:
<br>
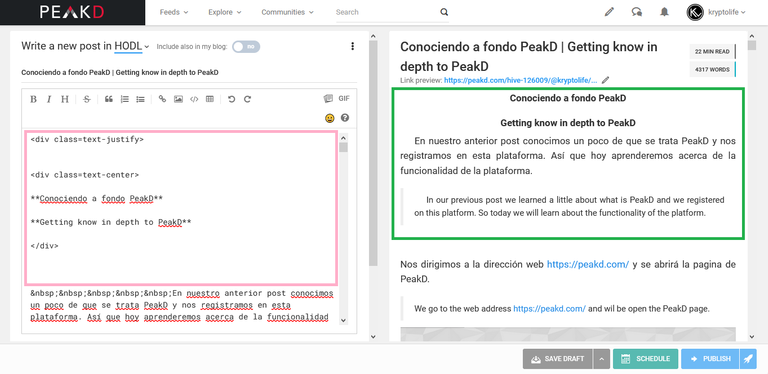
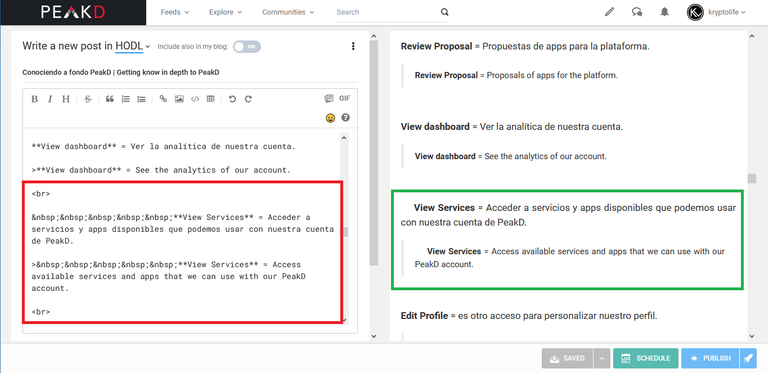
y los iremos pegando en la medida que lo vayamos usando. Como en la siguiente imagen.
And to give shape to our post more faster, we will copy the code
<br> (for line break)and
(to give space),Like this:
<br> And we will paste it when we need it. As in the following image.
Y una ves le hayamos dado salto de línea y colocado la sangría a el Post, verificamos que todo nuestro post esté en orden y legible, con nuestra miniatura para la portada del post. Con su titulo, sus respectivos tags para los que queremos que aparezca nuestro post y su descripción, le damos a publish y nuestro post será publicado de manera inmediata.
And once we have give the line break and put the indent at the Post, we verify that all our post is in order and legible, with our thumbnail for the cover of the post. With its title, its respective tags for which we want our post appear and its description, we click publish and our post will be published immediately.
Aquí te colocare algunos códigos Markdown y CSS que puedes utilizar para darle forma a tus Post.
Here I will put some Markdown and CSS codes that you can use to shape your Post.
Veras el código en su forma correcta a ser colocado y su función dentro del código en texto.
You will see the code in its correct form to be placed and its function inside the code in text.
Lista de códigos Markdown y CSS
List of Markdown and CSS codes
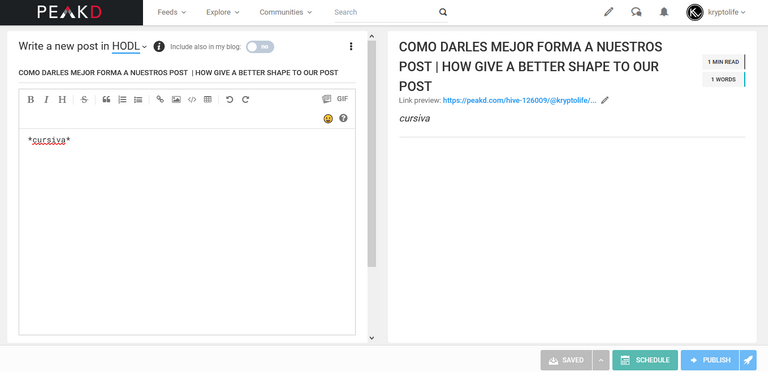
Cursiva
Un asterisco/An asterisk
*cursiva*
Cursiva
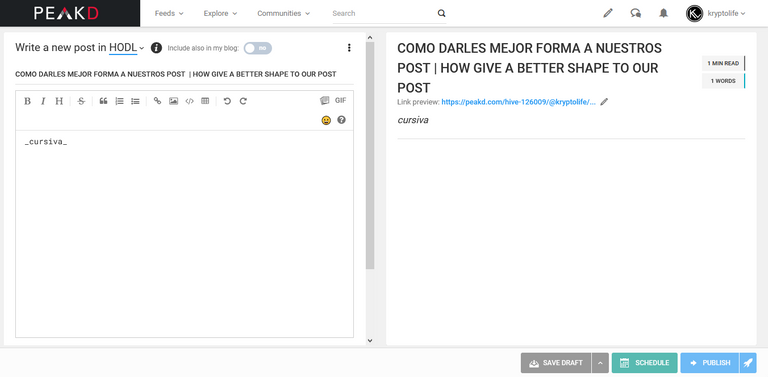
Un piso/Underscore
_cursiva_
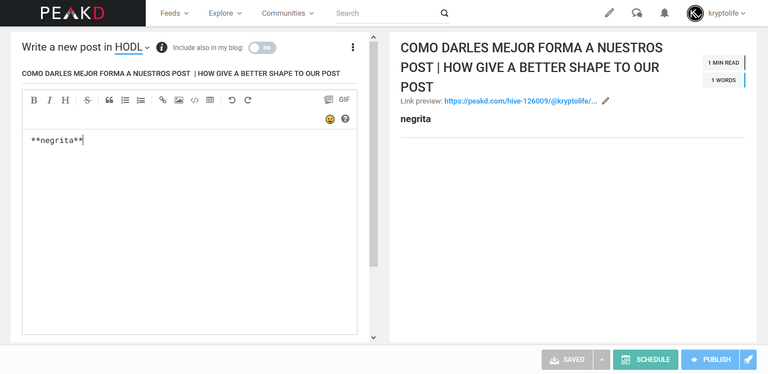
Negrita
Dos asteriscos/Two asterisks
**negrita**
Negrita
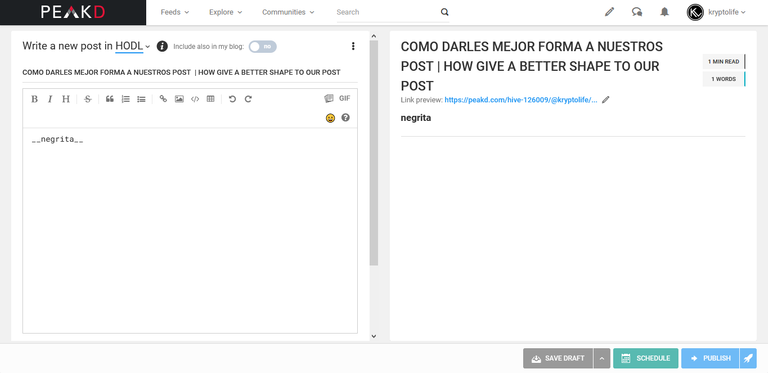
Dos pisos/Two underscore =
__negrita__
Cursiva + Negrita
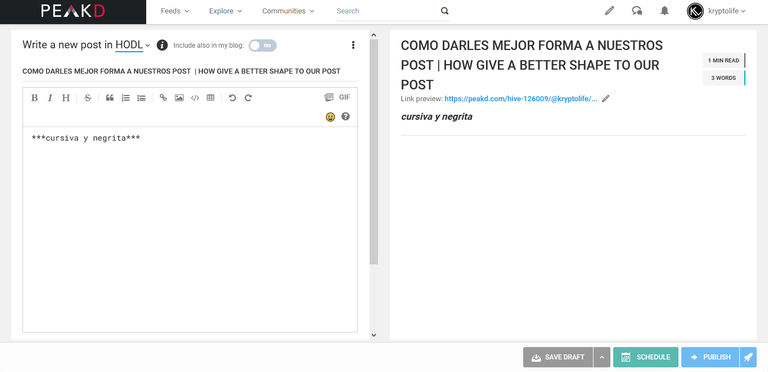
Tres asteriscos/ Three asterisks
***cursiva y negrita***
Cursiva + Negrita
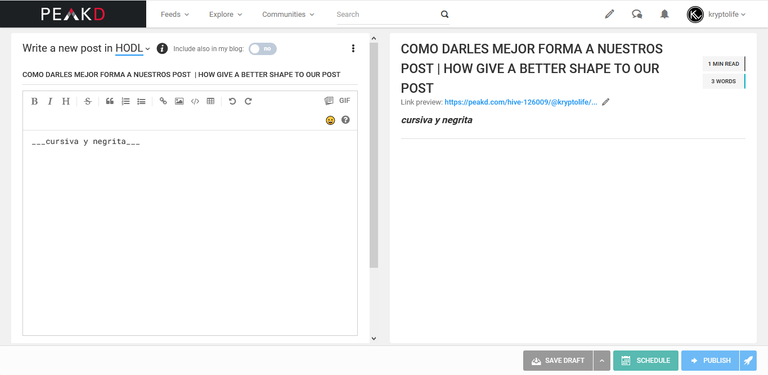
Tres pisos/ Three underscore
___cursiva y negrita___
Citar un texto / Quote a text
>
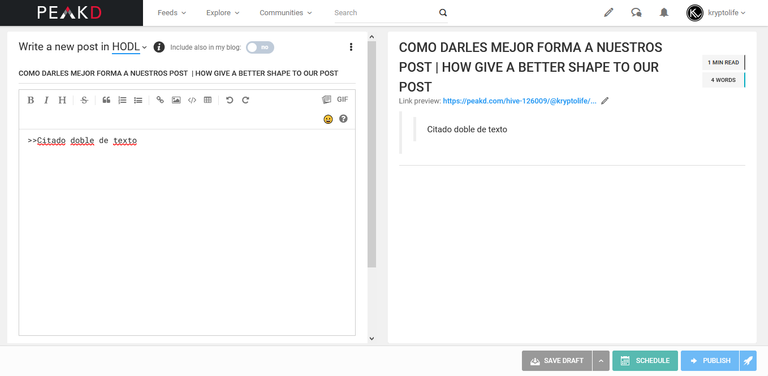
Citado doble de texto / Doble quote a text
>>
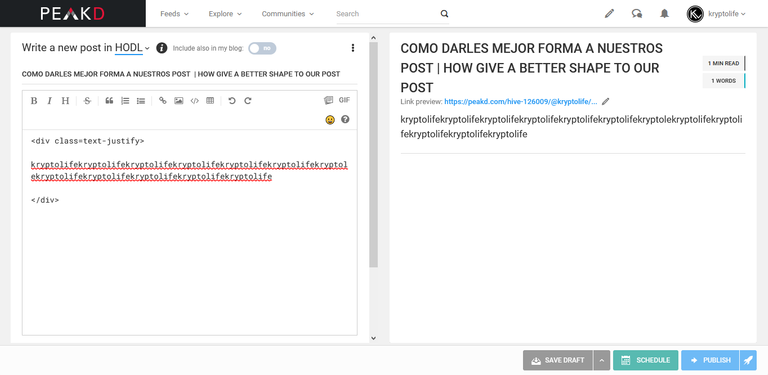
Justificar Texto / Justify texts
Codigo de apertura + codigo de cierre =
<div class=text-justify> Justificar textos </div>
Opening code + closing code =
<div class=text-justify> Justify texts </div>
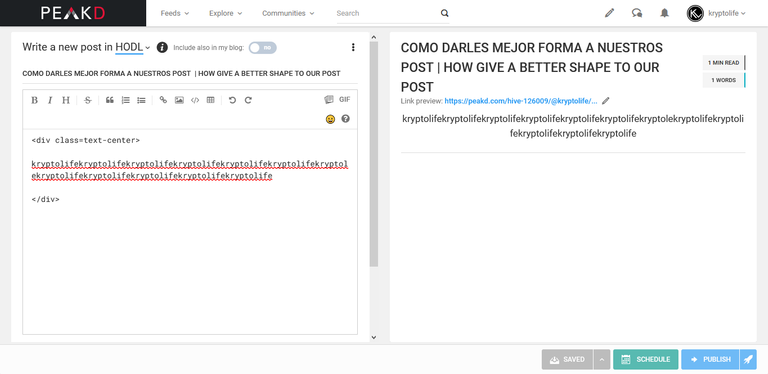
Centrar textos / Center texts
Codigo de apertura + codigo de cierre =
<div class=text-center> Centrar textos </div>
Opening code + closing code =
<div class=text-center> Center texts </div>
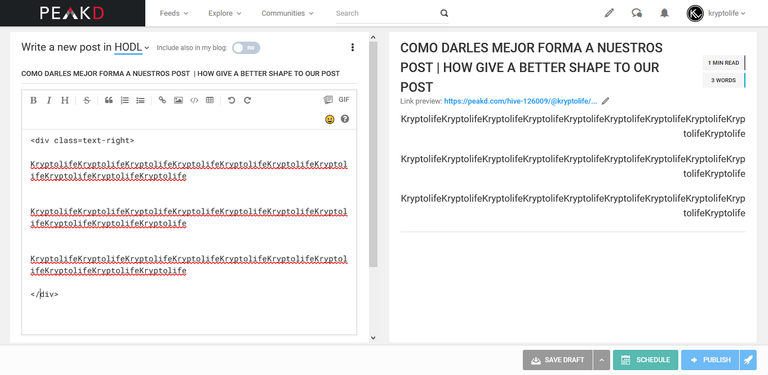
Textos alineados a la derecha / Right align texts
Codigo de apertura + codigo de cierre =
<div class=text-right> Centrar textos </div>
Opening code + closing code =
<div class=text-right> Center texts </div>
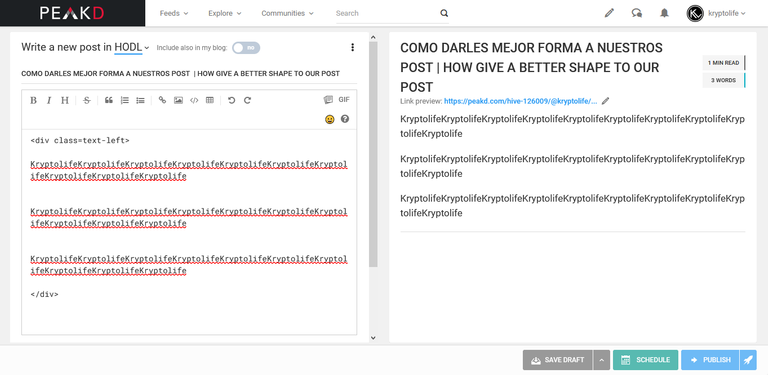
Textos alineados a la izquierda / Left align texts
Codigo de apertura + codigo de cierre =
<div class=text-left> Centrar textos </div>
Opening code + closing code =
<div class=text-left> Center texts </div>
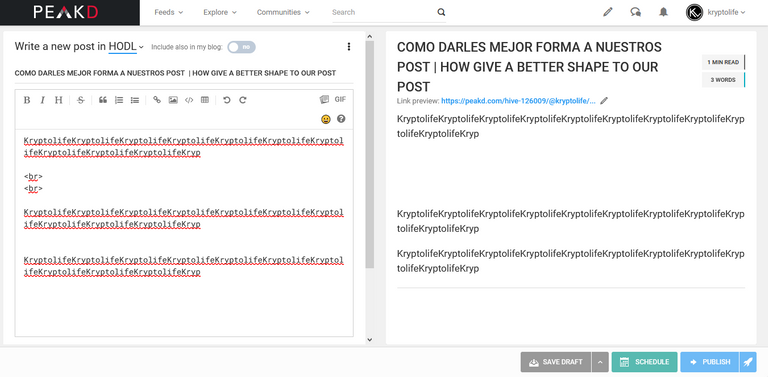
Salto de línea / Line break
<br>
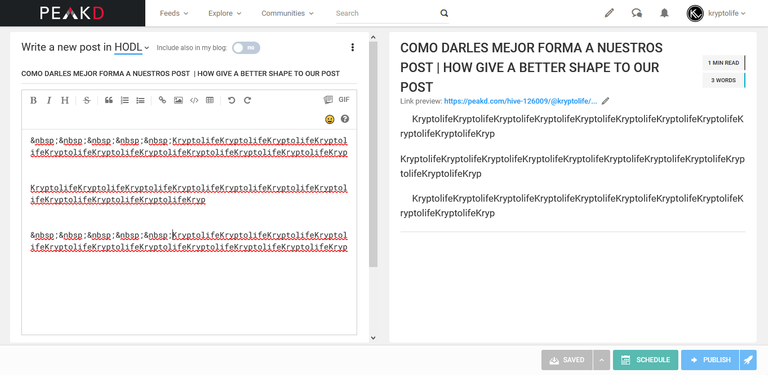
Espacio / Space
En nuestro próximo blog aprenderás, como promocionar tus Post en las diferentes comunidades, usando Discord.
In our next blog you will learn how promote your Post in the different communities, using Discord.
Espero este post te sea de mucha ayuda para darles una mejor forma a tus blogs un fuerte abrazo.
I hope this post has been very helpful to you, for give a better shape to your blogs, a big hug.
Hasta un proximo post
Until a next post
Links
¿Qué es Hive.io?
What is Hive.io?
https://hive.blog/hive-126009/@kryptolife/que-es-hive-io-whats-is-hive-io
¿Cómo registrarse en Hive.io?
How register on Hive.io?
https://hive.blog/hive-126009/@kryptolife/como-registrarse-en-hive-io-how-register-on-hive-io
Como crear tu primer post en Hive.blog
How create your first post on Hive.blog
Unete a nuestra comunidad Discord y aprende mas de Hive
Join to our Discord community and learn more about Hive
https://discord.com/invite/QzzrZuU92q
Kryptolife
Nuestra redes sociales / Our social networks:
