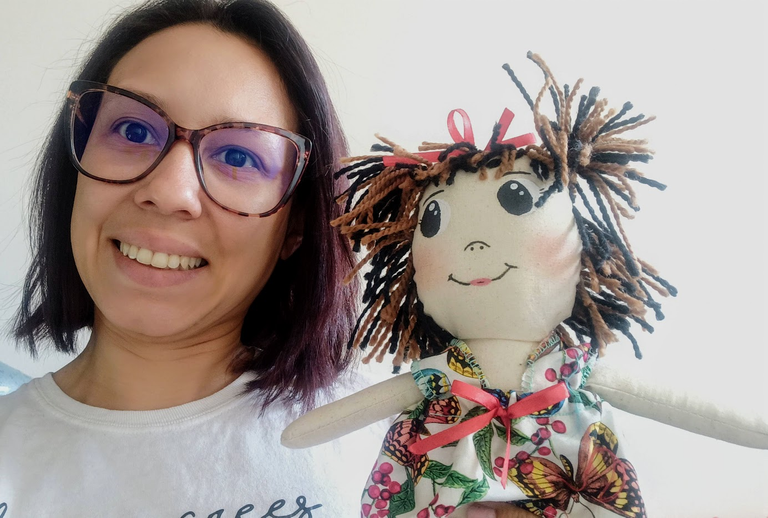
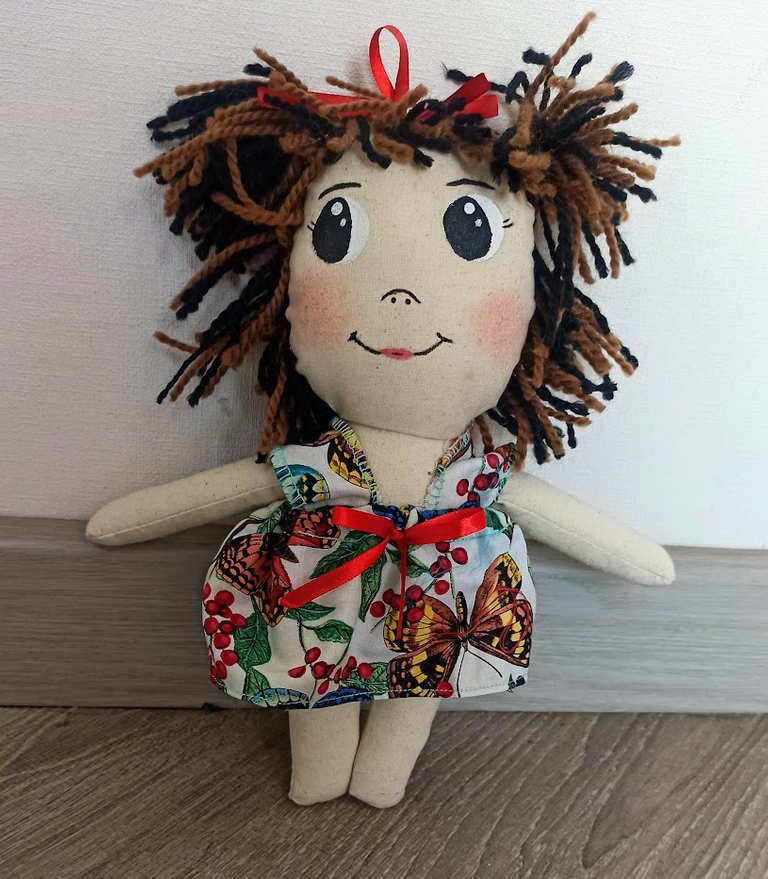
Hola Hivers, feliz inicio de semana, espero hayan tenido un gran fin de semana. Hoy les presento a Alegría, la muñeca de tela más tierna que he hecho hasta ahora, no se si es su cara como la pinté, pero la veo contenta con mucha tranquilidad. Me gustaría saber que te inspira a ti al verla.
Hello Hivers, happy Monday first day of the week, I hope you had a great weekend. Today I present to you Alegria, the cutest fabric doll I have made so far. I don't know if it's her face as I painted it, but I see her happy with a lot of tranquility. I would like to know what inspires you to see her.
Ya en otras publicaciones les he explicado cómo cortar y rellenar, sin embargo me gustaría hacer más detallado el post de hoy en cuanto a la vestimenta. De ser posible hacer otras explicaciones de los paso a paso de cada fase de forma individual, por si alguna vez te animas a hacer una muñeca de tela.
On other posts I have already explained how to cut and stuff, however I would like to make today's post more detailed about the clothing. If possible I would like to make other explanations of the step by step of each phase individually, in case you ever get the courage to make a fabric doll.
Bueno, como les dije anteriormente, hoy el post de Hive va dedicado al vestido de Alegría, es un paso a paso bastante sencillo, ideal para los principiantes en las costuras, pues permite practicar varias puntadas, tanto a mano como en la máquina de coser, para este trabajo necesitas: tela, cinta que le combine, hilo, aguja, tijeras, máquina (opcional).
Well, as I told you before, today Hive's post is dedicated to Alegria's dress, it's a pretty simple step by step, ideal for beginners in sewing, because it allows you to practice several stitches, both by hand and on the sewing machine, for this work you need: fabric, matching ribbon, thread, needle, scissors, machine (optional).
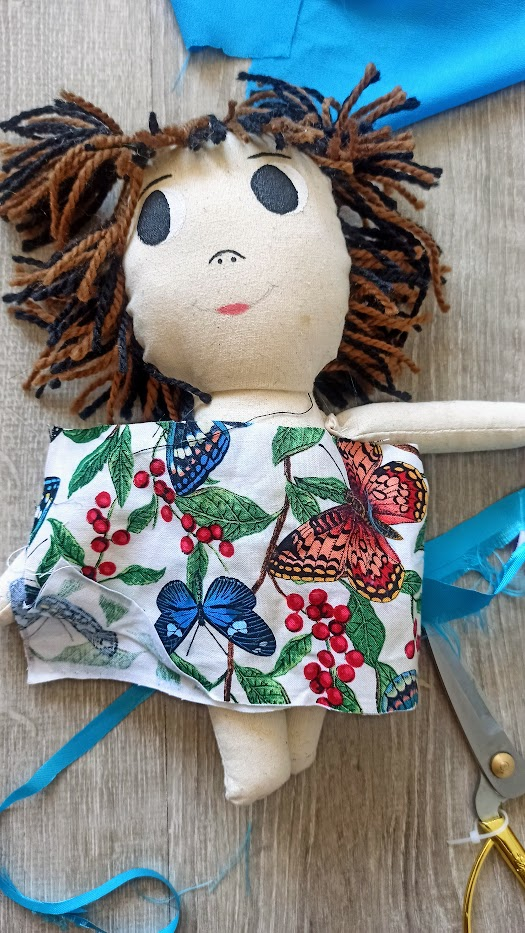
Ahora vamos mano a la tela, una vez tengas tu muñeca de tela lista de costura y relleno, es el momento de vestirla, primero, corta un rectángulo del doble de ancho de la cintura, luego corta un par de rectángulos más pequeños, para los tirantes del vestido, para hacerlo más fácil y cómodo puedes medirlos en la muñeca antes de cortarlo, recuerda la costura como el yoga, paso a paso como mejor te acomode sin forzar.
Now let's get to the fabric, once you have your fabric doll ready for sewing and stuffing, it's time to dress it, first, cut a rectangle twice the width of the waist, then cut a couple of smaller rectangles, for the straps of the dress, to make it easier and more comfortable you can measure them at the wrist before cutting it, remember the sewing like yoga, step by step as best suits you without forcing.

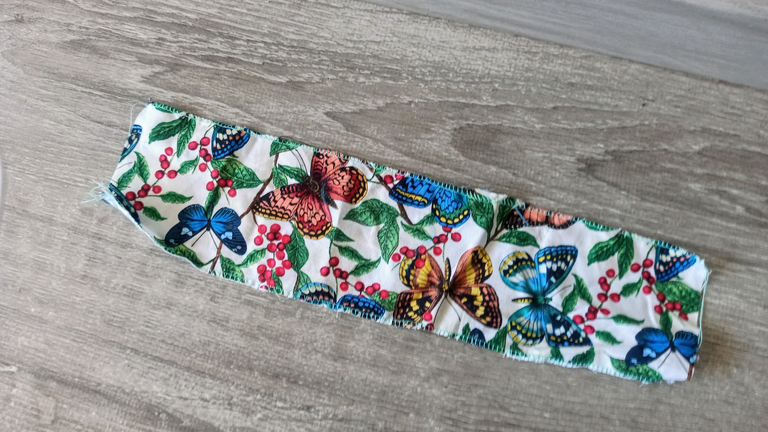
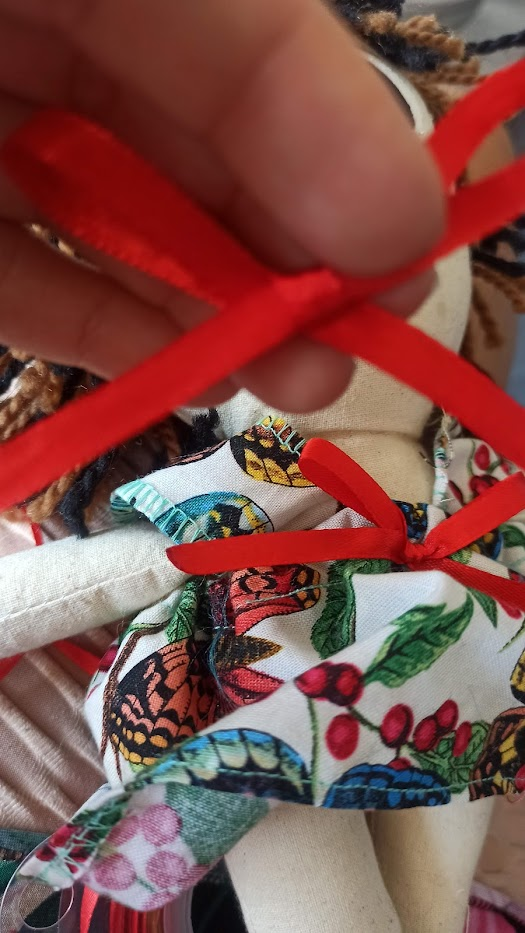
Ya con las tres piezas, planché para quitar toda arruga a la tela, también para doblar y aplanar bien los bordes de los ruedos de la falda del vestido, esto ayuda a tener un mejor acabado. Al rectángulo grande le hice un dobladillo con puntada en zig zag o simulando el overlock, luego otro dobladillo con puntada recta simple. Para los tirantes del vestido de la muñeca de tela en los bordes solo hice una puntada overlock como detalle decorativo.
Once I had the three pieces, I ironed to remove all wrinkles from the fabric, also to fold and flatten the edges of the hems of the skirt of the dress, this helps to have a better finish. I hemmed the large rectangle with a zig zag stitch or overlock stitch, then hemmed it with a simple straight stitch. For the straps of the fabric doll's dress, I only made an overlock stitch on the edges as a decorative detail.
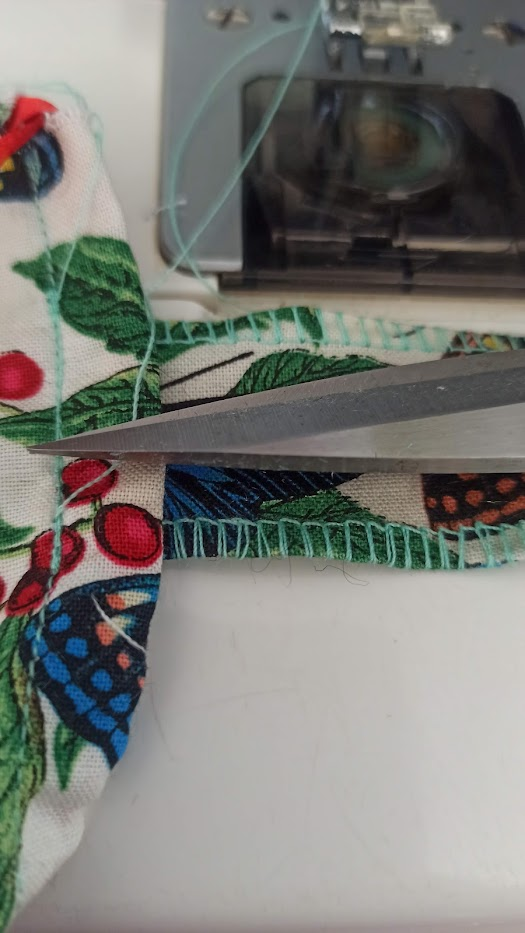
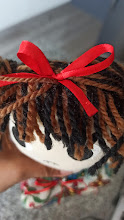
En el top de la falda hice un canal, por donde atravesé la cinta, ajustando a la medida de la cintura de la muñeca y finalmente hice un lazo anudando los extremos de la cinta, luego cerré el rectángulo de la falda por el revés con costura overlock y recta. Luego fue el turno de los tirantes, con ayuda de alfileres los sujeté en los lados correspondiente y pase una costura recta simple, para finalizar, le hice un lazo para decorar el frente del vestido que combina con el de la parte trasera y el de su cabeza.
On the top of the skirt I made a channel, through which I crossed the ribbon, adjusting it to the waist measurement of the wrist and finally I made a bow by knotting the ends of the ribbon, then I closed the rectangle of the skirt on the back with an overlock and straight seam. Then it was the turn of the straps, with the help of pins I pinned them on the corresponding sides and sewed a simple straight seam, to finish, I made a bow to decorate the front of the dress that combined with the one on the back and her head.

Así es como se hace el fácil vestido para la muñeca de tela Alegría, ideal para principiantes en la costura. Agradecería sus comentarios y sugerencias. Las fotos son registro personal. Gracias hivers siempre por el apoyo y constancia, nos vemos en una próxima obra, si tienen alguna idea dejenmelo saber. Para más inspiración visiten mi perfil y el de @needleworkmonday.
This is how to make the easy dress for the Alegria fabric doll, ideal for beginners in sewing. I would appreciate your comments and suggestions. The photos are personal records. Thanks hivers always for the support and constancy, see you in the next work, if you have any ideas let me know. For more inspiration visit my profile and @needleworkmonday.
She is so sweet, @afrikablr !! What a great face, and her dress is a glorious fabric: I adore fabric with fruits, flowers, birds, butterflies - this one is deliziosa!
Thanks for appreciating my art, and yeah, the fabric is so cute.
Thank you for sharing this post on HIVE!
Your content got selected by our fellow curator stevenson7 & you just received a little thank you upvote from us for your great work! Your post will be featured in one of our recurring compilations which are aiming to offer you a stage to widen your audience within the DIY scene of Hive. Stay creative & HIVE ON!
Please vote for our hive witness <3
Thanks a Lot for supporting me💖🌷
Saludos @afrikablr, te quedó muy lindo el vestido, hacer estos proyectos requiere paciencia, he hecho pocos vestidos para muñecas, las prendas pequeñas requieren especial atención y cuidado.
Bendiciones!
Ahora Belkys, tienes toda la razón. A mí me gusta hacer trabajo miniatura pero realmente me llevan tiempo, sim embargo siempre da alegría el final.
Ahora Alegría está más contenta, ya tiene un hermoso vestido nuevo, le quedo muy bien amiga la felicito, saludos 🖖
Hola Marly, muchas gracias, yo también estoy contenta con toda la receptividad 🎆💖
Es un vestido sencillo, bonito y colorido, la muñeca luce muy bien.
Gracias por comapartir, saludos!
Siii, es todo lo que quería lograr, gracias por apreciarlo 🤩
Amé el vestido de mariposa, quedo muy colorida, además tan tierna y muy feliz 😃.
Muchísimas gracias por apreciarlo 💖🤩
Sin duda, la expresión en su rostro además de felicidad, transmite mucha ternura, su nombre la describe perfecto.
Su vestido esta muy lindo, me encanta el estampado de mariposas.
Que bonito tu comentario, me motiva cuando las personas se detienen como tú a leer y observar los detalles. Muchas gracias ❤️
The rewards earned on this comment will go directly to the people sharing the post on Twitter as long as they are registered with @poshtoken. Sign up at https://hiveposh.com.
Hace mucho no te recibía a ti. Mil gracias ☺️, no sabes cuánto me emociona 💖🌅❤️
i love it!!!!😍
Thanks a lot.
Que adorable