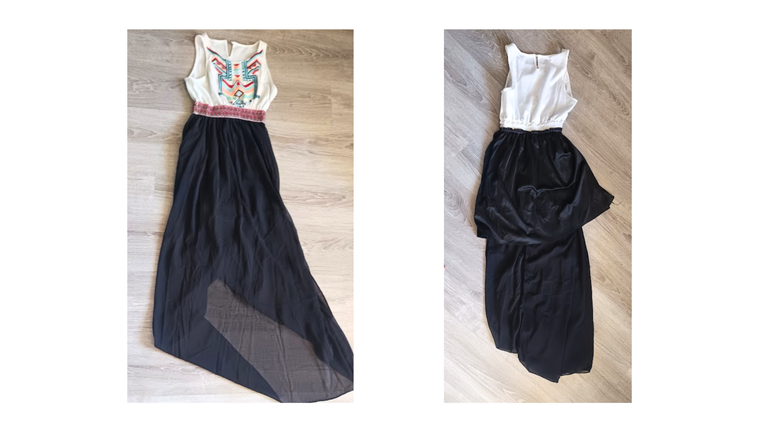
Hola amantes de las agujas e hilos ¿no les pasa que tienen ropa y repentinamente deciden transformarla? De eso el tutorial de hoy, más allá de un reuso o reciclaje, aquí estoy dándole segunda vida a un vestido largo, el cual me sorprendió dándome un trabajo distinto al cual planifiqué, sin embargo el resultado es divino, esperen hasta el final.
Hello needleworkers, Do you have clothes and suddenly decide to transform them? That's what today's tutorial is about. Beyond reuse or recycling, here I am giving a second life to a long dress, which surprised me by giving me a different job than I planned, however the result is divine, wait until the end.
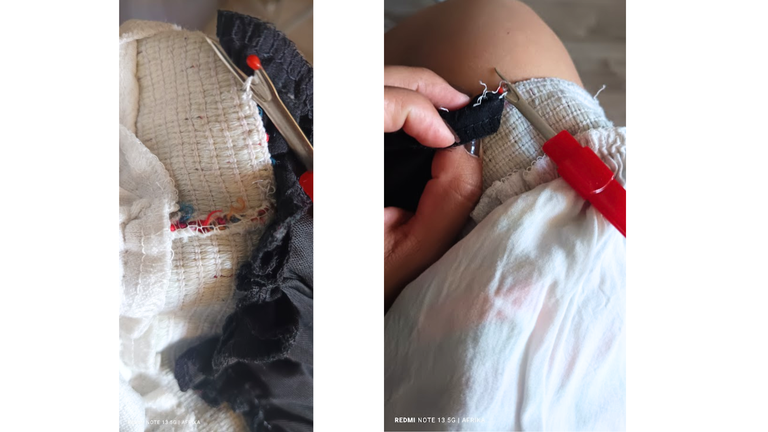
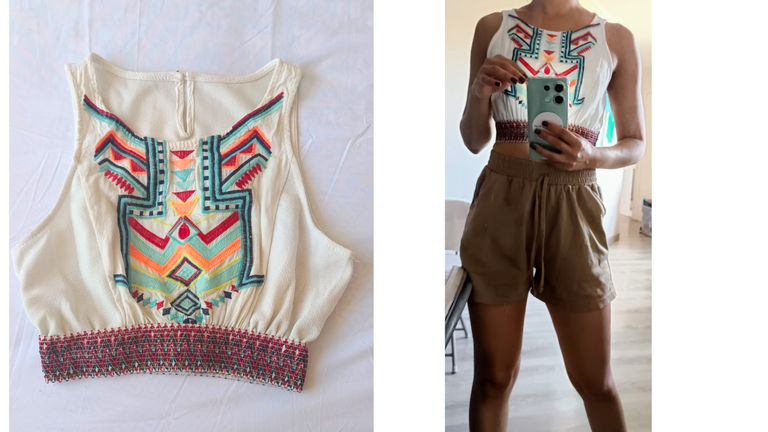
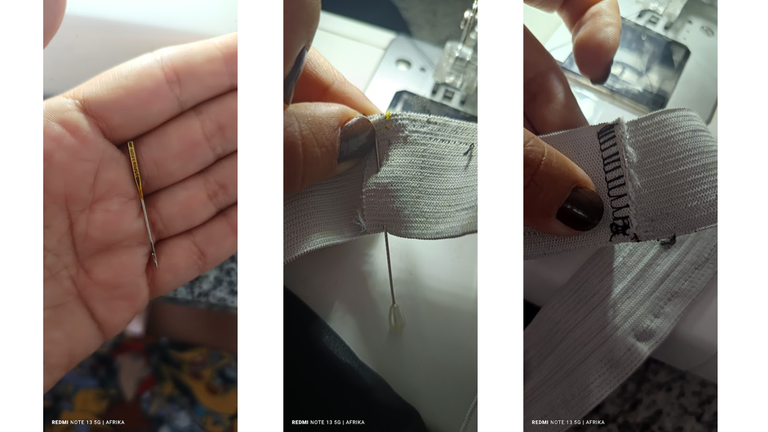
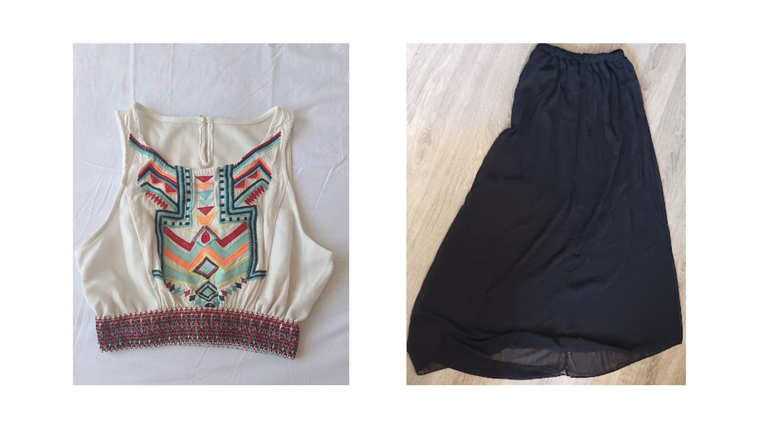
Lo primero fue buscar el saca costura, una elástica, hilos, agujas, tijeras y mucha decisión; luego fue darle la vuelta al vestido, para separar las piezas, con mucho cuidado usando el saca costura. Al tener separado todo confirmo que el top era donde estaba el cinturón elástico, muy bonito por cierto, allí ya tenía el top listo, lo unico fue limpiarlo de excedentes de hilos
The first thing was to find the seam ripper, an elastic, threads, needles, scissors and a lot of decision; then I turned the dress over, to separate the pieces, very carefully using the seam ripper. When I had everything separated I confirmed that the top was where the elastic belt was, very nice by the way, there I had the top ready, the only thing was to clean it of excess threads.
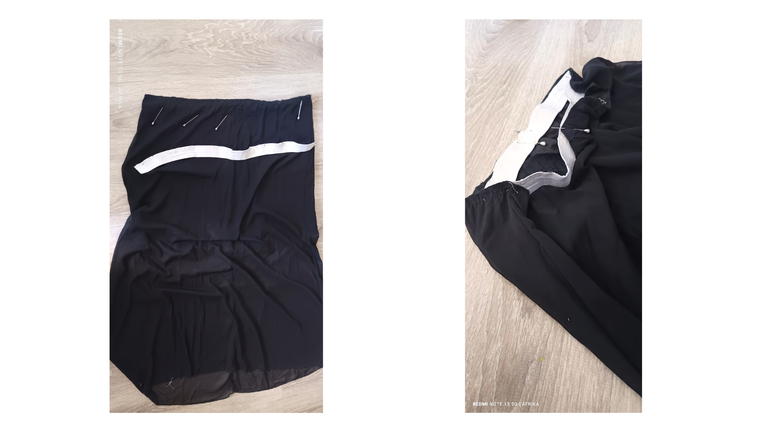
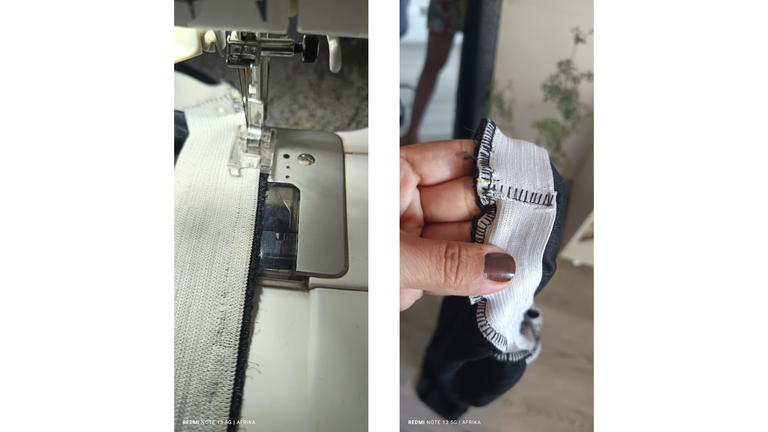
Acto seguido, fue armar la falda. Ubicar la elástica en 4 puntos especifico con ayuda de alfileres, sin embargo, les recomiendo unirla antes de este paso, con una costura en zig zag o similar a la overlock, como se muestra en la imagen, pues yo lo hice al revés y se movió un poco el ajuste, pero igual resultó.
Next, was to assemble the skirt. Place the elastic in 4 specific points with the help of pins, however, I recommend joining it before this step, with a zig zag stitch or similar to the overlock, as shown in the image, because I did it backwards and the adjustment moved a little, but it still worked.
Luego, ajuste la máquina de coser en cuanto a tensión y puntada, ya que va una pieza elástica y una tela fina, por esto mismo cambia a una aguja 90/60 o punta de bola también les puede funcionar. Después, cosí por todo el borde tanto de la falda como de las elastica, uniendolas con la puntada similar a la overlock, pero ustedes pueden hacerla en zig zag.
Next, adjust the sewing machine for tension and stitch, as there is a piece of elastic and a thin fabric, so switching to a 90/60 needle or ball point may also work for you. Next, I sewed all around the edge of both the skirt and the elastic, joining them with a stitch similar to the overlock, but you can zig zag it.
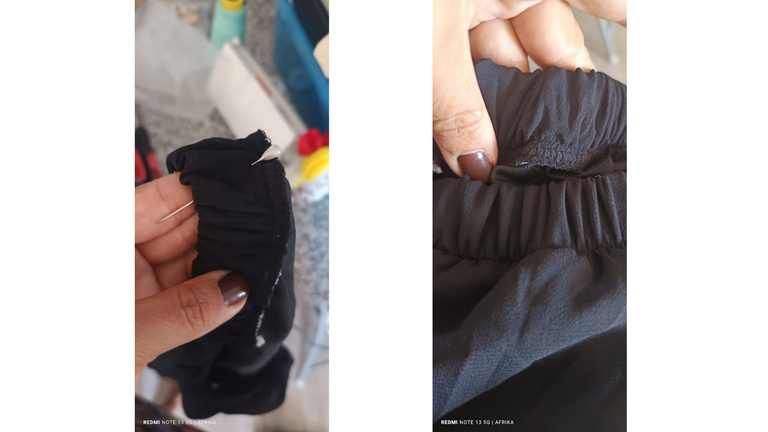
Para esa costura fui estirando un poco las piezas, porque de esa forma la elástica se frunce con la tela permitiendo la elasticidad en la pieza completa. Luego, para afirmar y darle la forma de cinturón, le di la vuelta hacia adentro a la primera costura, para luego asentar con una costura recta corta y apretada, pues así respeta el fruncido anteriormente, si es de tu agrado puedes hacer un par costuras rectas para afirmar y asentar el cinturón.
For this seam I stretched the pieces a little, because that way the elastic gathers with the fabric, allowing the elasticity in the whole piece. Then, in order to secure and give it the shape of a belt, I turned the first seam inwards, and then I sewed a short and tight straight seam, because this way it respects the previous gathering. If you like, you can make a couple of straight seams to secure and secure the belt.
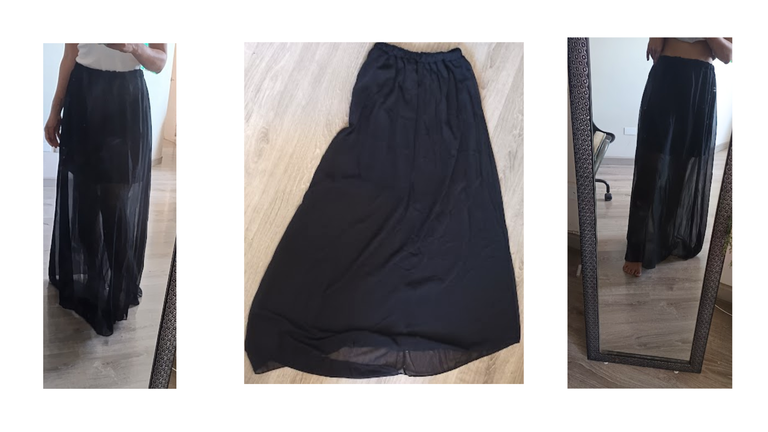
Y, así quedaron listas ambas piezas ¿qué les pareció? Siempre es bueno darle una segunda vida a tus piezas, bueno si da la calidad de las telas. Las fotos son registro propio hechas con un redmi 13 note, editadas en canva. ara más inspiración pueden visitar mi blog y el de la hermosa comunidad @needleworkmonday.
And, this is how both pieces were ready, what did you think? It's always good to give a second life to your pieces, well if it gives the quality of the fabrics. The photos are my own record made with a redmi 13 note, edited in Canva. For more inspiration you can visit my blog and that of the beautiful community @needleworkmonday.
--
Se ve genial, valió la pena todo el trabajo, el top es precioso, me encanto.😃
Totalmente valió el esfuerzo. Muchas gracias 😊
Felicidades querida @afrikablr 🤗
Awesome and wonderful
Thanks a Lot🪄
Te quedaron muy hermosos te felicito
Muchas gracias ☺️