Hola amigos de la costura!.😊🍓
Hello sewing friends!😊🍓
Antes de comenzar, les doy la bienvenida a mi blog; quiero aprovechar éste medio para enviarles un gran saludo y un fuerte abrazo a todas esas personas bellas que día a día nos sorprenden con su talento a la hora de coser y diseñar. Para todos los que integran ésta hermosa comunidad de costura les envio un gran saludo y mi sincera admiración, besos y abrazos.
Before starting, I welcome you to my blog; I want to take advantage of this medium to send a big greeting and a big hug to all those beautiful people who surprise us every day with their talent when it comes to sewing and designing. For all those who make up this beautiful sewing community, I send you a big greeting and my most sincere admiration, kisses and hugs.
Hoy quiero compartir con todos, un tutorial, donde les enseñaré como elaborar un cómodo short de rayas naranja aprovechando los colores de verano. Siempre me ha gustado diseñar para mis pequeños, y que puedan usar alguna prenda de vestir hecha por mis manos, creo que eso nos llena de mucho orgullo y hace que el que lo use sea especial y único, jeje!!
Today I want to share a tutorial with everyone, where I will teach you how to make comfortable orange striped short taking advantage of the colors of summer. I have always liked to design for my little ones, and that they can wear some garment made by my hands, I think that fills us with a lot of pride and makes whoever wears it special and unique, hehe!
Todos esperamos con mucho entusiasmo la llegada del verano, ya que sin duda podemos llevar a nuestros pequeños a disfrutar de las playas, ríos o simplemente llevarlos a una piscina.
We all look forward to the arrival of summer since we can surely take our little ones to enjoy the beaches, the rivers or simply take them to a swimming pool.
Por ésa razón les presento mi tutorial de hoy, donde les mostraré el paso a paso, como elaborar un lindo short de rayas, que quedará perfecto para la ocasión; así que si no hayas que traje de baño comprarles, te digo que ¡no te compliques! hazlo en casa fácil y sencillo y quedará muy hermoso que a ellos les encantará.
That is why today I present my tutorial, where I will show you step by step how to make cute striped shorts, which will be perfect for the occasion; So if you don't have a bathing suit to buy, I tell you not to complicate yourself, do it at home easy and simple and it will be very nice that they will love it.
Si eres una madre un poco conservadora como yo, entonces te invito a que lo intentes en casa, puedes tomar ésta idea y hacerla para los chicos, solo cambia los colores, te recomiendo tonos azules o puedes dejarlo en naranja que también va muy bien con ellos.
A continuación mi paso a paso, acompañenme.
If you are a slightly conservative mother like me, then I invite you to try it at home, you can take this idea and make it for the boys, just change the colors, I recommend blue tones or you can leave it in orange that also goes very well with they. Here is my step by step, come with me.
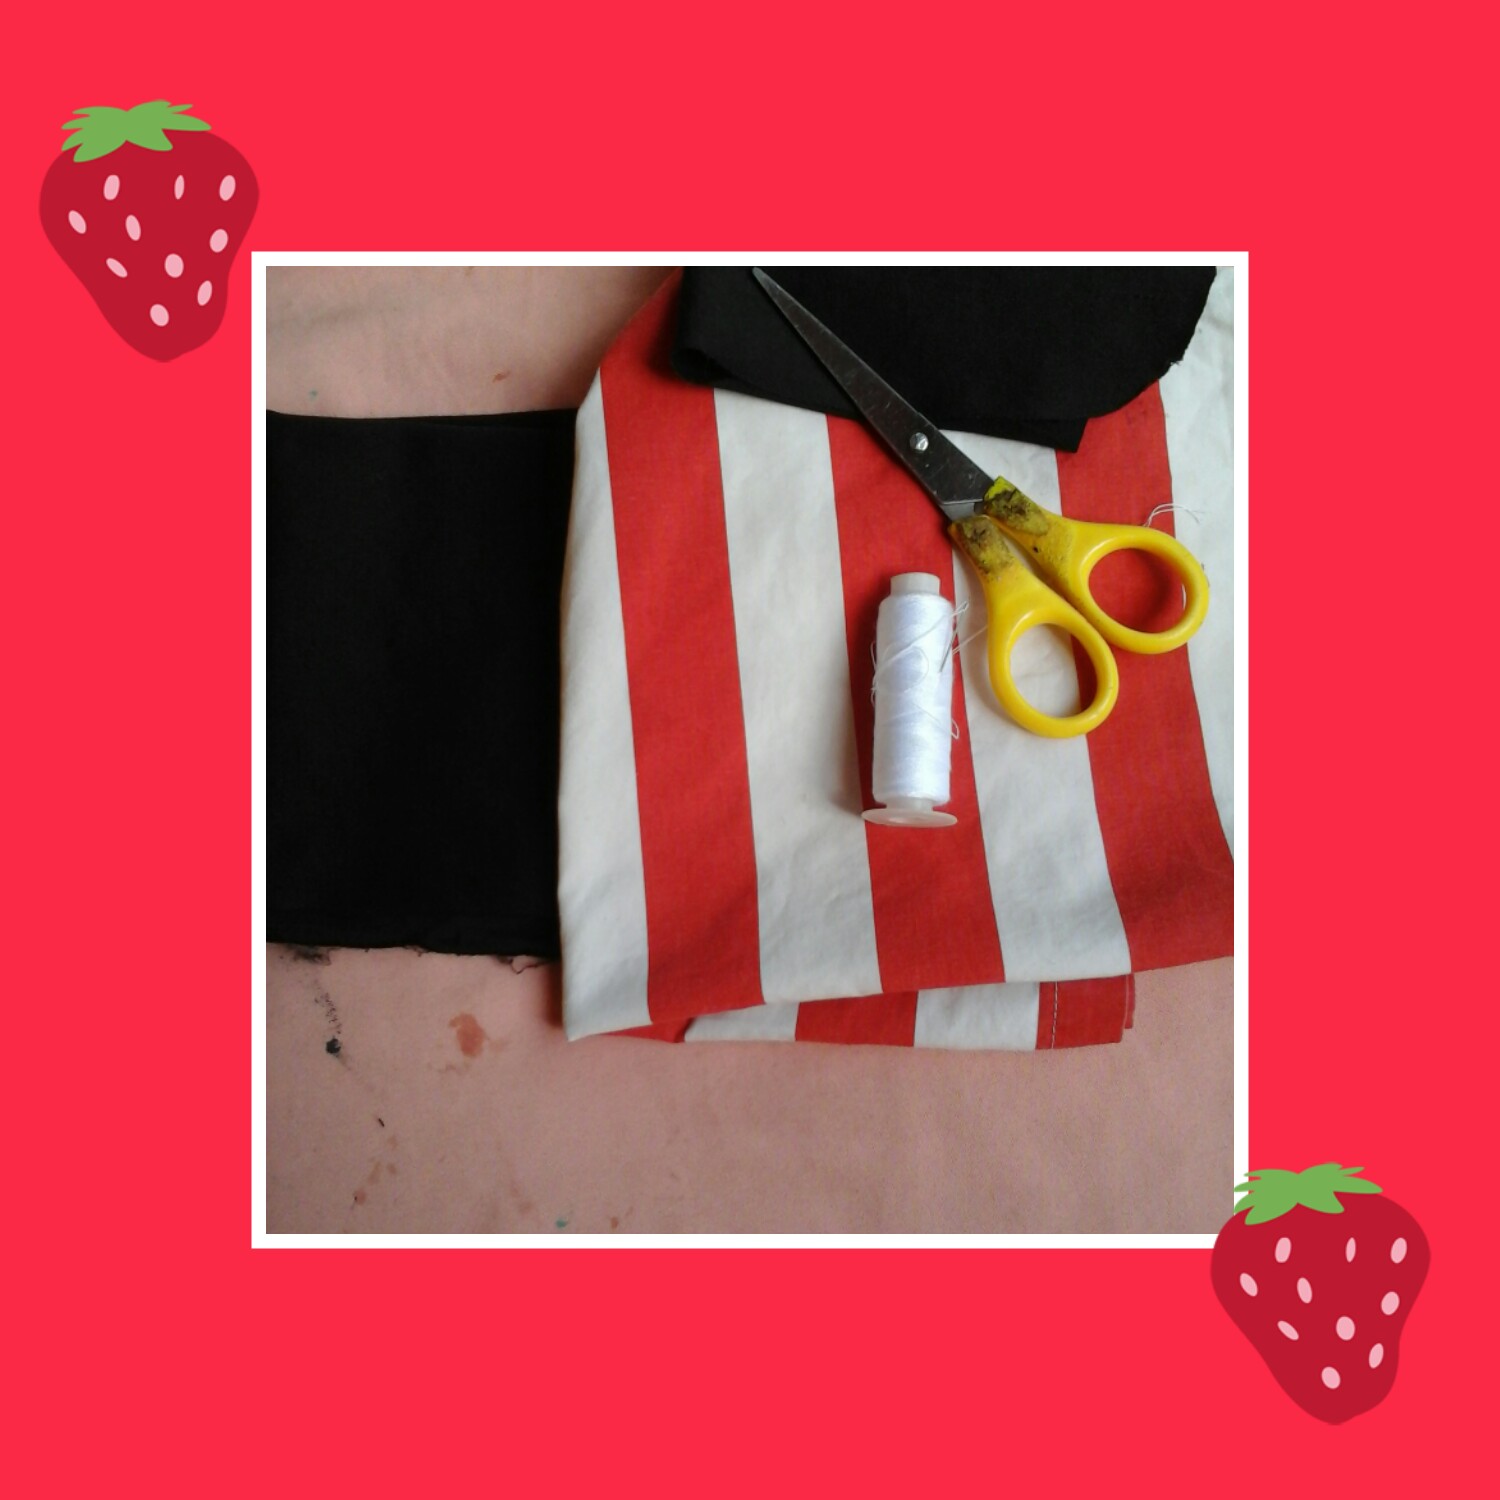
Para realizar éste llamativo shorts de rallas, necesitaremos los siguientes materiales.
Materiales.✂
- 1mt de tela con rayas.
- Tijera.
- 20cm de tela negra.
- Hilo y agua.
- Tiza para marcar tela o lápiz.
- Patrones de tela.
- Elástica.
To make this striking striped shorts, we will need the following materials.
Materials.✂
- 1mt striped fabric.
- Scissors.
- 20cm of black fabric.
- Thread and water.
- Chalk to mark fabric or pencil.
- Cloth patterns.
- Elastic.
Paso 1.
Amigos para iniciar la elaboración de éste short, tomamos la tela de rayas doblamos y colocamos el patrón sobre ella para marcar su forma. En éste caso utilicé un patrón que elabore con tela, puedes elaborar uno de cartón o papel.
Éste patró es talla 8, puedes usar la talla que prefieras, una vez que hayamos marcado la forma del patrón, procedemos a recortar, de ésta manera obtenemos dos pares de piezas que seguidamente uniremos con costura.
Step 1. ✂
Friends, to start the elaboration of this shorts, we take the striped fabric, fold it and place the pattern on it to mark its shape. In this case I used a pattern that I made with fabric, you can make one of cardboard or paper. This pattern is size 8, you can use the size you prefer, once we have marked the shape of the pattern, we proceed to cut it, in this way we obtain two pairs of pieces that we will then sew together.
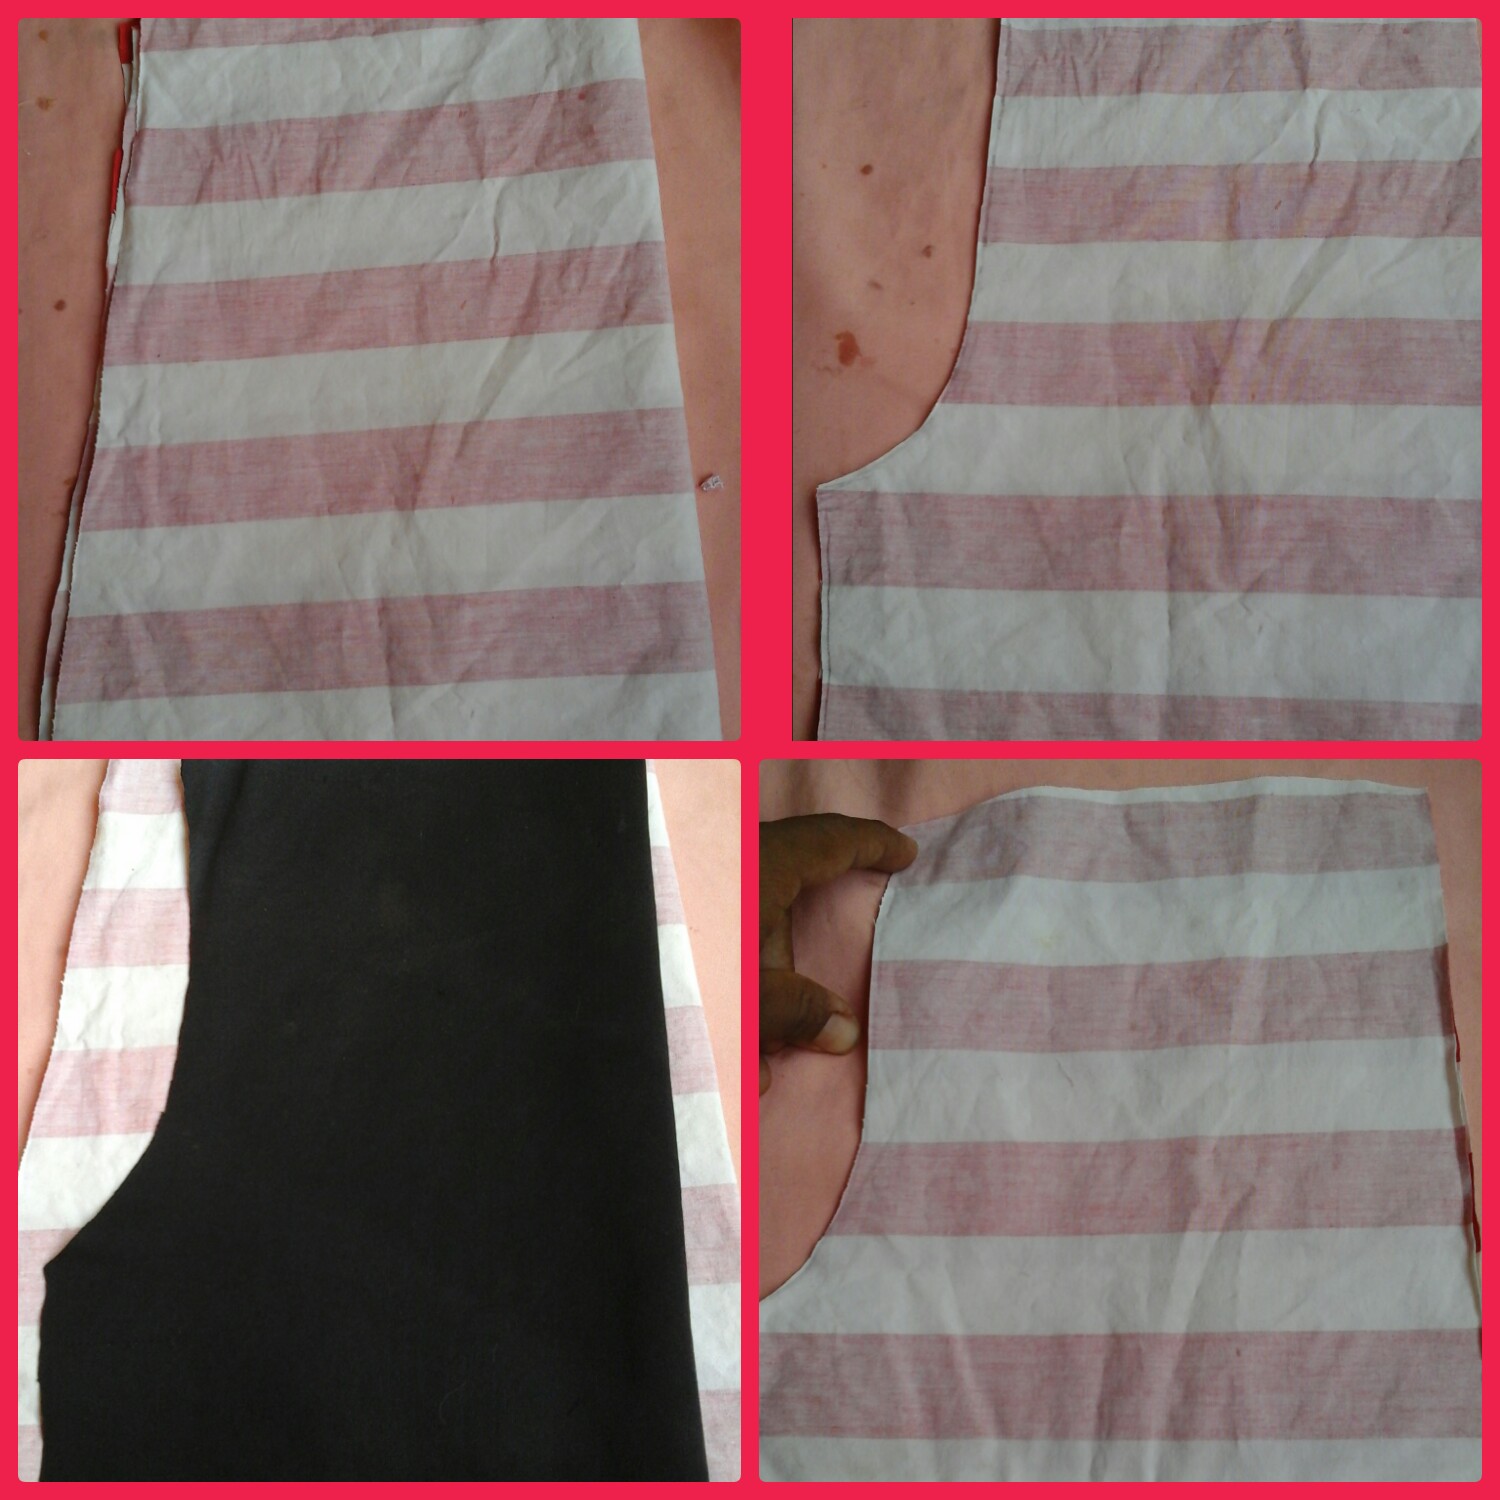
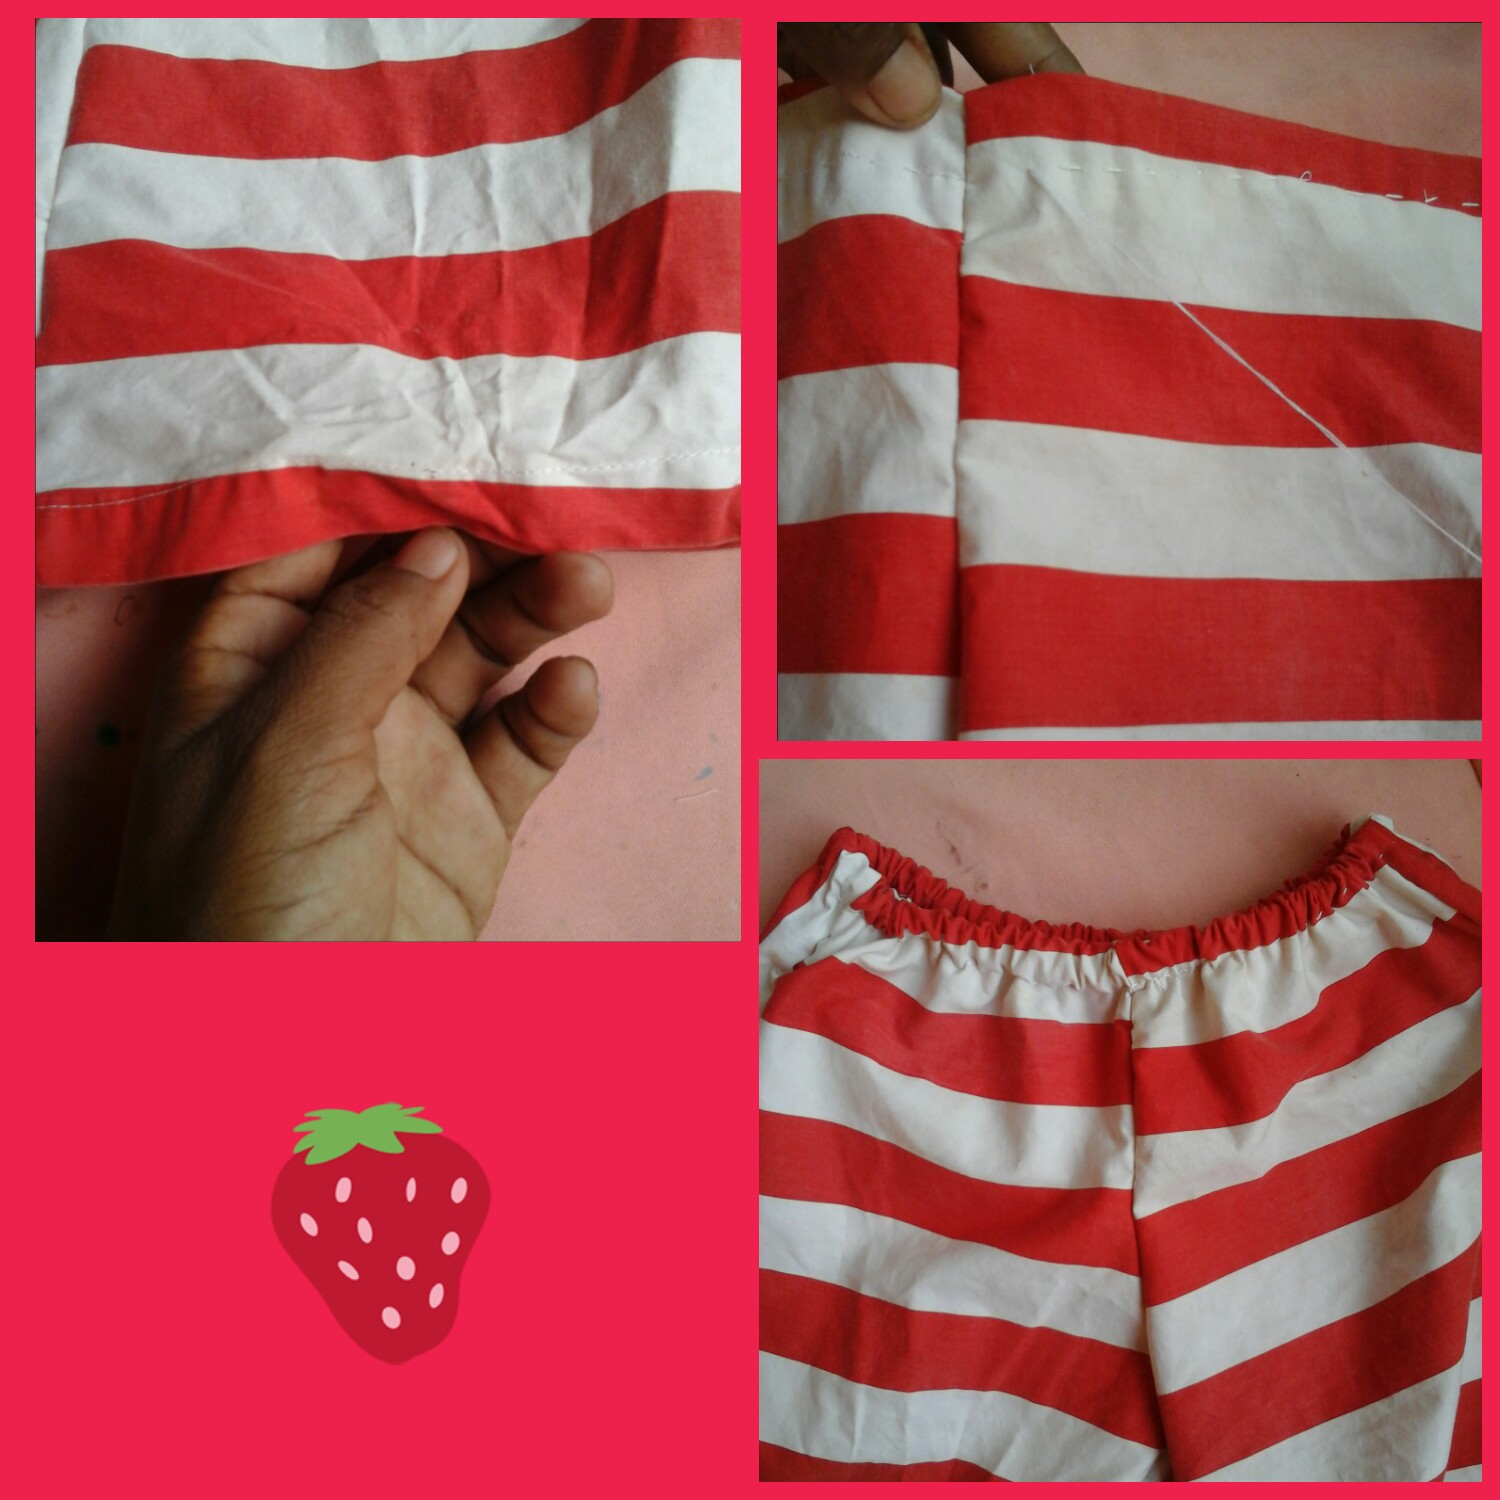
Paso 2.
Cosemos la parte trasera de éstas piezas, dejando la parte de las piernas sin costura aun, una vez que hayamos terminado de coser procedemos a unir las piezas cosiendo la parte inferior justo en las piernas.
Step 2.✂
We sew the back of these pieces, leaving the legs without seams, once we have finished sewing we proceed to join the pieces by sewing the lower part right on the legs.

Paso 3.
Recortamos un par de tiras de la misma tela pero ésta vez las rayas deben quedar en forma vertical, ésta tira debe ser del mismo largo de la parte latetal del short, procedemos a cosemos. Una vez que hayamos terminemos de coser las tiras en los lados, procedemos a unir la parte trasera con la delantera para formar el short.
Step 3. ✂
We cut a couple of strips of the same fabric but this time the strips must be vertical, this strip must be the same length as the side of the shorts, we proceed to sew. Once we have finished sewing the strips on the sides, we proceed to join the back with the front to form the short.
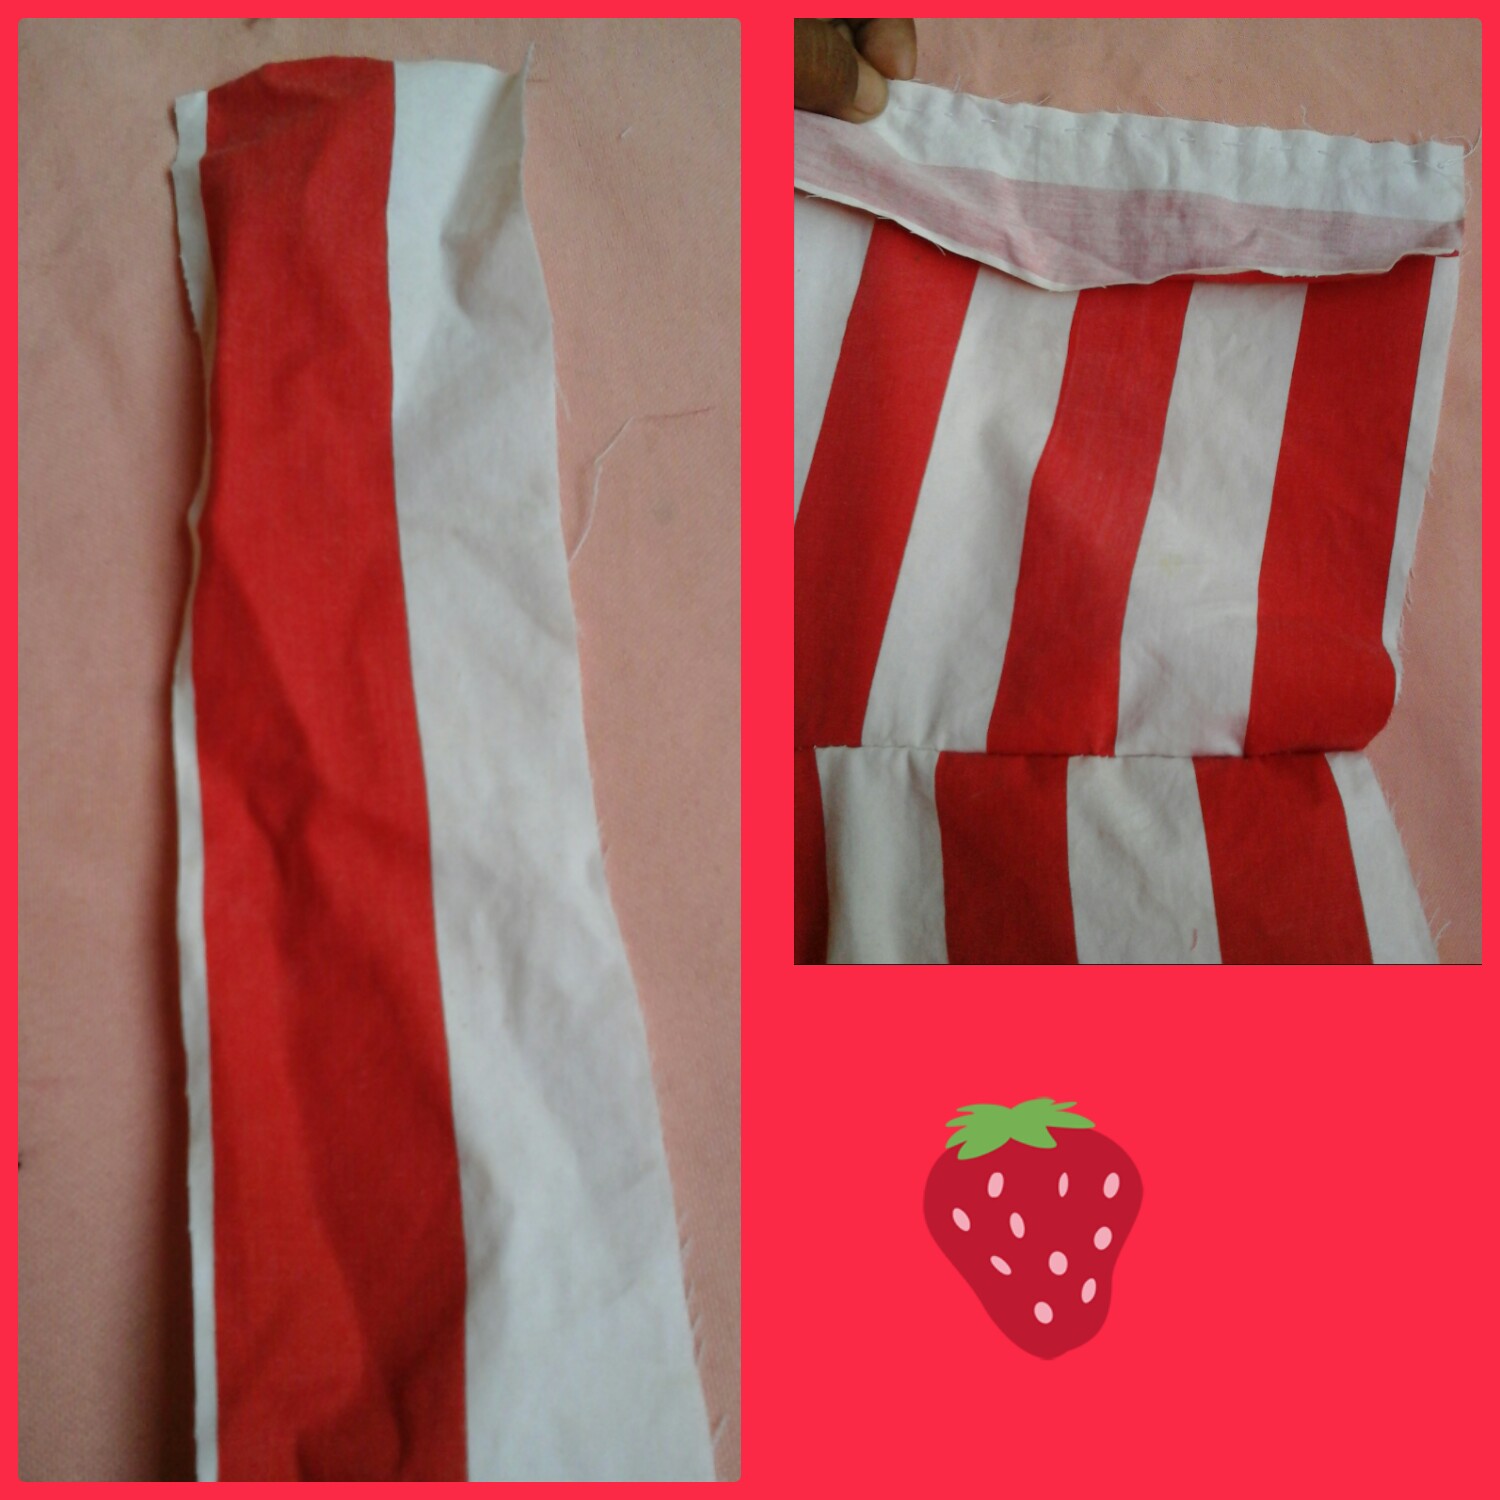
Paso 4.
Doblamos 3cm del borde superior llevandolo hacia la parte revés del short y cosemos dejando un pequeño espacio sin costura para poder introducir la elástica. Una vez que hayamos terminado de coser, tomamos una aguja de tejer o otro objeto que nos ayude a introducir la elástica, finalmente cosemos los extremos de la elástica y cerramos la abertura, de ésta manera podrá adaptarse a la cintura.
Step 4. ✂
We fold 3cm of the upper edge taking it towards the wrong part of the shorts and we sew leaving a small space without seam to be able to introduce the elastic. Once we have finished sewing, we take a knitting needle or another object that helps us to introduce the elastic, finally we sew the ends of the elastic and close the opening, in this way it can adapt to the waist.
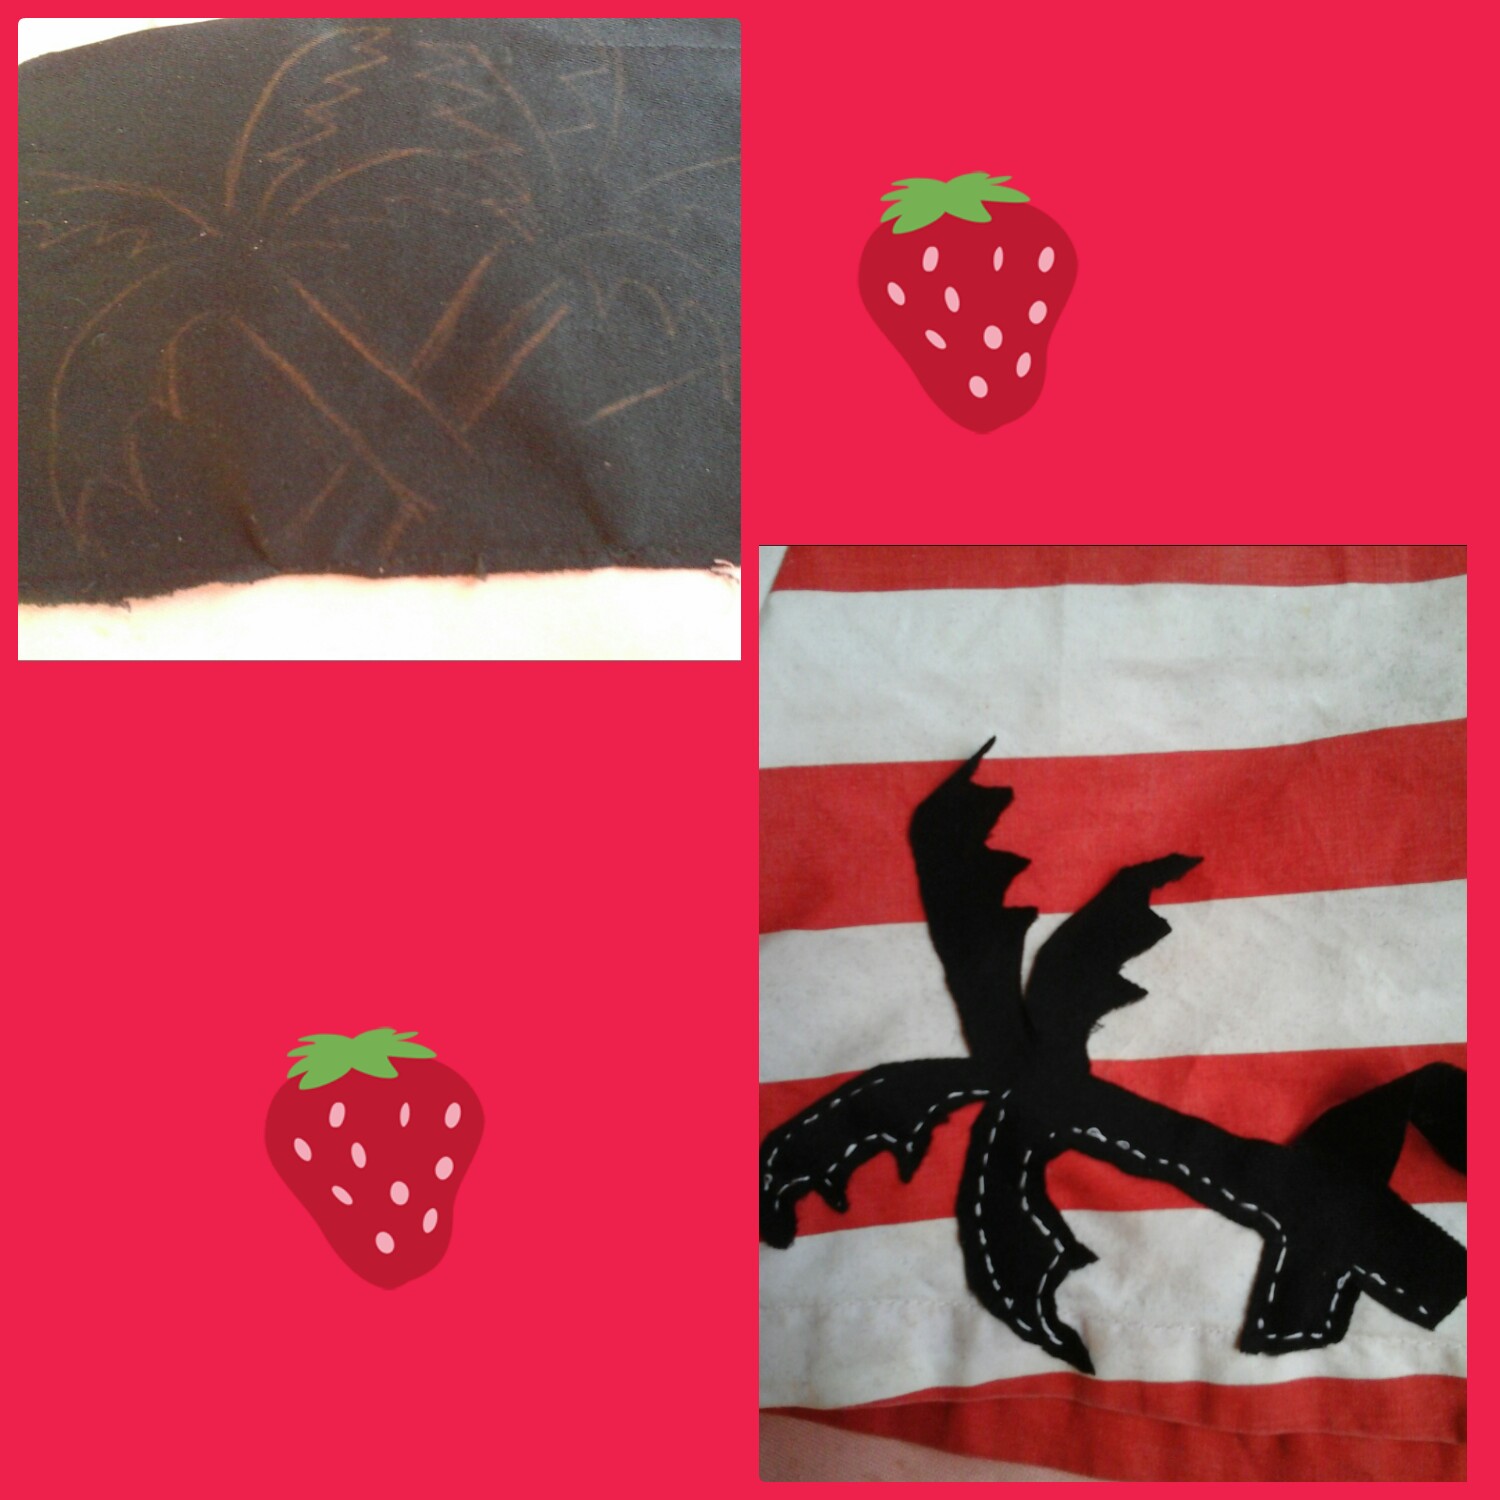
Paso 5.
Tomamos un trozo de tela negra, marcamos unas palmeras y recortamos, ésto solo es una decoración opcional; una vez que hayamos recortado procedemos a coser en la parte inferior del shorts justo en el lado de la pierna.
Step 5. ✂
We take a piece of black cloth, mark some palm trees and cut them out, this is only an optional decoration; once we have cut out we proceed to sew on the bottom of the shorts right on the side of the leg.
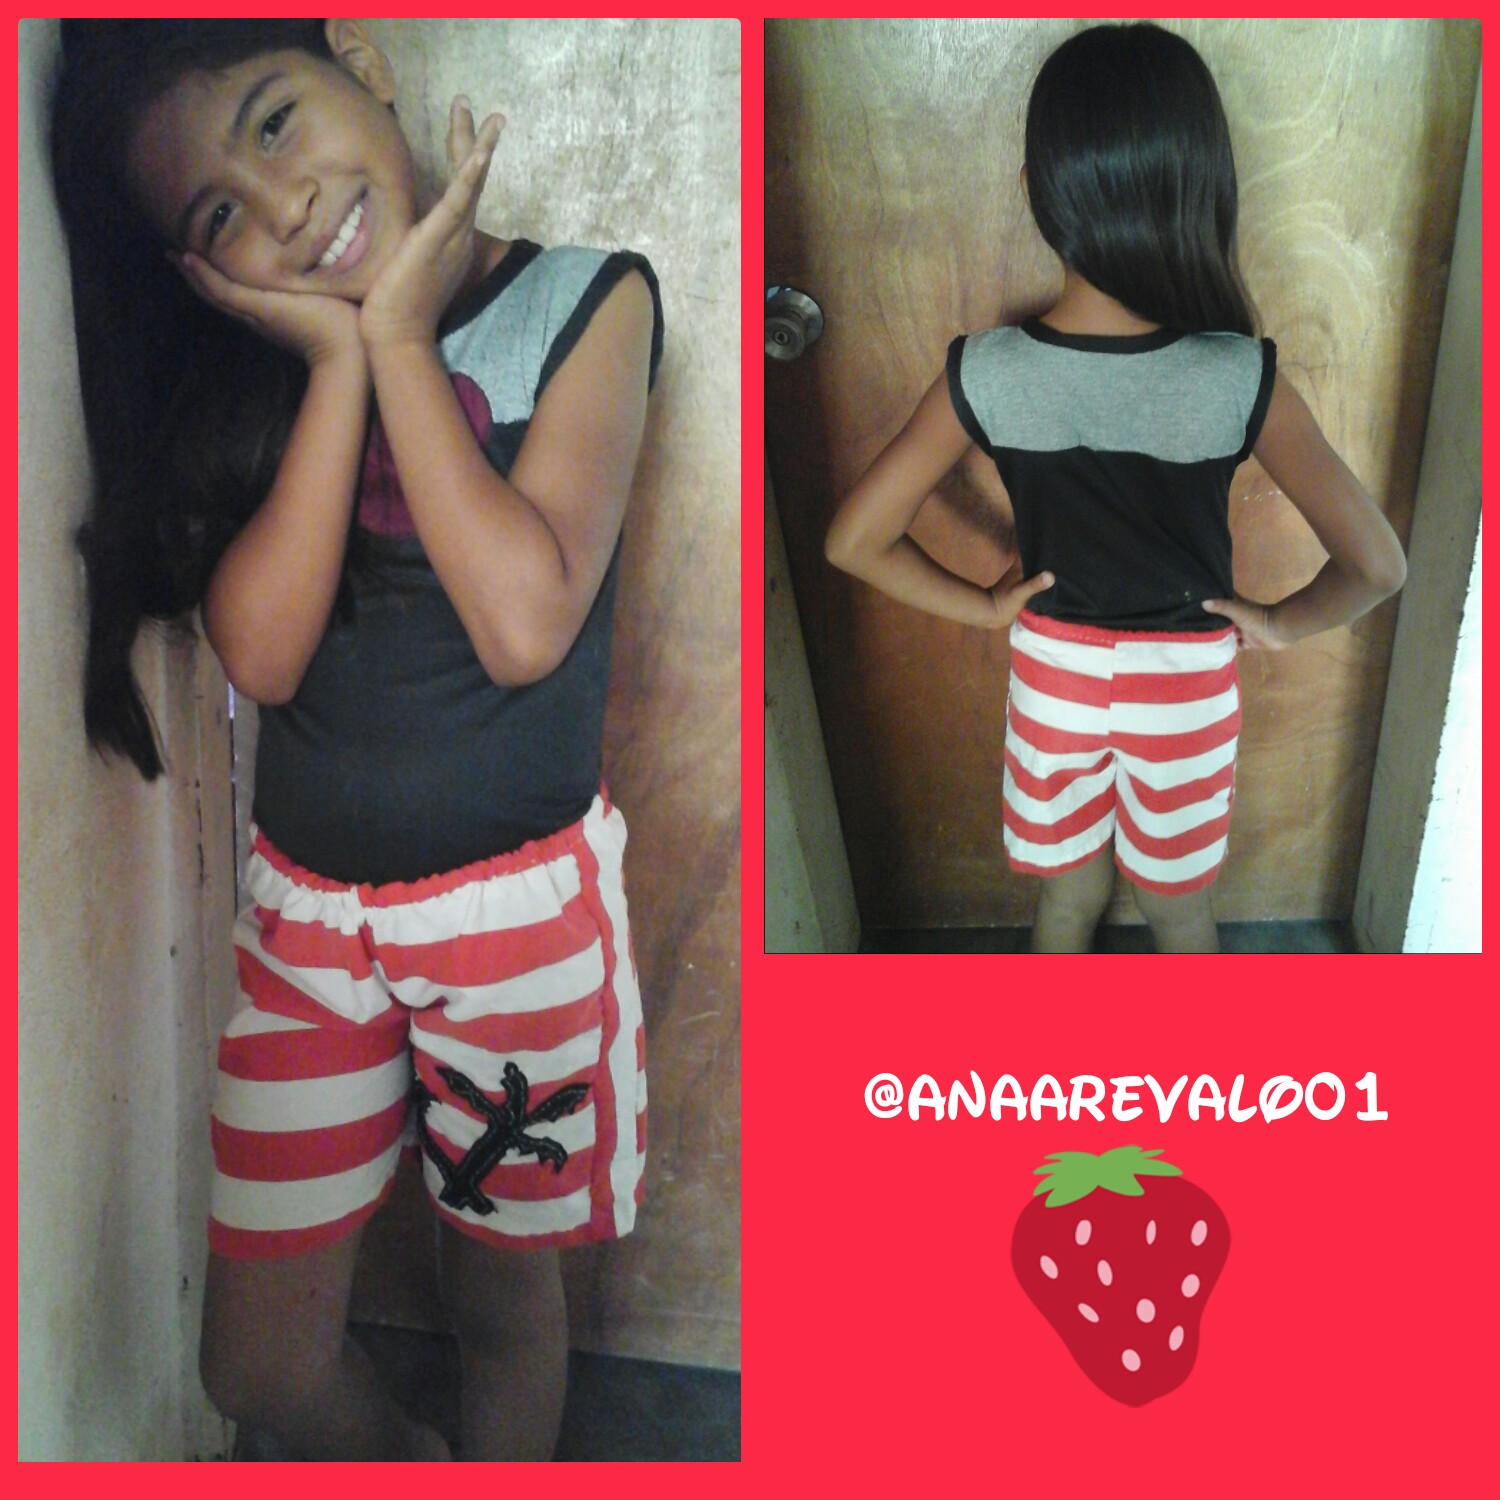
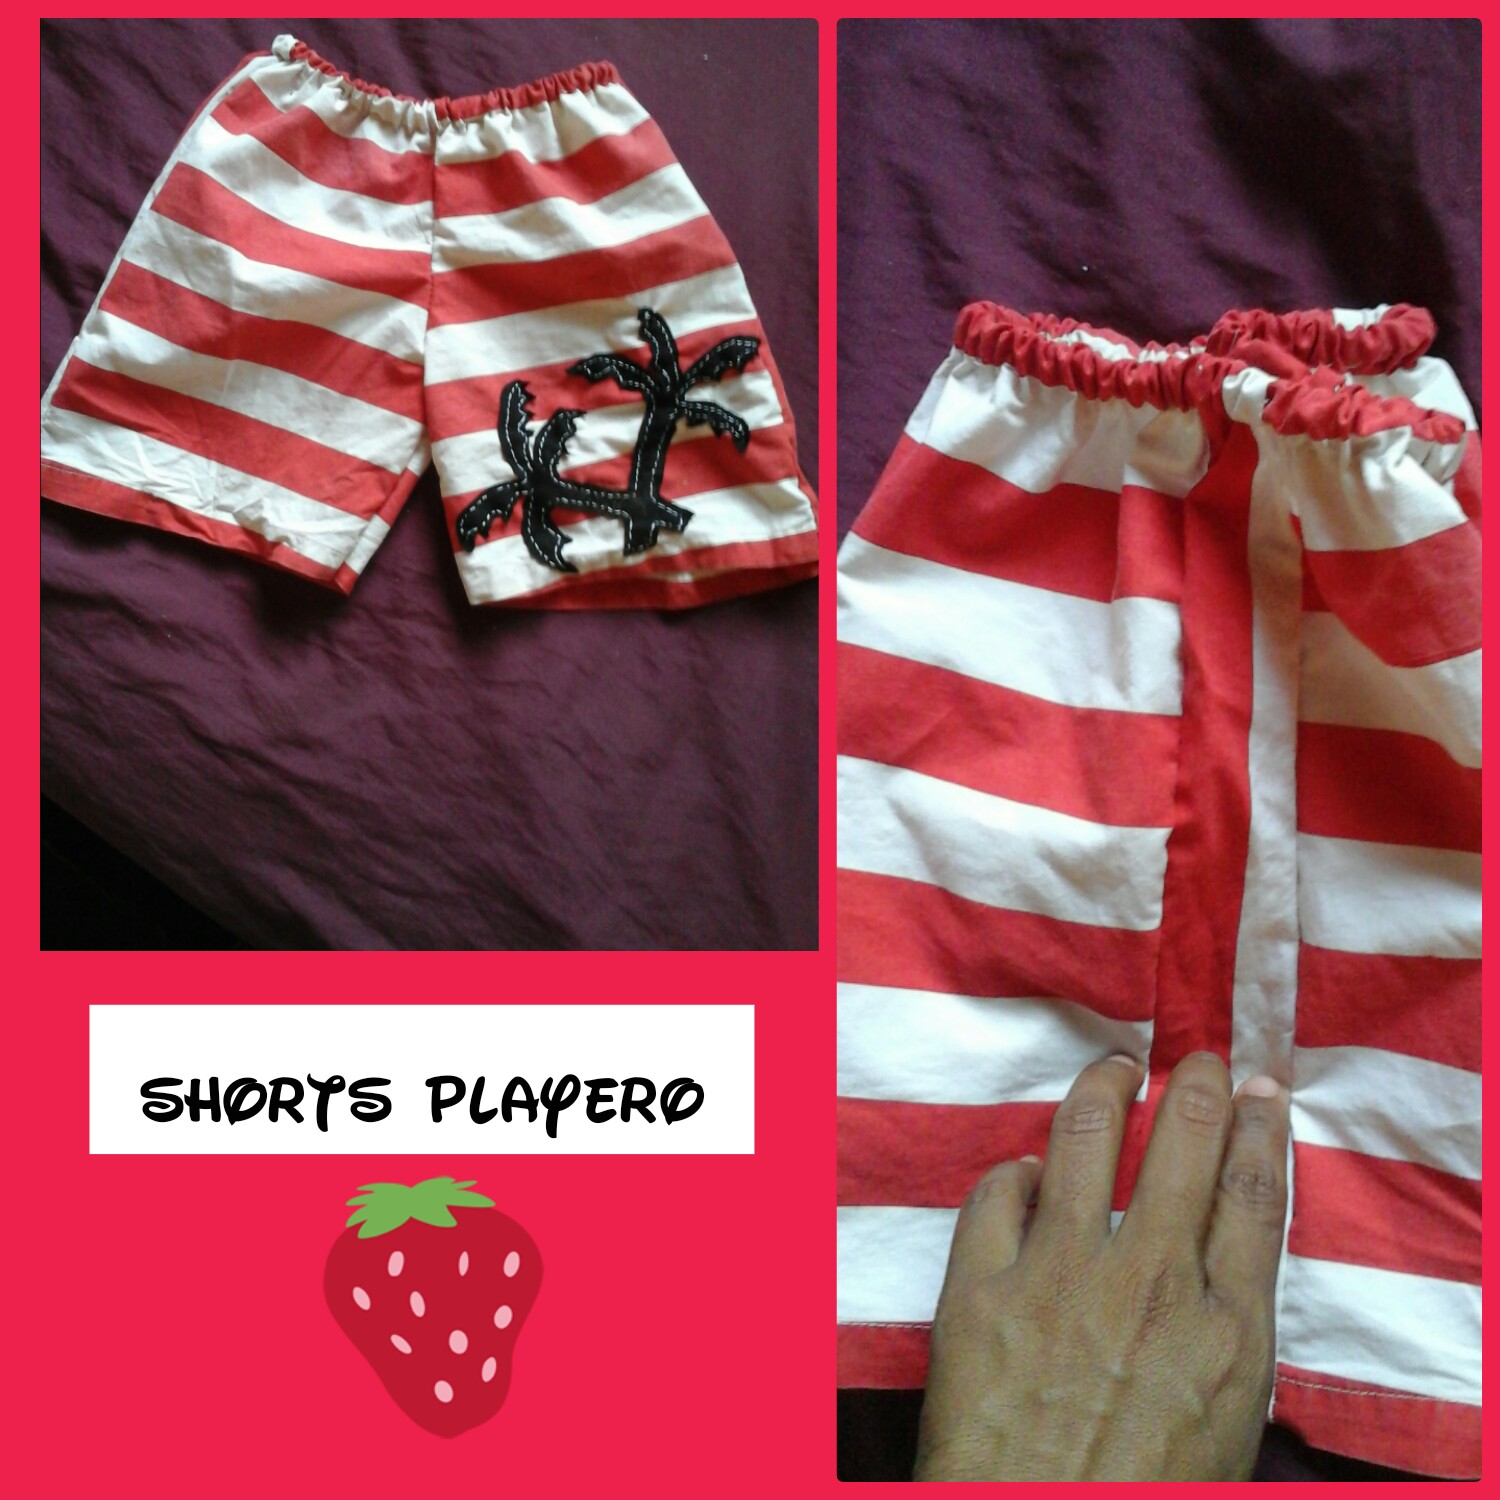
Trabajo final.🍓
Amigos este es el resultado final, vean como quedo y el toque playero que le da las rallas y la palmera, puedes colocarle un lindo cangrejo para ponerle un toque más infantil.
Final work. 🍓
Friends this is the final result, see how it looks and the beachy touch that the stripes and the palm tree give it, you can place a cute crab to give it a more childish touch.
Espero que les haya gustado mi trabajo de hoy, y les animo a poder realizarlo en casa, muchas gracias por visitar mi blog en @anaarevalo01, fue de sumo agrado poder compartir esta idea con todos, sin más que añadir me despido de todos deseandoles una hermosa tarde, cuidense mucho y hasta pronto.
I hope you liked my work today, and I encourage you to be able to do it at home, thank you very much for visiting my blog at @anaarevalo01, it was a great pleasure to be able to share this idea with everyone, without further ado I say goodbye to everyone wishing you a beautiful afternoon, take care of yourselves and see you soon.
Todas las fotos son de mi autoria capturadas por mi tablet Samsung galaxy.
Editadas por Collage_maker.
Traductor Español/inglés ( google.com).
All photos are my own, captured by my Samsung galaxy tablet.
Edited by Collage_maker.
Spanish/English translator (google.com).
Gracias por apreciar mi trabajo! lo hacemos con mucho cariño.
Muy hermoso
Gracias linda!.
This work is so nice and i enjoyed reading it. Thanks for sharing
Thank you for your support, I love that you like my work. Greetings!!
Your welcome
thank you!!😉
The short is so beautiful and it looks good on her, the tree design even enhance the beauty the more.
yes, well everything is letting our imagination fly. Thank you for appreciating my work, greetings!!👍