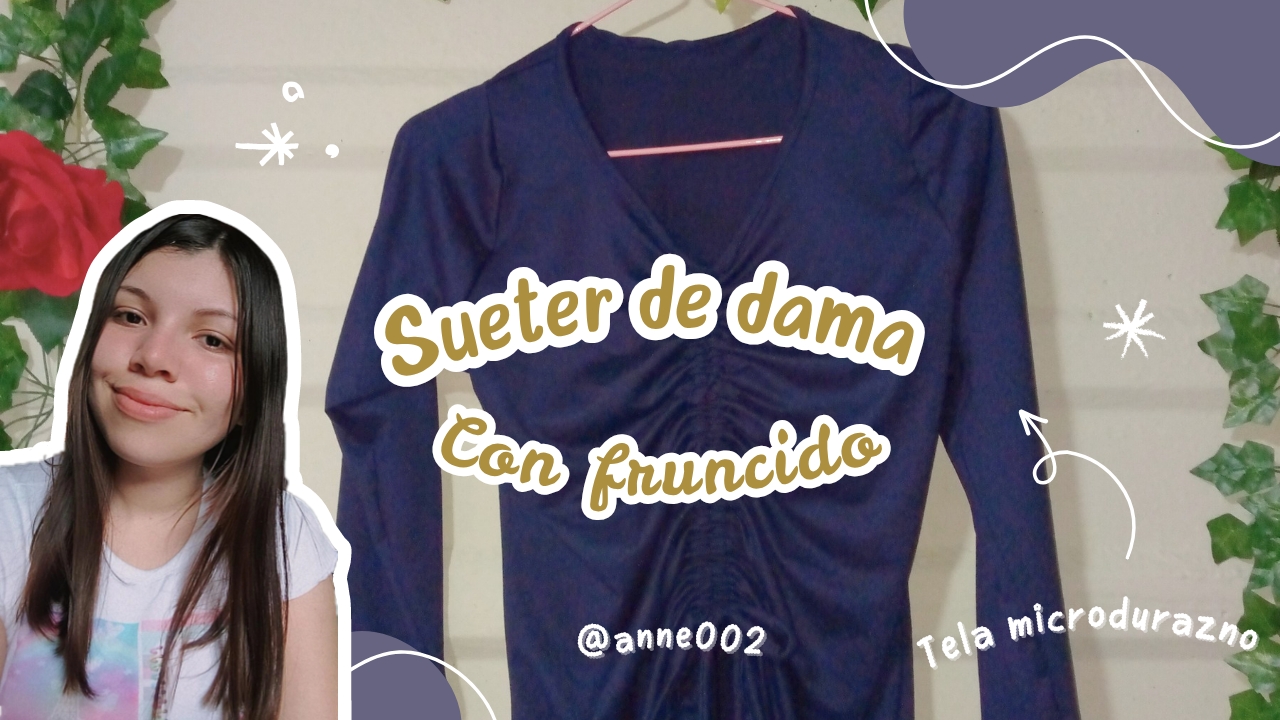

Good morning beautiful people, it is a pleasure to greet you who are here reading this blog, 🫂 I hope to know that you are well and in advance I send you a virtual hug, today I want to teach you how to make a very simple, versatile and comfortable ladies' sweater so that at any time you want to make one, well here is the tutorial just waiting for you 🤭 or if you were waiting for this tutorial, it has arrived so that you can also get to work and work those machines and that mind 😁 I will be teaching you how to make this beautiful sweater in a dark blue fabric shade, I chose it in this color because I felt I was missing one of these colors in my closet.
Ladies sweaters are an excellent garment for you when you only want to wear it both in cold and hot weather, of course in the cold to cover yourself from the sun and during the heat to cover yourself from the sun 🤭 but this is not just a common sweater because I will be making a gathered design in the front where there is a strip that makes the part where you make this gathering gather with the strip that I mentioned that it has, it makes your figure stand out and of course it is a sweater with a different model that you can add to your wardrobe.
If you like it and want to know how to make it, I'll leave you the steps so that if at any time you didn't know how to make this model you have the tutorial saved, we will use a garment as a reference measurement to make the pieces and cut them in the fabric, I always use a blouse that fits me well and I guide myself by it to be able to cut my pieces, so let's go with what we will use and then go straight to the tutorial.
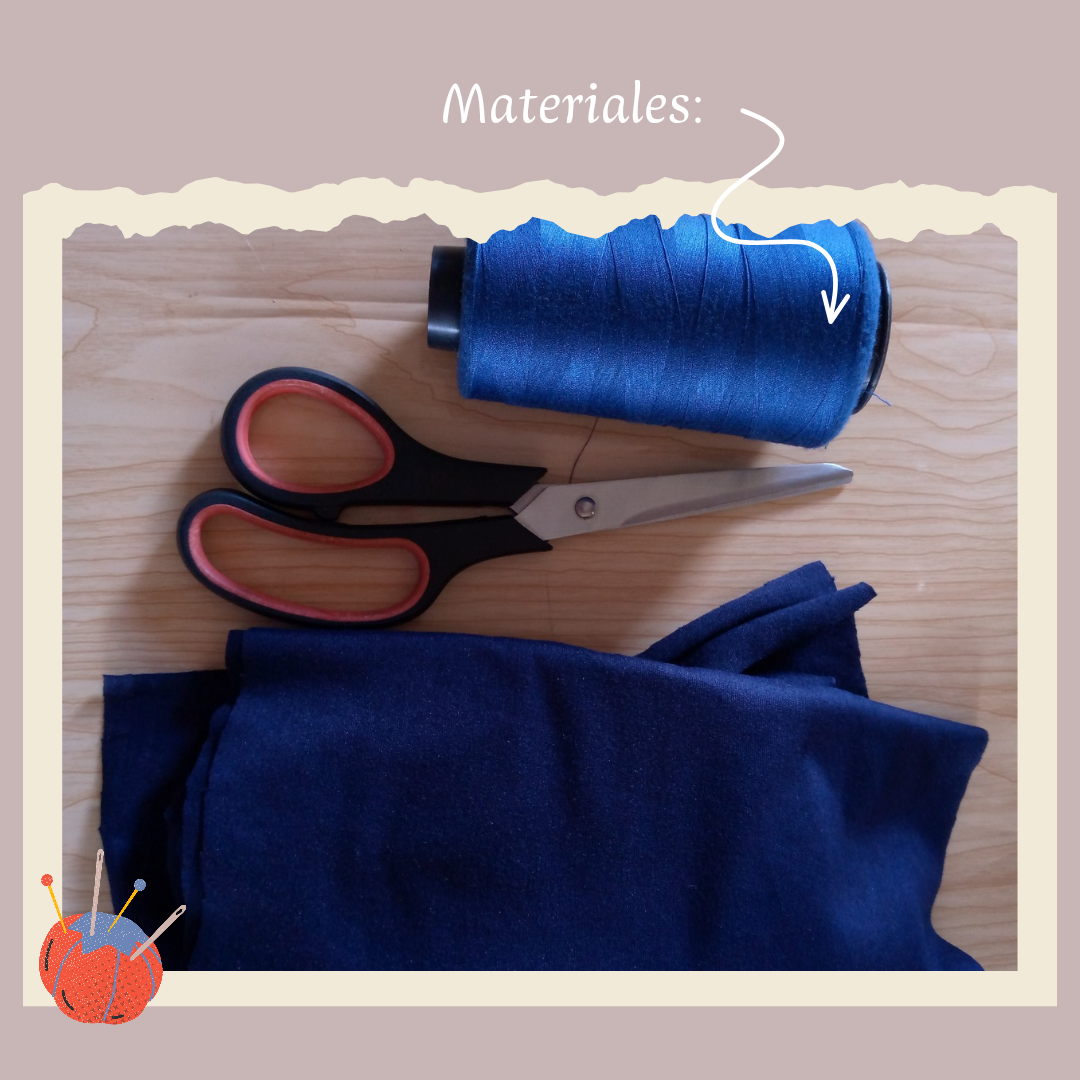
¿Que necesitas?: What do you need?
- 1 metro de tela microdurazno
- Tijeras
- Hilo
- Máquina de coser
- 1 meter of micropeach fabric
- Scissors
- Thread
- Sewing machine
Pasos a seguir://Steps to follow:
Paso 01
Step 01
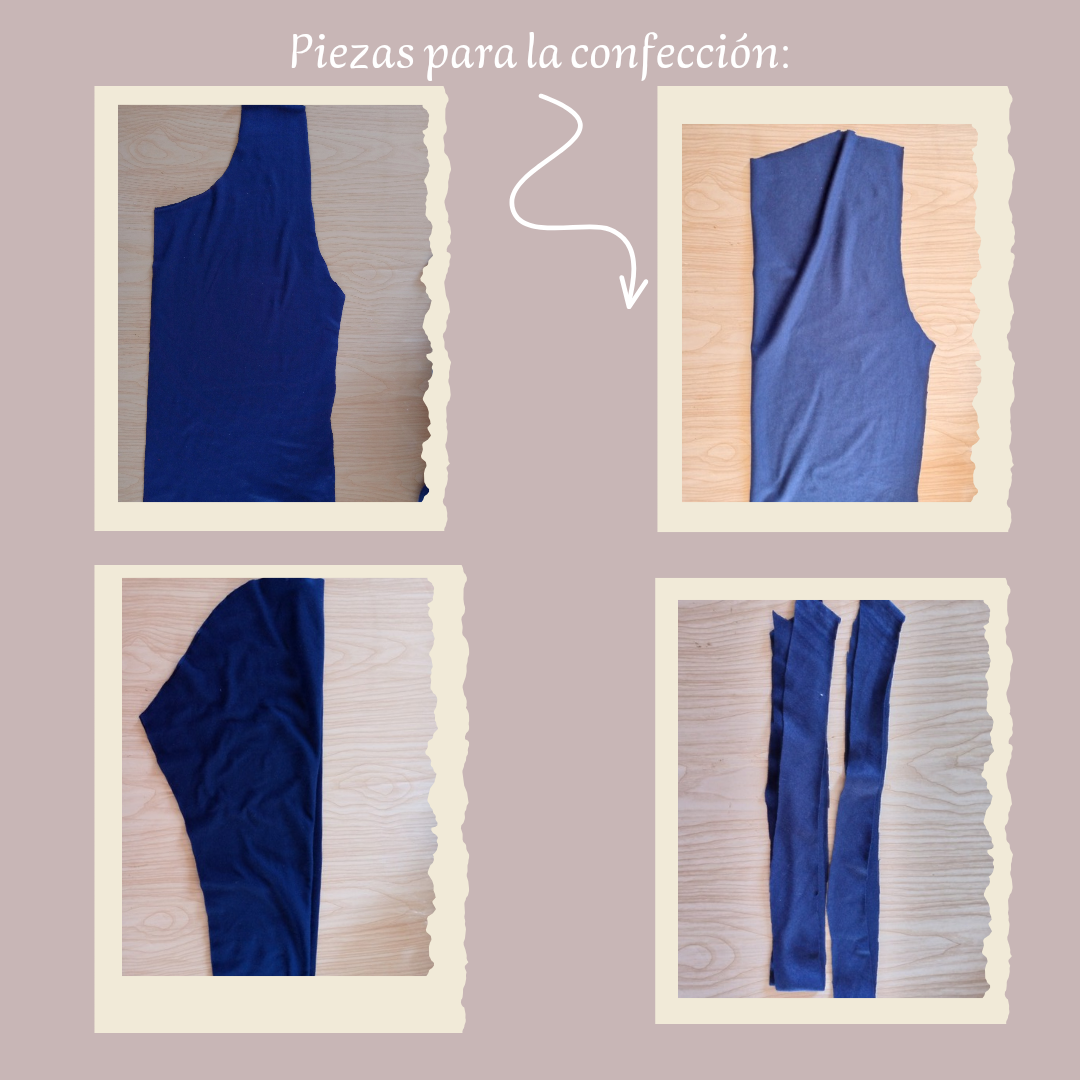
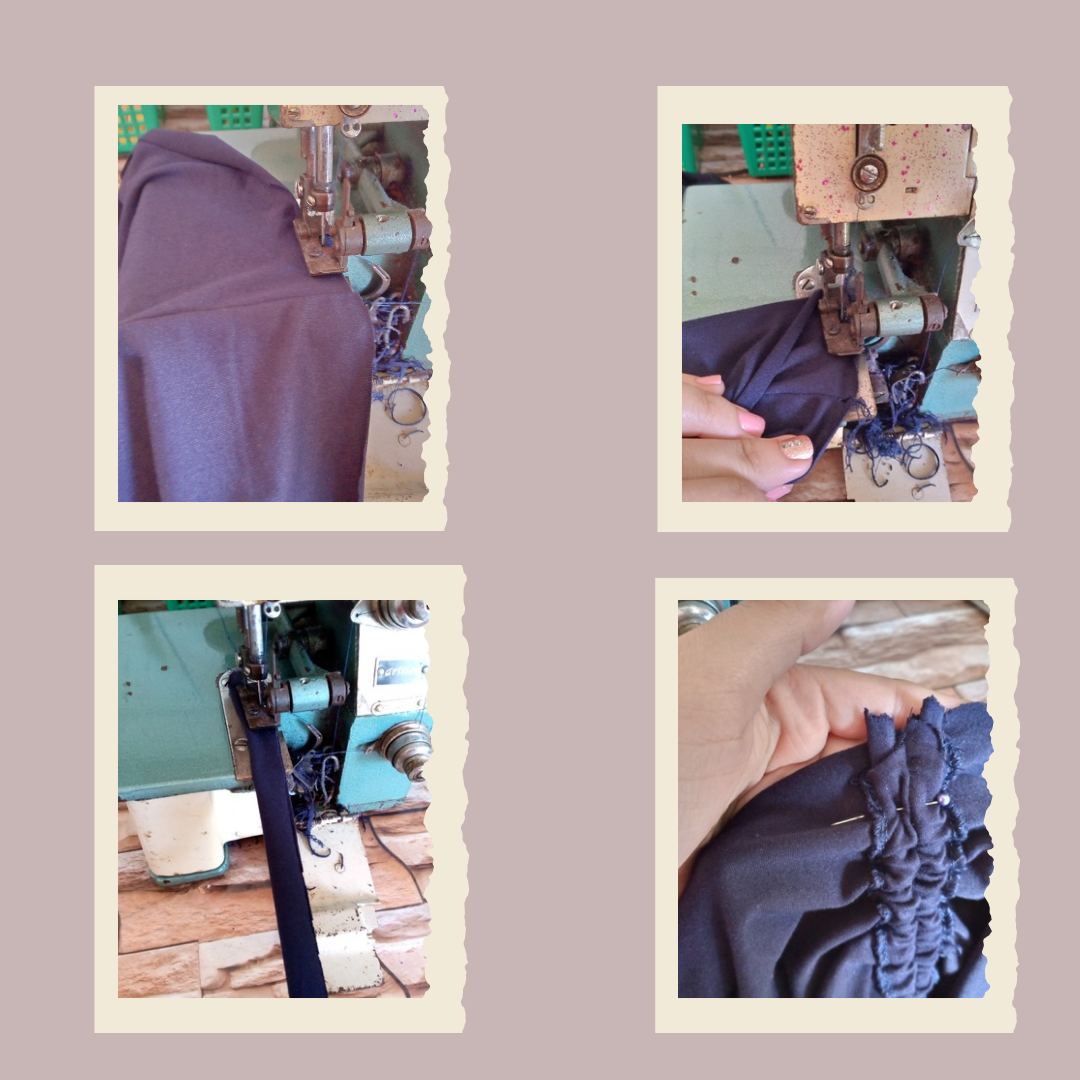
We are going to cut the front piece without a fold with 2 cm more so that we can later sew the fold where the strip will go. We cut two pieces from these, we also cut just one back piece and we are only going to cut this one double with only the top of the neck drop. We will cut the long sleeves and the strips of the sweater as well as the bias strip, and these are the pieces that we will need to start sewing.
Paso 02
Step 02
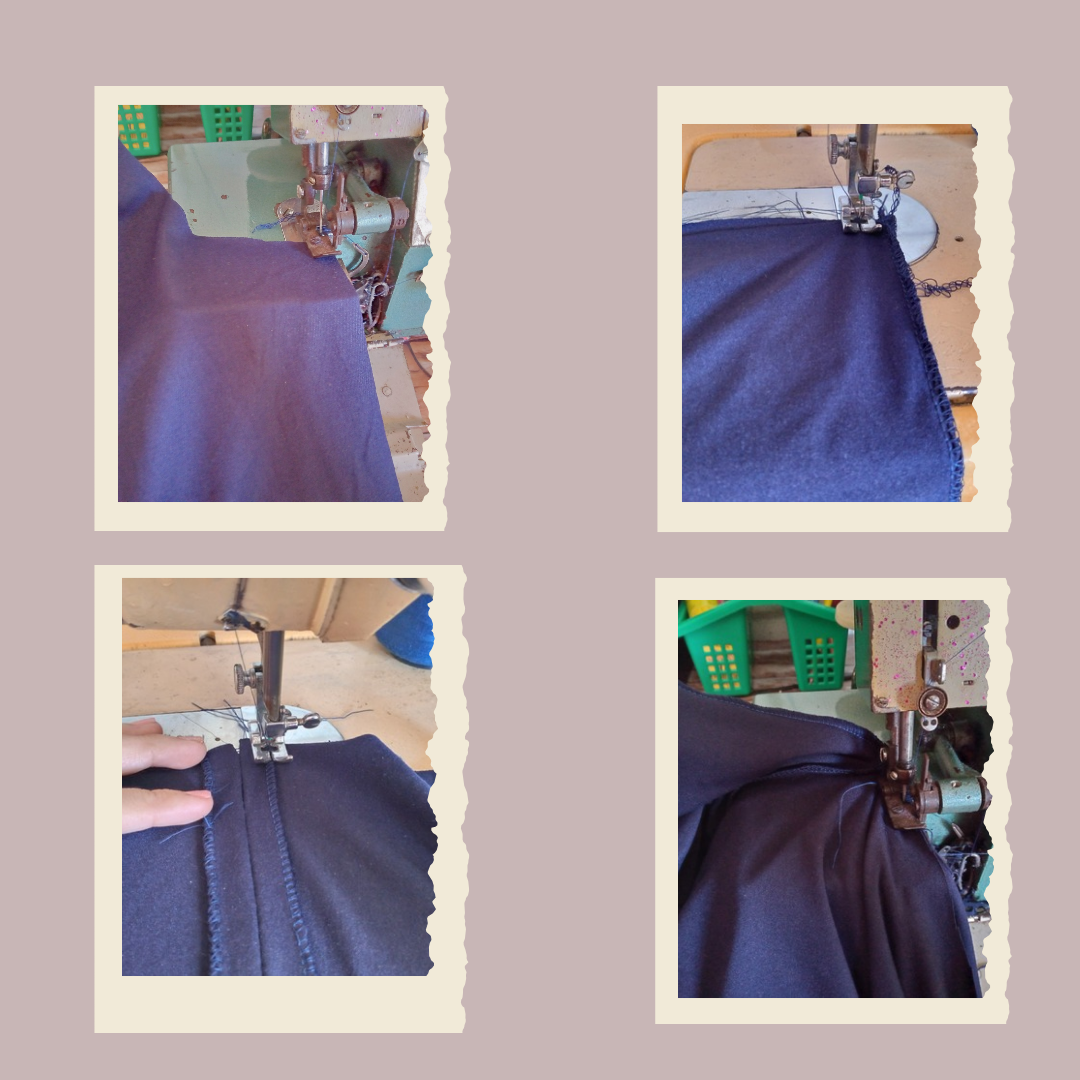
I proceed to sew the front pieces first on the sides, then we sew with a straight machine to join that piece, leaving the two centimeters that we added to the sewn front piece, we fold and sew, now we sew the sleeve and the side of the blouse along the seam, joining the front and back pieces.
Paso 03
Step 03
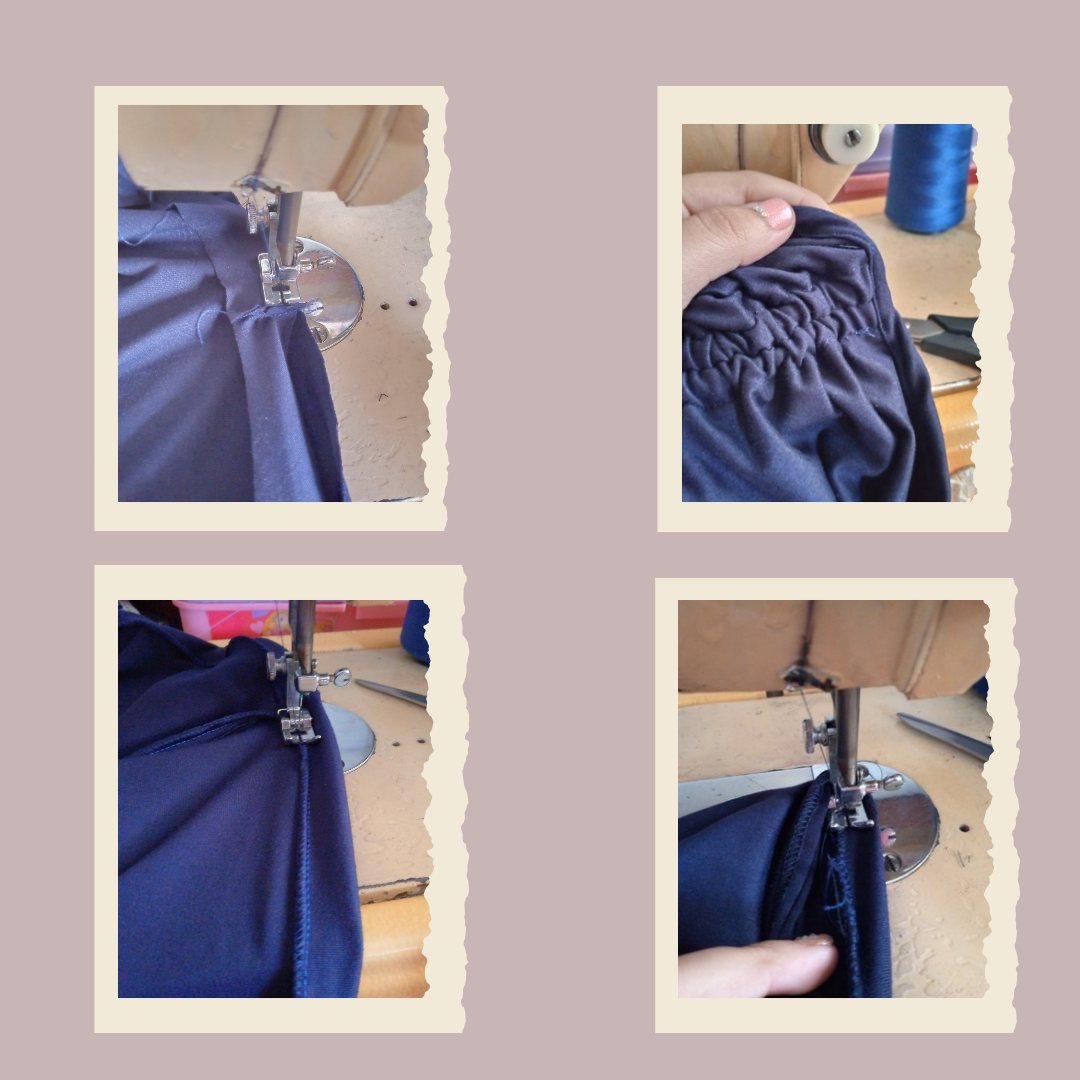
I proceed to sew the hem of the blouse and the hem of the sleeves below and then make a hem and sew the strips that we are going to insert in the front part to make the gathers, then we insert them through each front part, gathering it a little, and with a pin we hold it because it is precisely in that place that we will sew the bias.
Paso 04
Step 04
We will join the bias piece and place it on the back of the sweater and sew, I sew it from the inside out then I sew with a straight stitch over our bias, I finish by making the hem where I mentioned previously that we will do with the bottom of the blouse and the sleeves, this way I finish sewing this cute sweater.
Resultado:// Result:
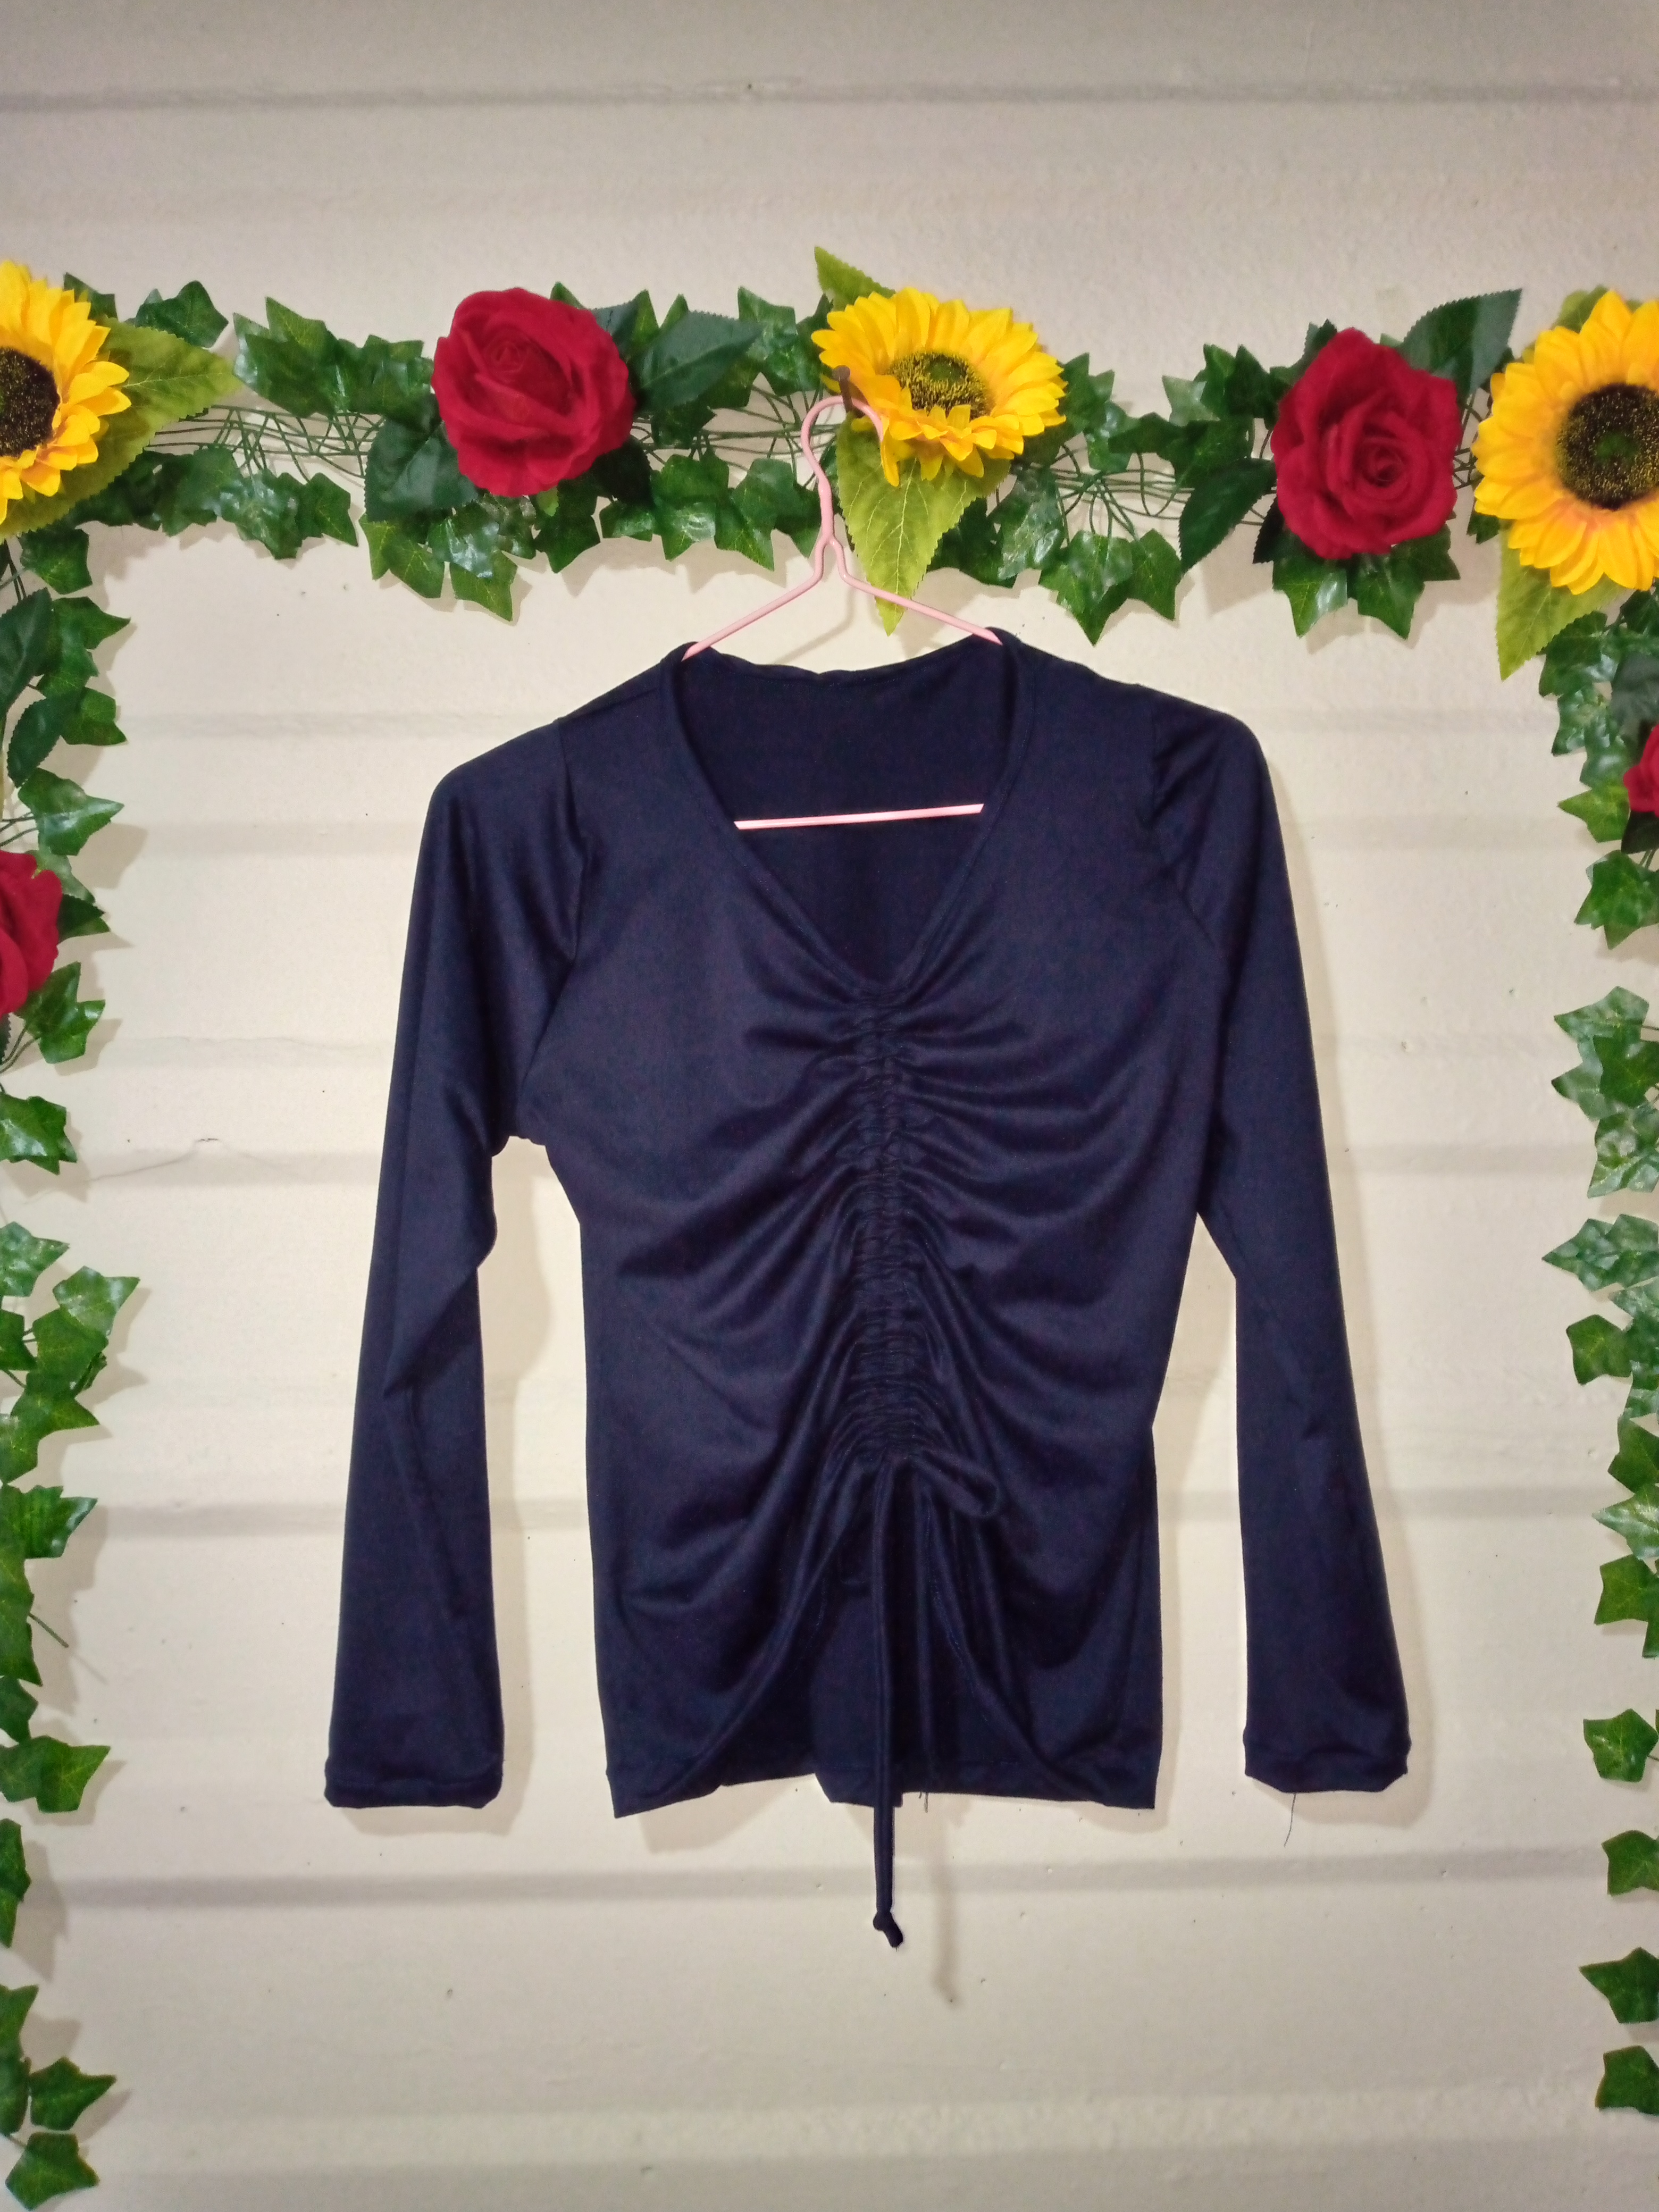

If you liked this tutorial don't forget to comment what you thought of it ☺️thanks in advance for staying here learning how to make this beautiful sweater, I wish you a beautiful day my little bees🐝 knitters and seamstresses🪡🧵, until next time 🧶.
Creating things with love 🌷❤️
🦋✨ All the images in this publication are my author ,📱taken with my TecnoSpark8C cell phone |📸Photos edited in PicsArt and Canva. Text translated in Google Translate.
Muy hermoso tu suéter querida, esa transformación del frente le quedó espectacular y original , te felicito.
Gracias ☺️amiga feliz y bendecida noche 💤
The final result is pretty good. It is beautiful, stylish, and charming. Love its design. Good to see how you made it. Keep it up!
Thanks 😊🥰
El fruncido en la parte frontal ha de ser todo un reto. Te quedó muy bella, aunque para mi este tipo de proyectos son muy complejos, tu lo haces parecer sencillo. Excelente trabajo.
Feliz noche amiga con buena práctica podemos dominar este tipo de prendas ☺️una vez lo hacemos nos adaptamos y queremos después intentar hacer de otros colores porque así me pasó a mi. 🤭 Gracias por comentar