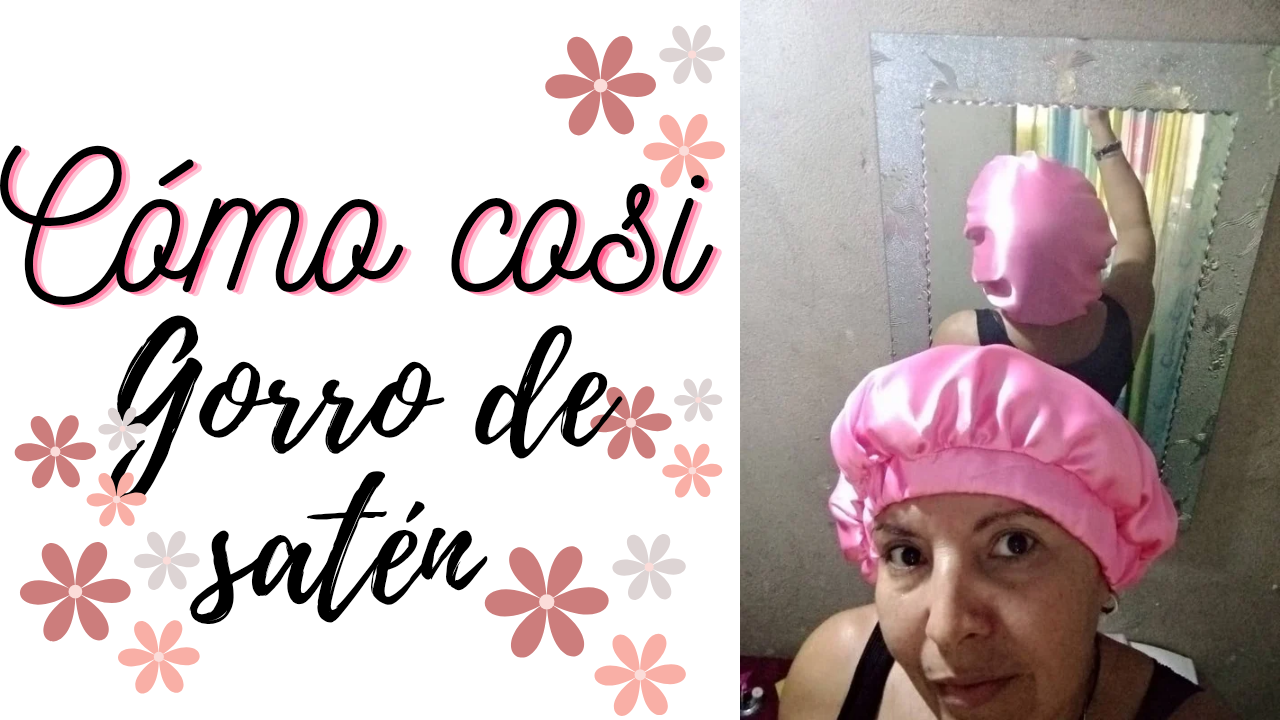
Hello everyone at NeedleworkMonday! I hope you are having a wonderful Sunday. Today I want to share with you a project that has me very excited: the creation of a satin hat. On this occasion, I have designed this hat especially for a young woman who cares about taking care of her beautiful curly hair. It is inspiring to see how girls today are taking the initiative to take care of their hair and look for solutions that allow them to show it off in its best condition. This hat is not only a practical tool, but also a form of personal expression and style.
This type of hat has gained popularity in recent times, and it is not difficult to understand why. Its design is not only elegant, but it also serves a very important function: helping to keep hair free of frizz. Frizz is a common problem that many of us face, especially if we have curly or textured hair. This satin cap acts as a soft barrier that protects our hair while we sleep or during the day, preventing tangling and damage. Additionally, satin is a material that helps retain moisture, which is crucial for maintaining the health of your curls.
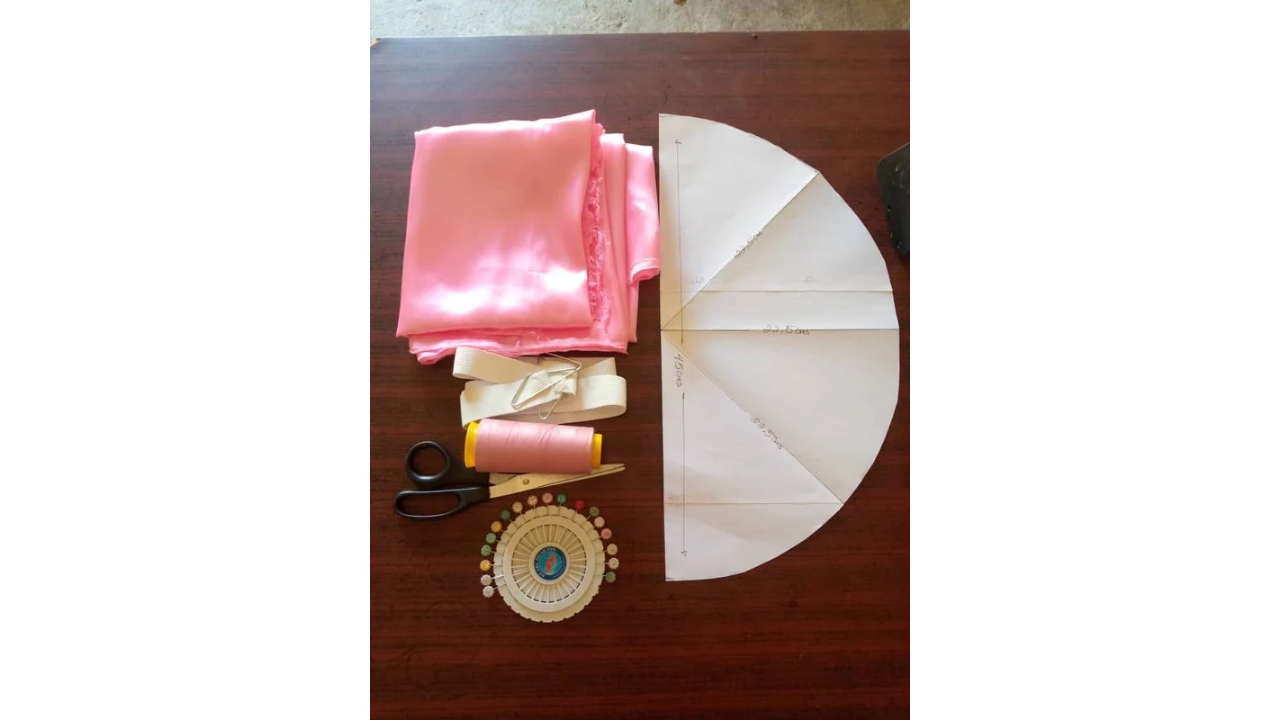
(Materiales📝:)||(Materials📝:)
- Tela de satén
- Liga elástica
- Hilo rosado
- Tijeras
- Alfileres
- Patrón circular
- Máquina de coser
- Satin fabric
- Elastic garter
- Pink thread
- Scissors
- Pins
- Circular pattern
- Sewing machine
(Procedimiento:)||(Procedure:)
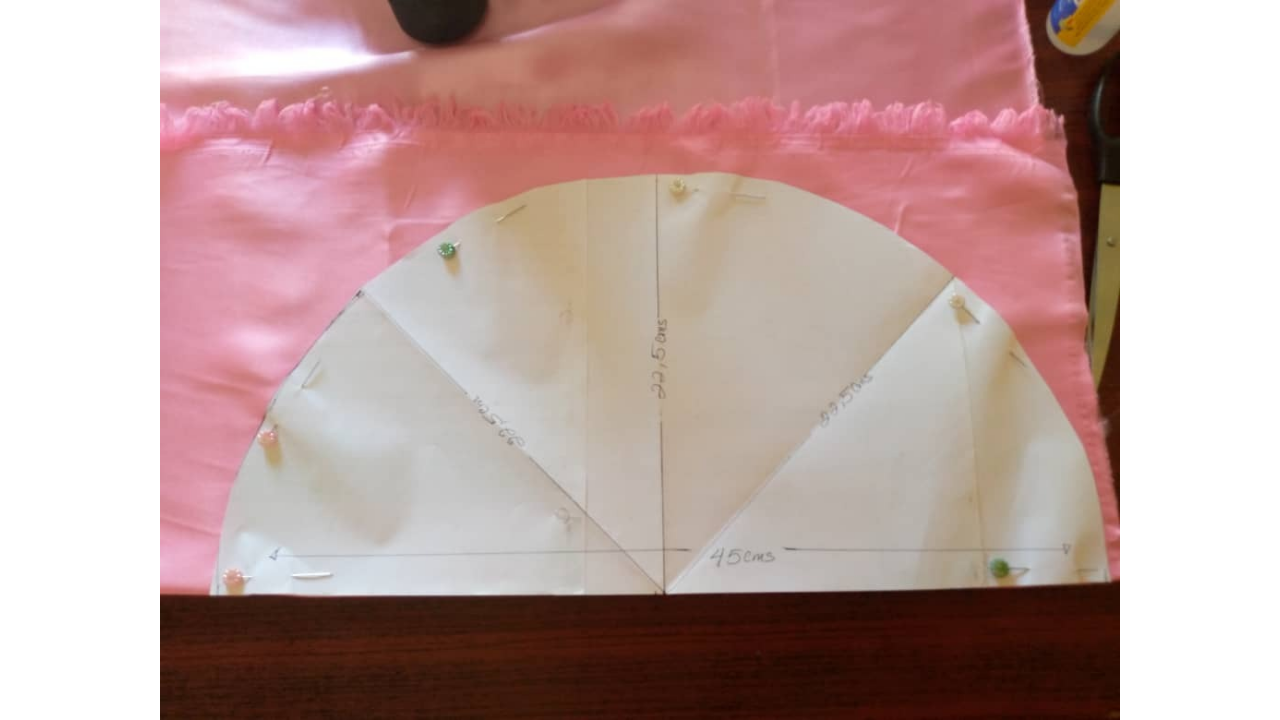
Paso nro 1
Paso nro 1
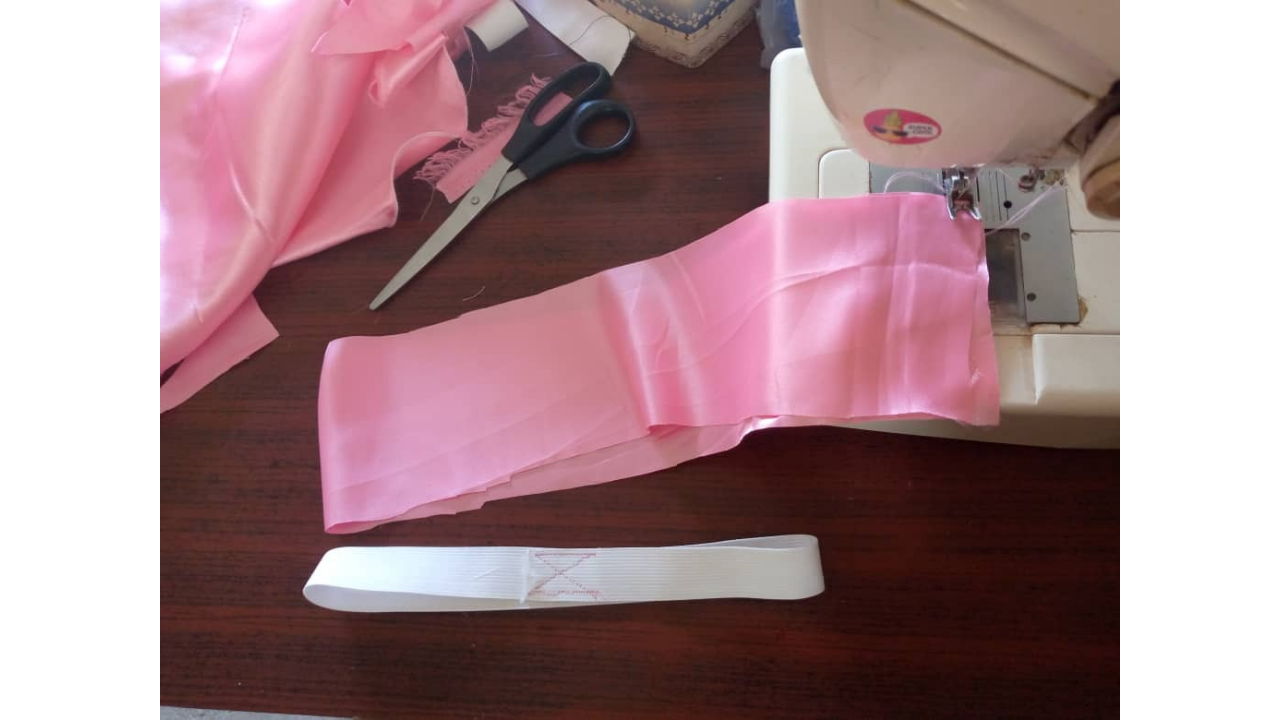
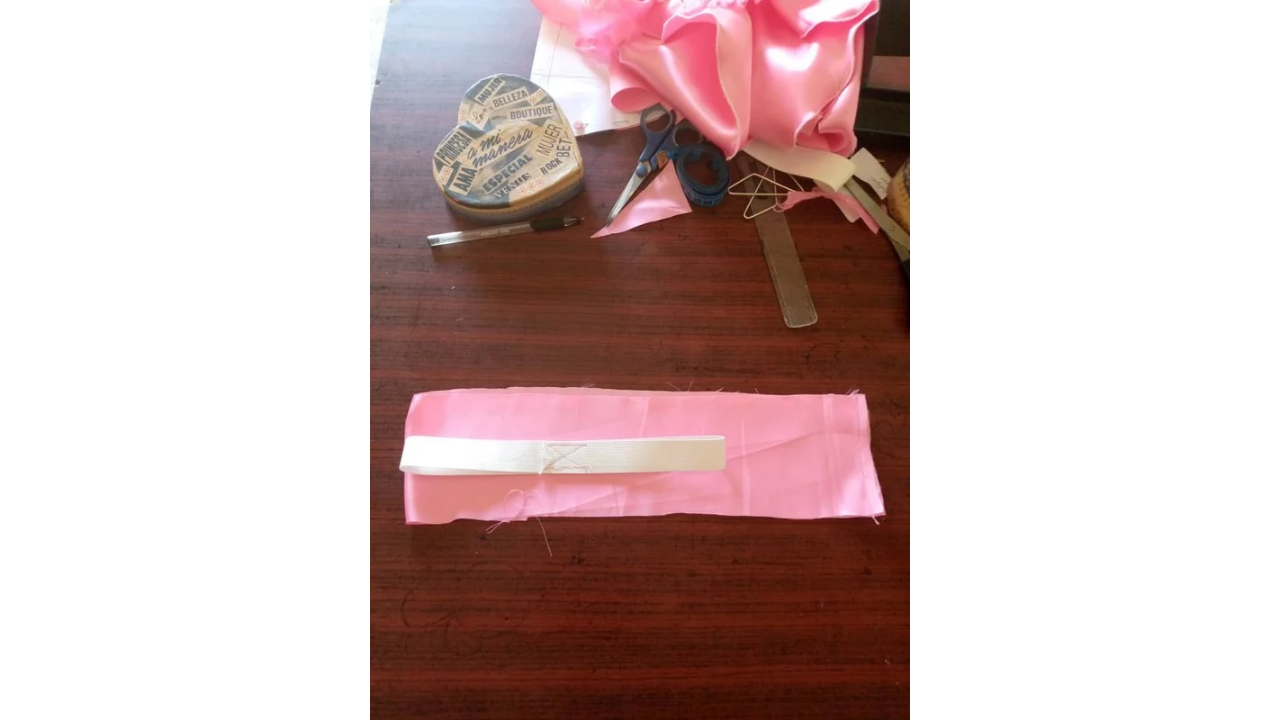
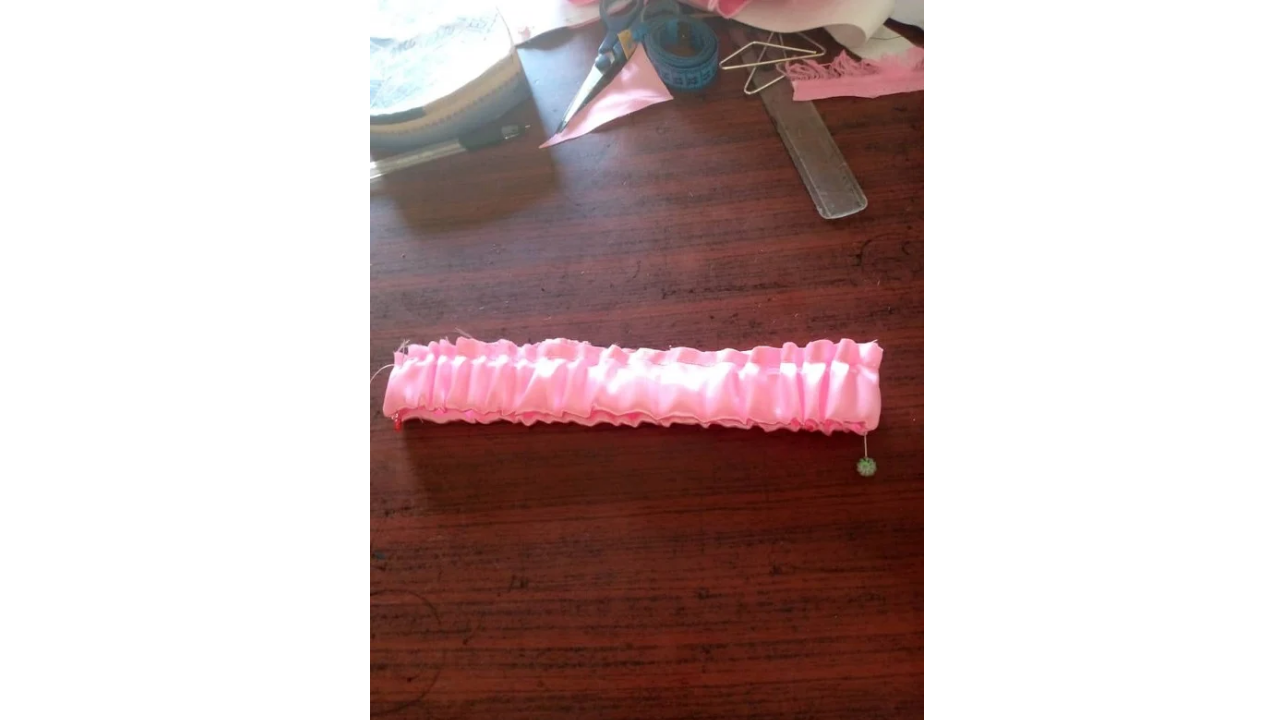
To start, I traced the pattern onto the fabric. I folded the fabric in half, which made cutting easier and allowed me to ensure that both parts of the hat were symmetrical. I used measurements of 45 centimeters in both length and width, which I consider ideal for this type of hat. This technique of folding fabric not only saves time but also ensures that the design is uniform. The part of the waistband that has the garter has the same measurement of 45 centimeters long and 5 centimeters.
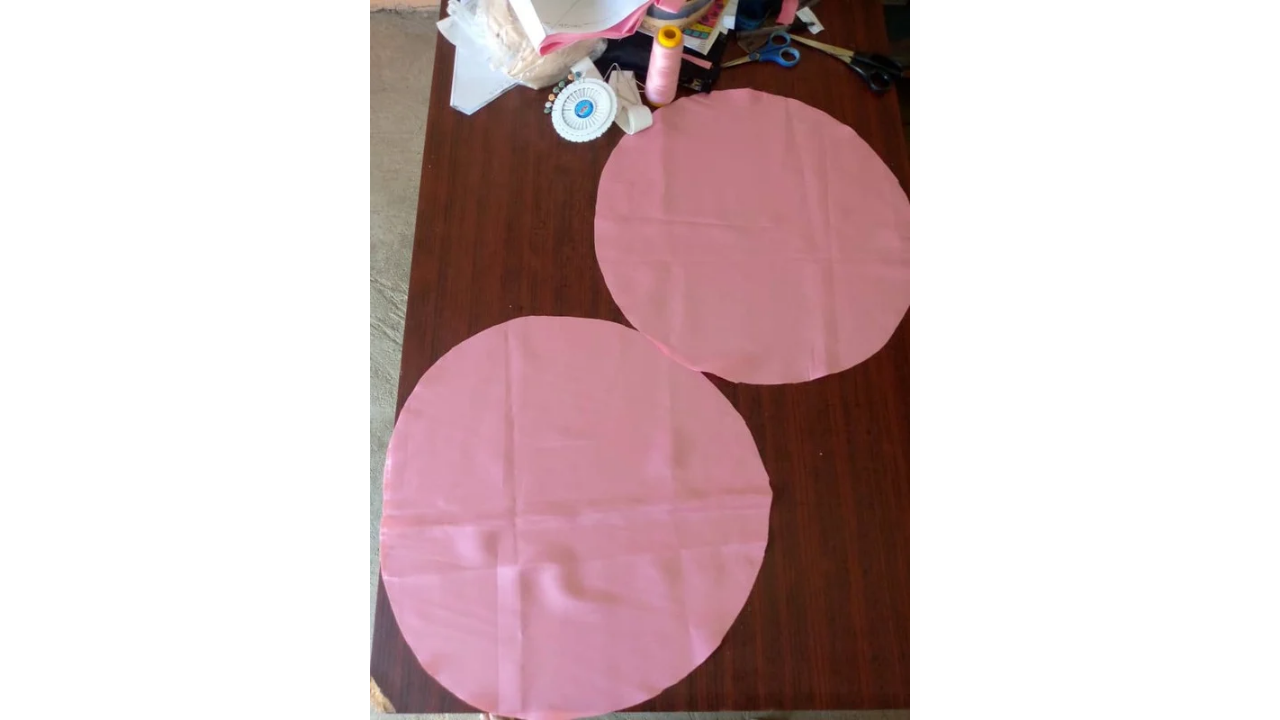
Paso nro 2
Paso nro 2
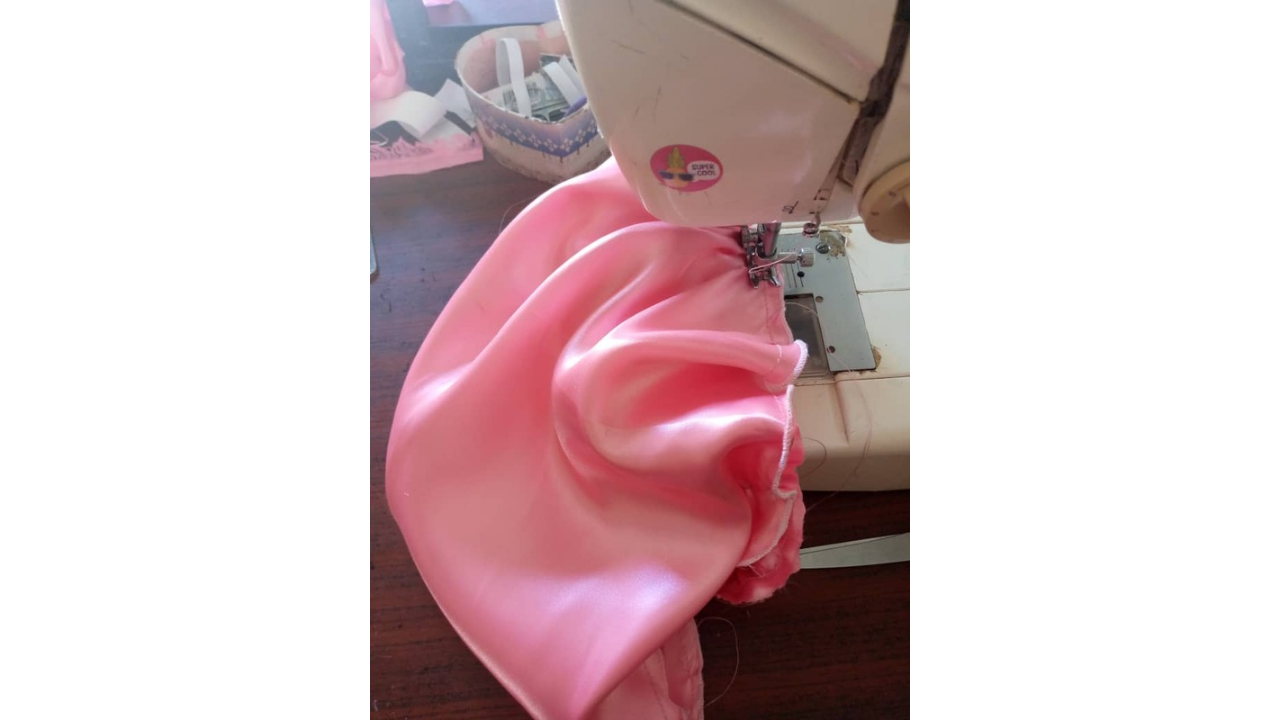
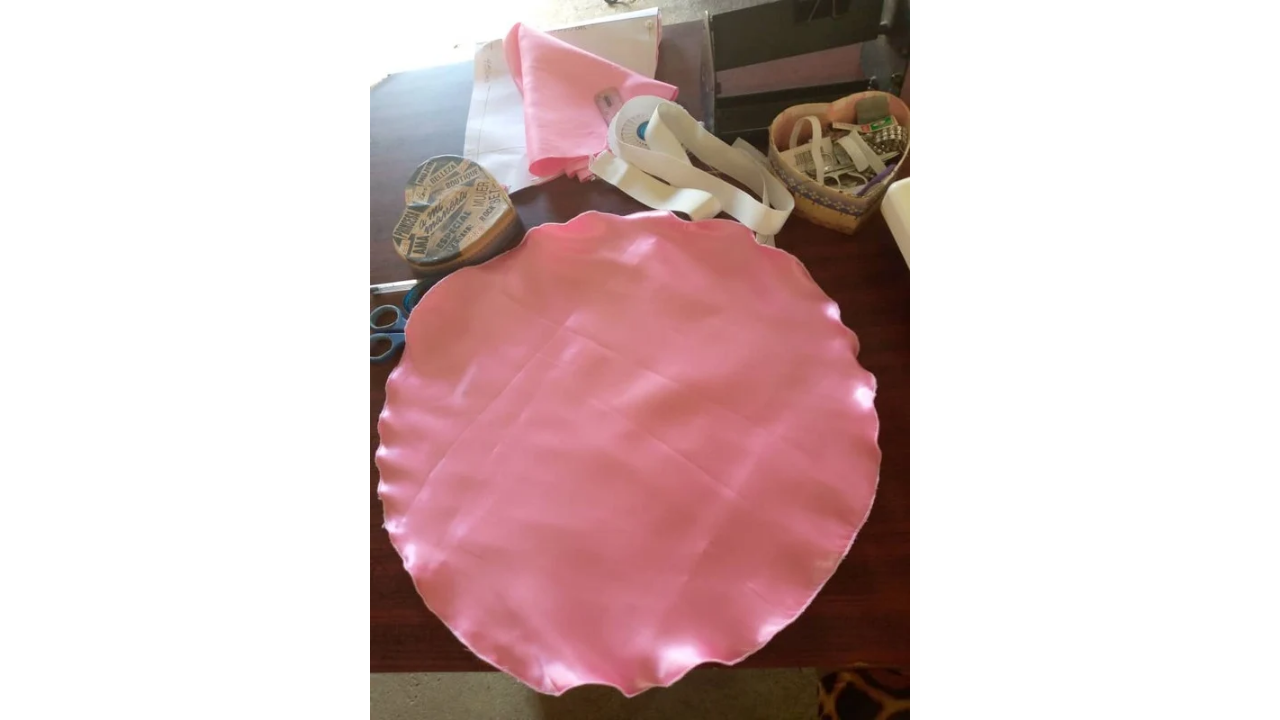
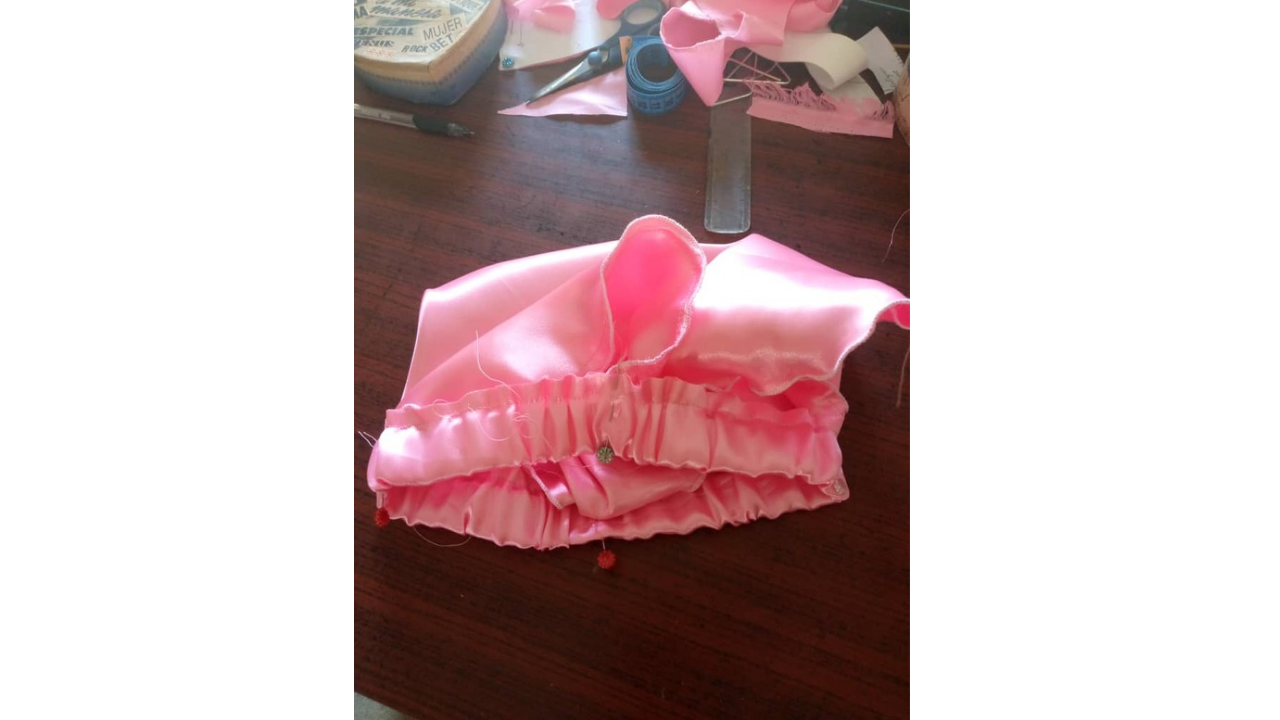
Now, I moved on to the sewing part. I started by laying out the two circular pieces of fabric, making sure the smooth sides of the satin were facing each other. This ensures that the hat is smooth inside and out. Using a sewing machine, I used a straight stitch to join the two pieces together. I started sewing from one end, keeping a seam allowance of about 1 centimeter. This is important to ensure that the hat is the proper shape and that the seams do not fray. As I progressed, I secured the fabric with pins to prevent it from shifting. This is especially useful when working with slippery fabrics like satin. After I joined the two parts of the hat, I moved on to the waistband. I cut a strip of fabric that will be the band that fits around the head. I folded the strip in half lengthwise and sewed it, leaving one end open so I could turn it inside out. This creates a stronger, clean-finished waistband. Once I pulled the waistband was sewn, I turned it inside out so the soft part was on the outside. Before attaching the waistband to the hat, I placed a rubber band on the inside of the waistband. For this, I measured the size of the head and cut the garter to that measurement. Next, I secured the garter in place with a couple of stitches, distributing the tension evenly so it didn't wrinkle. Finally, I attached the waistband to the brim of the hat. To do this, I lined up the top of the waistband with the edge of the hat, making sure the garter was securely in place.
Paso nro 3
Paso nro 3
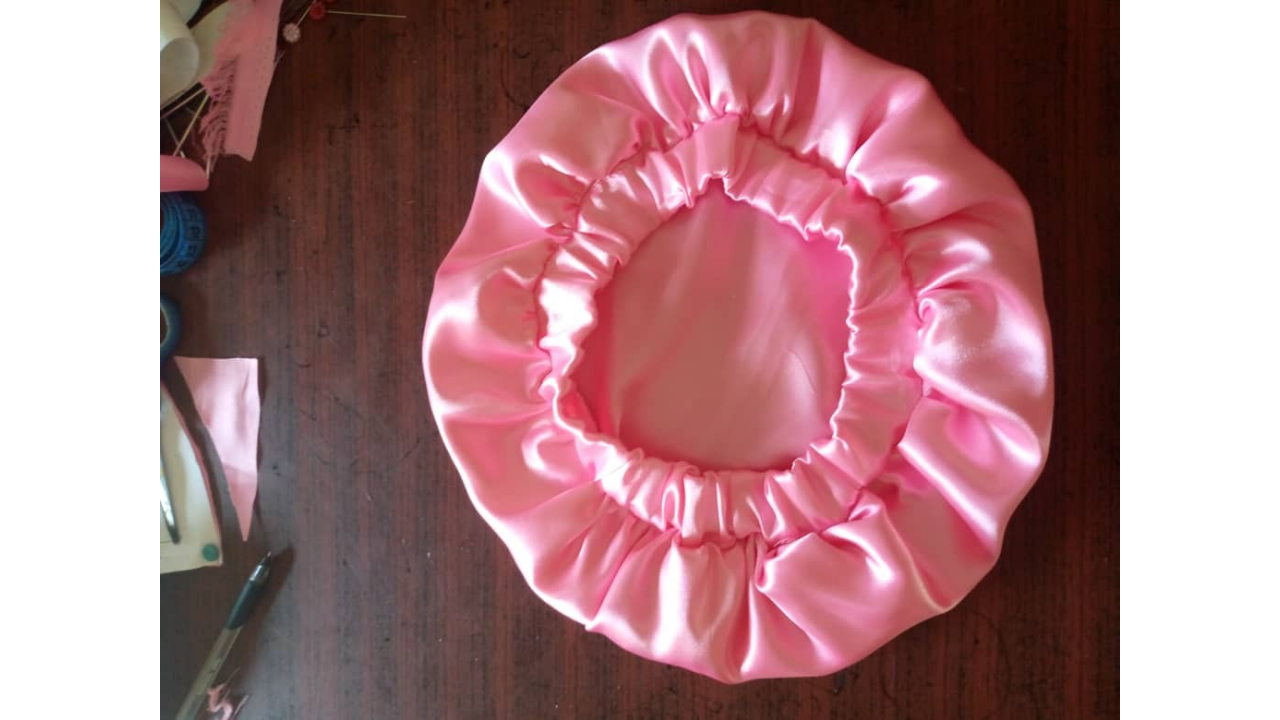
Once the hat was completely sewn, I made the finishing touches. It is important to pay attention to the details so that the hat looks perfect. Since the satin fabric is delicate, I ironed the hat very carefully. I used a low heat setting and an ironing cloth to protect the fabric, making sure not to burn it or leave marks. This helps eliminate any wrinkles and gives it a more professional finish. And just like that, this beautiful hat is ready for a girl who takes care of her hair to wear! I'm excited to see how this project is not only practical, but also a form of personal expression and style.
(Resultado final:)||(Bottom line:)
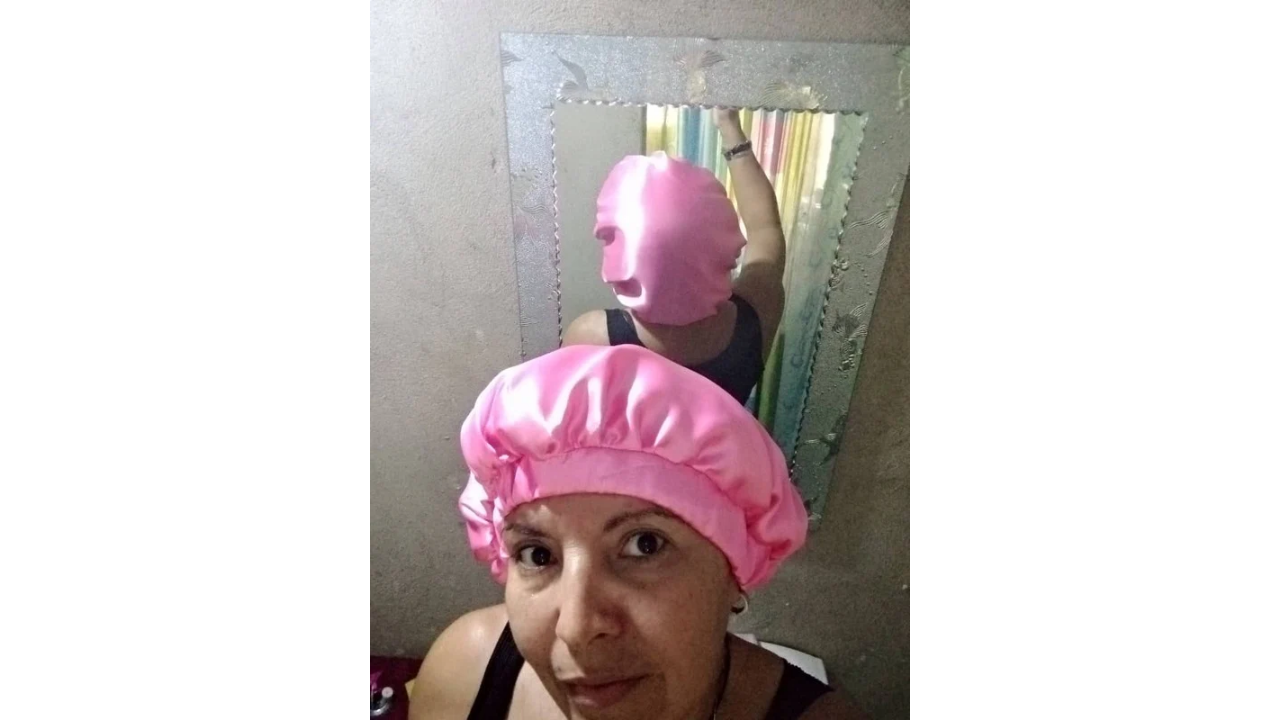
And so this hat was ready, I hope you like it, I hope to continue sharing more and more sewing with you, see you later.
The photos presented in this blog are my responsibility. The images have been edited using Canva. The photographs were taken with my Infinix hot 10 cell phone. The content has been translated with Google translator.
Such a thoughtful and practical creation. Looks great the hat.
Hello, thank you, I'm glad you liked it, thank you for your comment.
Buena explicación...
Gracias por compartir!!
Hola que bueno que haya gustado gracias saludos para ti
Wow, this look so beautiful and useful, I love the color, good work.
Wow. This is really useful stitching hack. I will stitch it soon. This one we can use in while doing work in kitchen.
Thanks for sharing with us