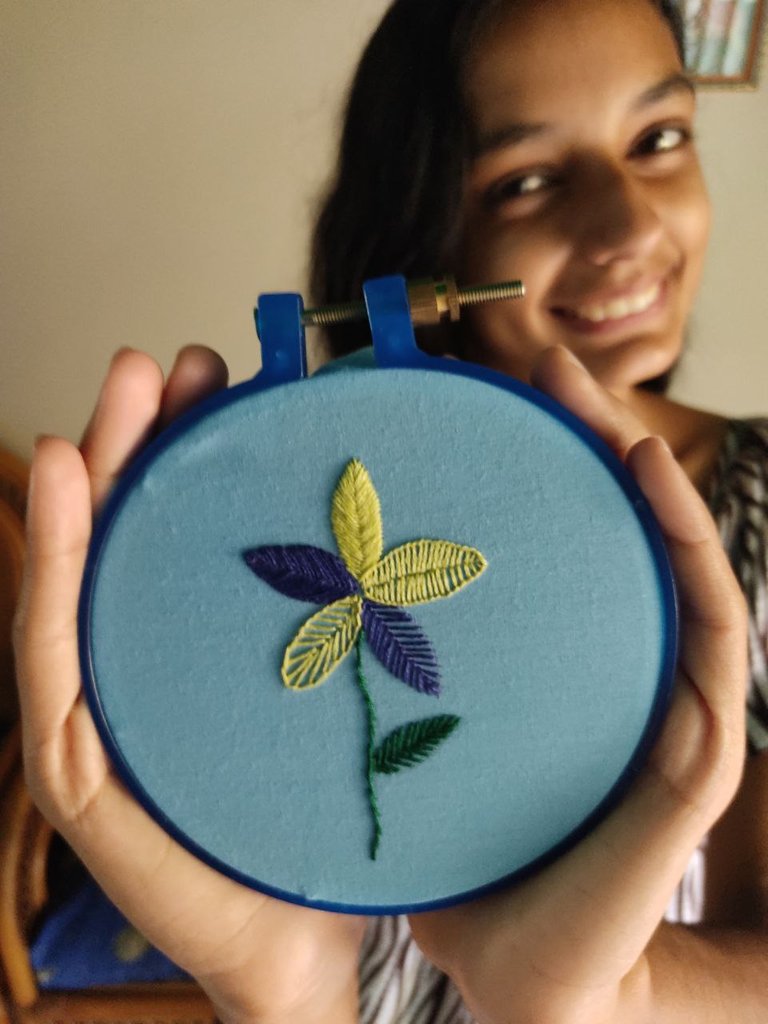
Español:
¡Hola! Bienvenidos a mi blog. El día de hoy les traigo un tutorial con unas puntadas básicas que te servirán para bordar pétalos de flores o hojas, se pueden usar de diferentes maneras, así que te aseguro que una vez que las aprenda¡las usarás mucho en tus bordados!
¡Empecemos!
English:
Hello! welcome to my blog. Today I bring you a tutorial with some basic stitches that will help you to embroider flower petals or leaves, they can be used in different ways, so I assure you that once you learn them you will use them a lot in your embroidery!
Let's get started!
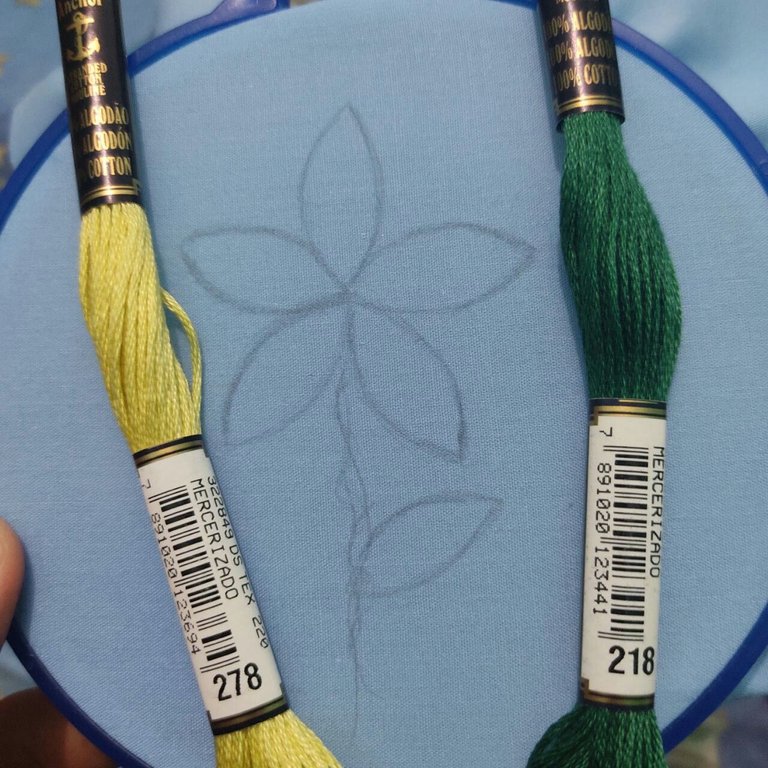
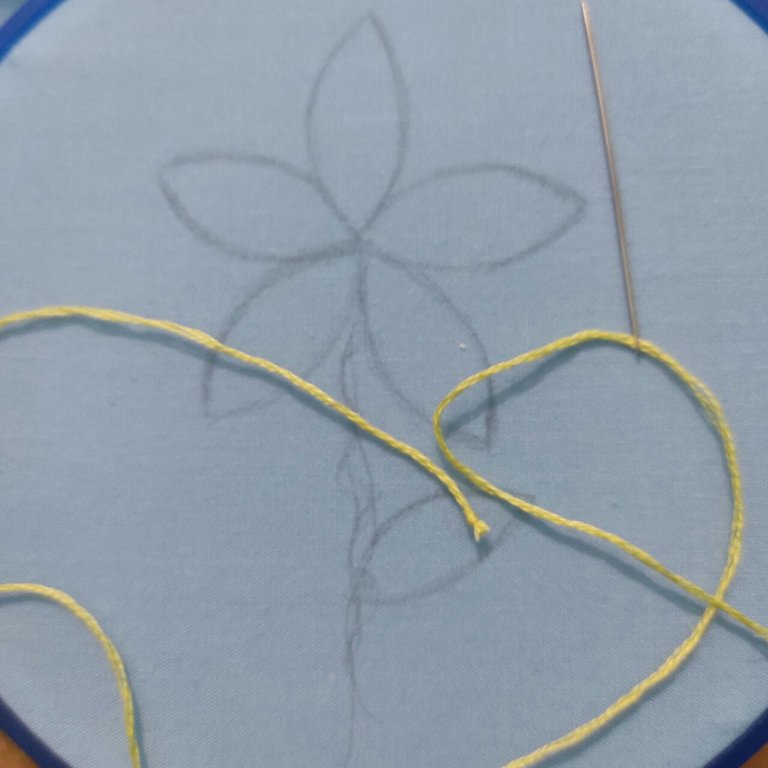
1- Puntada Ojal
Es bastante sencilla y puede usarse para bordar diferentes figuras, pétalos, hojas, círculos, etc.
Cómo realizar la puntada Ojal:
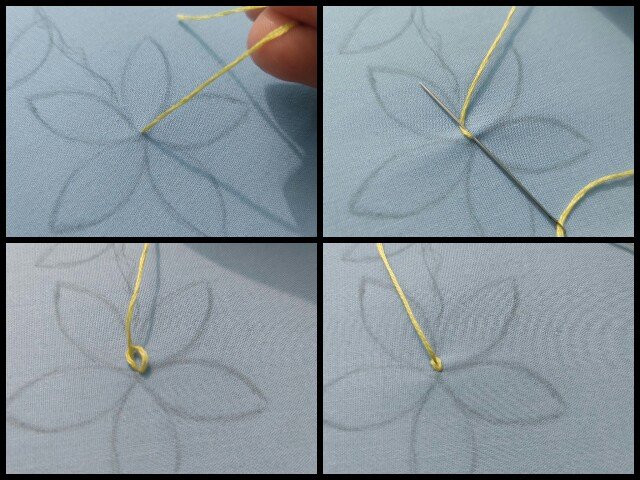
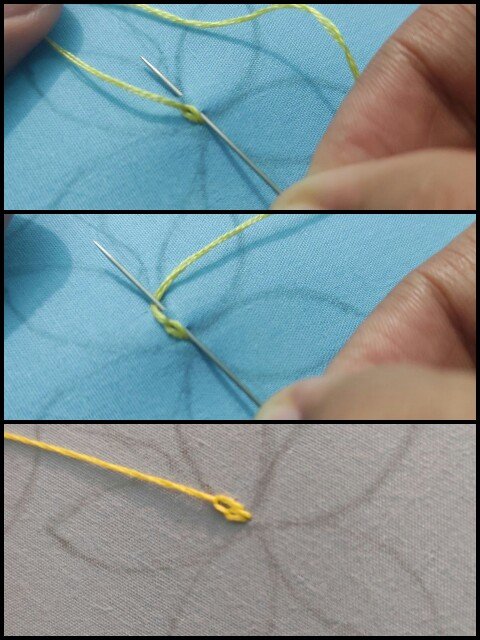
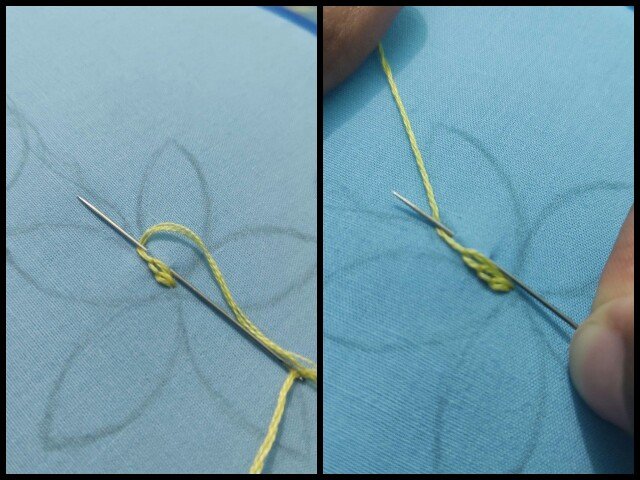
- Sacamos la aguja por la parte inferior media del pétalo.
- Introducimos la aguja justo al lado de donde salimos la primera vez, luego sacamos en la orilla del pétalo una parte de la aguja (sin sacarla toda), algo así como un pellizco a la tela.
- Antes de jalar la aguja por completo, pasamos el hilo por debajo de la aguja tal cómo se visualiza en la foto.
- Al jalar la aguja hacía arriba, nos quedará algo parecido a un punto margarita, sólo que este no lo cerraremos de inmediato.
2- Buttonhole Stitch
It is quite simple and can be used to embroider different shapes, petals, leaves, circles, etc.
How to make the buttonhole stitch:
- Pull the needle through the lower middle part of the petal.
- Insert the needle right next to where we came out the first time, then we pull out at the edge of the petal a part of the needle (without pulling out all of it), something like a pinch to the fabric.
- Before pulling the needle out completely, we pass the thread under the needle as shown in the photo.
- When we pull the needle up, we will have something similar to a daisy stitch, but we will not close it immediately.
2- Puntada Mosca
Ya he explicado esta puntada en otros post, pero quería enseñar cómo se puede aplicar para hacer flores. En mi opinión, es ideal para hojas o pétalos de girasoles. Para esta puntada, estaré usando un tono morado ANCHOR código 178
2- Fly stitch
I have already explained this stitch in other posts, but I wanted to show how it can be applied to make flowers. In my opinion, it is ideal for leaves or sunflower petals. For this stitch, I will be using a purple shade ANCHOR code 178.
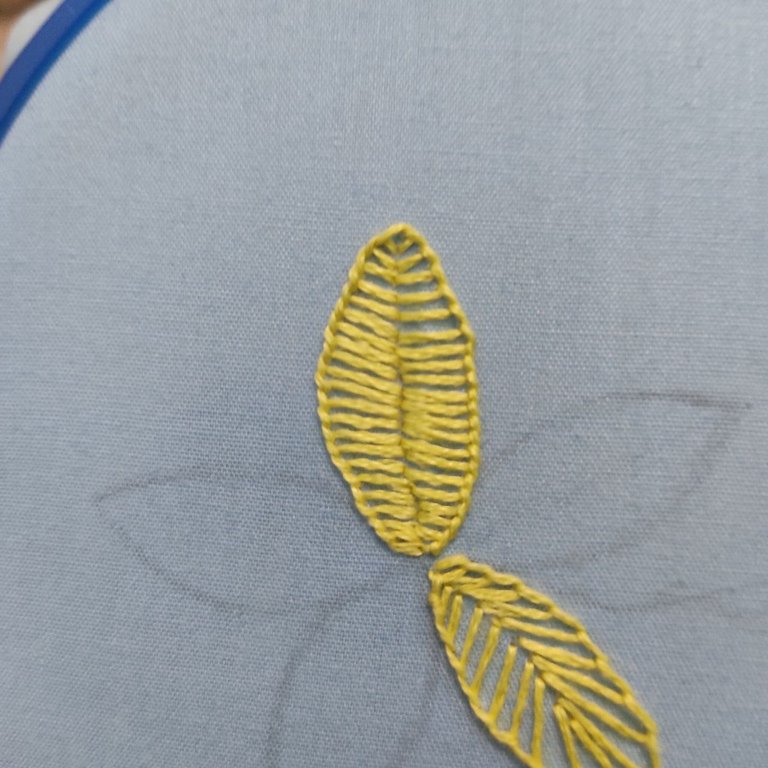
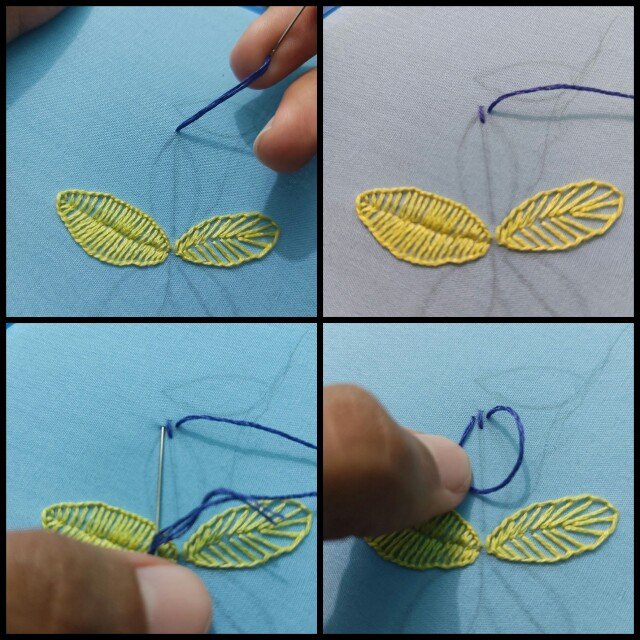
Para empezar debemos marcar con un lápiz la mitad del pétalo, una vez hecho eso, haremos una pequeña puntada vertical siguiendo la linea desde la parte de arriba del pétalo hacía abajo.
A continuación, salimos por el extremo derecho del pétalo, a la altura de la mitad de la primera puntada que hicimos.
Volvemos a entrar por el extremo izquierdo del pétalo, cómo si fuéramos a realizar una puntada horizontal pero sin halar el hilo.
To start we must mark with a pencil the middle of the petal, once that is done, we will make a small vertical stitch following the line from the top of the petal down.
Next, we go out through the right end of the petal, at the height of the middle of the first stitch we made.
We go back in through the left end of the petal, as if we were going to make a horizontal stitch but without pulling the thread.
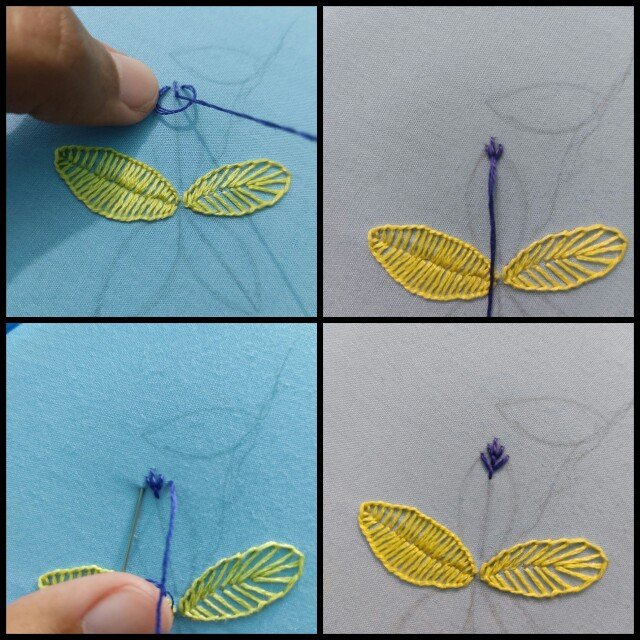
Salimos en el medio del pétalo, justo al final de la primera puntada que hicimos.
Halamos el hilo para ajustar la puntada y cerramos haciendo una pequeña puntada vertical hacía abajo.
Repetimos el proceso siguiendo los bordes del pétalo hasta completar.
We pull out the needle in the middle of the petal, right at the end of the first stitch we made.
We pull the thread to tighten the stitch and close by making a small vertical stitch downwards.
Repeat the process following the edges of the petal until complete.
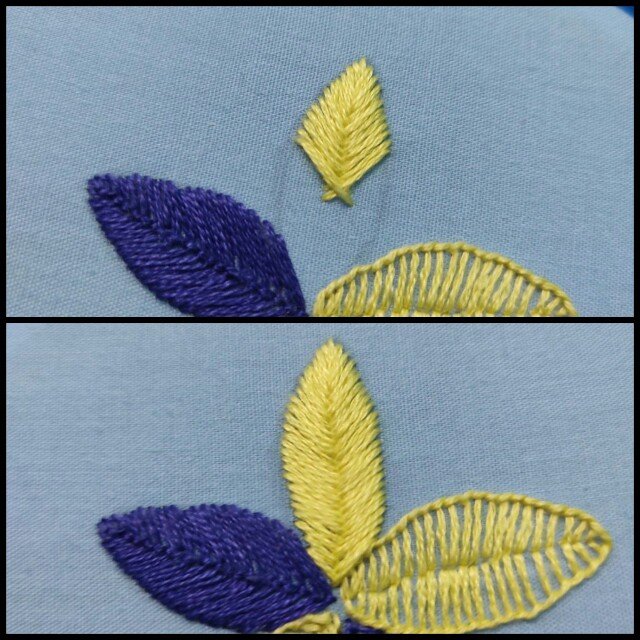
Este es el resultado final del pétalo. Yo digo que funciona muy bien para hojas ya que al realizar esta puntada te va quedando una especie de tallo en el medio.
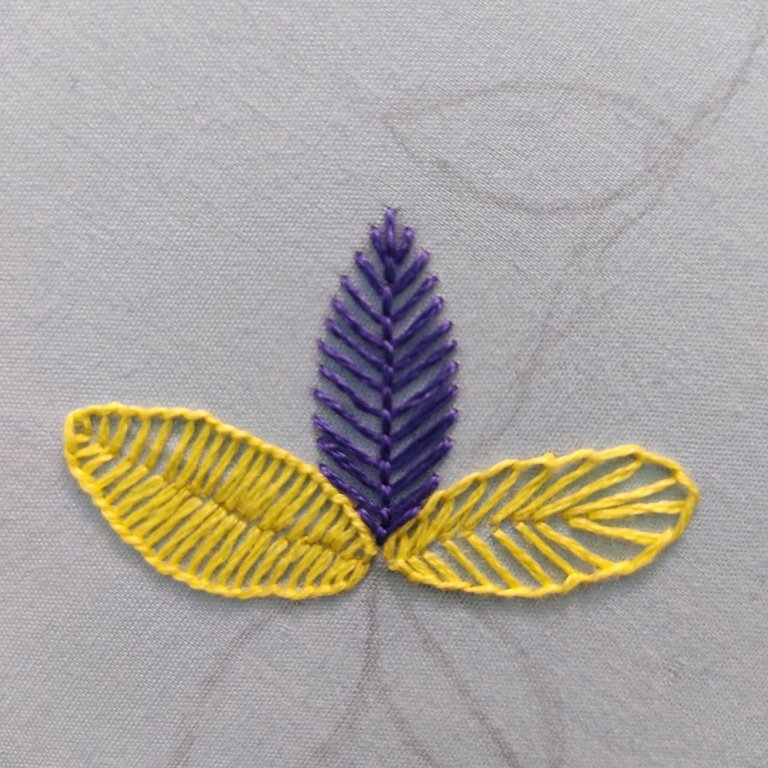
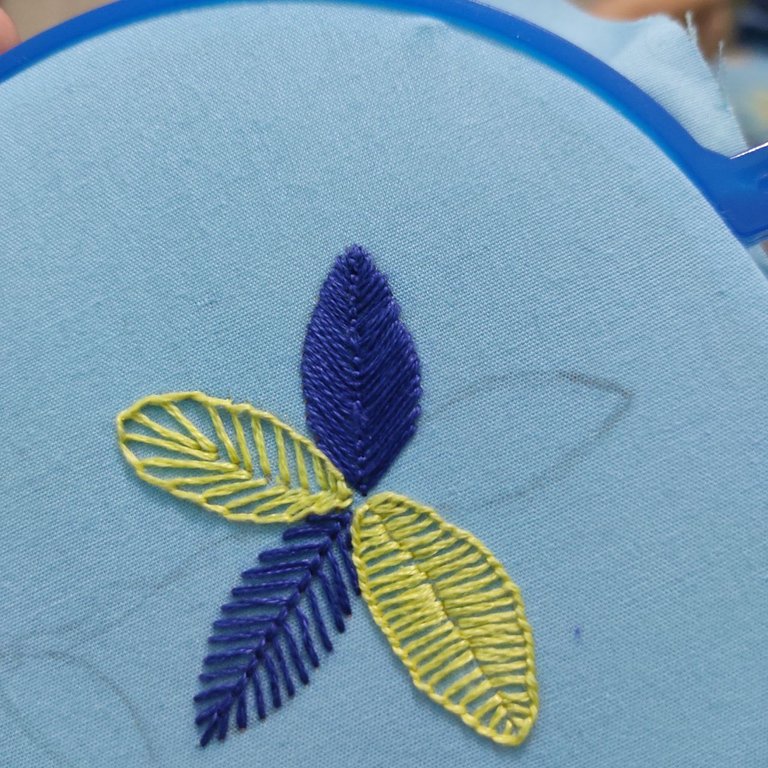
3- Puntada Espina de Pescado
Esta puntada es un poquito más complicada, en verdad espero que se pueda apreciar en las fotos los pasos a seguir.
Cómo realizar la puntada Espina de Pescado:
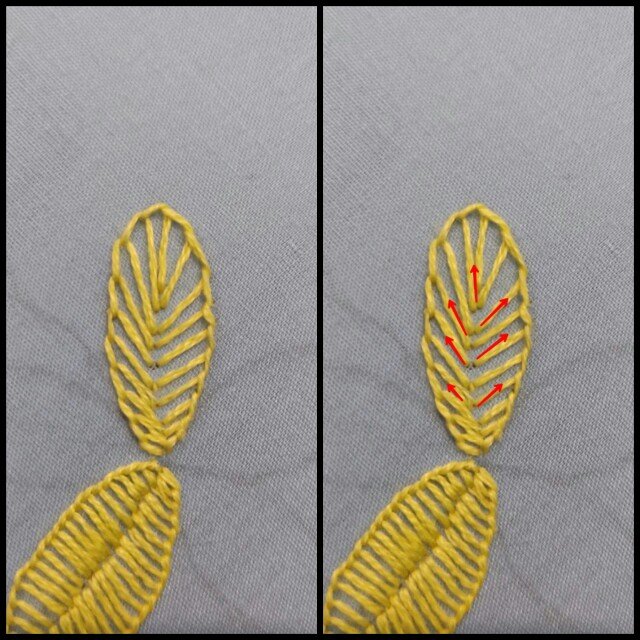
Se debe comenzar realizando una puntada vertical comenzando desde la punta de arriba en el medio del pétalo, hacía la parte de abajo del pétalo, para guiarnos mejor, vamos a llamar esta puntada como la principal.
El siguiente paso es sacar la aguja por la parte izquierda de arriba de la puntada principal, para después volver a insertar por la parte derecha de abajo de la puntada principal, haciendo que la puntada sea un poco diagonal y pae por encima de la principal.
3- Herringbone stitch
This stitch is a little bit more complicated, I really hope you can see in the pictures the steps to follow.
How to make the Herringbone stitch:
You must begin by making a vertical stitch starting from the top point in the middle of the petal, towards the bottom of the petal, to better guide us, we will call this stitch as the main stitch.
The next step is to pull the needle through the top left side of the main stitch, and then reinsert the needle through the bottom right side of the main stitch, making the stitch a little diagonal and going over the main stitch.
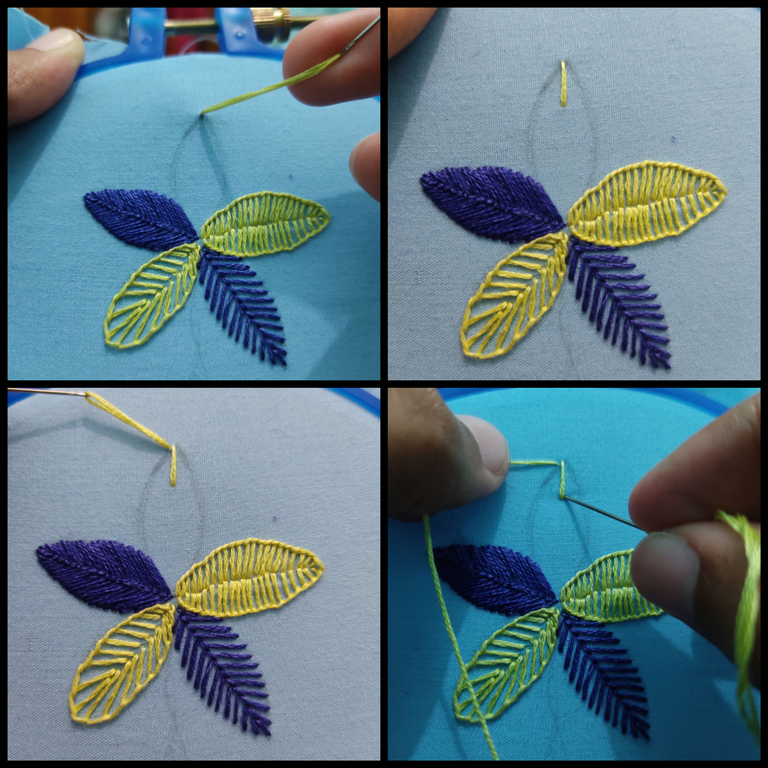
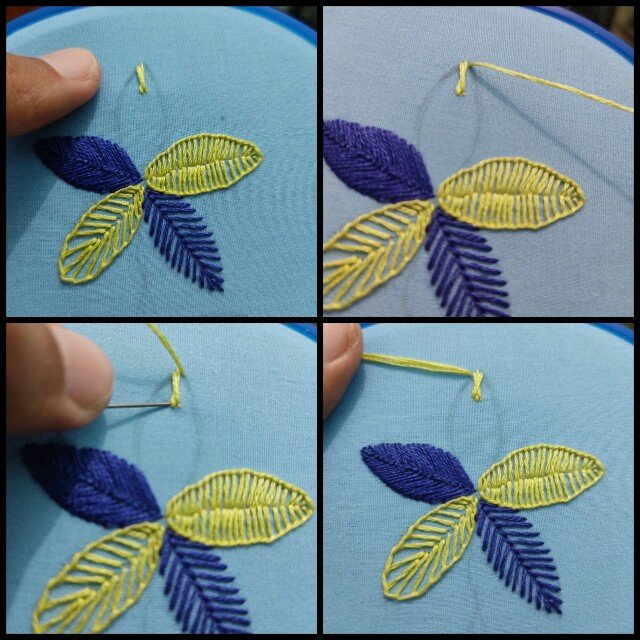
- Para continuar se saca la aguja por la parte izquierda de arriba de la puntada principal, y así repetimos el proceso desde el principio hasta completar el pétalo.
El patrón a seguir es algo así: Sacar por la izquierda arriba, insertar por la derecha abajo, sacar por la derecha arriba, insertar por la izquierda abajo.
Now pull the needle out of the top right side of the main stitch and reinsert it into the bottom left side. At this point it looks like the stitch is about making an elongated "X", and that's more or less it.
To continue, the needle is pulled through the top left side of the main stitch, and so we repeat the process from the beginning until the petal is completed.
The pattern to follow is something like this: Pull out through the left side at the top, insert through the right side at the bottom, pull out through the right side at the top, insert through the left side at the bottom.
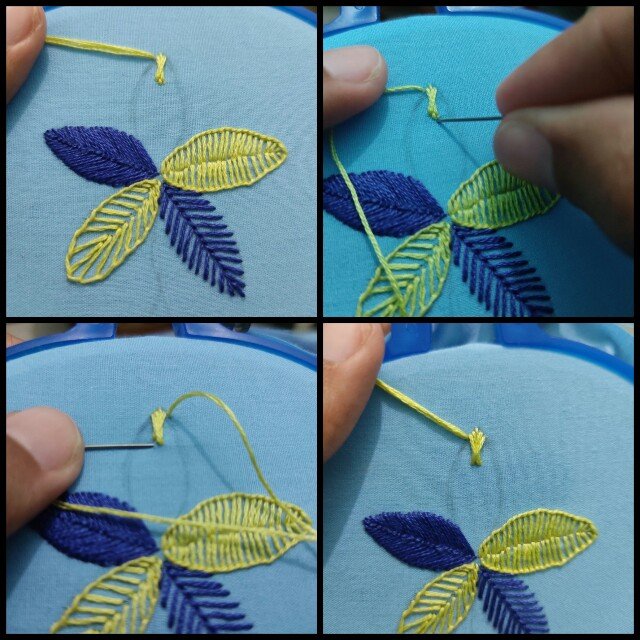
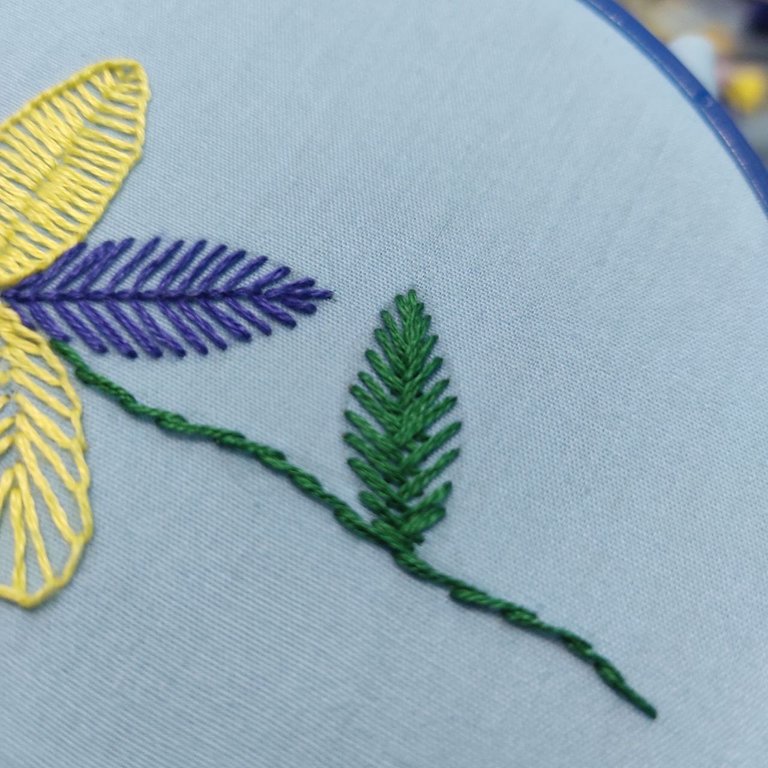
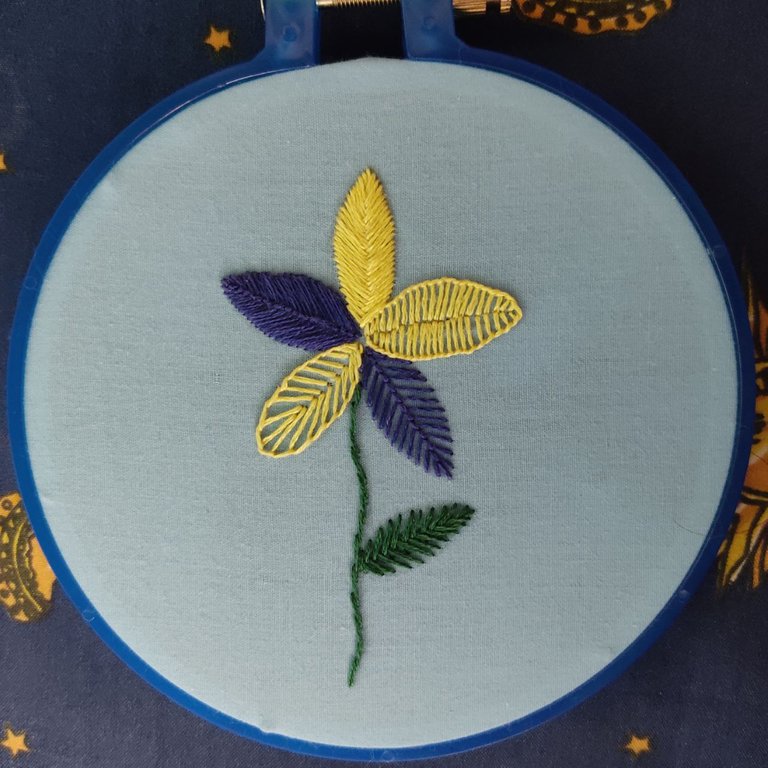
Here you can see the final result. Of course, I got it this way because I did all the stitches very close together, but if you prefer, you can do them a little further apart.
Hermosa labor. Me acabas de recordar a mi mamá, ella hacia unos bordados bellisimos!
Muchísimas gracias ♥ me alegra mucho tu comentario
Buen trabajo y post amiga. Eso quedo hermoso. ☺🪄
Gracias, bella ♥
Muy lindo todo. Muchas gracias por compartir. ¡Buenas vibras!.
Muchísimas gracias 😊
Hola @bunnysneedle, que bonita tu labor, la combinación de colores funciona bastante bien. Me gustaron mucho las puntadas en color azul. Hace un tiempo hice una capacitación para elaborar este tipo de bordado en prendas para bebés, la verdad admiro mucho a las personas que realizan este arte ya que es un trabajo muy delicado, yo no lo seguí haciendo por problemas de la vista, las agujas para estos bordados son extremadamente delgadas. Así que te felicito y te invito a que sigas compartiendo tu contenido con nosotros.
Muchas gracias, lamento que no haya podido continuar, es una labor muy hermosa. Por su puesto que seguiré publicando contenido, me encanta mucho la comunidad ♥
Admirable tu dedicación y paciencia. Me encanta el amor que le pones a tus post y como compartes tan detalladamente cada paso. Sin duda alguna, tus tutoriales son uno de los mejores que he visto. Abrazos.
Gracias, Jessica bella ♥ en verdad le dedico su tiempito a cada tutorial. Espero que funcione y varios e la comunidad se animen a aprender a bordar
Congratulations @bunnysneedle! You have completed the following achievement on the Hive blockchain and have been rewarded with new badge(s) :
Your next target is to reach 100 replies.
You can view your badges on your board and compare yourself to others in the Ranking
If you no longer want to receive notifications, reply to this comment with the word
STOPSupport the HiveBuzz project. Vote for our proposal!
Wonderful instructions! Thank you for including them in English.
Thank you very much! My intention is that everyone can be able to understand the tutorials even though the text is not translated by a person but by a computer, do you think that the translation is accurate?
Beautiful work, makes me want to do more embroidery.