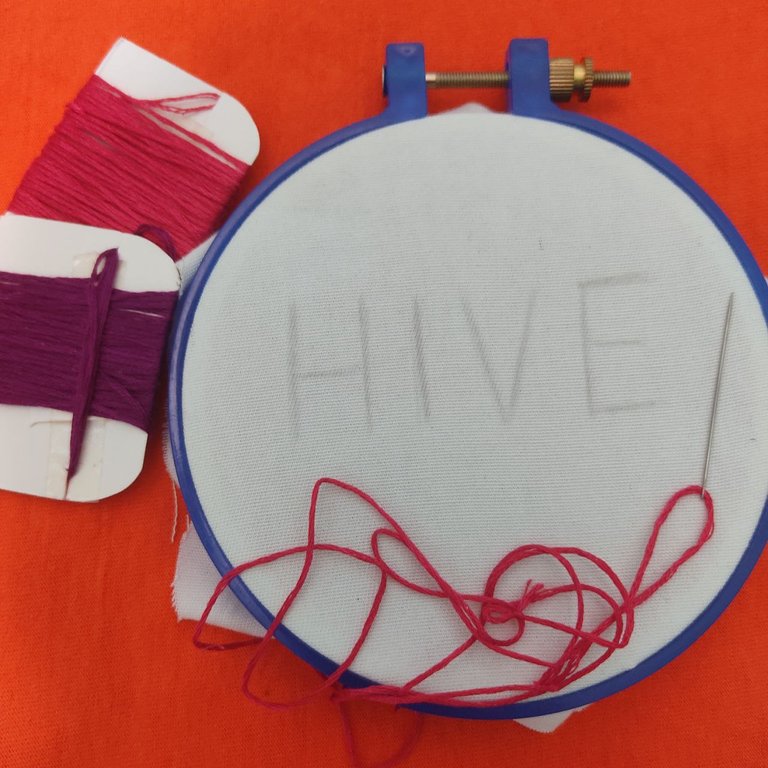
1- Puntada mosca
Es una puntada bastante sencilla, usualmente es una de las primeras que se aprende al iniciar en el bordado, se puede usar para hacer bordes, letras, arcos de flores, decoraciones, etc.
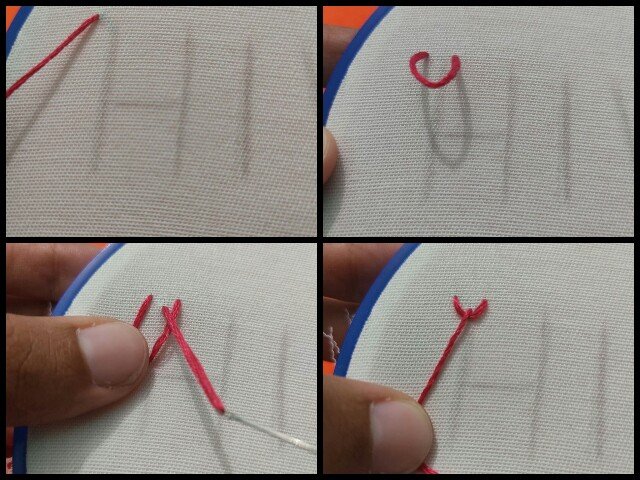
Cómo realizar la puntada mosca:
- Vamos a salir con el hilo un poco hacía la izquierda de la linea marcada, e insertamos la aguja un poco hacia la derecha de la línea dibujada, como si estuviéramos haciendo una linea horizontal.
- Sin jalar el hilo, volveremos a sacar la aguja un poco más abajo, en la linea dibujada y allí sí jalaremos el hilo.
- Volvemos a insertar la aguja unos milimetros más abajo, haciendo una linea vertica.
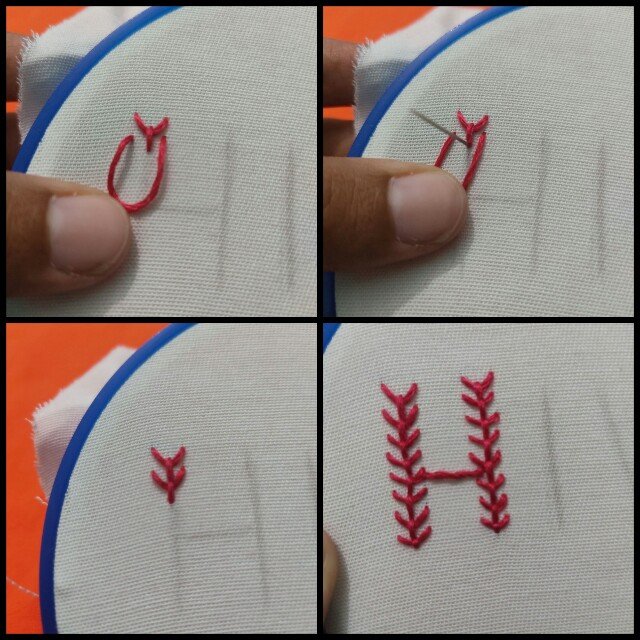
- Después de esto, seguiremos repitiendo el mismo procedimiento hasta terminar la linea de la letra.
1- Fly stitch
This is a fairly simple stitch, usually one of the first stitches you learn when starting in embroidery, it can be used to make borders, lettering, flower bows, decorations, etc.
How to make the fly stitch:.
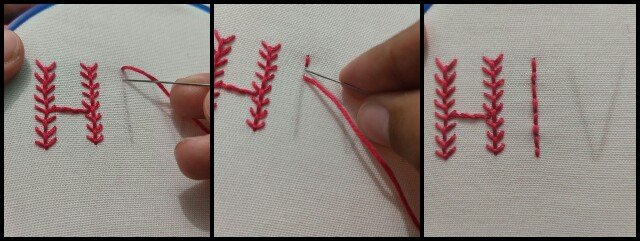
2- Puntada Woven Back
No pude conseguir el nombre de esta puntada en español,me disculpo por eso.Esta puntada es súper sencilla y bastante llamativa, ideal para darle un toque especial a letras o para hacer bordes sencillos.
2- Woven Back Stitch
I couldn't get the name of this stitch in Spanish, I apologize for that.
This stitch is super simple and quite eye-catching, ideal to give a special touch to letters or to make simple borders.
Como hacer la puntada Woven Back:
- Primero debemos realizar la puntada hacia atrás por toda la letra.
- Luego, tomaremos el segundo color, salimos por uno de los extremos, y sin pinchar la tela, pasaremos la aguja por debajo de las puntadas realizadas anteriormente. Primero por un lado y luego por el otro.
- Seguimos realizando el paso 2 hasta completar la linea.Para cerrar, pasamos la aguja hacía abajo.
How to make the Woven Back stitch:
- First, we must do the back stich all over the letter.
- Then, we will take the second color, go out through one of the ends, and without pricking the fabric, we will pass the needle under the stitches previously made. First on the right side, then on the left side.
- We continue the process of step 2 to complete the line, then to close, we pass the needle down, and that's it.
3- Puntada de cuerda
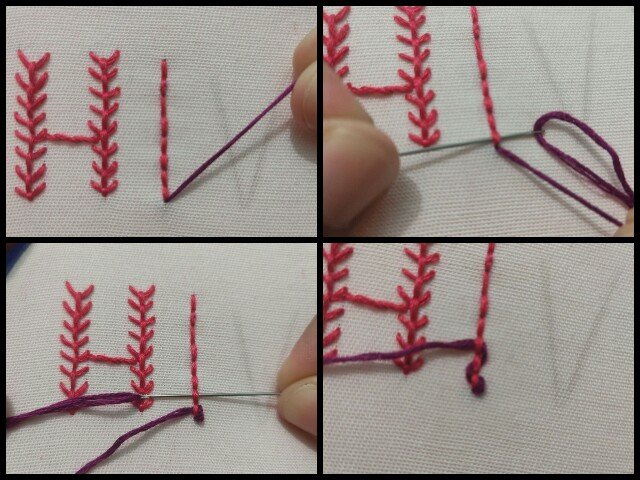
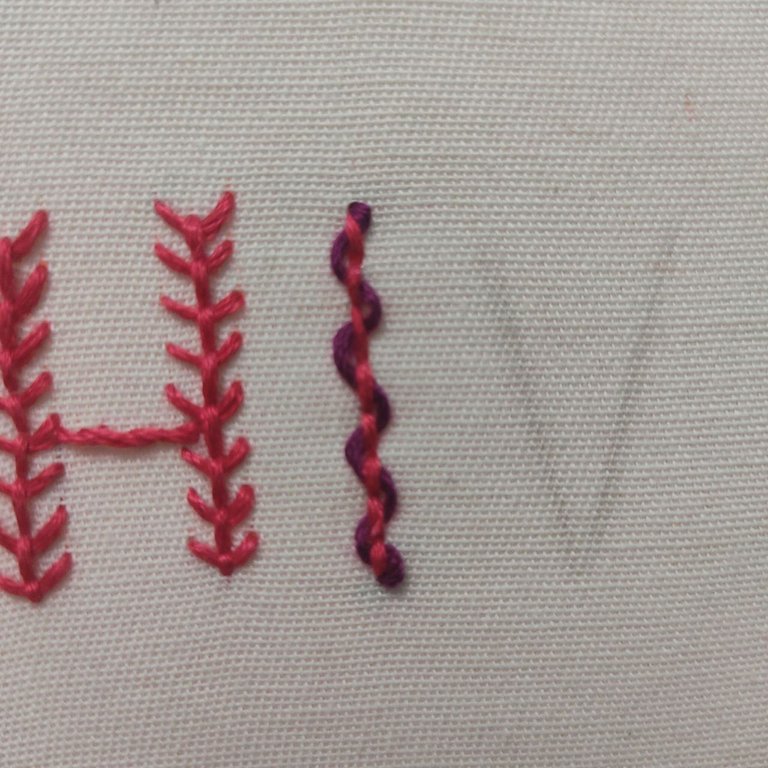
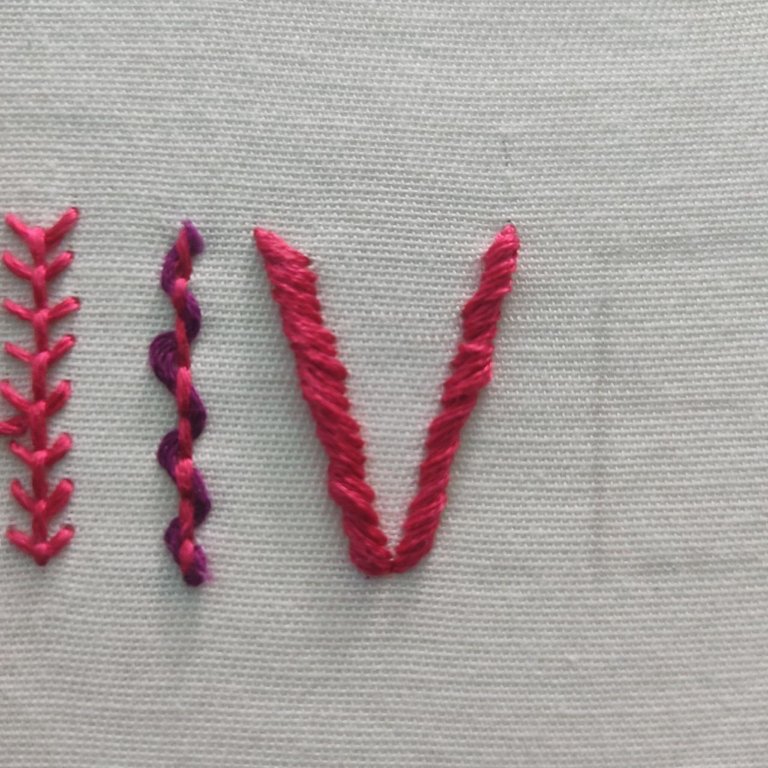
Esta puntada es muy útil para realizar lineas o letras con relieve.
Cómo realizar la puntada cuerda:
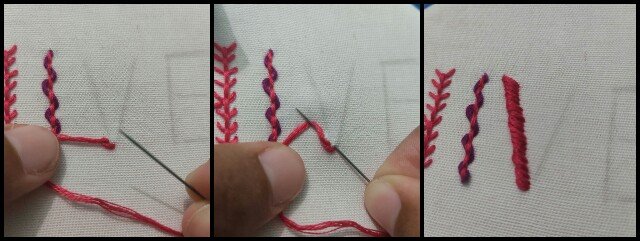
- Sal con la aguja unos milimetros hacía la izquierda de la linea marcada. Seguido pellizca la tela yendode desde la derecha hasta la izquierda, como indica la imagen
- Antes de jalar del hilo, enrolla el hilo en la aguja pasandolo por arriba de esta.
- Al jala la aguja no debería quedar una especie de linea con relieve, continuamos este proceso hasta terminar la letra o linea.
3- Rope stitch
This stitch is very useful for making raised lines or letters.
How to make the rope stitch:
- Step out with the needle a few millimeters to the left of the marked line. Then pinch the fabric going from the right to the left, as shown in the image
- Before pulling the thread, wind the thread onto the needle passing it over the top of the needle.
- When pulling the needle should not be a kind of line with relief, we continue this process until the end of the letter or line.
4- Punto pequinés
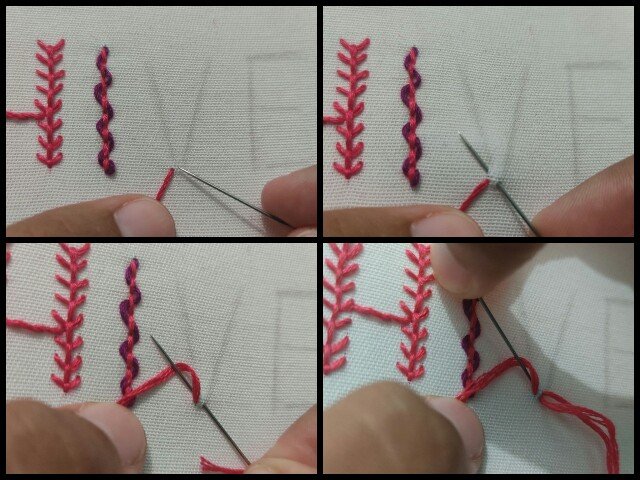
Un punto que según mi opinión tiene un toque muy tierno, lo usaría para decorar bordes y lineas, además de letras.
Como realizar el punto pequinés:
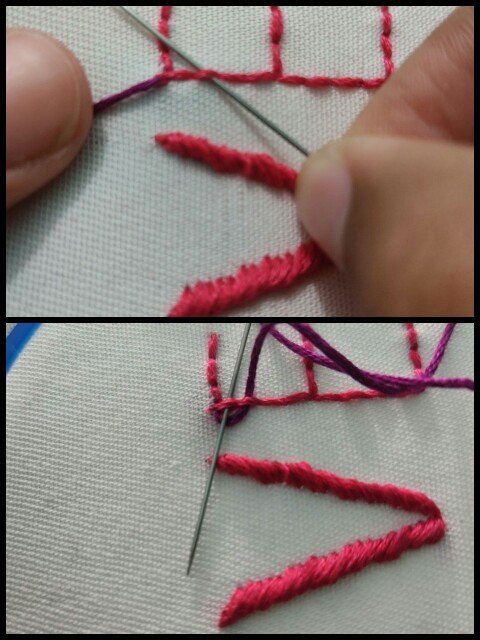
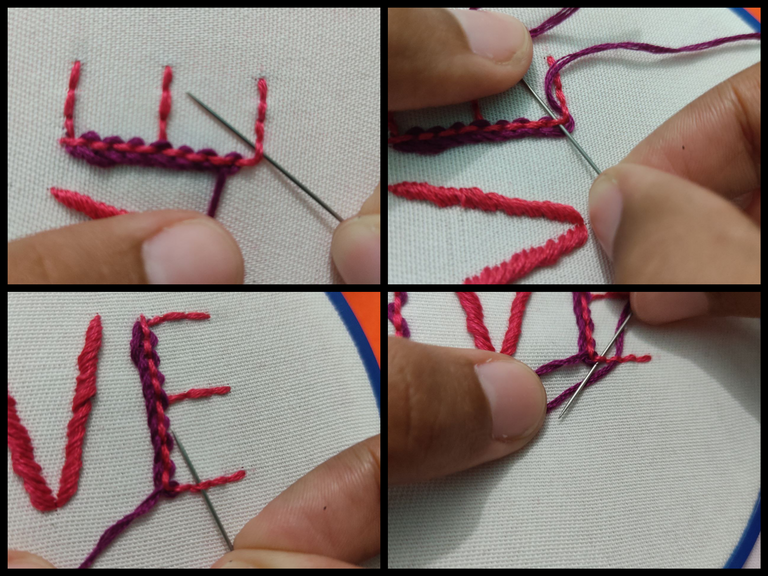
- Rellena toda las lineas con la puntada hacía atrás.
- Usando el otro color, sal por uno de los extremos. Pasa la aguja sin pellizcar la tela por debajo de la segunda puntada realizada anteriormente (O sea, por el segundo hueco)
- Vuelve a pasar la aguja por debajo de la primera puntada. Lo siguiente es repetir el mismo proceso pero con la tercera puntada, para luego pasar la aguja por la segunda puntada, luego hacía la cuarta y así sucesivamente
4- Pekinese stitch
A stitch that in my opinion has a very tender touch, I would use it to decorate borders and lines, as well as letters.
How to make the pekinese stitch:
- Fill in all the lines with the back stitch.
- Using the other color, stitch out one end. Pass the needle without pinching the fabric under the second stitch previously made (That means through the second hole)
- Pass the needle without pinching the fabric under the second stitch previously made.
- Pass the needle back under the first stitch. The next thing is to repeat the same process but with the third stitch, then pass the needle through the second stitch, then through the fourth stitch and so on
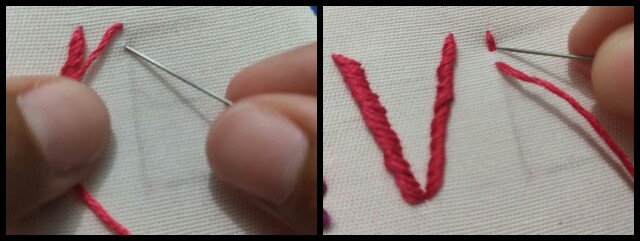
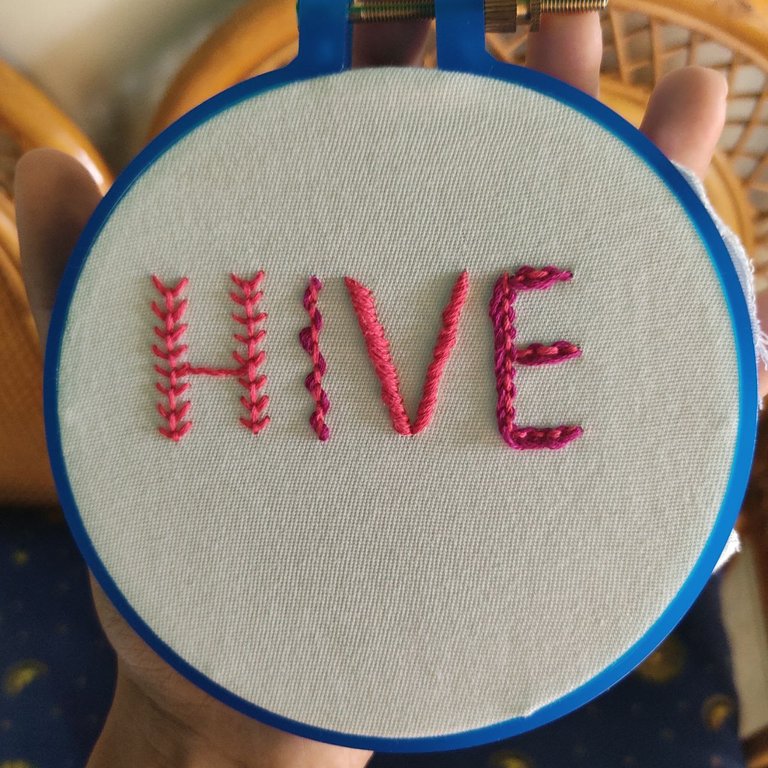
¡Y este es el resultado final!
And this is the final result!

Si haz llegado hasta acá, gracias por leer ♥ espero te haya gustado y te sea de utilidad.
¡Nos vemos pronto!
Importante: Todas las fotos son tomadas por mi. El texto fue traducido de español al inglés usando Deepl.
If you've made it this far, thank you for reading ♥ I hope you liked it and find it useful.
See you next time!
Important: All photos are taken by me. The text was translated from Spanish to English using Deepl.
Que genial! Hoy en día hay que aprender de todo. Excelente post :)
Muchas gracias ♥
Muy bonito y bien explicado.
Muchísimas gracias, espero le anime a aprender nuevas puntadas
OCD Community Incubation Program and has received an OCD upvote! Congratulations!!! Please keep sharing these quality posts 😊Hello @bunnysneedle! Your post was selected by our staff on behalf of the
I invite you to share anything needlework related directly to the NeedleWorkMonday Community. On Monday’s we use the #needleworkmonday tag and on all other days the #needlework tag.
NeedleWorkMonday CommunityWritten by @marblely for the
Te quedo hermoso. Me encantaron las fotografías y también la forma de las puntadas, mi favorita fue la de la letra "E"
Gracias ♥ la puntada pequinés es hermosisima, quien diría que con poquitos pasos se logra algo tan bonito
Beautiful designs❤