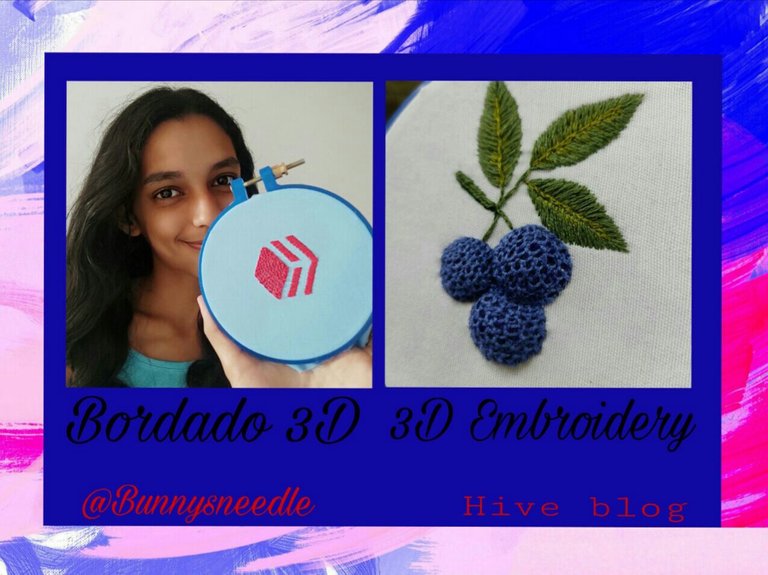
Español:
¡Feliz sábado a todos!
El día de hoy enseñaré un paso a paso muy interesante para explorar otras ramas del bordado, en este caso, el bordado con relieve o 3D, el cuál se puede aplicar para realizar diferentes trabajos cómo bordar frutas, animales, objetos, etc.
Si eres un(a) aficionado del bordado como yo, espero que este tutorial te sea de utilidad para aprender otras técnicas. Si no sabes nada sobre bordado pero te llama la atención, espero esto te animé a aprender e investigar más sobre está hermosa labor.
English:
Happy Saturday to everyone!
Today I will teach a very interesting step by step to explore other branches of embroidery, in this case, the embroidery with relief or 3D, which can be applied to perform different works such as embroidering fruits, animals, objects, etc.
If you are a fan of embroidery like me, I hope this tutorial will be useful for you to learn other techniques. If you don't know anything about embroidery but it catches your attention, I hope this will encourage you to learn and investigate more about this beautiful work.
~Corded detached buttonhole stitch~
Está vez, bordare el ícono de hive, ya que la forma de este diamante es perfecto para practicar el aumentar y disminuir la puntada.
This stitch is very simple to do, but I know that understanding the process can be complicated for some, so I leave a detailed step by step of how to do the corded detached buttonhole stitch
This time, I will embroider the hive icon, since the shape of this diamond is perfect to practice increasing and decreasing the stitch.
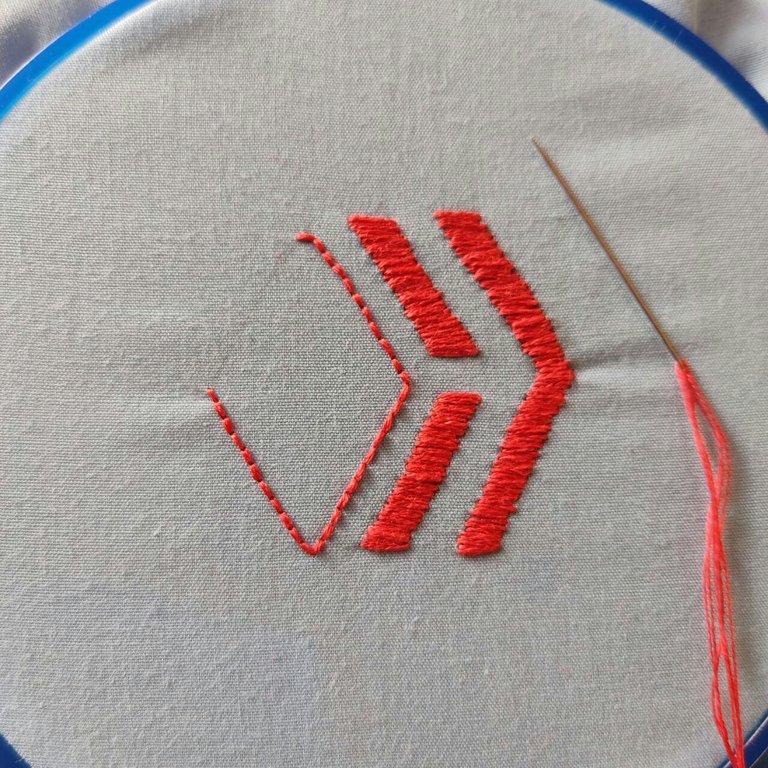
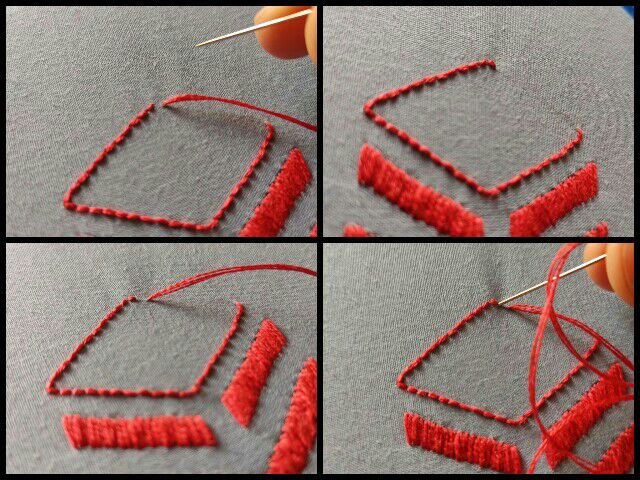
Para guiarnos mejor en este paso a paso, estas puntadas las llamaré "Puntadas lineales"
To guide us better in this step by step, I will call these stitches "Linear stitches".
~1ra vuelta~
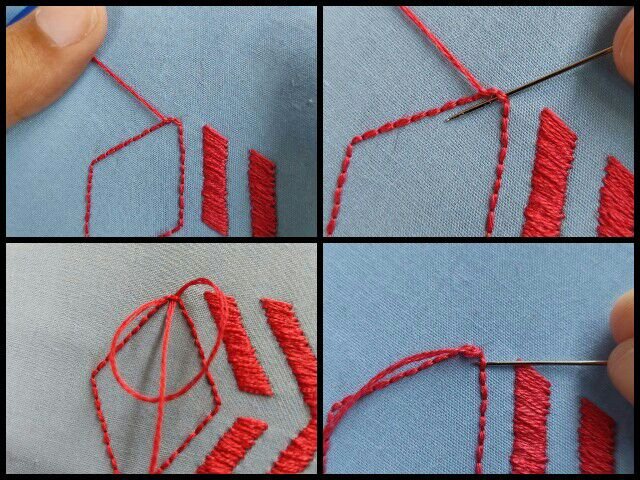
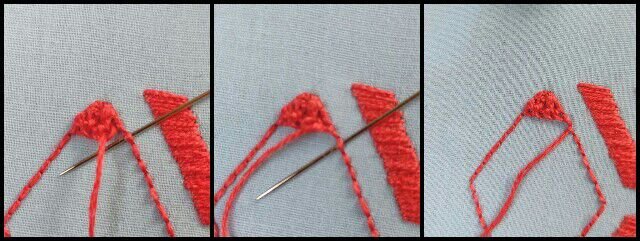
Comenzaremos sacando la aguja por la izquierda, justo al lado de la primera puntada lineal y pasaremos la aguja SIN PINCHAR LA TELA por debajo de la puntada lineal de la punta. Al jalar la aguja, el hilo debe pasar por debajo de esta, para que así se forme una especie de "casita" (así lo llamaré). Para cerrar pasamos la aguja por debajo de la primera puntada lineal del lado derecho.
~1st row~
We will start by pulling the needle out to the left, right next to the first linear stitch and pass the needle WITHOUT PUNCTURING THE FABRIC underneath the linear stitch at the tip. When pulling the needle, the thread should pass under the needle, so that it forms a kind of "little house" (that's what I'll call it). To close, pass the needle under the first linear stitch on the right side.
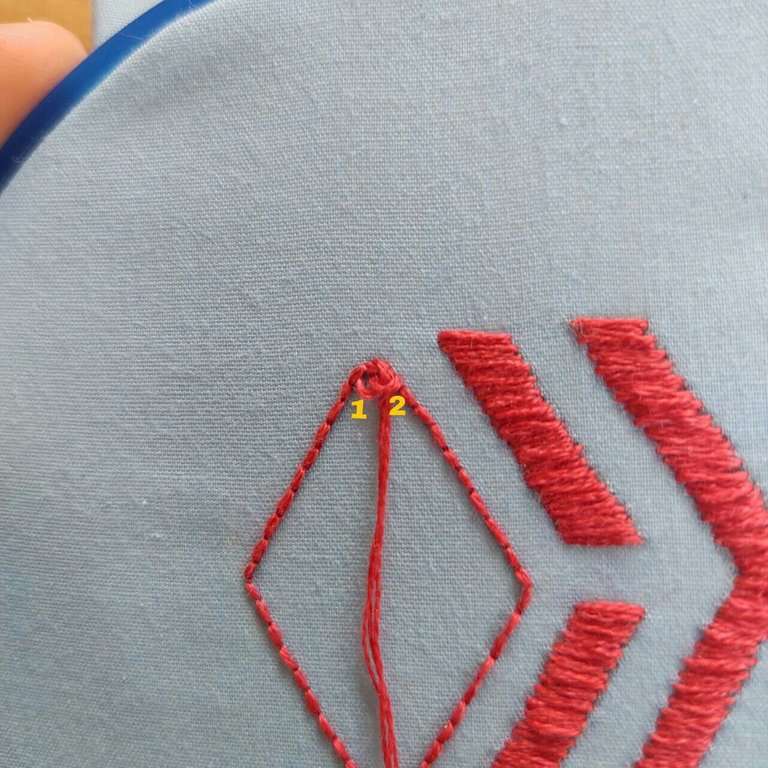
You will notice that at the end of this lap, the line has 2 "little houses", the idea is to increase the number of little houses until you reach half of the diamond.
~2da vuelta~
Para empezar la segunda vuelta, se debe pasar la aguja por debajo de la puntada lineal 2 de la derecha(La pasamos por la primera para cerrar la primera vuelta, y la pasamos por la segunda para iniciar la segunda vuelta). Está linea irá de derecha a izquierda, al contrario de la primera, que fue desde la izquierda a la derecha. Luego repetiremos el mismo proceso de formar las casitas, sólo que está vez en vez hacerlo una vez para crear dos casiras, se hará dos veces para formar tres casitas.
~2nd row~
To start the second row, pass the needle under the right linear stitch 2 (we pass it through the first stitch to close the first row, and pass it through the second stitch to start the second row). This line will go from right to left, contrary to the first one, which went from left to right. Then we will repeat the same process of forming the houses, only this time instead of doing it once to create two houses, we will do it twice to form three houses.
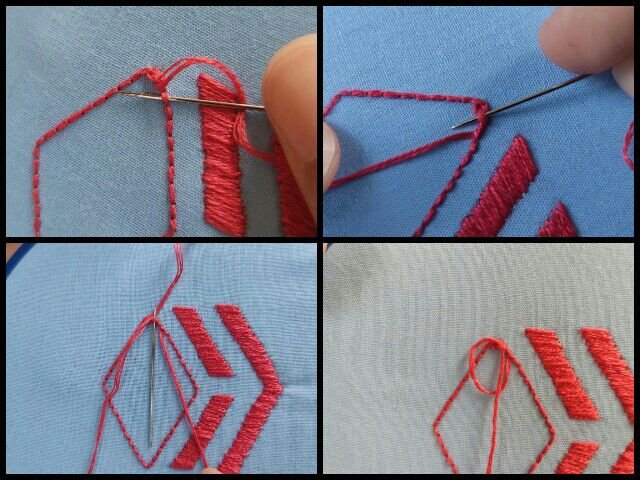

Ahora sólo queda repetir el proceso de izquierda a derecha y viceversa hasta llegar a la parte en donde debemos disminuir
You will notice that now instead of having 2 houses, there are 3 houses.
Now just repeat the process from left to right and vice versa until you reach the part where we must decrease.
~Realizando la 3ra vuelta~
~Doing the 3th row~

~Disminuyendo~
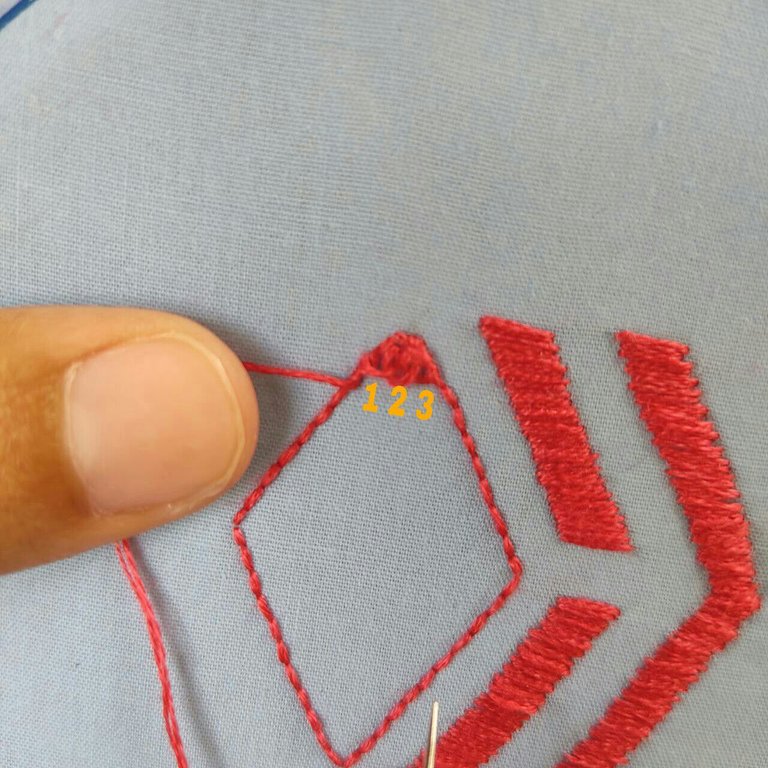
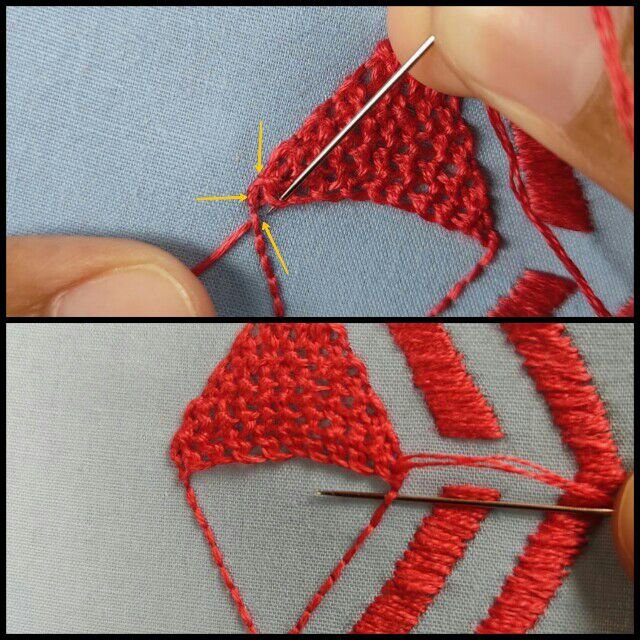
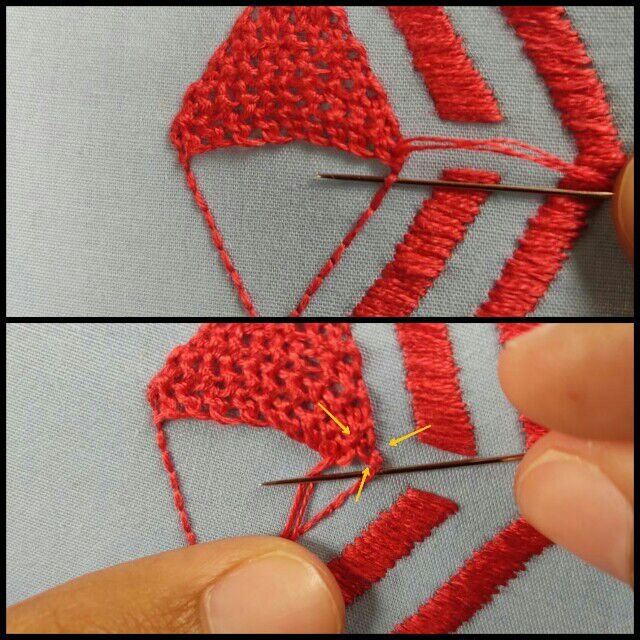
Para disminuir la puntada entre vuelta y vuelta, sólo tienes que saltarte la primera casita de la fila y la última casita de la fila. Es decir, se hará el mismo proceso al iniciar y culminar las vueltas, sólo que sin pasar la aguja por la primera y la última casita, cómo podrás visualizar en las fotos (señalo con flechas amarrilla). Este proceso hará que e vaya disminuyendo una a una el número de casitas en cada vuelta.
~Decreasing~
.To decrease the stitch between rows, just skip the first stitch of the row and the last stitch of the row. That is, the same process will be done at the beginning and at the end of the rows, only without passing the needle through the first and the last row, as you can see in the pictures (I point out with yellow arrows). This process will decrease one by one the number of houses in each turn.
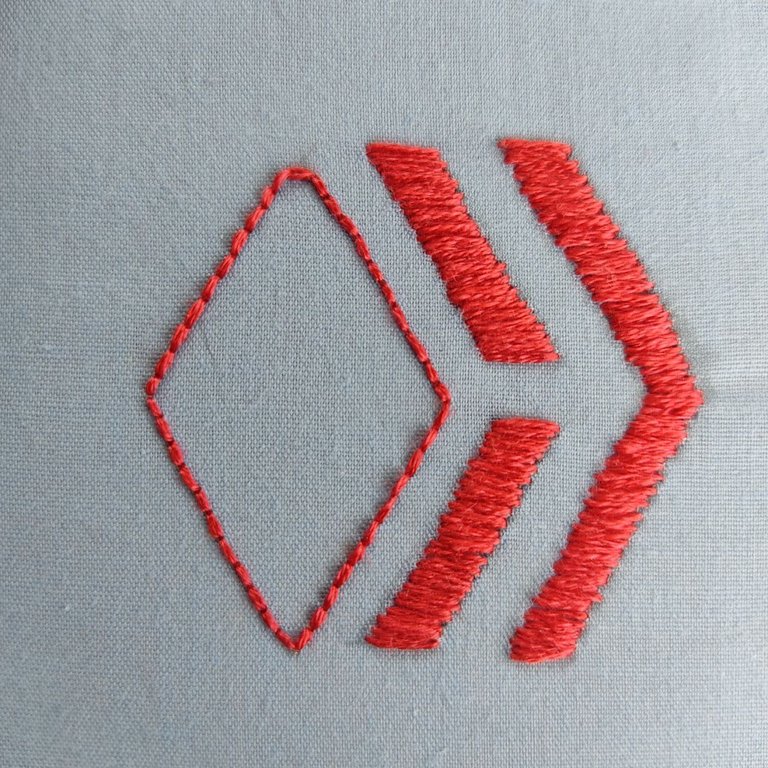
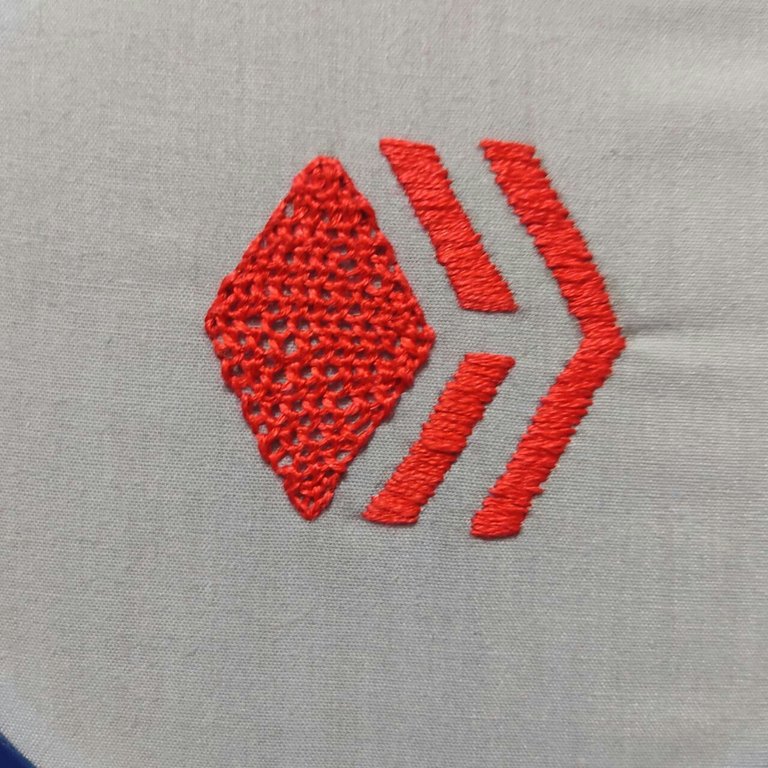
Aquí ya está el ícono de hive completamente bordado. Ustedes pensarán, ¿Y dónde está el efecto 3D? Paciencia, caramba, esto apenas lo utilicé para explicar la puntada, ya viene lo demás.
Here is the fully embroidered hive icon. You may think, where is the 3D effect? Patience, gee, I just used this to explain the stitch, the rest is coming.
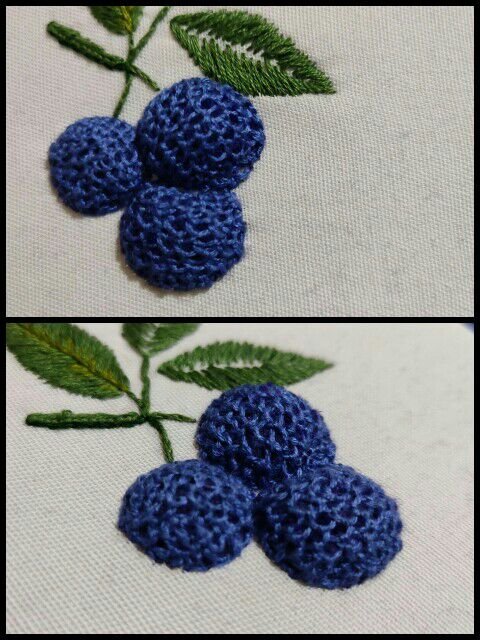
Para enseñar el efecto 3D, bordé estás hermosas moras azules, y ciertamente, parecieran bolitas pegadas a la tela♥
To show the 3D effect, I embroidered these beautiful blue berries, and indeed, they look like little balls stuck to the fabric♥
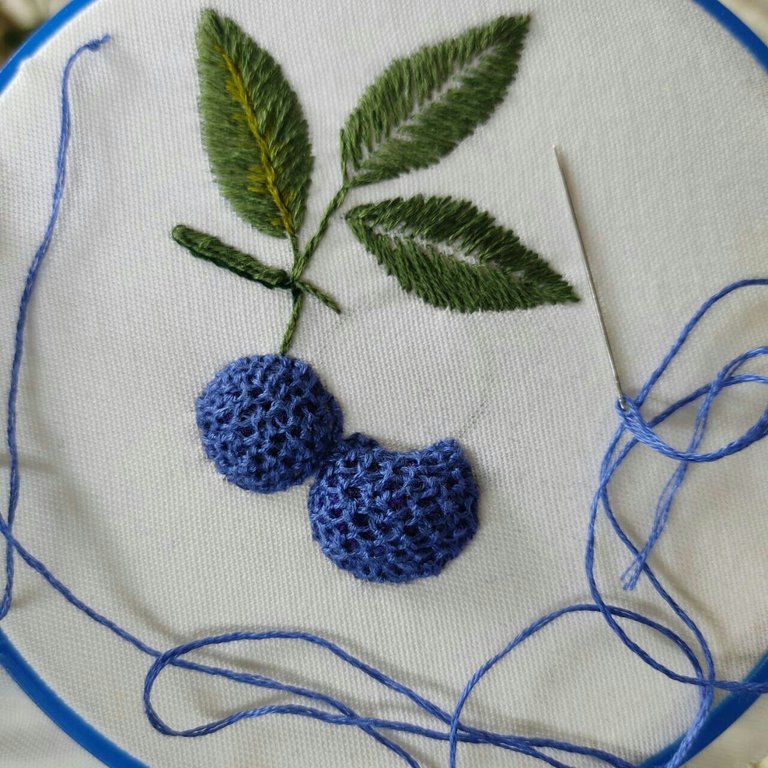
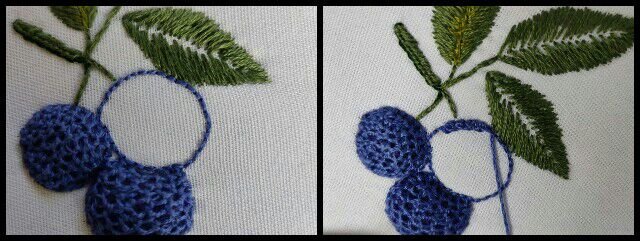
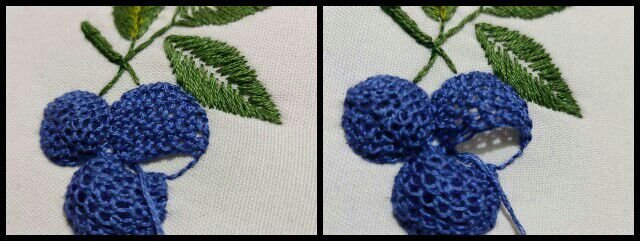
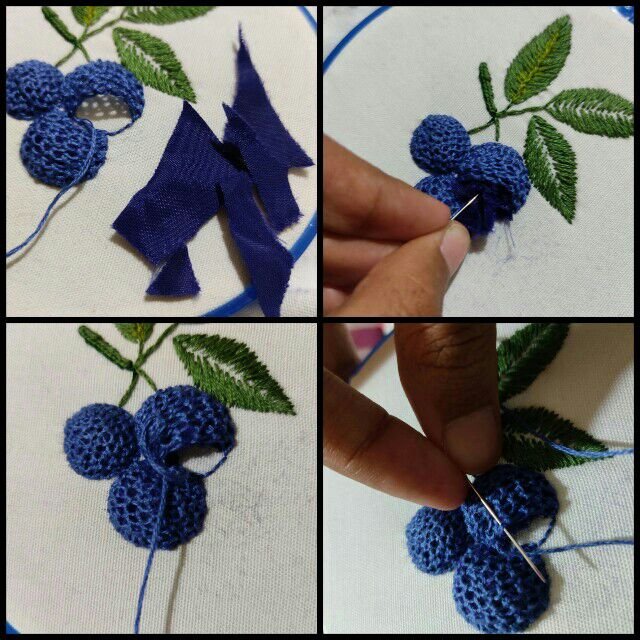
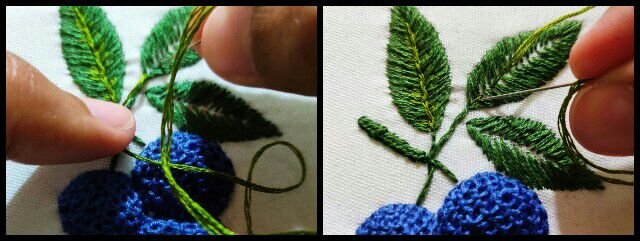
For the leaves I just followed my heart and did a lot of diagonal stitching trying to blend the light green with the dark green ♥.
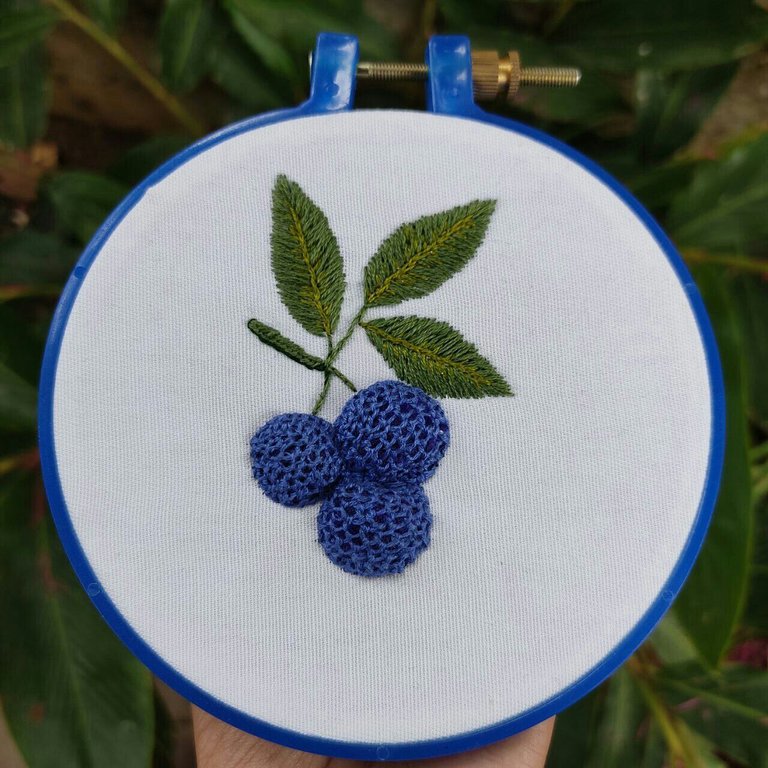
¡He aquí el resultado final!
Here it is the final result!
Congratulations @bunnysneedle! You have completed the following achievement on the Hive blockchain and have been rewarded with new badge(s) :
Your next target is to reach 1750 upvotes.
You can view your badges on your board and compare yourself to others in the Ranking
If you no longer want to receive notifications, reply to this comment with the word
STOPCheck out the last post from @hivebuzz:
Support the HiveBuzz project. Vote for our proposal!
That blue berry is cute.
Thanks!
Welcome :)
Hola @bunnysneedle
Que preciosidad de trabajo, las moras lucen simplemente espectacular, no imaginé que para lograr el efecto 3D se usaba tela, que genial. Las hojas lucen tan reales
Gracias por comaprtir.
Saludos
Hola, muchísimas gracias ♥ sí, se usan diferentes técnicas para rellenar, a veces usan el mismo hilo, guata o tela.
This is Amazing! 😳
Did you come up with this effect on your own? It’s genius to use the scraps for an added effect! It looks like those blueberries were just placed there...as if you could pick them up. Really great work @bunnysneedle. Thanks for showing how it’s done ~
No, it is pretty hard to create a new stitch from zero. I have learned from several investigations on youtube and pinterest, the are many variations of this stitch but I tried to learn it on my way, maybe should I clarify it next time? Anyway, thanks for the support.
Also, I used fabric scraps because I didn't have any stuffed plush. Is a cute way to recycle ♥
Great 3D stitch you made, love the blueberries
OCD Community Incubation Program and has received an OCD upvote! Congratulations!!! Please keep sharing these quality posts 😊Hello @bunnysneedle ! Your post was selected by our team on behalf of the
Your embroidery is so neat! Love the 3D effect from the method you shared. Thank you for showing us the steps, it adds on to our little book of knowledge :)
NeedleWorkMonday Community.Written by @marblely for the
¡Qué belleza de moras me encantó el efecto 3D!
Gracias por compartir tu hermoso trabajo,
WoW! Excelente post! Ya se para intentarlo 😊