¿Y como esta mi gente creativa? espero que hayan pasado una feliz semana de relajación, recogimiento y oración. Les comento que por acá por casa estuve bastante ocupada en las actividades de la iglesia, también me fui unos días a la playa con mi familia, en parte para distraernos de las actividades cotidianas y por otra parte para olvidarme que la cable operadora me dejo sin internet casi 8 días.

Pero mientras todo esto sucedía yo tomé mis agujas y me puse a tejer; definitivamente me di cuenta que cuando ocupamos la mente en otras cosas las angustias desaparecen y la calma se apodera del ambiente.
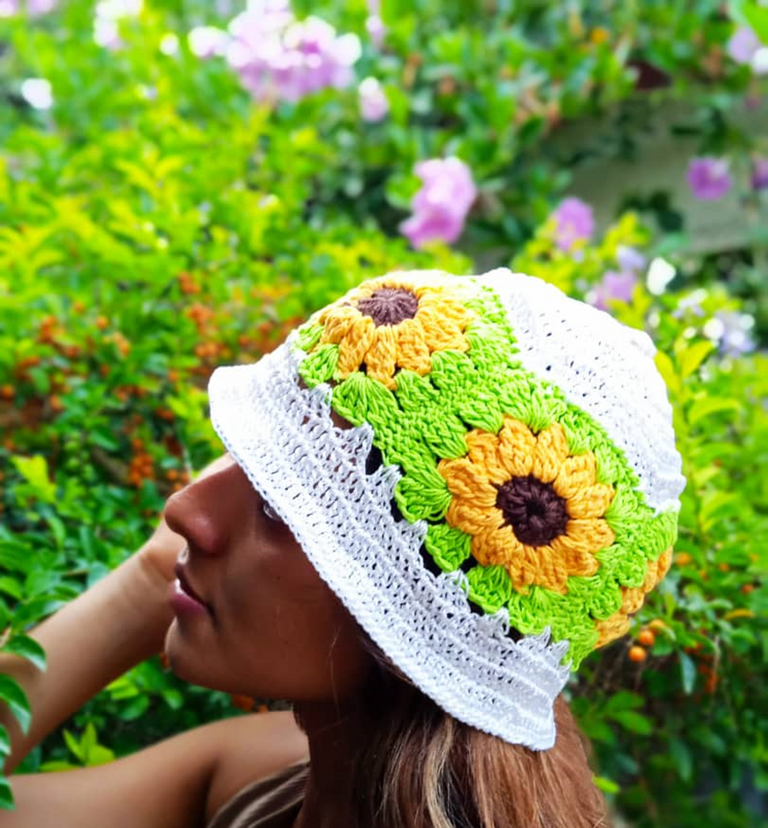
Hoy les quiero mostrar este gorro de girasoles tejido en crochet que hice para mi sobrina Emily a quien le encantan estas cosas que yo hago. Ella es mi fan número uno y también es mi modelo cuando necesito tomar bellas fotos.

Este año me han inspirado mucho las flores, hace unos días estaba tejiendo amapolas, luego rosas y ahora los girasoles, tal vez mi blog este año 2022 sea muy florido, ¡pienso yo!
Pues ahora les voy a contar un poco de cómo fue el proceso para elaborar este lindo y fácil gorro. Y como diría nuestro amigo el chapulín colorado ¡Síganme los buenos!
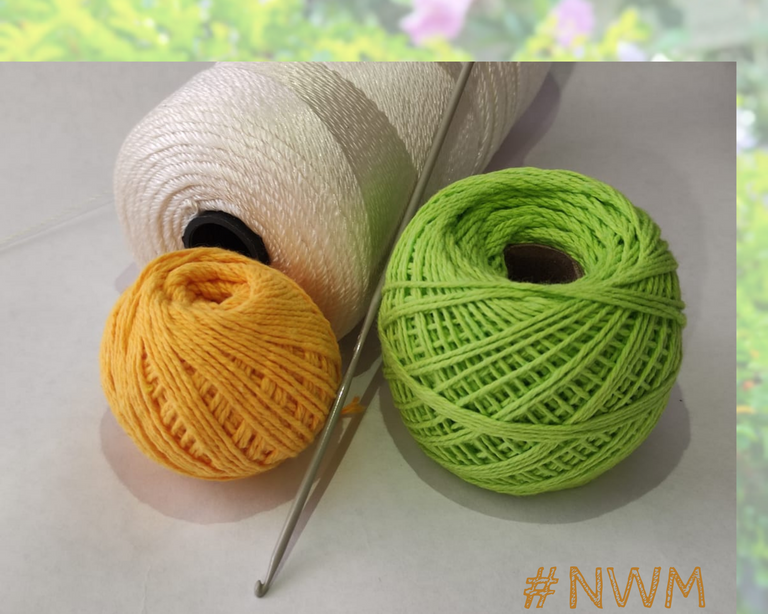

- Pabilos amarillo verde y marrón.
- hilo de cera para tejer macramé.
- aguja de tejer #3
La técnica utilizada fue crochet y tarde unas 6 horas aproximadamente ya que lo hice con mucha calma.

Hoy les tengo que contar toda la verdad, es decir, todo eso que sucede detrás de cámara. Este gorro comenzó muy bien, desde la idea principal, los patrones, los materiales, cuando cosas así suceden nadie se estresa y todo fluye.
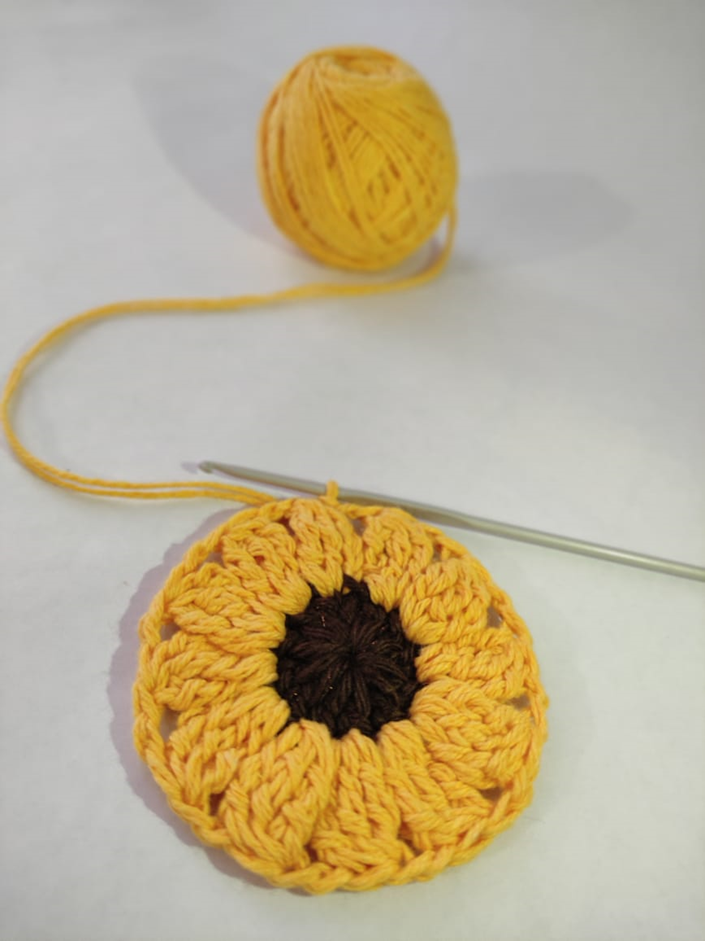
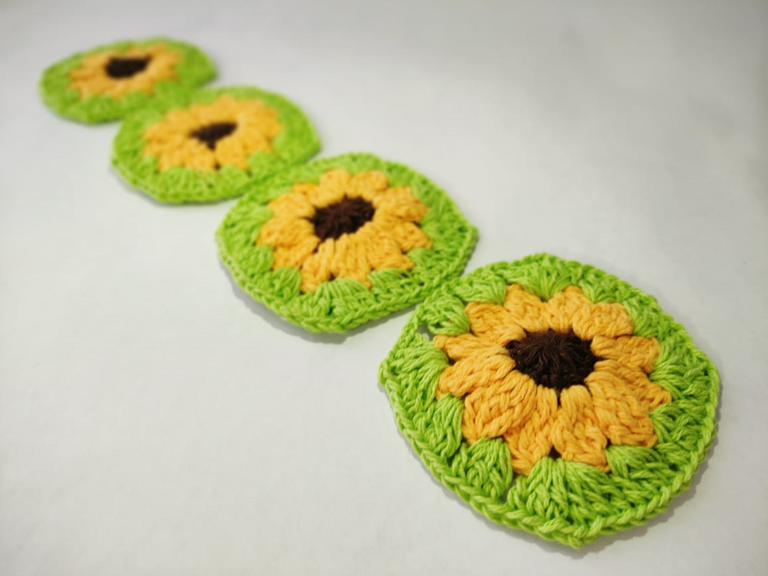
Este Girasol inicia con un aro mágico y dentro de él se levantan 3 cadenetas que equivalen a nuestro primer punto alto, luego se tejen 11 puntos altos más y cerramos con punto deslizado en la tercera cadeneta de inicio.
Cambiamos de hebra, en este caso puse doble hebra amarilla y comencé a tejer grupos de 3 puntos altos dobles sin terminar, por ultimo tomas hebra y sacas todos los puntos de una vez, así se van formando los pétalos de la flor separados por dos cadenetas al aire.
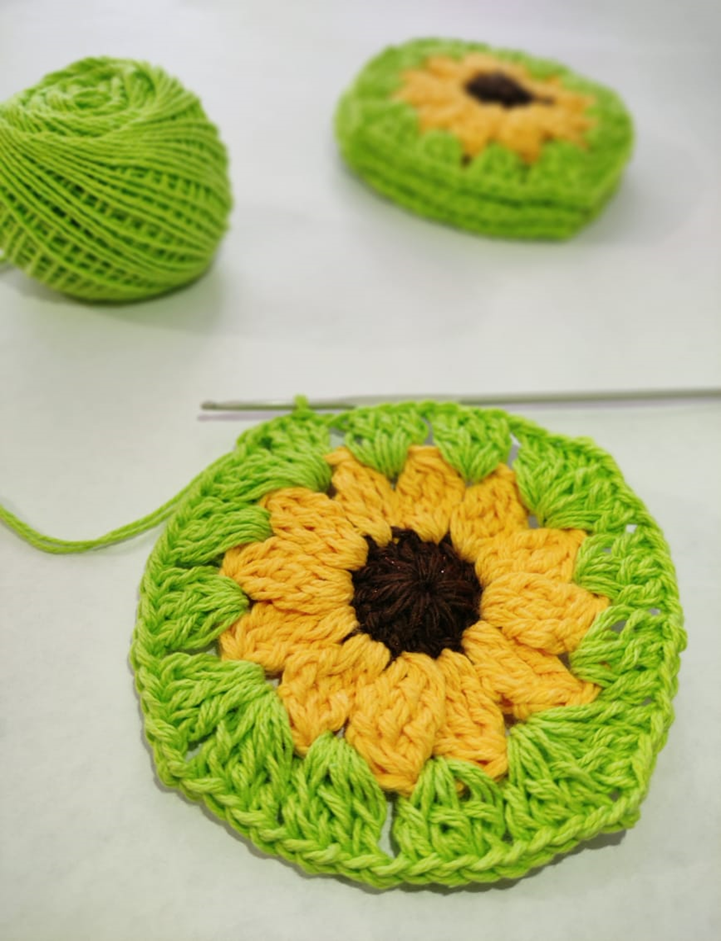
Cambiamos de hebra al color verde, levantamos 3 cadenetas y seguido tejemos dos puntos altos, dos cadenetas y en el mismo espacio tejemos 3 puntos altos más, así elaboramos un abanico. Tejemos una cadeneta y en el siguiente espacio de cadena de la vuelta anterior tejemos 3 puntos altos, una cadeneta y seguimos con 3 puntos altos en el espacio de cadena de la vuelta anterior. Ahora repetimos nuevamente el punto abanico y continuamos repitiendo el mismo proceso hasta terminar.
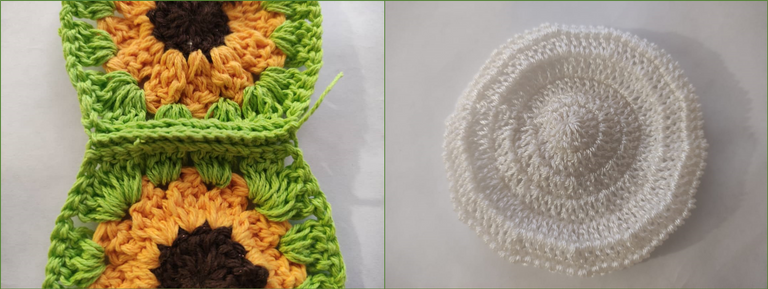
Como pueden ver en esta imagen yo solo hice 4, creía que con eso iba a ser suficiente para la circunferencia del cráneo, así que junte los 4 cuadros con puntos bajos tomando solo la hebra del frente de cada cuadro, siempre pendiente del lado derecho.
Resulta que cuando tenía todos mis cuadros unidos me lo puse en mi cabeza y ¡PLUM! no entraba en mi cabeza. Me di cuenta que con cuatro solo sirve para una niña.
No sé si a ustedes les pasa lo mismo que a mí, pero cuando tengo que destejer ¡me da de todo! pero como apenas estaba empezando me llené de paciencia y solo me animaba el querer ver la imagen del gorro terminado.
Solté de un lado, busqué mas material (Que por suerte tenia por ahí guardado) e hice otro cuadro, lo junté y listo ¡Boala! tenía mi gorro en proceso nuevamente.
Con el ánimo nuevamente al 100% inicié el tejido de la copa o parte superior, para eso vamos utilizar hilo Beis. En un aro mágico tejemos 12 puntos altos, luego en la segunda vuelta tejemos aumentos, es decir 2 puntos altos en cada punto de base, en total debemos tener 24 puntos altos al final de esta vuelta.
Seguimos en la tercera vuelta con aumentos, es decir, dos puntos altos en el mismo punto de base, luego un punto alto solo, repetimos un aumento y continuamos hasta el final.
Así fui realizando vueltas hasta obtener 5 puntos altos y un aumento. Esta medida me dio exactamente la circunferencia que daban los 5 cuadros de girasol.

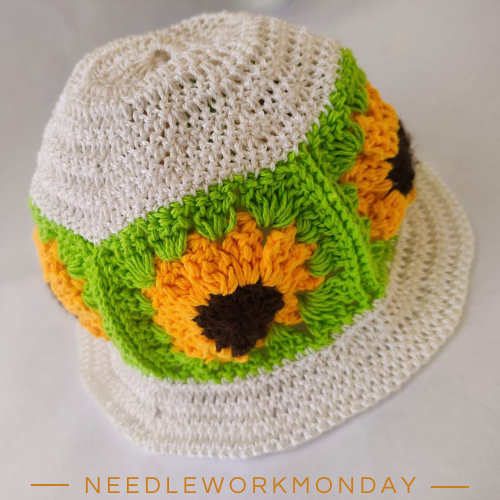
En esta imagen que les muestro hubo nuevamente una falla, porque resulta que yo inicie con una vuelta de puntos bajos para luego tejer 3 vueltas de puntos altos con aumentos, pero cuando creí que ya todo iba bien y estaba terminado fui al espejo y me lo puse ¿Y adivinen qué? no me gustaba lo que veía; el ala de mi gorro era muy pequeña, no tenía forma, así que tome un descanso y al rato retomé el tejido.
La verdad es que tengo un problema y es que me gusta que las cosas queden bien, que se van bonitas y que la gente que va a utilizar mis prendas se vean felices cuando las usen.
Yo lo que hice fue tomar animo a partir de este pensamiento y destejí para volver a empezar la solapa o ala. En la segunda imagen que publiqué el día de hoy pueden ver lo que hice. Con hilo beis tejí 3 puntos altos en cada espacio de cadena de las hojas verdes. Luego hice vueltas de aumentos, es decir: un aumento de dos puntos altos en el mismo espacio de cadena, luego 5 puntos altos, uno en cada espacio de cadena de la vuelta anterior y seguidamente otro aumento. Así seguimos hasta terminar la vuelta.
Continuamos haciendo vueltas con aumentos, en mi caso hice hasta obtener 7 puntos altos y un aumento y terminé mi tejido con una vuelta de puntos bajos.

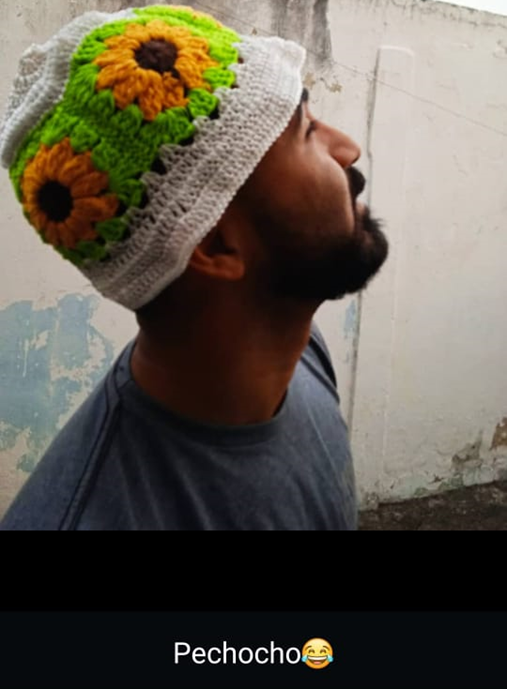
Este día no pudo terminar mejor, esta imagen me dio muchísima risa, cuando me al enviaron no podía parar. Le presento a mi sobrino Alfredo quien posa un hermoso gorro tejido a crochet por su tía linda Carolina. La verdad es que en mi familia ocurre de todo y de ello hacemos un chiste.
Como ven todo terminó bien gracias a Dios y mi sobrina le quedó muy bien su gorro.
La vida es así, hay momentos buenos y otros no tanto, pero está en nosotros afrontar las dificultades y salir adelante. No nos dejemos decaer por nada, Dios nos da una oportunidad cada día para vivir y ser felices, así que los invito a sonreír y disfrutar la vida que es muy bella.
𝕋𝕠𝕕𝕠 𝕧𝕒𝕝𝕖 𝕝𝕒 𝕡𝕖𝕟𝕒 𝕤𝕚 𝕝𝕝𝕖𝕧𝕒, 𝕙𝕚𝕝𝕠𝕤, 𝕥𝕖𝕝𝕒𝕤 𝕪 𝕞𝕦𝕔𝕙𝕒𝕤 𝕡𝕦𝕟𝕥𝕒𝕕𝕒𝕤 𝕕𝕖 𝔸𝕄𝕆ℝ.

And how are you my creative people? I hope you had a happy week of relaxation, recollection and prayer. I'll tell you that here at home I was quite busy with church activities, I also went a few days to the beach with my family, partly to distract us from the daily activities and on the other hand to forget that the cable operator left me without internet for almost 8 days.

But while all this was happening I took my needles and started to knit; I definitely realized that when we occupy our minds with other things the anxieties disappear and calmness takes over the environment.
Today I want to show you this crocheted sunflower hat I made for my niece Emily who loves these things I make. She is my number one fan and she is also my model when I need to take beautiful pictures.
This year I have been very inspired by flowers, a few days ago I was knitting poppies, then roses and now sunflowers, maybe my blog this year 2022 will be very flowery, I think!
Well now I'm going to tell you a little bit about the process to make this cute and easy hat. And as our friend El Chapulín Colorado would say, follow me, the good ones!

- Yellow green and brown wicks.
- macramé weaving wax thread.
- knitting needle #3
The technique used was crochet and it took about 6 hours approximately since I did it very calmly.

Today I have to tell you the whole truth, that is, everything that happens behind the camera. This hat started very well, from the main idea, the patterns, the materials, when things like this happen nobody gets stressed and everything flows.
This Sunflower starts with a magic ring and inside it we pick up 3 chains that are equivalent to our first high stitch, then we knit 11 more high stitches and close with slip stitch on the third starting chain.
We change yarn, in this case I put double yellow yarn and started to knit groups of 3 double high stitches without finishing, finally you take yarn and pull out all the stitches at once, thus forming the petals of the flower separated by two chain stitches in the air.
We change the yarn to green, we pick up 3 chains and then we knit two double crochet, two chains and in the same space we knit 3 more double crochet stitches, this way we make a fan. We knit one chain and in the next chain space of the previous row we knit 3 double crochet, one chain and continue with 3 double crochet in the chain space of the previous row. Now we repeat again the fan stitch and continue repeating the same process until we finish.
As you can see in this image I only made 4, I thought that would be enough for the circumference of the skull, so I joined the 4 squares with low stitches taking only the front strand of each square, always pending on the right side.
It turns out that when I had all my squares joined together I put it on my head and PLUM! it didn't fit on my head. I realized that with four it's only good for one girl.
I don't know if it's the same for you, but when I have to unknit, I get all kinds of things! But since I was just starting, I was filled with patience and just wanted to see the finished hat image.
I let go of one side, looked for more material (which luckily I had saved somewhere) and made another frame, put it together and boom! I had my hat in process again.
With the mood back to 100% I started knitting the cup or upper part, for that we will use beige yarn. In a magic ring we knit 12 high stitches, then in the second row we knit increases, that is to say, 2 high stitches in each base stitch, in total we should have 24 high stitches at the end of this row.
We continue in the third row with increases, that is, two high stitches in the same base stitch, then a single high stitch, we repeat an increase and continue until the end.
In this way I made rounds until I had 5 double crochet stitches and one increase. This measurement gave me exactly the circumference of the 5 sunflower squares.

In this image I show you there was again a failure, because it turns out that I started with a round of single crochet and then knit 3 rounds of double crochet with increases, but when I thought that everything was fine and was finished I went to the mirror and put it on and guess what? I didn't like what I saw; the brim of my hat was too small, it had no shape, so I took a break and then I went back to knitting.
The truth is that I have a problem and that is that I like things to look good, that they look nice and that the people who are going to wear my garments look happy when they wear them.
What I did was to take heart from this thought and unweave to start over the flap or wing. In the second image I posted today you can see what I did. With beige yarn I knit 3 high stitches in each chain space of the green leaves. Then I made rows of increases, that is to say an increase of two double crochet stitches in the same chain space, then 5 double crochet stitches, one in each chain space of the previous row and then another increase. This is how we continue until the end of the row.
We continue making rows with increases, in my case I did until I got 7 double crochets and one increase and I finished my knitting with a row of single crochets.

This day couldn't have ended any better, this image gave me so much laughter, when it was sent to me I couldn't stop. Meet my nephew Alfredo who is posing a beautiful crochet knitted hat by his cute aunt Carolina. The truth is that everything happens in my family and we make a joke out of it.
As you can see, everything ended well, thanks to God, and my niece's hat turned out very well.
Life is like that, there are good moments and others not so good, but it is up to us to face the difficulties and move forward. Let us not let ourselves be discouraged by anything, God gives us an opportunity every day to live and be happy, so I invite you to smile and enjoy life, it is very beautiful.
Antes de despedirme me gustaría invitar a todas mis amigas manualistas a que se unan al NeedleWork Your Jewelry for Mother’s Day! A NeedleWorkMonday Contest!, el cual estará muy bonito ya que trae olor a Mujer, a madre, a cosas lindas. Espero que muchas de ustedes se unan a la diversión. Un beso enorme para todas.
Before I say goodbye I would like to invite all my handmade friends to join our community NeedleWork Your Jewelry for Mother’s Day! A NeedleWorkMonday Contest! which will be very nice as it brings the smell of Woman, mother, nice things. I hope many of you will join the fun. A huge kiss to all of you.

Wow, this fits you more with the wonderful environment you are in. Thanks for sharing.
Thank you very much friend, nice to meet you.
Enamorada totalmente de este gorro😍😍😍
Amo los girasoles 🌻❤️
Te quedó hermosísimo
Gracias por compartirlo con nosotros 🥰
Hola Yeni, que bueno que te gustó, lo hice con mucho amor para mi comunidad favorita.
Entonces el bello gorro para Emily también fue modelado por Alfredo y se le ve muy bien.
Me encanta que tú blog esté muy florido. Estará hermoso para final de año y tendremos muchos modelos de flores para guiarnos.
Los detrás de cámara me encantan. Yo igual que tú apenas veo que algo no va como me lo esperaba, reposo, me relajo y luego retomo. Es lo mejor que podemos hacer.
Está lindísimo el gorro de girasoles.
Hola Lelys, como estas.
lo mejor que podemos hacer es eso antes de dejar un trabajo mal hecho, creo que eso me daría pena. Aunque te digo que creo que voy a destejer nuevamente el ala para ampliarla mas. 🙈
These hat is so beautiful and as well attractive due to the colour combinations and designs, you really did a great job.
thank you, what I like I do with love. I like to dedicate myself to the details so that everything looks beautiful.
So beautiful I reblog your posting
Thank you very much, it is an honor for me to be among your favorite publications.
Mostly well come
Me encantan los girasoles, simplemente este gorro te quedó hermoso y esa fotografía con tu modelo quedó genial amiga. Felicidades por tu dedicación, eres ejemplo a seguir.
Un abrazo. @carolinacardoza
Ay que linda eres Luisa! que bonito contarte entre las amistades mas hermosas que he cosechado en Hive.
Hola Caro, me alegra estés bien, ya me estaba preocupando.
Que bueno que lograste resolver el tamaño del gorro con un cuadrito de girasol más y que la solapa tenga el tamaño adecuado.
Me pasa igual, cuando algo no me va saliendo, descanso y cuando regreso todo fluye.
Muchos cariños😘
Uy si Jicrochet, ya estaba preocupada, me hacia mucha falta escribir, por suerte nosotras tenemos las agujas para descansar en ellas nuestras preocupaciones.
Muy bonito diseño en girasoles.
Esa es la flor favorita de mi hija mayor 🌻🌻
Ay que lindo. saludos a tu hija.
Éstos colores están increíbles! Que gorro tan hermoso! De verdad un gran trabajo, me gusta ésta creación en especial. No dejes de compartir! Bendiciones! 🌹🌹
Gracias bleuclair, siempre estaré aqui haciendo lo mejor en cada cosa que haga. el amor es lo que guía mis puntadas y nada màs.
Bello gorro amiga @carolinacardoza y con girasoles me encantan , trasmite mucha frescura😍😘
Hola amiga, que linda eres al pasar por acá por este humilde blog. dios bendiga tus días.
Nada de eso, todo lo que pones en tu blog es hermoso, con mucha finura y siento mucha satisfacción en que nuestros caminos se hayan cruzado eres una persona especial y tu trabajo es intachable 😘
Thank you for sharing this amazing post on HIVE!
non-profit curation initiative!Your content got selected by our fellow curator @stevenson7 & you just received a little thank you via an upvote from our
You will be featured in one of our recurring curation compilations and on our pinterest boards! Both are aiming to offer you a stage to widen your audience within and outside of the DIY scene of hive.
Join the official DIYHub community on HIVE and show us more of your amazing work and feel free to connect with us and other DIYers via our discord server: https://discord.gg/mY5uCfQ !
If you want to support our goal to motivate other DIY/art/music/homesteading/... creators just delegate to us and earn 100% of your curation rewards!
Stay creative & hive on!
thanks...❤️
This is so cute, I love the colors and the environment.
This year I have knitted several flowers, but these sunflowers have left me in love, I like them very much. now comes the new contest and these flowers inspire me to make something beautiful to give to my mothers.
Oh my, that's would be so lovely. I look forward to seeing what you will create for your mom!
That is a pretty hat. I love it.
Glad you liked it, nice to see you.
Me encantó, quiero unoo jajajaj💛
Gracias por compartir este hermoso trabajo 😊
It is very attractive. I feels like crocheting one for my self.
Wonderful!!! I love, love, love flowers!! What a fun hat to make and wear! Fabulous @carolinacardoza!
Yes my friend, it is very pretty, my niece looked beautiful. now that I know how to do it I want to make one for myself but in a more beachy tone.