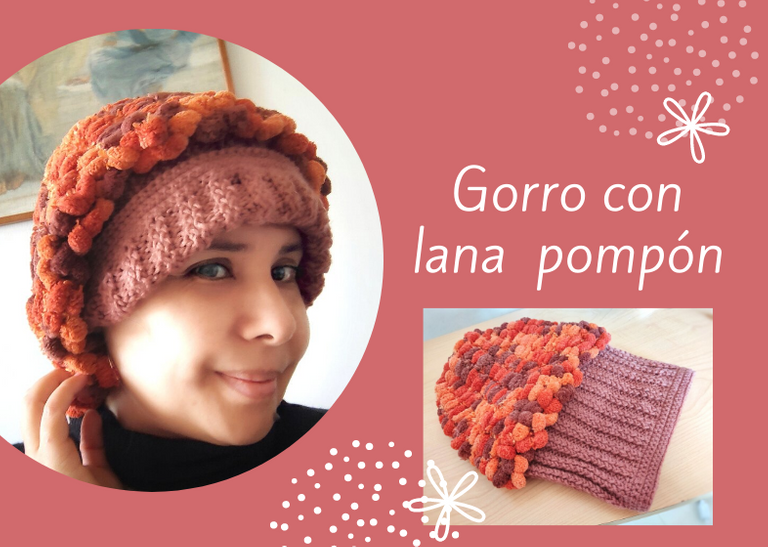
Saludos abejitas creativas, hoy les quiero compartir mi experiencia haciendo un gorro con lana tipo pompón.
Greetings creative bees, today I want to share my experience making a pompom hat with wool.

Hace una semana fui a la tienda de lanas y vi unas tan hermosas que no pude resistirme pero no sabía que me estaba metiendo en un gran problema porque lejos de comprar lanas por su color y textura hay que tener en cuenta qué se quiere hacer con ellas y en especial las herramientas y técnicas apropiadas para poder realizar un lindo proyecto.
Después de averiguar bien para qué servía la lana pompón y cómo se trabajaba me aventuré a tejer "mi primer gorro", sí, aunque ustedes no lo crean, es la primera vez y la experiencia fue de aprendizaje muy gratificante.
A week ago I went to the wool store and saw some beautiful ones that I could not resist, but I did not know that I was getting into a big problem because far from buying wool for its color and texture you have to consider what you want to do with them and especially the appropriate tools and techniques to make a nice project.
After finding out what the pompom yarn was for and how to work with it, I ventured to knit "my first hat" Yes, believe it or not, it was the first time, and the experience was very rewarding learning.

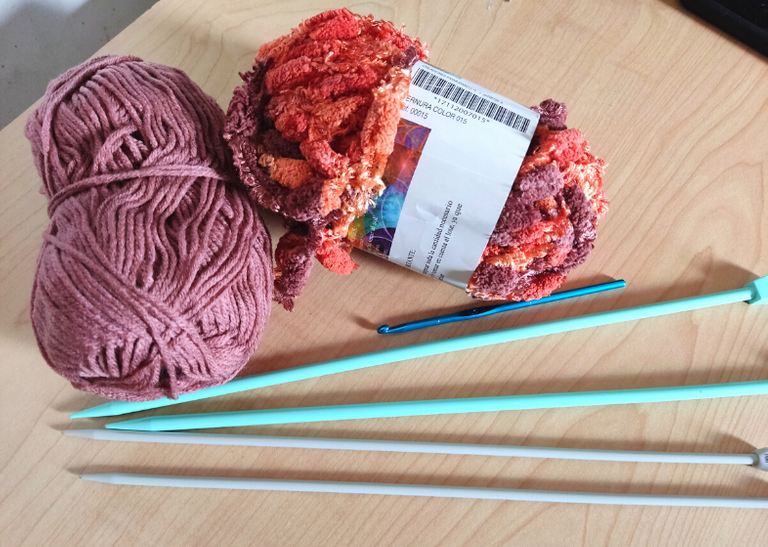
Para tejer este gorro utilicé 1 madeja de lana unicolor, una madeja de lana de pompón, palillos de tejer Nº 5 y Nº 7 y aguja de crochet Nº 5.
To knit this hat I used 1 skein of unicolor yarn, 1 skein of pompom yarn, knitting sticks Nº 5 and Nº 7, and a crochet hook Nº 5.

Lo primero que hice fue la parte inicial del gorro que va sujeto a la frente para lo cual decidí que haría un punto elástico.
The first thing I did was the initial part of the hat that is attached to the forehead for which I decided I would do a ribbed stitch.
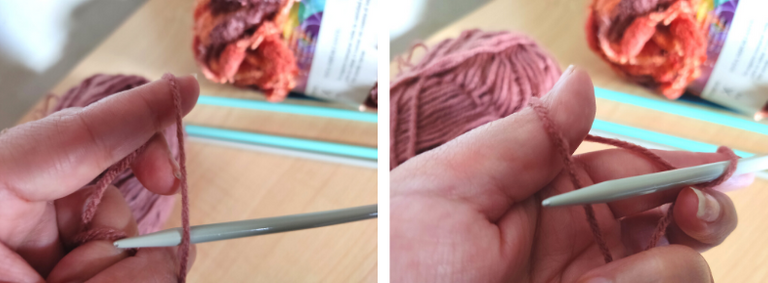
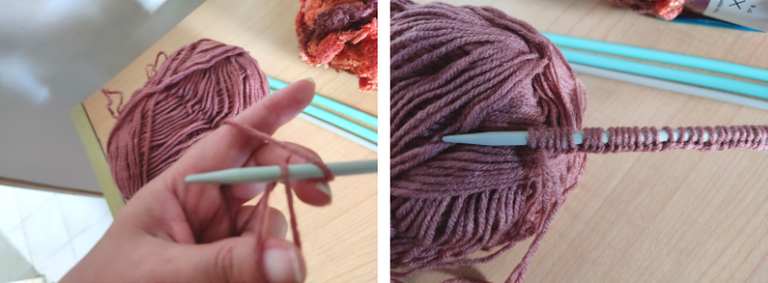
Toma la hebra de lana con la mano derecha (si eres zurdo, con la izquierda) y sosténla entre los dedos pulgar e índice. Por la parte inferior coloca el palillo de tejer y enlaza de izquierda a derecha la hebra de lana del dedo pulgar y luego de derecha a izquierda la hebra del dedo índice y jala. Así se formarán consecutivamente los puntos. Para una circunferencia cefálica de 55 centímetros coloqué 120 puntos de base para realizar mi gorro.
Una vez que todos los puntos están sobre el palillo se hace un nudo al final de éstos y se comienza a tejer el punto elástico el cual consiste en tejer dos puntos hacia adelante y dos atrás. Si deseas ver más en detalle cómo se hace este punto te dejo este link que te puede ayudar bastante.
Cómo quería que esta parte del gorro permitiera hacer un borde que pudiese doblar, tejí un rectángulo de 12 centímetros de alto de punto elástico.
Take the strand of wool with your right hand (if you are left-handed, with your left hand) and hold it between your thumb and index finger. At the bottom place the knitting stick and link from left to right the strand of wool from the thumb and then from right to left the strand of wool from the index finger and pull. This will form the stitches consecutively. For a head circumference of 55 centimeters, I placed 120 base stitches to make my cap.
Once all the stitches are on the stick, make a knot at the end of them and start knitting the elastic stitch which consists of knitting two stitches forward and two backward. If you want to see more in detail how to knit this stitch, I leave you this link that can help you a lot.
Because I wanted this part of the hat to allow for a border that I could fold over, I knitted a 12-centimeter high rectangle of the ribbed stitch.

To start knitting with the pompom yarn
Tejer con la lana pompón requiere de hacer puntos solo con el segmento liso que se encuentra entre pompón y pompón. Esto implica que con una aguja de tejer número 5 al tratar de hacer 2 puntos quedan muy apretados. Por tanto en este momento debemos cambiar a palillos número 7 y tejer un solo punto, para ello hay que ajustar la cantidad de puntos del tejido.
Knitting with the pompom yarn requires knitting stitches only with the smooth segment between pompom and pompom. This implies that with a number 5 knitting needle when trying to knit 2 stitches they are too tight. Therefore, at this point we must change to a number 7 knitting stick and knit a single stitch, for this we must adjust the number of stitches in the knitting.
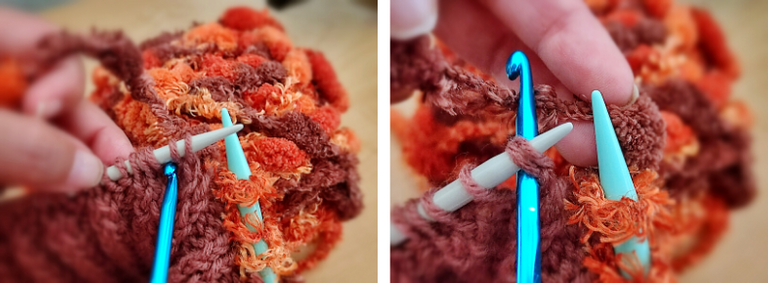
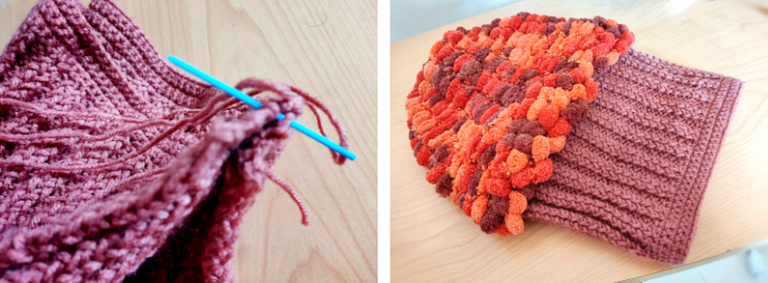
Con un ayuda de una aguja de crochet número 5 toma dos puntos y enlaza por la parte de atrás el segmento de lana pompón que es liso.
With the help of a number 5 crochet, take two stitches and link the back of the pompom yarn segment that is smooth.
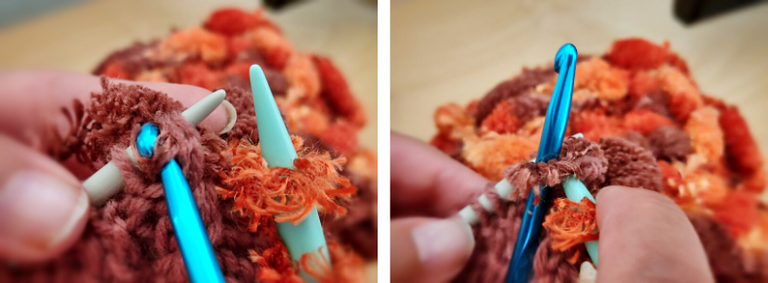
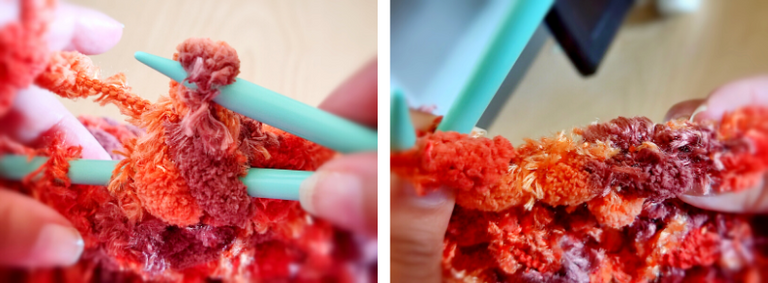
Trae hacia adelante la hebra de lana y colócala sobre el palillo nuevo (el de color turquesa en la foto, ese es Nº 7). Repite esta operación con el resto de los puntos hasta obtener un total de 60 puntos.
Bring the yarn strand forward and place it on the new yarn stick (the turquoise one in the picture, that's #7). Repeat this operation with the rest of the stitches until you have a total of 60 stitches.
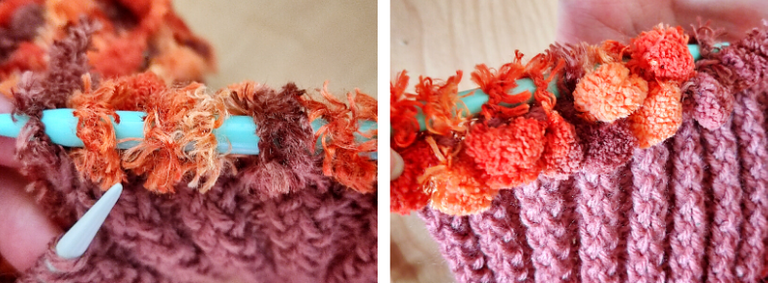
Fíjate en la fotografía cómo todos los puntos formados por la parte posterior alinean los pompones. Cuando tejas la próxima hilera, el primer punto no se teje solo se coloca en el palillo y luego enlaza los puntos de atrás hacia adelante, esto hará que siempre los pompones queden del mismo lado formando un tejido uniforme.
Sigue tejiendo hasta obtener una franja de pompones de 16 centímetros.
Look in the picture how all the stitches formed by the back side line up the pompoms. When you knit the next row, the first stitch is not knitted placed on the stick, and then link the stitches from back to front. This will always make the pompoms stay on the same side forming a uniform weave.
Continue knitting until you get a strip of pompoms of 16 centimeters.

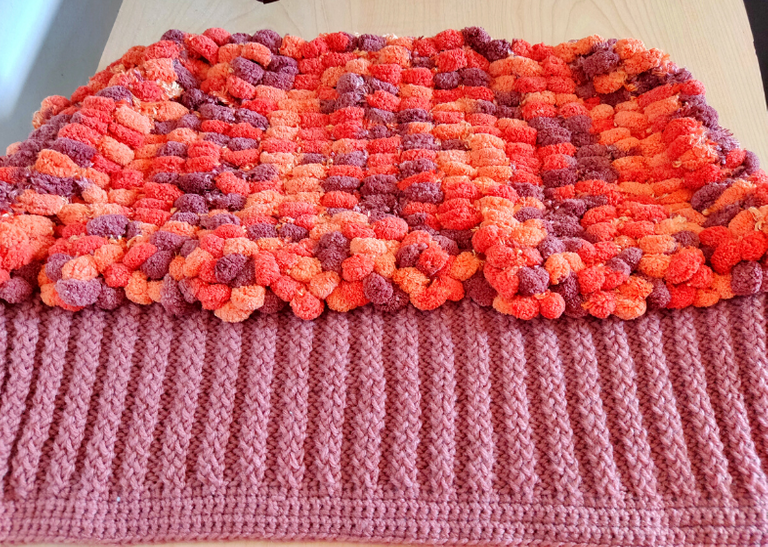
Para terminar la parte superior del gorro procede a tomar dos puntos juntos y enlaza la hebra de lana pompón por la parte lisa y trae hacia adelante. Con ese punto nuevo formado toma otro del palillo del lado izquierdo y vuelve a repetir la operación hasta el último punto. Debe quedar toda una hilera de pompones en la parte superior del tejido como lo puedes observar en la cuarta foto de este segmento.
To finish the top of the hat proceed to take two stitches together and loop the pompom yarn through the smooth side and bring it forward. With that new stitch formed, take another stitch from the stick on the left side and repeat the operation until the last stitch. There should be a whole row of pompoms at the top of the fabric, as you can see in the fourth picture of this segment.
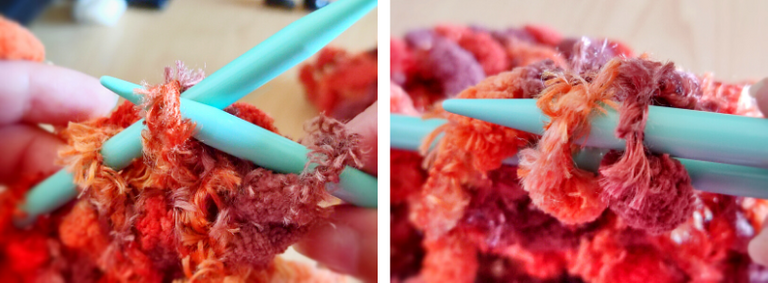
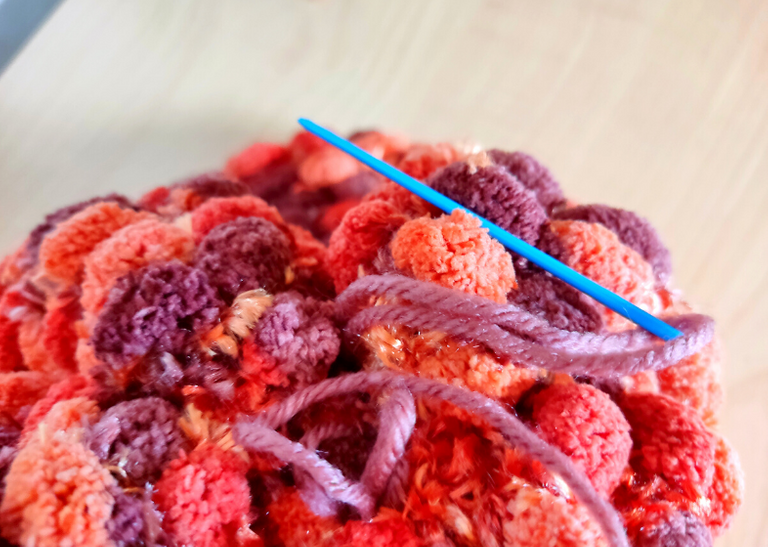
Para finalizar con ayuda de una aguja lanera toma una hebra larga de lana lisa y enhebra cada pompón de la parte superior del tejido y jala fuerte hasta que todos los puntos confluyan formando una circunferencia cerrada. Realiza un nudo y listo.
Finally, with the help of a wool needle, take a long strand of plain wool and thread each pompom from the top of the fabric and pull tight until all the stitches come together to form a closed circle. Tie a knot, and you're done.

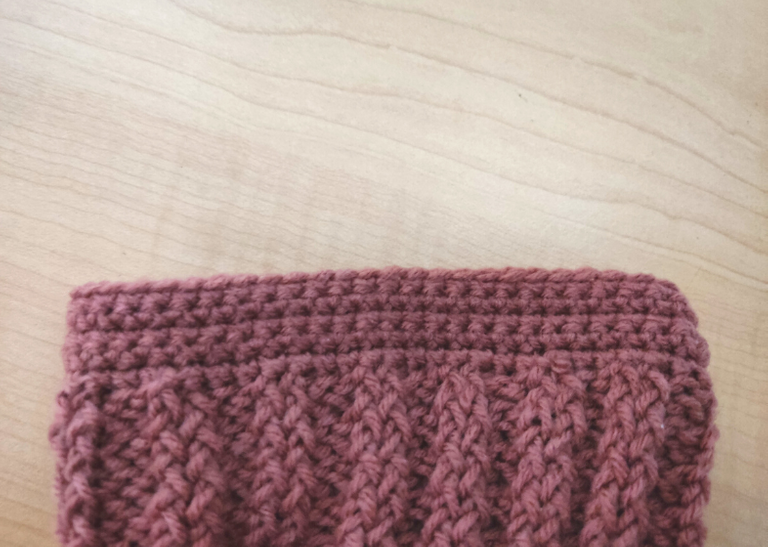
Para evitar que con el uso frecuente el borde del gorro se elongue mucho, decidí reforzar esta parte tejiendo unas hileras de punto bajo a crochet.
To prevent the brim of the hat from stretching too much with frequent use, I decided to reinforce this part by knitting a few rows of crochet single crochet.
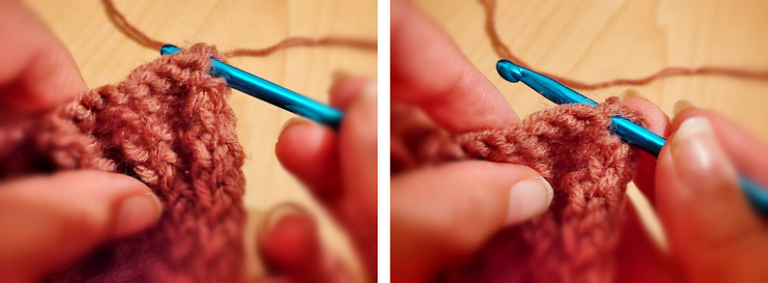
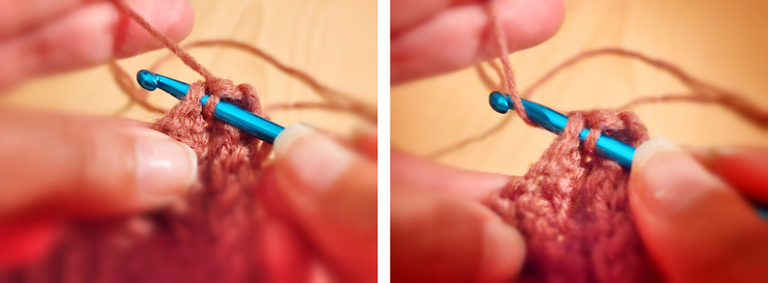
Con ayuda de una aguja de crochet Nº 5, introduce por el primer punto del borde del tejido de adelante hacia atrás y enlaza la hebra de lana y trae hacia adelante.
With the help of a #5 crochet needle, insert through the first stitch of the knitted edge from front to back and loop the yarn strand of yarn and bring it forward.
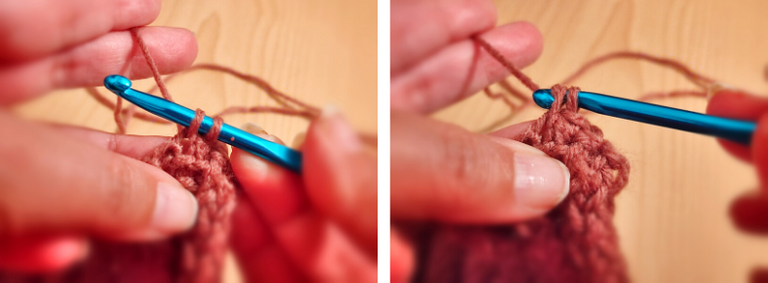
Una vez formado dos puntos sobre el ganchillo, vuelve a enlazar la hebra de lana y pásala a través de los dos puntos, hasta obtener uno solo. Repite la operación hasta tejer un segmento de hileras de aproximadamente 2 centímetros.
Once you have formed two stitches on the crochet hook, loop the yarn again and pass it through the two stitches until you have only one stitch. Repeat the operation until you have knit a row segment of approximately 2 centimeters.
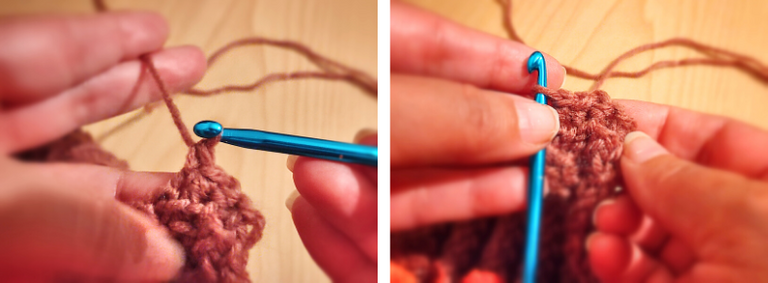
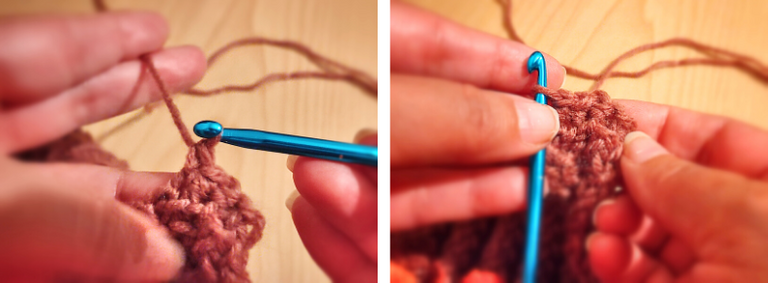
Por último dobla el tejido por la mitad, calzando bien ambos extremos y con ayuda de una aguja lanera cose con la lana lisa uniendo bien los puntos de ambos lados. Esto lo debes hacer hasta alcanzar la parte superior del gorro. Realiza un nudo interno y corta el sobrante de lana.
Finally, fold the fabric in half, fitting both ends well, and with the help of a wool needle, sew with the plain wool joining the stitches on both sides. This should be done until you reach the top of the hat. Tie an internal knot and cut off the excess wool.

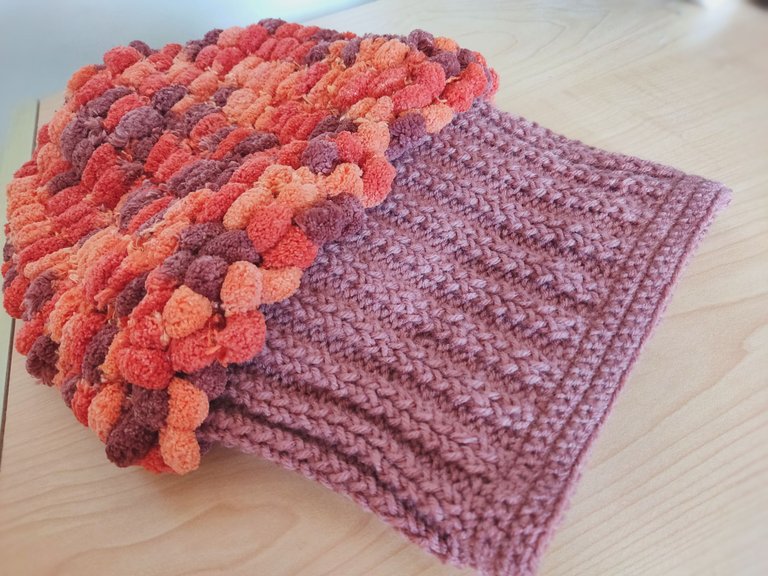
Mira qué lindo resultado se logró combinado dos texturas de lana. Los pompones dan una sensación de abrigo ¿no lo crees así?
Espero que mi tejido te haya gustado. Si en alguna oportunidad has tejido algo similar estoy abierta a tus consejos ya que recién estoy iniciando en este mundo del tejido y estoy muy emocionada de aprender nuevos trucos.
Look what a nice result was achieved by combining two wool textures. The pompoms give a warm, feeling don't you think so?
I hope you liked my knitting. If you have ever knitted something similar, I am open to your advice. I am just starting in this knitting world. I am very excited to learn new tricks.

Todas las imágenes son propiedad de la autora
Thanks for reading. See you in a future post!
All images are property of the author.


Fun and functional! I love it!
Thank you 😃
Beautiful thanks for sharing @chaodietas
Thank you 😃
The rewards earned on this comment will go directly to the person sharing the post on Twitter as long as they are registered with @poshtoken. Sign up at https://hiveposh.com.
Gracias por su apoyo, un abrazo 😃
El gorro es un espectáculo, pero de verdad te ves muy hermosa con el!
Posted using Dapplr
Muchas gracias, fue todo un reto hacer este gorro!
Hermoso trabajo, gracias por compartir. Bendiciones 🌹
Muchas gracias por visitar y leer mi post 😃
The hat looks so cute and very colorful. It looks like a cupcake also to me. Thanks for sharing and God bless.🥰
Yes, when I saw the final result it looked like a cupcake, I felt like a strowberry shortecake cartoon 🤣
Cheers to more baking, oops I mean knitting beautiful and colorful artwork. 🥰 God bless you always.
😃💕
Love the pompom, it looks so cute.
Thank you 😃
You're welcome (^_^)
Increíble, te felicito, es un modelo que no había visto, muy innovador.
Muchas gracias, me inspiré mucho en los trabajos tan maravillosos que he visto en esta hermosa comunidad. Me siento feliz de ver sus trabajos tan delicados y hermosos a la vez 😃
Hermoso trabajo felicidades
Muchas gracias por visitar mi post 😃
That is very interesting yarn! I haven't worked much with novelty yarns but it looks like a fun project!
It was not as easy as I thought it would be, but I was so motivated to do this nice project that I watched some tutorials and learned some techniques.
It is always fun to learn new things - and so many things end up harder to do than we think... :)