Saludos para todos los hive blogueros, hoy les traigo el pequeño paso a paso que realicé para la elaboración de un vestido para una bebe de temática navideña, como lo es el traje de Santa Claus.
Greetings to all the hive bloggers, today I bring you the little step by step that I made for the elaboration of a dress for a baby with a Christmas theme, as it is the Santa Claus costume.
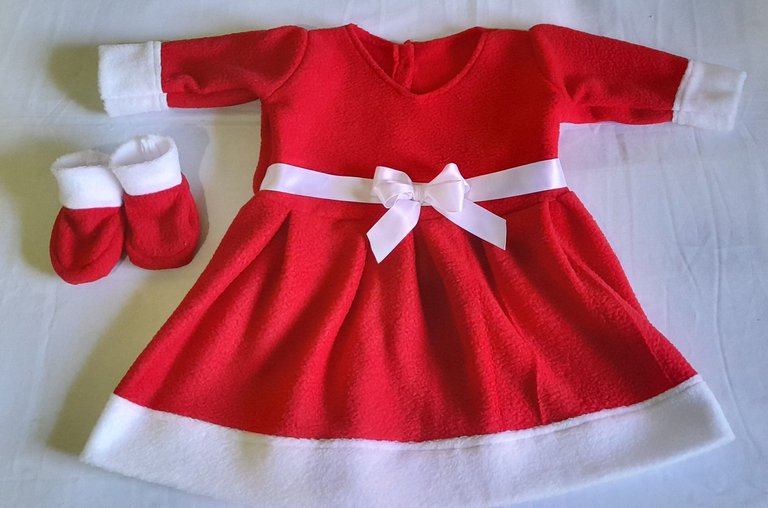
Vestido de Santa Claus
Ya que el vestido es para una bebe de meses solo utilice de tela 1/2 metro de tela manta polar de color rojo,¼ metro de tela manta polar color blanco y 1 metro de cinta blanca.
Since the dress is for a baby of months I only used 1/2 meter of red polar blanket fabric, ¼ meter of white polar blanket fabric and 1 meter of white ribbon.
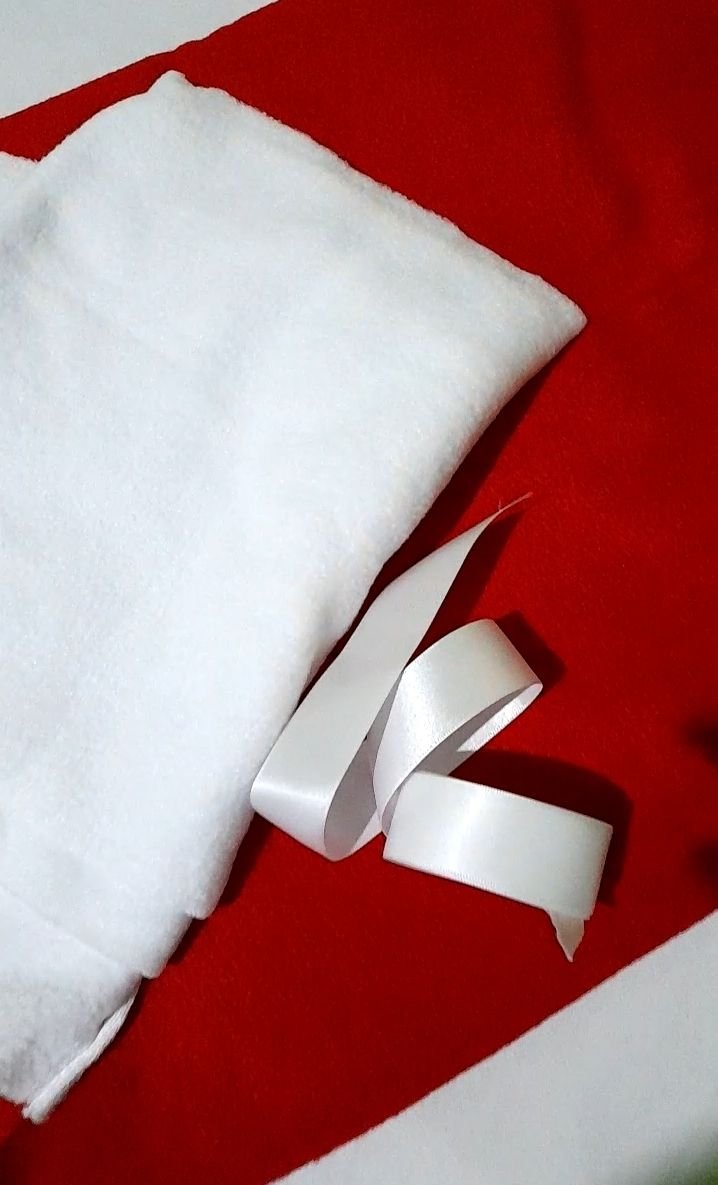
Materiales
Las medidas las tomé de un vestido referencial que me trajo la mamá de la bebe, tomando en cuenta que siempre al cortar un patrón a partir de una pieza ta elaborada uno debe dejar un margen de 1cm a 1,5 cm. Ya cortadas las partes de la blusa delantera,trasera y mangas, procedemos a cortar la parte baja del vestido, es decir, la falda.
I took the measurements from a reference dress that the baby's mother brought me, taking into account that when cutting a pattern from a piece that is already made, you should always leave a margin of 1 cm to 1.5 cm. Once the front, back and sleeves of the blouse have been cut, we proceed to cut the lower part of the dress, that is, the skirt.
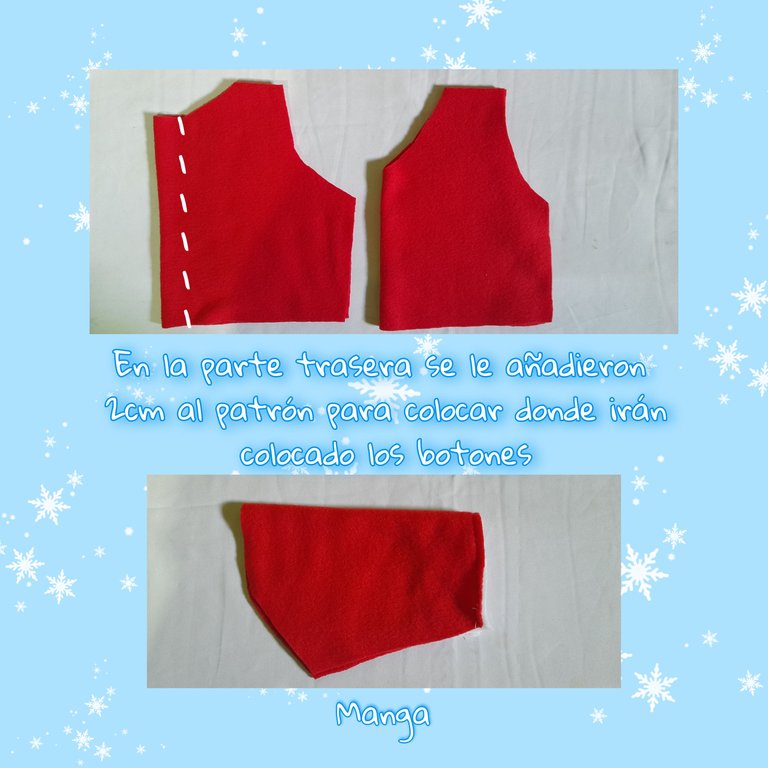
Piezas de la blusa
Por ser un vestido para un bebé de meses lo ideal es cortar esta pieza (falda) de forma rectangular en mi caso la corte de unos 60cm al doblez de ancho y de largo unos 28cm para la parte roja, y para el detalle de la orilla en color blanco corte 60cm al doblez de ancho y 6cm de largo, esta última tomándose en cuenta que al coserse quedará de 3cm al doblez. Esta misma medida del largo del detalle blanco lo tomé para el acabado en las mangas.
As it is a dress for a baby of months the ideal is to cut this piece (skirt) in a rectangular shape, in my case I cut it 60cm wide and 28cm long for the red part, and for the detail of the border in white color I cut 60cm wide and 6cm long, this last one taking into account that when sewing it will be 3cm at the fold. I took the same length of the white detail for the sleeves.
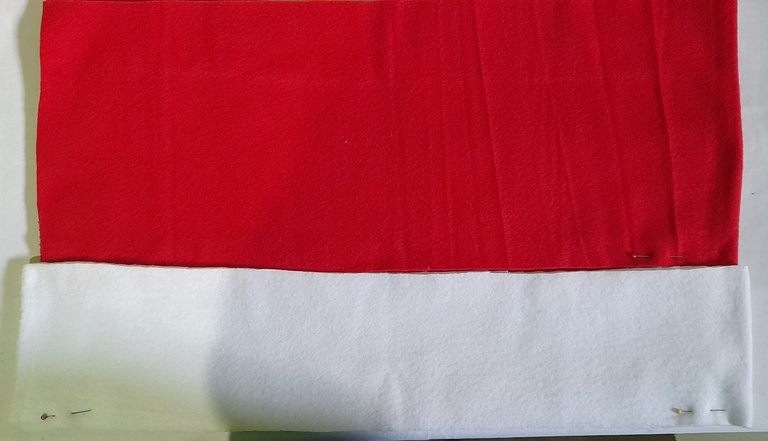
Lo que será la falda
Primeramente procedí a coser los detalles de las mangas colocando los derechos de la tela de frente. Luego se cosí los orillos del cuello del vestido y colocando los derechos de la parte delantera y trasera de la blusa frente una a la otra procedí a unir por los hombros. Luego de haber unido los hombros es que unimos la manga, a esta le hice un pequeño pliegue para que quedara con un pequeño bombache en el hombro.
First I proceeded to sew the details of the sleeves placing the rights of the fabric facing each other. Then I sewed the selvedges of the neck of the dress and placing the rights of the front and back of the blouse facing each other I proceeded to join the shoulders. After joining the shoulders, we joined the sleeve, I made a small pleat on the sleeve so that it would have a small bump on the shoulder.
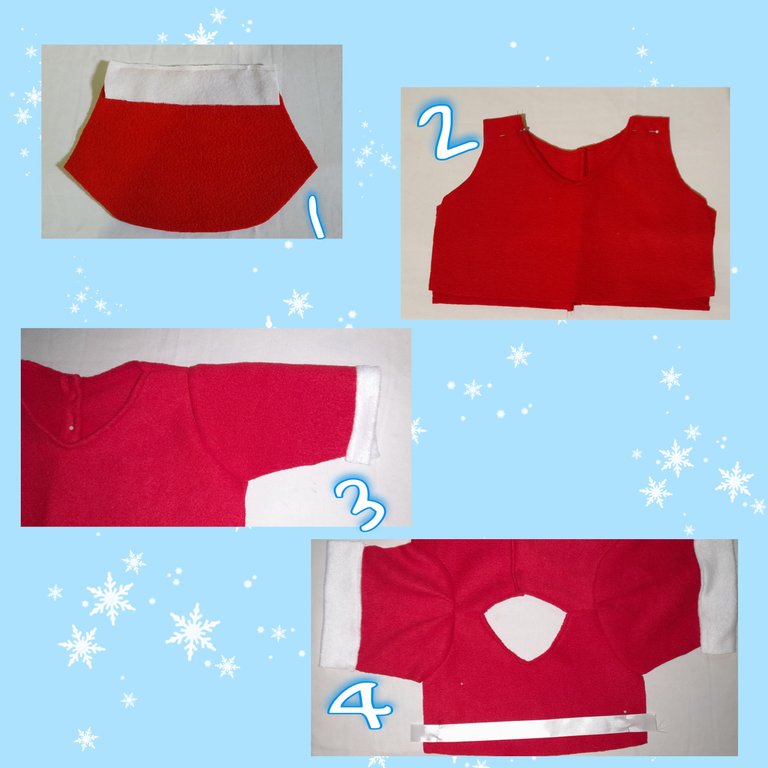
Parte del proceso de confección
Antes de unir los costados de la blusa sujeto con alfileres la cinta blanca que irá por la parte delantera, después de esto uní los costados. Para el detalle blanco de la parte baja del vestido coloco nuevamente los derechos frente uno al otro de tela roja con la blanca y cosemos, luego le doy el doblez hacia la parte inferior del vestido y le damos una costura de acabado a la orilla. Para finalizar unimos la parte superior (blusa) con la parte inferior (falda) dándole unos pequeños pliegues en la unión para darle volumen y movilidad al vestido.
Before joining the sides of the blouse I pin the white ribbon that will go down the front, after this I join the sides. For the white detail of the lower part of the dress I place again the right sides facing each other of red fabric with the white one and we sew, then I give the fold towards the bottom of the dress and we give a finishing seam to the edge. To finish we join the upper part (blouse) with the lower part (skirt) giving it a few small pleats at the junction to give volume and mobility to the dress.
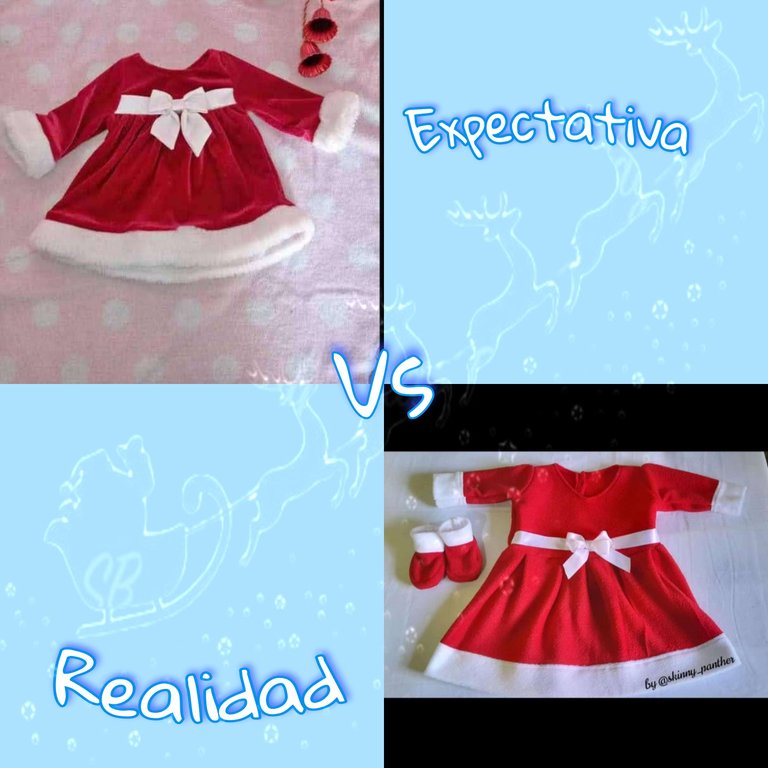
Espero les guste el acabado final
Wow for the season lovelyb
Thank you very much 🤗
Que lindo vestido, la niña seguro lucirá muy bonita y navideña. Saludos y bendiciones
Esperando con ansias una foto de la bebita luciendo su vestido 🤩,saludos bendiciones para toda su familia.
Espectacular, te ha quedó muy bonito el vestido 🤩
Muchas gracias amiga que bueno que te haya gustado 😊
Congratulations @chicalternative! You have completed the following achievement on the Hive blockchain and have been rewarded with new badge(s):
Your next target is to reach 300 replies.
You can view your badges on your board and compare yourself to others in the Ranking
If you no longer want to receive notifications, reply to this comment with the word
STOPCheck out the last post from @hivebuzz:
Support the HiveBuzz project. Vote for our proposal!
Thank you very much!
Un tutorial de fácil comprensión, pero sin duda coser es un arte, excelente trabajo, muy encantador el vestido y muy de esta época. 🎄💞
!discovery 22
Sin duda alguna,lo mejor es ver materializado lo que uno sé ha imaginado,saludos.
This post was shared and voted inside the discord by the curators team of discovery-it
Join our community! hive-193212
Discovery-it is also a Witness, vote for us here
Delegate to us for passive income. Check our 80% fee-back Program
Very grateful
Your content has been voted as a part of Encouragement program. Keep up the good work!
Use Ecency daily to boost your growth on platform!
Support Ecency
Vote for new Proposal
Delegate HP and earn more
Thanks so much
Thank you for sharing this amazing post on HIVE!
non-profit curation initiative!Your content got selected by our fellow curator @rezoanulvibes & you just received a little thank you via an upvote from our
You will be featured in one of our recurring curation compilations and on our pinterest boards! Both are aiming to offer you a stage to widen your audience within and outside of the DIY scene of hive.
Join the official DIYHub community on HIVE and show us more of your amazing work and feel free to connect with us and other DIYers via our discord server: https://discord.gg/mY5uCfQ !
If you want to support our goal to motivate other DIY/art/music/homesteading/... creators just delegate to us and earn 100% of your curation rewards!
Stay creative & hive on!