Que tal mi gente amante de la costura, feliz miércoles, mis buenos deseos para todos ustedes. El día de hoy estaba haciendo mucho frió y mire que mi amigo necesitaba un abrigo o un sweater ademas sus pantalones también le estaban quedando pequeños, entonces dije: Vamos!! hagamos que se sienta mejor con un cambio de ropa, y conseguí un calcetín y un poco de tela de jeans y manos a la obra.

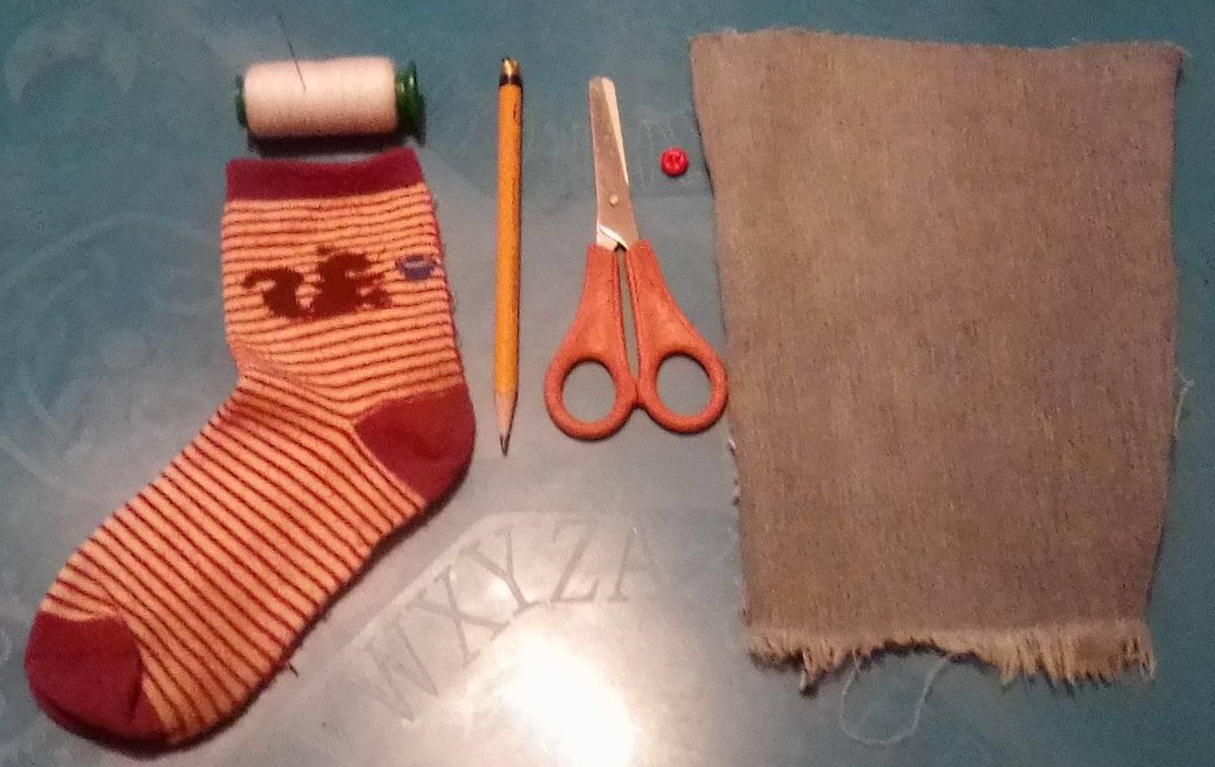
•1 Used sock.
•Thread and needle.
•1 Button.
•Scissors.
•Crayon pencil.
•A piece of jeans fabric.
•1 Calcetín usado.
•Hilo y aguja.
•1 Botón.
•Tijera.
•Lápiz Crayón.
•Retazos de tela jeans.
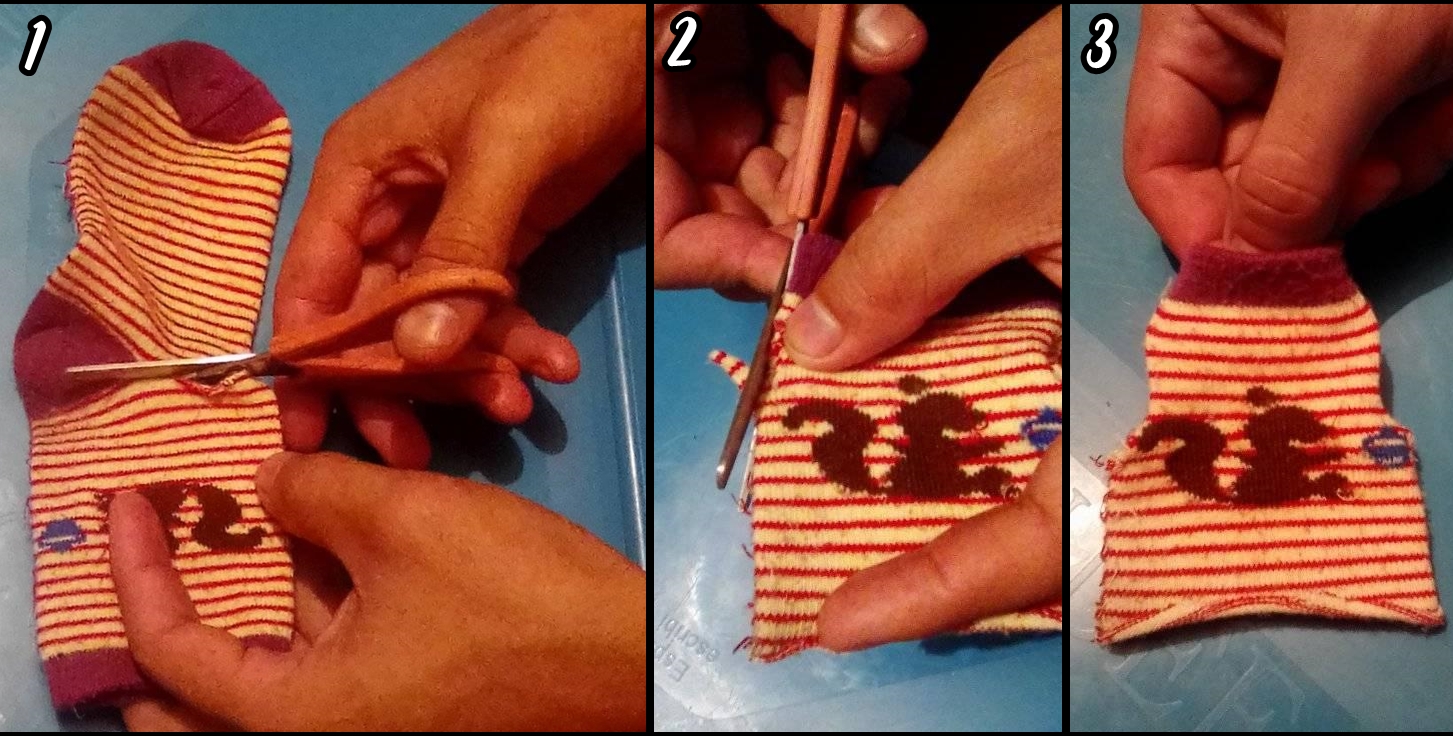
•STEP 1: Cut the sock in half using the scissors (For now we will use the upper part of the sock).
•STEP 2: We use the top part of the sock and with the scissors we open 2 holes on the sides (these will be where the sleeves of our friend's sweater will go).
•STEP 3: Cut 1 centimeter in the back part, and sew (this will be the neck of our friend's sweater).
•PASO 1: Cortar el calcetín a la mitad usando la tijera (Por ahora usaremos la parte superior del calcetín).
•PASO 2: Usamos la parte superior del calcetín y con la tijera abrimos 2 agujeros a los lados (estos serán donde irán las mangas del sweater de nuestro amigo.
•PASO 3: Cortamos 1 centímetro en la parte trasera, y cosemos (esto será el cuello del sweater de nuestro amigo).
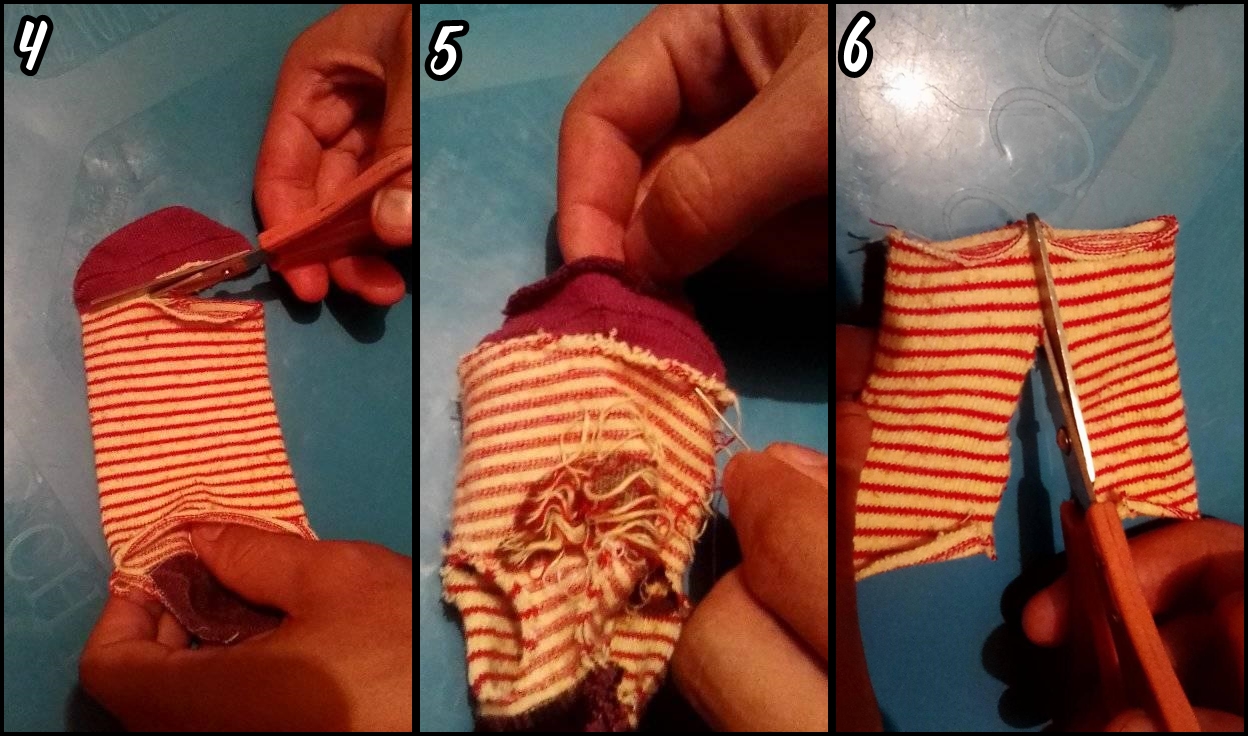
•STEP 4: Cut the bottom part of the stocking (where the fingers go).
•STEP 5: The part where the toes go that we just cut, we will use to join it to the bottom of the sweater (we use thread and needle).
•STEP 6: The remaining part of the sock half that we have left, we cut it in half vertically (we will use it for the sleeves of the sweater).
•PASO 4: Cortar la parte inferior de la media (donde van los dedos).
•PASO 5: La parte donde van los dedos que acabamos de cortar, la usaremos para unirla a la parte inferior del sweater (usamos hilo y aguja).
•PASO 6: La parte restante de la mitad del calcetín que nos quedó, la cortamos a la mitad en forma vertical (esta la usaremos para las mangas del sweater).
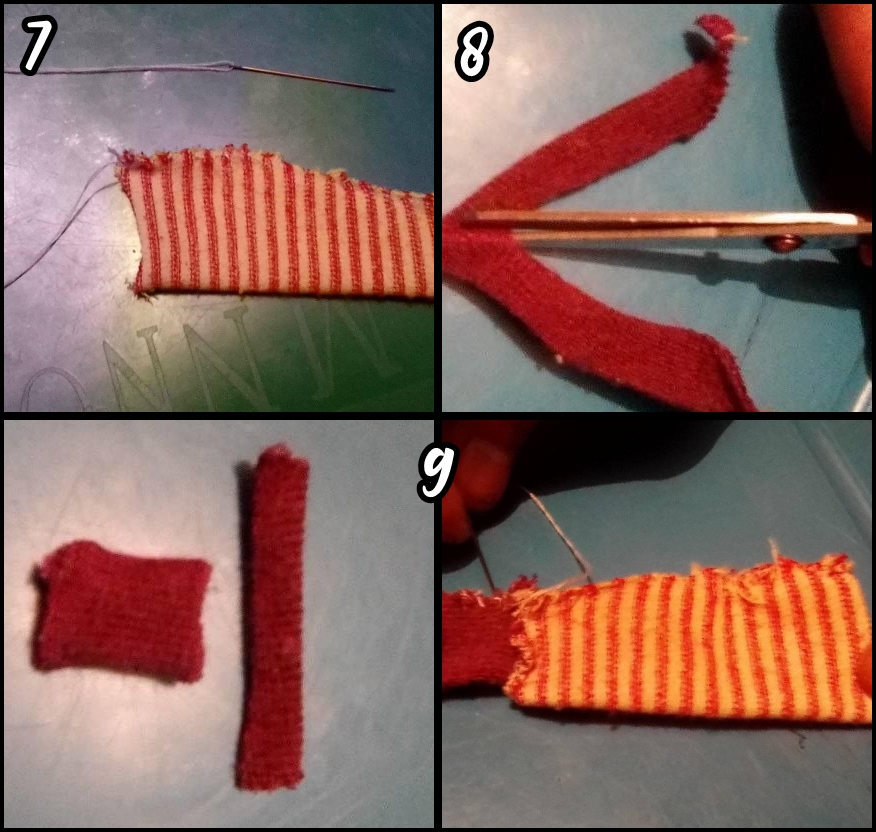
•STEP 7: Fold each part of the lower part of the stocking and proceed to sew to shape the sweater sleeves.
•STEP 8: Cut the heel part in half and take those 2 strips of fabric, to complete the missing parts of the sweater sleeves.
•STEP 9: Fold the strips to make 2 squares and proceed to attach them to the sweater sleeves using thread and needle.
•PASO 7: Doblamos cada parte de la parte baja de la media y procedemos a coser para darle forma a las mangas de sweater.
•PASO 8: Cortamos la parte del talón a la mitad y tomamos esas 2 tiras de tela, para completar las partes faltantes de las mangas del sweater.
•PASO 9: Doblamos las tiras para realizar 2 cuadros y procedemos a unirlas a las mangas del sweater usando hilo y aguja.
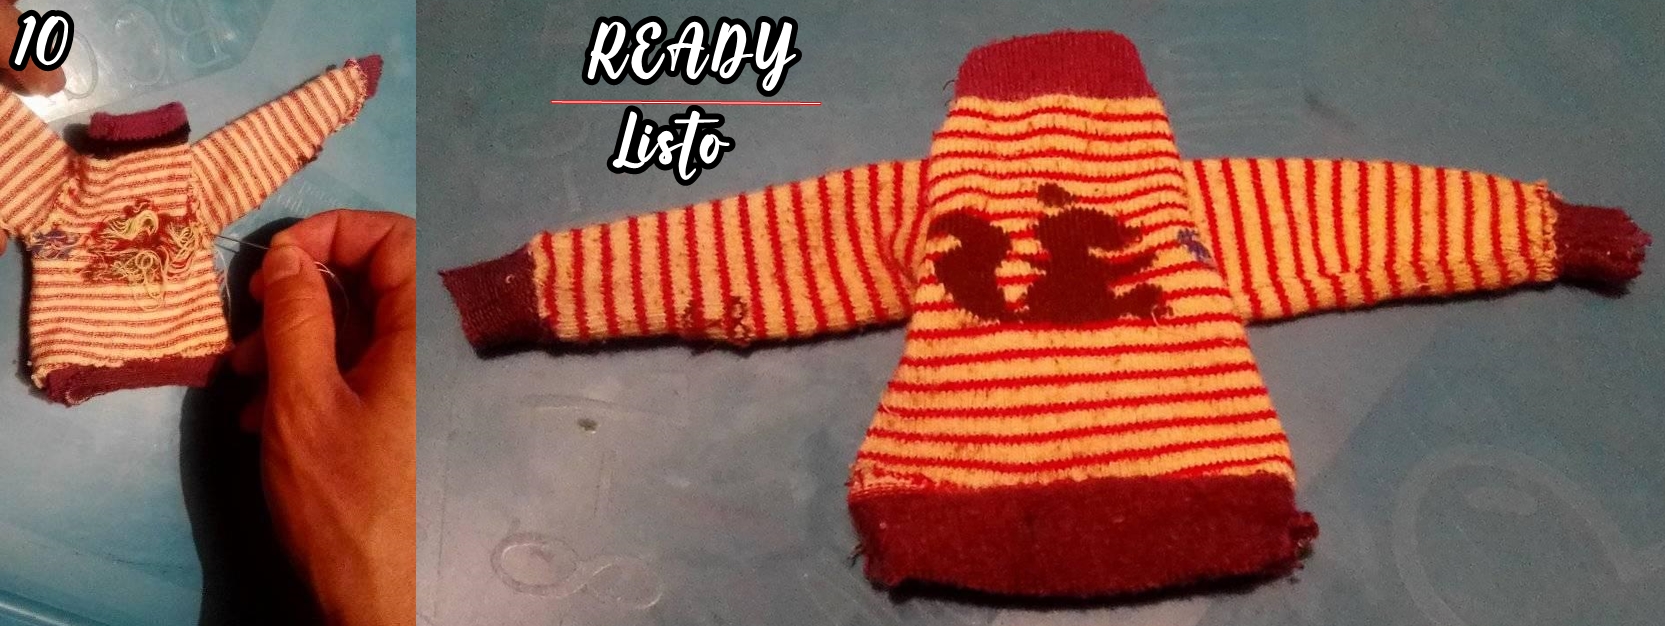
•STEP 10: This is the last step to finish our sweater, we sew both sleeves to the sweater.
•PASO 10: Este es el último paso para finalizar nuestro sweater, cosemos ambas mangas al sweater.
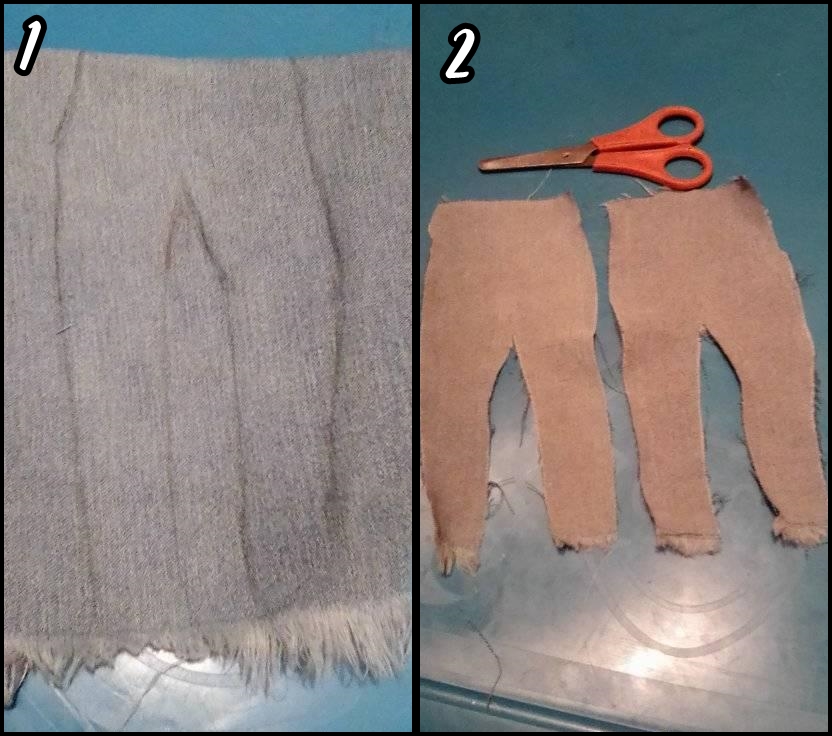
•STEP 1: We take the measurements of the legs of our doll, then we draw the shape of a pair of pants on the jeans fabric (use the crayon pencil).
•STEP 2: Cut out, then repeat the process until we have 2 equal pieces.
•PASO 1: Tomamos las medidas de las piernas de nuestro muñeco, luego dibujamos la forma de un pantalón en la tela jeans (usar el lápiz crayón).
•PASO 2: Recortamos, luego repetimos el proceso hasta tener 2 piezas iguales.
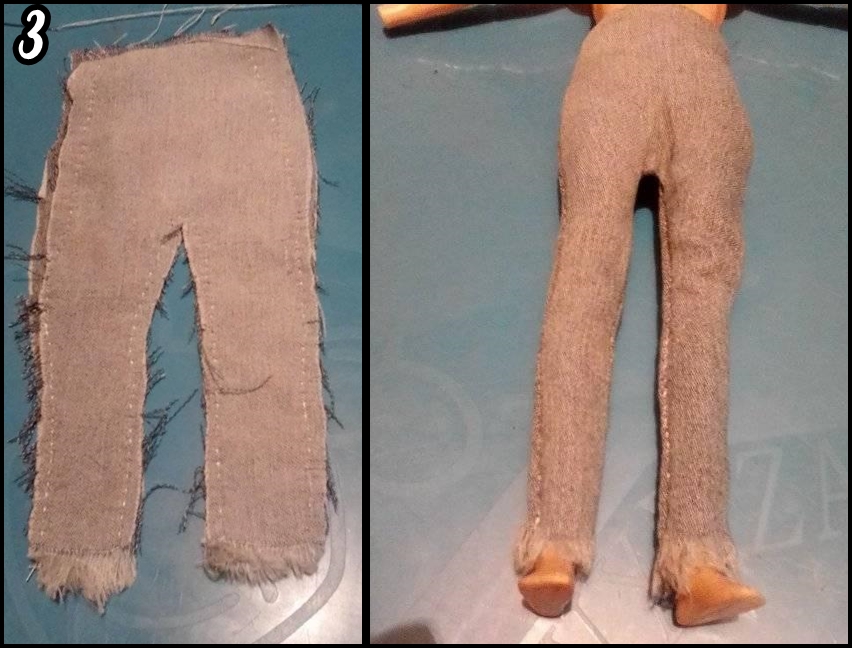
•STEP 3: Sew the edges of the pants on the inside, then turn the turn to the outside.
•PASO 3: Cosemos los bordes del pantalón por la parte de adentro, luego giramos la vuelta hacia la parte exterior.
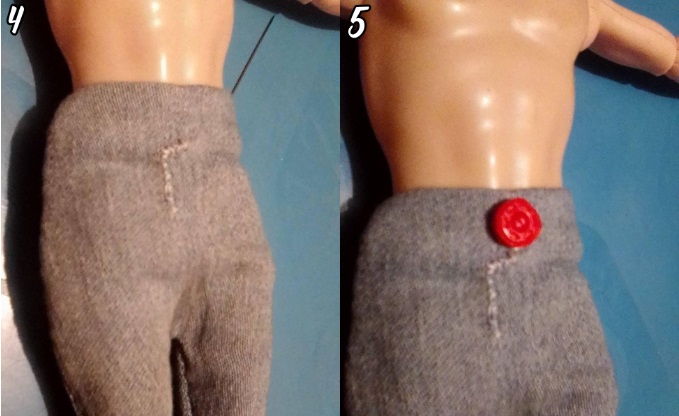
•STEP 4: With the thread and needle we create the shape of a zipper on the front of the pants.
•STEP 5: Sew the button on the top front of the pants (above the zipper).
•PASO 4: Con el hilo y la aguja creamos la forma de un cierre en la parte delantera del pantalón.
•PASO 5: Cosemos el botón en la parte delantera superior del pantalón (encima del cierre).
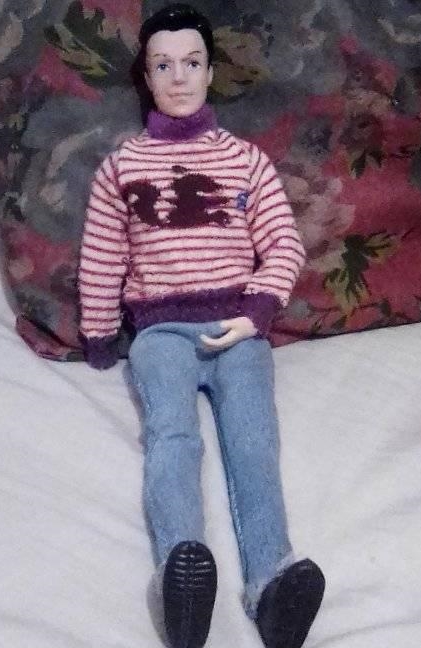
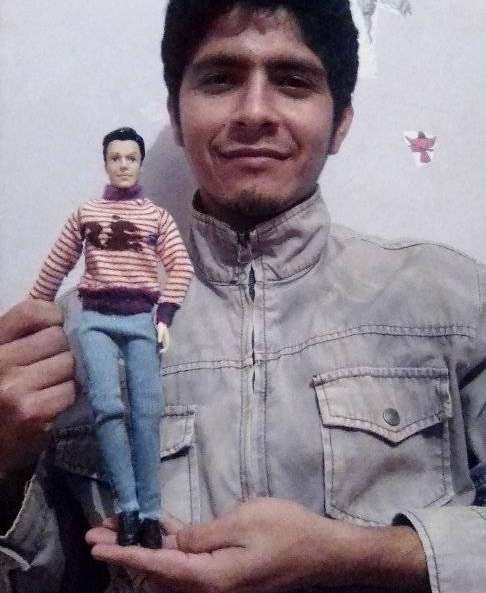
All photos are my own, edited in PhotoScape, translator used: DeepL.

Me he quedado impresionada de lo bien que trabajaste el sweater con ese calcetín.
El atuendo completo está genial. Espero puedas conocer a mi muñeca y a las otras muñecas de la comunidad, para que veas los increíbles atuendos que realizan mis colegas.
Bienvenido una vez más espero seguir viendo tus posts. Saludos!Hola @deivisperez que bueno tenerte de vuelta por la comunidad.
Hola @kattycrochet gracias por valorar mi trabajo, creo que aun me falta bastante por aprender, pero hay tiempo de sobra, espero aprovecharlo. Saludos!
Hola @deivisperez
Wao! Impresionante el vuelco que le diste al calcetín, realmente eso fue genial. Me quedo con esa idea. Me sorprende también que el trabajo de cosido lo realices a mano, te queda prolijo e impecable el resultado. Buen trabajo.
El outfit de tu amigo quedó muy cool, luce espectacular.
Saludos.
Hola @jicrochet gracias por tu comentario, espero poder aprender mas y seguir creciendo. Pasare a visitar tu contenido, Saludos!
Wow so lovely 😊😊 in a short period of time you'll start sewing for a bigger person 😂
Hey thanks for your comment. Yes, I hope I can learn how to create clothes for big people, I will try soon.