Hello, friends especially needleworkers!
Valentine is nearby so i remember the one i love the most, it is my beloved late mother and also her beloved passed away cat, of course. So to remind both, i made a cat bag charm which is the fat version of my late mother's beloved cat. When i made it, i also remember good times that we had together. It is such a relieve to have it as a reminder of them both. And now i would like to share how i made it to you all.
Project Time: around 4 hours
Difficulty: Medium
Skills needed:
- whipped stitch
- smiling stitch
- back stitch
- blanket stitch
Materials and Things needed:
- paper
- pencil
- scissors
- pins
- felt fabrics in black, white and soft pink
- sewing needle
- embroidery thread
- pink ribbon
- filling fiber (i used dacron)
- key ring
How to make it:
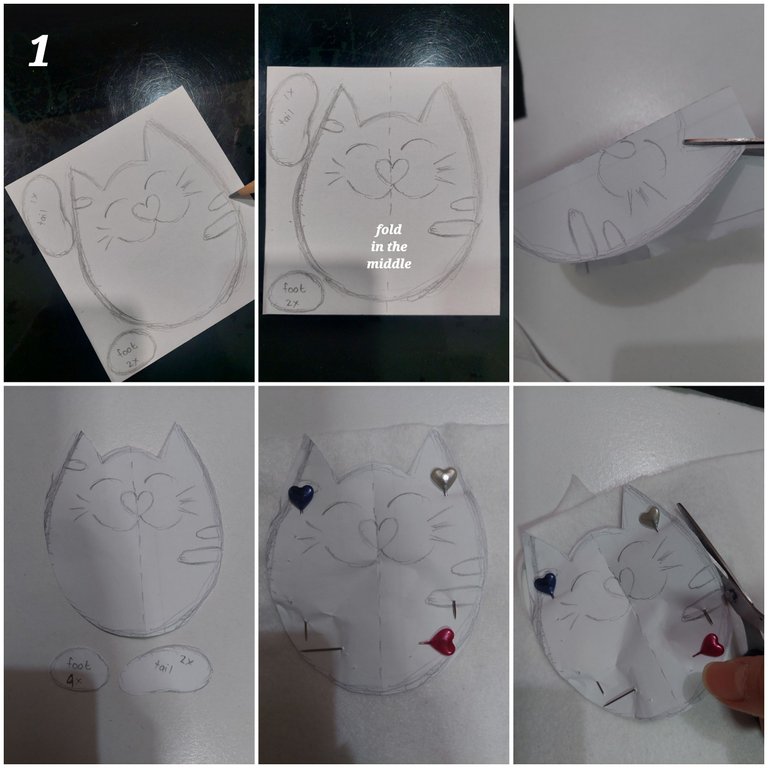
1ST
I drew the cat with the tail and feet. Then for the cat i folded it in the middle before i cut it. The purpose is to make it symmetric. After i cut the pattern off, then i pinned it to the white felt. Then i cut it off.
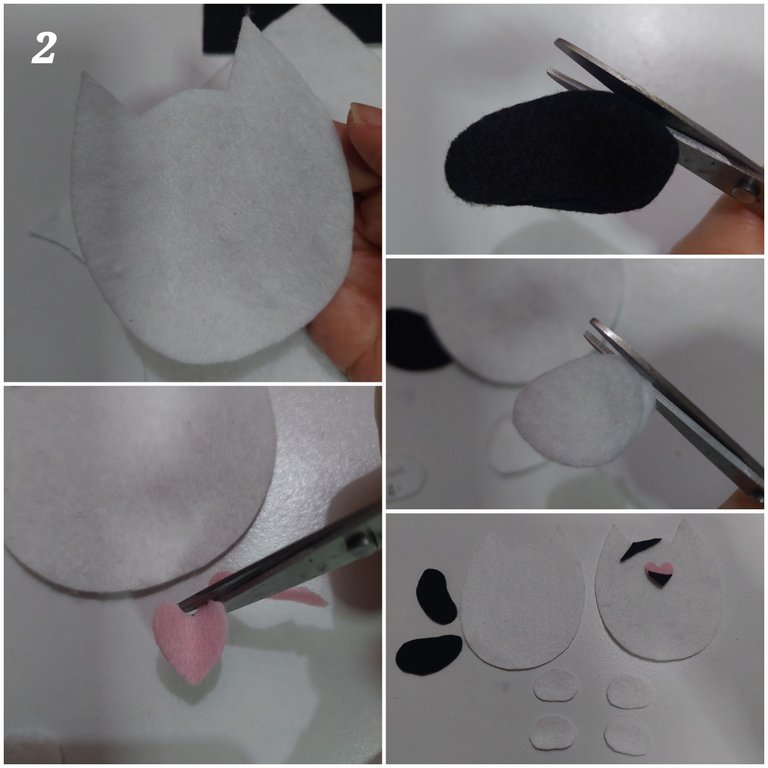
2ND
Next, i made another white felt cat shape. Cut the pink felt with heart shape for the nose. I also cut the black felt for the tail (2 pieces) and white felt for the feet (4 pieces). I completed it with the bang look like and like the stain of Rere's nose (mom's beloved cat)
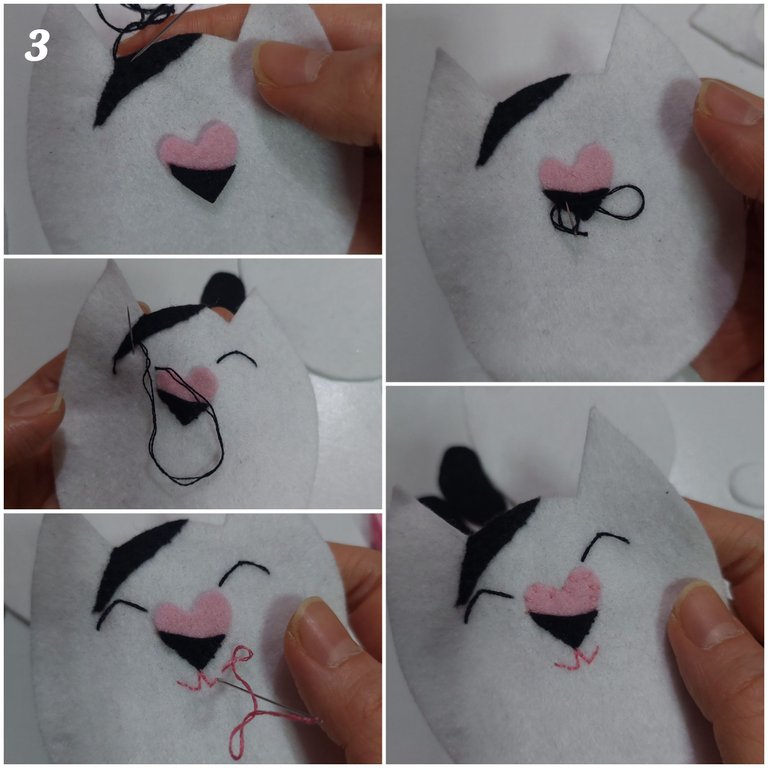
3RD
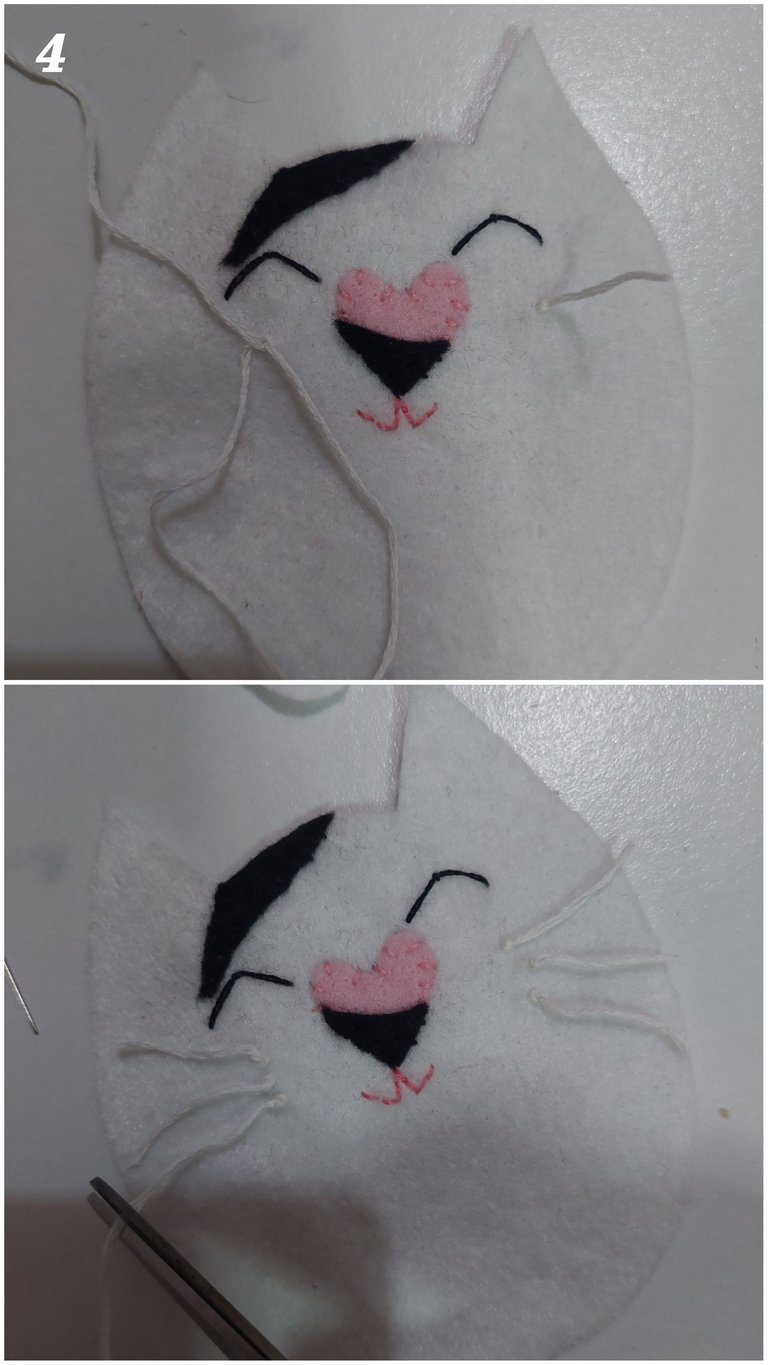
After cutting off the parts, i whipped stitch the bang and also black part of the nose. Then i did the smiling stitch for the smiling closed eyes. I also back stitched the smiling mouth. And whipped stitch the nose too.
4TH
Next, i made the whiskers. I made it like below. Each part of the face has 3 whiskers.
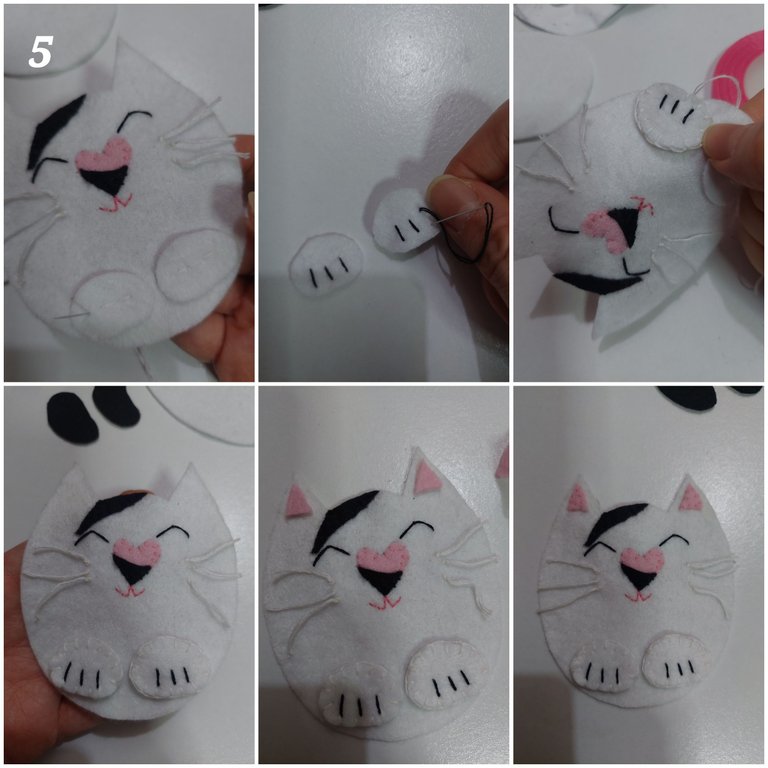
5TH
I also back stitched the back parts of the feet to the front part of the cat's body. After that, I made the claws of by sewing he black thread on the front parts of the feet. Also i did blanket stitch to attach the front parts of the feet to the back. I did the same for both feet.
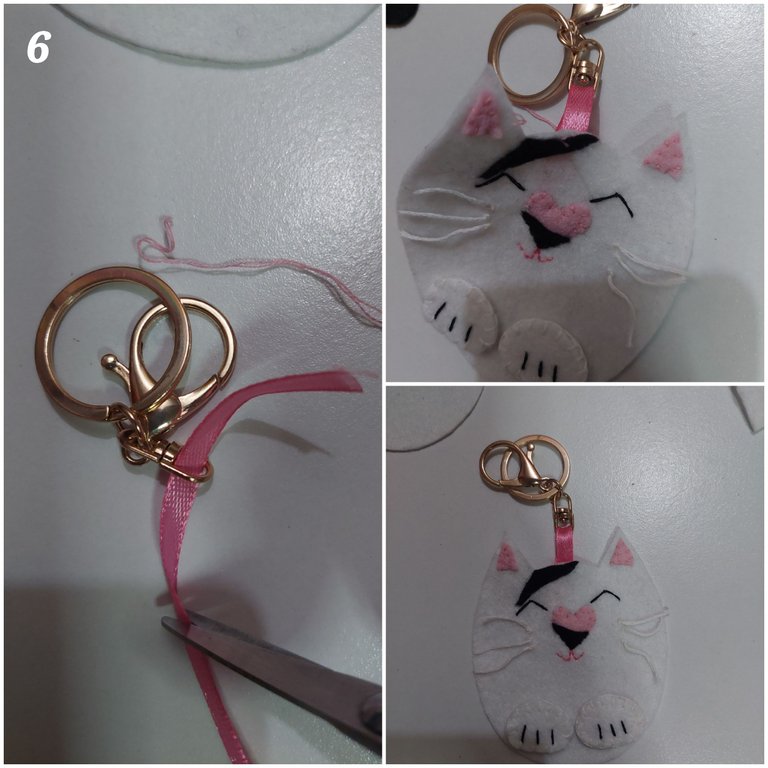
6TH
Next, i cut the ribbon then sew it to the cat under the black bang.
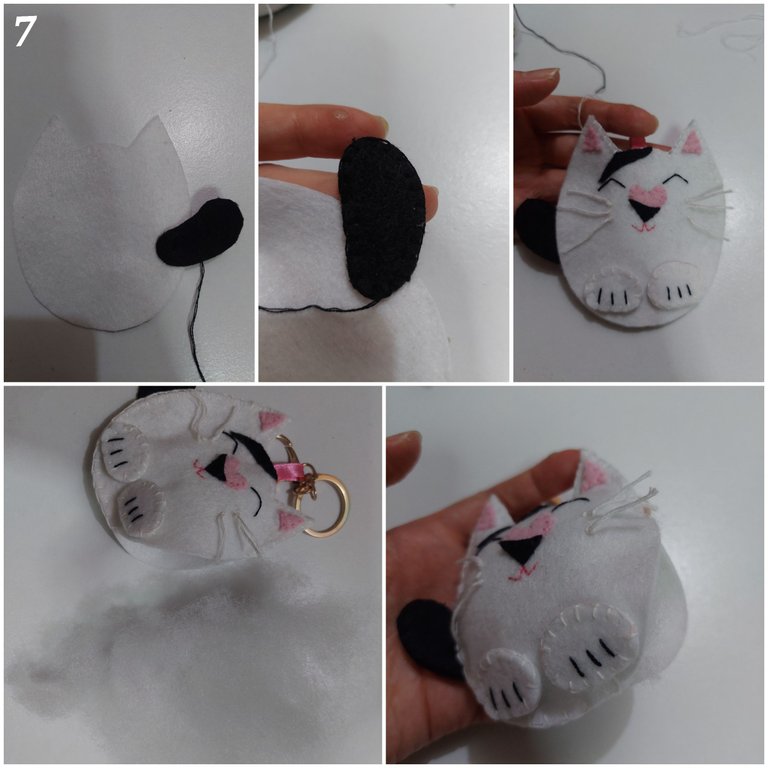
7TH
Next i back stitched the back part of the tail to the back part of the cat. Then i blanket stitched the other part of tail to it. Last, i joined the front and back part of the cat by using blanket stitch, before i closed it i had put some filling fiber to it.
THE RESULT
Voila, here it is...
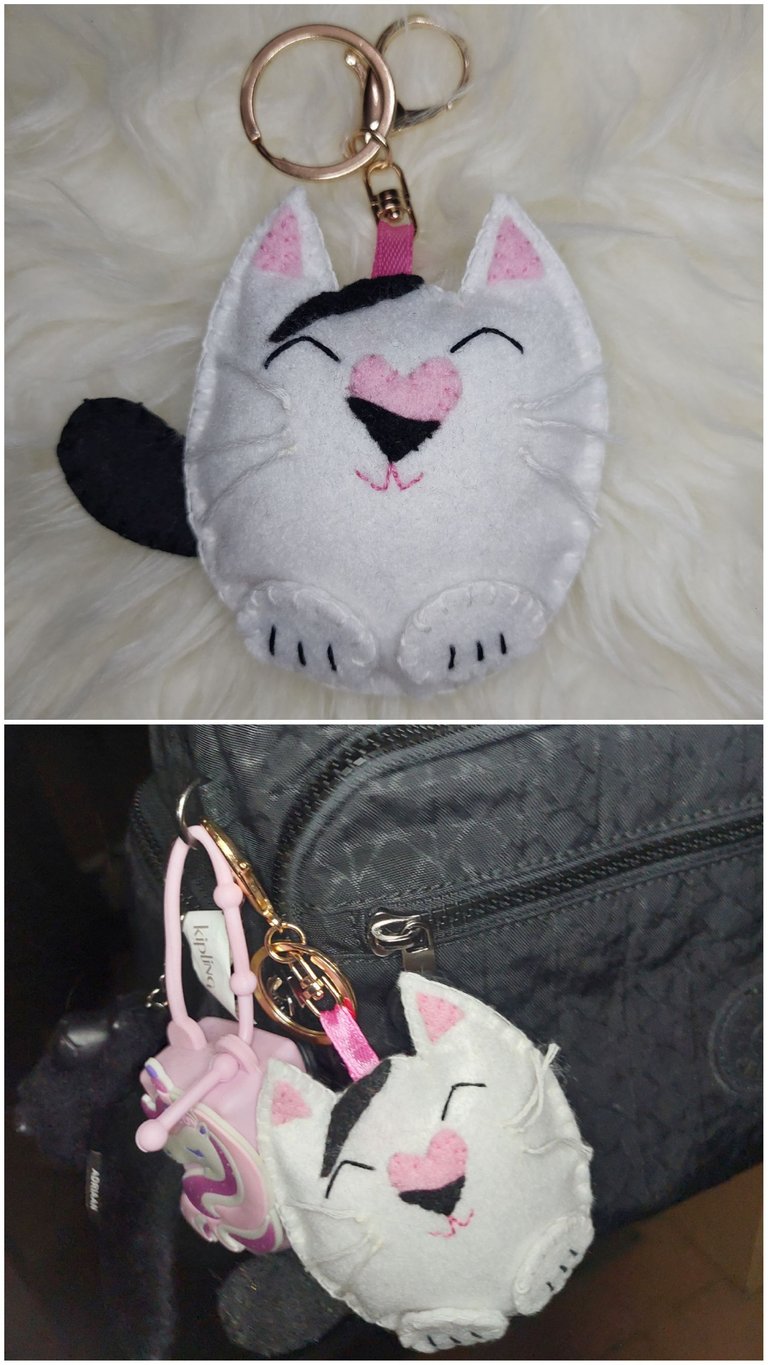
Beloved cat bag charm is now ready to use. And look how it appears with my bag.
Don't you think it's cute?
Thanks for reading my article, if you enjoy my article, upvote, reblog, follow me and stay tune for more CRAFT things from me!
All of the pictures were taken with Samsung A52 5G android phone and i used incollage apps for the cover picture.
A bit about the author
She works in a bank but she interests in CRAFT (CRaft, Art, Food and Travel). To pursue her art passion she does the cross stitch, embroidery, handsewing, crafts, crochet and also draws. Find hers in
https://de-creartique.redbubble.com and https://decreartique.threadless.com/designs. Also find her cute collectibles pixel cat pictures here https://opensea.io/collection/pixelcryptocat . Find her contents, follow, like and subscribe https://instagram.com/better_us123 https://www.youtube.com/@better-us123 https://www.tiktok.com/@better_us123?_t=8sC8mqR0gwj&_r=1
I can see your effort in this project.
Keep up the good work 👍🏻
Thanks
Always welcome 🤗
This is beautiful, unique and style, such a beautiful way to keep their memory. Well done dear.
Thank you very much :)