
Hello, friends especially needleworkers!
Love to make crafts, i even missed my workout time to make crafts recently. One that i love the most is the one i make recently, this drawstring bag which came with cute piglet (ufufy version) embroidery and also some square patchwork on each corner. Well, let's follow me to know how i made it.
Project Time: around 7 hours
Difficulty: Medium
Skills needed:
- back stitch
- french knot
- satin stitch
- running stitch
Materials and Things needed:
- 2 pieces of 25x25 cm fabric
- 4 pieces of 5x5 cm fabric
- pencil
- small embroidery hoop
- some matching embroidery floss (for piglet, a flower and a butterfly)
- iron (optional)
- pins
- needle
- sewing thread
- scissors
- sewing machine (optional)
- felt fabric in soft pink
- soft pink ribbon
- safety pin
How to make it:
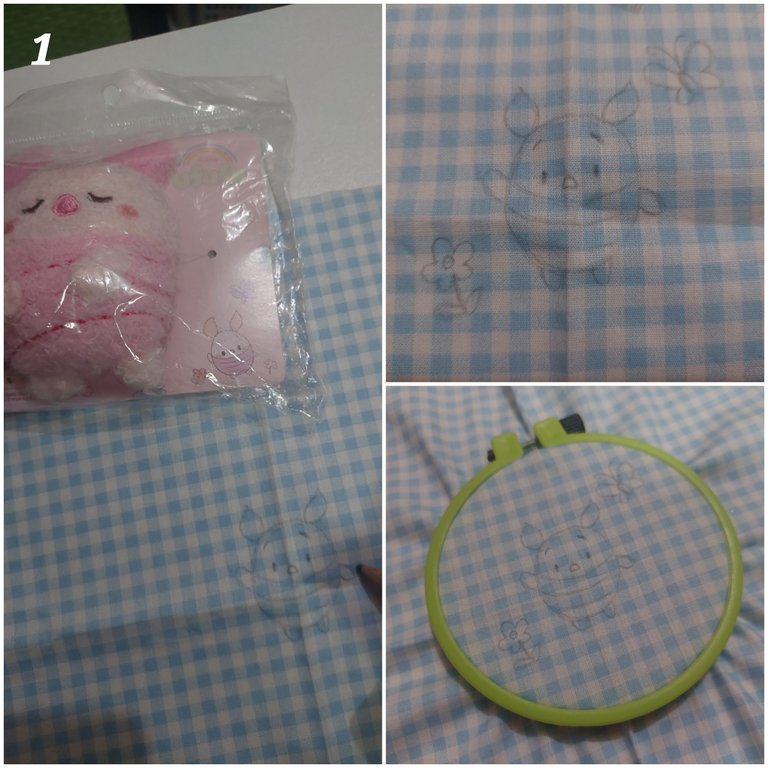
1ST
Inspired with piglet ufufy , i drew piglet ufufy with a flower and a butterfly on a piece of gingham fabric. Then i put it in an embroidery hoop.
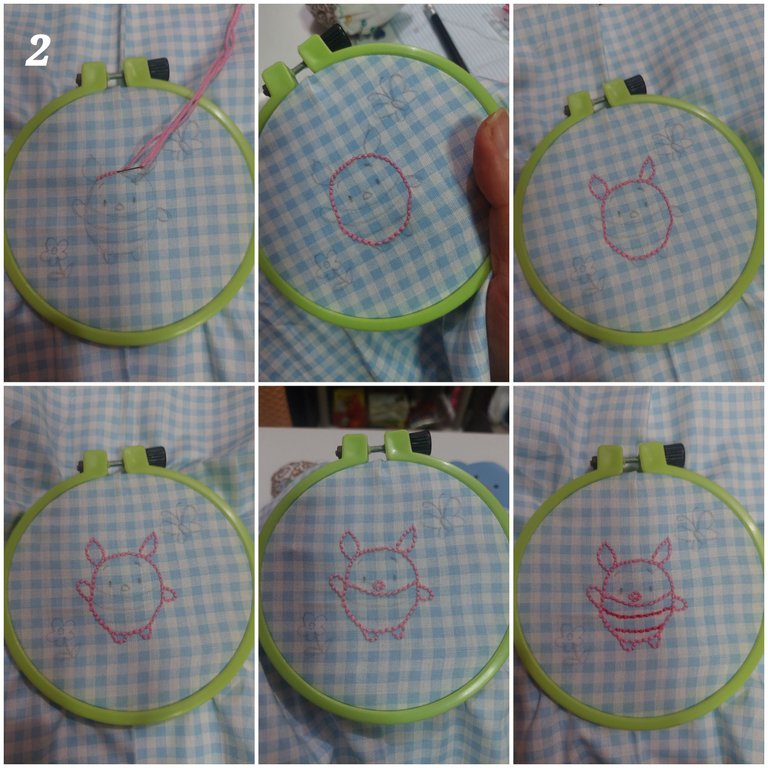
2ND
I started to do the back stitch with medium pink color embroidery floss (6 strands). I made the oval body, ears, hands and feet plus around the nose. Then with pink floss, i back stitched the body's stripes.
3RD
Next, with brown floss, i back stitched the eyebrow, then made french knots for both eyes. I also added two small pieces of pink felt for the cheeks. I french knotted the center of it to attach it to piglet.

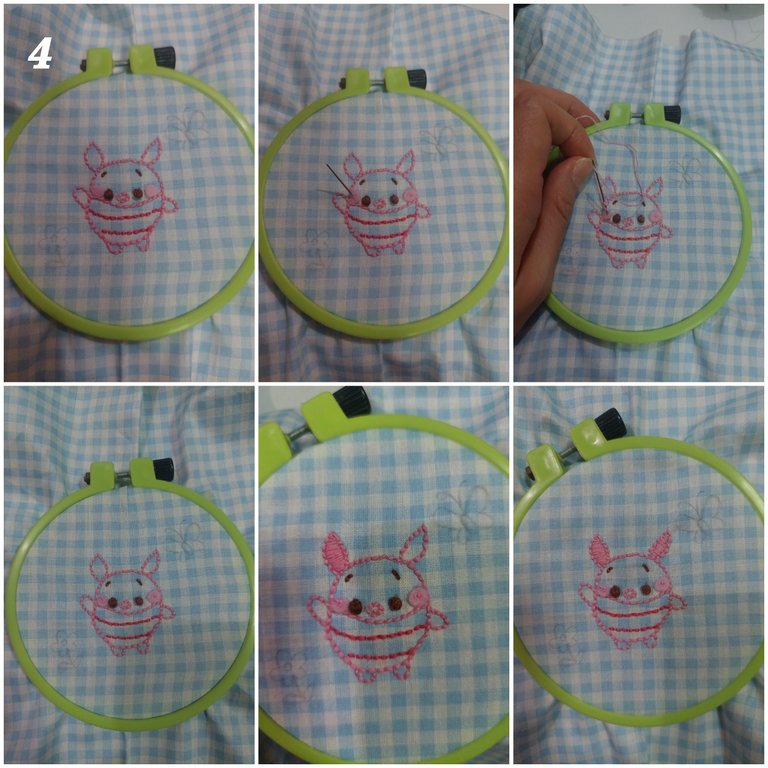
4TH
I then made fulfill the ears with satin stitch of 4 strands medium pink floss.
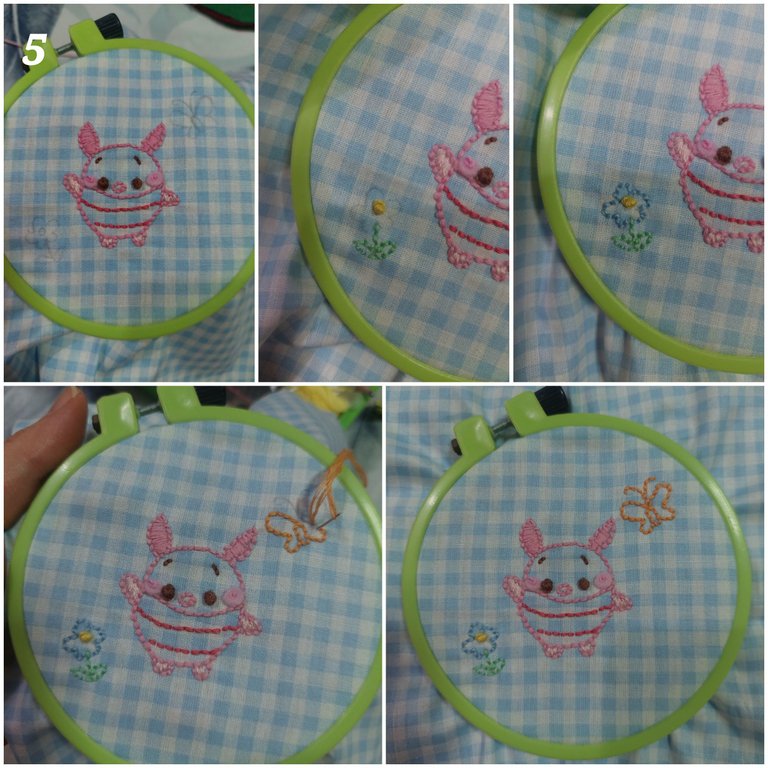
5TH
I made the satin stitch too for hands and feet by using 4 strands of soft pink floss. Then i backstitched the stem and leaves with green floss, backstitched the flower and in the middle, french knot. I also backstitched with orange floss or the butterfly.
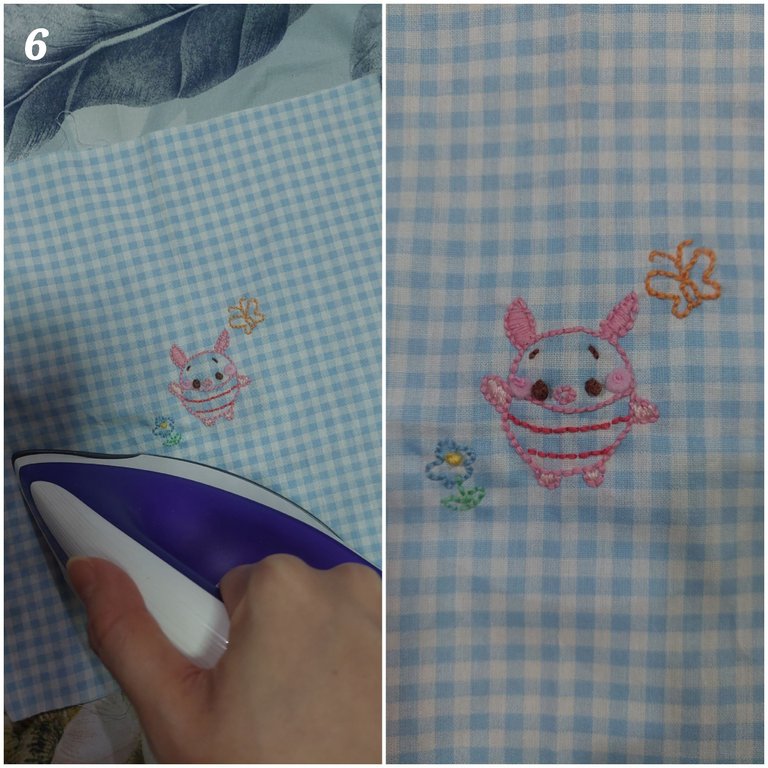
6TH
Next, i ironed the fabric. Here how it looked, after i took off the hoop.
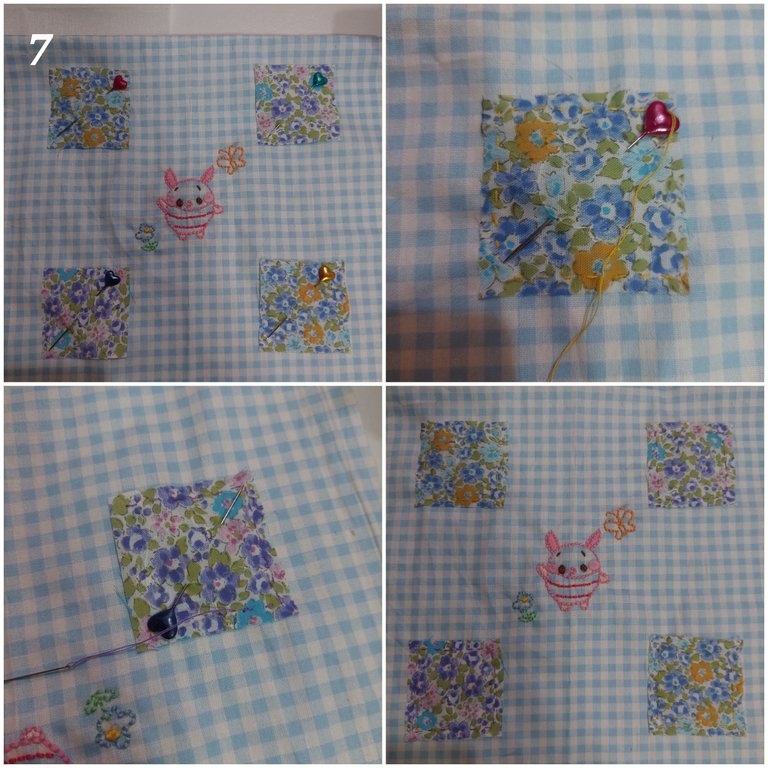
7TH
Next i pinned 4 pieces of 5x5 cm fabric patches to it, right on corner of the piglet embroidery. Then i did running stitches to attach them.
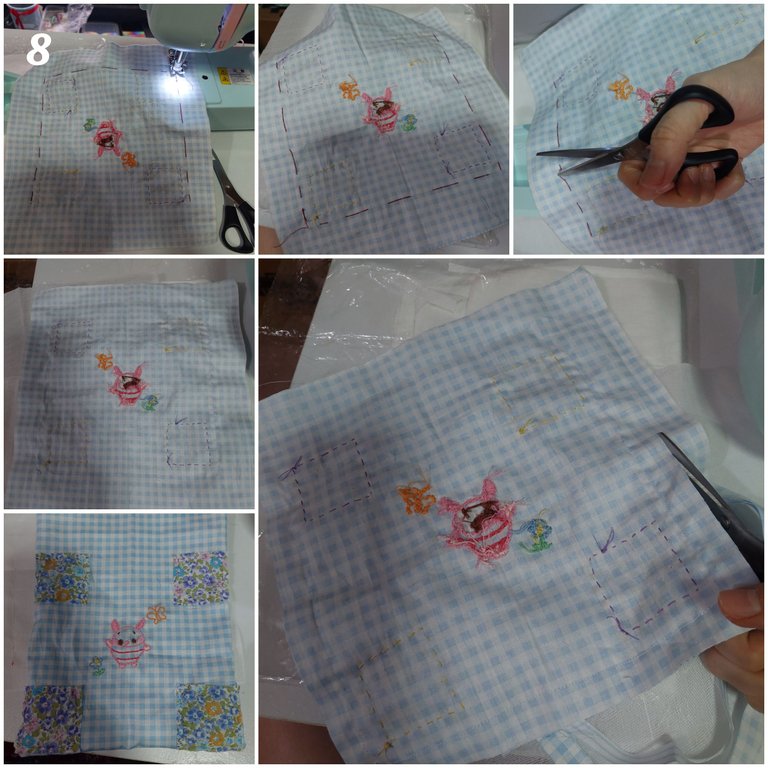
8TH
Later, i sew around with large stitches with maroon thread to join the back and front part of the bag . Then i sew it by using my mini sewing machine. After finished, i released the large stitches. I cut around and made it inside out.
9TH
I slipped the back fabric then sew it first with the maroon thread (large stitches). After finished, i sew it on the same place with my sewing machine.
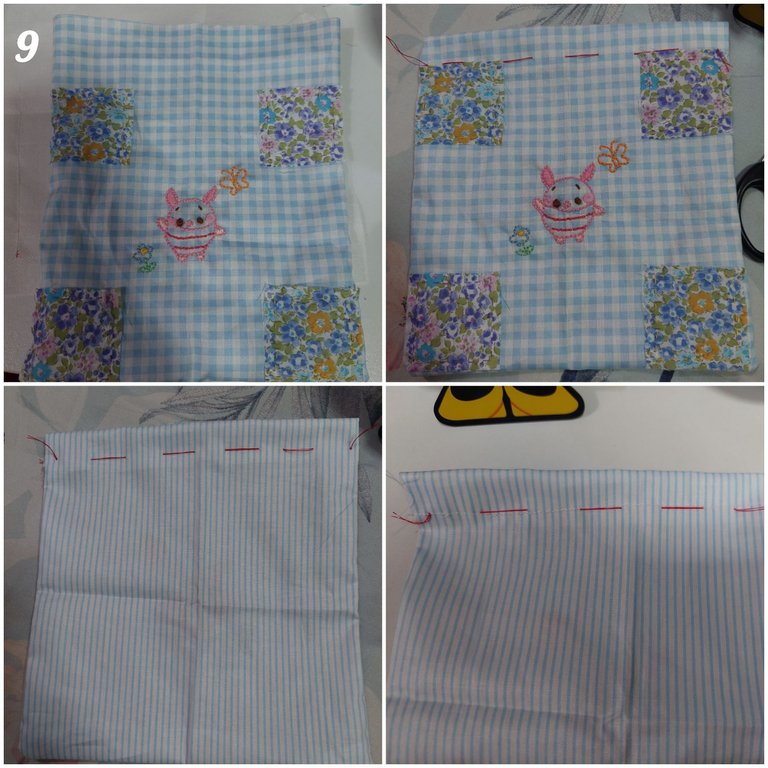
10TH
I did the same thing for the front part.

11TH
Last thing was i put the ribbon inside with the help of safety pin.
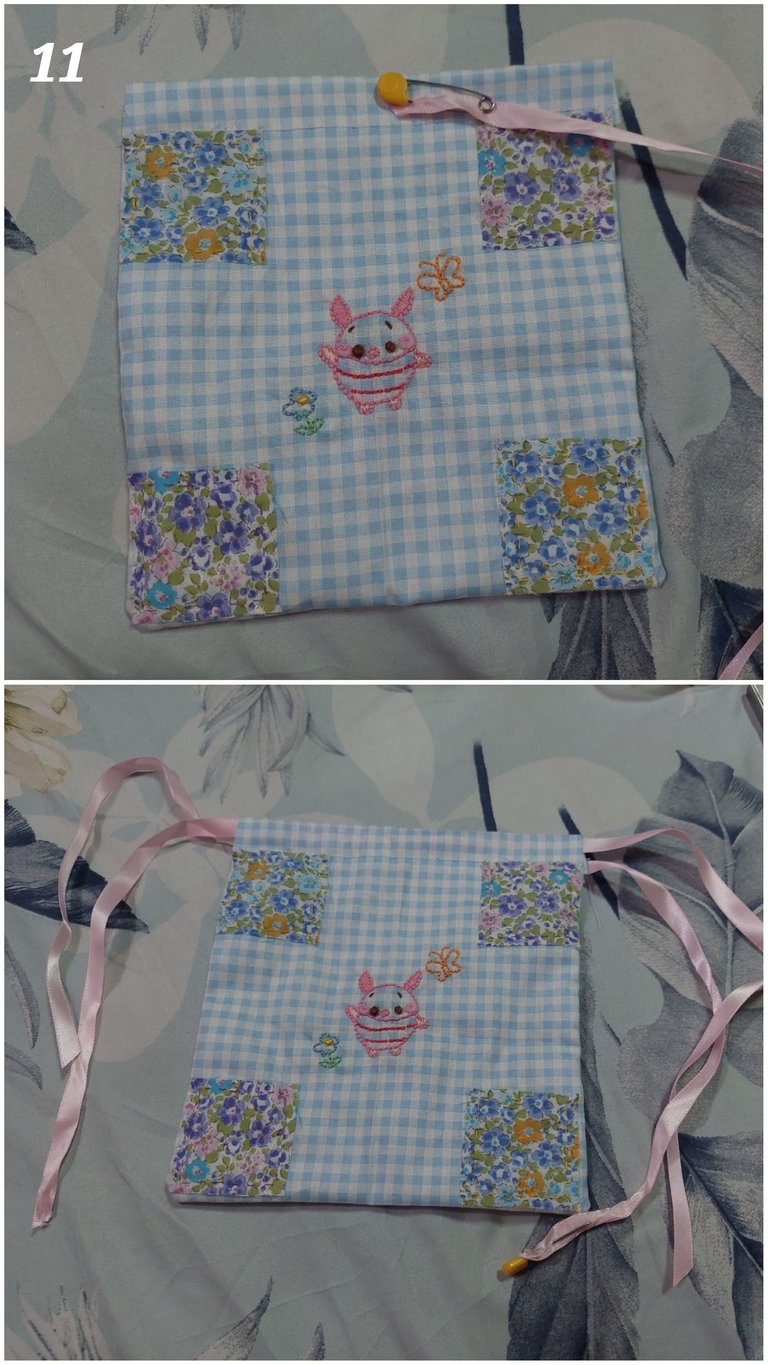
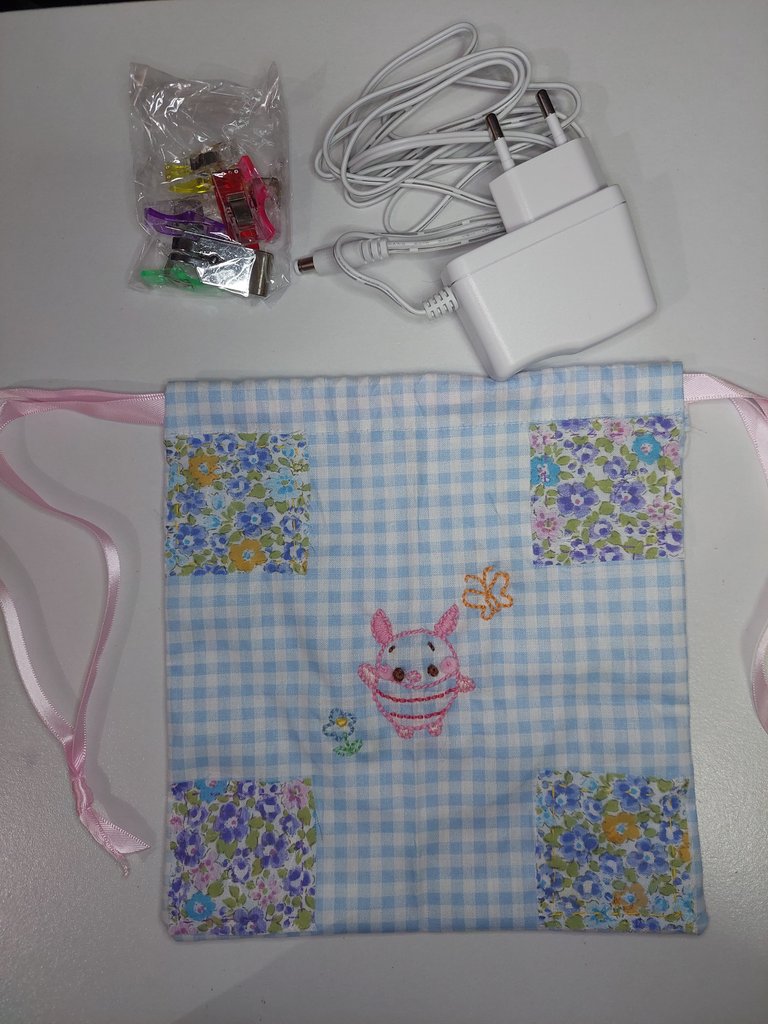
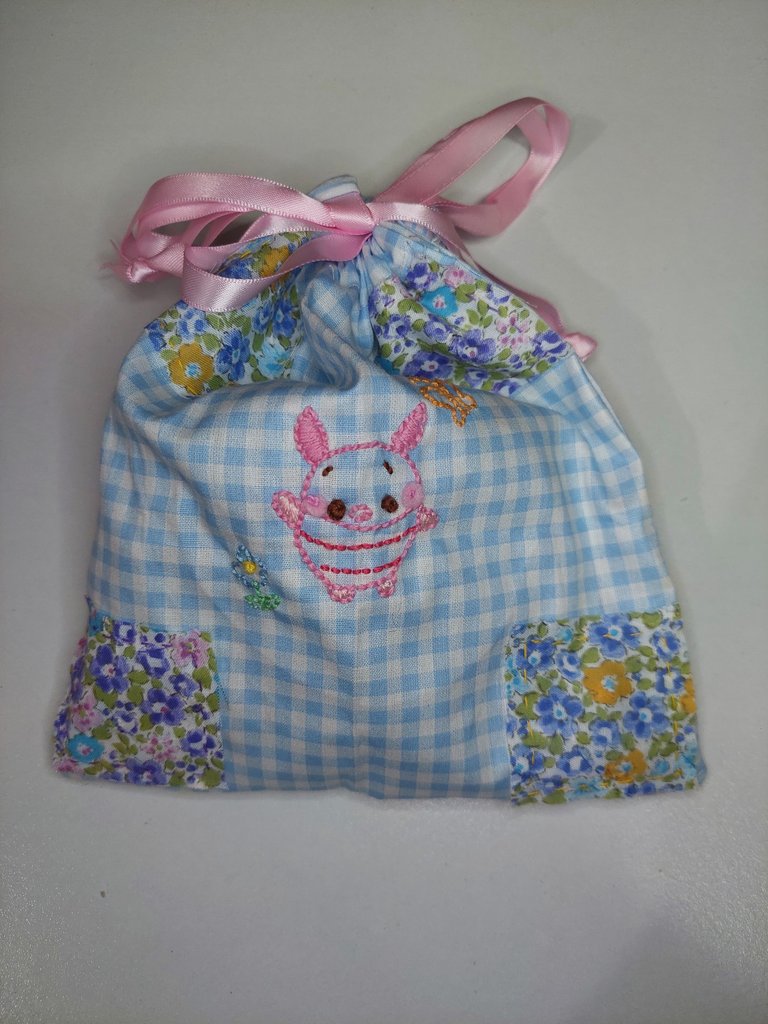
THE RESULT
Voila, here it is
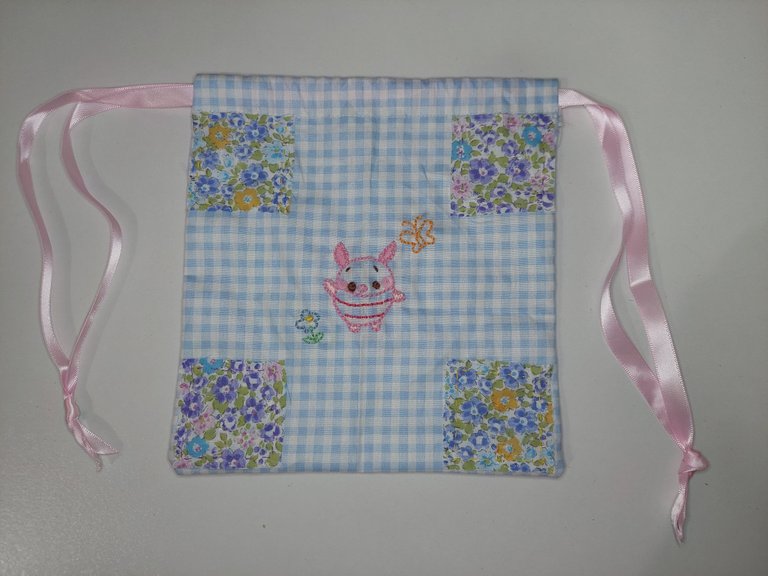
Now i could put my craft stuffs in this cute small drawstring bag.
How do you think of it?
Thanks for reading my article, if you enjoy my article, upvote, reblog, follow me and stay tune for more CRAFT things from me!
All of the pictures were taken with Samsung A52 5G android phone and i used canva for the cover picture.
A bit about the author
She works in a bank but she interests in CRAFT (CRaft, Art, Food and Travel). To pursue her art passion she does the cross stitch, embroidery, handsewing, crafts, crochet and also draws. Find hers in
https://de-creartique.redbubble.com and https://decreartique.threadless.com/designs. Also find her cute collectibles pixel cat pictures here https://opensea.io/collection/pixelcryptocat . Find her contents, follow, like and subscribe https://instagram.com/better_us123 https://www.youtube.com/@better-us123 https://www.tiktok.com/@better_us123?_t=8sC8mqR0gwj&_r=1
I liked this project. I was looking at the embroidery work and thought how cute it would look on baby quilts.
Great job.
Cheers!!!
Thanks a lot
👍👍🫶🫶💖
Thanks
Awwnn, this is really cute the embroidery and everything blended so well. Thank you for sharing this beauty with us. I love it so much.
Thanks a lot. I am so glad you like it :)
French knot, back stitch and the likes, last time I worked with those, I was in primary school 😅. Reading through your blog sure felt nostalgic and brought back so many memories with craft, especially sewing 🥹
Thank you :)
You are welcome 🤗