Hello, friends especially needleworkers!
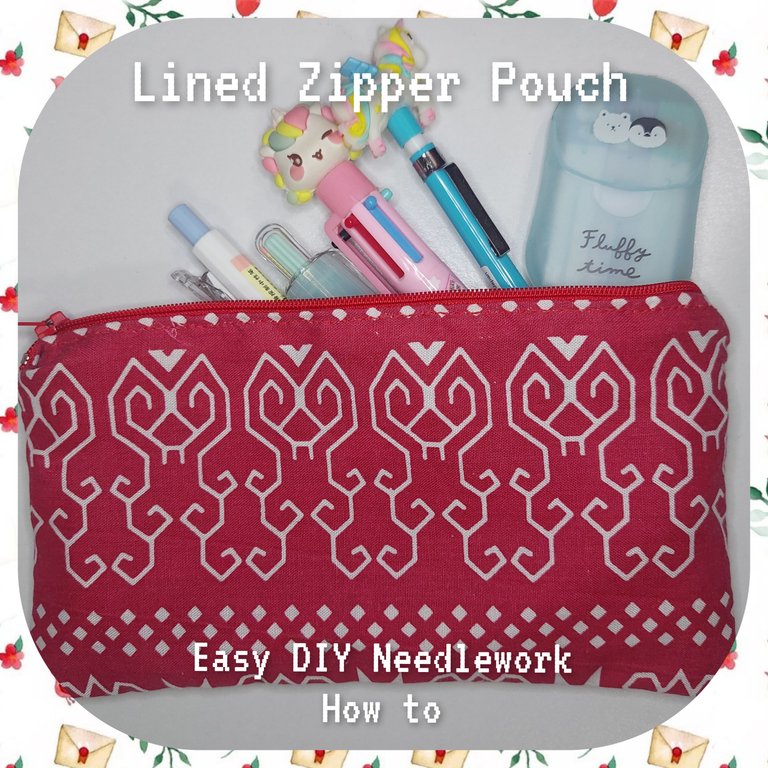
One of my plastic zipper pouch is almost totally broken, so instead of buying i tried to make one from fabric with lining and zipper. I find it easily to make and it the pouch itself would be useful, so you could copy one if you like.
Project Time: around 8 hours
Difficulty: Medium
Skills needed:
only back stitch and ladder stitch
Materials and Things needed:
- two kind of fabrics (2 pieces each, around 21 cm x 8 cm)
- a 18 cm zipper
- fabric scissors
- pins
- sewing thread
- sewing needle
- sewing releaser (unnecessary, i used it because my mini sewing machine couldn't sew the zipper :()
How to make it:
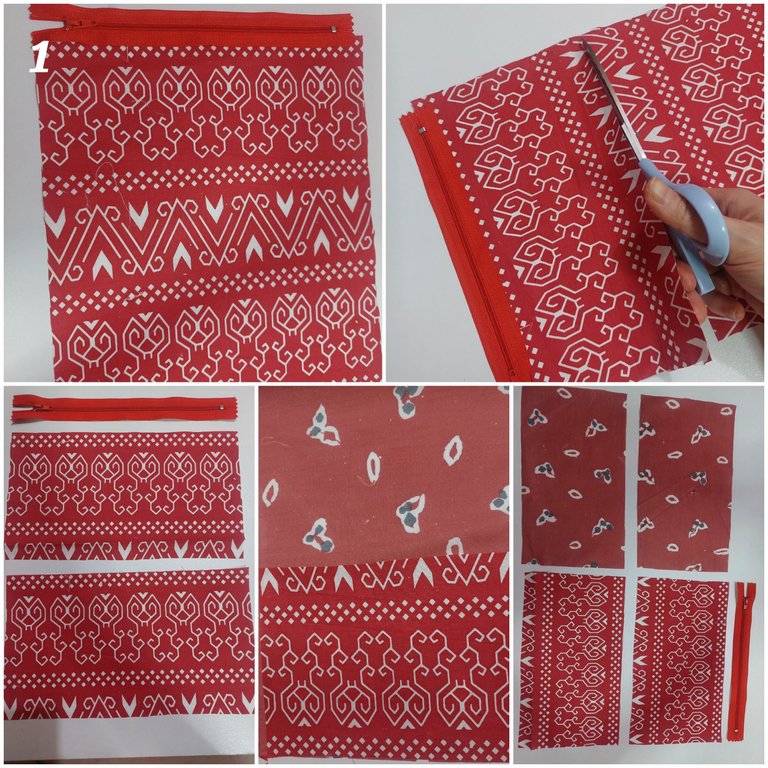
1ST
I measured the fabric with the zipper then cut it. I also did the same for the lining fabric so it would be 4 pieces of fabric, with 4 exactly same rectangle shape.
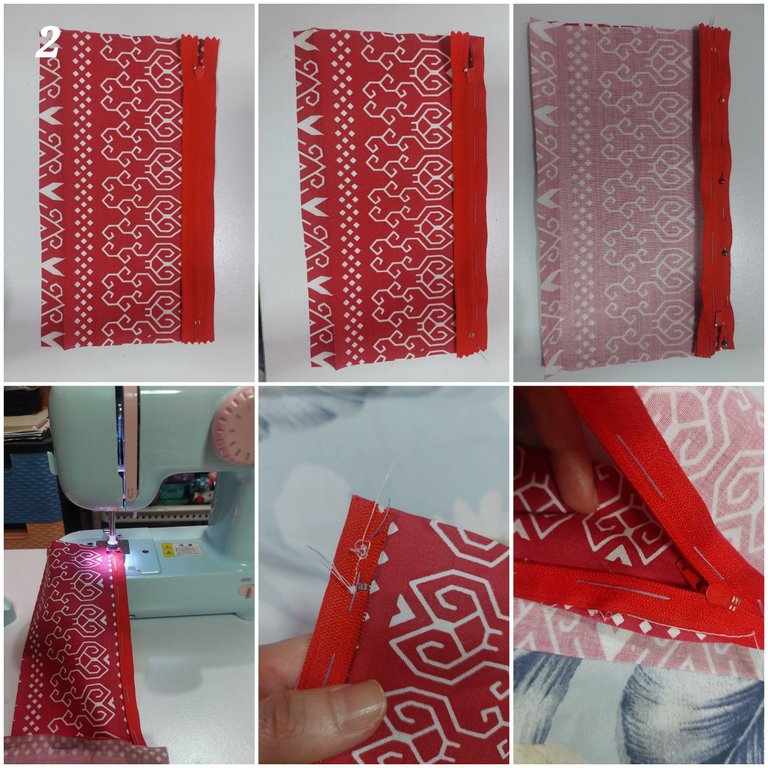
2ND
Next, i sew the zipper to the fabric. The fabric that i mean is the fabric that i use for the pouch, right side for the fabric and wrong side for the zipper like below. I also pinned the other side the zipper with the other piece of fabric then sew them with loose seam. I tried to use my mini sewing machine to sew them.. But oh no it didn't work well. It seemed not moving and sew on the same place. I released the sewing then.
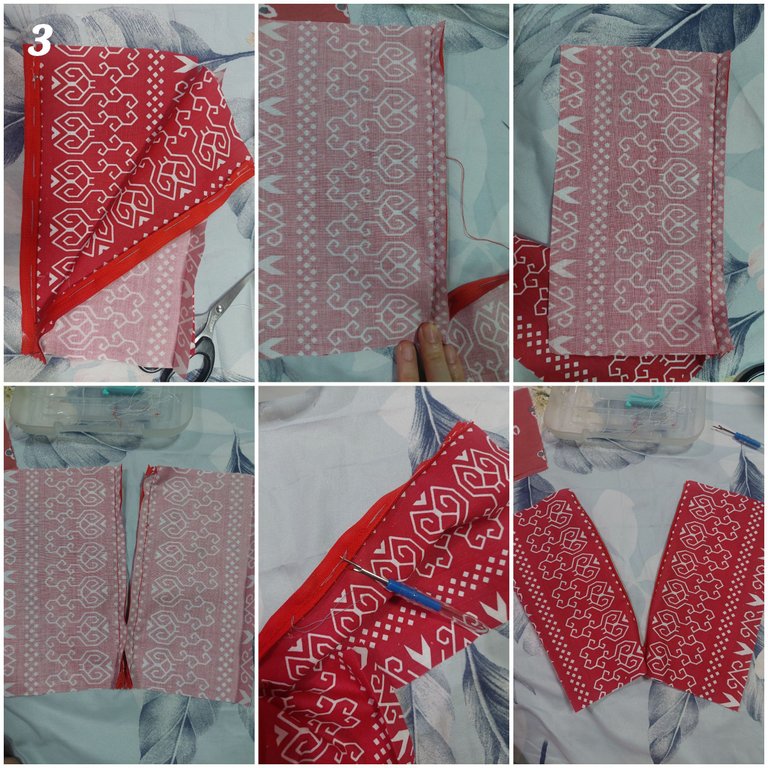
3RD
Then instead of using the machine i decided to use my hand to sew. I first joined the zipper with the piece of fabric by using running stitch then running stitch again to close it so it made back stitch. I did the same to the other part of the zipper (to make it easier i opened the zipper). After finished joining them, i released the loose seam. And look at the picture, it already joined perfectly.
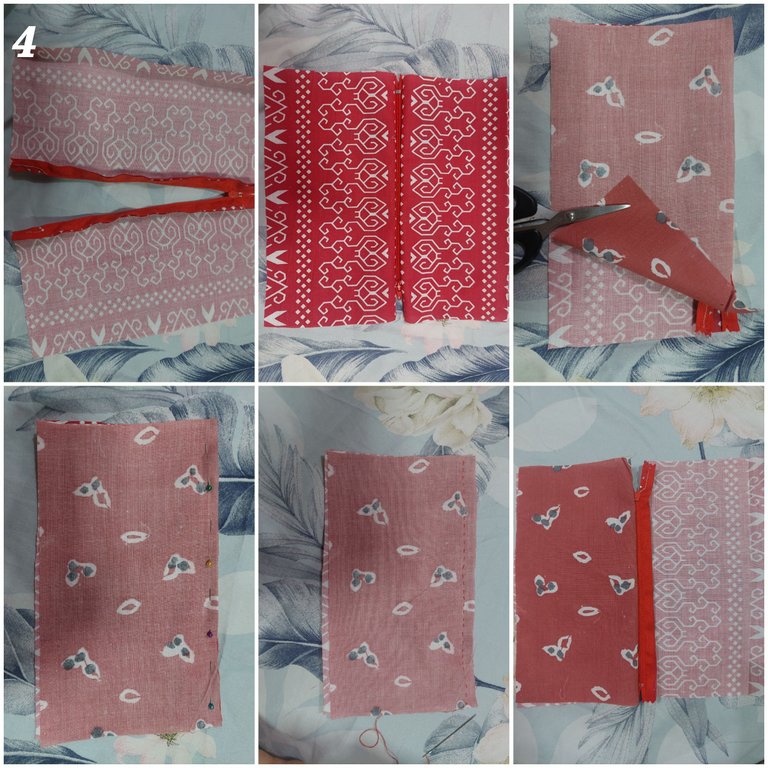
4TH
Next, i tried to add the lining fabric. I put it on the fabric on the wrong side like a sandwich. Then i pinned it, and sew it too. Look that it already attached well.
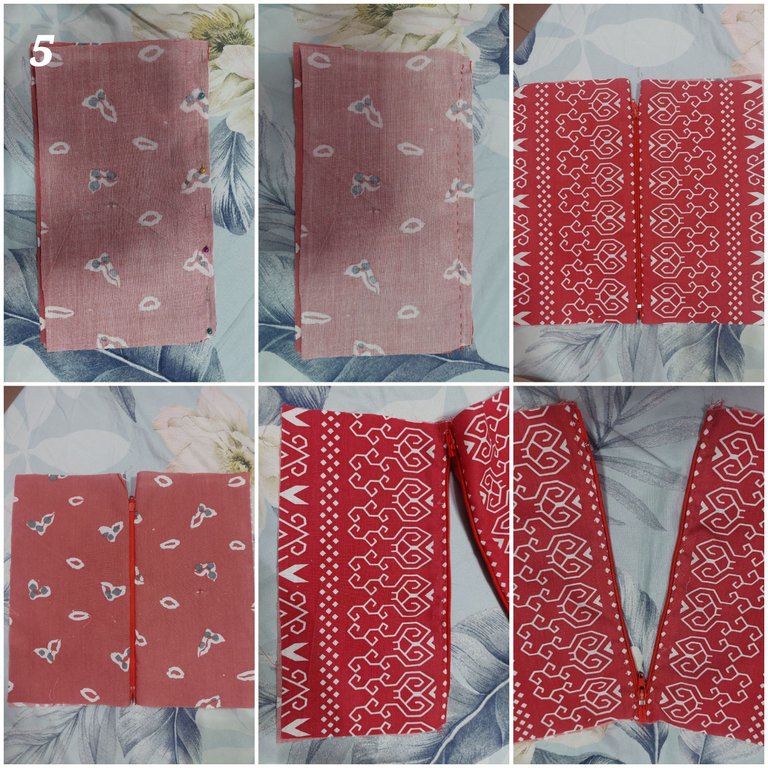
5TH
I also did the same for the other side. Until they were perfectly attached. To make sure that it would be great attached but the zipper working well, i sew the the side of fabrics near the zipper.
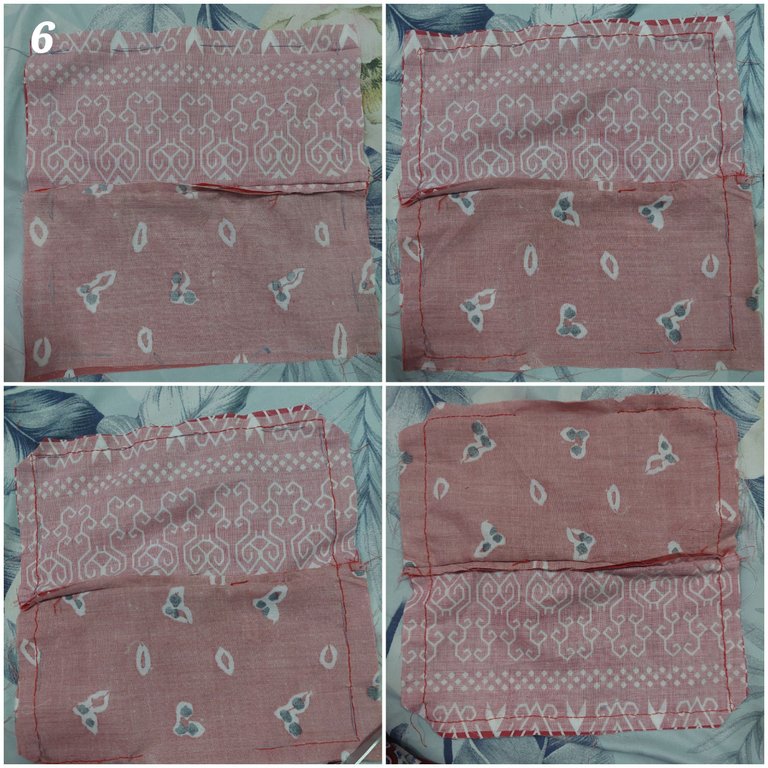
6TH
Next, i seamed around inside. Then i sew them but i left a small part around 5 cm on the lining fabric. After i sew them, i released the seam.
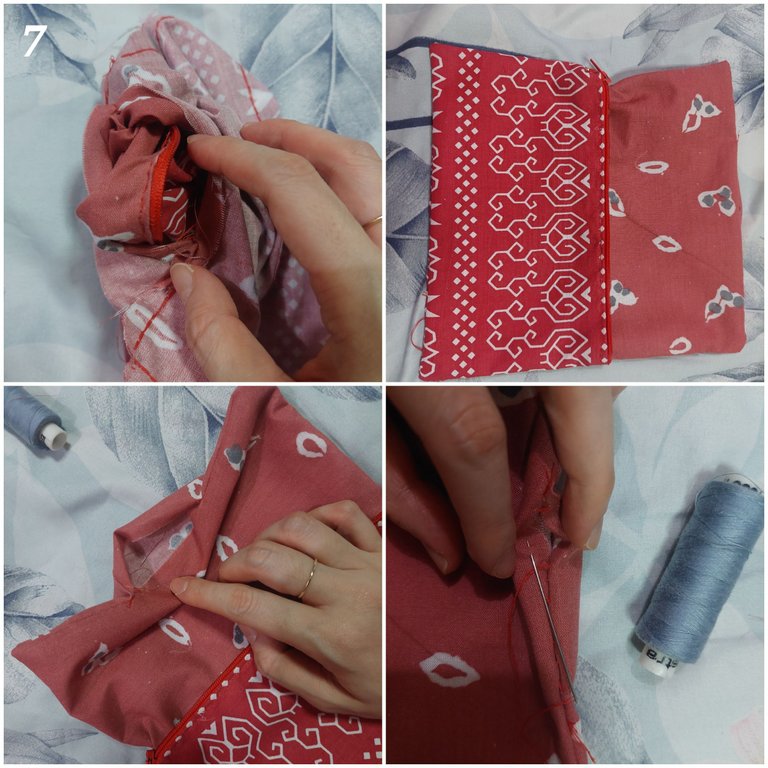
7TH
Time to turn all the side to get the look and then my time to do the ladder stitch to close the lining.
THE RESULT
Voila, here it is...
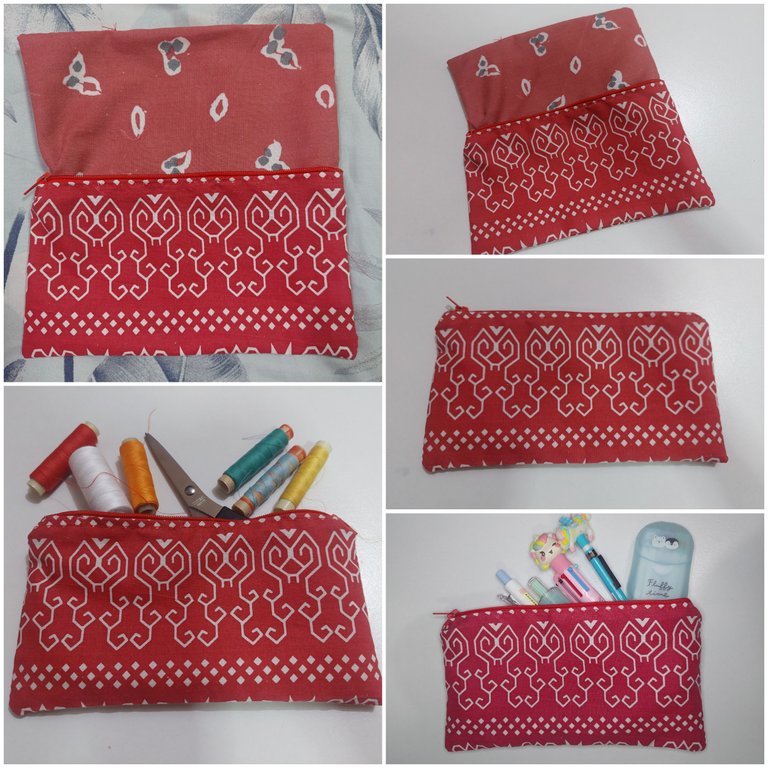
This multipurpose lined zipper pouch is finished. I tried to use it to put my sewing needs then office supplies. Well tit get along with those things and i am sure it could be useful for anything! How do you think about this pouch?
Thanks for reading my article, if you enjoy my article, upvote, reblog, follow me and stay tune for more CRAFT things from me!
All of the pictures were taken with Samsung A52 5G android phone and i used incollage apps for the cover picture.
A bit about the author

She works in a bank but she interests in CRAFT (CRaft, Art, Food and Travel). To pursue her art passion she does the cross stitch, embroidery, handsewing, crafts, crochet and also draws. Find hers in
https://de-creartique.redbubble.com and https://decreartique.threadless.com/designs. Also find her cute collectibles pixel cat pictures here https://opensea.io/collection/pixelcryptocat . Find her contents, follow, like and subscribe https://instagram.com/better_us123 https://www.youtube.com/@better-us123 https://www.tiktok.com/@better_us123?_t=8sC8mqR0gwj&_r=1
its a useful thing also and creative, thanks for sharing your ideas
Thanks :)