Happy start of the week to all my dear Hive friends. May this week be full of many materialized and successful projects. May the universe be with us at every stage and above all may we enjoy the process.
Feliz inicio de semana para todos mis queridos amigos de Hive. Que esta semana esté llena de muchos proyecto materializados y exitosos. Que el universo nos acompañe en cada etapa y que sobre todas las cosas que disfrutemos el proceso.
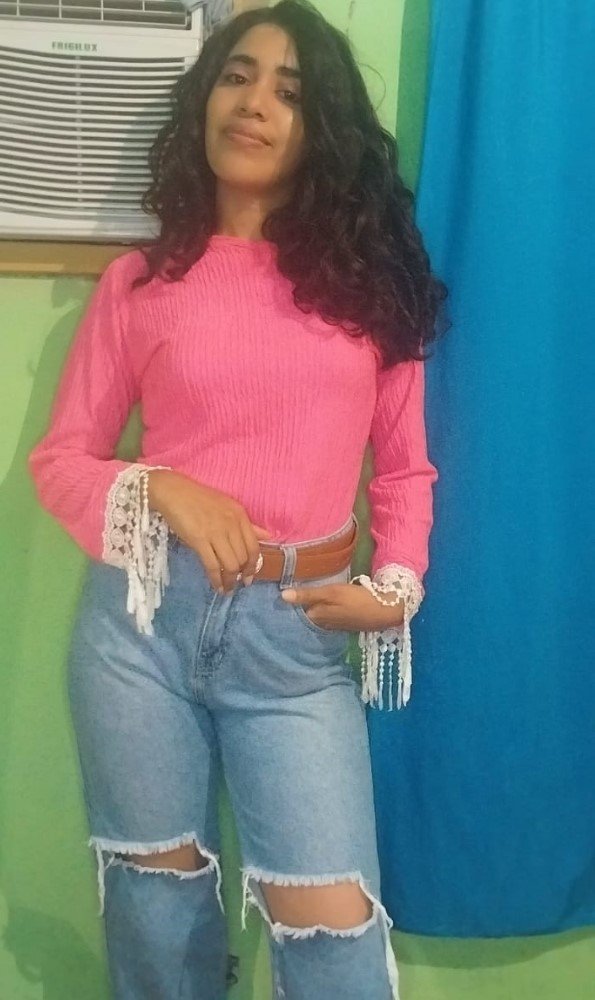
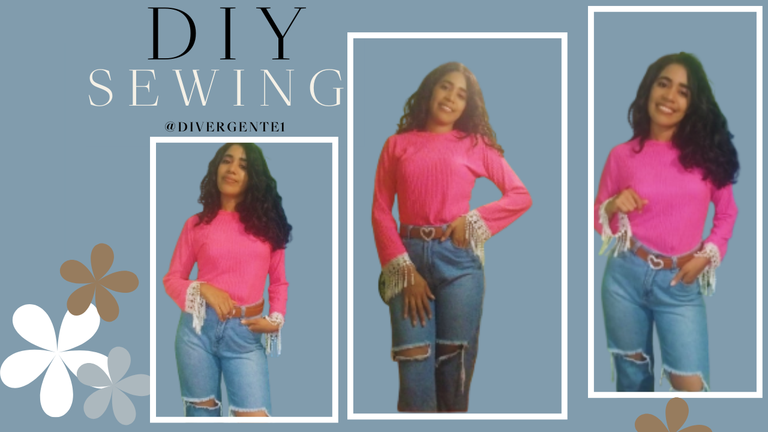
To start this week I bring you a project of a sweater with bangs on the sleeves. I hope you like the result, because it is an easy way to be elegant, beautiful and we can also make this beautiful creation ourselves.
Para iniciar esta semana les traigo un proyecto de un suéter con flecos en las mangas. Espero que les guste el resultado, porque es una forma fácil de estar elegantes, bellas y que además podamos hacer nosotros mismos esta bonita creación.

Materials - Materiales
- 1 Meter of fuchsia elastic fabric
- 1 Fuchsia thread
- 1 meter of lace with bangs.
- Pattern (Sweater)
- Pins
- Scissors

- 1 Metro de tela fucsia elastica
- 1 Hilo Fucsia
- 1 metro de Encaje con Flequillos.
- Patron (Sueter)
- Alfileres
- Tijera
Step by Step - Paso a Paso
1
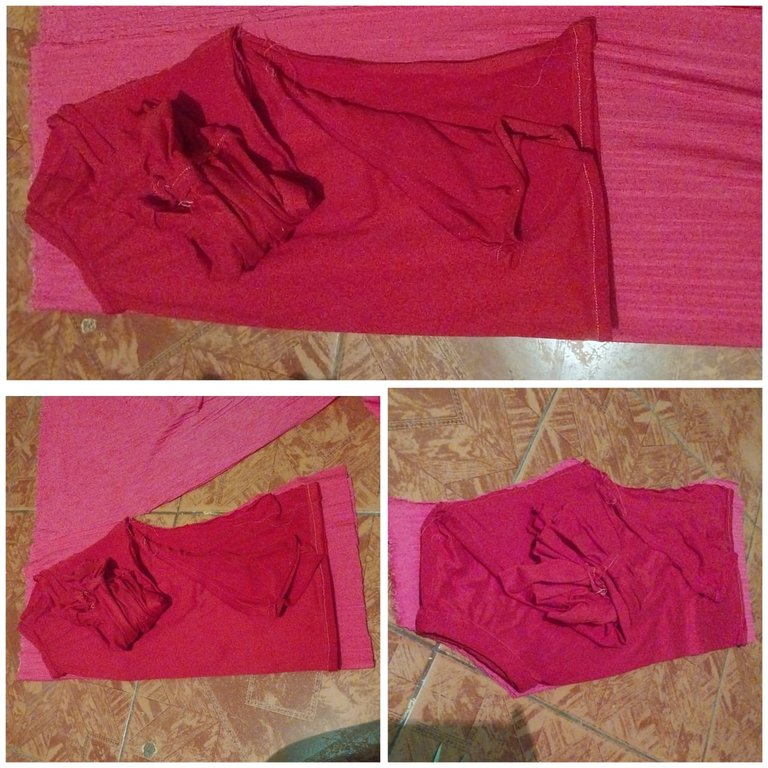
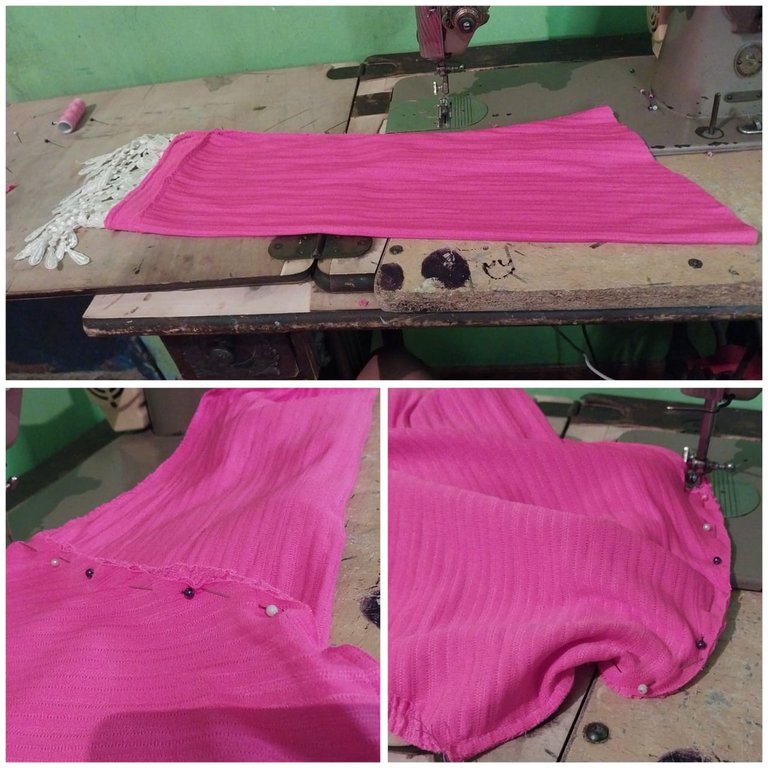
We take the sweater that we like the most and we must copy the shape of it on the fabric. How do we do this?
We must fold the fabric in equal parts, and at the moment of doing this we also place the shape of the sweater folded right in the middle on the fabric. We must copy the base shape of the front and the back of the sweater. To do this we fold the sleeve area to mark the armhole (which is the curved shape that has the garment at the end of the armpit)
Then with the help of the scissors we get the figure or the front piece.
Tomamos el sueter que mayormente nos guste y debemos copiar la forma de este en la tela. Como haremos esto?
Debemos doblar la tela en partes iguales, y al momento de hacer esto colocamos también la forma del suéter doblado justo a la mitad sobre la tela. Debemos copiar la forma base de la parte delantera y la trasera del suéter. Para ello doblamos la zona de la manga para poder marcar la sisa ( que es la forma curva que tiene las prenda en el acabado de la axila)
Luego con la ayuda de la tijera vamos obteniendo la figura o la pieza delantera.
2
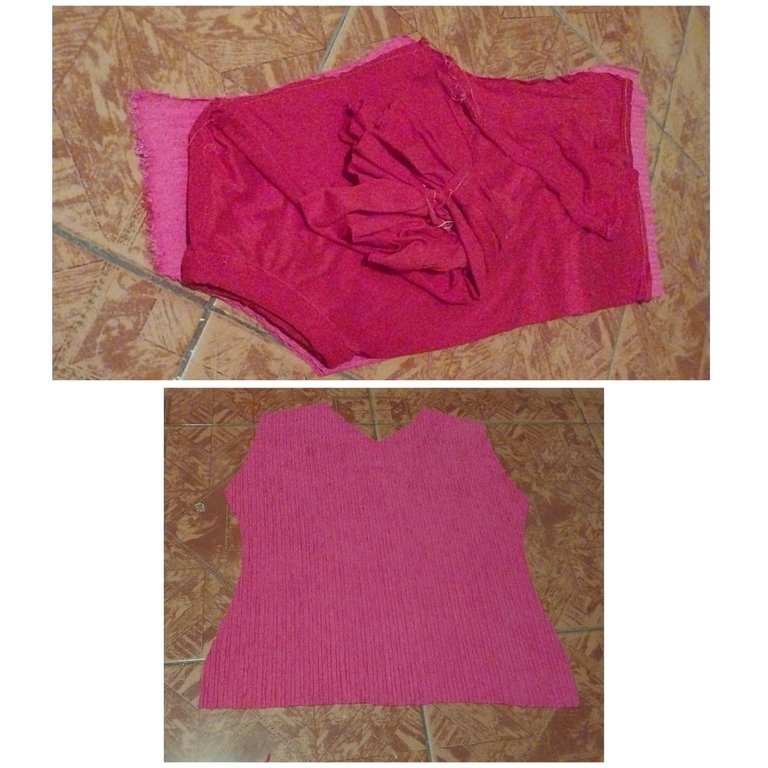
Then we cut out the curved shape of the neck.
Luego recortamos la forma curva del cuello.
3
Then we proceed to make the marking of the sleeve, for this we must also fold the fabric just in half and the top should lead to the area of union of the doubles, and the area we must cut in the lower area and the shape of the armhole.
Luego procedemos a realizar el marcado de la manga, para ello tambien debemos doblar la tela justo a la mitad y la parte de arriba debe dar a lugar a la zona de union del dobles, y la zona que debemos recortar en la zona inferior y la forma de la sisa.
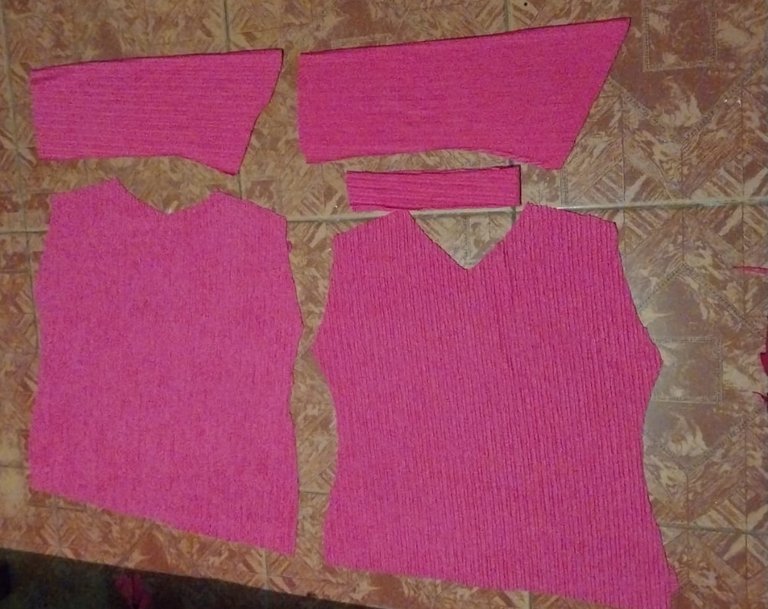
This way we will have the pieces, the front and back of the sweater, the sleeves and we will also need a 3“ wide X 15” long fabric ribbon.
Asi tendremos las piezas, la zona delantera y trasera del sueter, las mangas y tambien necesitaremos una cinta de tela de 3" de ancho X 15" de largo.
4
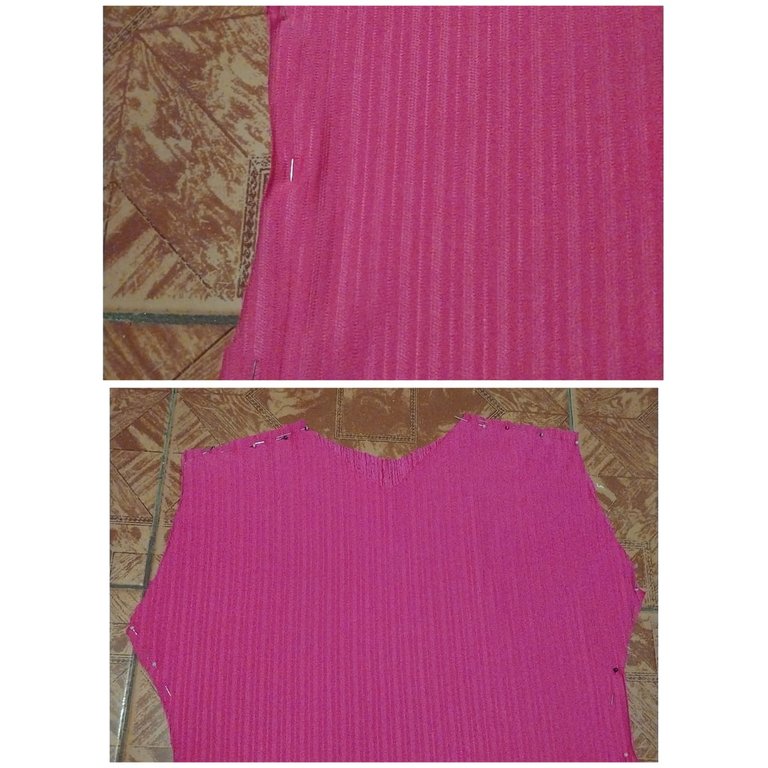
Then we join the pieces with the help of the pins.
Luego unimos las piezas con la ayuda de los alfileres.
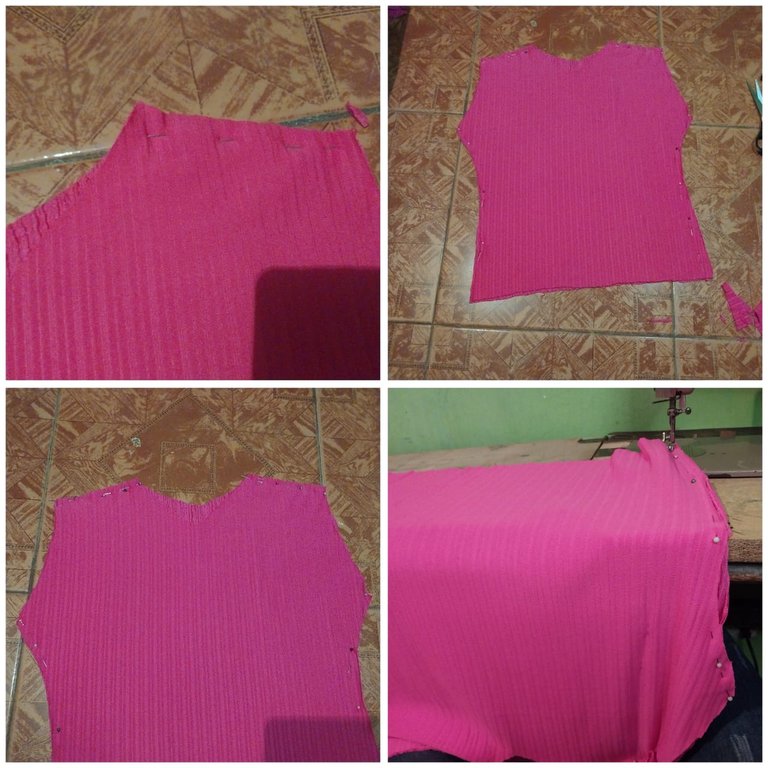
Then we sew these pieces together.
Luego pasamos a costuras estas piezas.
5
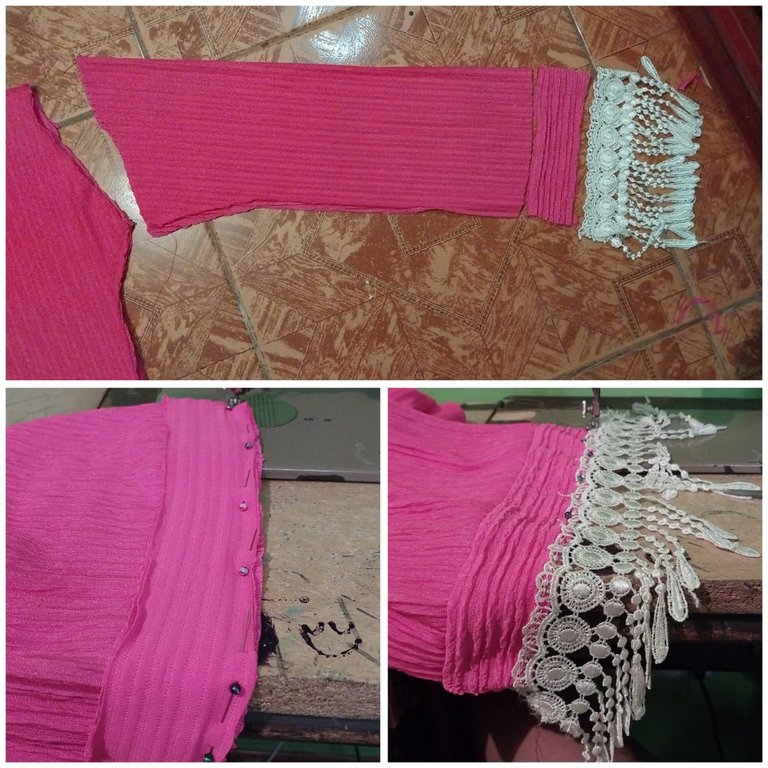
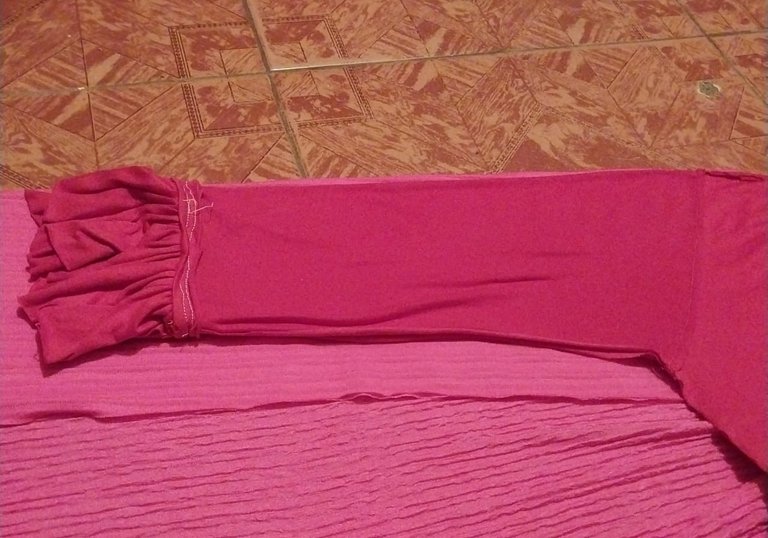
Next we must join the sleeve pieces together, I have cut another ribbon to lengthen the sleeve area, followed by the lace, as you can see. We sew the ribbon first at the end of the sleeve and then add the fringe lace.
Seguidamente debemos unir las piezas de las mangas, he recortado otra cinta para alargar la zona de la manga, seguido luego del encaje, como pueden apreciar. Cosemos la cinta primero en la terminación de la manga y luego añadimos en encaje de los flequillos.
Then we pin the sleeve to the armhole of our front and back pieces of the sweater. We help ourselves with the pins and then we sew!
Luego fijamos la manga en la sisa de nuestra piezas delantera y trasera del sueter. Nos ayudamos con los alfileres y luego pasamos costura!
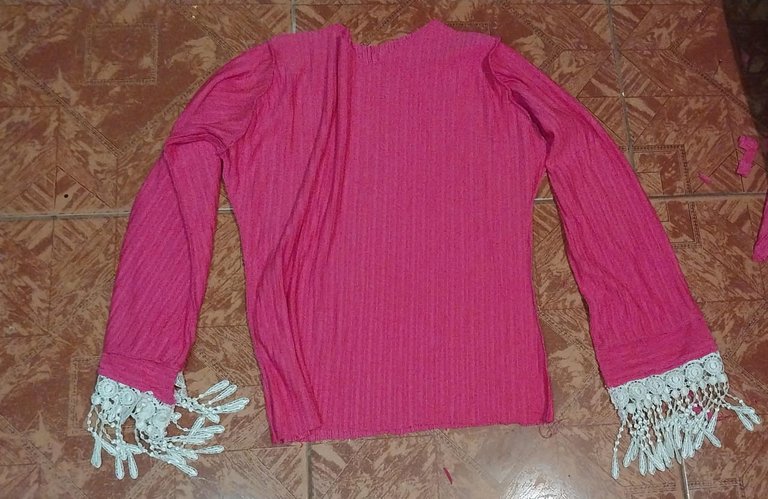
This is how our sleeves will look like!
Asi quedaría el resultado de nuestras mangas!
5

Finally we take the ribbon and proceed to sew both ends. Then we fold the ribbon in half and sew face to face in the neck area. We make a hem at the bottom edge of the sweater and we have this nice sweater with bangs.
Por ultimo tomamos la cinta y Procedemos a coser ambos extremos. Luego doblamos la cinta a la mitad y cosemos cara con cara en la zona del cuello. Hacemos un dobladillo en la zona inferior del borde del sueter y asi tenemos esta bonito suéter con flequillos.
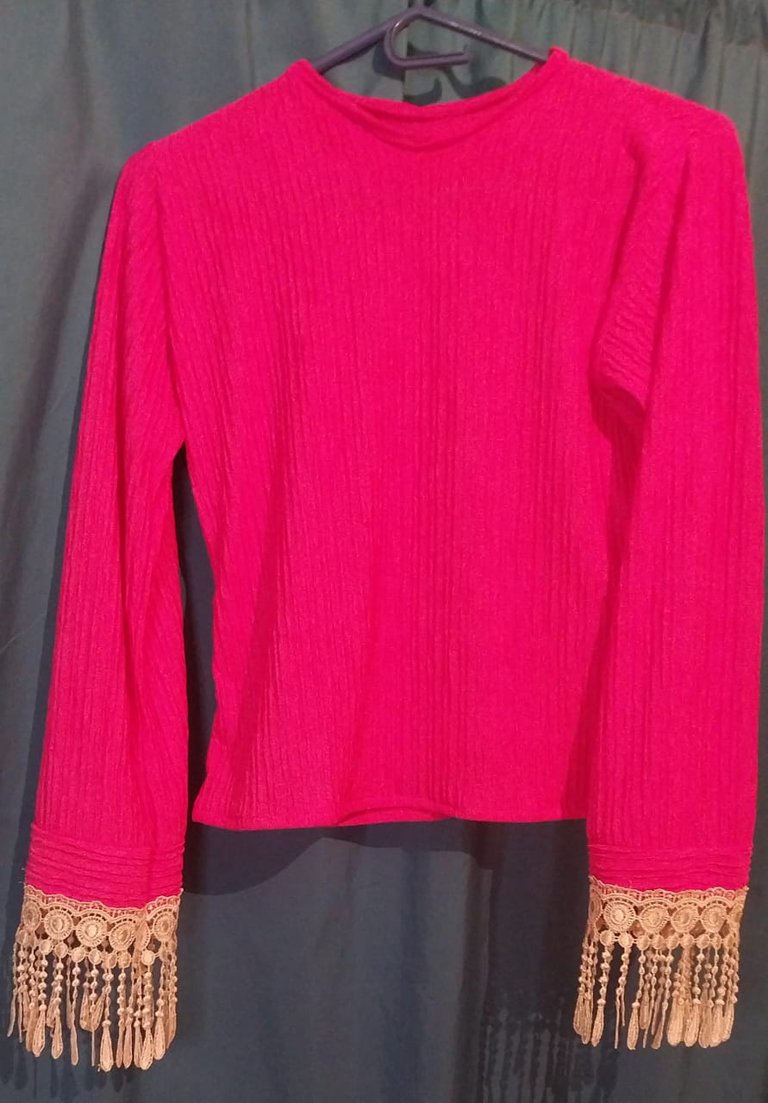
*I hope you like the ending! Greetings to all my dear friends. Thank you very much!
Espero que les guste el final! Saludos a todos mis queridos amigos. Muchas gracias!

Every dream starts in our mind! Create it...
Cada sueño inicia en nuestra mente! Créalo...

It’s always nice to be able to create beautiful things we can be proud of. Lovely work friend.
Hi, thank you very much for the support Diy hub
it came out very cool, and it fits perfectly with you, cool craft. 🌺👌👌👌😋😋🌺 seeing your other work, you will do them without much problem, I believe you still have cool ideas for what to do more soon, I fill wait next post also 😋👌👌👌
Hello, Thank you very much for your support. 🥰
Npr 👌😋🌺... I be back and wate new post .
This is beautiful, you actually made it look simple. I always view sewing as a very difficult task.
Thanks my friend
Precioso. Amé el color
Si, el color es muy bonito. Saludos y gracias
Me gustó mucho este modelo con flequillos en las mangas, muy original, feliz día 😊
Muchas gracias linda amiga! Saludos feliz dia para ti tambien!
Wow that is so incredibly cool, a very cool sweater with a very beautiful combination to look at ❤️
That’s really nice and I would wear it myself immediately with the weather getting warmer. !INDEED