
un saludo mi querida comunidad @needleworkmonday en esta oportunidad me atreví a ir más allá, pues a parte confeccionar una franela para niña también la personalice con el motivo de su personaje favorito. Este nuevo proyecto que les comparto para este lunes de aguja es una linda personalizada con el tierno personaje de Snoopy, en realidad el resultado fue el esperado
Greetings my dear community @needleworkmonday this time I dared to go further, because apart from making a flannel for girl also customize it with the motif of her favorite character. This new project that I share with you for this needlework monday is a cute personalized with the cute character of Snoopy, actually the result was as expected.
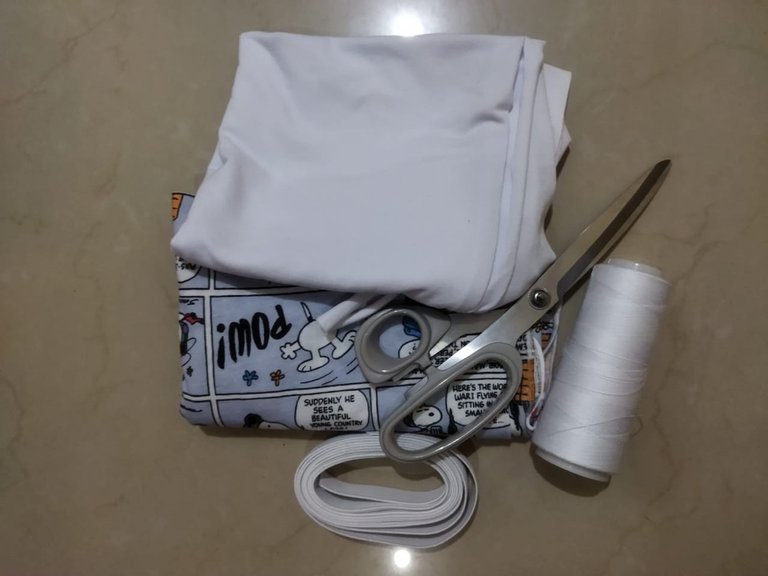
- Tela micro durazno blanca
- hilo
- Alfileres
- Tijera
- White micro peach fabric
- yarn
- Pins
- Scissors

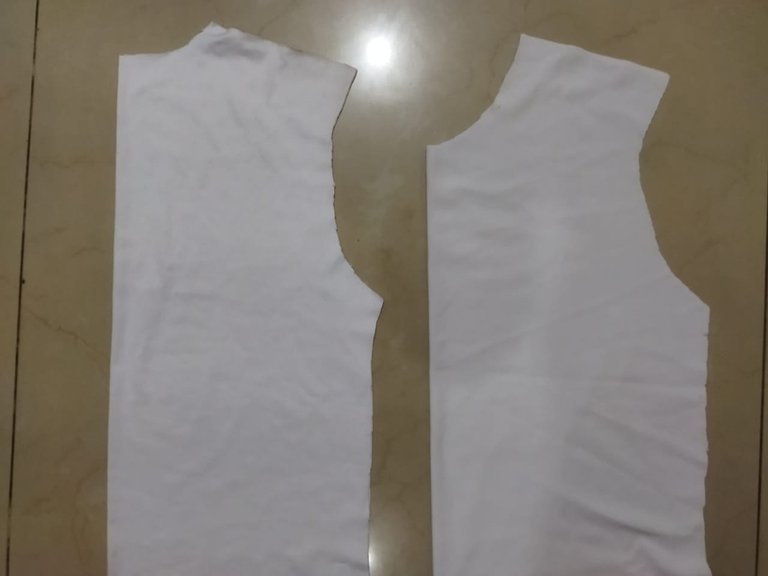
Iniciamos con este nuevo proyecto de costura que les comparto con mucho cariño el día de hoy, se trata de una franela personalizado de Snoopy. Cómo siempre les digo en los tutoriales anteriores que debemos cortar todas las piezas necesarias para la confección tanto de la franela.
We start with this new sewing project that I share with much affection today, it is a personalized Snoopy flannel. As I always tell you in the previous tutorials that we must cut all the necessary pieces for the making of the flannel.
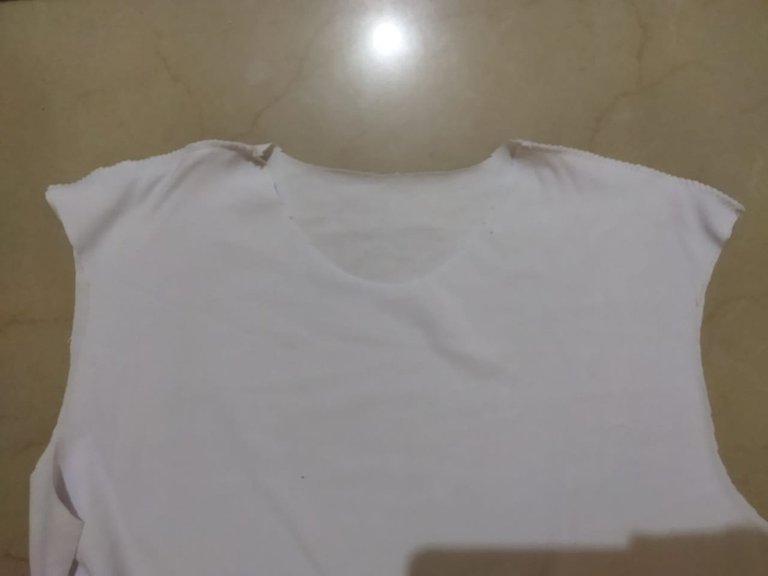
Ahora vamos a iniciar haciendo la franela. Unimos la parte delantera y trasera por los hombros encontrando cara con cara por el derecho de la tela, luego hacemos coincidir la pieza de las mangas con el contorno de la sisa, fijamos con alfileres y luego llevamos a la máquina de coser
Now let's start by making the flannel. We join the front and back at the shoulders meeting face to face on the right side of the fabric, then we match the piece of the sleeves with the contour of the armhole, we fix with pins and then we take to the sewing machine.
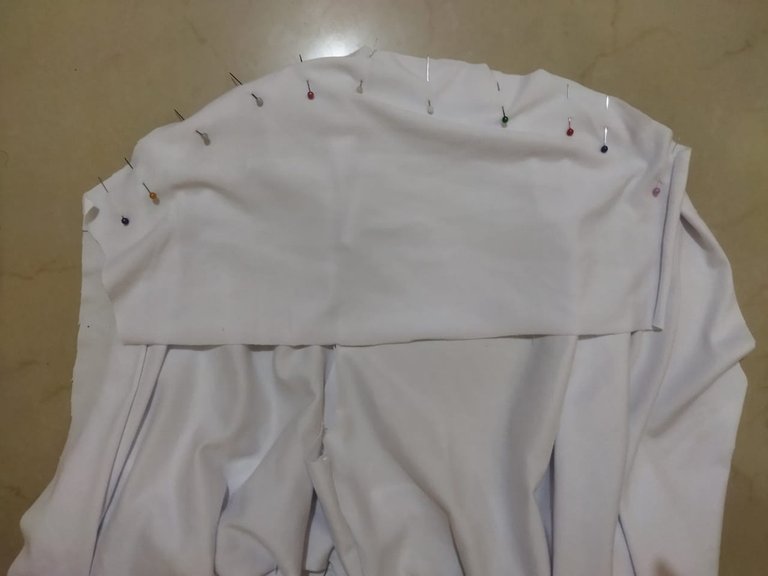
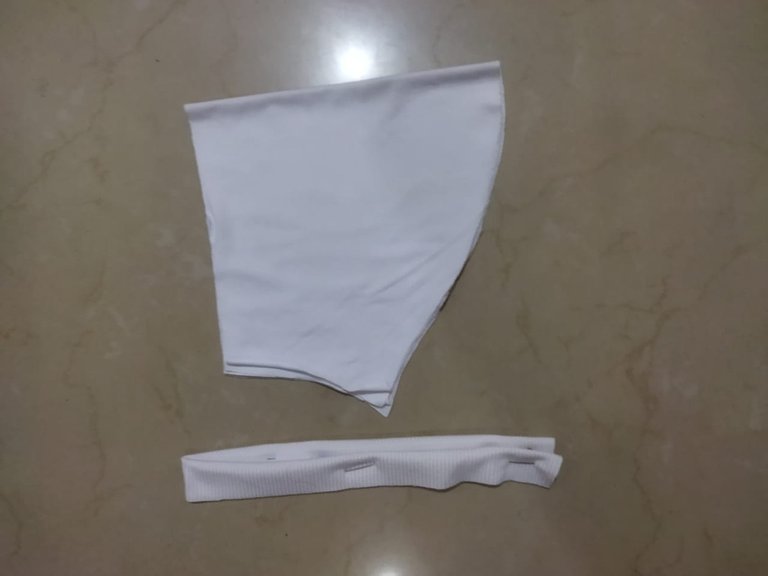
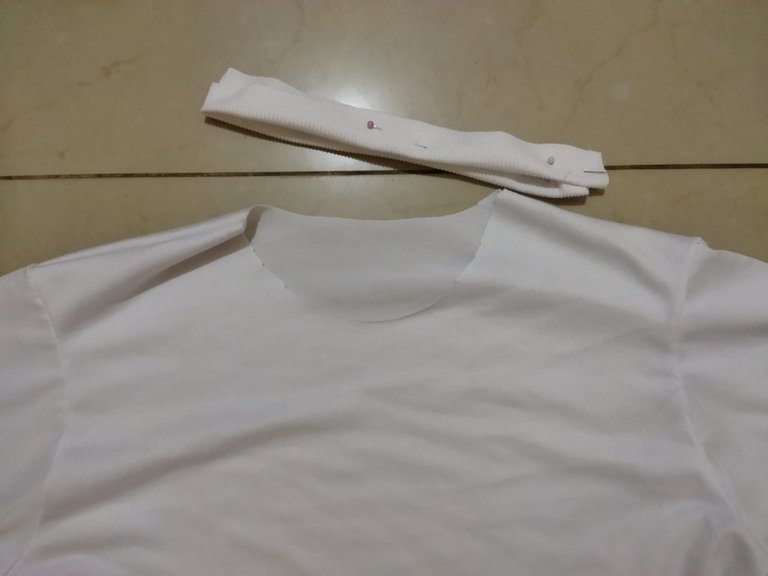
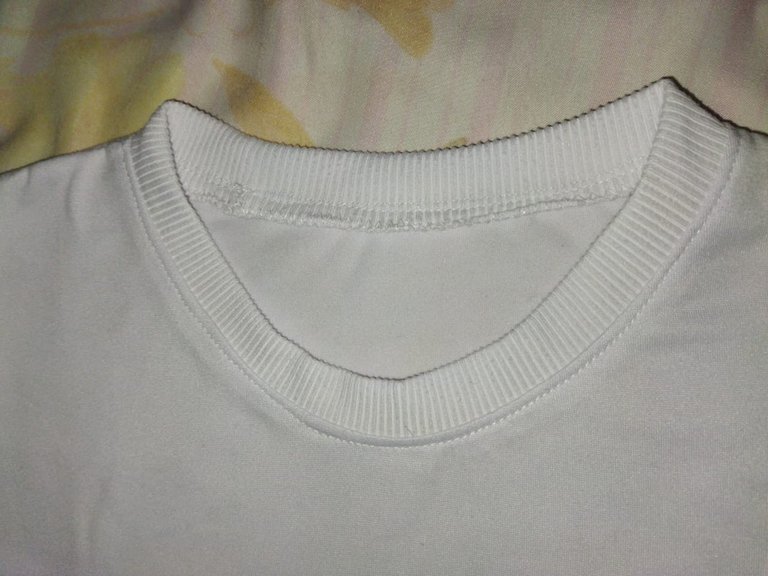
El siguiente paso es colocar el cuello de la franela. Para esto voy a medir el contorno del cuello y a esta medida le voy a restar 8 centímetros, este será el largo de la pieza o tira para el cuello, la cual tendrá un ancho de 6 centímetros. La unimos y dividimos en cuatro partes iguales al igual que el contorno del cuello de la franela, hacemos coincidir los puntos y cosemos
The next step is to place the neck of the flannel. To do this I will measure the contour of the neck and subtract 8 centimeters from this measurement, this will be the length of the piece or strip for the neck, which will have a width of 6 centimeters. We join it and divide it into four equal parts as well as the outline of the neck of the flannel, we match the points and sew.
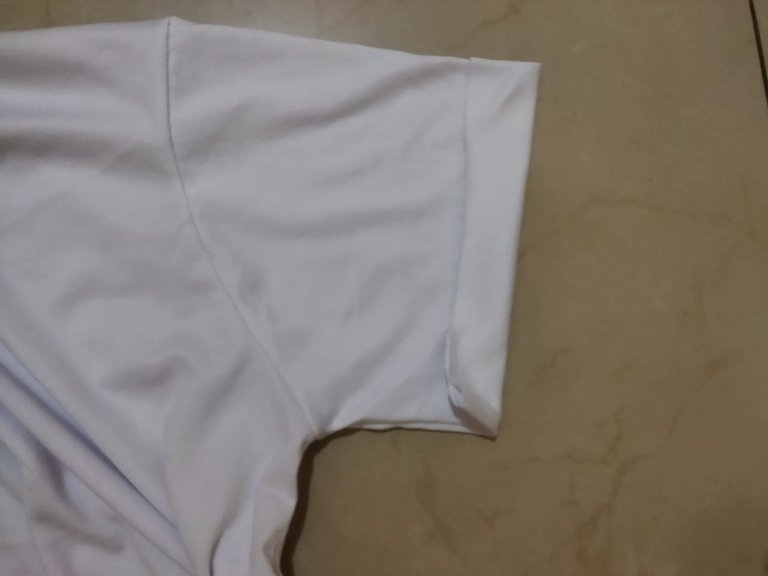
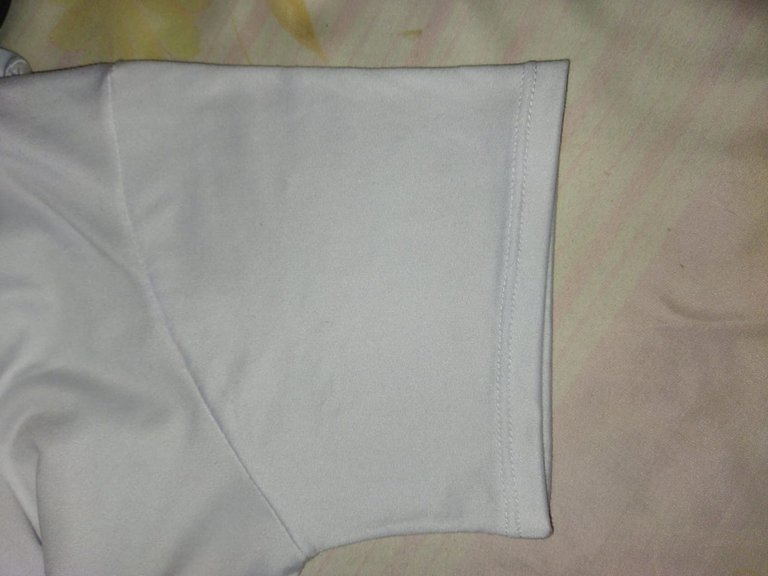
Seguidamente cerramos las franela por ambos costados y le damos el acabado tanto a las mangas como a la parte inferior de la franela. Les quiero decir que está vez utilice para esto una aguja doble y el resultado quedó increíble.
Then we close the flannel on both sides and finish the sleeves and the bottom of the flannel. I want to tell you that this time I used a double needle for this and the result was amazing.
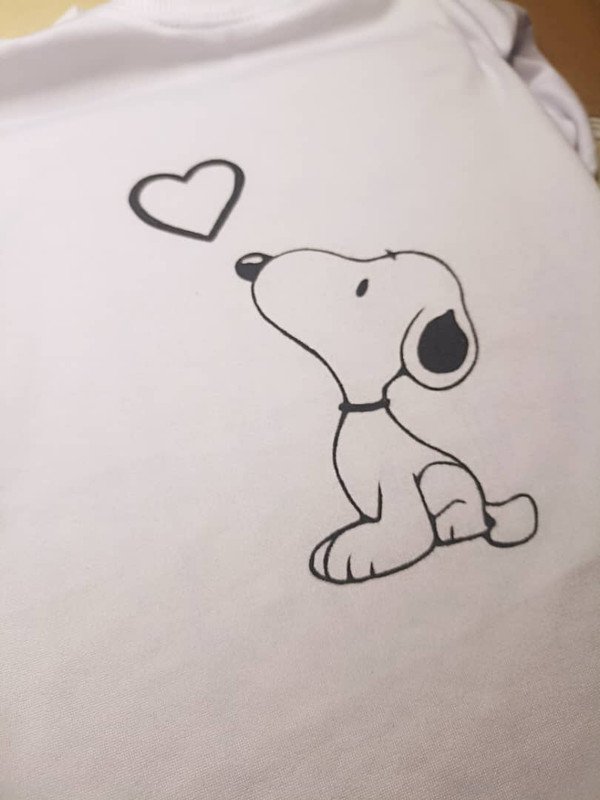
Por último transferí el diseño en la franela, le coloque algo para separar ambas caras y evitar asi que se manche. Le aplique pintura especial para telas con un pincel liners, como el Snoopy es blanco me facilito el trabajo, porque solo bebía marcar el borde con pintura negra
Finally I transferred the design on the flannel, I put something to separate both sides to avoid stains. I applied special paint for fabrics with a liners brush, as the Snoopy is white it made my job easier, because I only had to mark the edge with black paint.
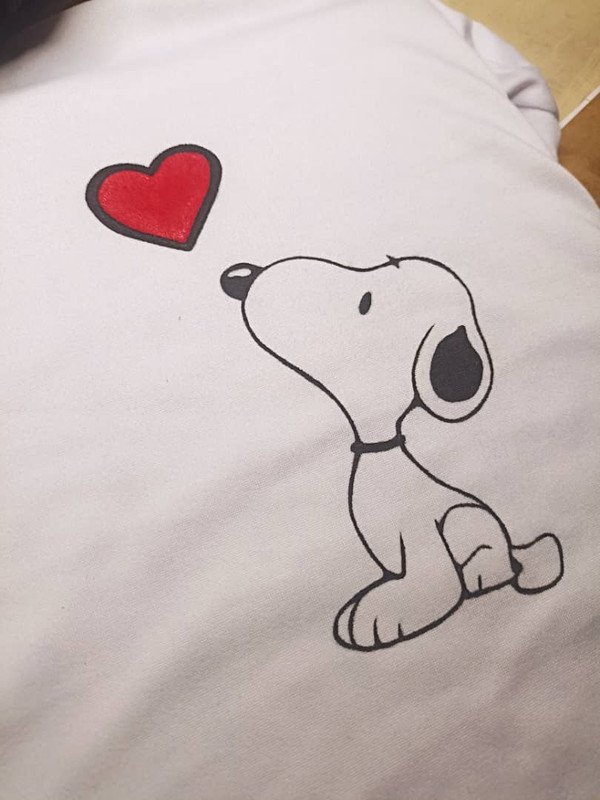
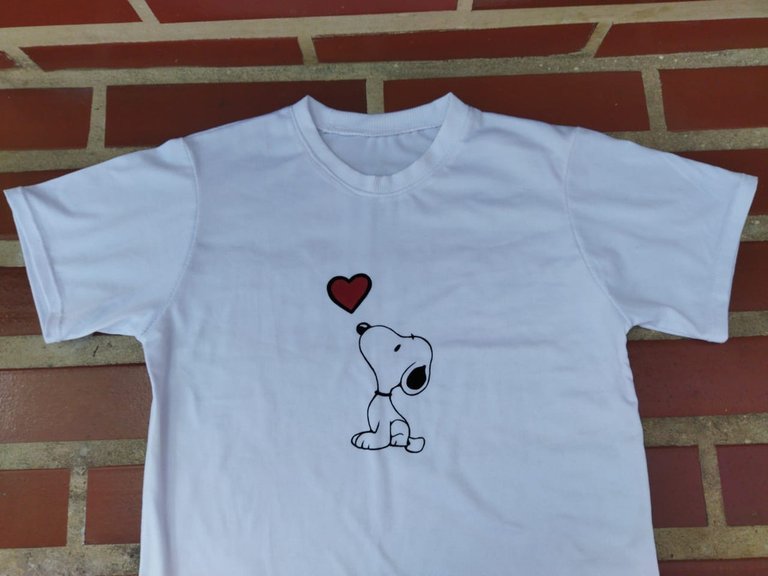
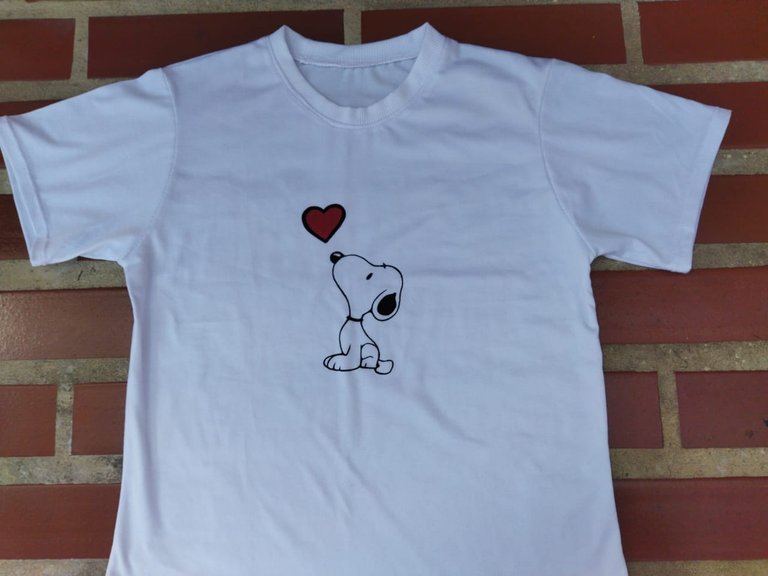
Ahora si listo de esta manera he terminado con este lindo proyecto de costura pero esta vez, ademas de confeccionar le añadí un toque personalizada a esta franela pintando sobre ella un tierno Snoopy enamorado. Espero les haya gustado y sea de provecho para todos mis seguidores. Saludos y muchas bendiciones
Now I'm done with this cute sewing project but this time, besides sewing I added a personalized touch to this flannel by painting a cute Snoopy in love on it. I hope you liked it and I hope it will be useful for all my followers. Greetings and many blessings
| Pueden seguirme en 💙: | You can follow me on 💙: |
|---|---|
| eveyese1312 | |
| Discord | eveyese1312#6211 |
Las fotos y el contenido son de mi autoria
Imágenes editadas en PowerPoint Canva y PicMonkey
Para la traducción usé el traductor: DeepL
The photos and content are my own.
Images edited in PowerPoint Canva and PicMonkey
For the translation, I used the translator: DeepL
Te felicito me encantó. feliz noche
The Snoopy themed flannel shirt looks fantastic. The combination of sewing and painting adds a unique touch, making it truly special. Great work