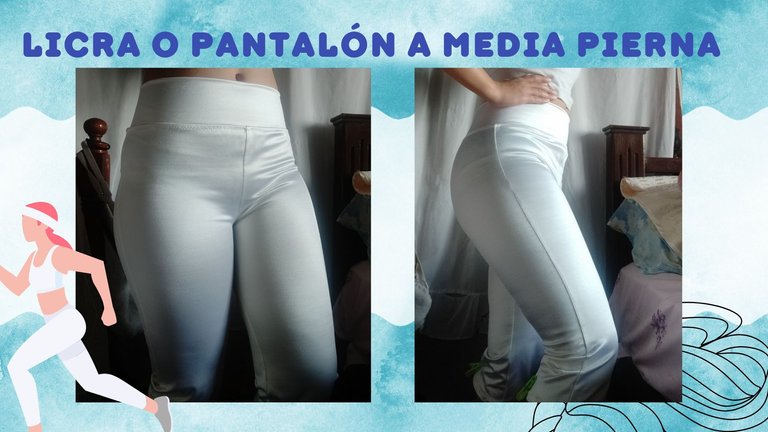

Hola mis queridos amigos de Hive, el día de hoy quiero compartir un proyecto algo diferente a lo que estoy acostumbrada.
Se trata de una licra hasta las rodillas también llamado pescador. La misma se elaboró con powernet tela con la que se elaboran las fajas, es decir una yela elástica pero los suficientemente gruesa para mantener la forma del cuerpo. También debo decir que para este modelo no use patrones sino se copio o clono de una licra deportiva que tenía.
Y para elaborar esta prenda vamos a necesitar:

- Tela powernet.
- Hilos y alfileres.
- Aguja y cinta métrica.
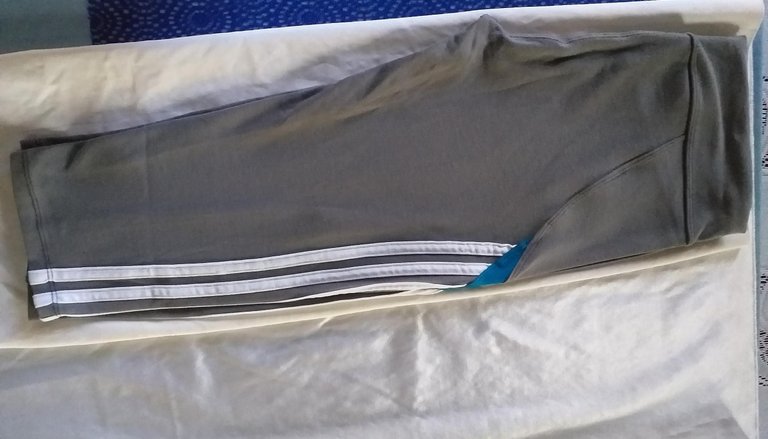
- Licra a clonar.
- Tijeras.


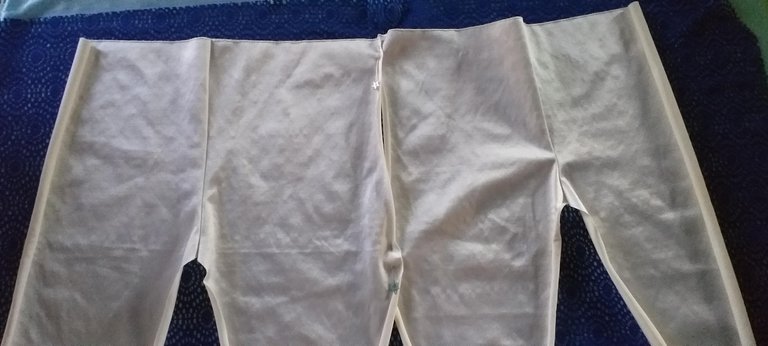
La elaboración de esta prenda es sencilla y para comenzar debemos de colocar la licra que vamos a clonar sobre la tela doble, doblamos la licra a la mitad y cortamos al ras.
Volteamos la licra y cortamos de nuevo.
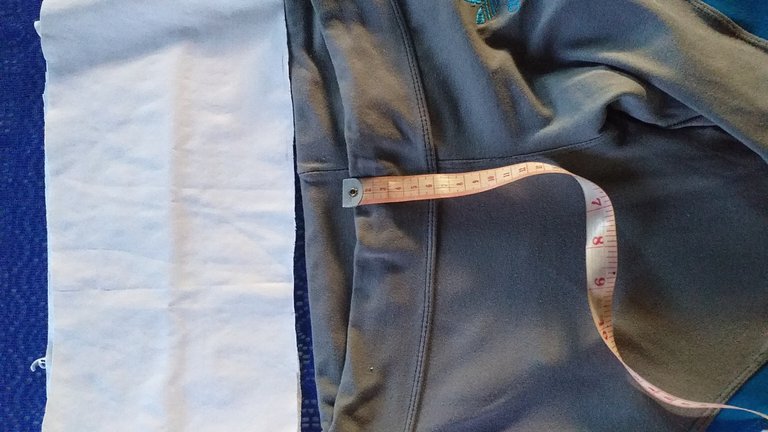
Para la cintura vamos a hacer una tira de 72 cm de ancho por 16 de alto que será la cintura.
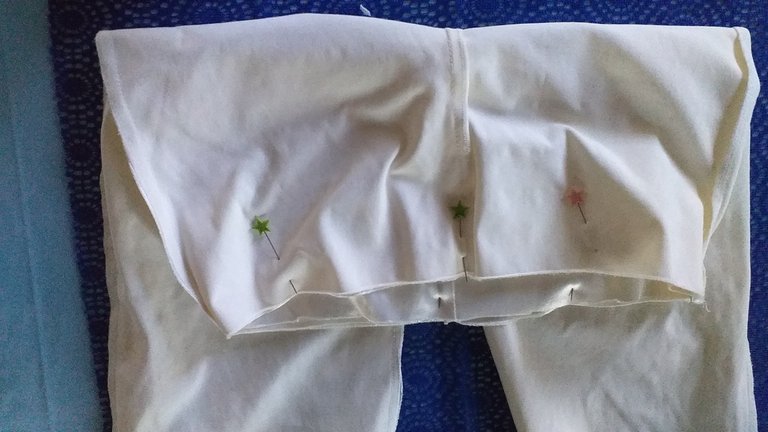
Continuamos uniendo las piezas por el tiro delantero y trasero, nos ayudamos con unos alfileres antes de pasar costura.

Luego de tener estás piezas debemos unir la parte delantera y la posterior comenzando por los laterales y luego por la entrepierna.
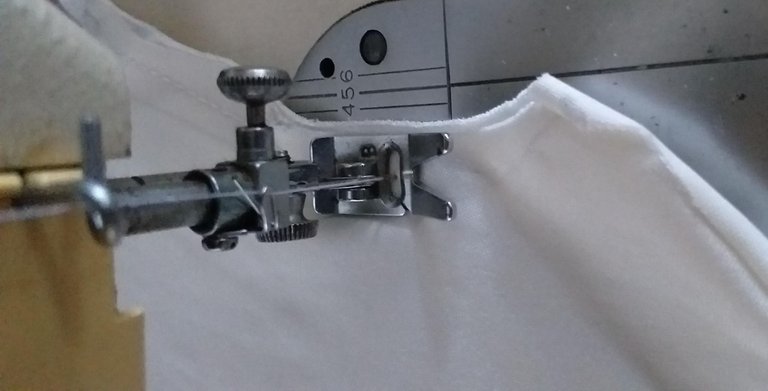
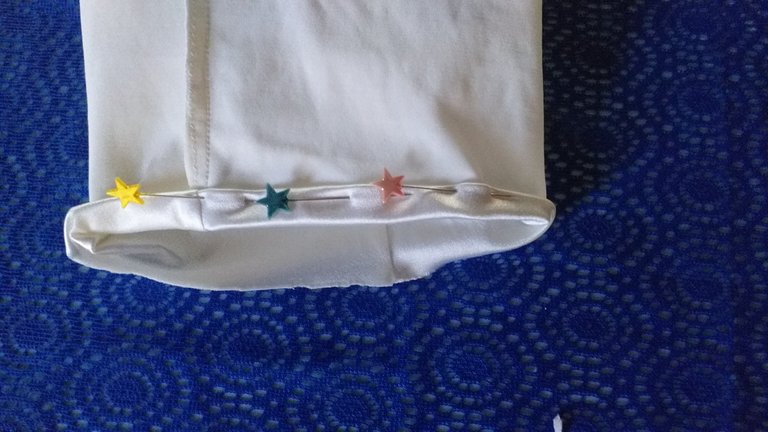
Se continua uniendo la cintura, para ello la vamos a doblar a la mitad, de manera que quede de una altura de ocho centímetros.
La ajustamos con ayuda de unos alfileres, de manera que cuando se pase costura la tela quede siempre a la misma distancia y no en algunas partes más estirada que en otras. También se debe recordar dejar al menos un centímetro de costura.
Por último hacemos un dobladillo en ambas piernas de un centímetro cada uno.
Ya con esto tendremos listo este bonito proyecto que además de ser sencillo, no necesita de un molde en específico para hacerlo ya que me sirvió una prenda que tenia guardada. Para finalizar les doy gracias por visitar mi blog, espero les guste la pública y espero leer sus comentarios para saber su opinión, les deseo que tengan un buen día y noche.

Hello my dear friends of Hive, today I want to share a project a little different from what I'm used to.
It is a lycra to the knees also called fisherman. The same was made with powernet fabric with which the girdles are made, ie an elastic fabric but thick enough to maintain the shape of the body. I must also say that for this model I did not use patterns but copied or cloned from a sports lycra I had.
And to make this garment we will need:
- Powernet fabric.
- Thread and pins.
- Needle and measuring tape.
- Lycra to be cloned.
- Scissors.
The elaboration of this garment is simple and to begin with we must place the lycra that we are going to clone on the double fabric, fold the lycra in half and cut flush.
Turn the lycra over and cut again.
For the waist we are going to make a strip of 72 cm wide by 16 cm high that will be the waist.
We continue joining the pieces at the front and back, using pins to help us before sewing.
After having these pieces we must join the front and the back starting with the sides and then the crotch.
We continue joining the waistband, for this we are going to fold it in half, so that it is eight centimeters high.
We adjust it with the help of some pins, so that when passing the seam the fabric is always at the same distance and not in some parts more stretched than in others. You should also remember to leave at least one centimeter of seam allowance.
Finally we make a hem on both legs of one centimeter each.
With this we will have ready this nice project that besides being simple, it does not need a specific mold to make it because I used a garment that I had saved. Finally I thank you for visiting my blog, I hope you like the public and I hope to read your comments to know your opinion, I wish you have a good day and night.

Fotos tomadas de mi teléfono Xiaomi Redmi Note 6 Pro || Photos taken from my Xiaomi Redmi Note 6 Pro phone.
Fuente del editor de imágenes || Image editor source
Amiga te felicito te quedó espectacular 🙂
Hola Laura muchas gracias, a mi también me gustó mucho el resultado. Saludos
Felicidades te ha quedado muy bien. La tela se ve que es excelente para este tipo de pantalones. Gracias por compartir. Saludos.
Hola Mariela, la verdad es una tela que quedó genial con el tipo de prenda, es elástica pero sigue siendo lo suficientemente gruesa para que no se vea transparente.
Saludos.
That’s an easy tutorial , great and simple way to make my gym wears henceforth
Thanks for sharing
Thank you very much for your comment. Greetings and happy Wednesday.
You’re welcome
Hermoso, feliz día.
Muchas gracias, igualmente
Wow this is so beautiful and simple this is the simplest way to sew mine well done dear
Thank you very much, nice day.
Ouuuu nice pants. I love the cool color of the fabric.