Paso a paso, haz tú mismo los ruedos de tus Jeans
¡Hola! Mis apreciados creadores, les cuento que estoy muy agradecida 🙏 y contenta 😃 de estar en éste mundo de Hive 💕.
Durante mucho tiempo de mi vida me he dedicado a mis hijos y hogar, aplazando actividades favoritas para un después, pero éste año 2023, empezó a marcar la diferencia, pues lo que va de año no me he ido a descansar sin haber dedicado un tiempo satisfactorio a lo que me gusta hacer 😁 👍.
Tengo muchos pendientes desde hace años y hoy les voy a compartir uno de ellos.
Hace más de un año, mi cuñada Ruth me regaló un lindo Jeans color negro y no había hecho un tiempito para arreglarlo, pues como mi estatura es baja, la mayoría; por no decir todos, los pantalones tengo que cortarles y hacerles ruedo nuevamente 😅, y algo que no me gustaba era que perdieran el acabado (ruedo) original de los jeans 😒.
Hacer los ruedos de los pantalones de vestir me enseñó mi padre💕, pantalones de "vestir" le llamamos aquí en Venezuela a los pantalones
elaborados en telas como la gabardina, cachemir, lino, etc. Sí, ¡ésos odiosísimos de planchar! 🙃 Chicos y lo hacía como todo un sastre😍, no se le veía la costura ni por dentro ni por fuera y le planchaba muy bien ésos filos que quedaba bellos 😍, y claro todo buena labor se lleva su tiempo 🧐. Jajajaja después que me enseñó 🙂, hasta ése día los hizo él, después me corregía los que yo le hacia 😂 .
📸
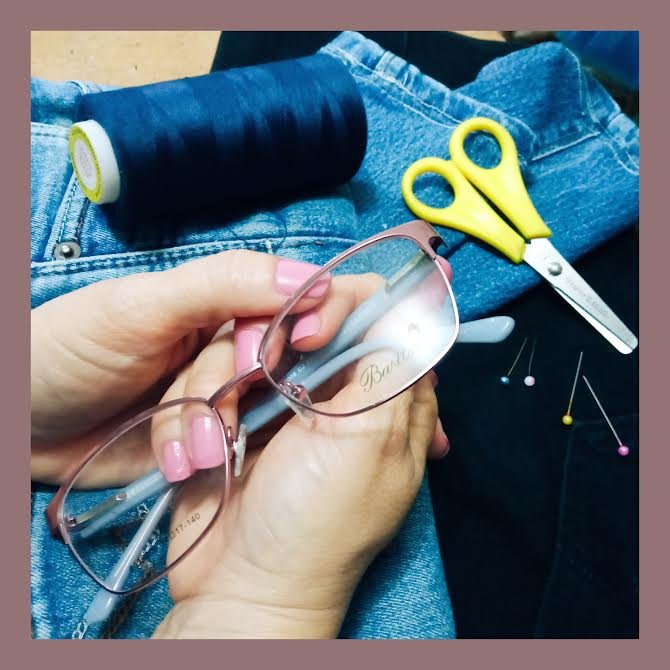
Para ello necesitamos muy pocas herramientas que de seguro tienes en tu hogar ✍️:
- Tijera.✂️
- Aguja,
- Hilo de color a
utilizar. - Alfileres.
- Máquina de coser.
- Cinta métrica.
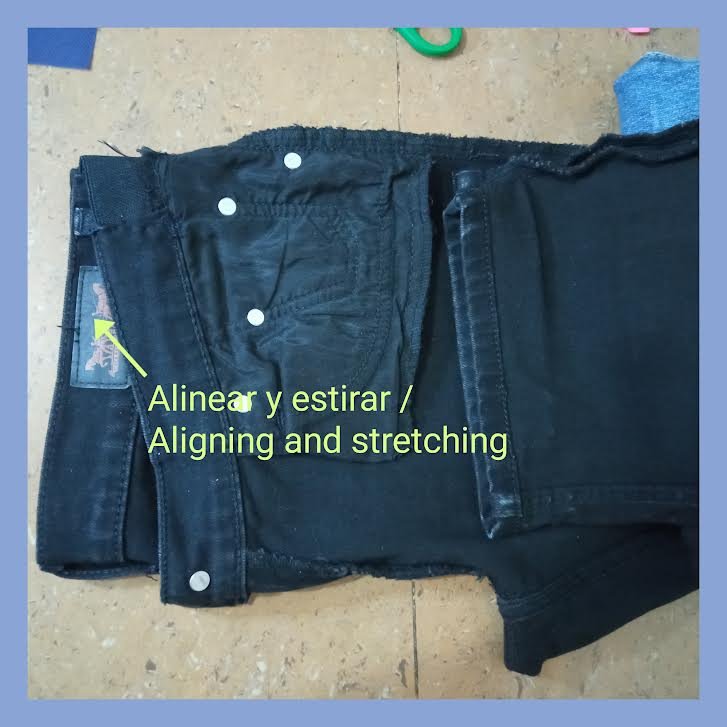 Imagen B
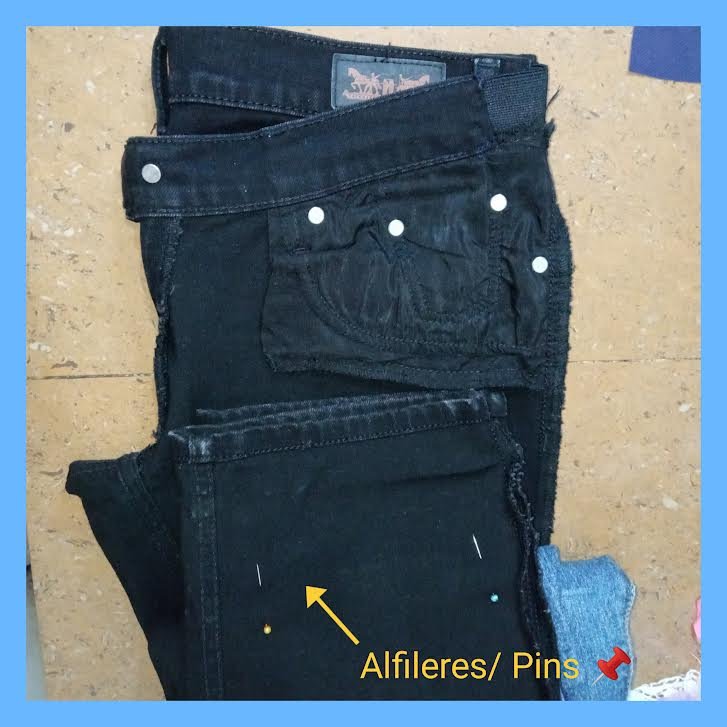 Imagen C
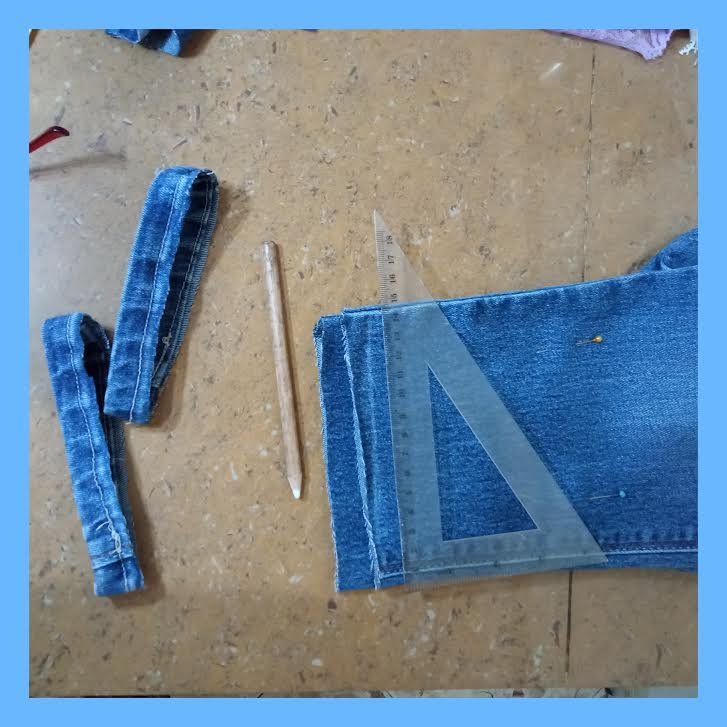 Imagen D
- Primero que todo debemos saber cuántos centímetros vamos a cortar, en mi caso me puse el pantalón e hice un doblez asegurando la medida con un alfiler o en su defecto una aguja, coloqué el pantalón en la mesa y verifique con la cinta métrica los centímetros que iba a cortar, posterior a ello, debemos unir los lados del pantalón muy bien , juntando la pretina delanteras y las traseras, (Imagen A) para evitar que una pierna quede más larga que otra, lo aseguramos con unos alfileres, 📌 (Imagen B) y cortamos al largo deseado, tratando de que sea lo más recto posible, en mi caso yo uso una regla o la cinta métrica y trazo una línea, así voy segura en el corte. (Imagen C)
- luego vamos a cortar el borde del Jeans dejando aproximadamente 1,5 cms.(Imagen C)
✍️ En mí caso cómo es la primera vez que lo hacía corté mucho y me costó 🥴hacer la costura en la máquina. Pero logré hacerlo👍.Así que es importante ese detalle .
- 🙋🏻♀️Éste es el momento que tenemos la opción si queréis reducir el ancho de la pierna completa del pantalón o sólo bota del jean. De ser así tomas tú cinta métrica y una regla📐✏️ y dibujas por dónde vas a reducir, particularmente lo hago por el lado donde no tiene la doble costura para no perderla.(Imagen D)
- En mí caso sólo reduje de la rodilla hacia abajo de manera de tener un pantalón corte recto. Otro dato importante es que debe coincidir el ancho de la bota con el ancho del ruedo que vas a colocar después.
luego cortas ✂️ el excedente y utilizas la puntada para los bordes con zig zag♒.
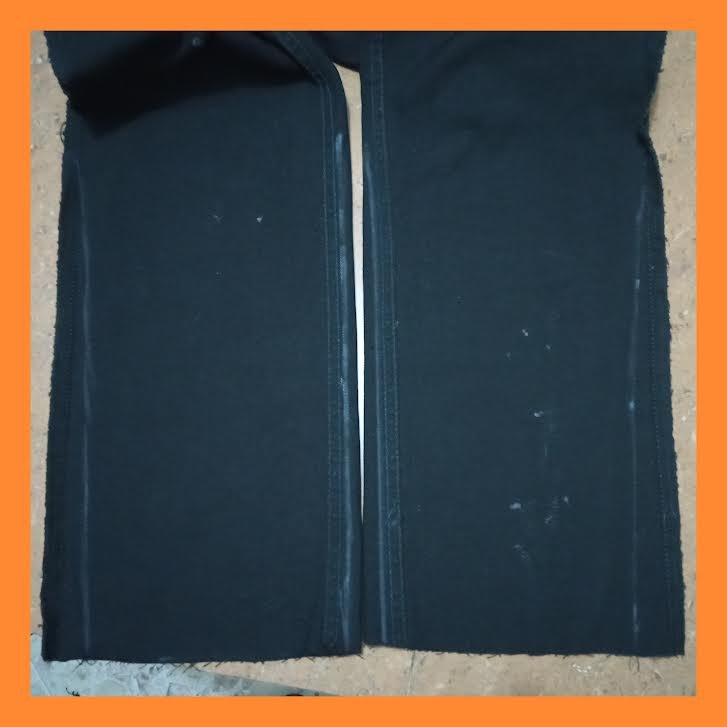
En el siguiente paso retiré parte del doblez del ruedo ya que como corté mucho no podía pasar la máquina con facilidad.(Imagen E)
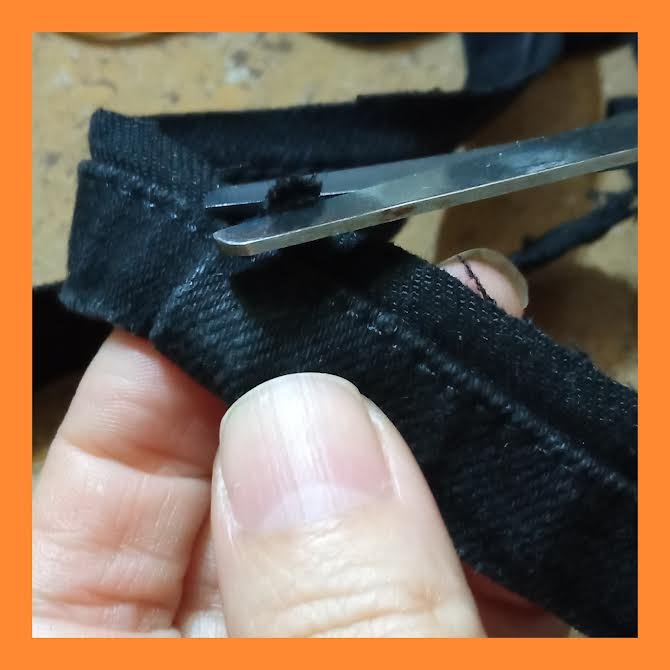 Imagen F
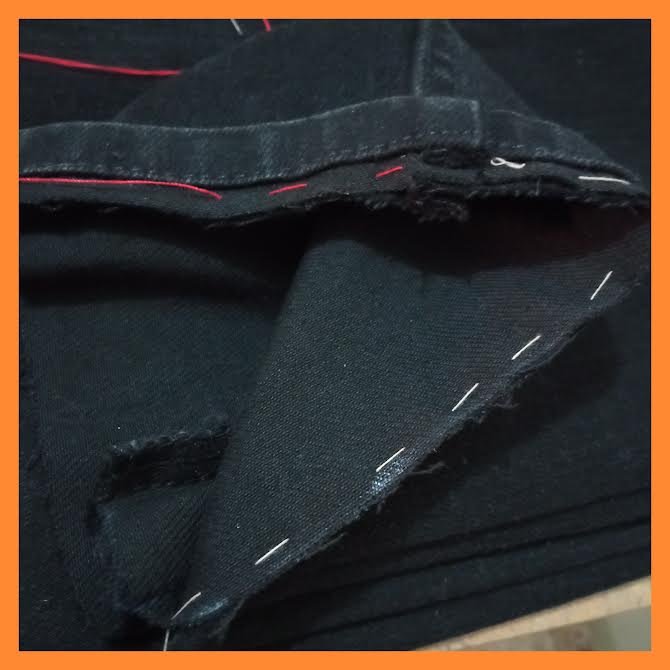
- Ahora vamos a unir derecho con derecho de las telas uniendo bota del pantalón y el borde del ruedo original y hacemos un hilván ó basteamos para lograr visualizar si tienes la misma distancia de la bota y el ruedo.(por eso reduje el ancho de la pierna del pantalón)(Imagen F)
Lo llevamos a la máquina y pasamos la costura.
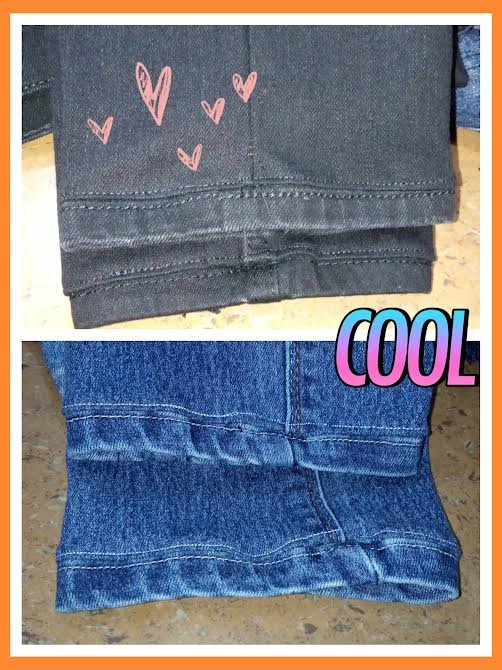
Otra consecuencia de no haber dejado suficiente espacio cerca del ruedo es que quedaba muy levantado, entonces me decidí a pasar una costura para aplastar la unión y no quedara levantado y listo 🙌.Es fácil 😏.
Estoy feliz con los resultados y espero que lo practiquen y me cuenten como les quedó ó si tienen una mejor opción me la hacen saber.
No puedo dejar de comentarles lo feliz que me hace compartirles mis ideas y por favor cuídense mucho y gracias por leer mi post, se les aprecia de 💝.
Las fotos publicadas en este post las tomè y editè con mi teléfono Redmi9
Translated with www.DeepL.com/Translator (free version)
English
Step by step, make the hems of your Jeans
Hello! My dear creators, I am very grateful 🙏 and happy 😃 to be in this world of Hive 💕.
For a long time in my life I have dedicated myself to my children and home, postponing favorite activities for later, but this year 2023, began to make a difference, because so far this year I have not gone to rest without having dedicated a satisfactory time to what I like to do 😁 👍.
I've had many unfinished ones for years and today I'm going to share one of them with you.
More than a year ago, my sister-in-law Ruth gave me a nice black Jeans and I had not made a little time to fix it, because as my height is short, most, if not all, the pants I have to cut them and make them roll again 😅, and something I did not like was that they lost the original finish (hems) of the jeans 😒.
My father taught me how to make the hems of dress pants💕, "dress" pants we call here in Venezuela to pants made in fabrics such as gabardine, cashmere, linen, etc. elaborated in fabrics like gabardine, cashmere, linen, etc. Yes, those obnoxious ironing ones! 🙃 Guys, and he did it like a tailor😍, you could not see the seam neither on the inside nor on the outside and he ironed very well those edges that were beautiful 😍, and of course all good work takes time 🧐. Hahahaha after he taught me 🙂 even that day he made them, then he corrected the ones I made 😂 .Once I saw one of those magazines that circulated on Sundays, the way to fix jeans without losing their original hem and that stuck in my blessed little brain 🧠 and that's what I'm going to share with you.
To do this we need very few tools that you probably have at home ✍️:
- Scissors.✂️
- Needle,
- Color thread to be used.
to use. - Pins.
- Sewing machine.
- Tape measure.
 Imagen B
 Imagen C
 Imagen D

- Then we will cut the edge of the jeans leaving approximately 1.5 cm (Image C)*.
✍️ In my case, since it was the first time I made it, I cut a lot and it was difficult 🥴 to make the seam in the machine. But I managed to do it👍.So that detail is important .
- 🙋🏻 Éste is the moment that we have the option if you want to reduce the width of the whole pant leg or just the boot of the jean. If so, take your tape measure and a regla📐✏️ and draw where you are going to reduce, particularly I do it on the side where it does not have the double seam to not lose it (Image D).
- In my case I only cut from the knee down so that I have a straight cut pant. Another important fact is that the width of the boot must match the width of the hem that you are going to place later.
Then cut ✂️ the excess and use the zig zag♒ stitch for the edges.
In the next step I removed part of the fold from the hem because I cut too much and could not easily pass the machine.(Imagen E)
End result

 Imagen F

We take it to the machine and pass the seam.
Another consequence of not having left enough room near the hem is that it was too raised, so I decided to pass a seam to flatten the join so it wouldn't be raised and that's it 🙌.It's easy 😏.
I'm happy with the results and I hope you practice it and let me know how it turned out or if you have a better option let me know.
Simultaneously I fixed another light blue jeans so that you could observe better because the Black Jeans did not allow to clearly visualize the procedure. I also hesitated to publish my mistake, but the important thing is that it doesn't happen to you!
I can't stop telling you how happy I am to share my ideas with you and please take care of yourselves and thank you for reading my post, it's appreciated 💝.
📸
The published in this post were taken and edited with my Redmi9 phone.
Translated www.DeepL.com/Translator (free version).
Congratulations @griselpattdiaz! You have completed the following achievement on the Hive blockchain And have been rewarded with New badge(s)
Your next target is to reach 800 upvotes.
You can view your badges on your board and compare yourself to others in the Ranking
If you no longer want to receive notifications, reply to this comment with the word
STOPCheck out our last posts:
Support the HiveBuzz project. Vote for our proposal!