Bienvenidos a mi blog.🩷
Welcome to my blog.🩷
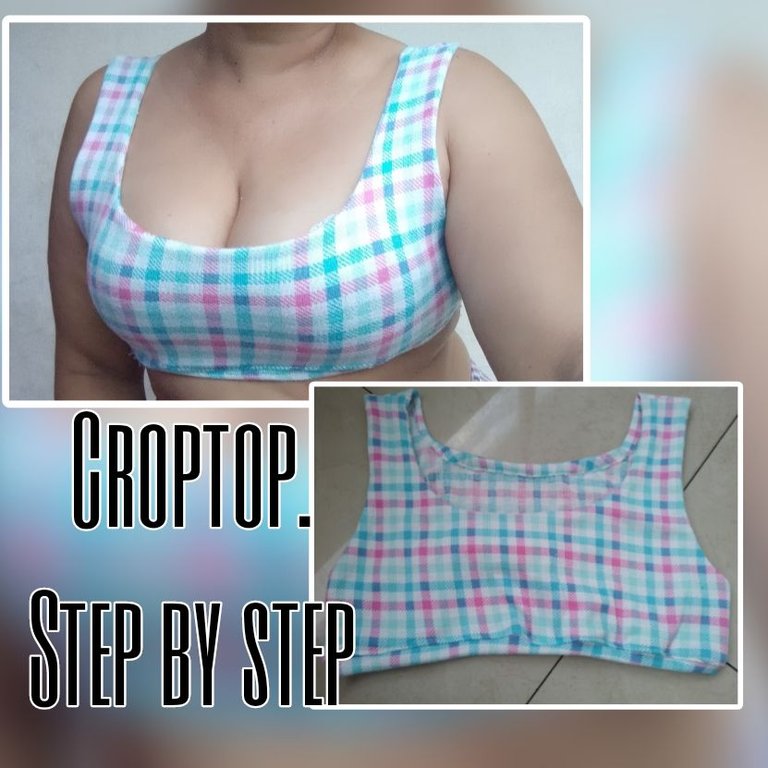
Un gran saludo para todos los hiver espero se encuentren bien, feliz año para todos y que tengan un exitoso dia para mi es un placer estar nuevamente con todos ustedes para mostrarles con mucho cariño y esmero la realización de un croptop,para este utilice tela de algodón estampada una cantidad aproximadamente de 35cm, me encanto esta tela por sus colores calidos y su suavidad sin mas nada que agregar acompañenme y les muestro
A big greeting to all hiver I hope you are well, happy new year to all and have a successful day for me is a pleasure to be with you all again to show you with love and care the realization of a croptop, for this use printed cotton fabric an amount of approximately 35cm, I love this fabric for its warm colors and softness without anything else to add join me and I show them
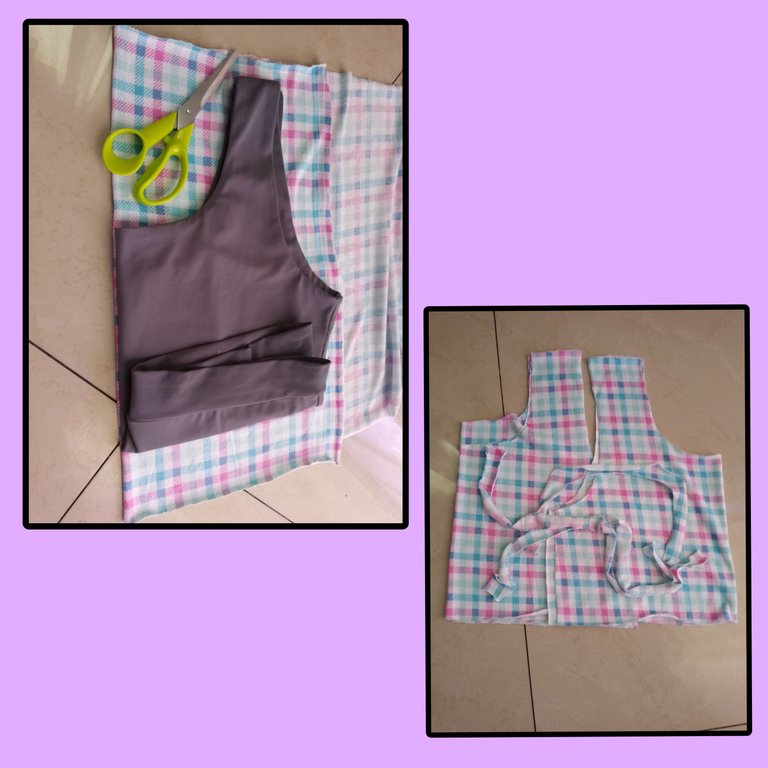
Materiales
Tela de algodón
Hilo
Maquina de coser
Tijeras
Alfileres
Materials
Cotton fabric
Thread
Sewing machine
Scissors
Pins
Paso A Paso
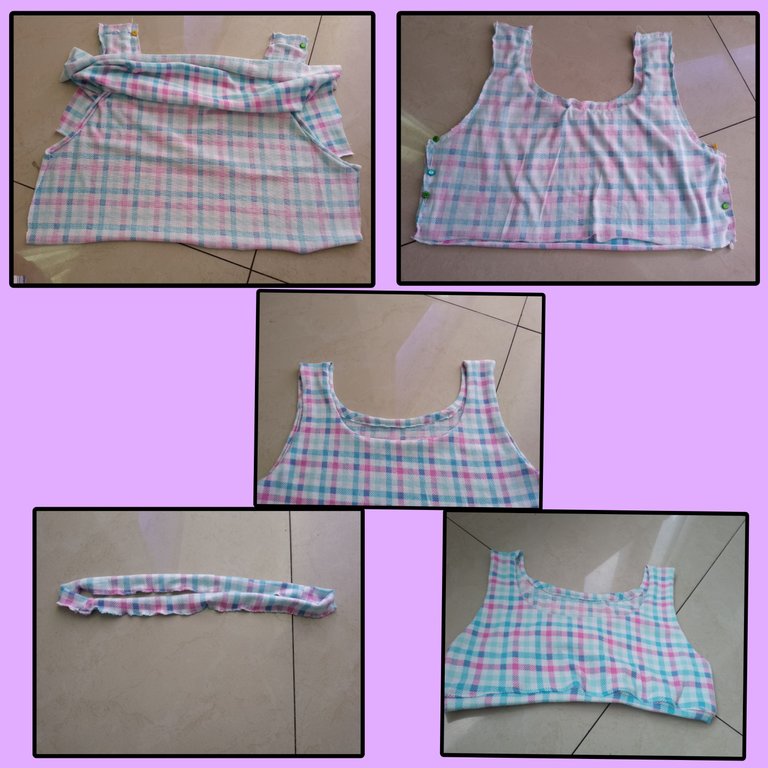
Primeramente corte todas las piezas guiándome por una medida y asi realice los cortes con mayor facilidad
First I cut all the pieces guided by a measurement to make the cuts more easily.
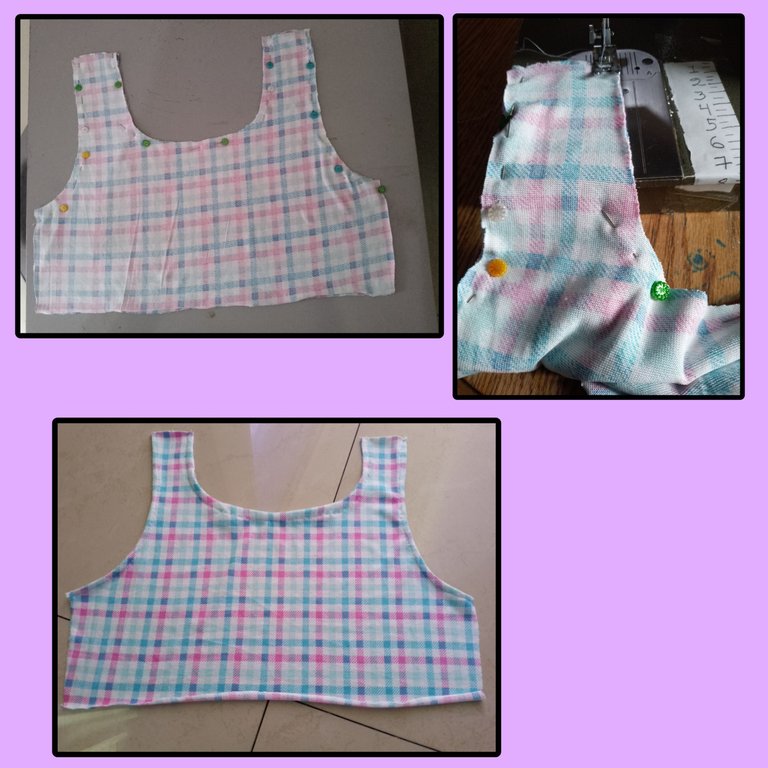
Luego empece su elaboración la parte delantera la corte doble y entonces uni los hombros y la sisa con la ayuda de unos alfileres y luego le pase costura en la maquina
Then I started its elaboration the front part I cut it double and then I joined the shoulders and the armhole with the help of some pins and then I sewed it on the machine.
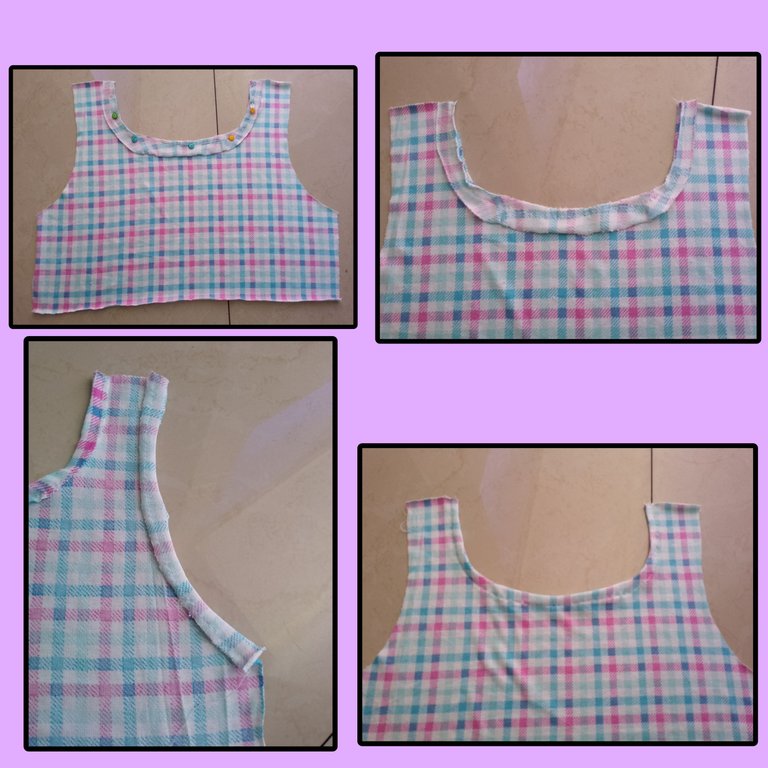
Despues trabaje la parte tracera colocandole sesgo en el cuello y en la sisa para luego coserlo en la maquina para despues hacerle el doblez hacia dentro y de igual manera coser
Then I worked the back part placing bias in the neck and in the armhole to sew it in the machine and then make the fold inwards and sew it in the same way.
Luego coloque la parte doble alreves y despues introduje la parte tracera dentro de la doble para después unir hombros y laterales luego le coloque un sesgo en la parte baja y listo trabajo terminado
Then I placed the double part upside down and then I inserted the back part inside the double part to join shoulders and sides and then I placed a bias in the lower part and that was it, job done.
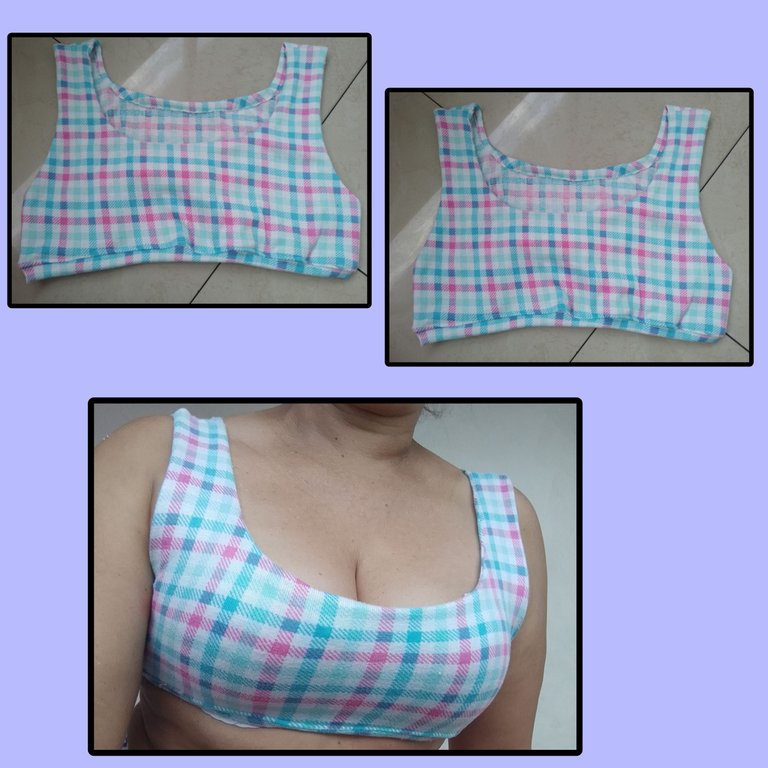
Y este es el resultado de este proyecto, muy coqueto me quedo este croptop con estos colores cálidos,espero que les haya gustado hasta otra próxima oportunidad nos vemos
And this is the result of this project, very flirty I got this croptop with these warm colors, I hope you liked it, see you next time.
Gracias por visitar y leer mi blog🥰

Las imágenes son propiedad del autor
The images are property of the author
It is so beautiful, charming, and stylish. Love its design. It looks amazing. Good to see each step of making this. Well done!