
Me siento feliz de trabajar en esta plataforma llamada :hive. Dios les bendiga a todos.
¡Bienvenido a mi blog!Hola , buenas noches a todos los que forman parte de esta comunidad #needlework, espero que se encuentren bien, hoy ha sido un día agotador pero siempre con ganas de trabajar y hacer mis proyectos.
I feel happy to work on this platform called :hive. God bless you all.
Welcome to my blog!Hello , good evening to all who are part of this community #needlework, I hope you are well, today has been a tiring day but always eager to work and do my projects.
Hoy me sucedió algo, después de llegar de trabajar , me puse a hacer oficios en mi casa. Resulta que en un abrir y cerrar de ojos , se me perdieron los lentes. Los busqué en todas partes y nada que los encontraba, pensé , a los lentes deben ponerle algo que suene cuando se pierde, estilo teléfono, que repique. Jajajaja. Estaba desesperada ,ya que sin lentes ,no veo bien. Total me di por vencida. Dije: algún día lo conseguiré. Cual es mi sorpresa que fui a buscar una cosa en el clóset de ropa. Lo abro y lo primero que veo, son los lentes , después de dos horas buscándolos , me alegré al verlos.
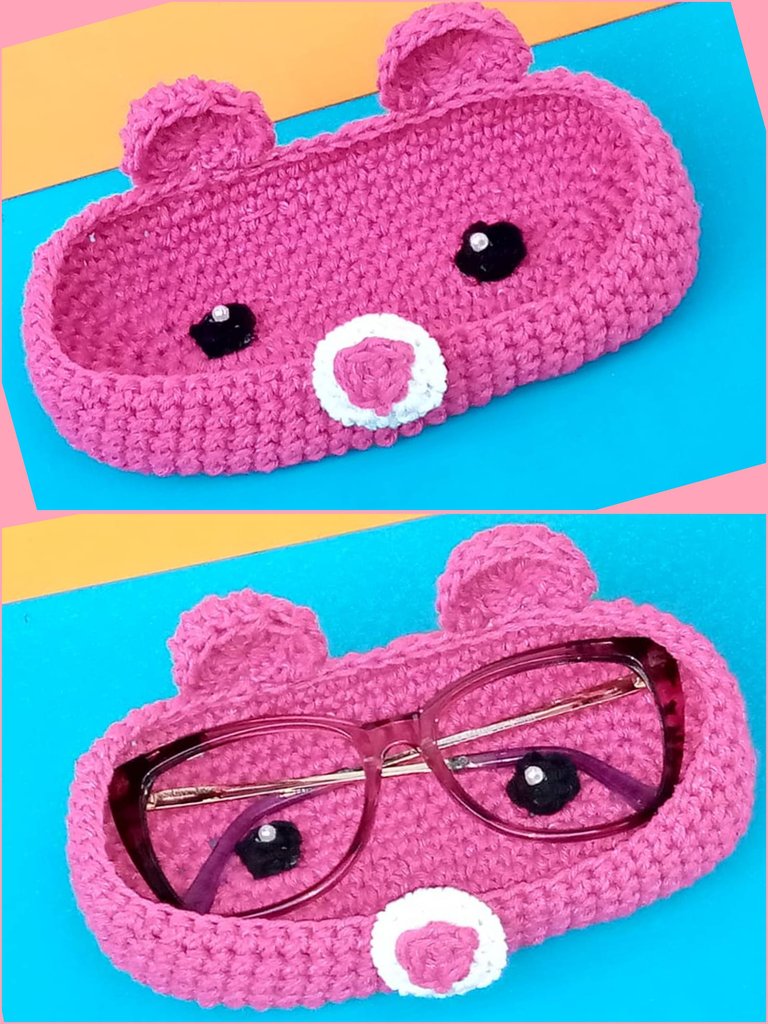
Por lo tanto ,hoy quiero mostrar por medio de un tutorial ,como hacer un porta lentes de ositos tejido a crochet. Fácil de hacer y en pocos minutos.
En este proyecto utilicé : puntos bajos, cadenetas y punto deslizado. Espero que les guste. Con este porta lentes ,más nunca se me perderán,ya que siempre los guardaré ahí.
Today something happened to me, after coming home from work, I started to do some work at home. It turns out that in the blink of an eye, my glasses were lost. I looked for them everywhere and I couldn't find them, I thought, they should put something on the glasses that rings when they get lost, like a telephone, that rings. Hahahaha. I was desperate, because without glasses, I can't see well. So I gave up. I said: someday I will get it. To my surprise, I went to look for something in the clothes closet. I opened it and the first thing I saw were the glasses, after two hours looking for them, I was happy to see them.
**Therefore, today I want to show through a tutorial, how to make a teddy bear glasses holder crochet. Easy to make and in a few minutes **.
In this project I used : single crochet, chain stitch and slip stitch. I hope you like it. With this glasses holder, they will never get lost, because I will always keep them there.

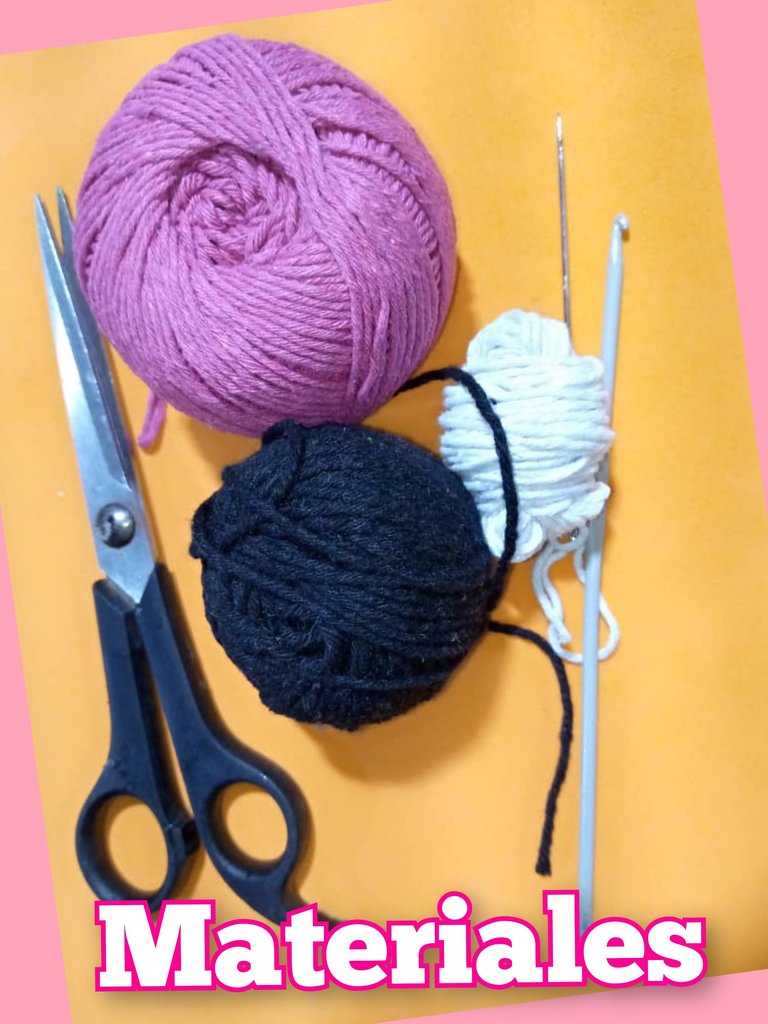
Materiales que se necesitan para la realización del lindo porta lentes de ositos,tejido a crochet:
- Hilo de tejer , colores: rosado, blanco y negro.
- Aguja de tejer , número 3.
- Aguja lanera.
- Tijera.
- 2 perlas pequeñas, color blancas.
Materials needed for the realization of the cute teddy bear glasses holder, crochet knitted:
- Knitting yarn , colors: pink, white and black.
- Knitting needle, number 3.
- Knitting needle.
- Scissors.
- 2 small pearls, white color.
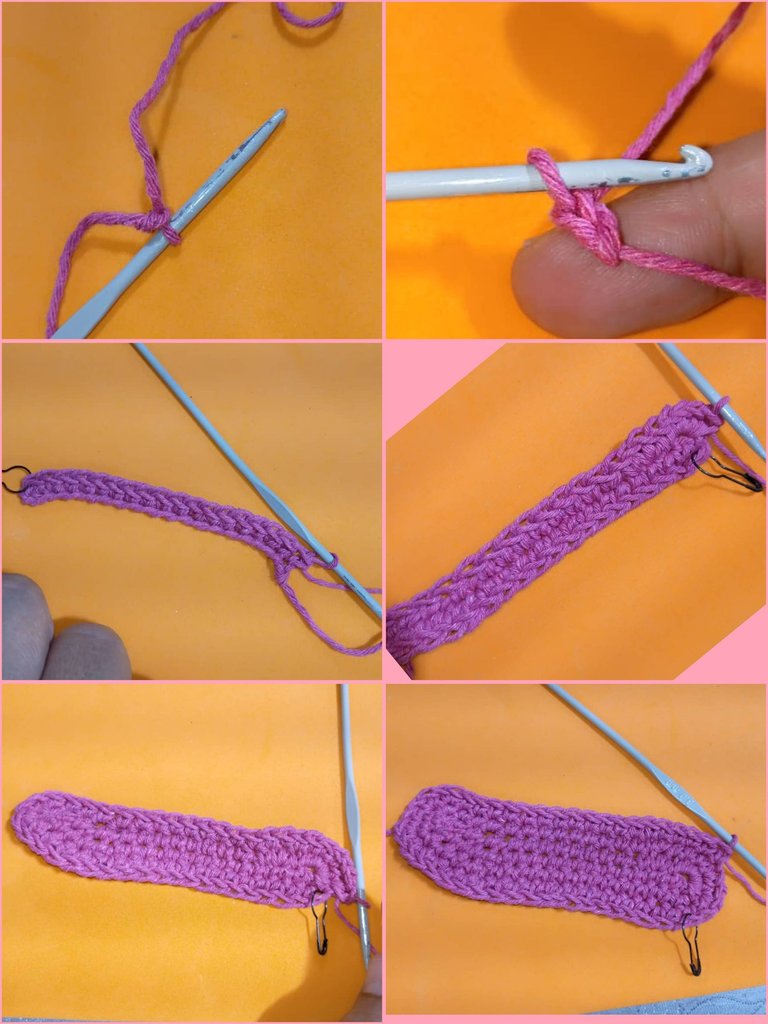
Paso a paso para la realización del porta lentes de osito:
- Tomar el hilo de color rosado y la aguja , hacer un nudo sencillo, levantar 20 cadenas , meter la aguja en el punto, número 18, continuar haciendo puntos bajos en los 18 puntos, en el punto 20, hacer un aumento. Continuar con 18 puntos bajos más, del otro lado del motivo. - Hacer dos aumentos .Colocar un indicador, tenemos la primera vuelta
- Para la segunda vuelta, hacer 18 puntos bajos, un aumento, un punto, y otro aumento. Hacer 18 puntos bajos, un aumento , un punto bajo y un aumento.
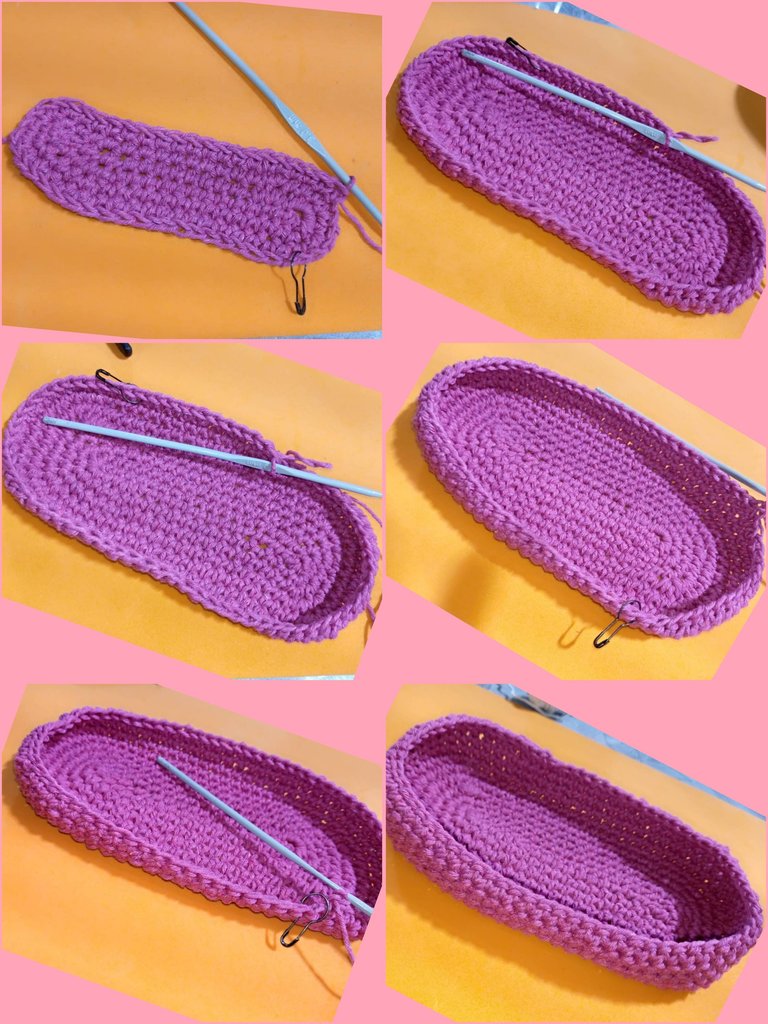
- Tercera vuelta: veinte puntos bajos, tres aumentos, un punto y un aumento, 20 puntos bajos, tres aumentos, un punto y un aumento.
- Cuarta vuelta: puntos bajos sobre los puntos. Sin aumento .
- De la cuarta, hasta la vuelta 10 son los mismos puntos. Después que hayas terminado todas las vueltas. - Recortas el hilo con las tijeras.
- Está lista una parte del motivo.
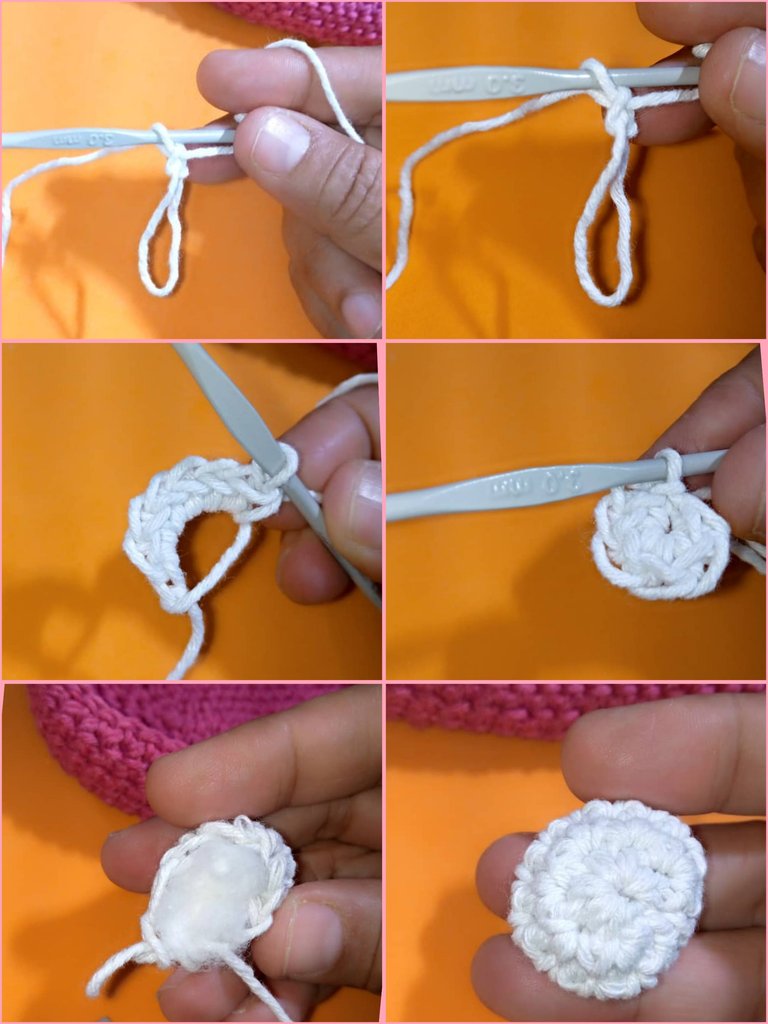
- Ahora tejemos la nariz : hacemos un anillo mágico, primero levantamos dos puntos, luego tejemos 10 puntos bajos, esto es la primera vuelta .
- Para la segunda vuelta, hacemos dos puntos bajos en cada punto y continuamos tejiendo los mismos puntos.
- Ya tenemos listo la nariz.
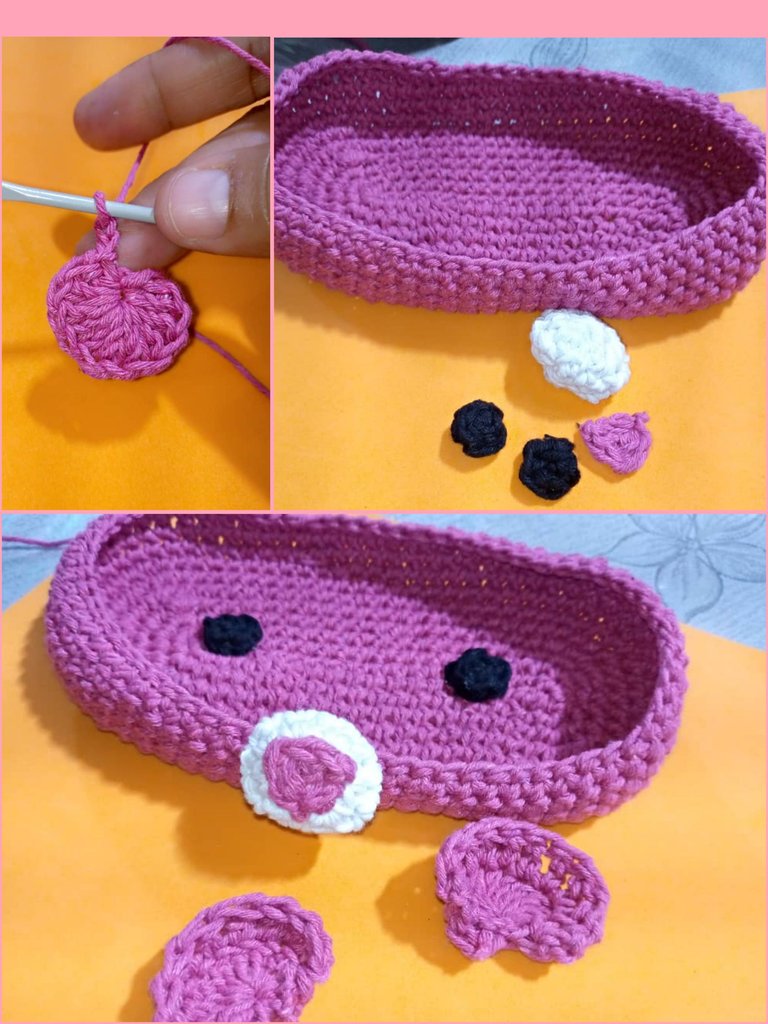
- Las orejas : tejemos con el hilo rosado ,un anillo mágico, luego tejemos 10 puntos bajos, levantamos dos puntos y metemos los puntos en casa punto. De esta hacemos dos.
- Para hacer los ojos, metemos dentro de un anillo mágico ,cuatro puntos bajos. Y cierra con un punto deslizado.
- Cose con la aguja lanera , La nariz y el pico. Luego los ojos en el lugar que van y por último las orejas.
Step by step for the realization of the teddy bear glasses holder:
- Take the pink colored yarn and needle , make a single knot, pick up 20 strings , put the needle in the stitch, number 18, continue making low stitches in the 18 stitches, in stitch 20, make an increase.
- Continue with 18 more single crochet stitches on the other side of the motif. Place a marker, we have the first row.
- For the second row, knit 18 single crochets, one increase, one stitch, and one more increase. Cast on 18 single crochets, one double crochet, one single crochet and one double crochet.
- Third row: twenty single crochets, three increases, one stitch and one increase, 20 single crochets, three increases, one stitch and one increase.
- Fourth row: single crochet over the stitches. No increase.
- From the fourth to the 10th row are the same stitches. After you have finished all the rows. - Trim the yarn with scissors.
- One part of the motif is ready.
- Now we knit the nose: we make a magic ring, first we pick up two stitches, then we knit 10 single crochet stitches, this is the first round.
- For the second round, we knit two single crochet stitches in each stitch and continue knitting the same stitches.
- The nose is ready.
- The ears : we knit with the pink yarn, a magic ring, then we knit 10 single crochet stitches, pick up two stitches and put the stitches in each stitch. From this we make two stitches.
- To make the eyes, we put into a magic ring, four single crochet stitches. And close with a slip stitch.
- Sew with the wool needle, the nose and the beak. Then the eyes in the place where they go and finally the ears.
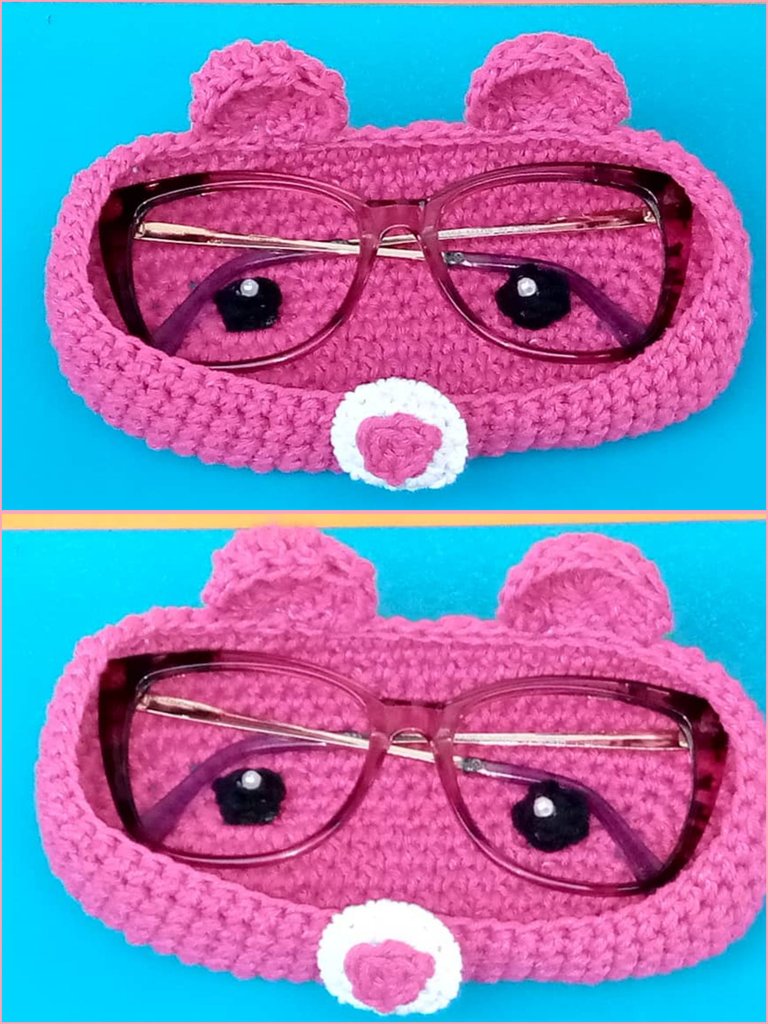
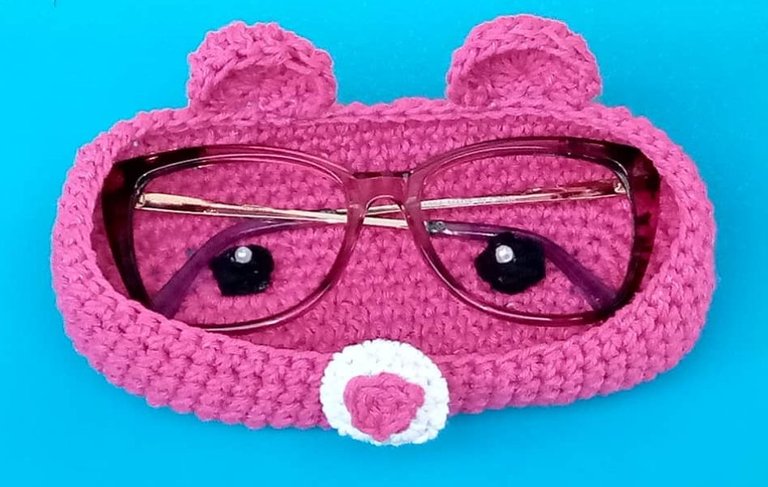
Aquí el resultado final del hermoso porta lentes de ositos, tejidos a crochet.
Here is the final result of the beautiful teddy bear glasses holder, crocheted.
Gracias por leer y comentar mi post, las fotos son mías, tomadas con teléfono infinix, editado con incollage y traducido con Deepl.
Thanks for reading and commenting on my post, the photos are mine, taken with infinix phone, edited with incollage and translated with Deepl.

Haha, it's so cute and lovely, especially the colour chosen, the eye details, etc. I wish it had a cover though,
Si @glorydee , el porta lentes quedó lindísimo. Es buena idea colocarle algo que quede cerrado. Pronto haré uno con tapa. Gracias por la idea. Muchas bendiciones.Saludos.
Me reí leyendo tu historia, ja ja eso nos sucede a todos, lo bueno fue que te surgió una idea espectacular, el portal lentes quedó muy hermoso, te felicito lindo trabajo, saludos 😊
Ay @marlynmont , me alegra mucho que te haya gustado y reído , en muchas oportunidades he perdido los lentes. Dios te bendiga. Saludos
The final result is impressive. That's really a teddy bear glasses holder. And it is very useful. Thank you for sharing this. Keep it up!
Congratulations @josdelmi! You have completed the following achievement on the Hive blockchain And have been rewarded with New badge(s)
Your next target is to reach 185000 upvotes.
You can view your badges on your board and compare yourself to others in the Ranking
If you no longer want to receive notifications, reply to this comment with the word
STOPCheck out our last posts:
Hay que cosita más linda. Me encanto, luce bien bonito
¿ᴺᵉᶜᵉˢᶦᵗᵃˢ ᴴᴮᴰ? ᵀᵉ ˡᵒ ᵖʳᵉˢᵗᵃᵐᵒˢ ᶜᵒⁿ
Que hermoso quedó @josdelmi me encanta el detalle de los ojos y la nariz, se ve muy bonito 💕