
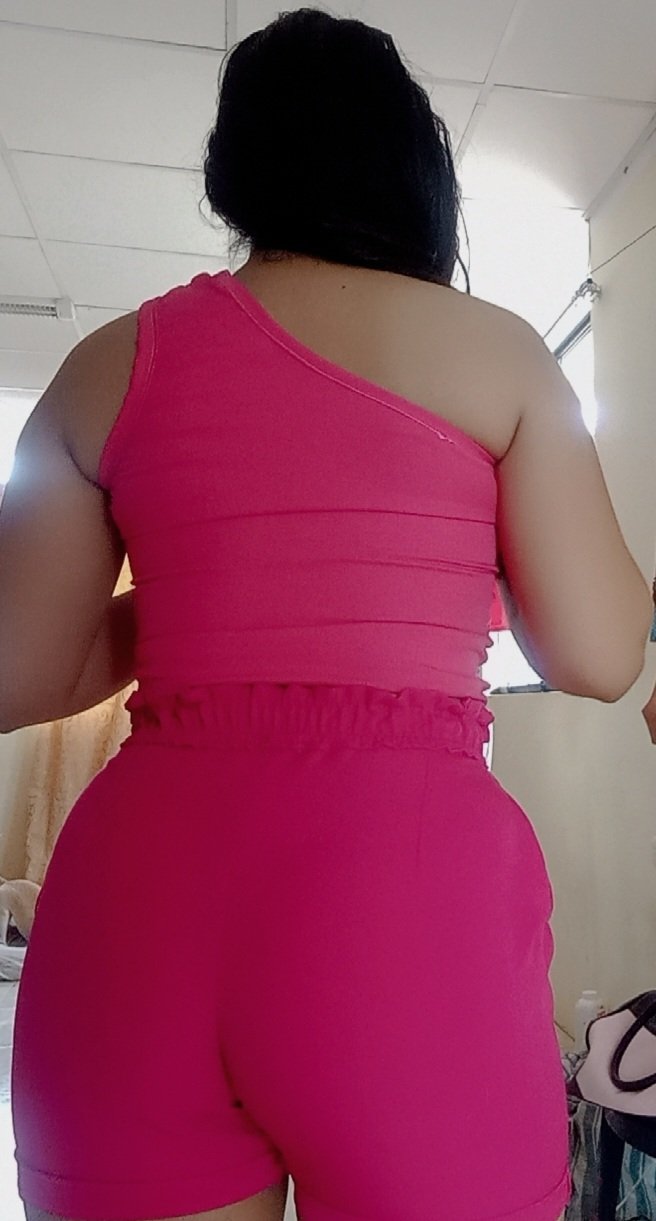
Hola, hola mis muy apreciados amigos de ésta linda Colmena #Needleworkmonday, deseo que estén pasando un excelente día, es un gusto volver a saludarlos y estar una vez más por acá, para compartir con todos ustedes un nuevo proyecto de costura; en esta oportunidad quiero mostrarle la confección de un short, que está en tendencia no solamente por el modelo sino también por el color, se trata de un short con cintura alta y elástica qué nos permite destacar más nuestra cintura, además es una prenda de vestir muy versátil que podemos llevar en cualquier ocasión.
Hello, hello my very dear friends of this beautiful Hive #Needleworkmonday, I hope you are having a great day, it is a pleasure to greet you and be here once again, to share with you all a new sewing project; this time I want to show you the making of a short, which is in trend not only for the model but also for the color, it is a short with high waist and elastic which allows us to highlight more our waist, it is also a very versatile garment that we can wear on any occasion.

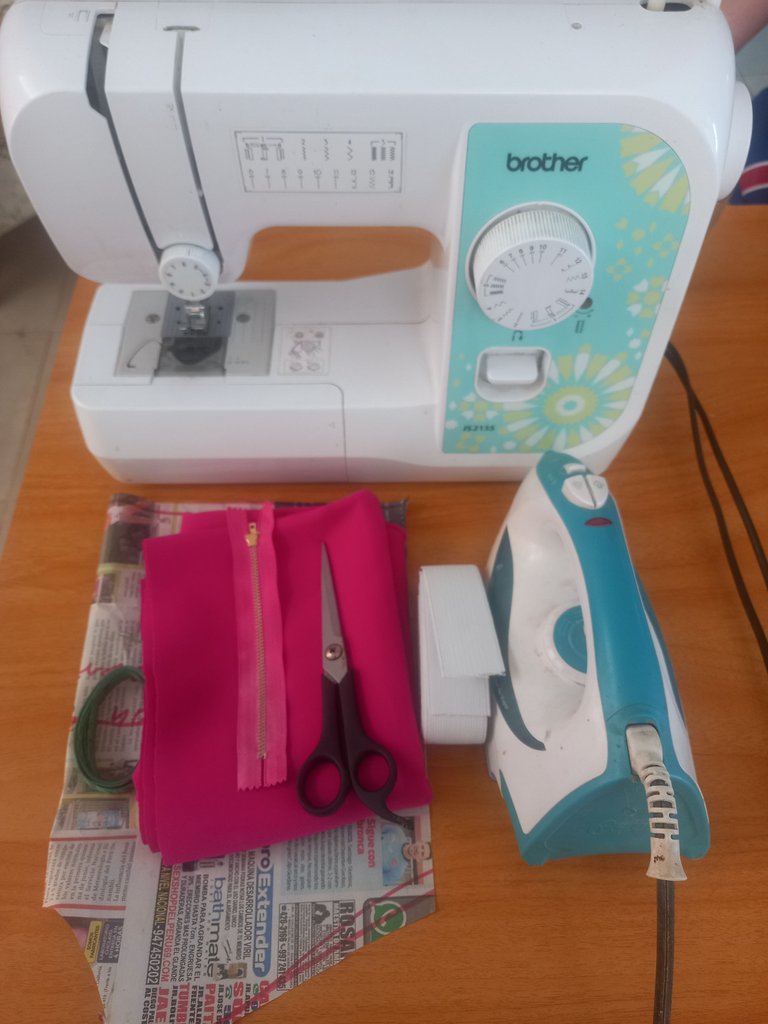
- Tela Catania fucsia.
- Elástico de 2 cm de ancho.
- Cierre de 15 cm.
- Patrones del short.
- Plancha de ropa.
- Cinta métrica.
- Máquina de coser.
- Tijeras.
- Fuchsia Catania fabric.
- Elastic 2 cm wide.
- Closure of 15 cm.
- Patterns of the shorts.
- Clothes iron.
- Tape measure.
- Sewing machine.
- Scissors.

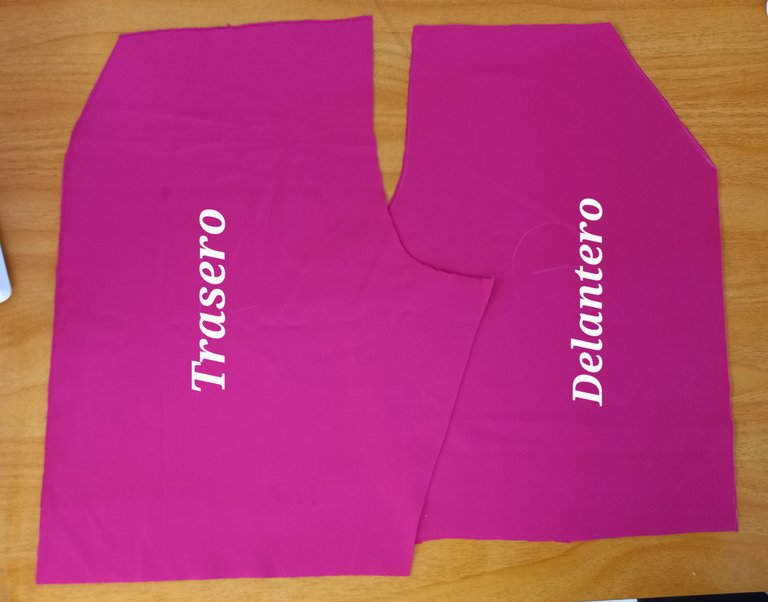
Para la confección de este short lo primero que hice fue sacar mis patrones es decir las partes delanteras y las partes traseras de un short básico.
To make these shorts, the first thing I did was to get my patterns, that is to say, the front and back parts of a basic shorts.
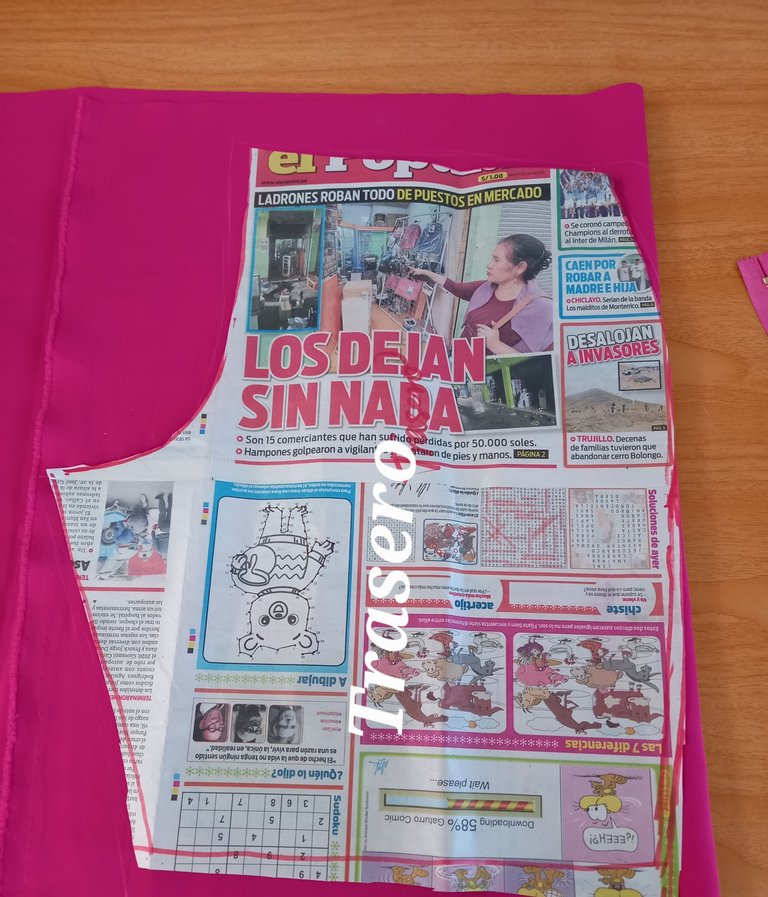
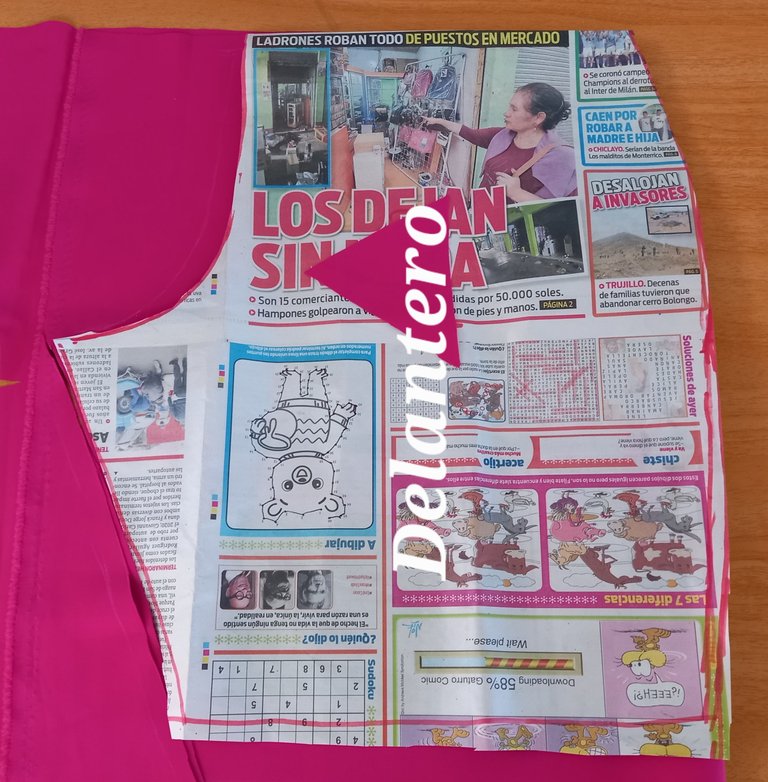
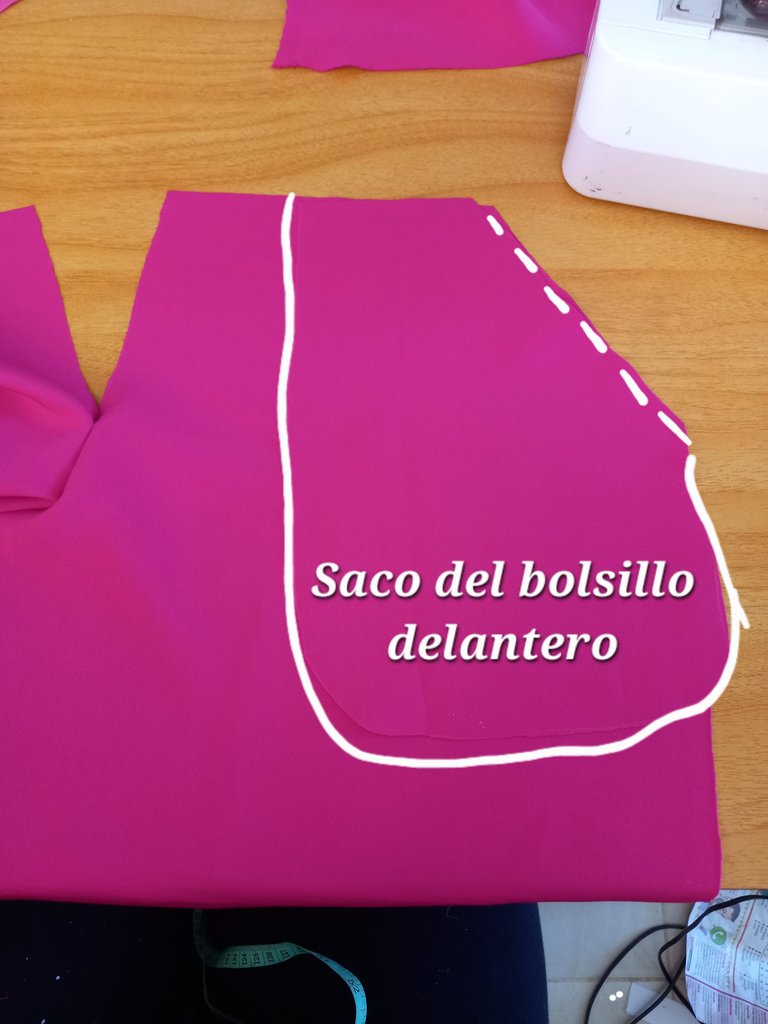
A las partes delanteras le hice el corte del bolsillo de 17 cm en diagonal.
To the front parts I made the pocket cut 17 cm diagonally.

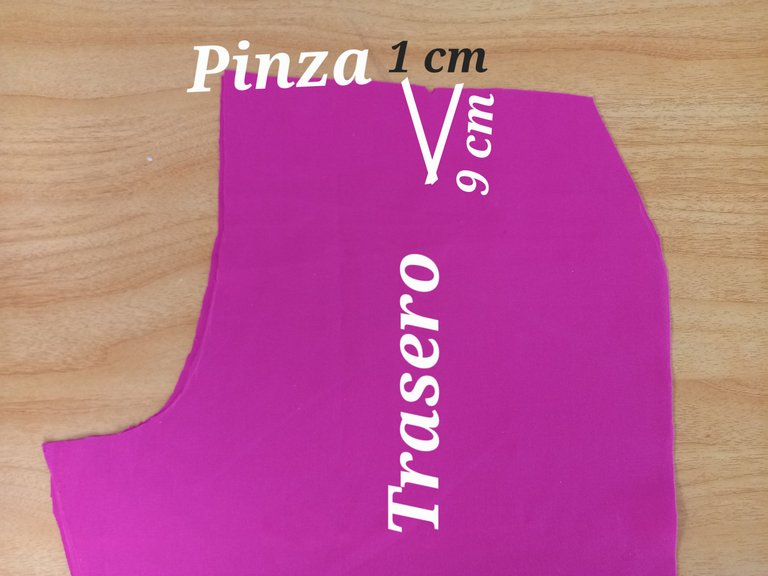
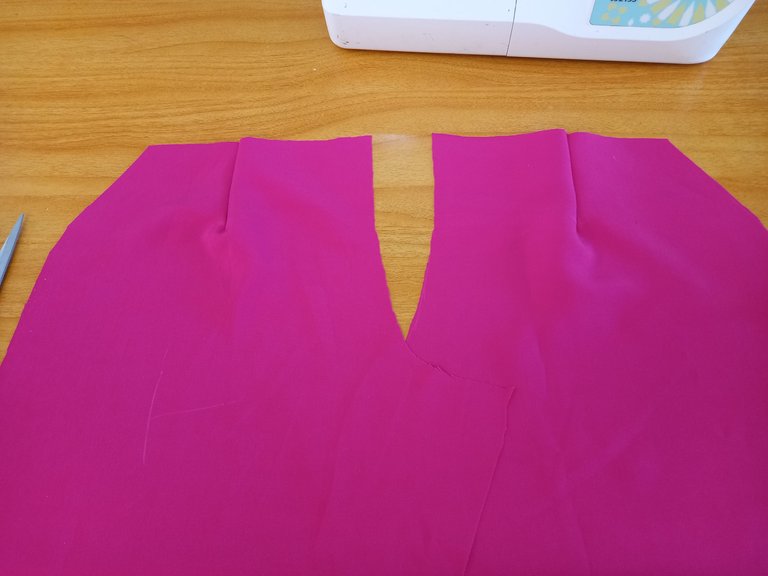
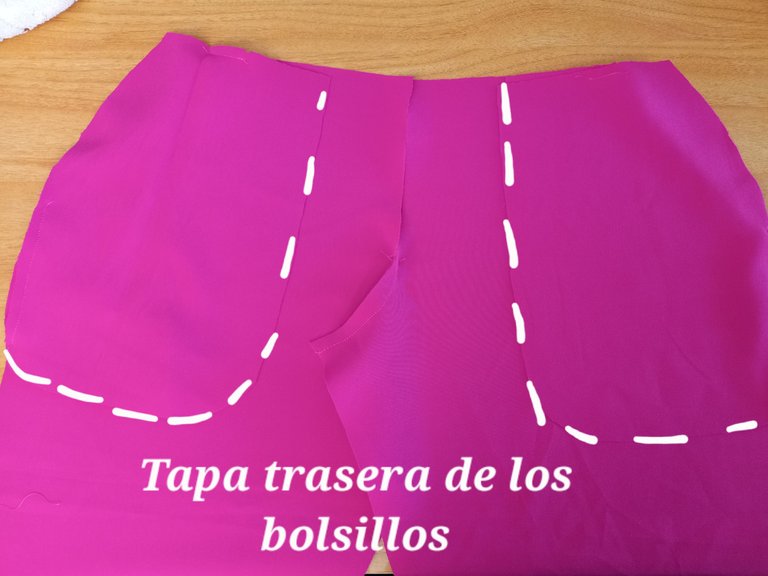
Antes de unir las partes traseras por el tiro, realicé una pinza a cada lado de estás de 9 cm de largo y 1cm de ancho en el comienzo.
Before joining the back parts by the draft, I made a clamp on each side of these 9 cm long and 1 cm wide at the beginning.
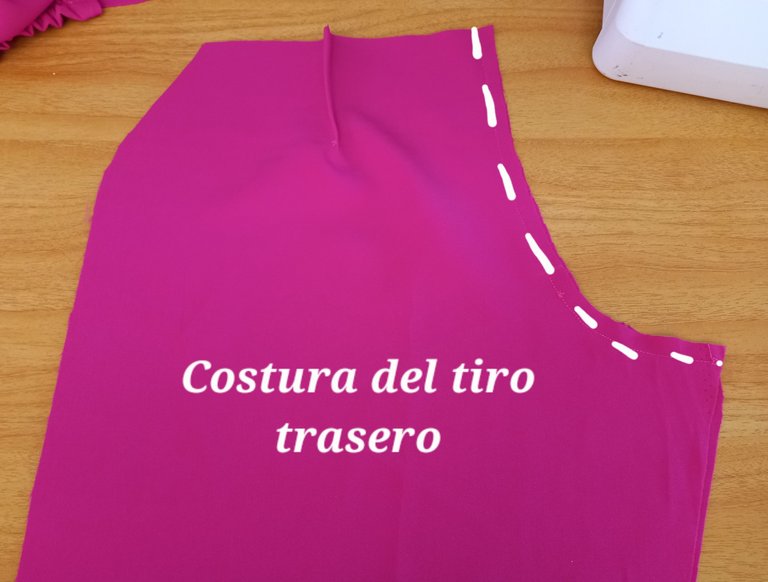
Posteriormente procedí a unir las partes traseras por el tiro.
Subsequently, I proceeded to join the rear parts by the draft.
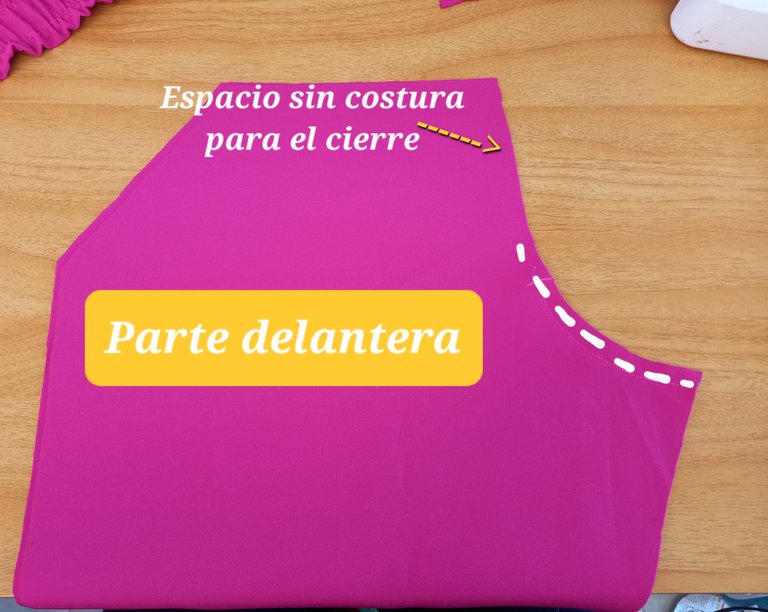
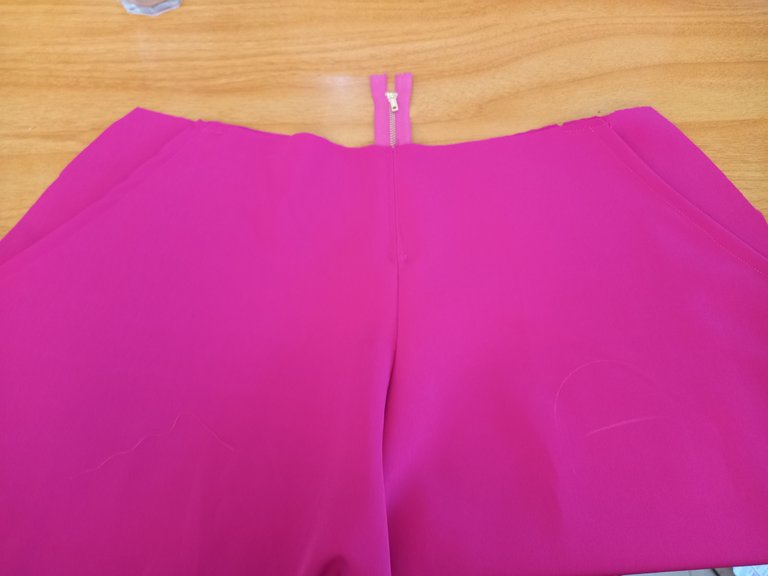
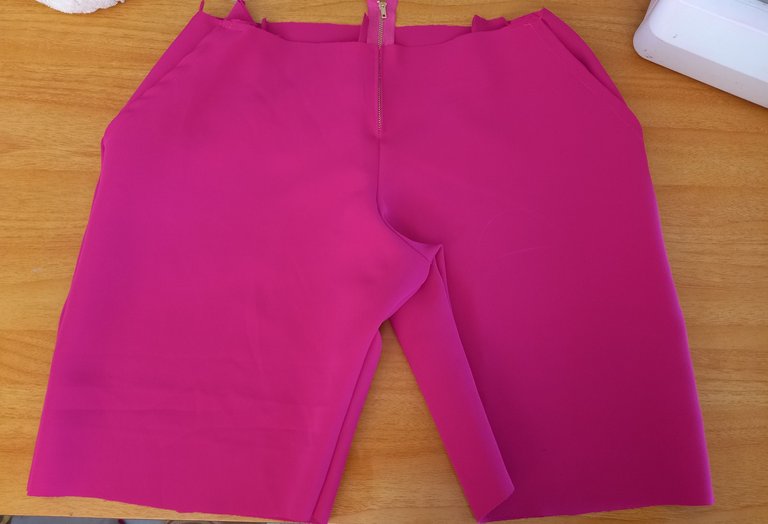
Después uní las dos partes delanteras por el tiro dejando el espacio donde irá el cierre.
Then I joined the two front parts together at the hem, leaving the space where the zipper will go.
Luego uni la parte delantera del saco del bolsillo, con la parte delantera del short,haciendo coincidir las orillas.
Then I joined the front part of the pocket bag to the front part of the shorts, matching the edges.
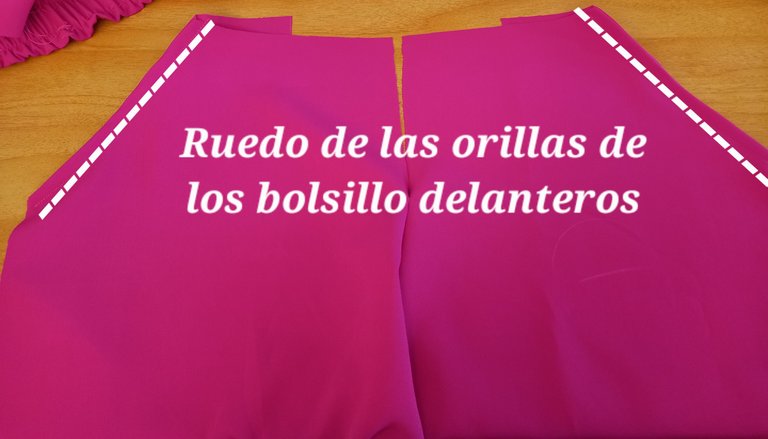
Posteriormente ni por la orilla superior del sol la otra parte del sapo del bolsillo.
Subsequently nor by the upper edge of the sun the other part of the pocket toad.

Para pegar el cierre, lo que hice fue, terminar la costura del tiro hasta arriba y montar por la parte de atrás el cierre sobre la costura abierta.
To attach the zipper, what I did was to finish the seam allowance all the way to the top and mount the zipper on the back over the open seam.

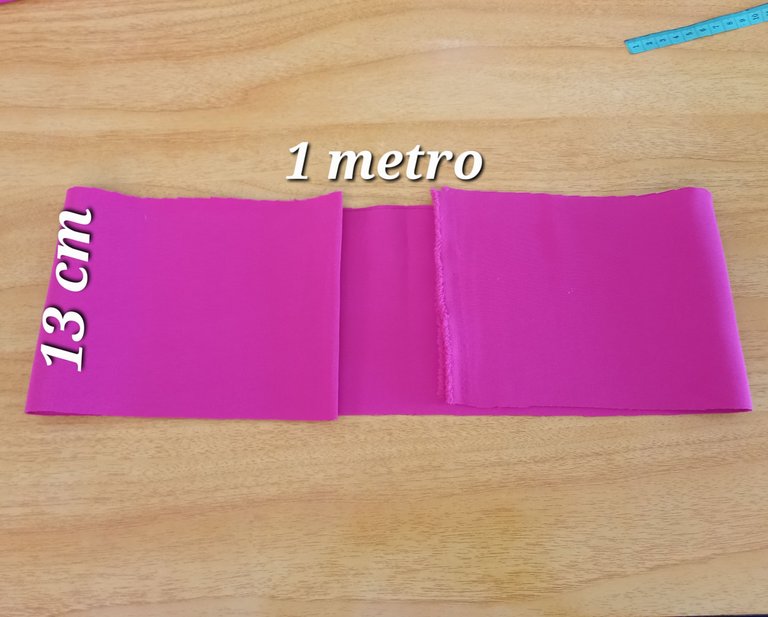
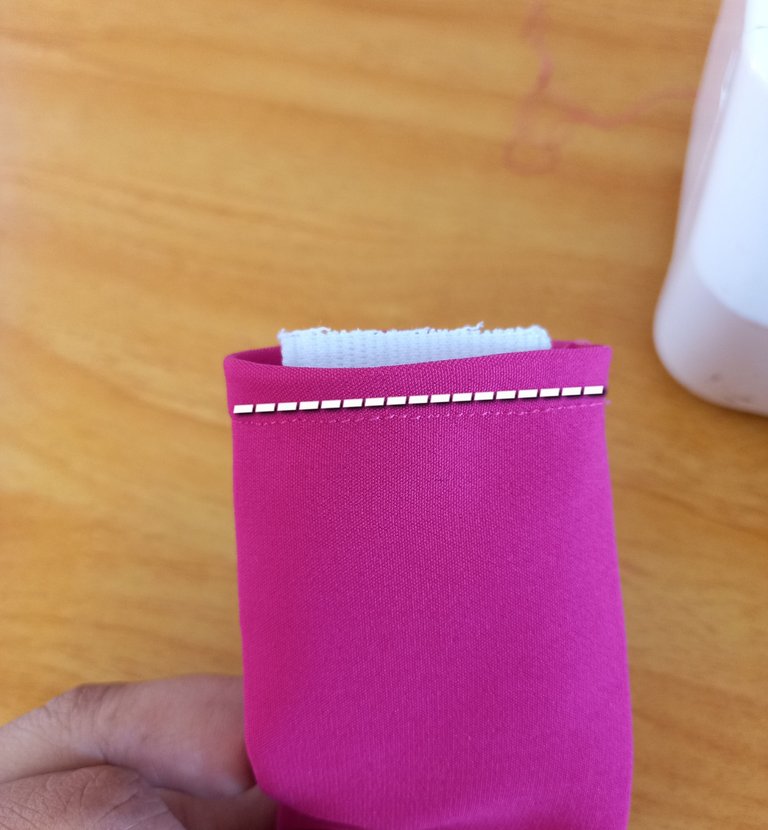
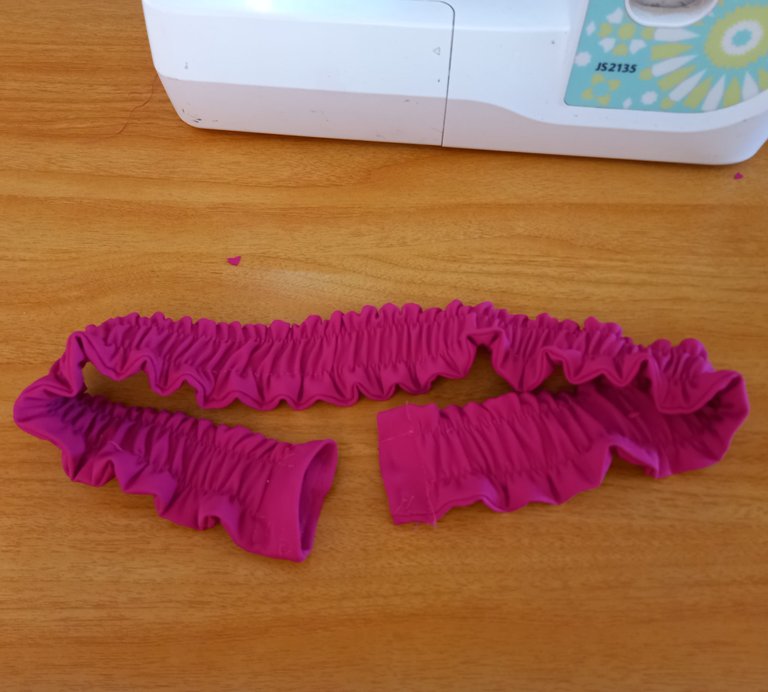
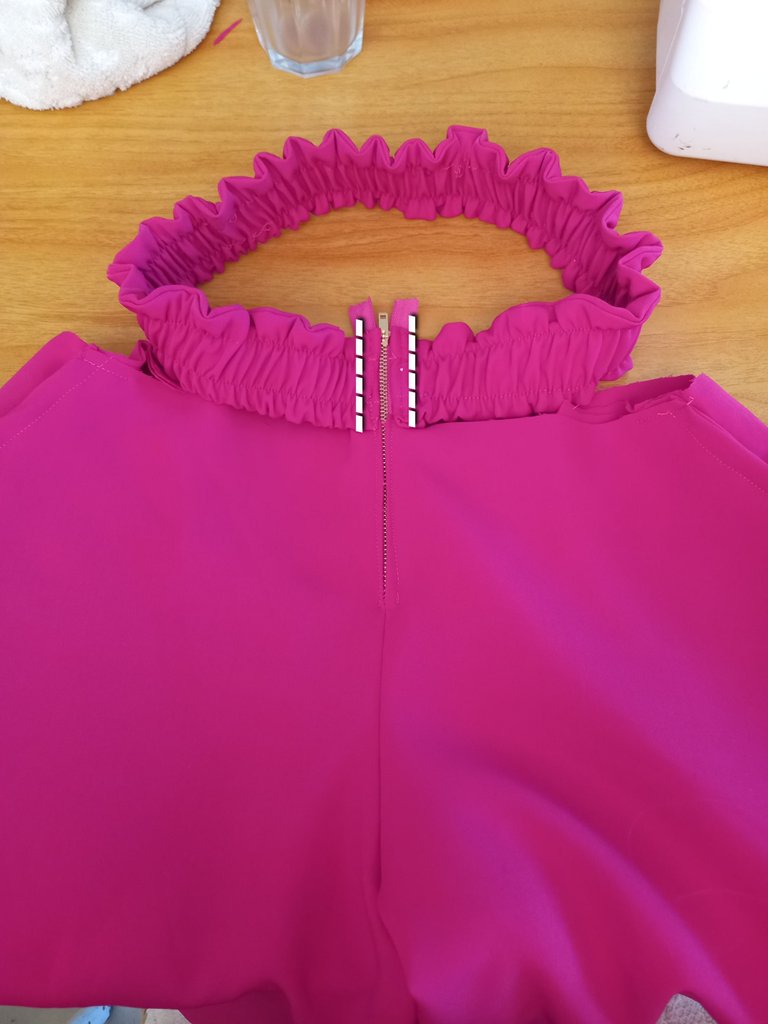
Para la pretina de la cintura lo que hice fue recortar una tira de tela de 13 cm de ancho y un metro de largo la doble uní sus orillas con costura y luego introduje por allí el elástico el cual aseguré en cada uno de los extremos de la tira y pasé costura arriba y abajo
For the waistband, what I did was to cut a strip of fabric 13 cm wide and one meter long, fold it, sew its edges together and then insert the elastic through it, which I secured at each end of the strip and sewed at the top and bottom.
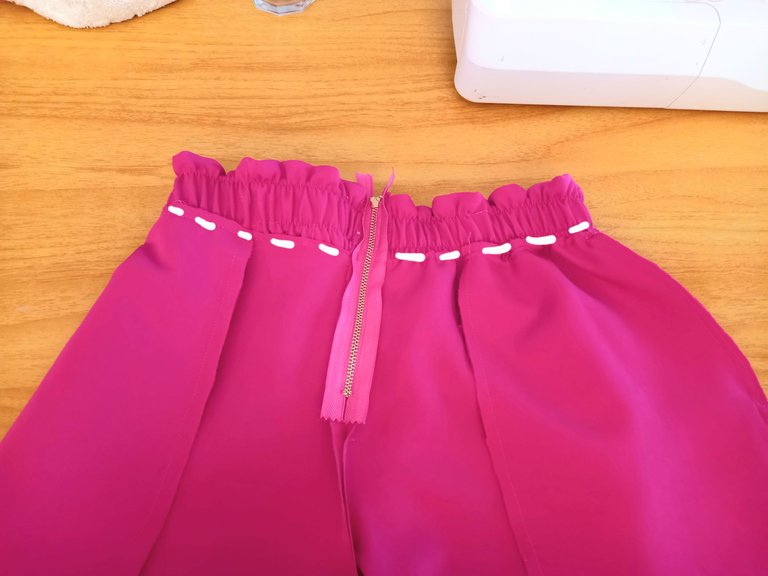
Coloqué las dos piezas una encima de la otra, con su derechos enfrentados y pasé costura por los laterales y la entrepierna.
I placed the two pieces one on top of the other, right sides facing each other, and sewed the sides and crotch.
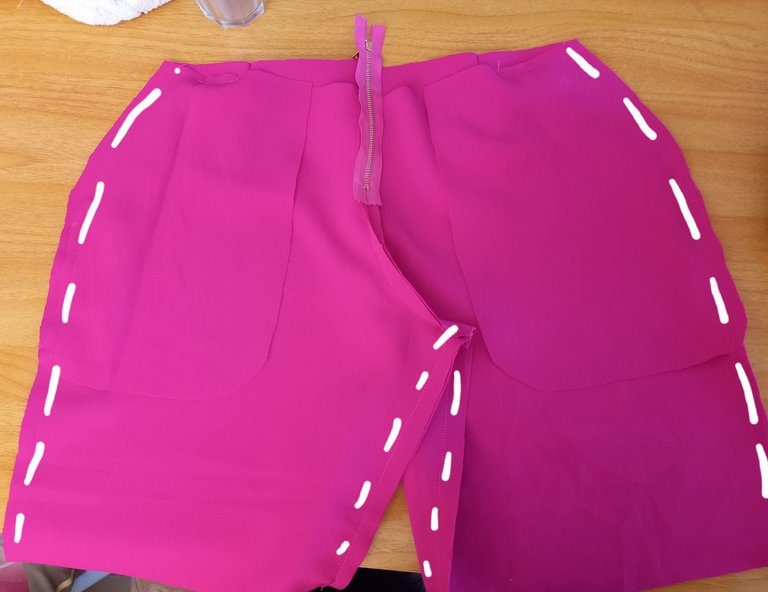
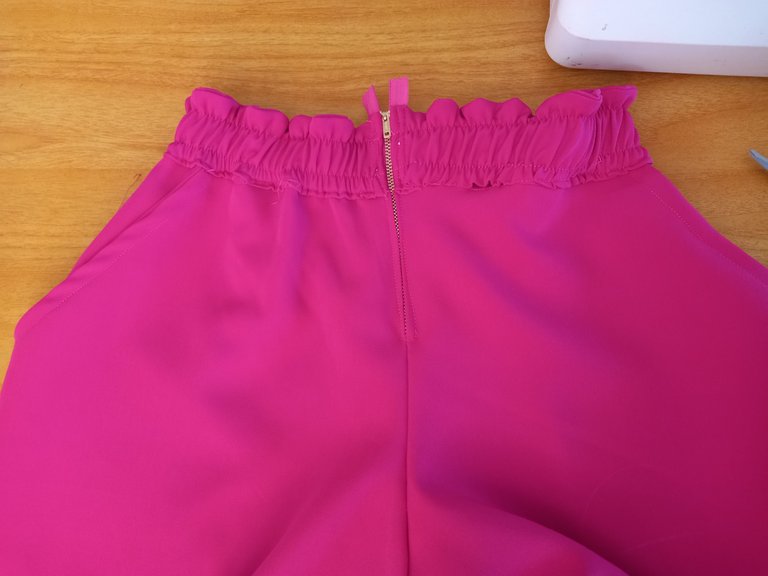
Finalmente cosí la pretina por encima del borde del contorno de cintura para esto lo primero que hice fue coser los extremos a cada lado del cierre primeramente luego hice varias puntadas en los laterales y en la parte de atrás para que esa quede lo más exacta posible.
Finally, I sewed the waistband over the edge of the waistband contour. The first thing I did was to sew the ends on each side of the zipper first, then I sewed several stitches on the sides and on the back to make it as accurate as possible.


Espero que este tutorial te haya gustado y sea de gran utilidad para tus
próximos proyectos. Muchas bendiciones mis muy apreciados.😊🙏.
I hope you liked this tutorial and that it will be useful for your next projects.
next projects. Many blessings my very appreciated ones.😊🙏..
Congratulations!
Your post has been manually curated and reblogged.
You can follow our curation trail on Hive.Vote
If you want to support us and the authors we vote for you can upvote this comment or delegate some Hive Power to our account. Thanks!
Propose a worthy post by mentioning us in the post or in a comment.
We reblog curated posts, follow us if you wish to see them in your feed.
Hi, I loved your post! Especially with that edition where you specify the part of the garment, the measurements in centimeters and even the highlighting of the seams, that makes an important difference in other publications of this niche. In addition, you model the final result, it couldn't be better, congratulations...
Hola querido amigo @jesuslnrs, gracias por pasar por aquí y dejar tu lindo comentario, es un gusto saber que éste contenido fue de tu agrado. Que tengas un lindo día 😊👍
Qué estupendo Kathe!!! Te queda super bien, amé todo el proceso y tu presentación con mucha alegría. Ya quiero hacerme unos, realza la cintura <3
Gracias querida @equipodelta, es un gusto saber que el proceso y el resultado de éste tutorial fue de tu agrado... si amiga, realza bien la cintura, se ajusta muy bien a ella. Feliz noche 🤗👍
@kathelopez77 Quedó excelente! Gracias por compartir tu trabajo, Saludos 😊
Qué bello te quedó el short, esta linda tu presentación y todo el proceso.
Gracias querida @keicynieves.art por comentar. Feliz día 😊
Me encanta y el color abuloso.