

Hello, my dear readers, I hope you are having or have had an excellent day. I am again with you sharing something that I love to do, and it entertains me a lot.
I like to make new things and I like to watch tutorials on how to knit to learn a little more and nowadays there are so many new stitches and tips that help you to improve your knitting and I am left thinking, “! Wow and I just stuck to chain stitches and low stitches!” 🤭🤭. Every day you learn something new, no matter how small it is, and it is very rewarding.
I want to show you how I made a keychain, crocheted, when I saw how they did the tubular knitting I saw it so easy to do, I said, this is a piece of cake. And in fact if it is an easy knitting, but as for being the first time I do it, it did not come out very well and I think it has happened to many, but still I did not give up and here I show you the step by step.
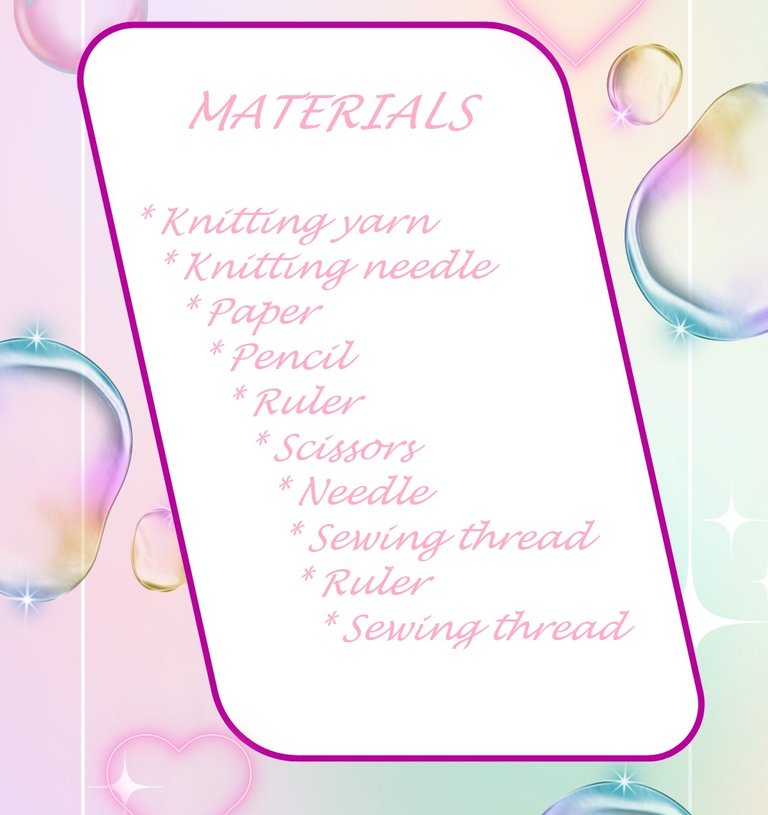

STEP BY STEP:
The first thing I made was a sketch of the letter I was going to knit. On a recycled sheet of paper, I made a square of 5x5 cm and there I drew a letter, in this case the letter A, because my daughter's name begins with that letter and it is for her that I made this.

Then with the same yarn that I am going to weave, I will measure all around the edge of the letter, to know what size I will make the tubular weave. And it measured 20 cm, so my fabric should not exceed that size.


I started by knitting 4 chain stitches. Then I knit 3 single crochet stitches, left one chain free and knit on the remaining 3 chains. This is where it gets a little tricky for first time knitters. It turns out that the single crochet will not be completed, but we will always leave the last loop on the needle unclosed, so that we are left with three loops.


Then remove the needle from the first two loops and leave only one. We help ourselves by putting a little pressure with our fingers on the stitches that are loose, so that when we start knitting, they do not come loose. And then we take the yarn and knit 3 low stitches, without finishing them so that the loops always remain.


These are the stitches that we will knit during the whole work. Just knit three single crochet stitches without finishing, cast off two stitches and knit three double crochet stitches again.

A tip to make the fabric tubular, is that every time we knit a round, we pull the stitches well so that the fabric is tight, thus joining the stitches on each side and makes it have a tubular shape. If this is not done (and this is what happened to me when I started to knit it, I did not get the tubular shape but a flat fabric), the fabric will be loose and shapeless.

Once the desired length is obtained, I finish it off with a slipped stitch. The letter I made can be made without wire on the inside, but in my case, I placed one to give it a better shape.


With the wire inside, I just shape it as I have it in the sketch and the letter is ready.

Then make another tubular strip of the same size as the previous one, to make a flower. Once the strip is finished, finish it off and leave enough thread to be able to assemble the flower. As you can see in the picture, I introduced the remaining thread about 1.5 cm from the beginning to form a petal.


I do the same process, until I form 5 petals and with the same thread I tie them well so that they do not come loose. With the same remaining thread, I introduced a bead to decorate. To insert the bead, I used the sewing thread, as shown in the picture. I only introduced the bead through the needle until it reached the thread, then I made a loop leaving the knitting thread inside and then I pulled the sewing thread and this is how the bead is left with the knitting thread.


I then tie the flower to the letter, taking care to hide the thread once the tying is complete. Finish by decorating the flower with a bead in the center of the flower on each side.


Now it only remains to place the hook by which it will be hung and I have the keychain ready. It is simple, but delicate and will look very nice anywhere it is used. I hope you liked this tutorial that I gladly prepared for you.
I say goodbye as always, but not before thanking you for taking a little of your valuable time to visit my blog and support me. And as the saying goes: “Do good, without looking at whom”.


Original creation content:
❤️ All photos are mine, taken and edited with my Infinix SMART 8 phone.
💛 The cover image and materials were made with the Canva app and edited by me.
💚 English translation was done with the help of deepl.com/translator.
💙 The images of the dividers were taken from: glitter-graphics.com/
🧡 The letters indicating the languages were made at es.textstudio.com and edited by me.



Hola mis queridos lectores, espero que estén teniendo o hayan tenido un excelente día. Estoy nuevamente con ustedes compartiendo algo que me encanta hacer y me entretiene bastante.
Me gusta hacer cosas nuevas y me gusta ver tutoriales de como tejer para aprender un poco más y hoy en día hay tantos puntos nuevos y tips que te ayudan a mejorar el tejido y me quedo pensando: "! Wow y yo solo me quede en las cadenetas y puntos bajos!" 🤭🤭. Cada día se aprende algo nuevo, por muy pequeño que sea y es muy gratificante.
Quiero mostrarle como realice un llavero, tejido a crochet, cuando vi como hacían el tejido tubular lo vi tan fácil de hacer, que dije, esto es pan comido. Y de hecho si es un tejido fácil, pero como por ser la primera vez que lo hago, no me salía muy bien y creo que a muchos les ha pasado, pero igual no me rendí y aquí les muestro el paso a paso.
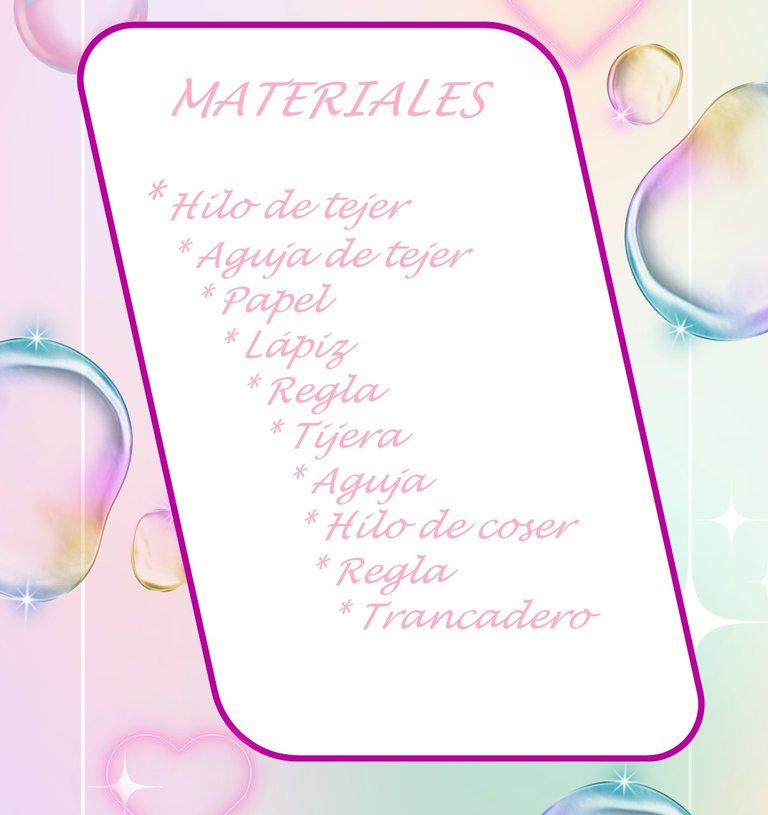

PASO A PASO:
Lo primero que realice fue un boceto de la letra que voy a tejer. En una hoja reciclada, realice un cuadrado de 5x5 cm y allí dibuje una letra, en este caso la letra A, porque el nombre de mi hija empieza por esa letra y es para ella quien realizo esto.

Luego con el mismo hilo que voy a tejer, mediré por todo el borde de la letra, para saber de que tamaño haré el tejido tubular. Y midió 20 cm, entonces mi tejido no debe sobrepasar esa medida.


Empecé haciendo el tejido con 4 cadenetas. Luego realice 3 puntos bajos, deje una cadeneta libre y tejí en las 3 cadenetas restantes. Aquí es donde se hace un poquito difícil para los que los hacen por primera vez. Resulta que el punto bajo no lo realizaremos completo, sino que dejaremos siempre la última lazada en la aguja sin cerrar, para así quedarnos con tres lazadas.


Luego sacamos la aguja de las dos primeras lazadas y dejamos solo una. Nos ayudamos haciendo un poco de presión con los dedos en los puntos que quedan sueltos, para que cuando empecemos a tejer, no se suelten. Y entonces tomamos el hilo y hacemos 3 puntos bajos, sin terminarlos para que siempre queden las lazadas.


Estos son los puntos que haremos durante todo el trabajo. Solo tejer tres puntos bajos sin terminar, soltar dos puntos y volver a tejer 3 puntos bajos.

Un tip para que el tejido quede tubular, es que cada vez que tejemos una vuelta, halemos bien los puntos para que el tejido quede apretado, así se unen los puntos de cada lado y hace que tenga forma tubular. Si no se hace (y es lo que me paso a mí cuando empecé a tejerlo, no me quedaba la forma tubular sino como un tejido plano) así, les queda el tejido flojo y sin forma.

Una vez obtenido el largo deseado, remato con un punto deslizado. La letra que hice se puede hacer sin alambre por dentro, pero en mi caso, yo sí le coloque uno para darle mejor forma.


Ya con el alambre por dentro, solo le doy forma tal como lo tengo en el boceto y ya queda lista la letra.

Luego realice otra tira tubular del mismo tamaño que la anterior, para hacer una flor. Una vez que finalice la tira, remate y deje suficiente hilo para poder armar la flor. Tal como ven en la imagen el hilo restante, lo introduje como a 1.5 cm del inicio para formar un pétalo.


Realizo el mismo proceso, hasta formar 5 pétalos y con el mismo hilo amarro bien para que no se suelten. Con el mismo hilo restante, introduje una cuenta para decorar. Para introducir la cuenta, me ayudé con el hilo de coser, tal como se aprecia en la imagen. Solo introduje la cuenta por la aguja hasta llegar al hilo, luego hice una lazada dejando dentro el hilo de tejer y después hale el hilo de coser y así queda la cuenta el hilo de tejer.


Luego amarro la flor a la letra y cuidando de ocultar el hilo una vez finalizado el amarre. Termine decorando la flor con una cuentas en el centro de la flor de cada lado.


Ya solo queda colocar el gancho por el cual se va a guindar y ya tengo listo el llavero. Es sencillo, pero delicado y quedará bien bonito en cualquier sitio que se use. Espero que les haya gustado este tutorial que con mucho gusto les preparé.
Me despido como siempre, no sin antes agradecerles por tomarse un poco de su valioso tiempo para visitar mi blog y apoyarme. Y como dice el dicho: “Hagan el bien, sin mirar a quién”.


Contenido de la creación original:
❤️ Todas las fotos son mías, tomadas y editadas con mi teléfono Infinix SMART 8.
💛 La imagen de portada y los materiales fueron hechos con la app Canva y editados por mí.
💚 La traducción al inglés se hizo con la ayuda de deepl.com/translator.
💙 Las imágenes de los separadores fueron tomadas de: glitter-graphics.com/
🧡 Las letras que indican los idiomas se hicieron en es.textstudio.com y editadas por mi.