


Hello my dear readers, I hope you are well and that you are having or have had an excellent day.
A few days ago I was looking for some papers that I had stored in the wardrobe and my daughter is always after me, wanting to help me with everything. She is only 6 years old and I know that when she grows up, she won't want to look for anything I send her, ha, ha, ha.
In the wardrobe I also keep clothes from when she was little and I had forgotten that I also keep the toys she doesn't use anymore. She noticed a bag with a stuffed animal sticking out of it and wanted to see it. Among the stuffed animals was a doll, which she adored, slept with it and played with it all the time, so much so that it deteriorated.
I once told him that I was going to put it away because it was already very worn out and could shed a lot of fluff that could make him sick. And just as on that occasion I insisted to her that I could keep the doll, she insisted so much that I could take it out and let her play with it again. She told me, let's fix her up, put a piece of cloth over here and that's it.
Since I have some free time right now, I decided to listen to her and put the piece of cloth here and there. And how can I say no to that little face she makes when she begs me, ha ha ha ha. So here I show you how I remade the doll. Without further ado, I leave you the step by step.


STEP BY STEP:
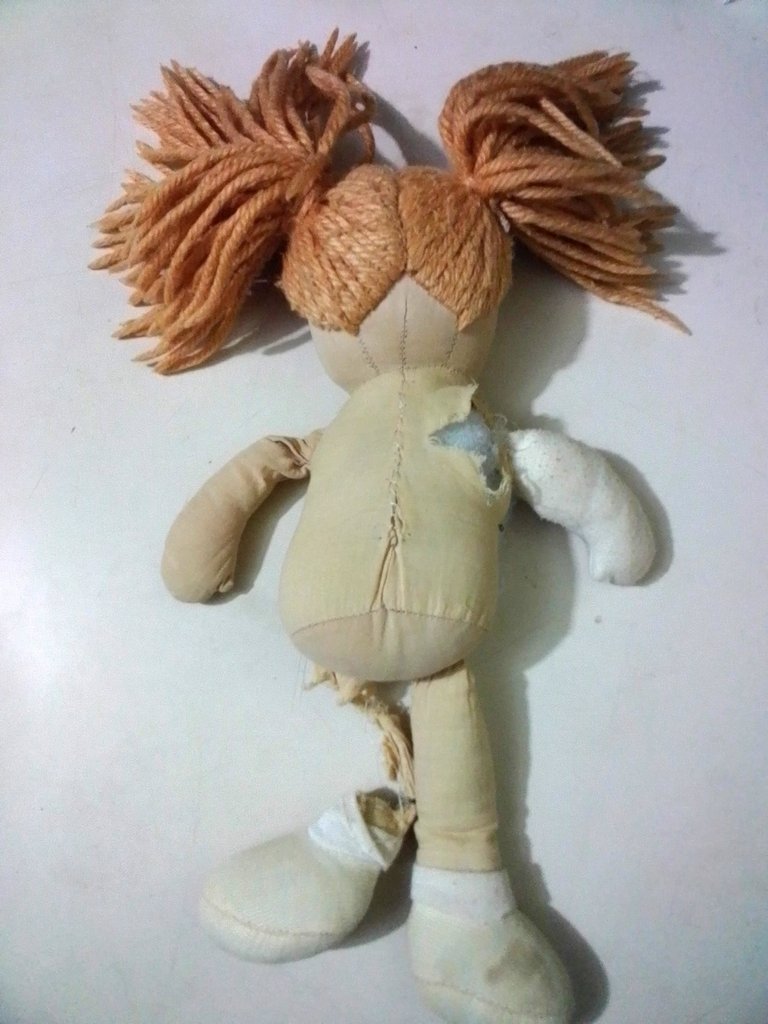
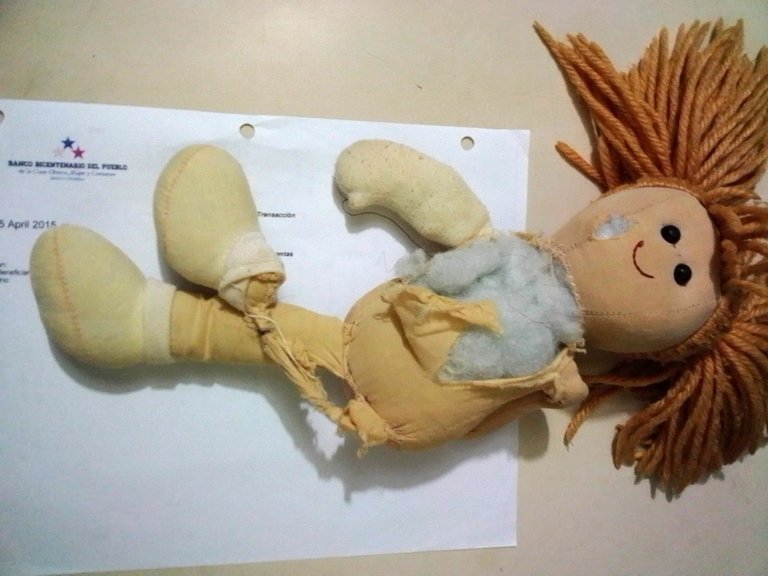
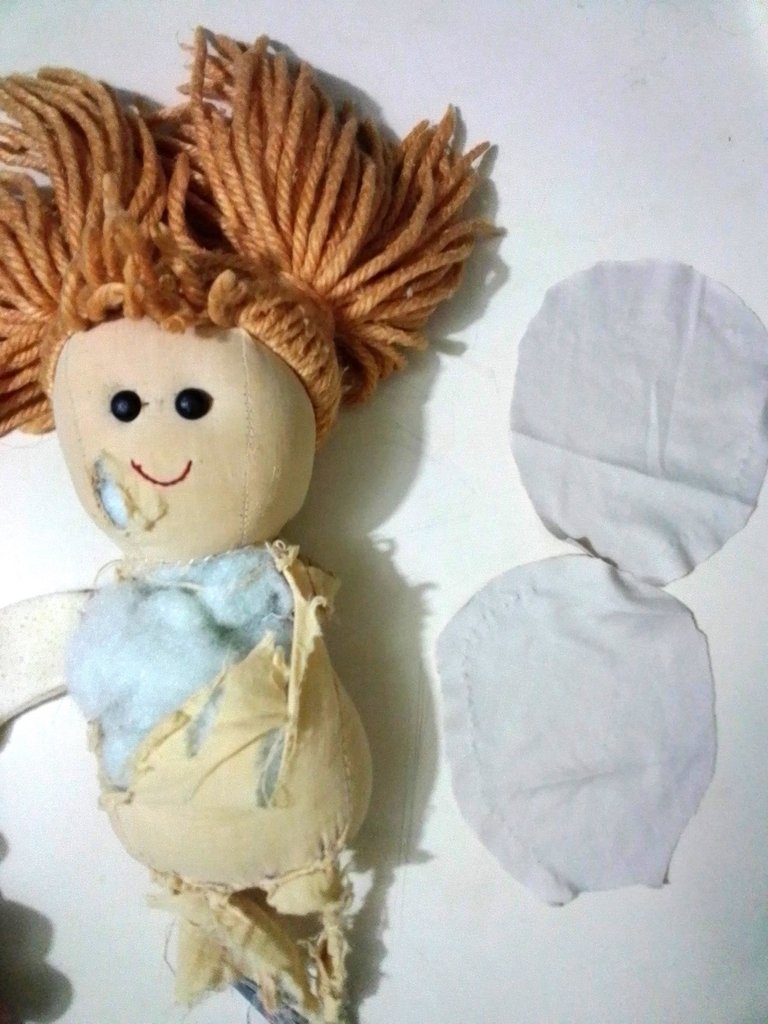
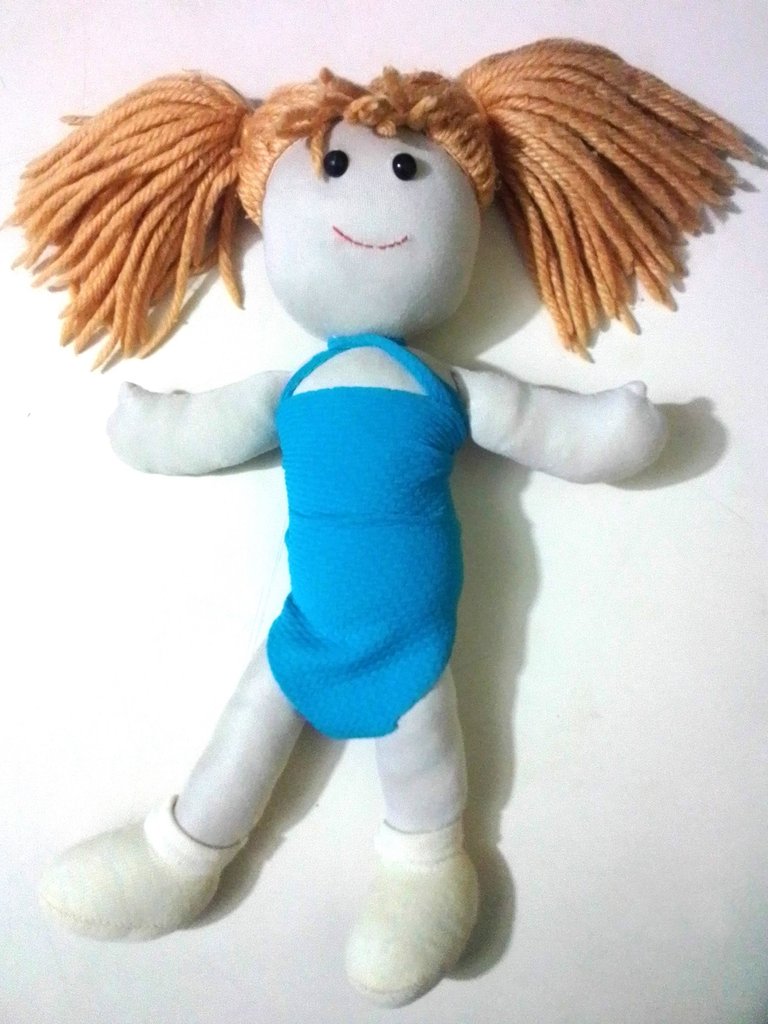
As you can see, the doll is quite deteriorated and still my daughter played with it. So what I will do is to remake her again. A new body, but I will keep her eyes, hair and shoes.
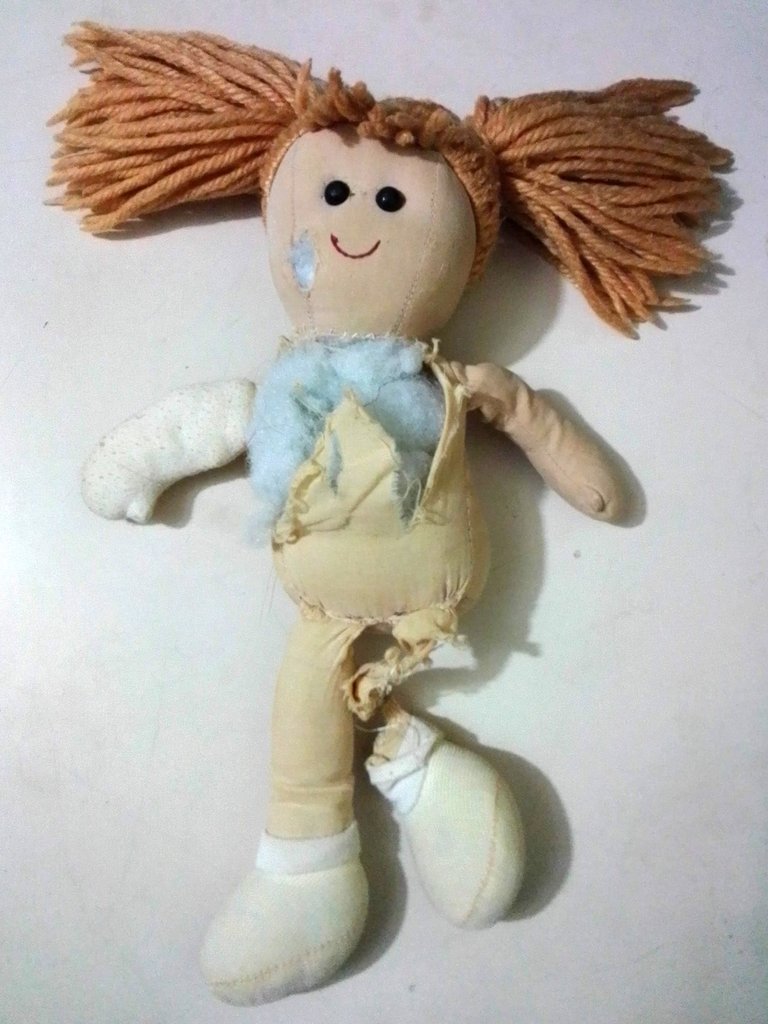
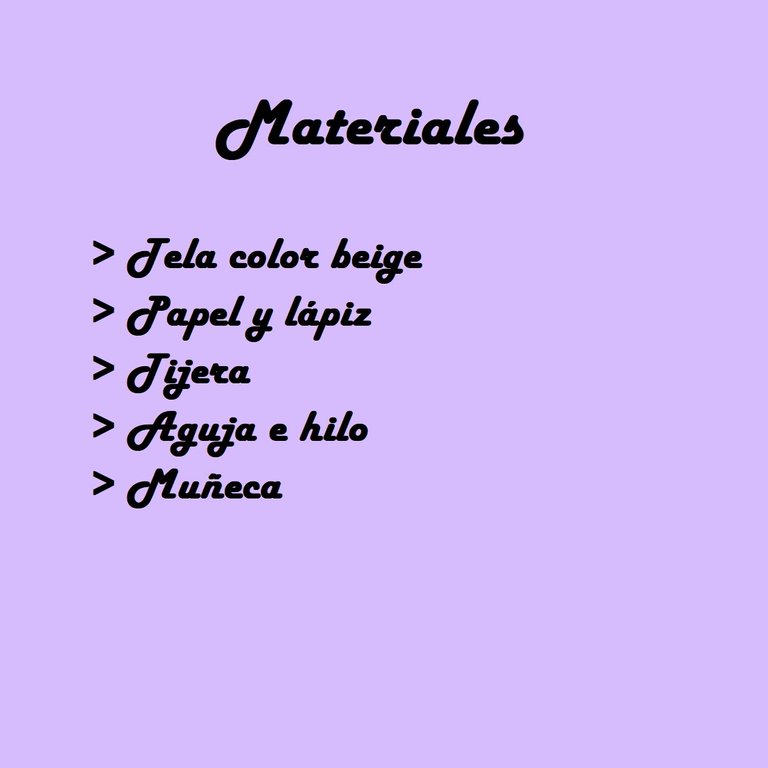
On the sheet of paper and with the help of the pencil, I will draw a sketch of all the parts of the body. Once I have marked the parts, I perfect them and cut them out.
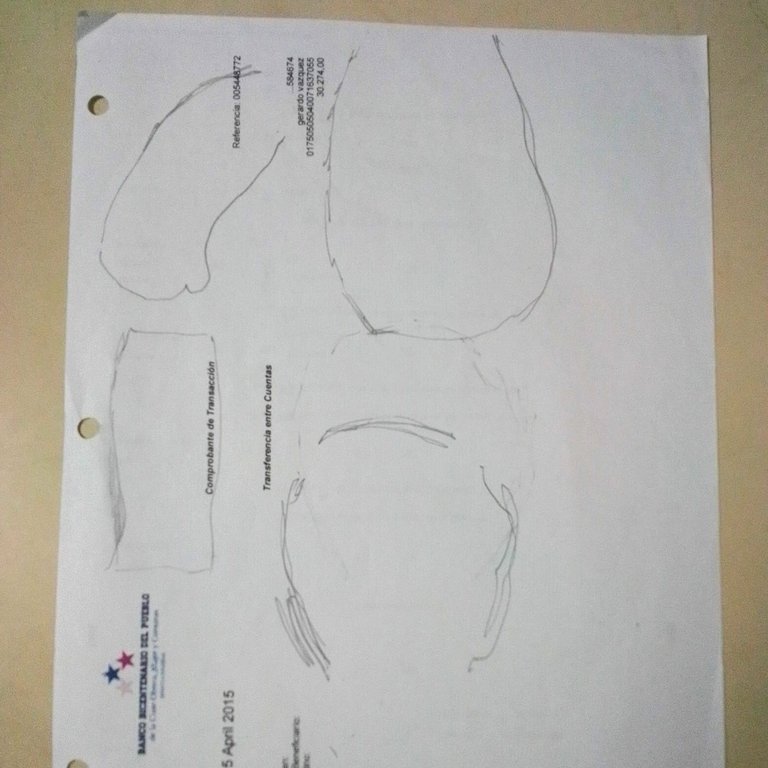
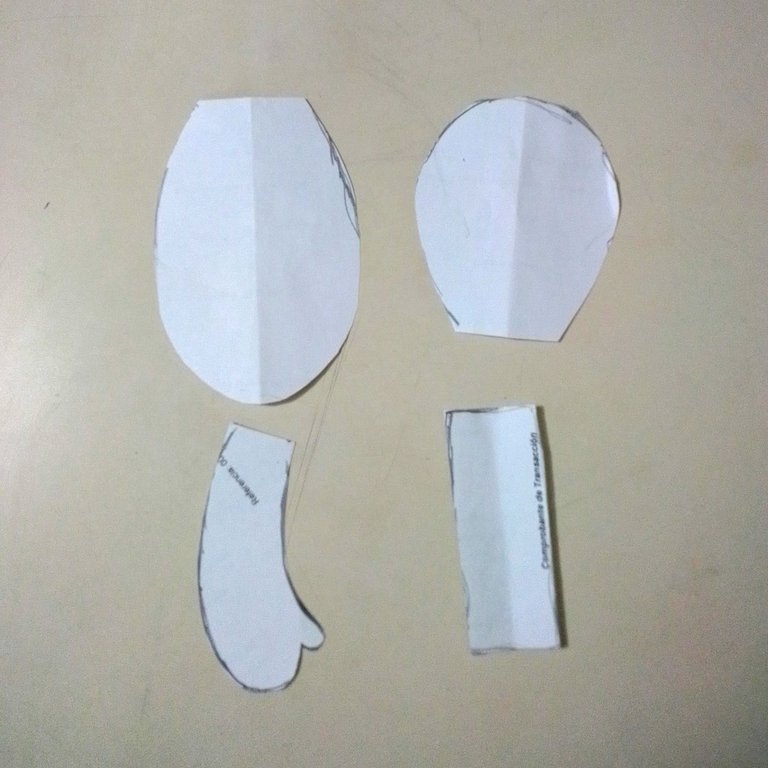
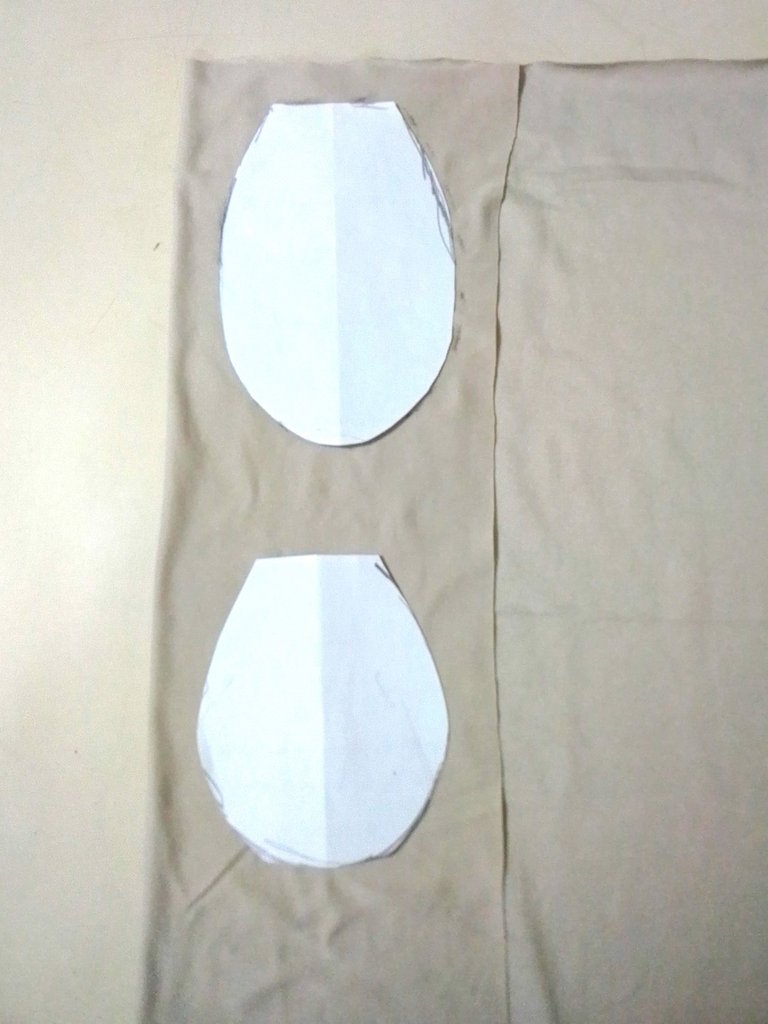
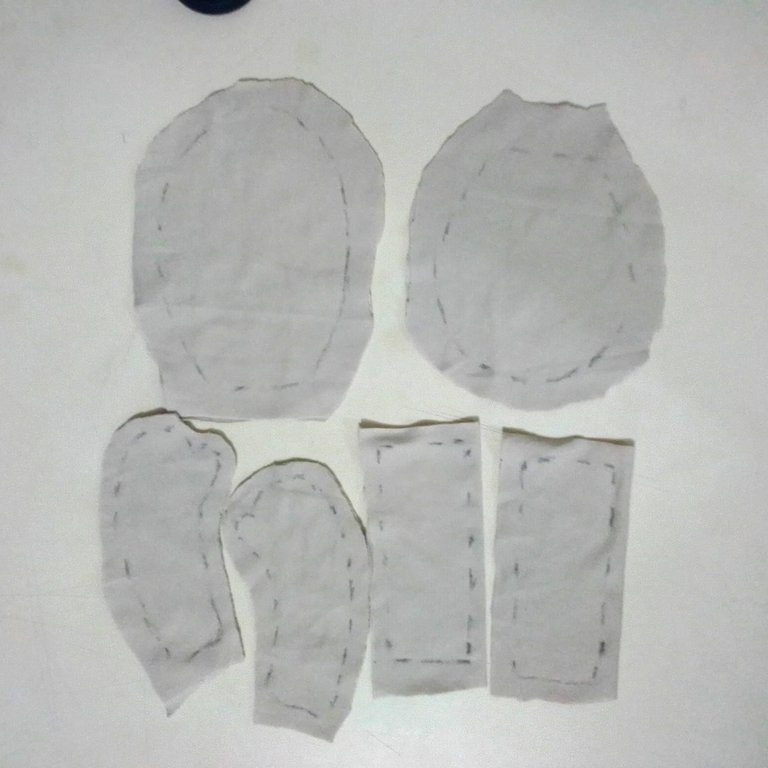
Now on the fabric, I will place the patterns on top and cut out the pieces. Two parts for the head and body and 4 for the arms and legs.
 |  |  |
|---|
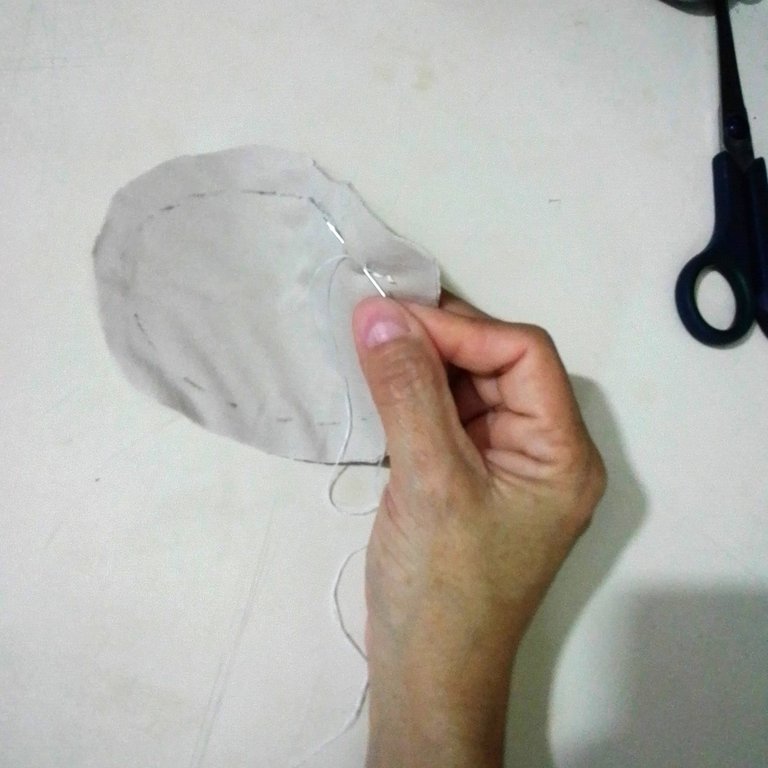
As I don't have a sewing machine, which would be very useful, the sewing would be better and it would be much quicker to make the doll. I have to make it by hand, so I'll start sewing the arms and legs.
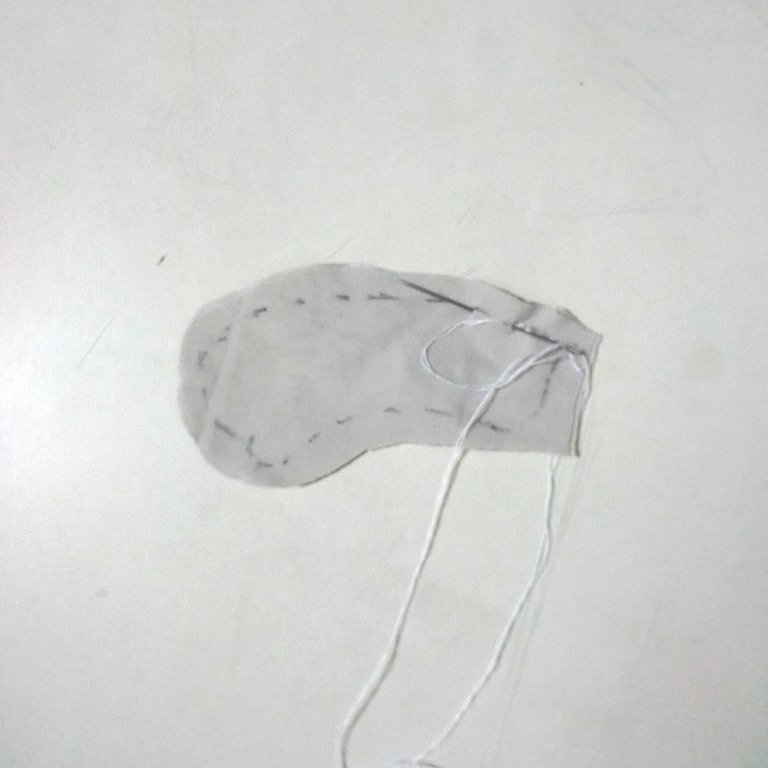
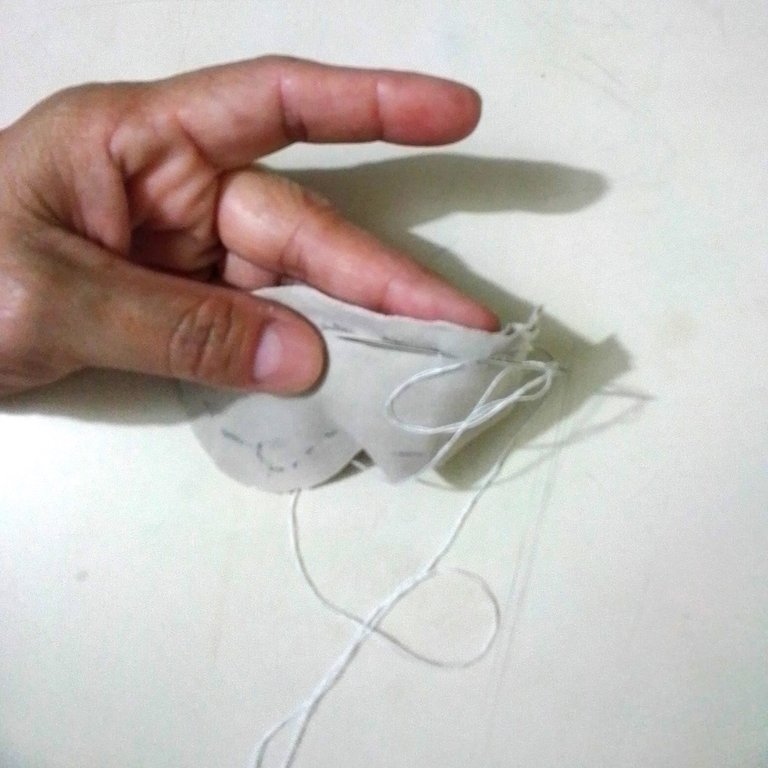
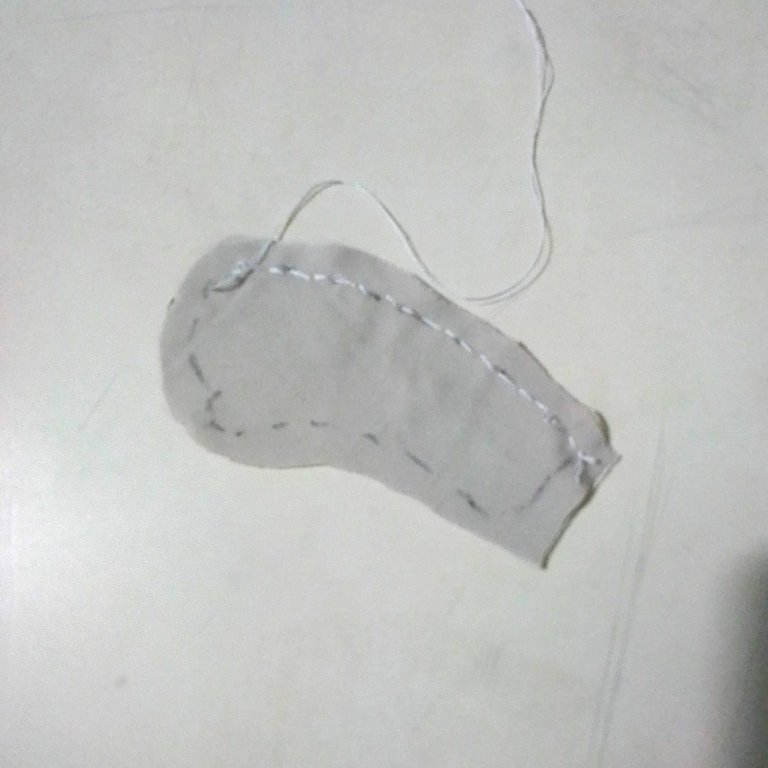
As you can see, I sewed the seam with small stitches, trying not to leave any open parts when stuffing it. In the same way I sewed all the pieces together and when I finished sewing, I made some small cuts all around. This will ensure that when I turn it over, the seams won't be wrinkled.
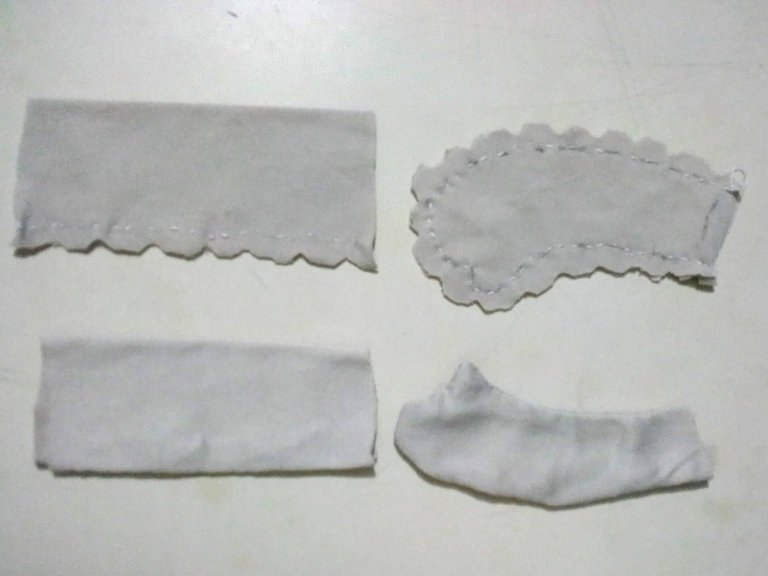
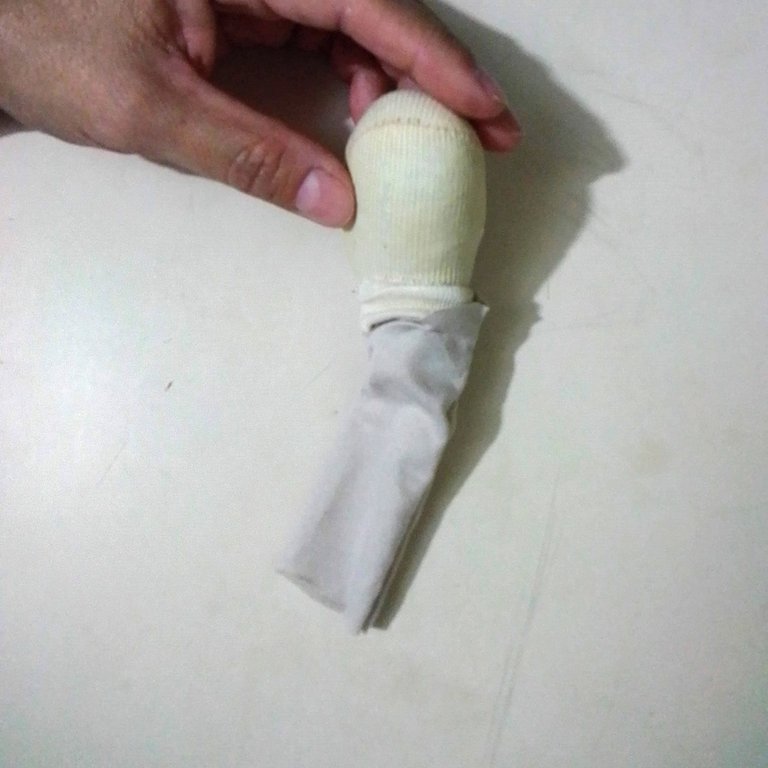
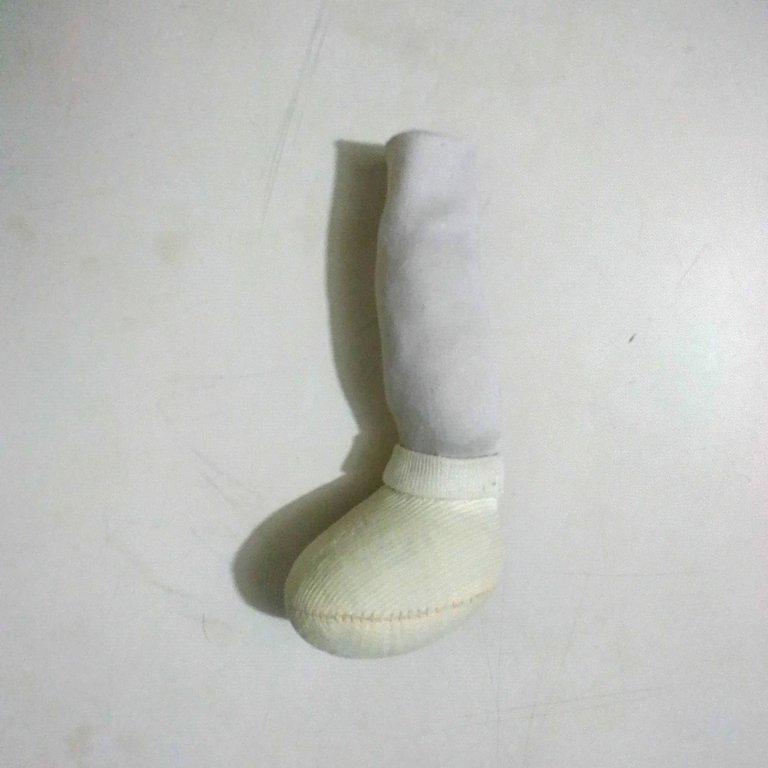
As I said before, I was going to keep the shoes. I cut out the damaged part of the fabric, leaving the shoe as shown in the picture. And to this one I sewed the new piece I took out for the leg.
 |  |  |
|---|
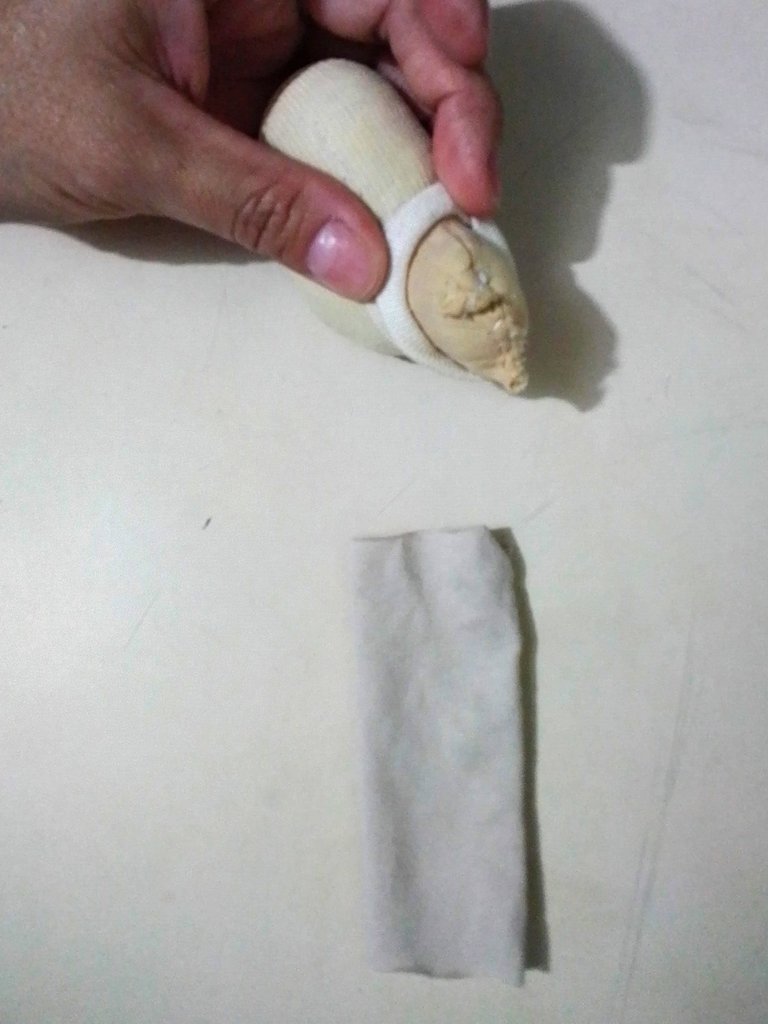
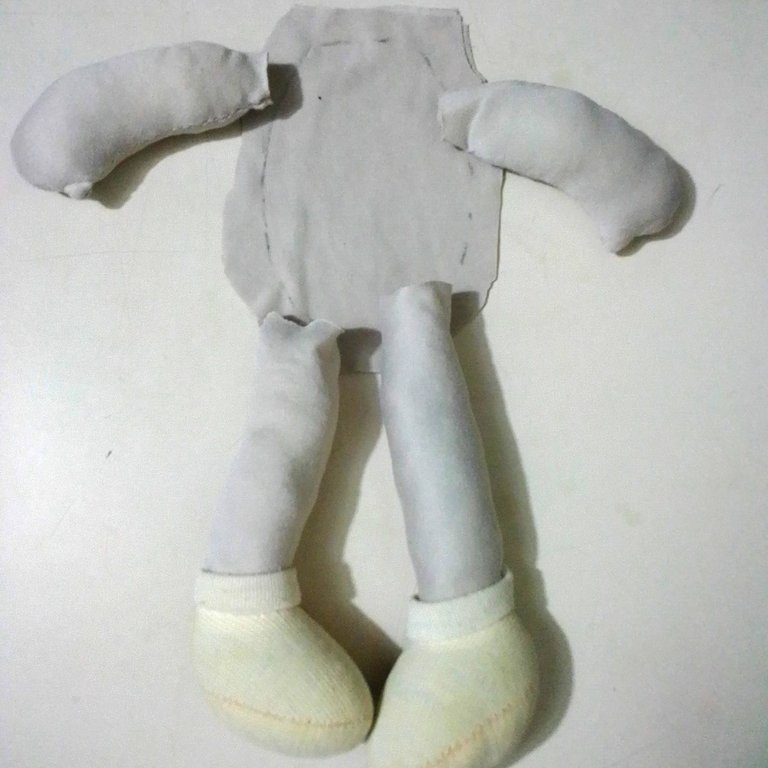
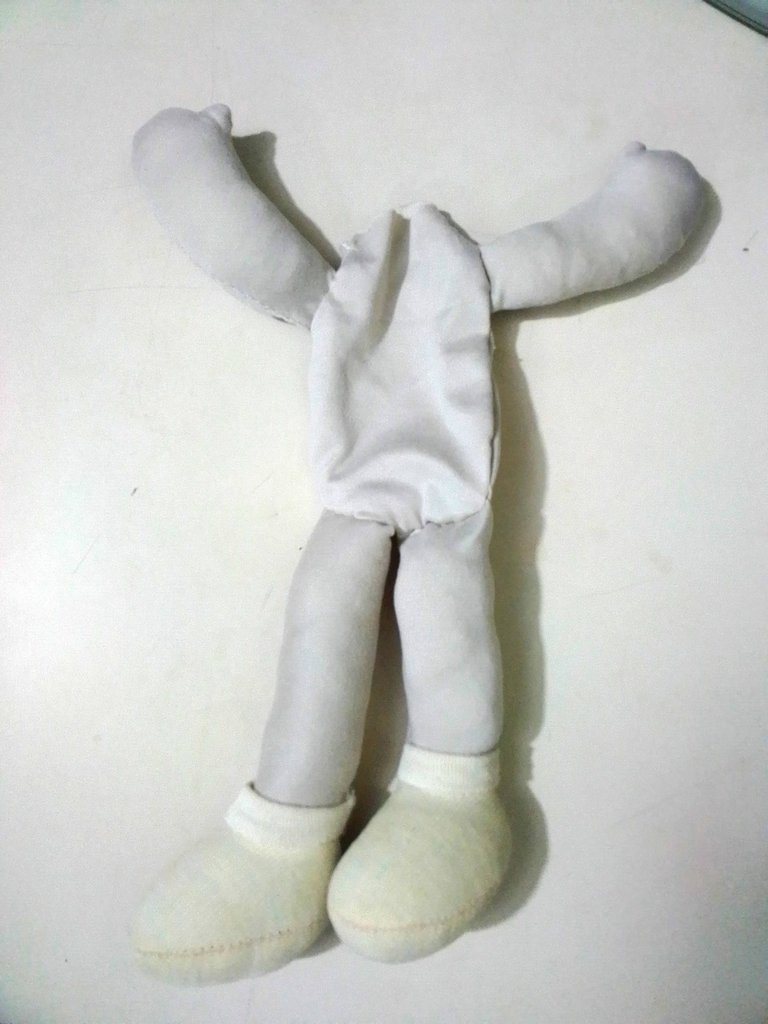
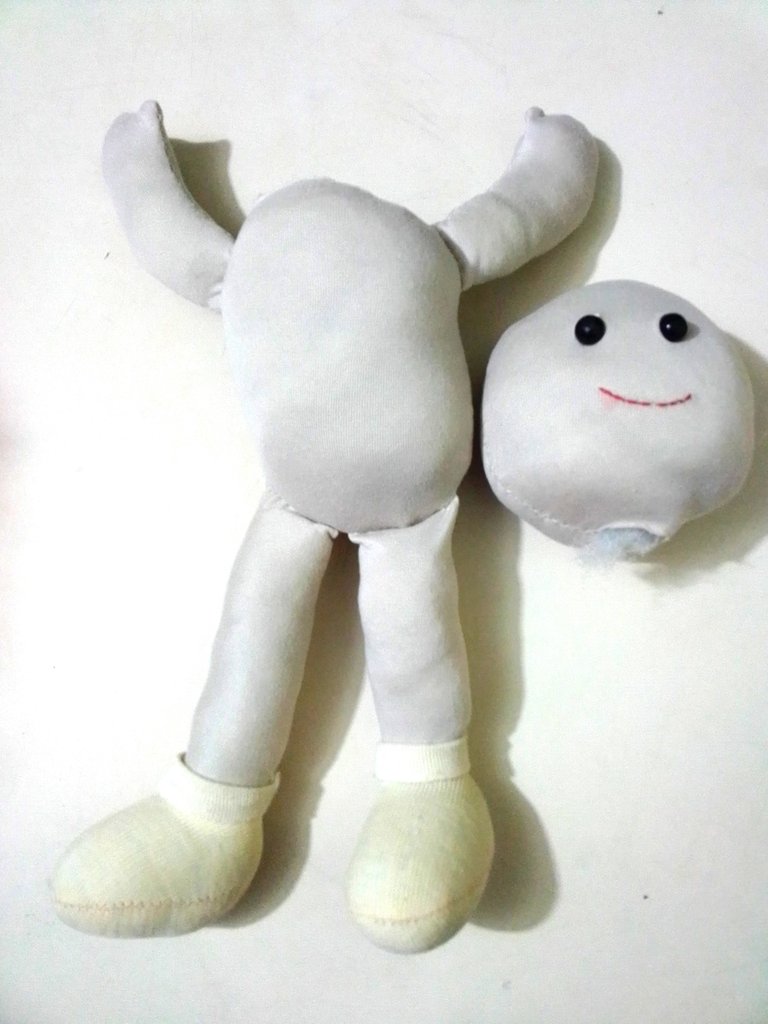
Now fill in all the pieces with the cotton from the doll itself. I needed to get the arms and legs ready before I started on the body, because I need to attach them to the body while I'm baking the body.
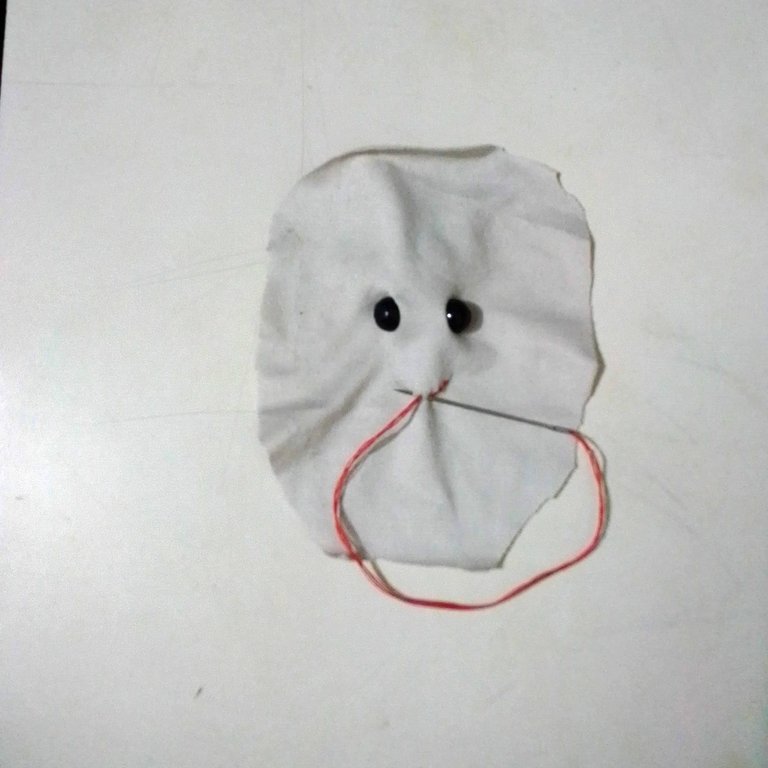
Before I start sewing the head, I will transfer the eyes and sew on the mouth with red thread.
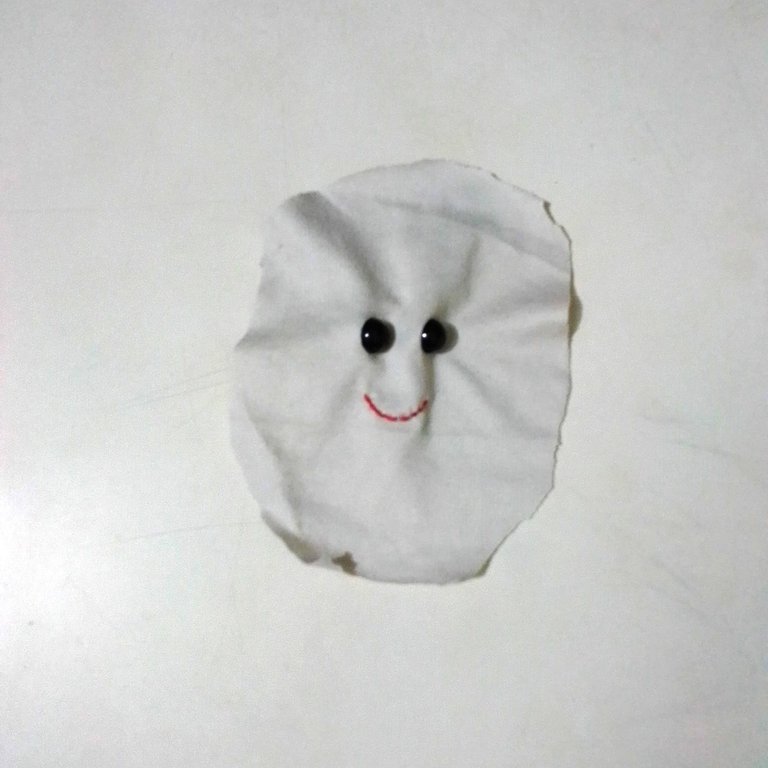
I finish sewing the head and now I have my doll almost assembled.
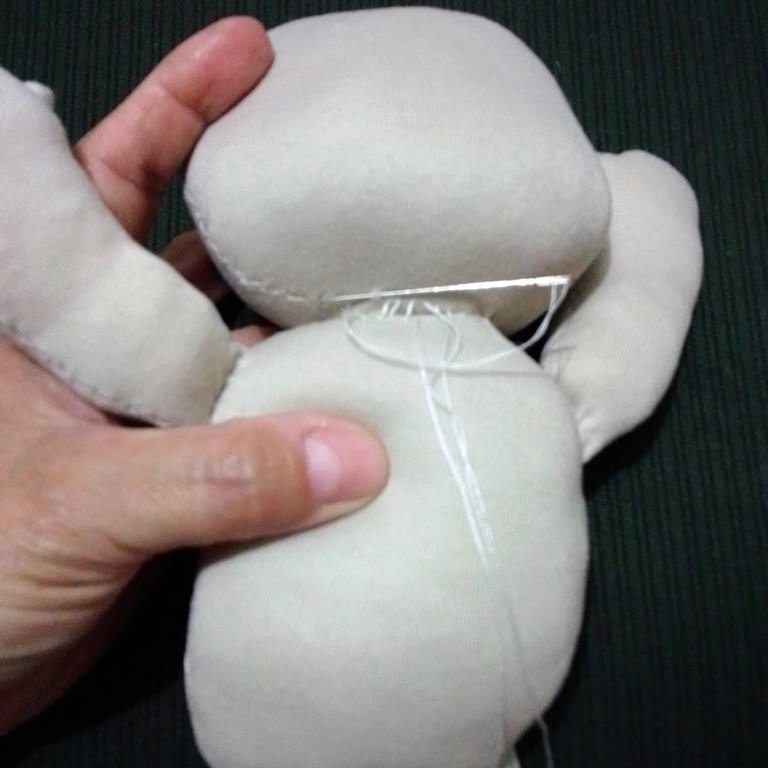
Now I will sew the head to the body, I will make small stitches, one stitch on the head and one on the body and so on until it is very well joined.
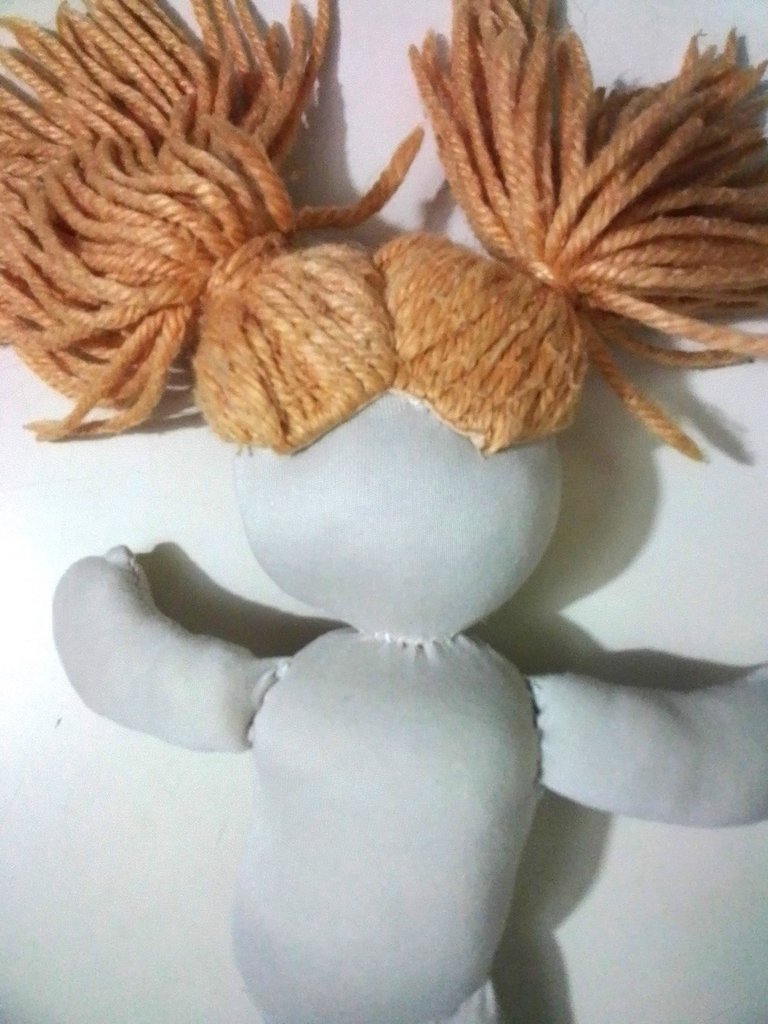
I removed most of the fabric from the other doll's hair, leaving only one edge, so that the hair doesn't come unstuck. As you can see in the picture, you can see the previous fabric, so I will try to hide it very well and I will sew the hair all around, fixing it very well.

And now, yes, I have the doll ready. I confess that I had never made a doll before and although I'm just remaking this doll, it's practically like making a new one. And it doesn't look so bad, does it? What do you say?
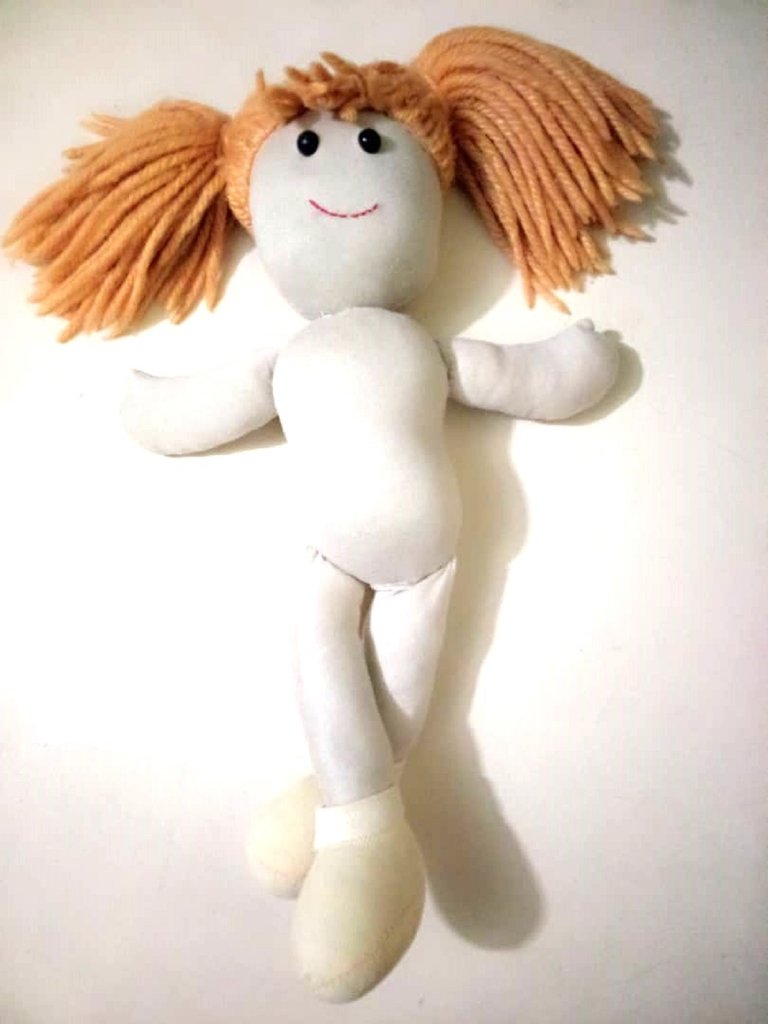
I hope you liked this tutorial that I gladly prepared for you. My daughter was delighted with the return of her doll, as she says, she is very happy and as long as she is happy, I am too.
I say goodbye as always, but not before thanking you for taking a little of your valuable time to visit my blog and support me. Be well and take care of yourselves.
Content of the original creation:
❤️ All photos are mine taken and edited with my Alcatel phone.
💛 The cover image, was made with the Canva app and edited by me.
💜 The divider images were taken from the Canva page and edited by me.
💚 The English translation was done with the help of DeepL. 🧡 The letters indicating the languages were taken from fontmeme.com/en/.


Hola mis queridos lectores, espero que se encuentren bien y que tengan o hayan tenido un excelente día.
Hace unos días estaba buscando unos papeles que tenía guardados en el closet y mi hija como siempre anda detrás de mí, queriendo ayudarme en todo. Solo tiene 6 años y sé que cuando crezca, no va a querer buscar nada de lo que le mande, ja, ja, ja.
En el closet también tengo guardada la ropa de cuando ella era pequeña y se me había olvidado que también guarde allí los juguetes que ella ya no usa. Ella se dio cuenta de un bolso, donde se asomaba un peluche y se antojó de querer verlo. Entre los peluches estaba una muñeca, la cual adoraba, dormía con ella y se la pasaba jugando todo el tiempo con ella, a tal punto que se llegó a deteriorar.
Yo en una oportunidad le dije que la iba a guardar porque ya estaba muy gastada y así podía soltar mucha pelusa que le podía enfermar. Y así como en aquella oportunidad le insistí a ella para que yo pudiera guardar la muñeca, pues ella me insistió tanto para poder sacarla y dejarla jugar con ella de nuevo. Me dijo, vamos a arreglarla, le ponemos un pedazo de tela por aquí y ya.
Como ahorita tengo tiempo libre, me decidí a hacerle caso y colocarle el pedazo de tela por aquí y por allá. Y como decirle que no, a esa carita que coloco al momento de rogarme, ja ja ja. Así que aquí les muestro como rehice la muñeca. Sin más preámbulo, les dejo el paso a paso.
PASO A PASO:
Como pueden ver, la muñeca está bastante deteriorada y aun así mi hija jugaba con ella. Así lo que haré es rehacerla de nuevo. Un nuevo cuerpo, pero conservaré sus ojitos, el cabello y sus zapatos.
En la hoja de papel y con la ayuda del lápiz, sacaré un bosquejo de todas las partes del cuerpo. Una vez marcadas las partes, las perfecciono y recorto.
Ahora en la tela, colocaré encima los patrones y recortaré las piezas. Dos partes para la cabeza y el cuerpo y 4 para los brazos y piernas.
| | |
|---|
Como no tengo máquina de coser, que me sería de mucha utilidad, pues la costura quedaría mejor y sería mucho más rápido hacer la muñeca. Me toca hacerla a mano, así que empezaré a coser los brazos y las piernas.
Como pueden ver hice una costura con puntadas pequeñas, tratando de que, a la hora de rellenarla, no queden partes abiertas. Del mismo modo cosí todas las piezas y al terminar de coser, le hice unos pequeños cortes por todo el alrededor. Eso hará que cuando lo voltee, no queden las costuras arrugadas.
Como les comente anteriormente, de que iba a conservar los zapatos. Recorte la parte de tela que tenía dañada, quedándome el zapato como se muestra en la imagen. Y a este le cosí la pieza nueva que saque para la pierna.
| | |
|---|
Ahora rellene por todas las piezas con el algodón de la misma muñeca. Necesitaba tener los brazos y las piernas listas antes de empezar con el cuerpo, porque necesito unirlas al cuerpo mientras voy cociendo el cuerpo.
Antes de empezar a coser la cabeza, transferiré los ojos y le coseré con hilo rojo la boca.
Termino de coser la cabeza y ahora si ya tengo mi muñeca casi armada.
Ahora coseré la cabeza al cuerpo, haré puntadas pequeñas, una puntada en la cabeza y una en el cuerpo y así sucesivamente hasta unir muy bien.
El cabello que tenía la otra muñeca, le quite gran parte de la tela que tenía, dejando solo una orilla, para que no se vaya a despegar el cabello. Como pueden ver en la imagen, se nota la tela anterior, así que trataré de ocultarla muy bien e iré cosiendo el cabello por todo el alrededor, fijándolo muy bien.
Y ahora sí, ya tengo lista la muñeca. Les confieso que nunca había hecho una muñeca y aunque solo estoy rehaciendo esta muñeca, prácticamente es como hacer una nueva. ¿Y no me quedo tan mal o sí? ¿Ustedes qué dicen?
Espero que le haya gustado este tutorial que con mucho gusto les prepare. Mi hija quedó encantada con el regreso de su muñeca, como ella dice, está muy feliz y mientras ella sea feliz, yo también lo estoy.
Me despido como siempre, no sin antes, agradecerle por dedicarme un poco de su valioso tiempo, para visitar mi blog y apoyarme. Pórtense bien y cuídense mucho.
Content of the original creation:
❤️ Todas las fotos son mías tomadas y editadas con mi teléfono Alcatel.
💛 La imagen de portada, fue realizada con la aplicación Canva y editada por mí.
💜 Las imágenes divisorias fueron tomadas de la página de Canva y editadas por mí.
💚 La traducción al inglés fue hecha con la ayuda de DeepL. 🧡 Las letras que indican los idiomas, fueron tomadas de la página fontmeme.com/es/.
¡Felicitaciones!
1. Invierte en el PROYECTO ENTROPÍA y recibe ganancias semanalmente. Entra aquí para más información.
3. Suscríbete a nuestra COMUNIDADEntra aquí para más información sobre nuestro trail., apoya al trail de @Entropia y así podrás ganar recompensas de curación de forma automática.
4. Creación de cuentas nuevas de Hive aquí.
5. Visita nuestro canal de Youtube.
Atentamente
El equipo de curación del PROYECTO ENTROPÍA
Me alegra que pueda contar con ustedes. Muchas gracias por su apoyo.
This is awesome. You did save the dull and it has become completely new better than throwing it away. Now your baby has a new doll to play with. You did well with this dear.
Well done.
Hola. Hoy en día el reciclaje es muy importante, siempre que se pueda restaurar algún objeto, prenda o cualquier otra cosa, hay que hacerlo, aunque sea un juguete como en este caso. Algo que tuvo un valor sentimental para mi hija y que lo pueda reutilizar, eso es muy valioso tanto para ella, como para mí. Eso me llena de orgullo y me alegra, devolverle su muñeca, casi nueva.
Gracias por compartir. Saludos 🤗Hola @kdelvaeg creo que has hecho un lindo trabajo al restaurar esta muñeca. Las muñecas de trapo forman parte de la infancia de todas las niñas y que bueno que tu hija podrá tener un bonito recuerdo de su muñeca gracias a tu restauración.
Hola @kattycrochet, muchas gracias. A mí, desde pequeña, nunca me gustaron las muñecas, pero solo por eso, no le voy a prohibir a mi hija que le guste y que juegue con ellas. Espero que cuando crezca, recuerde su adorada muñeca que se la restaure con todo el cariño del mundo, solo para que ella sea feliz.