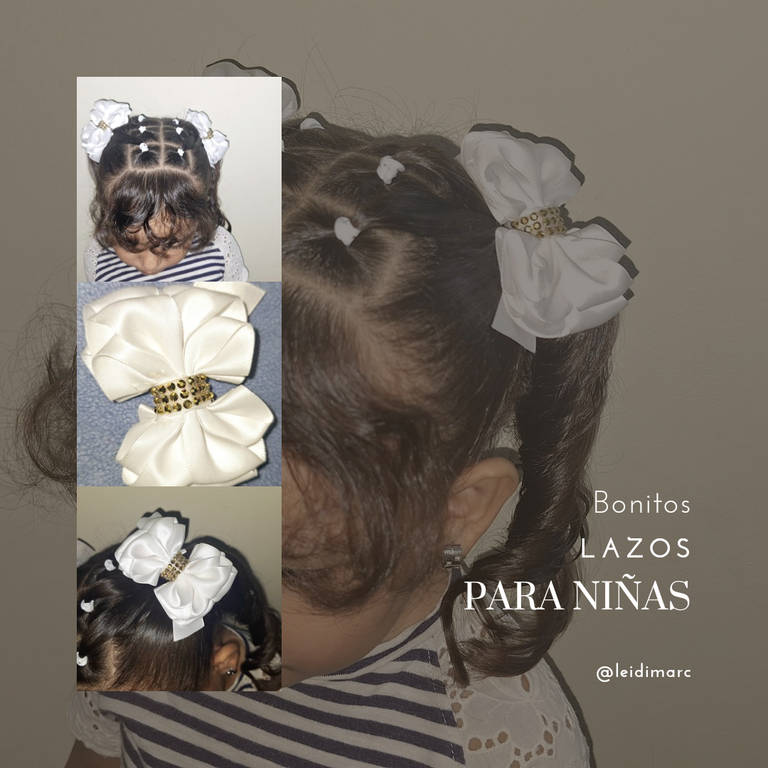
Hola, mi gente bonita de @needleworkmonday, otro lunes de costura, ha llegado y con él una nueva creación manual para mostrarles, en donde la aguja y el hilo son primordiales en el proceso.
Ya les he mostrado varios lazos escolares, por sus colores blanco y azul marino. Este también es para la escuela, pero por ser blanco es más combinable.
Estos son más pequeños, por eso los hice de a par y así hacerle dos moños, el peinado característico de las niñas para ir a clase. Bueno, así se los hago a mis princesas y se ven tan lindas, si no miren a mi princesa Ámbar cómo los luce.
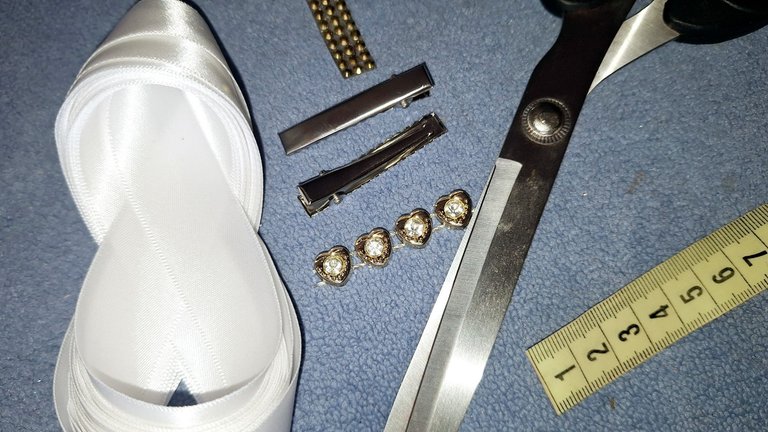
Materiales
Si gustan hacerlo, sigan el paso a paso; es muy fácil de hacer. Estos son los materiales a utilizar:
Cinta de raso de 2,5 cm blanca.
Pinzas tipo caimán.
Hilo y aguja
Decoraciones.
Alfileres.
Tijera.
Cinta métrica.
Silicona.
 |  |
|---|---|
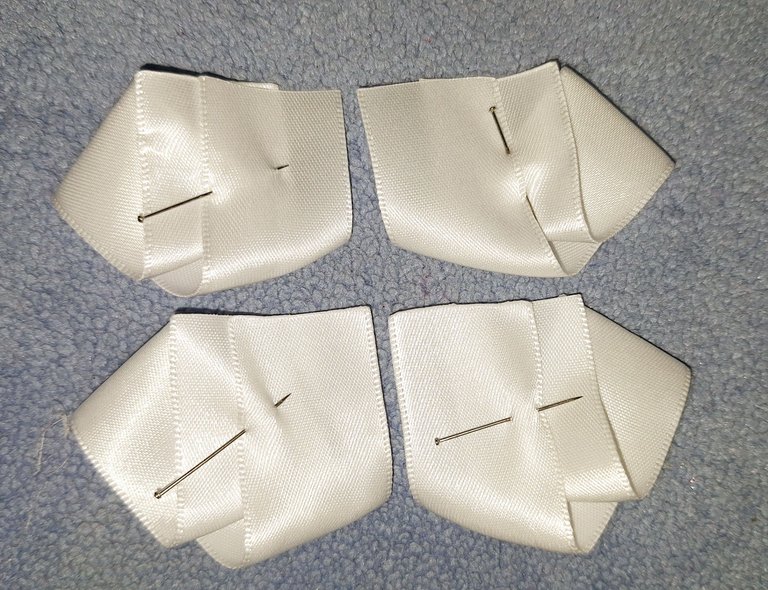 |  |
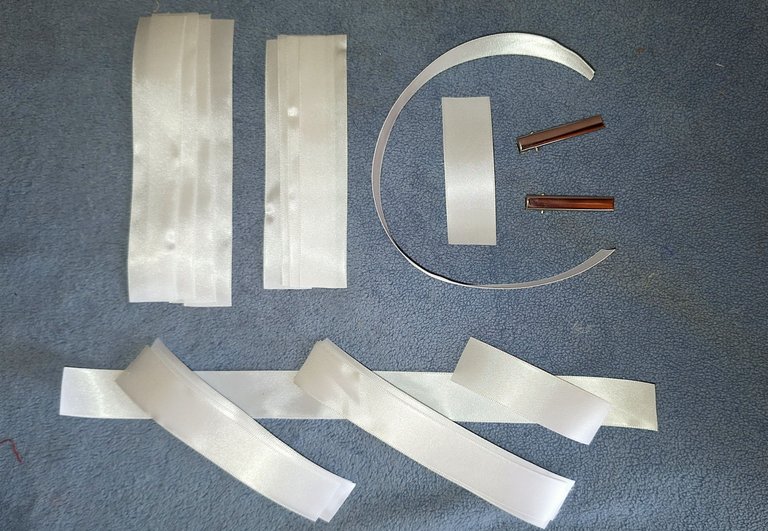
Por cada lazo corté 4 trozos de cinta de 16 cm y 4 de 18 cm. Una de 26 cm y otra de 8 cm para el centro.
Ahora vamos a formar dos lazos pequeños y dos más pequeños con el mismo procedimiento.
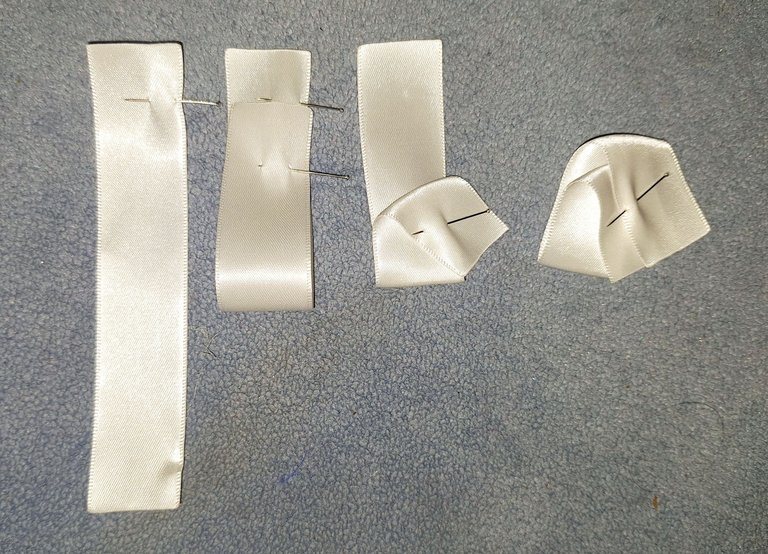
Desde un extremo hacia adentro, medí 2 cm, coloqué un alfiler para marcar. Doblamos la cinta hasta la marca, luego la volvemos a doblar hacia una esquina del centro.
Así lo hacemos con las demás, teniendo en cuenta que dos las doblamos hacia la derecha y dos hacia la izquierda.
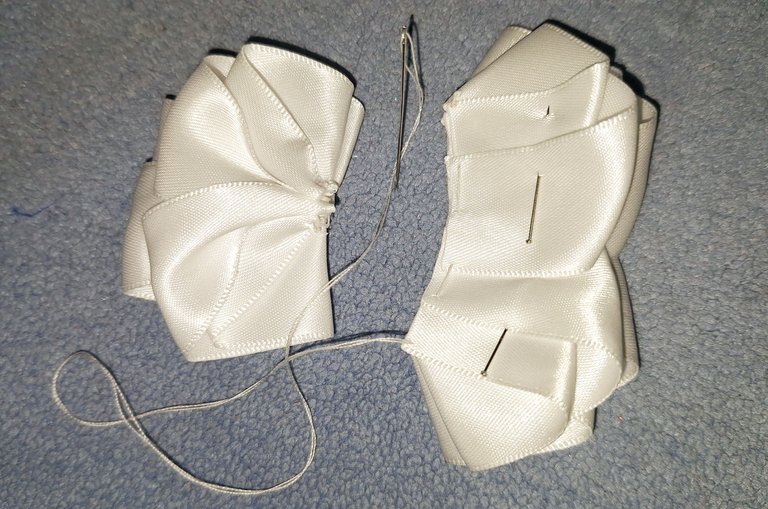
Luego es hora de pasar costura, son 6 puntos que debemos hacer, tal cual se muestra en la imagen, para que quede un bonito fruncido. Cabe destacar que debemos pegar las cintas más pequeñas encima de las más grandes antes de pasar la costura.
 |  |
|---|---|
 |  |
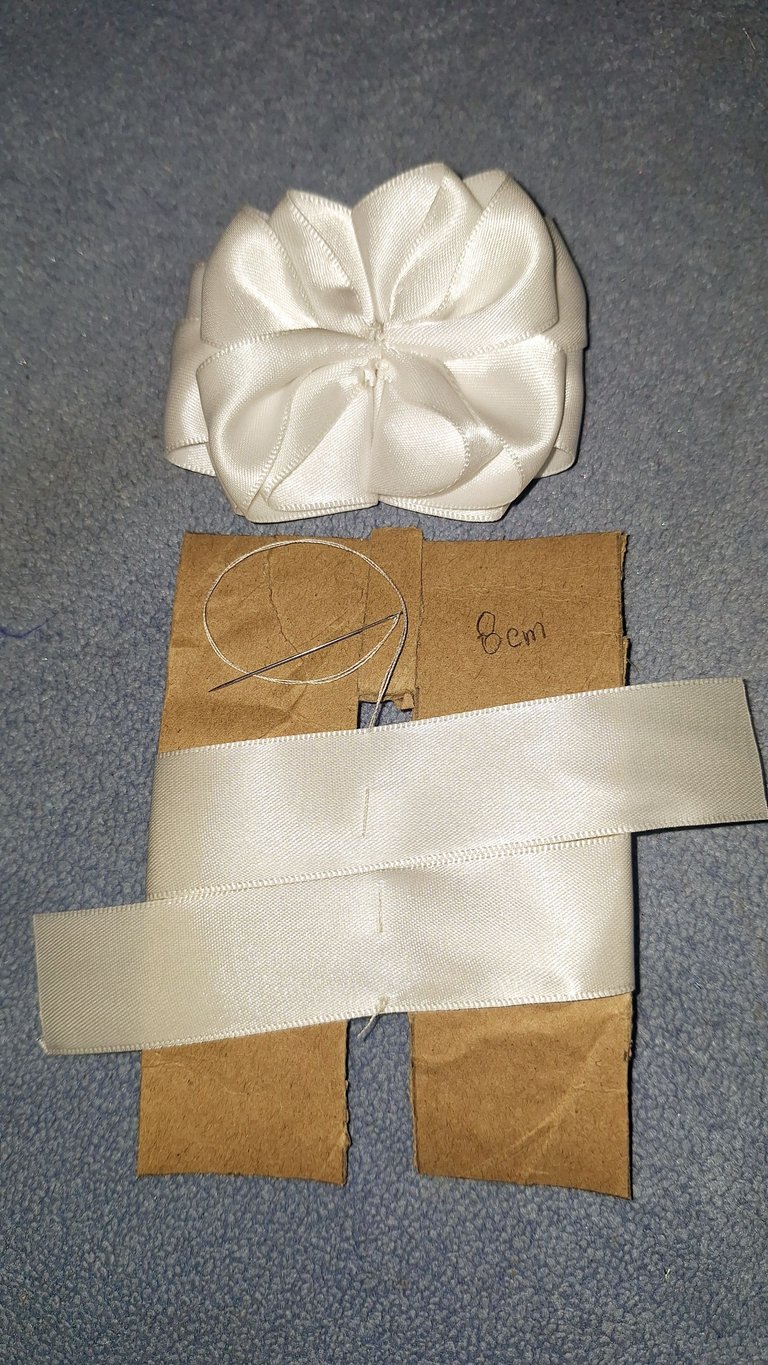
Una vez hecho el lazo principal, es necesario hacer un lazo base para que le dé más volumen. Esto lo hacemos envolviendo la cinta en este molde de 8 cm, dejando unas puntas y cociendo por el centro.
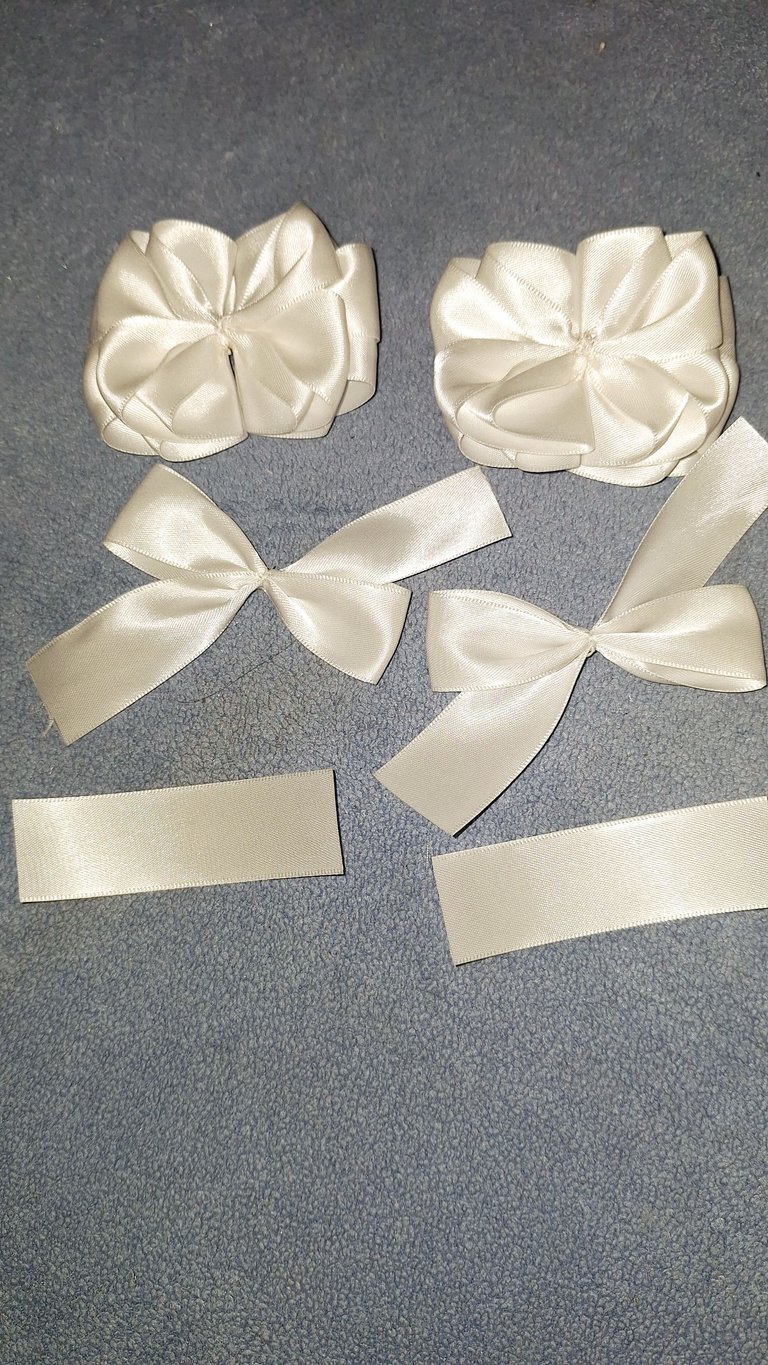
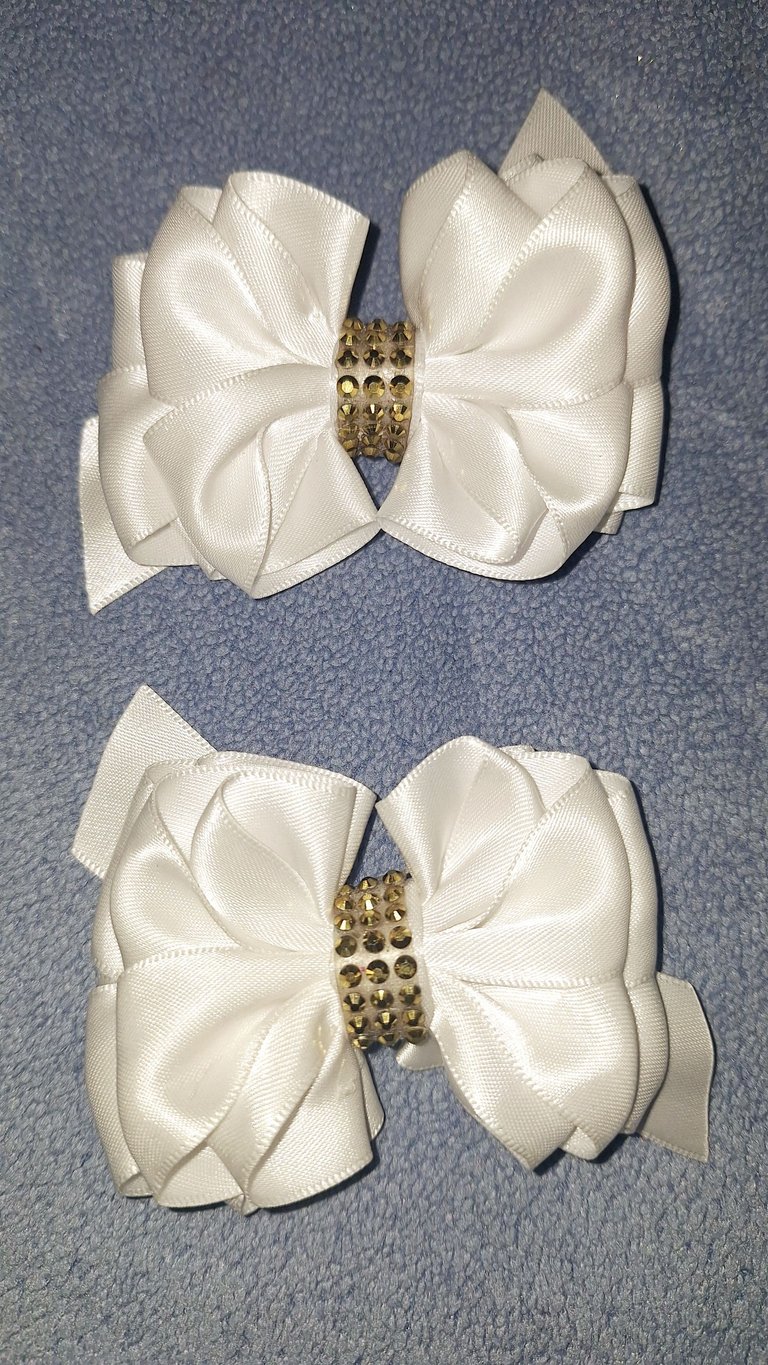
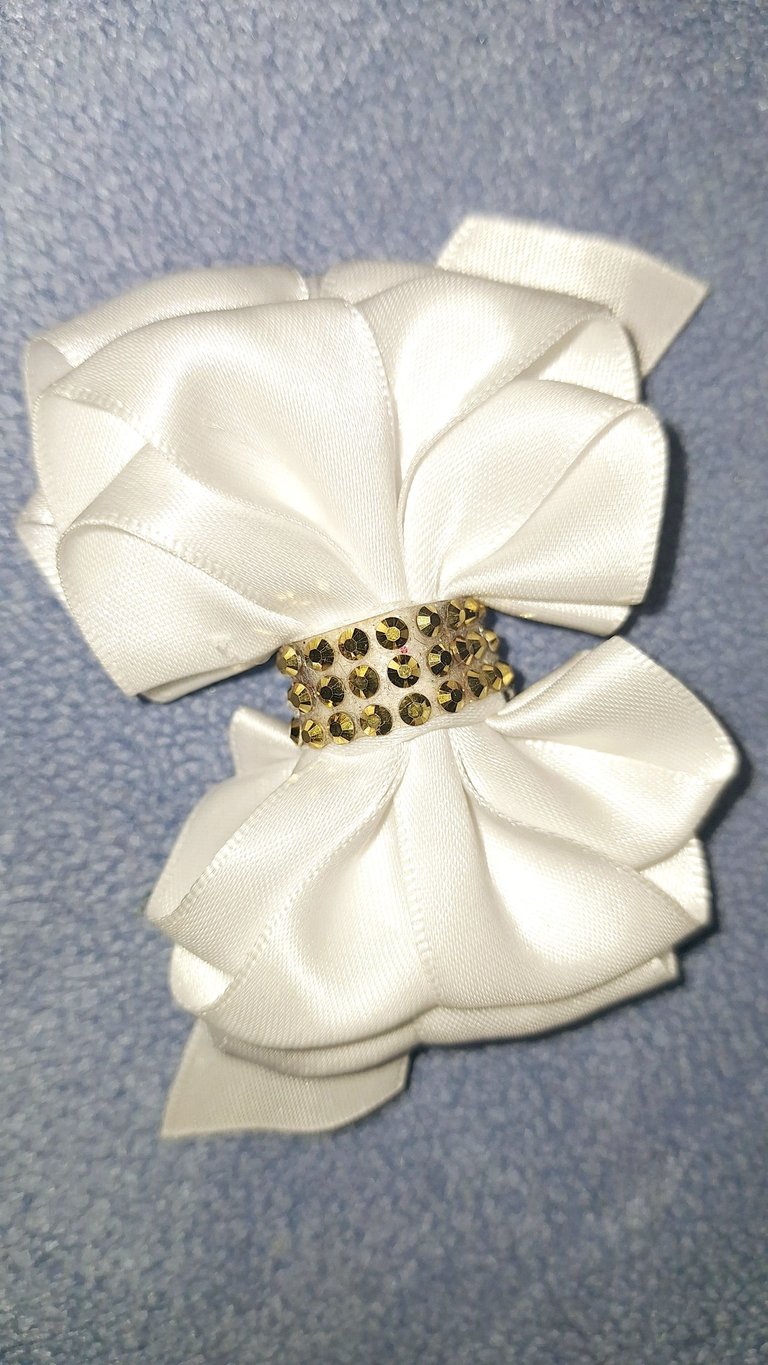
Y así tenemos todas las piezas listas para armar estos hermosos lazos. Se le pegan las pinzas y una bonita decoración en el centro en color dorado.
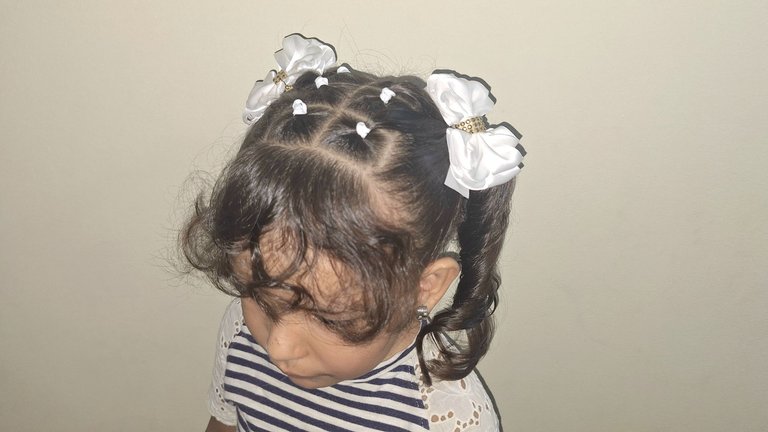
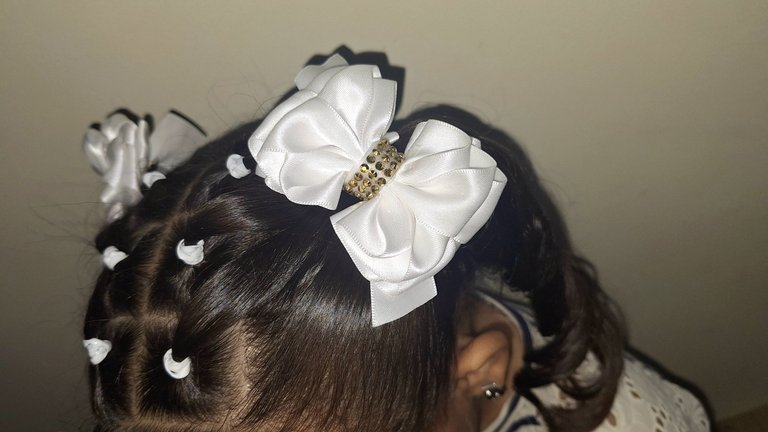

Miren qué bonito lo modeló mi princesa Ámbar. Se pueden hacer diferentes peinados para usar estos accesorios para el cabello de las niñas.
Una anécdota en la elaboración de estos lazos fue, que una vez listos, cuando les voy a tomar las fotos, me doy cuenta de que en uno de los lazos, había colocado en un lado, la parte más grande arriba y la más pequeña abajo, así que tuve que deshacer todo el lazo y hacerlo de nuevo. La idea es que se vea hermoso y no con defectos.
Todavía me queda un par de lazos que compartirles y los que me falta hacer, que tengo días pendientes por hacer y las niñas me los piden a gritos, je, je, je.
Pero primero tengo que hacerles unas camisas, para estos días que es el cumpleaños de Ámbar, ya se los estaré mostrando.
Bueno, amigos, esto ha sido todo por hoy. Me despido deseándole una hermosa semana. Bendiciones.


Cute bows for girls

Hello, my beautiful people of @needleworkmonday, another sewing Monday, has arrived and with it a new handmade creation to show you, where needle and thread are paramount in the process.
I have already shown you several school bows, for their white and navy blue colors. This one is also for school, but because it is white it is more combinable.
These are smaller, so I made them in pairs to make two bows, the characteristic hairstyle of girls to go to school. Well, that's how I make them for my princesses and they look so cute, if not look at my princess Amber how she wears them.

Materials
If you like to do it, follow the step by step; it is very easy to do. These are the materials to use:
White satin ribbon of 2.5 cm.
Alligator clips.
Thread and needle
Decorations.
Pins.
Scissors.
Tape measure.
Silicone.
 |  |
|---|---|
 |  |
For each loop I cut 4 pieces of ribbon of 16 cm and 4 of 18 cm. One of 26 cm and one of 8 cm for the center.
Now we are going to form two small loops and two smaller ones with the same procedure.
From one end inward, I measured 2 cm, I placed a pin to mark. We fold the ribbon to the mark, then fold it back to one corner of the center.
We do the same with the others, keeping in mind that we fold two to the right and two to the left.
Then it's time to sew 6 stitches, as shown in the picture, to get a nice pucker. It should be noted that we must glue the smaller ribbons on top of the larger ones before sewing.
 |  |
|---|---|
 |  |
Once the main ribbon is done, it is necessary to make a base ribbon to give it more volume. We do this by wrapping the ribbon in this 8 cm mold, leaving a few ends and sewing through the center.
And so we have all the pieces ready to assemble these beautiful bows. Glue the clips and a nice decoration in the center in gold color.


Look how beautifully my princess Amber modeled it. You can make different hairstyles to use these accessories for the girls' hair.
An anecdote in the elaboration of these bows was that once they were ready, when I was going to take the pictures, I realized that in one of the bows, I had placed on one side, the bigger part on top and the smaller part on the bottom, so I had to undo the whole bow and do it again. The idea is to make it look beautiful and not flawed.
I still have a couple of bows to share with you and the ones I still have to make, I have days left to do and the girls are screaming for them, heh, heh, heh.
But first I have to make some shirts, for these days is Amber's birthday, I'll be showing them to you.
Well, friends, that's all for today. I bid you farewell wishing you a beautiful week. Blessings.

Mi blog es familiar, de mi día a día, en donde puedo subir fotos de niños u otras personas de mi entorno, NO autorizo a usar mis fotografías sin mi autorización.
My blog is a family blog, of my daily life, where I can upload photos of children or other people around me, I do NOT authorize you to use my photos without my authorization.
Dispositivo | Device | Samsung Galaxy A54
Fotos editadas en: |Photos edited in | CC Express for Picsart / Canva
Separadores hechos en | Separators made in | CC Express for Samsung
Traducción con | Translation with| DeepL
Esos lazos están bellos mami, tienes que hacerme unos así.
Gracias mi princesa. Si, se los tengo pendiente hija.
This is really cute
You baby girl rock it with so much beauty
Saludos, gracias por visitar mi blog
Que bien que le gusto
Si ella es mi pequeña modelo.
Amiga tu trabajo es muy bonito, me gusto como has explicado el paso a paso. La forma en que uniste cada pieza y el resultado se ve profesional.
¡¡¡Saludos!!! ❤️
Tan bella amiga, me alegra que así lo veas, es hecho con mucho cariño para una linda princesa y el tutorial para esta bonita comunidad.
Saludos y bendiciones 😘
Amo cada vez más , los lazos que haces🥰
Gracias amiga..
Ojalá también le puedas hacer sus lacitos a la princesa Olivia. Este es sencillo y bonito.