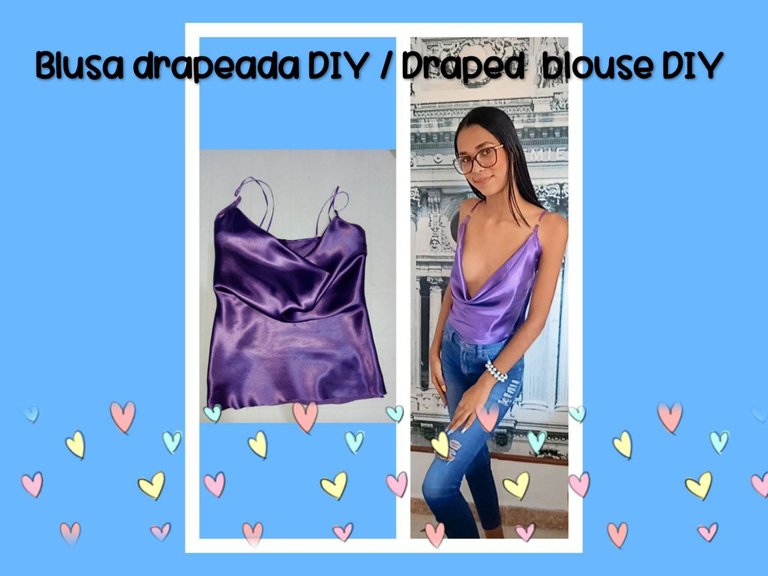
Decidi comenzar un reto de replicar videos y DIY que consiga en youtube que a ver que tan bien puedo hacer las cosas, poner a prueba mis hablidades empiricas de costura, y en el camino aprender tips de costura que me sirvan para mejorar. Desde hace mucho tiempo estaba enamorada de los vestiditos drapeados con gran escote que usan las influencers en instagram, asi que cuando encontre el video y el patron me motive a empezar esta serie, pues quedaba completamente con mi idea de los retos de costura.
I decided to start a challenge to replicate videos and DIY that I get on youtube to see how well I can do things, test my empirical sewing skills, and along the way learn sewing tips that will help me to improve. For a long time I was in love with the draped dresses with great necklines that the influencers use on instagram, so when I found the video and the pattern I was motivated to start this series, because it completely fit my idea of sewing challenges.
Estando en una tienda de telas hace tiempo compre un metro de Razo Japon, en un color morado metalizado que me dejo encantada, como ya tenia la tela, solo me faltaba comprar los materiales restantes.Para realizar la camisa utilice:
- 1 Metro de tela razo
- Hilo del color de la tela
- 1 Metro de cinta de razo de 1cm
- 2 Aros de lenceria transparentes
- Maquina recta
- Tijera
- Plancha
- Alfileres
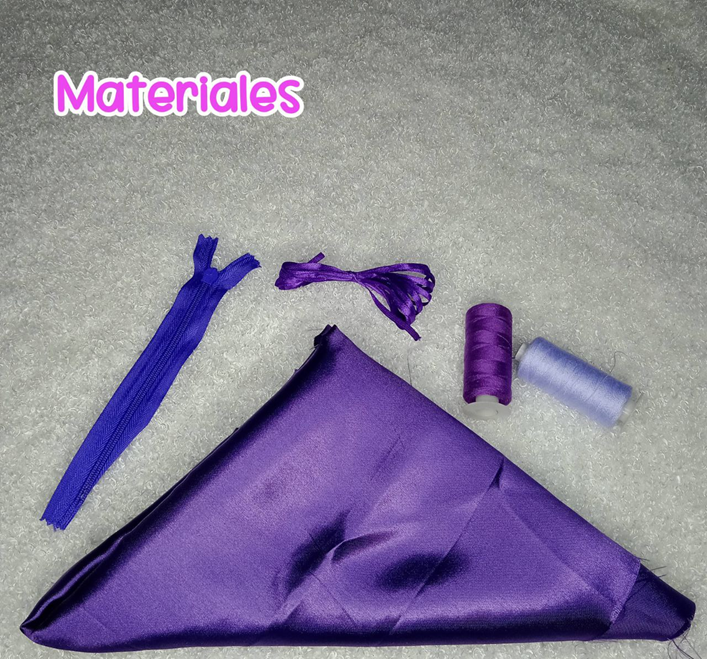
Being in a fabric store some time ago I bought a meter of Razo Japon, in a metallic purple color that left me enchanted, as I already had the fabric, I just needed to buy the remaining materials:
- 1 meter of razo fabric
- Thread in the color of the fabric
- 1 meter of 1cm loop ribbon
- 2 transparent lingerie hoops
- Straight machine
- Scissors
- Iron
- Pins
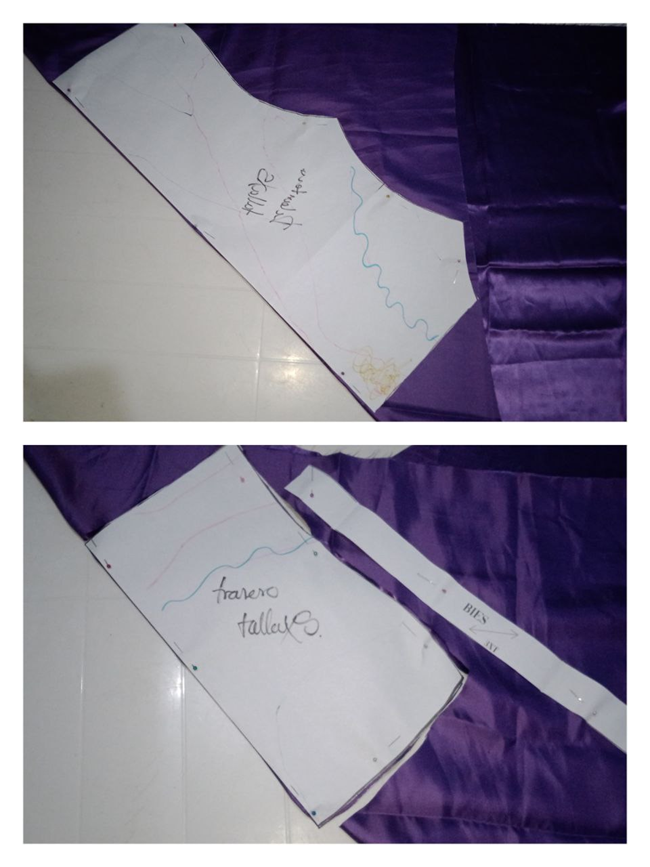
Yo modifique un poco la forma en como realice la camisa respecto al video, y queria modificarla aun mas colocandola mas ceñida al cuerpo y colocandole un cierre invisible, aunque al final no lo hice pues la camisa ya era lo suficientemente pequeña. Ya que elegi la talla XS del patron.
I modified a little the way I made the shirt with respect to the video, and I wanted to modify it even more placing it tighter to the body and placing an invisible zipper, although in the end I did not do it because the shirt was already small enough. I chose size XS from the pattern.
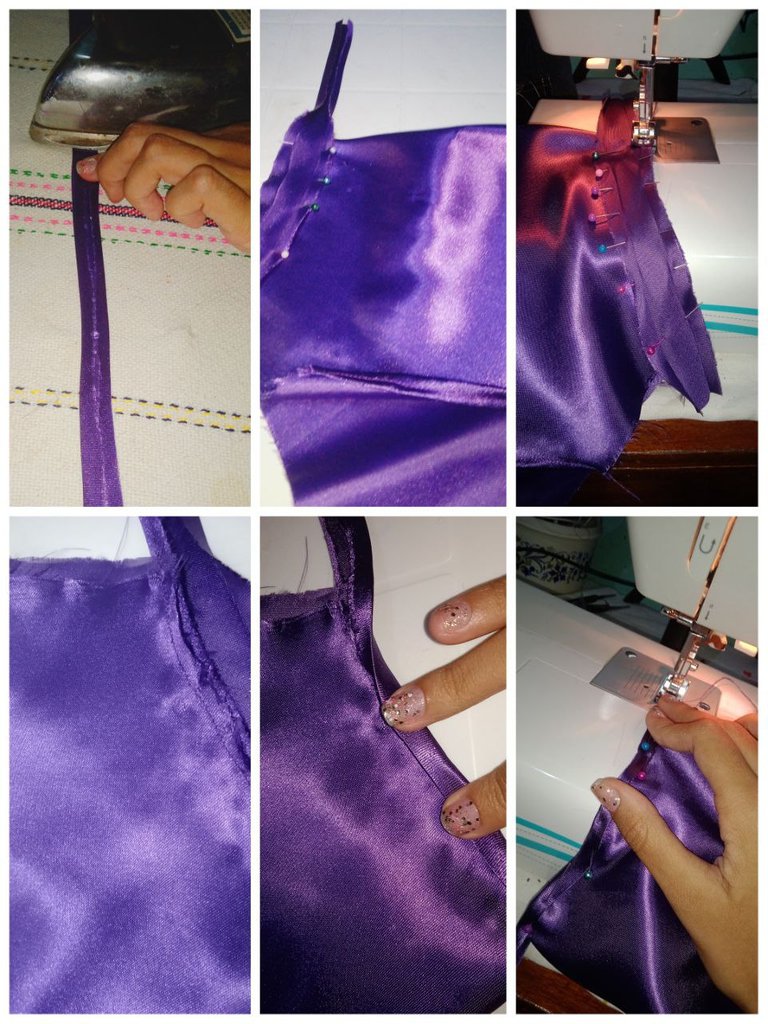
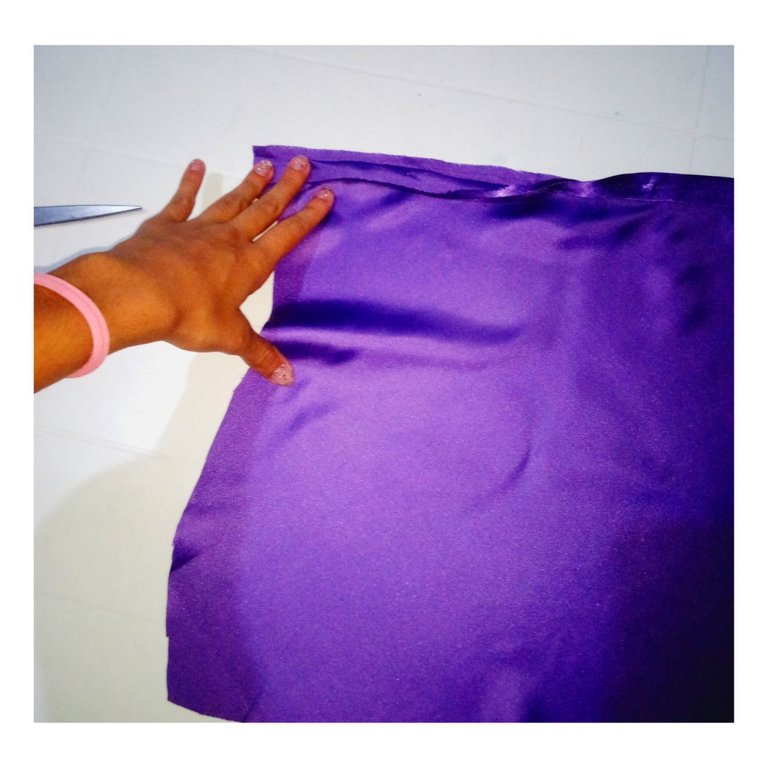
Comence colocando los patrones en la tela al sesgo, es decir, con la tela doblada en diagonal, pues esta tela debe ser cortada si para que la costura no salga deforme, corte la tela a una pieza por patron y 2 para el bies de la camisa. Ya con todas las piezas listas comence pasando una costura en la vista del escote para que la tela no se fuera deshaciendo.
I started placing the patterns on the fabric on the bias, that is, with the fabric folded diagonally, as this fabric should be cut if so that the seam does not come out deformed, cut the fabric to one piece per pattern and 2 for the bias of the shirt. Once all the pieces were ready, I started sewing a seam at the neckline so that the fabric would not unravel.
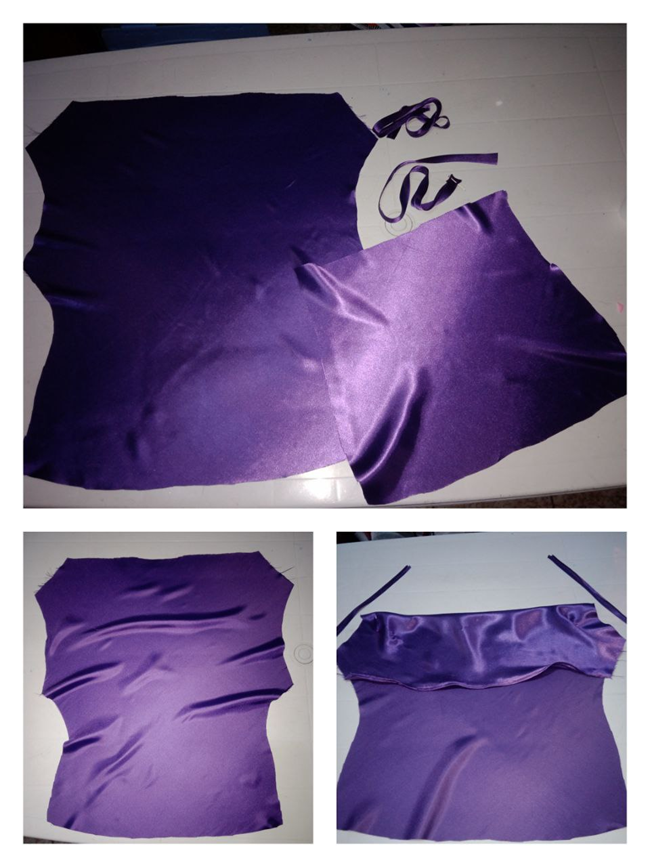
Con el escote listo, empece a doblar y planchar las cintas que habia cortado pars formar el bies de la costura de la sisa y a espalda, en lo que estuvieron listas hice la costura empezando primero con uno de los lados del doblez y juntando la vista con la camisa por la sisa, y luego dando vuelta al bies para hacer la costura delantera, de igual forma hice con la parte de la espalda.
With the neckline ready, I started to fold and iron the ribbons that I had cut to form the bias of the armhole and back seam, as soon as they were ready I sewed the seam starting first with one of the sides of the fold and joining the view with the shirt by the armhole, and then turning the bias to make the front seam, in the same way I did with the part of the back.
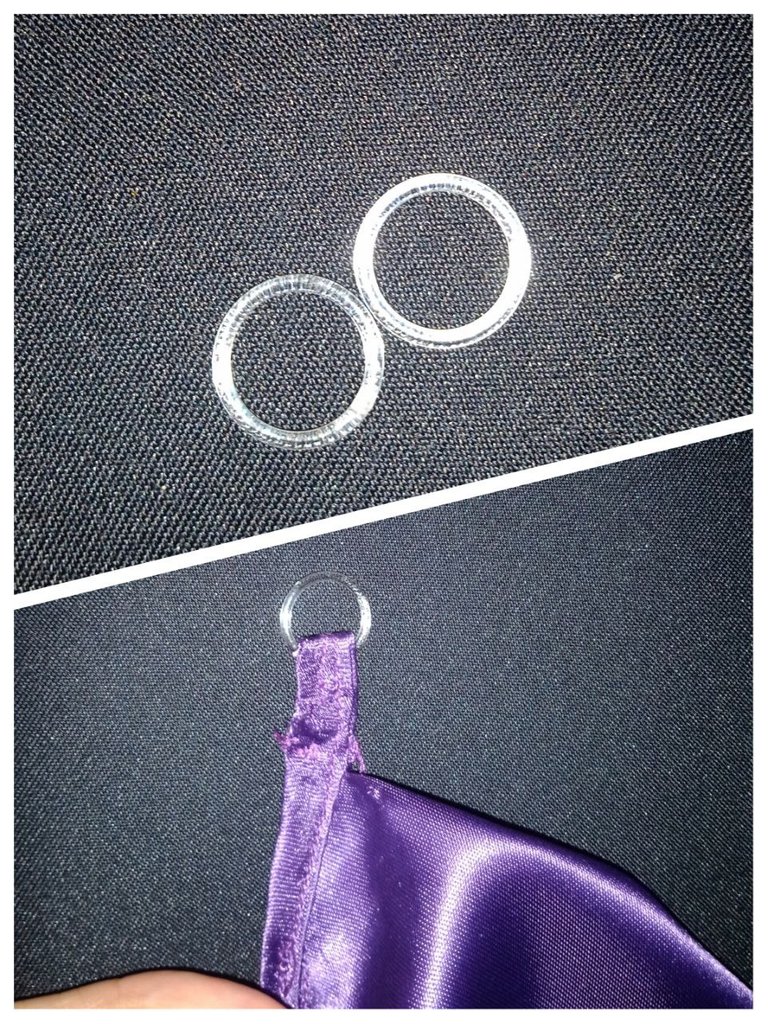
En la costura del bies de la sisa fue que me puse creativa, pues utilice los aros de lenceria para poder ponerle las cintas a la camisa, esta parte la tuve que coser a mano, porque ya la maquina no queria coser tanta tela.
I got creative when sewing the bias binding on the armhole, I used the lingerie hoops to put the ribbons on the shirt, this part I had to sew by hand, because the machine didn't want to sew so much fabric.
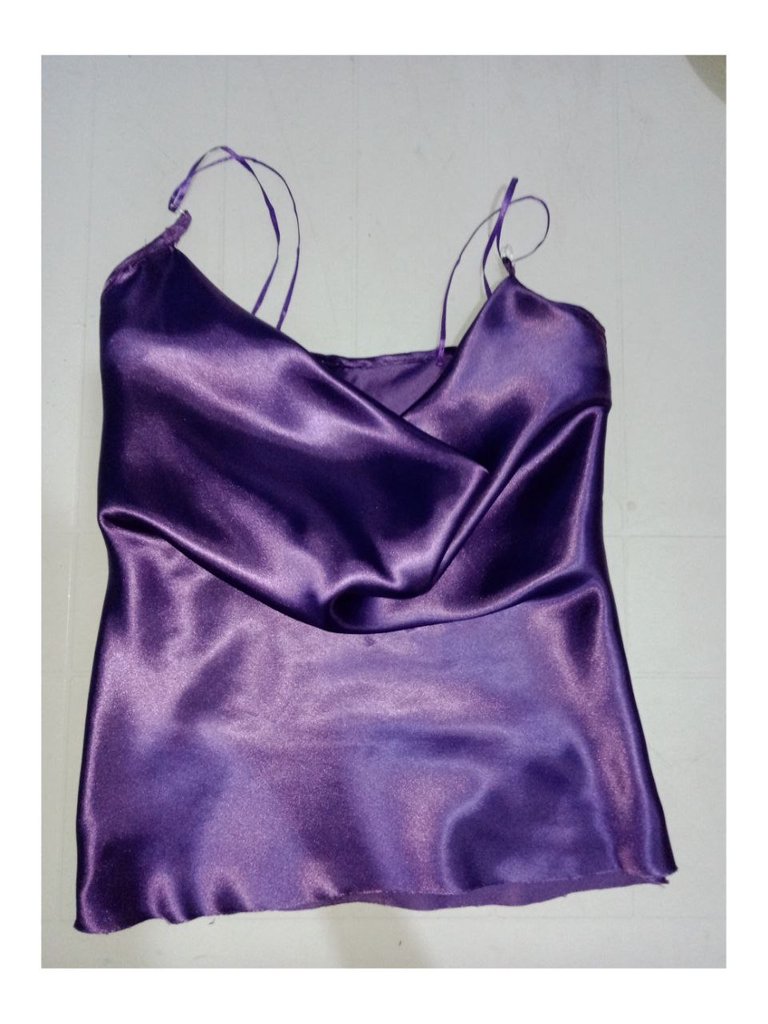
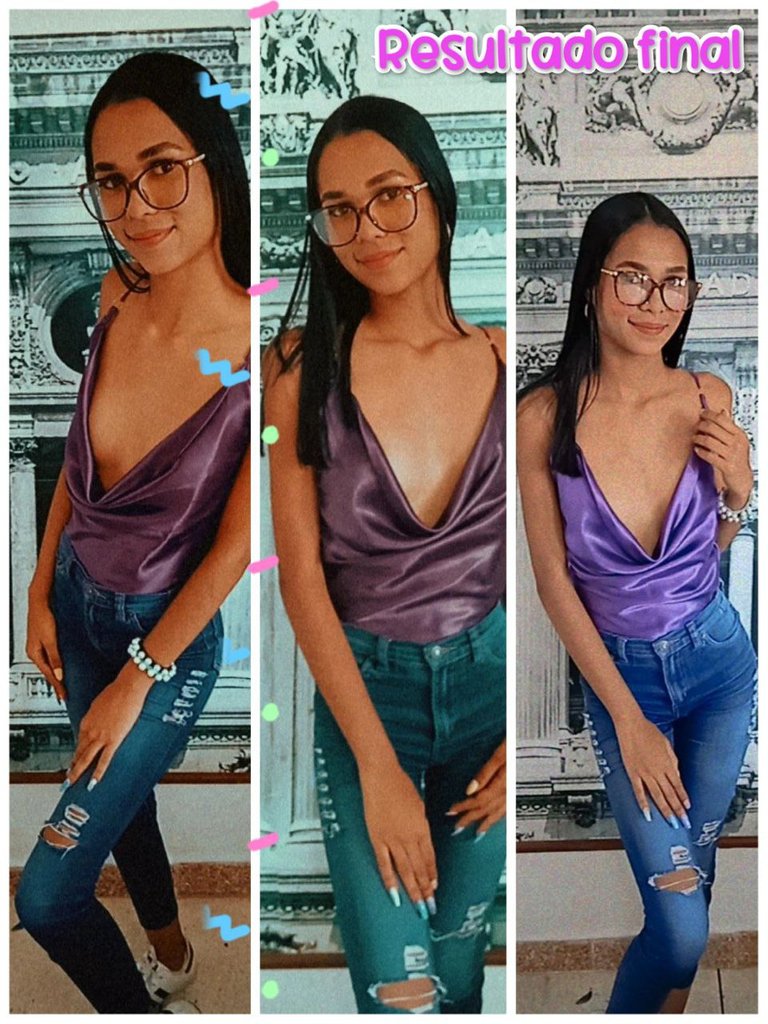
Cuando termine la camisa me di cuenta que no escogi la tala correcta para mi, pero se la regale a una prima que es un poco mas delgada que yo.
When I finished the shirt I realized that I did not choose the right size for me, but I gave it to a cousin who is a little thinner than me.
Si te animas como yo a hacer la camisa te dejo aqui el Link del video que me guie, y alli encuentras el patron armable. Blusa Satinada
If you want to make the shirt like me, I leave you here the link to the video that guided me, and there you will find the pattern that you can assemble. satin blouse
I love draped outfits but never knew a satin fabric can be draped and fall so well like this. Besides I love the purple sure.
Sure looks like a party top.
I love this dearir thanks for sharing the process @nvstekman.
Beautiful thanks for sharing @nvstekman
Congratulations @nvstekman! You received a personal badge!
You can view your badges on your board and compare yourself to others in the Ranking
Check out the last post from @hivebuzz:
Support the HiveBuzz project. Vote for our proposal!
Hi nvstekman,
Join the Curie Discord community to learn more.