Greetings!
How are you all? I am good and I hope you all are also good. Today I am back with another creative idea. Today I am going to make the sleeping mask for my girls. Last Sunday I stitched a frock for my girl and she like it so much so this Monday also I thought to make a frock but on last Monday when they both went for the shopping they saw sleeping mask and they we insisting that I should buy them but I said no it's easy and simple I can make it at home and I can give you both in any colour which you want and they said that we know you can't make same as that but I said yes I can so. They said okay will see if you can't make mean we will buy from here I said OK. So today I am going to show them that I can also make the sleeping mask. So let's start the procedure.
We just need small piece of cloth and a type of elastic band. That's it.
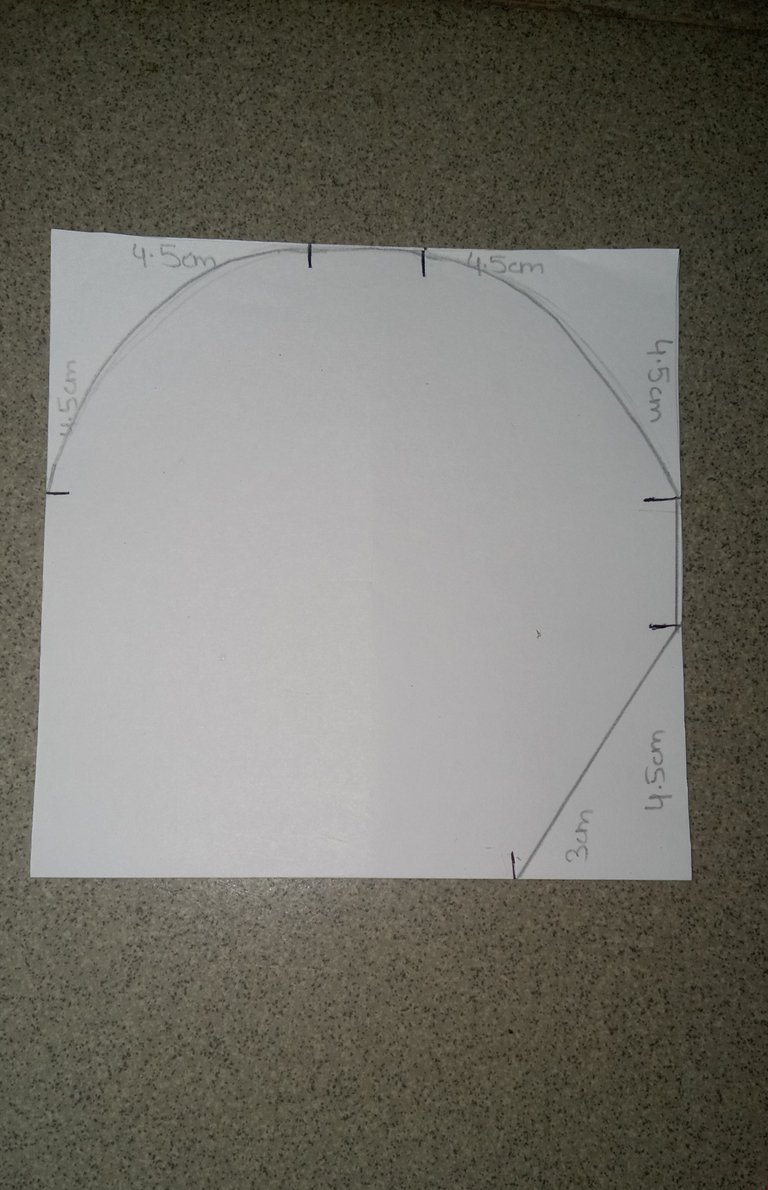
For the pattern first I have taken the white half sheet. And I have cut the length of 22 cm and width 11 cm.

Then I have folded the paper from the middle and marked 4.5 CM on on first two corners.

On the other side also I have marked the 4.5cm lengths.

Then one more side I have marked 4.5 cm length but the other corner of that I have marked 3 cm length.

Then I have joined all the 4.5 CM lengths and made a curve and the point where 3 cm was marked I have drawn a straight line there.
And I have cut that pencil curve and a straight line.
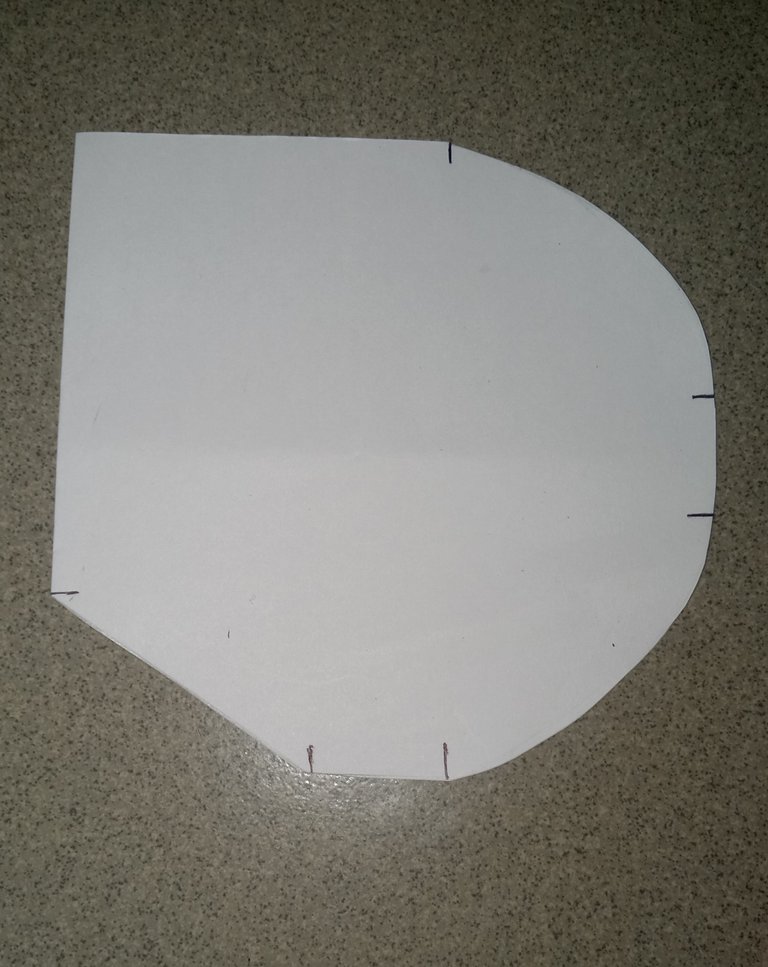
And after opening it we are getting a shape of a Googles. But it's in a big size and we can adjusted according to our face according to our eyes or whatever the but length and width we need.

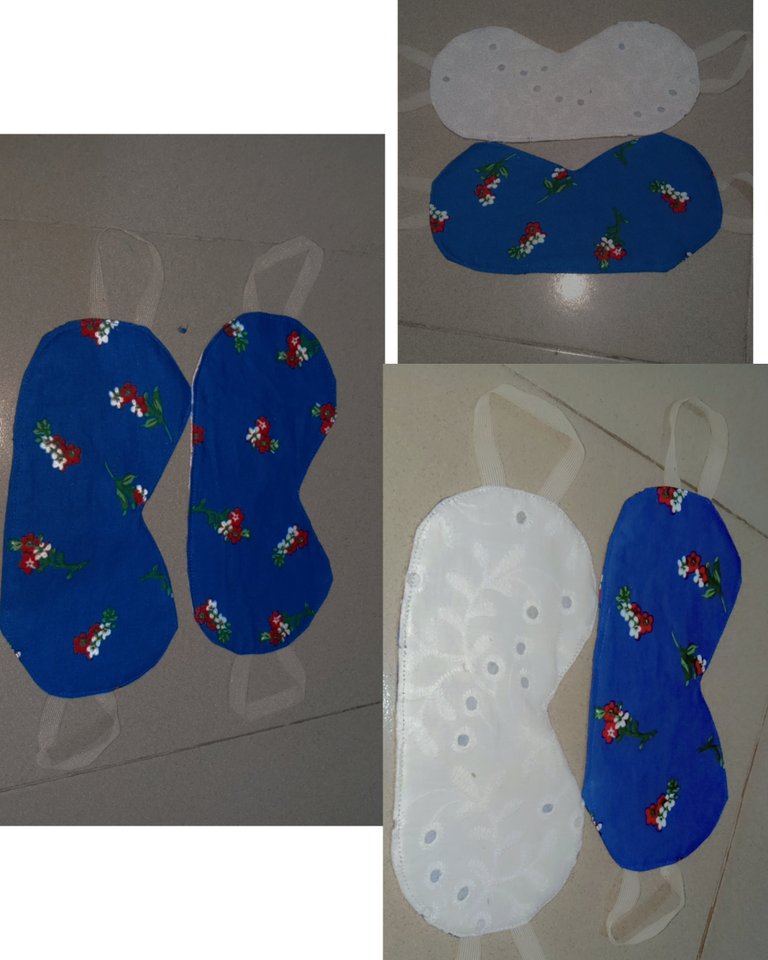
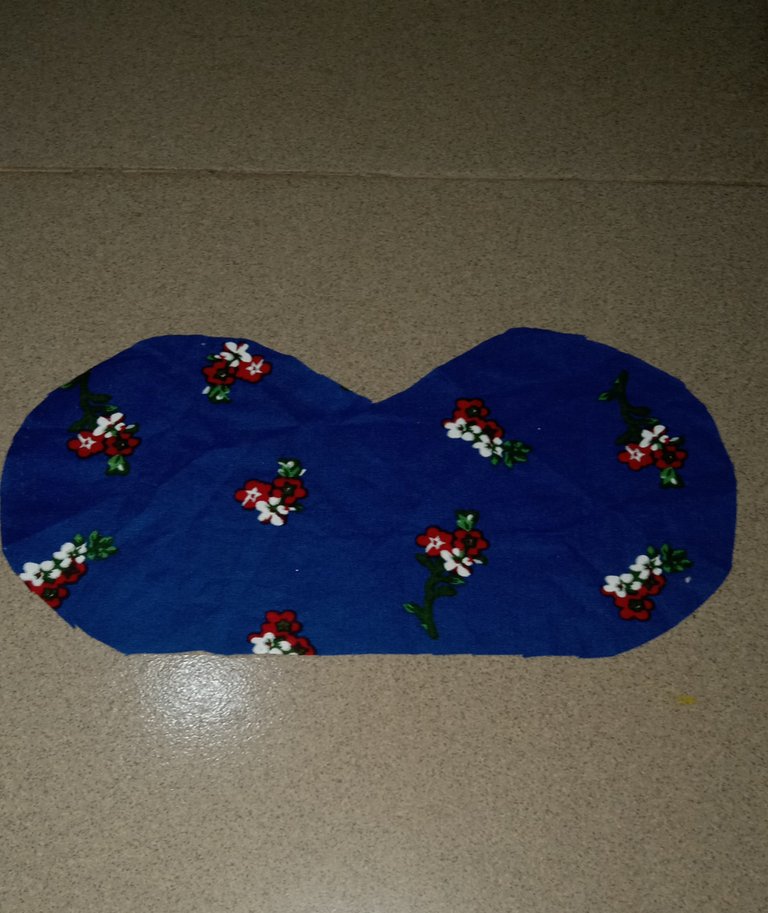
I kept the paper pattern on the cloth and cut the shape of that paper. In one sleeping mask I am using two different colours one side blue and other side white but for the second sleeping mask I have used both the sides in blue colour.
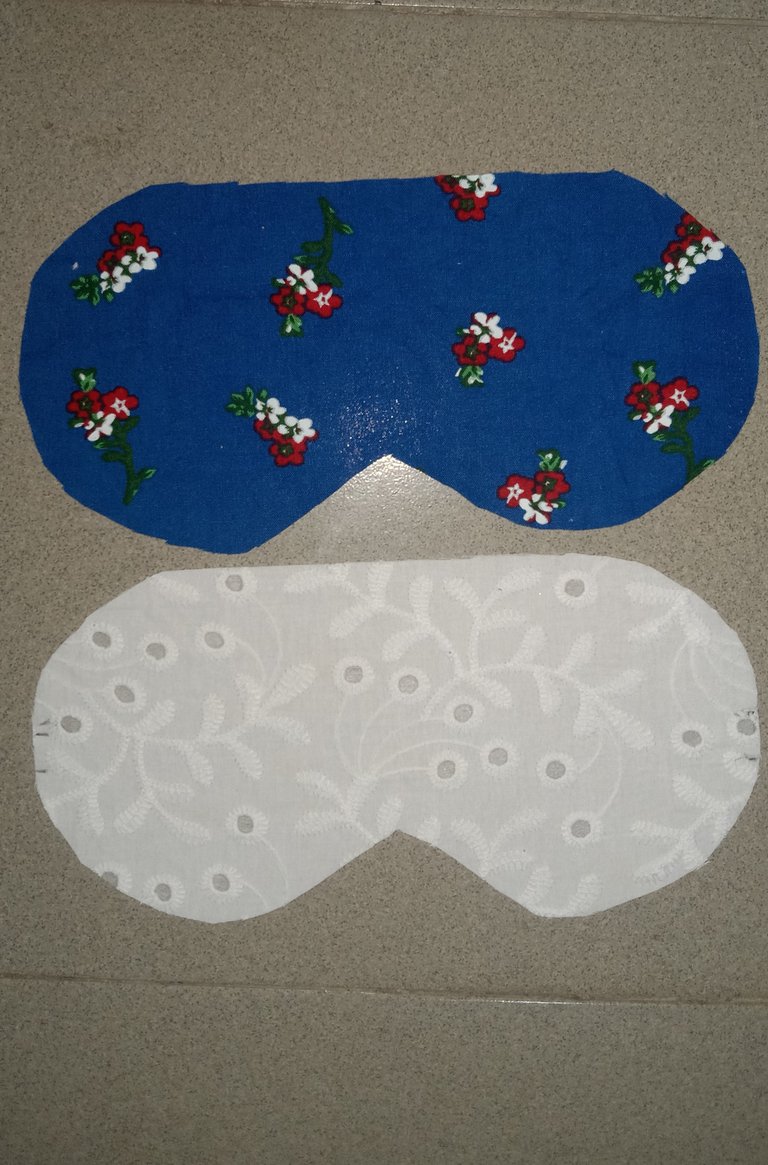
The elastic which I have used here is very thin and comfortable to wear at night.
In one side of the cloth which was blue in colour I have attached the paper press also. Which is need to touch this with the help of iron.

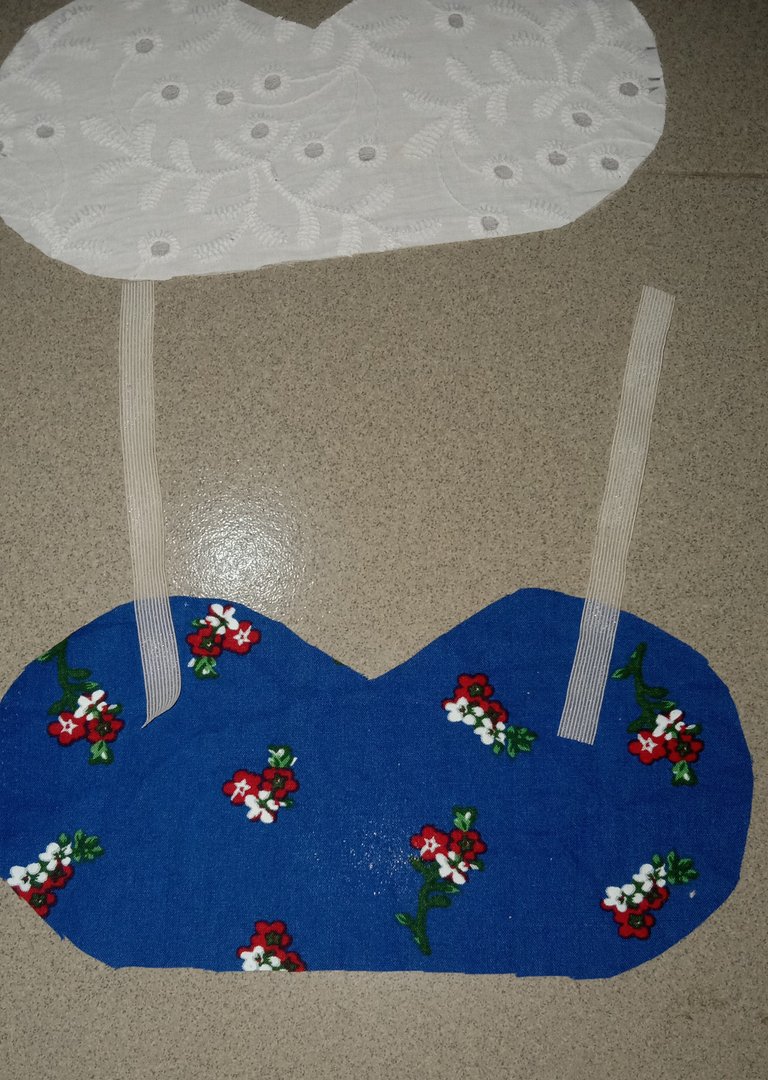
Then both of the pieces we have to keep on each other and use to stitch it from the side.

Before stitching them we have to attach the elastic also.

As we are stitching from the back side so we have to leave some space for opening it.


We have to open it. From some sort of support. Like a needle or something type of stick.
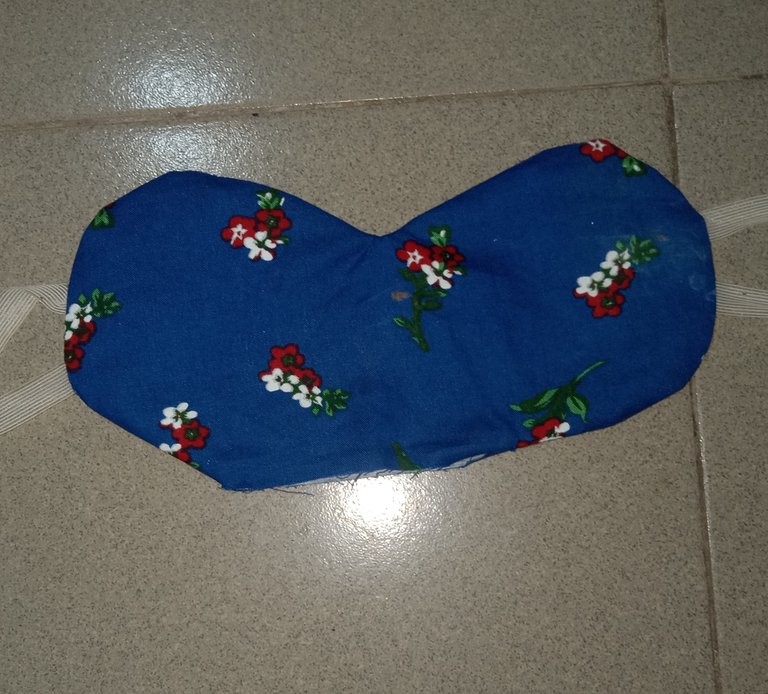
And then from the all of the corners we have to stitch it one more time and here is my sleeping mask.
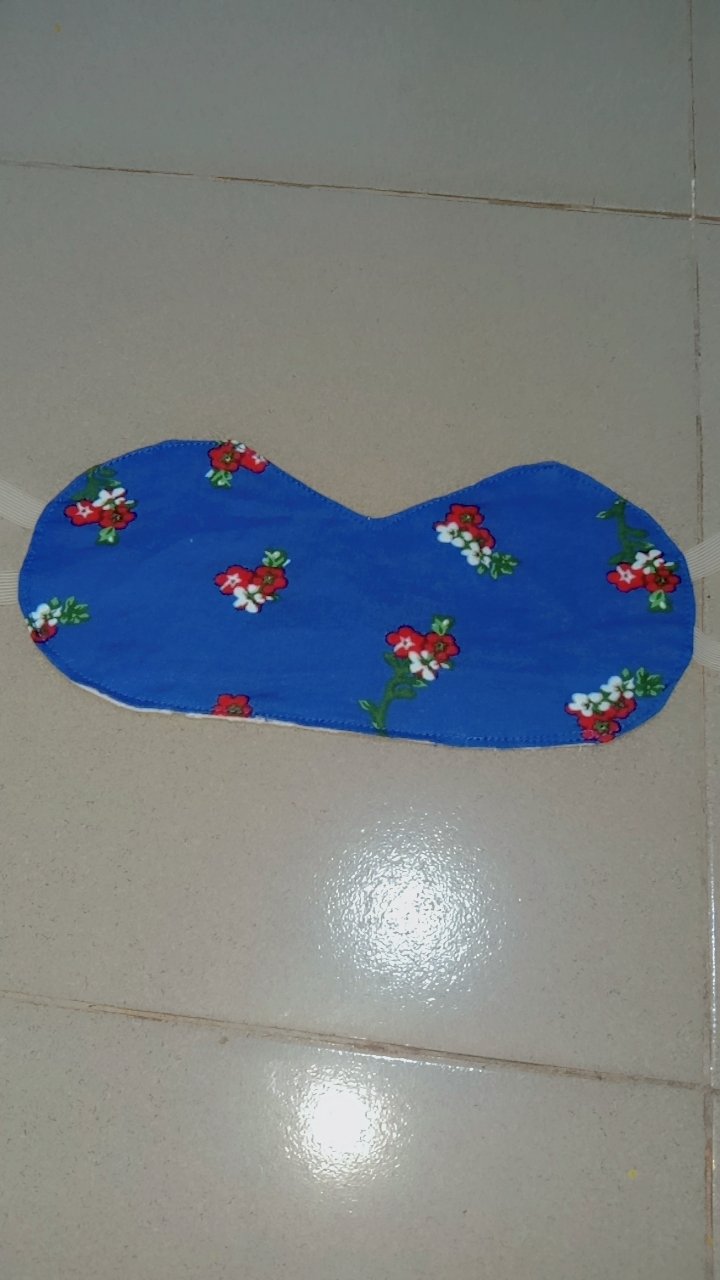
My girls didn't like it still they were saying that you should have inserted cotton also inside of that but as it was my first time so that's why i didn't have much idea but I will try to make the Cotton one also so soon as possible.
I will be back with another creative Idea soon. Maybe on next Monday I will try my best to stitch some frock for my baby girl. So stay safe and stay connected by for now.
Its good that you can save yourself some money by choosing to make the sleeping mask yourself rather than purchase ready made ones at the shopping mall. Well done...
Your leftover fabric turned out to be useful after all. You made a sleeping mask that is beautiful and cost-effective. Well done and thanks for sharing.
selected by @ibbtammy
This is so nice, I'm sure the girls will love this and forget about buying from the store now that you've made this looking nice for them.