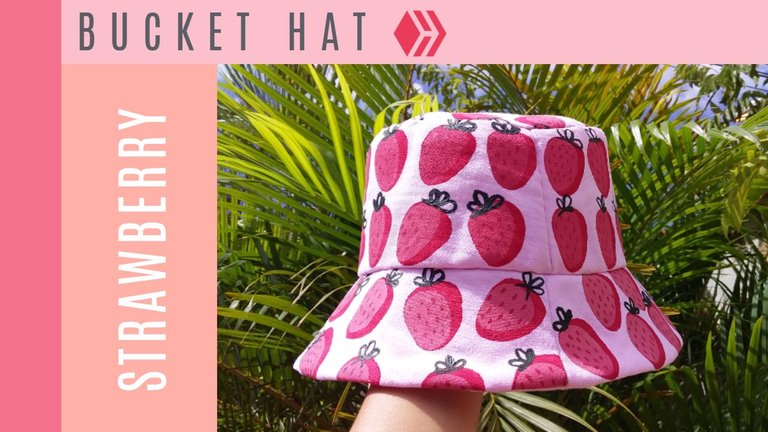
¡Un gran saludo a la comunidad de Hive! | A big shout out to the Hive community!
Hoy quiero compartirles este curioso proceso de cómo realicé mi primer Bucket Hat. Siempre he querido uno y viendo pinterest hace unos días, encontré este diseño y me encantó, así que me animé a recrearlo con materiales que tenía en casa.
Today I want to share with you this curious process of how I made my first Bucket Hat. I've always wanted one and looking at pinterest a few days ago, I found this design and I loved it, so I decided to recreate it with materials that I had at home.
Materiales | Materials:
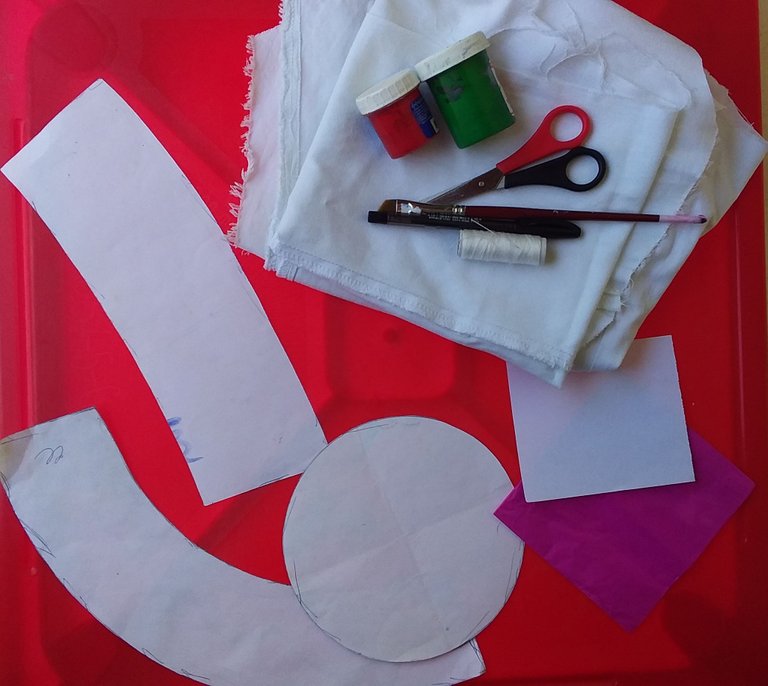
- Patrón
- Hilo y aguja
- Un trozo de goma eva
- Pintura para tela
- Pinceles
- Tijeras
- Un jean blanco viejo.
- Y por último, papel crepé para teñir.
- Pattern
- Thread and needle
- A piece of Eva rubber
- Paint
- Paintbrushes
- scissors
- Old white jeans.
- And finally, crepe paper for dyeing.
Paso 1 | Step 1
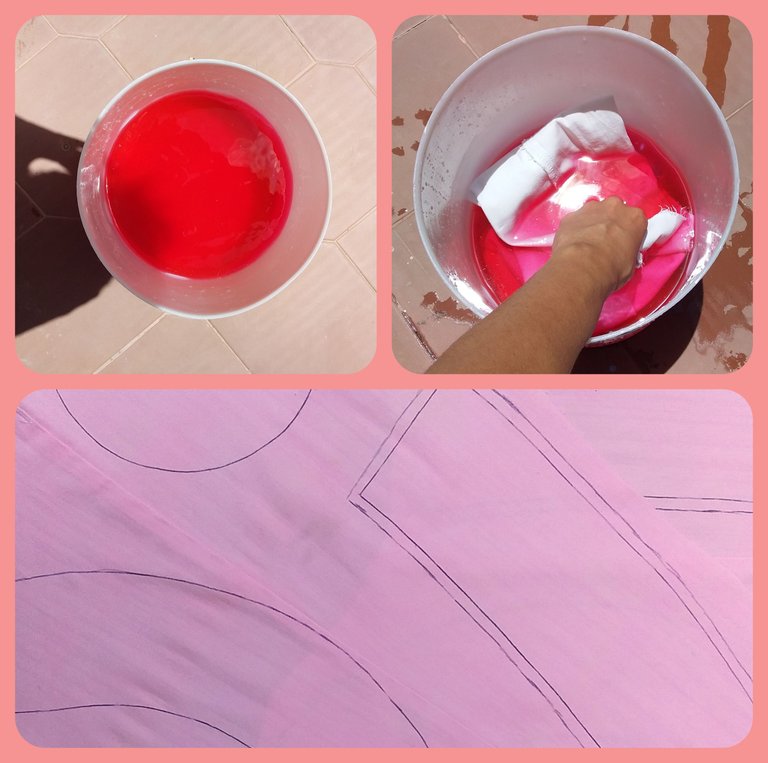
Lo primero que hice fue tomar una balde con suficiente agua y agregar el papel crepé para que desprendiera su color. Sumergí la tela para teñirla y luego de un rato la enjuagué con agua hasta que no saliera más tinte. Al terminar la dejé secar y marqué los patrones del gorro.
The first thing I did was take a bucket with enough water and add the crepe paper to release its color. I soaked the fabric to dye it and after a while rinsed it with water until no more dye came out. When finished I let it dry and marked the patterns of the hat.
Paso 2 | Step 2
Para las fresas | For the strawberries:
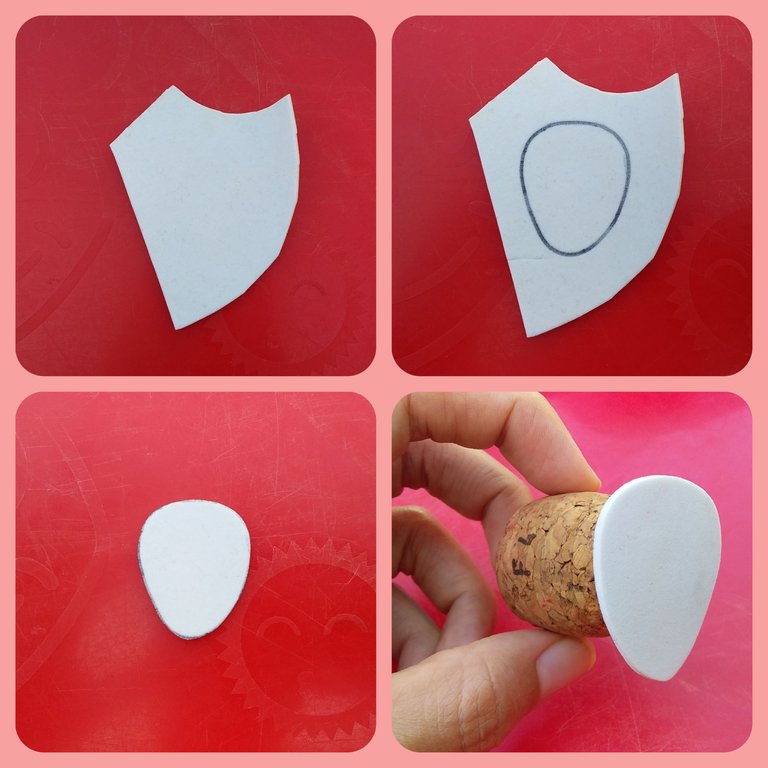
En un trozo de goma eva dibujé la silueta de una fresa, la corté y luego pegué en un corcho para realizar un sello.
On a piece of eva rubber, I drew the silhouette of a strawberry, cut it and then glue it to a cork wine to make a stamp.
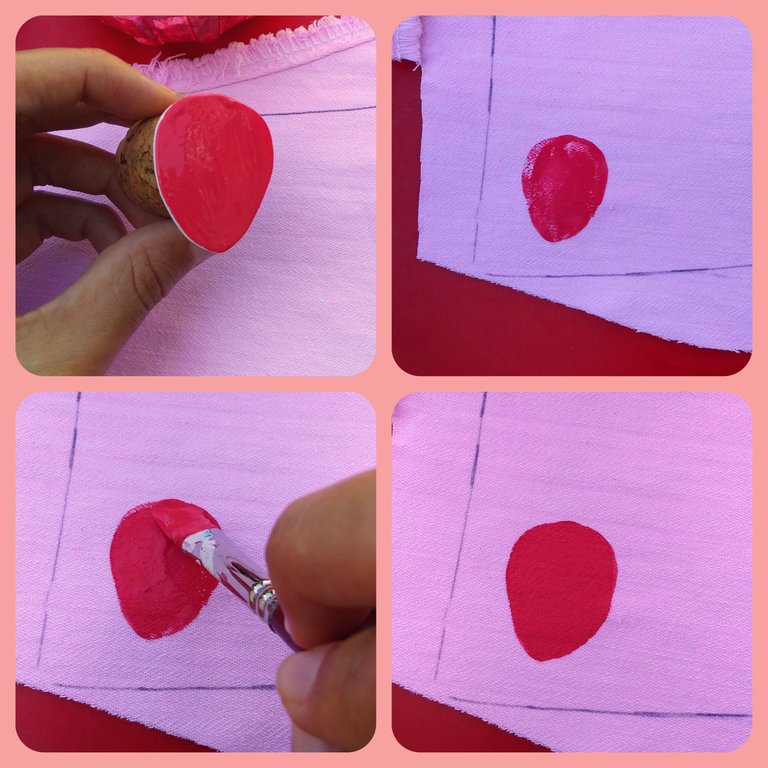
Llené el sello de pintura y lo presioné muy bien sobre la tela para pintarla, luego con un pincel cubrí los espacios en blanco.
I filled the stamp with paint and pressed it very well on the fabric to paint it, then with a brush, I covered the blanks.
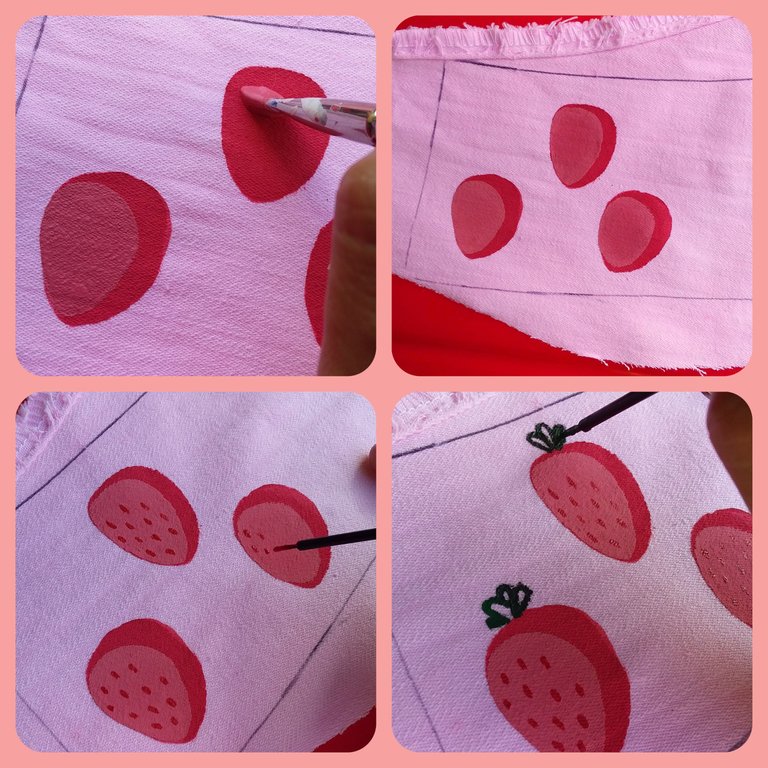
Para darle un toque de luz, apliqué una capa de pintura con un tono más claro sobre el tono base y al secar hice los detalles de las semillas y las hojas.
To give it a touch of light, I applied a coat of paint with a lighter shade on the base tone and when drying I made the details of the seeds and leaves.
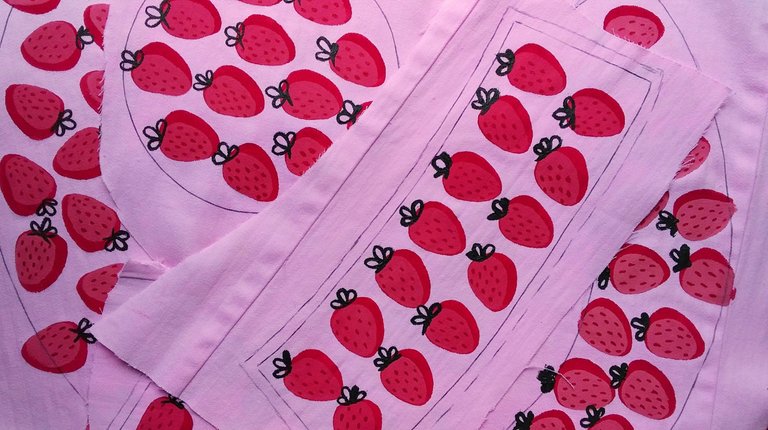
Repetí este proceso hasta llenar todas las piezas.
I repeated this process until all the pieces were filled.
Paso 3 | Step 3
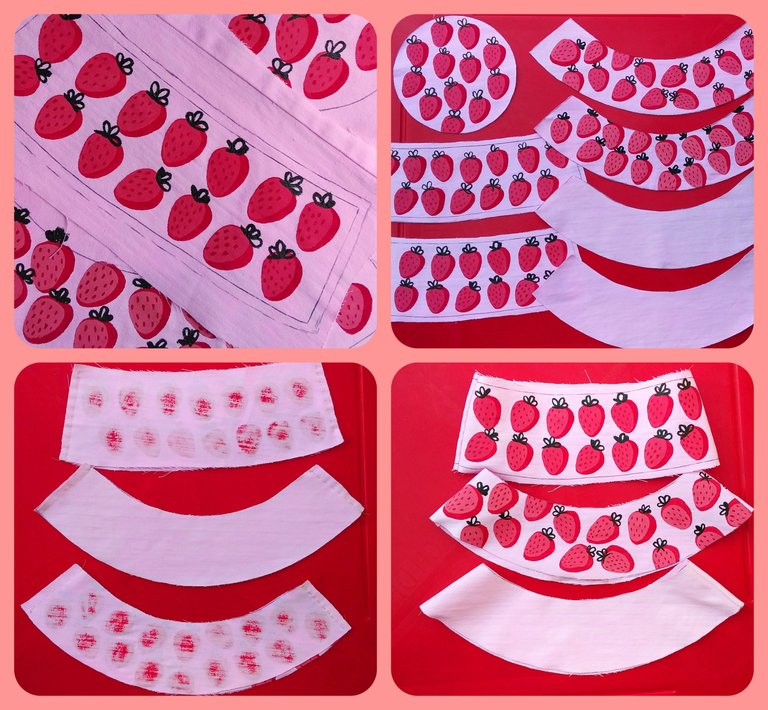
Ya con las piezas pintadas, procedí a cortarlas y coserlas por los extremos. Fueron 7 en total, Un círculo para la parte de arriba, 2 para el medio (cuerpo del gorro) y 4 para las alas (2 externas y 2 internas sin pintar).
With the pieces already painted, I proceeded to cut them and sew them at the ends. There were 7 in total, a circle for the top, 2 for the middle (body of the hat) and 4 for the wings (2 external and 2 internal unpainted).
Paso 4 | Step 4
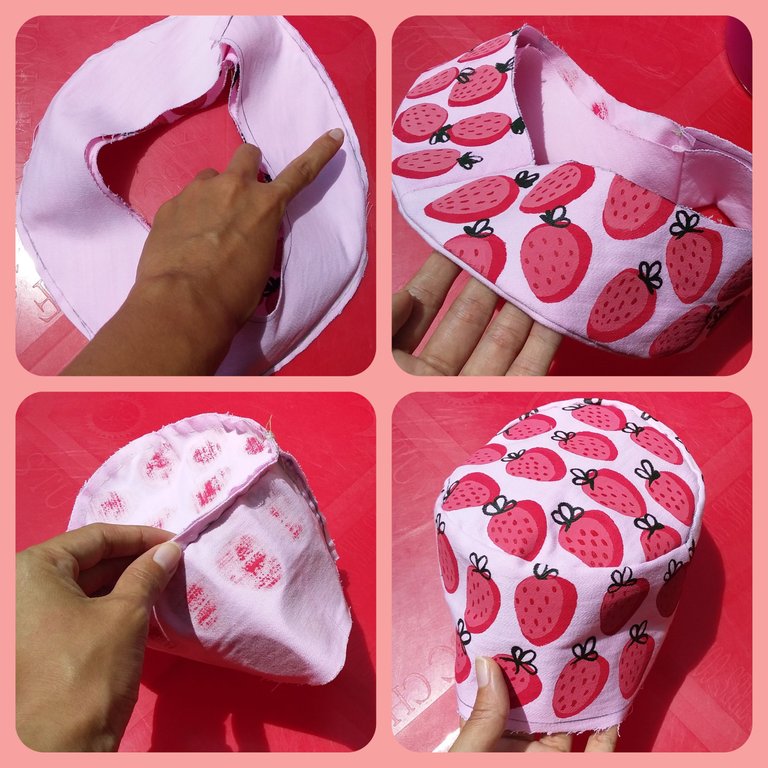
Junté las alas externas con las internas y las cosí por todo alrededor de ellas, luego el círculo con el cuerpo del gorro.
I joined the outer wings with the inner ones and sewed them all around them, then the circle with the body of the hat.
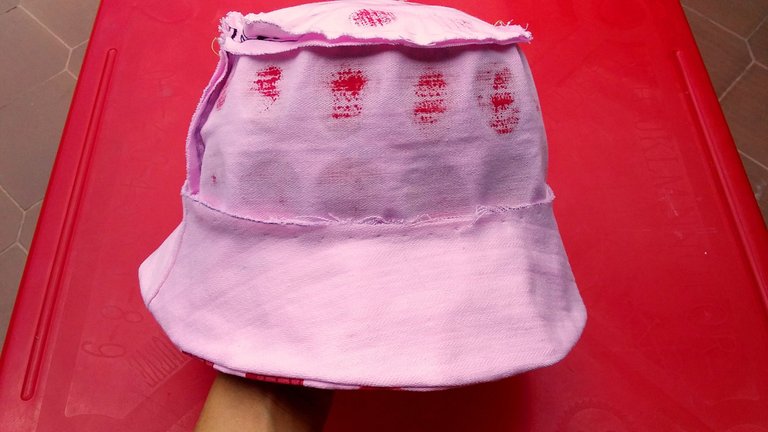
Finalmente cosí ambas piezas.
I finally sewed both pieces.
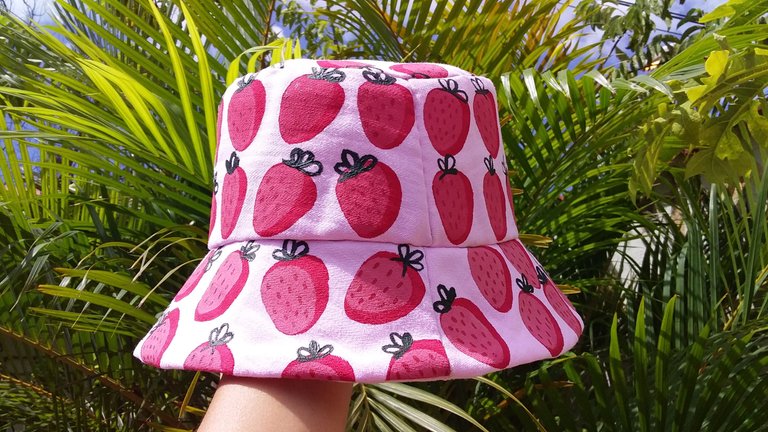
Y listo! Así es como se ve el Bucket Hat. Espero les sirva de inspiración y que les haya gustado. :)
And ready! This is what the Bucket Hat looks like. I hope it inspires you and that you liked it. :)
Te quedó hermoso. No sabía que podíamos teñir la tela con papel crepé. Imagino que la intensidad del tinte dependerá de la cantidad de papel que use.
Es buena técnica usar el foami como sello para estampar.
Los bebés se ven hermosos con este tipo de gorros, aunque los adultos también los podemos usar para un domingo cualquiera- Te felicito, me gustó tu trabajo.
Así es, el papel crepé funciona para dar un poco de color, pero no quedará tan intenso como un tinte de ropa. Muchas gracias por tu comentario :)❤
Hace tiempo que no veía un diy tan dulce y fresco, me gustó muchísimo! Además usaste un patrón de fresitas, me encantan las fresitas 🍓🍓🍓 si tienes cuenta en Pinterest, un tablero con estas fotos quedaría nené, seguro te traería mucho tráfico al blog por lo llamativo y bien hecho que está -chefkiss- 👌
Las fresitas son lo mejor y AAA sin duda lo haré, muchas graciass 😭❤
Btw tu firma con la referencia de Chihiro está bien linda ; u ; 🍙🐲
Gracias uwu ❤ lo había hecho para un diy, pero decidí dejarlo permanente:3
Definitivamente quedé enamorada de tu trabajo, quiero felicitarte y demostrarte mi admiración, Sigue adelante porque tienes futuro.
Me alegra que le haya gustado. Gracias por sus lindas palabras, me ha motivado muchísimo. :)❤❤
Awwwwww this is so cute, I love the strawberry details. Such impressive work!
Congratulations @paugomez! You have completed the following achievement on the Hive blockchain and have been rewarded with new badge(s) :
Your next target is to reach 700 upvotes.
You can view your badges on your board and compare yourself to others in the Ranking
If you no longer want to receive notifications, reply to this comment with the word
STOPCheck out the last post from @hivebuzz:
Hello @paugomez! It is lovely to see you joining us. Welcome to the NeedleWorkMonday community!
Your bucket hat is beautiful. I love that you made your own fabric design and colour. The strawberries are really cute!
Every week needleworkers from around the globe get together to share our work, patterns, tips, ideas and shortcuts as we support one another. Our goal is to inspire the Hive blockchain to give crafting a try.
On Monday’s we use the #needleworkmonday tag and on all other days we use the #needlework tag without the word Monday attached. We share and post our work directly from the Community page.
We encourage our members to share the process of their work through photos. This not only validates your work but it takes us along the creative journey with you ;) And we love reading stories about you and your journey with the needlework project you share!
For more information about what we do and for our posting guidelines please visit our FAQs.
Thank you ~
Me gustó mucho 🤩 excelente, muy bien presentado
This is amazing, I love that you painted on the strawberries! When I first opened the post I thought it was fabric with strawberries already printed on it. I'm so impressed! :D
Esto es increíble, ¡me encanta que hayas pintado las fresas! Cuando abrí la publicación por primera vez pensé que era tela con fresas impresas. ¡Estoy tan impresionado! :D
You do beautiful work. You created your own unique fabric! !BBH
Because this is such an awesome post, here is a BBH Tip for you. . Keep up the fantastic work