Hola amigos de NeedleWorkMonday. Hace pocos días decidí iniciar en esta plataforma y me pareció increíble encontrar esta comunidad ya que estoy iniciando en la costura y me gustaría compartir mis proyectos con ustedes.
Hoy quise realizar algún detalle para usar en mi cabello así que decidí hacer una diadema y compartir el paso a paso con todos ustedes.
Me pareció un proyecto ideal para hacer un regalo o incluso para la venta.
Así que empecemos:
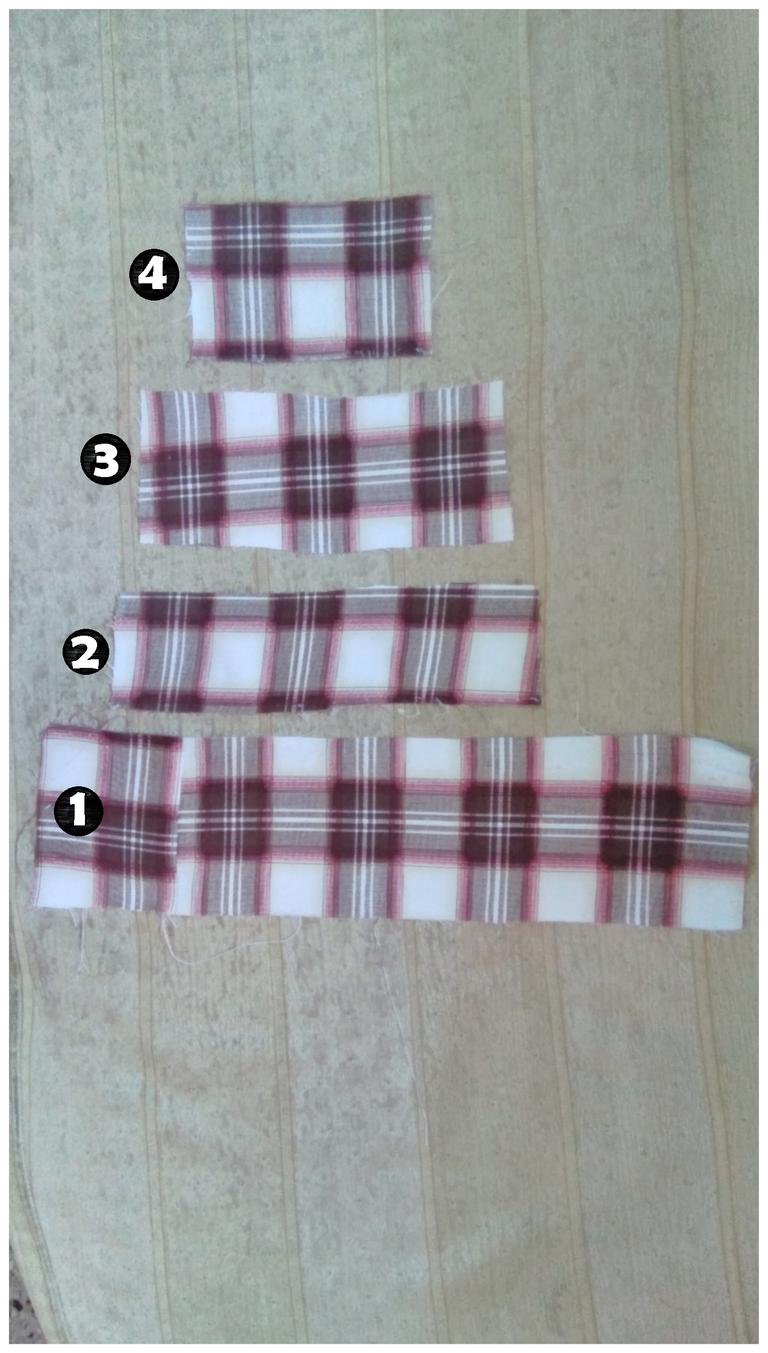
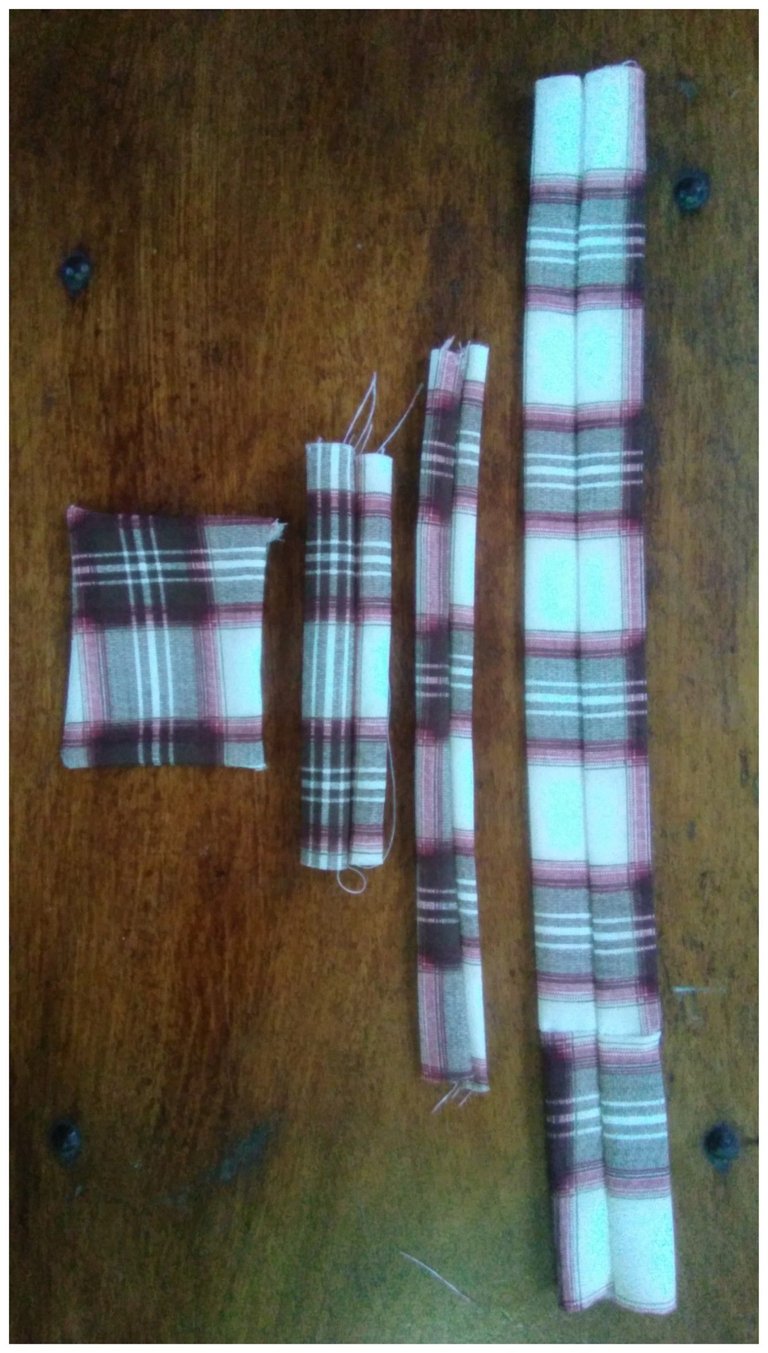
Cortaremos 4 rectángulos con las siguientes medidas:
1.- 47 cm de largo por 16 cm de ancho.
2.- 30 cm de largo por 8 cm de ancho.
3.- 30 cm de largo por 15 cm de ancho.
4.- 10 cm de largo por 17 cm de ancho.
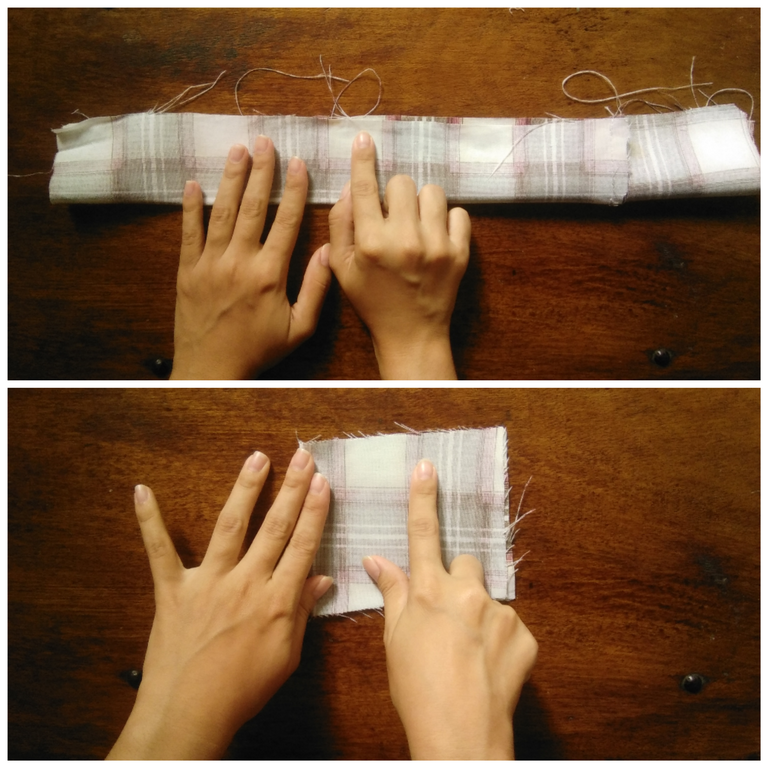
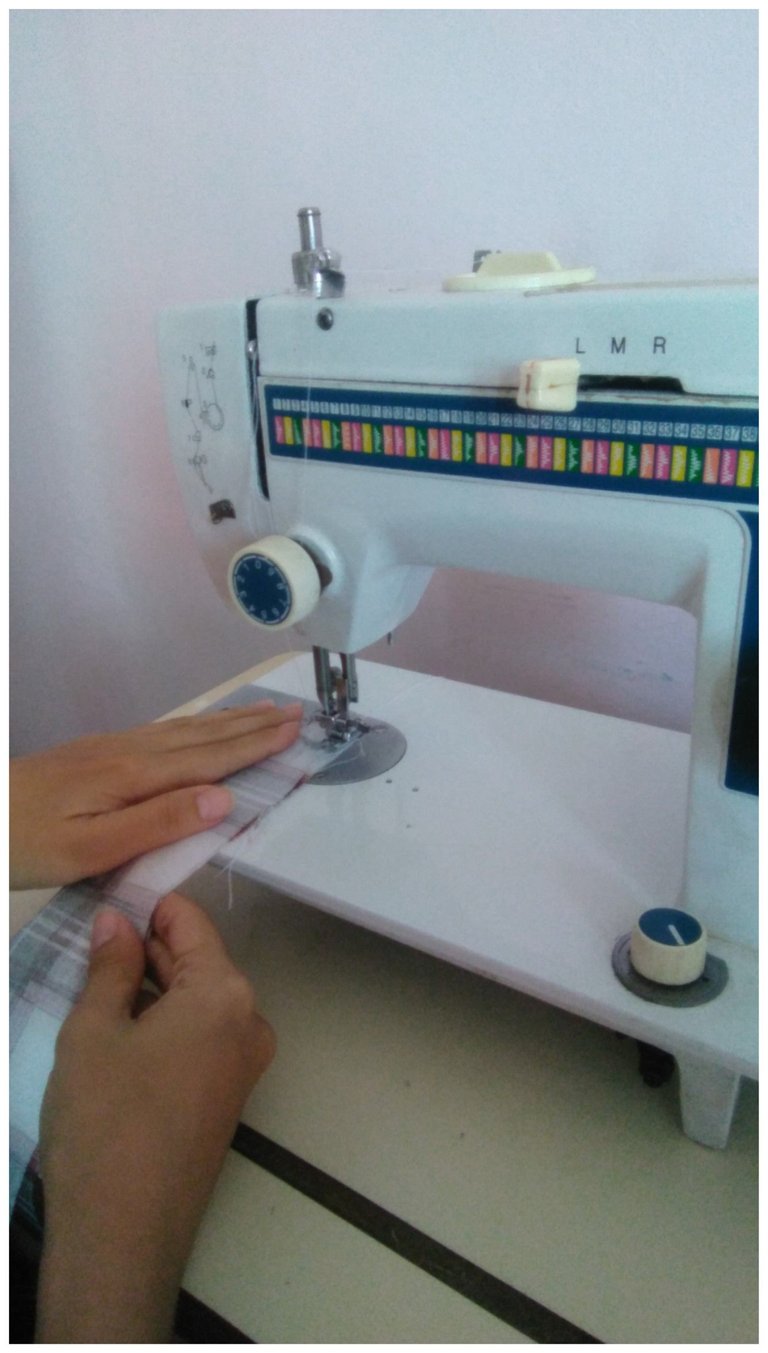
Doblaremos cada uno de los rectángulos al revés de la tela y pasaremos costura.
Para el rectángulo nº3 con medidas 30x15cm doblaremos a la mitad
formando un cuadrado como se muestra en la imagen.
Debemos hacer unos pequeños cortes en las esquinas para que al voltear la pieza
nos queden las puntas bien definidas.
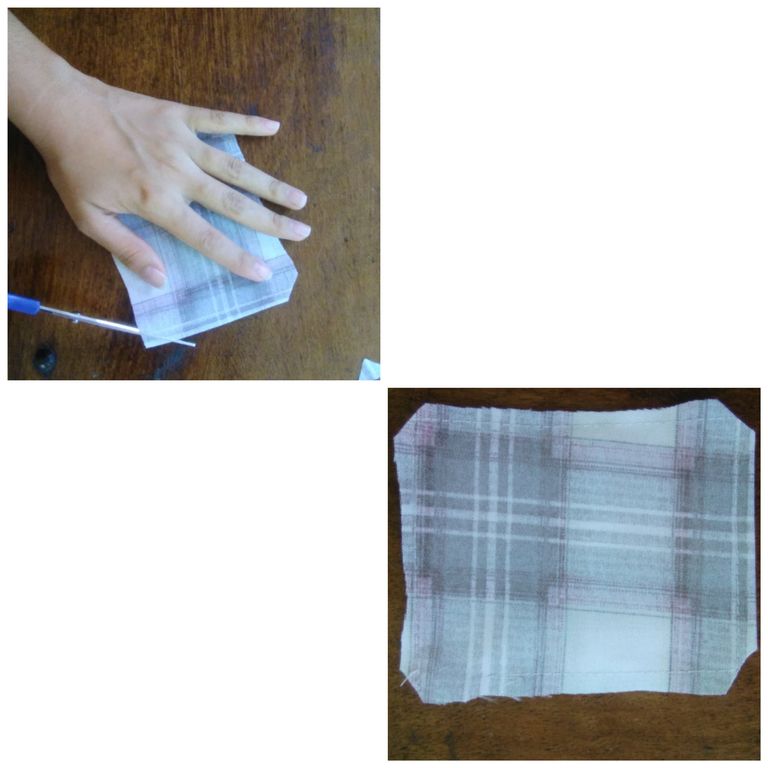
Damos vuelta a nuestras piezas unas vez cosidas y planchamos.
Como nuestra tela es rígida le vamos a colocar un elástico de 13cm de largo por 2cm de ancho.
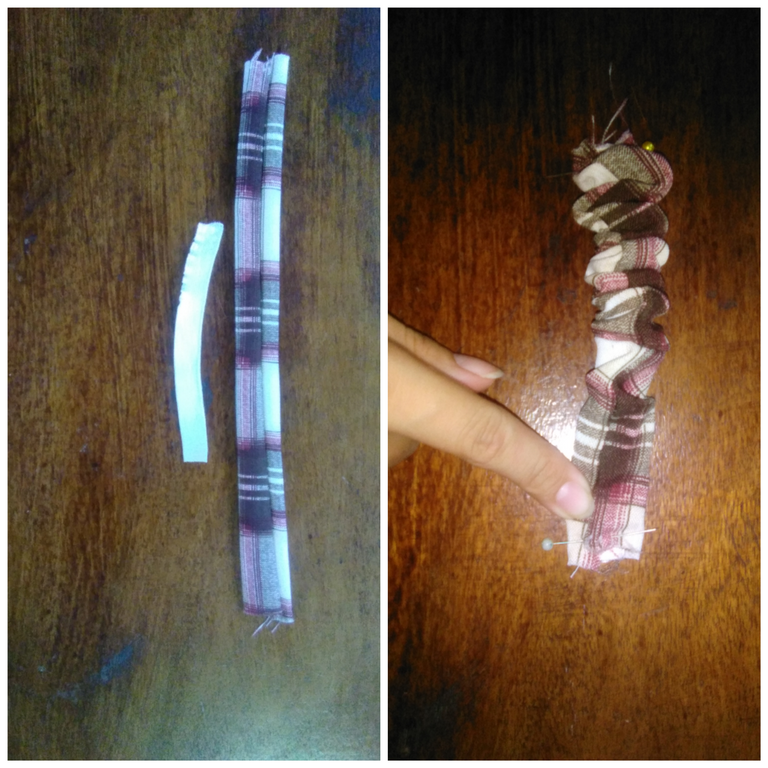
Aseguramos nuestro elástico en los extremos y luego pasamos zig-zag.
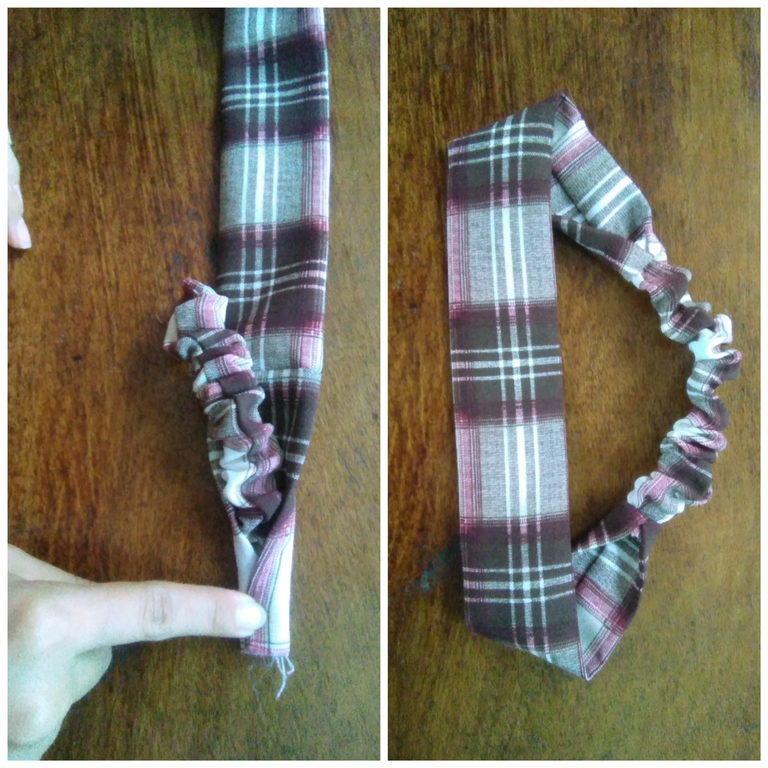
Enfrentamos nuestra pieza de 47cm con la pieza del elástico y doblamos los bordes recubriendo los de la pieza con el elástico y pasamos costura.
Al tener los dos extremos con la costura volteamos y obtendremos una pieza con unos bordes sin detalles.
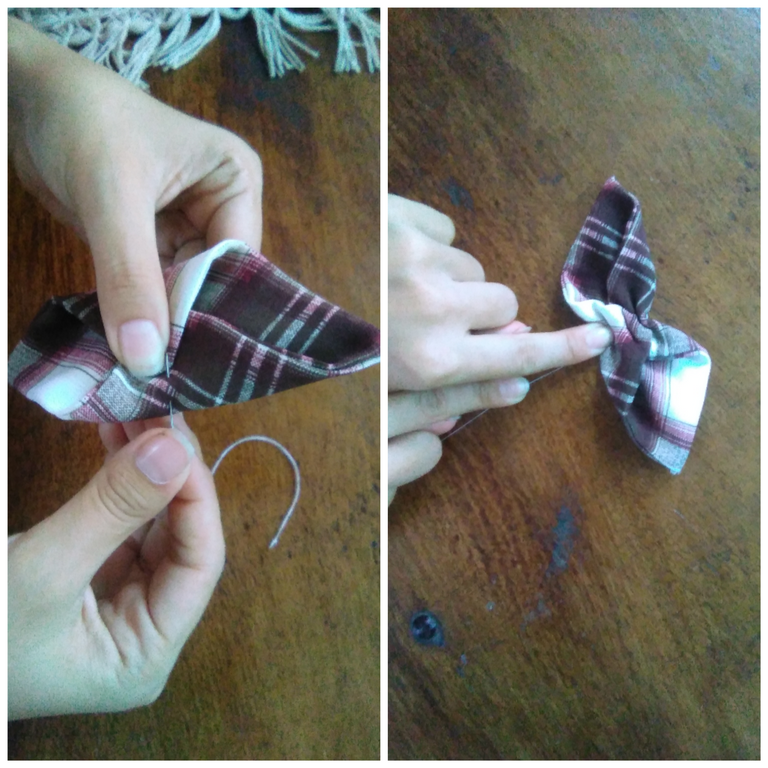
Tomamos nuestro cuadrado y vamos a doblar dos de las puntas hasta el centro haciéndolas coincidir.
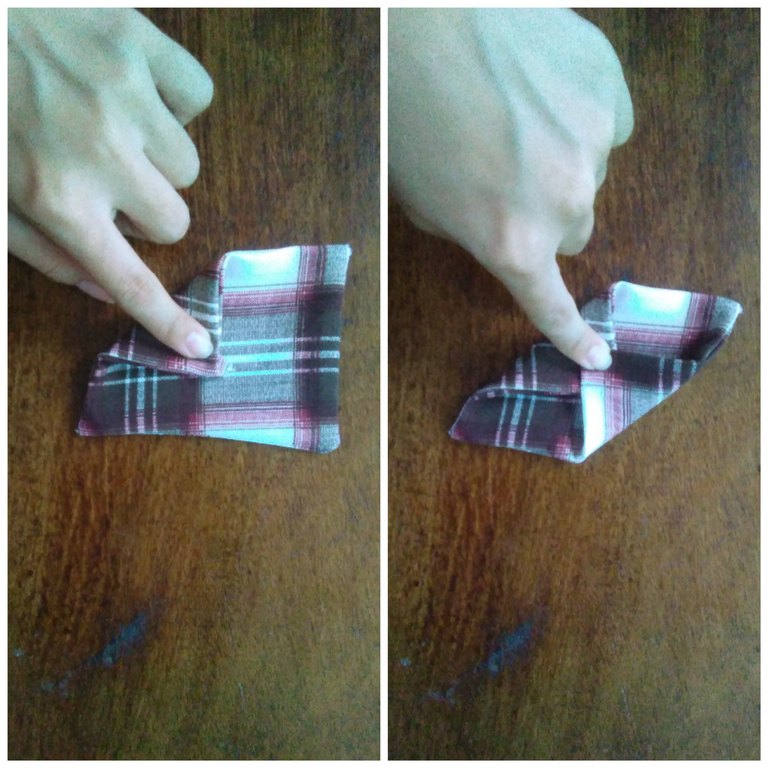
Con aguja e hilo fijamos nuestras puntas.
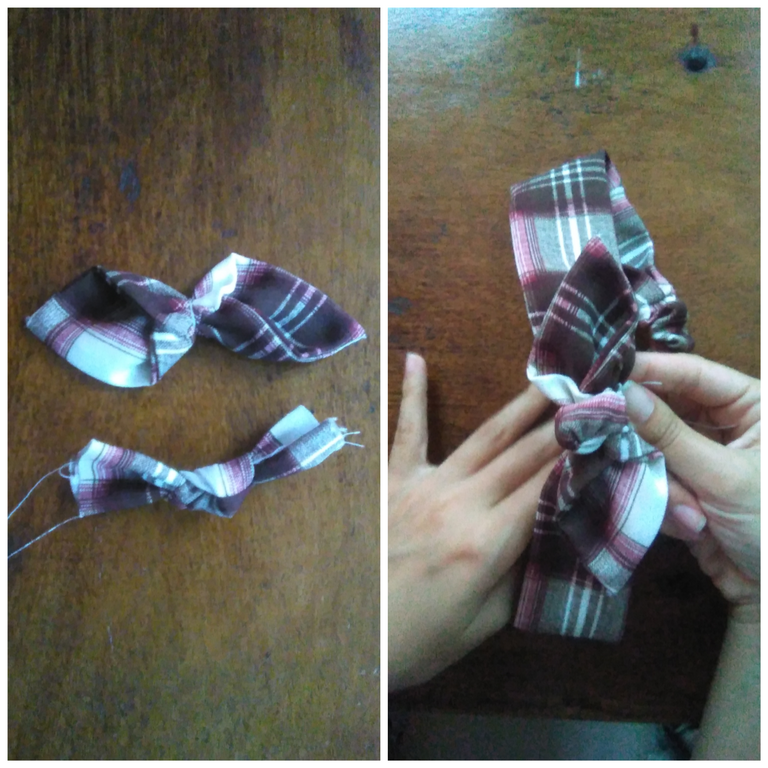
Con nuestra última pieza que es la más pequeña (10x17 cm) hacemos un nudo centrado y lo colocamos encima de nuestra pieza anterior. Finalmente lo unimos a nuestra primera pieza obteniendo así nuestra diadema.
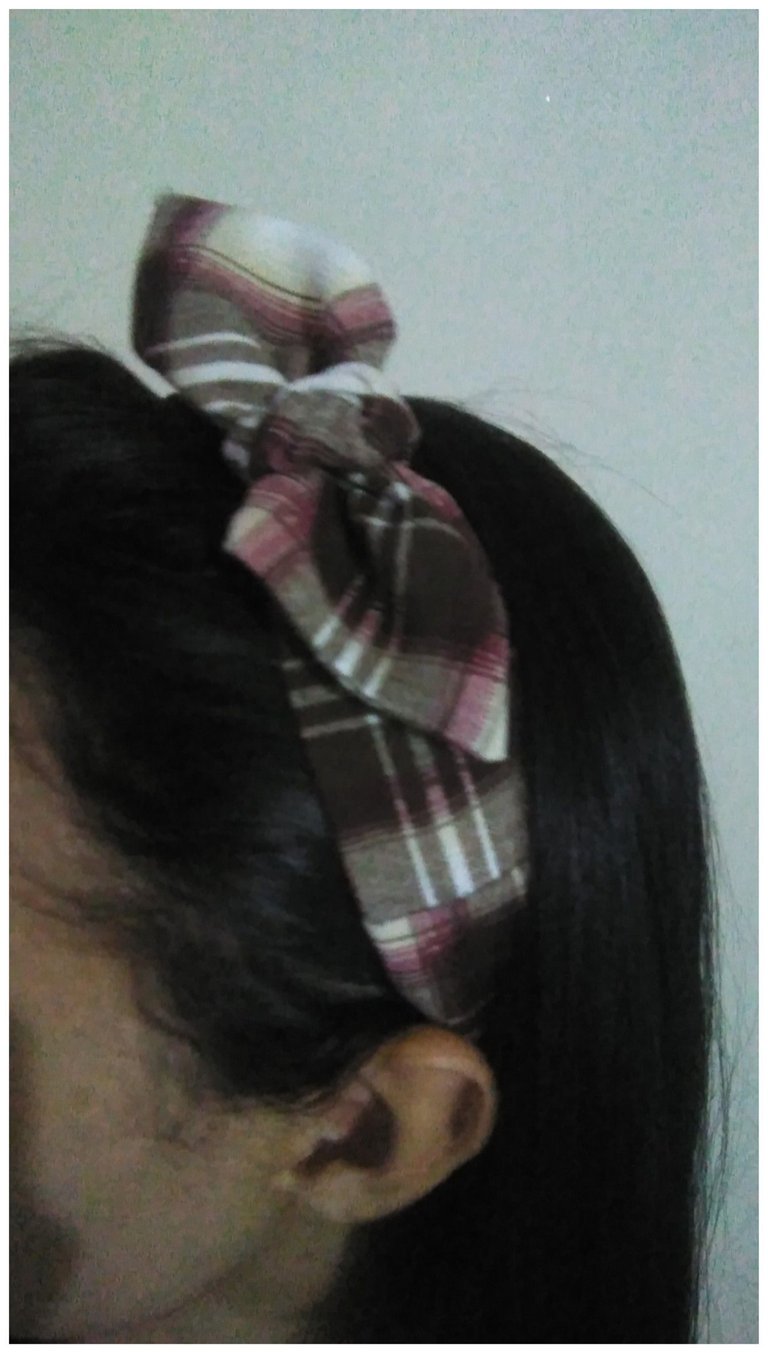
Y así nos queda nuestra diadema

Hello NeedleWorkMonday friends. A few days ago I decided to start on this platform and I thought it was amazing to find this community because I'm starting to sew and I would like to share my projects with you.
Today I wanted to make a detail to use in my hair so I decided to make a headband and share the step by step with all of you.
I thought it was an ideal project to make a gift or even for sale.
So let's get started:
We will cut 4 rectangles with the following measurements:
1.- 47 cm long by 16 cm wide.
2.- 30 cm long by 8 cm wide.
3.- 30 cm long by 15 cm wide.
4.- 10 cm long by 17 cm wide.
Fold each of the rectangles to the back of the fabric and sew them together.
For the rectangle nº3 with measures 30x15cm we will fold in the middle
forming a square as shown in the image.
We must make a few small cuts in the corners so that when we turn the piece over,
the ends are well.
We turn our pieces once they are sewn and iron them.
As our fabric is rigid, we are going to place an elastic of 13cm long by 2cm wide.
We secure our elastic at the ends and then zig-zag.
We face our 47cm piece with the elastic piece and fold the edges over, covering the edges of the piece with the elastic and stitch.
When we have the two ends with the stitching we turn the piece over and we will get a piece with undetailed edges.
We take our square and we are going to fold two of the ends to the centre, making them coincide.
With needle and thread we fix our tips.
With our last piece, which is the smallest (10x17 cm), we tie a knot in the middle and place it on top of our previous piece. Finally we join it to our first piece to obtain our headband.
And this is what our headband looks like
Interesting, My mom would definitely like this. Thanks for sharing. ❤
It is also very easy and beautiful, I'm sure you will like it. Thanks for reading me.
Está muy práctico tu proyecto y muy bien explicado el paso a paso.
Te sugiero usar un formato horizontal para la imagen de portada para que se pueda apreciar mejor tu creación. Un tamaño ideal para que se pueda ver mejor puede ser [900 x 500].
Aprovecho para darte la bienvenida y dejarte algunas pautas a tener en cuenta para publicar en esta comunidad.
Gracias por compartir con nosotros, Saludos!
Cada semana los trabajadores de la aguja de todo el mundo compartimos nuestro trabajo, patrones, consejos, ideas y atajos mientras nos apoyamos unos a otros. El objetivo es inspirar a Hive blockchain a darle una oportunidad a la artesanía.
Los lunes usamos la etiqueta #needleworkmonday y los demás días usamos la etiqueta #needlework sin la palabra lunes. Compartimos y publicamos nuestro trabajo directamente desde la página de la Comunidad.
Animamos a nuestros miembros a que compartan el proceso de su trabajo a través de fotos. Esto no sólo valida su trabajo sino que nos lleva al viaje creativo con ustedes.
Para más información sobre lo que hacemos y para nuestras pautas de publicación por favor visita nuestras FAQs.
Gracias.
Tendré en cuenta la sugerencia de la foto de portada para mi próxima publicación. Gracias por leerme y además dejar las pautas de la comunidad. Muy agradecida.
Saludos.Gracias @kattycrochet , traté de explicar paso a paso para que pudieran entender por si alguien se animaba a realizarlo.
I sure need a headband and will try this out.
Thanks for sharing
Thank you for reading me. I hope you are encouraged to make it and that it looks very nice.
Congratulations @reborn30! You have completed the following achievement on the Hive blockchain and have been rewarded with new badge(s):
Your next target is to reach 100 upvotes.
You can view your badges on your board and compare yourself to others in the Ranking
If you no longer want to receive notifications, reply to this comment with the word
STOPCheck out the last post from @hivebuzz:
Support the HiveBuzz project. Vote for our proposal!
We continue to move forward. My next goal is 100 votes.
Lovely thanks for sharing
Thank you for visiting my publication