Hace rato que estaba por crear un centro de mesa para el comedor, y de hecho mi esposo me hizo uno hace un tiempo, pero decidí cambiarlo para la cocina pues me pareció se vería mucho mejor ahí y así fue, luce realmente lindo, pero ese cambio me dejó nuevamente con la mesa del comedor vacía y después de buscar ideas en pinterest me decidí por una bandeja que por supuesto haría yo misma, y decidí usar para ella un hilo para bufandas súper bonito que tenía en casa, así podría darle un toque especial a mi bandeja con el uso del crochet que definitivamente a todo le va bien.
I had been thinking about creating a centerpiece for the dining table for a while, and in fact my husband made me one a while ago, but I decided to change it for the kitchen because I thought it would look much better there and it did, it looks really nice, but that change left me again with an empty dining table and after looking for ideas on pinterest I decided on a tray that of course I would make myself, and I decided to use for it a super nice scarf yarn I had at home, so I could give a special touch to my tray with the use of crochet.
En mi búsqueda de ideas de bandejas tejidas me encontré que para ellas venden una base de madera con perforaciones por todo el borde para a partir de ahí realizar el tejido, pero la verdad es que aquí donde vivo no hay nada parecido, así que me pasé por varias ideas para poder hacer mi bandeja tejida y la solución fue usar un marco de madera de los que traen los lienzos para pintar, y cartón, con eso tendría la base perfecta para trabajar, y les digo que amé el resultado y por aquí les comparto cómo la hice.
In my search for ideas of woven trays I found that they sell a wooden base with holes all around the edge to make the weaving, but the truth is that here where I live there is nothing like that, so I went through several ideas to make my woven tray and the solution was to use a wooden frame that bring the canvases to paint, and cardboard, with that I would have the perfect base to work, and I tell you that I loved the result and here I share with you how I made it.
Materiales
Hilo de lana color beige
Aguja para crochet
Hilo de coser beige
Aguja
Marco de madera rectangular
Cartón grueso
Lápiz
Regla
Cutter (exacto)
Pintura al frío blanca
Pincel
Pistola de silicón
Materials
Beige wool yarn
Crochet needle
Beige sewing thread
Needle
Rectangular wooden frame
Thick cardboard
Pencil
Ruler
Cutter (exact)
White cold paint
Brush
Silicone gun
Elaboración
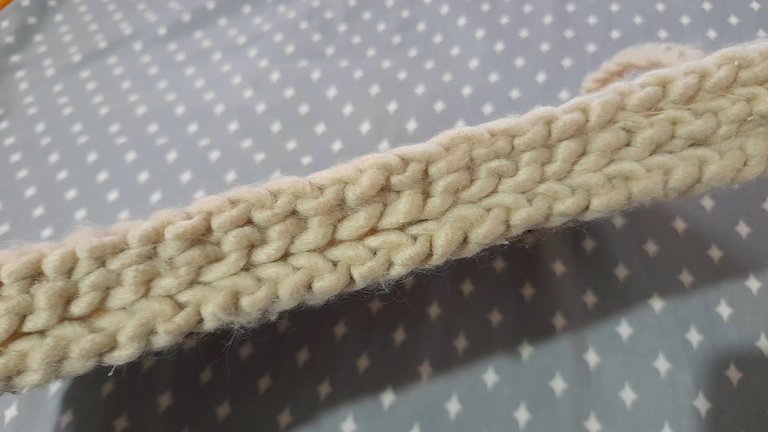
Como les dije al inicio me estuve paseando por varias ideas para el centro de mesa, y en un principio no pensaba hacer una una bandeja como tal, sino una especie de tapete redondo para lo que necesitaría hacer solo una cadeneta muy larga que luego coseria para darle la forma circular y hacer un pequeño borde y listo, pero luego, como siempre sucede conmigo, a mitad del proceso decidí que haría una bandeja, pero utilizando igual la cadeneta, así que comencé con ella.
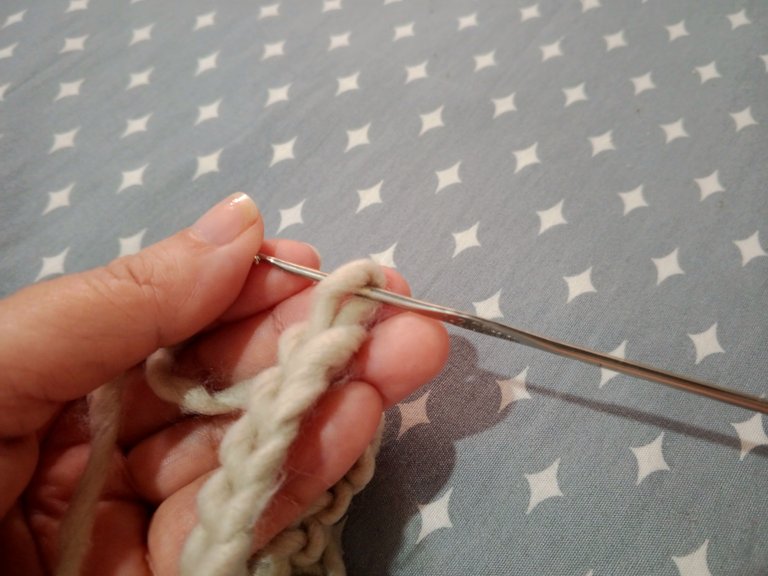
Hice la lazada inicial y comencé a armar la cadeneta, y como ven, la aguja que utilicé no era la adecuada para trabajar con ese tipo de hilo, pero eso no iba a detenerme, así que aunque el proceso iba a ser mucho más lento, decidí trabajar igual, y lo que hice fue alargar un poco cada punto para que se viese como si estuviese usando la aguja adecuada.
Elaboration
As I told you at the beginning I was going through several ideas for the centerpiece, and at first I was not thinking of making a tray as such, but a kind of round mat for which I would need to make only a very long chain stitch that I would sew to give it a circular shape and make a small border, but then, as always happens with me, in the middle of the process I decided I would make a tray, but using the chain stitch anyway, so I started with it.
I made the initial loop and started to assemble the chain stitch, and as you can see, the needle I used was not the right one to work with that kind of yarn, but that was not going to stop me, so even though the process was going to be much slower, I decided to work the same, and what I did was to lengthen each stitch a little bit to make it look like I was using the right needle.

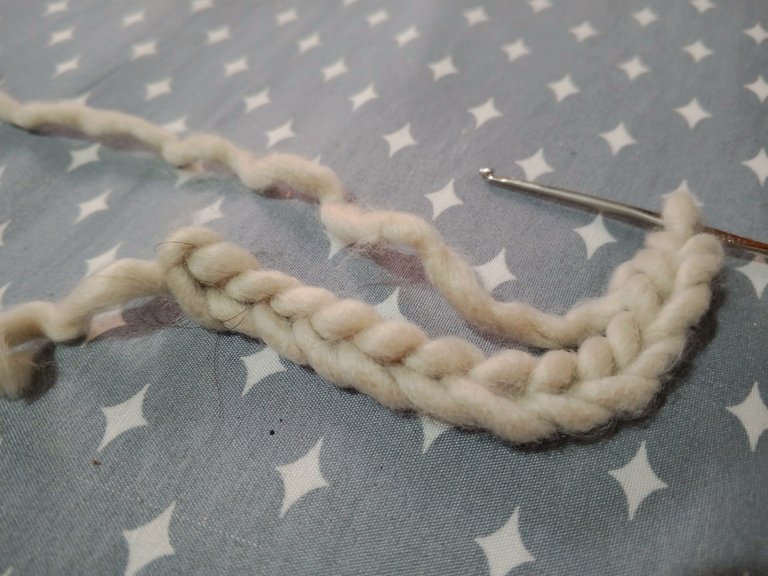
La verdad no conté la cantidad de cadenetas que hice, ya que lo que hacía era probar cuánto había avanzado dando la forma circular y ver cuánto más faltaba, pero fue justo ahí cuando me di cuenta que no me iba a alcanzar el hilo y decidí cambiar el plan, porque cerca de casa no se encuentra, así que tuve que sentarme a pensar qué haría y me decidí por hacerla con un marco de madera y cartón para el fondo.
The truth is that I didn't count the number of chains I made, since what I did was to test how far I had progressed with the circular shape and see how much more was missing, but it was right there when I realized that I wasn't going to have enough yarn and I decided to change the plan, because I couldn't find it near my house, so I had to sit down and think about what I would do and I decided to make it with a wooden frame and cardboard for the background.

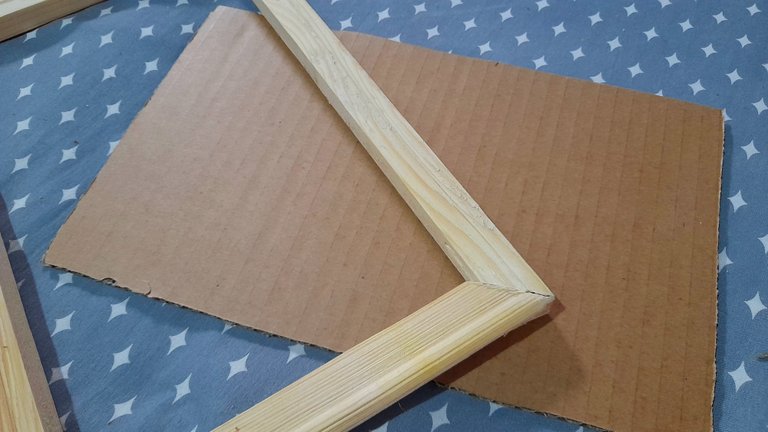
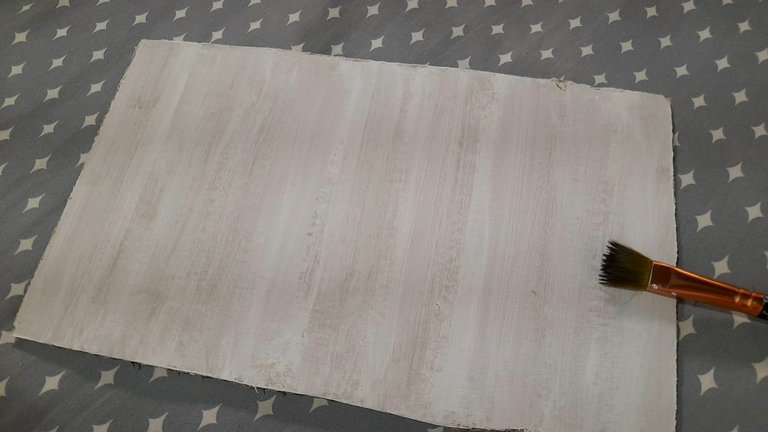
Lo que hice fue recortar el cartón del tamaño del marco, y para eso utilicé una regla y el cutter, y listo este paso, procedí a pintar el cartón de blanco, y aunque pensaba darle dos capas, con una sola me pareció que se veía súper lindo, como una especie de pátina, así que lo dejé de esa forma.
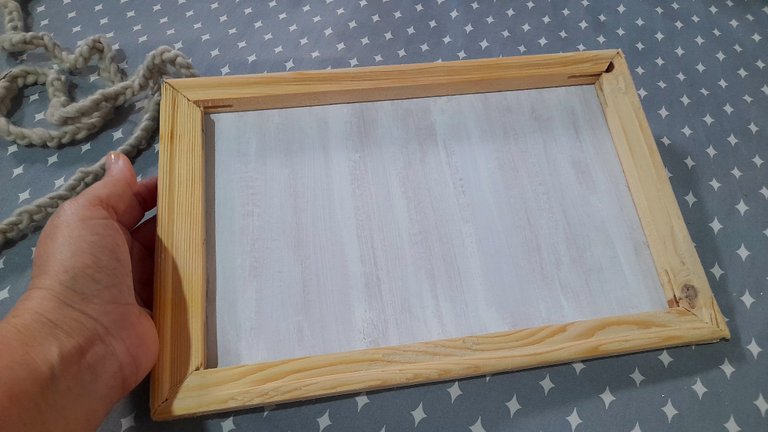
Finalmente con la pistola de silicon fijé la madera al marco y ya tenía la base para continuar trabajando.
What I did was to cut the cardboard to the size of the frame, and for that I used a ruler and the cutter, and ready this step, I proceeded to paint the cardboard white, and although I thought to give it two coats, with only one I thought it looked super nice, like a kind of patina, so I left it that way.
Finally with the silicon gun I fixed the wood to the frame and I had the base to continue working.
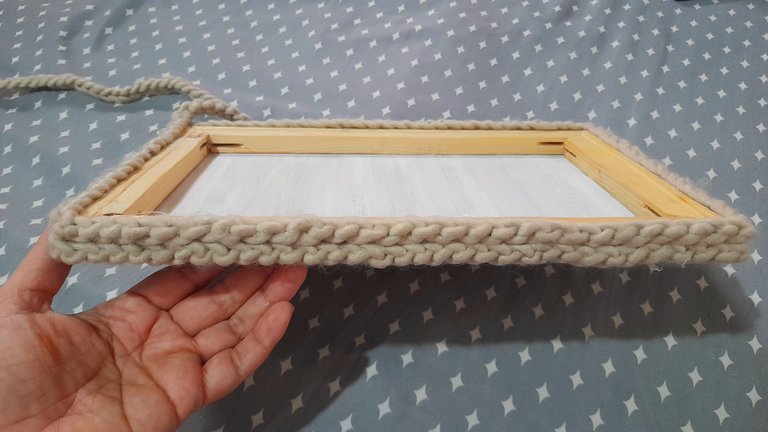
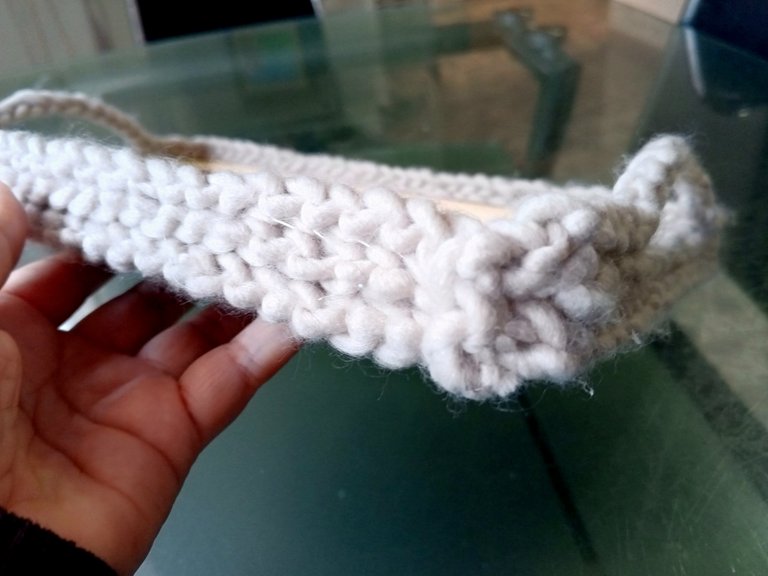
Ahora ya solo tenía que realizar la cantidad de puntos que me permitieran dar tres vueltas a la base de la bandeja, ya que en realidad no la quería muy alta pues la idea era usarla para poner algunos objetos decorativos, así que no necesitaba que fuese alta, por lo que seguí armando la cadeneta hasta alcanzar el tamaño que necesitaba y luego con ayuda de la pistola de silicón fijé dos hileras al marco, solo para cubrirlo.
Now I only had to make the number of stitches that would allow me to make three turns at the base of the tray, since I didn't really want it to be very high because the idea was to use it to put some decorative objects, so I didn't need it to be high, so I continued making the chain stitch until I reached the size I needed and then with the help of the silicone gun I fixed two rows to the frame, just to cover it.
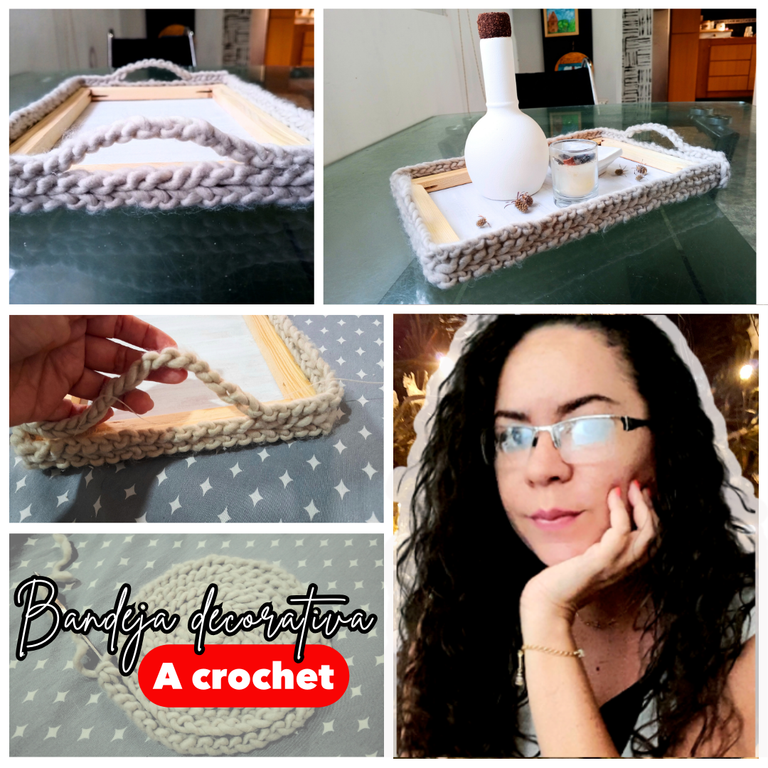
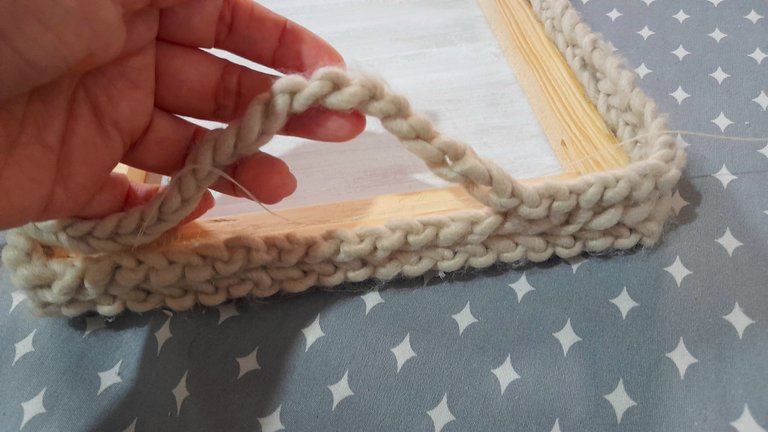
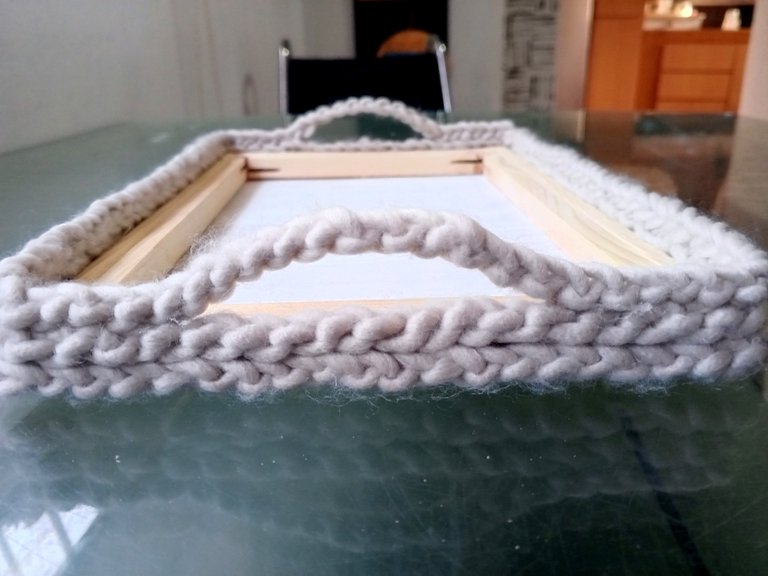
Para la tercera y última hilera seguiría trabajando con hilo y aguja de coser, y lo que hice fue dar puntadas pequeñas para unir las dos hileras de manera que no se viera el hilo. Y trabajé de esta manera en los dos lados más largos de la bandeja y en los extremos más pequeños decidí hacer un asa, así que lo que hice fue coser solo una pequeña parte, el espacio que ocupaban 5 cadenetas, corté el hilo y dejé sin costura una parte para luego volver a unir, cinco cadentas más hacia la esquina de la bandeja creando así el asa. Un toque que me pareció precioso.
For the third and last row I would continue working with thread and sewing needle, and what I did was to make small stitches to join the two rows so that the thread was not visible. And I worked this way on the two longer sides of the tray and on the smaller ends I decided to make a handle, so what I did was to sew only a small part, the space occupied by 5 chains, I cut the thread and left a part unstitched and then rejoined, five more chains towards the corner of the tray thus creating the handle. A touch that I thought was beautiful.
Al llegar al final lo que hice fue coser hacia abajo la cadeneta restante de manera bien prolija, recorté el excedente y coloqué un poco de silicón caliente en la punta y estuvo lista mi bandeja decorativa a crochet.
When I reached the end, I sewed down the remaining chain stitch very neatly, trimmed the excess and put some hot silicone on the end and my decorative crochet tray was ready.
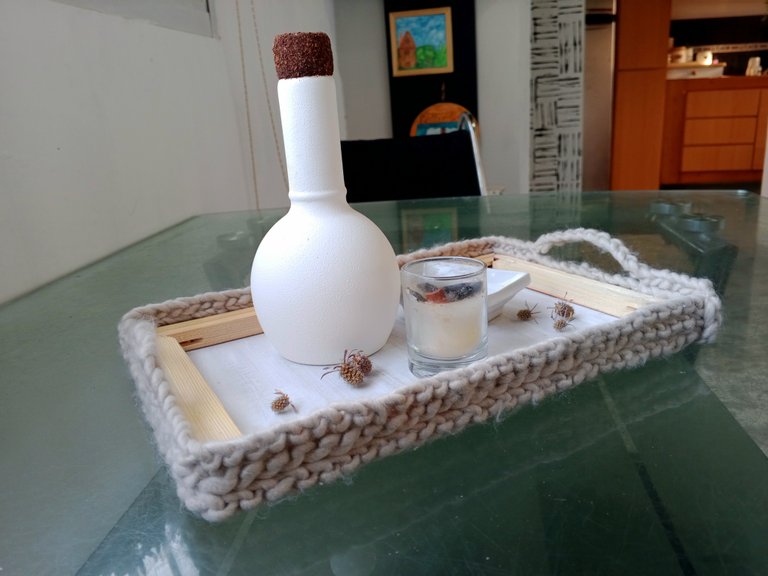
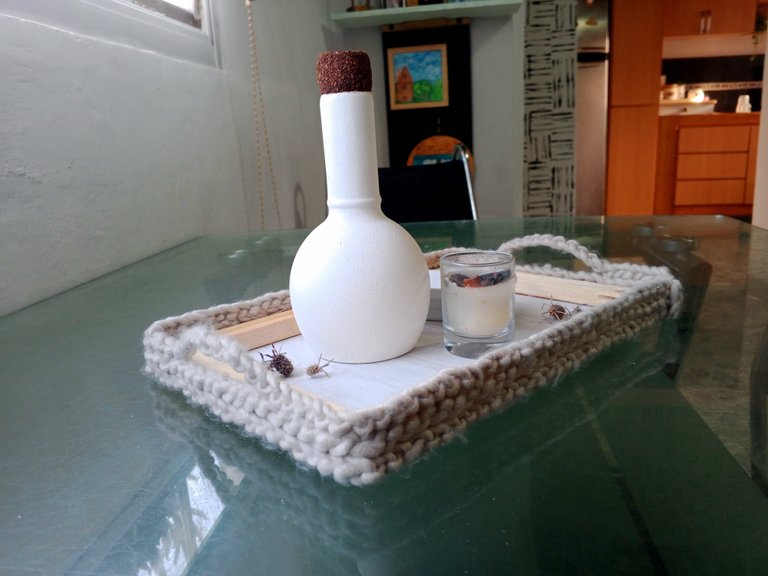
Como ven, inicié este proyecto con una idea en mente, pero me tocó cambiar de plan a mitad de camino, ajustarme y buscar una solución, pero la verdad es que amé lo bonita que se ve, y una vez que le coloqué lo que tenía destinado para ella siento que luce realmente bonita y muy acorde con toda la decoración en casa, y definitivamente entre el color, y el tejido, le aportan mucha calidez a la mesa de vidrio. ¿Ustedes qué piensan?
As you can see, I started this project with an idea in mind, but I had to change my plan halfway through, adjust and look for a solution, but the truth is that I loved how beautiful it looks, and once I put what I had intended for it, I feel that it looks really nice and very consistent with all the decoration at home, and definitely between the color and the fabric, it brings a lot of warmth to the glass table. What do you think?


Es una hermosa idea. Te felicito, Luce moderna, simple y con buen gusto.
Muchas gracias amiga, yo quedé enamorada jeje
Quedo hermosa amiga, ese toque fashion que le diste con el tejido me encantó, aunque de eso si es verdad que no te copio, jejeje, porque no se tejer, una vez medio aprendí a bordar pero hasta allí, Jejeje. Es un proyecto muy original, realmente hace juego con todo en tu casa, y para que más, y como siempre tu buscando alternativas creativas para poner tu casita más bonita 🤗
Gracias ami, tu sabes inventando aquí jeje, lo bueno es que el invento resultó bien
me parece super curioso, que solo de ver una minima parte de la imagen de portada, ya se que es un post tuyo, eso quiere decir que has seguido un patron y que tus fans te ubicaran rapido 10/10.
ta calidad, cuando vi la lana dije, guardo todo el cabello cortado de miri en toda su vida e hizo hilo, jajajajajaja
un abrazo y un beso 😘
JAJAJAJA deshice una bufanda, salió mejor que comprar el hilo.
Gracias por la evaluación positiva jeje, a mi me encantó cómo quedó, he hecho muchas cositas últimamente.
Tú cómo vas, cómo has estado?
Abrazos de vuelta
yo pues... en muchas cosas, cusos, programar, electronica... valer verga y asi xD
Saludos amiga! Tiempo que no me pasaba por tu blog! Ahora me detuve con mucho cariño para expresarte lo maravilloso que quedó tu centro de mesa. Se ve súper genial🤩, muy creativo y fabuloso para dar el toque ideal que te hacia falta. No es complicado el detalle es que olvide como se teje. Mi esposo aún espera un sueter que le prometí para aprender a tejer jajajaja. Abrazos y bendiciones y espero disfrutes de esa hermosura.
Que linda amiga, gracias por pasar.
La verdad fue sencilla y me gustó mucho. Yo debo practicar bastante con la aguja pero los puntos básicos los recuerdo aún.
Un abrazo
Amiga hasta tejer sabes, nunca lo aprendí. Quedó muy hermosa. Abrazos
Yo se de todo un poco jeje. También sé bordar en punto cruz
This is so beautiful. I love the aesthetic, it made the table more beautiful. This design is better than the circular design, the wood even added to the aesthetics. Thanks for sharing
Thank you so much for ypur lovely message
This is such a brilliant idea and very thoughtful of you. The covering of the frame is beautiful and would be really decorative on your dining table. Well done dear.
Thank you so much for your beautiful message
This crochet tray is both beautiful and practical. Nice work.
Thank you so much
Que belleza mi Rosita! De verdad que es una gran idea y lo haces ver simple💕
Muchas gracias ami, a mi me encantó, quedó muy cuchi
Me gusta mucho esta propuesta tuya, es delicado y muy original 🤗
Muchas gracias amiga, es un proyecto muy lindo y el tejido le da un toque muy lindo
Que bella te quedo, gracias por compartir @rlathulerie.
Gracias amiga, un abrazo
@tipu curate 8
Upvoted 👌 (Mana: 0/75) Liquid rewards.
Se ve tan linda.
Naguara rosa me sorprende como se alguna idea logras solucionar cuando no consigues exactamente lo mismo. Todo te queda hermoso😍😍