Buenos días mis amigos de # hive, aquí de nuevo con nuestra maravillosa Comunidad, mi ausencia ante ustedes era por causa de salud🤧 pero gracias a Dios ya aquí de vuelta. La vida no consiste en recordar el pasado con nostalgia, ni esperar el futuro con ansiedad, si el vivir el presente con pasión, constancia, fortaleza y la firme convicción de qué todo lo que hagamos de corazón ❤ y con mucho amor 😍.
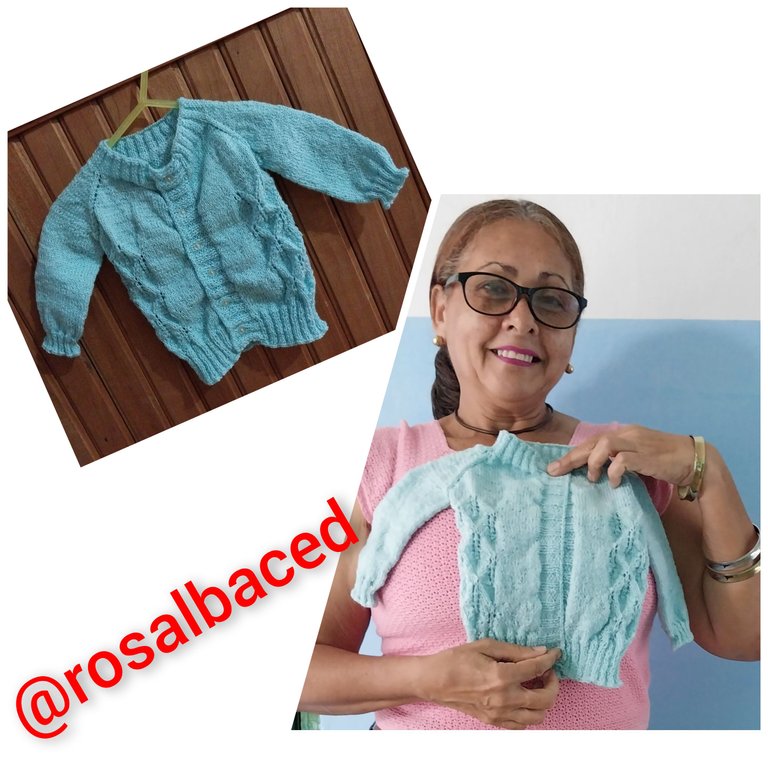
Es por eso que en esta ocasión les voy a mostrar este tutorial paso a paso de como realizar un chaleco tejido con estambre en agujas circulares para un hermoso 🚼 bebe q todavia esta en la pancita 🤰de su mami,que es mi sobrina y yo como bis tia emocionada le hice este hermosisimo detalle.
Les comento q el Internet no nos acompaña mucho.
Que nuestro Padre amoroso nos permita seguir teniendo un feliz, bendecido y excelente día.
A continuación voy a compartir como tejer en agujas circulares.
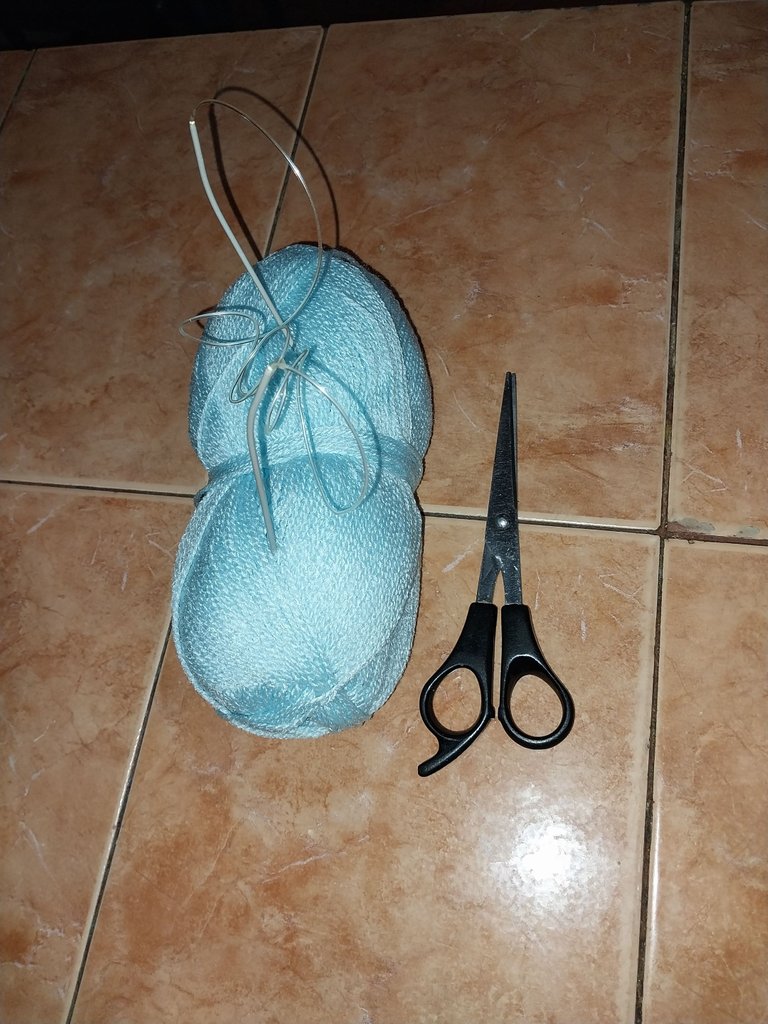
Materials:
Blue antiallergic yarn.
Circular needles.
Scissors.
Four needles.
6 buttons.
Materiales:
Estambre antialergico color azul.
Agujas circulares.
cuatro agujas.
6 botones.
Tijera.
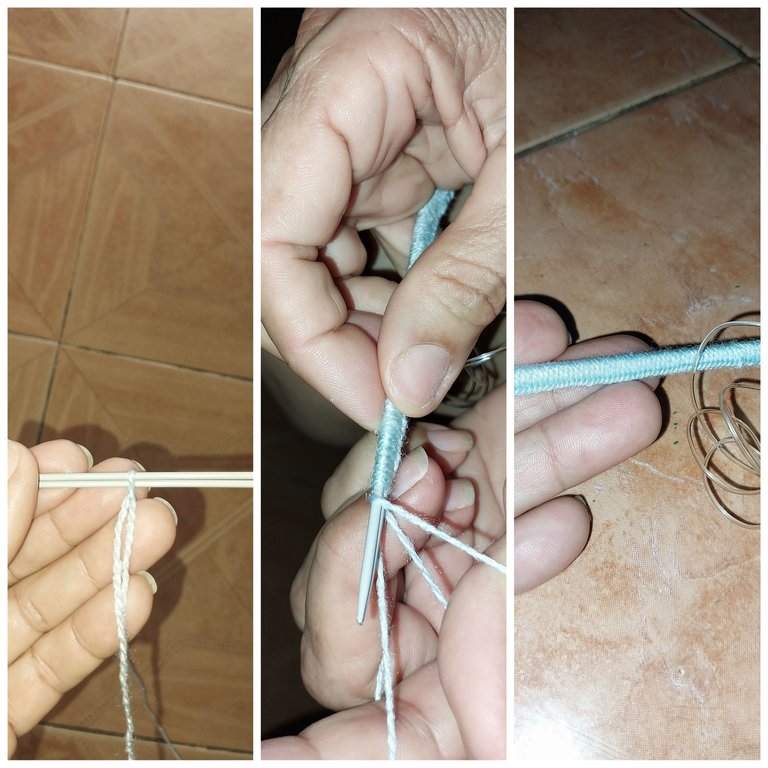
step 1
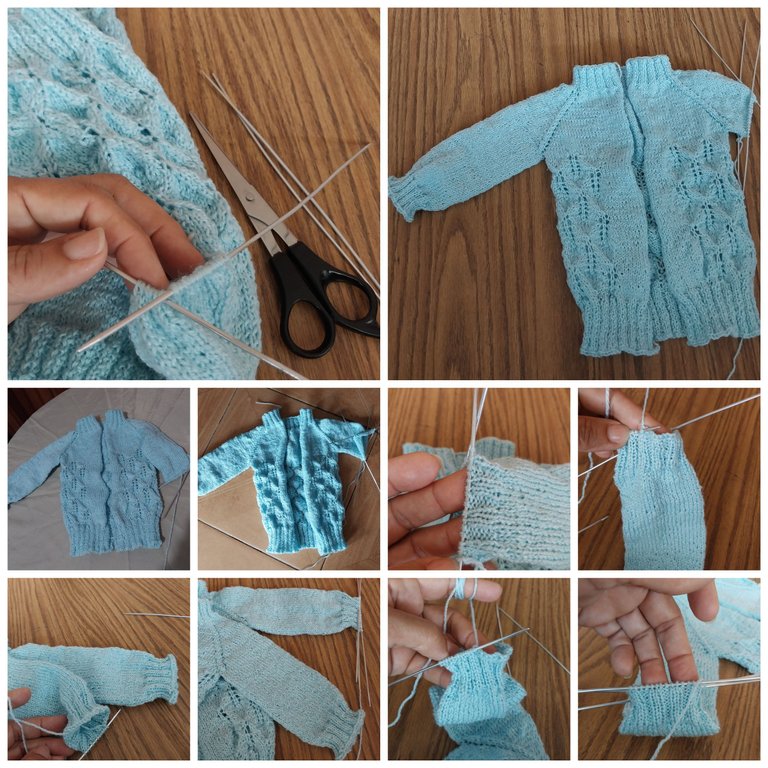
We take The pair of needles and start with the length of the yarn to make a knot AND get a ring, so we place it on the needles and begin to assemble the 100 stitches.
Paso 1
Tomamos El par de agujas y comenzamos con el largo del estambre para realizar un nudo Y obtener un aro, así lo colocamos en las agujas y se comienza a montar los 100 puntos.
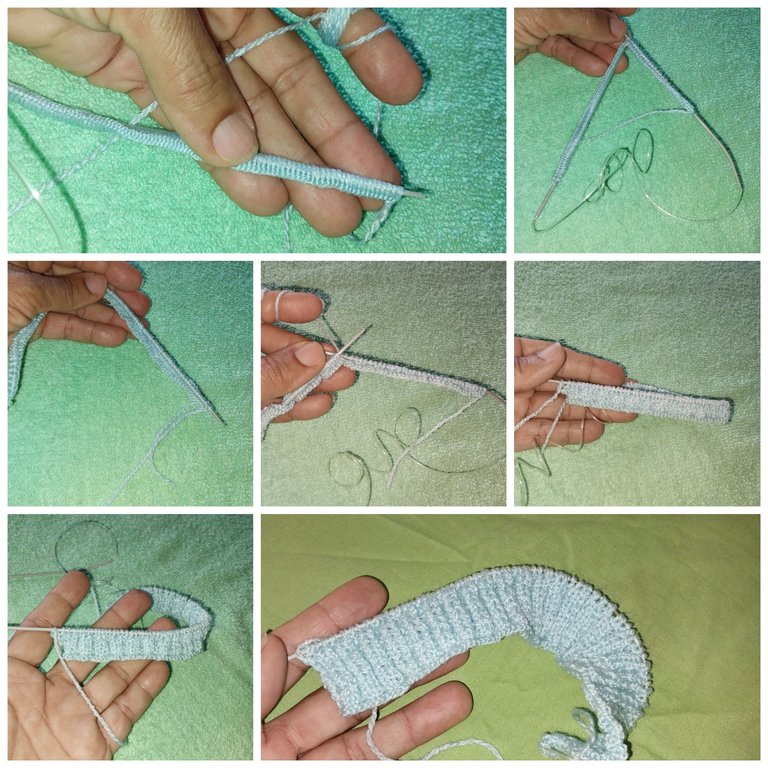
Step 2
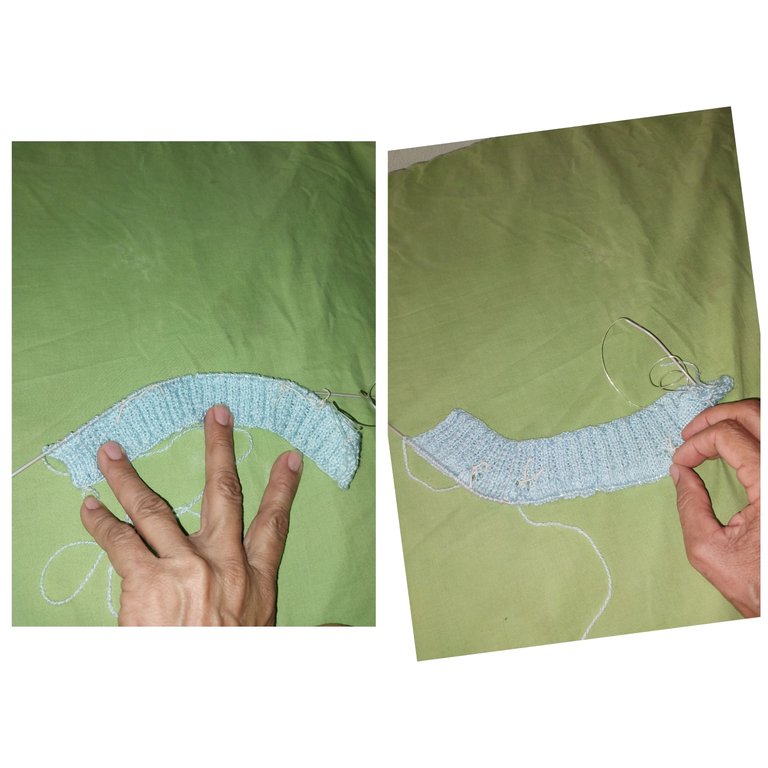
We pull one of the two needles to start knitting the ribbing stitch, which we identify as two purl stitches and two purl stitches, and so we continue knitting until we get the desired size of the collar.
Paso 2
Jalamos una de las dos agujas para comenzar a tejer el punto elástico, que lo identificamos como dos puntos al revés y dos puntos al derecho, y así continuamos Tejiendo hasta obtener el tamaño deseado del cuello.
Step 3
We divide the amount of stitches mounted in this case one hundred stitches, forty stitches back, forty stitches front and ten stitches of each sleeve that come to be the one hundred stitches mounted to start this beautiful vest, we mark it with a little piece of yarn on each sleeve so that it becomes easier to identify when we are Knitting.
Paso 3
Dividimos la cantidad de puntos montados en este caso cien puntos, cuarenta puntos de espalda, cuarenta puntos de frente y diez puntos de cada manga que vienen siendo los cien puntos montados para comenzar este hermoso chaleco, lo marcamos con un pedacito de hilo en cada manga para que se haga más fácil de identificar cuando estemos Tejiendo.
Step 4
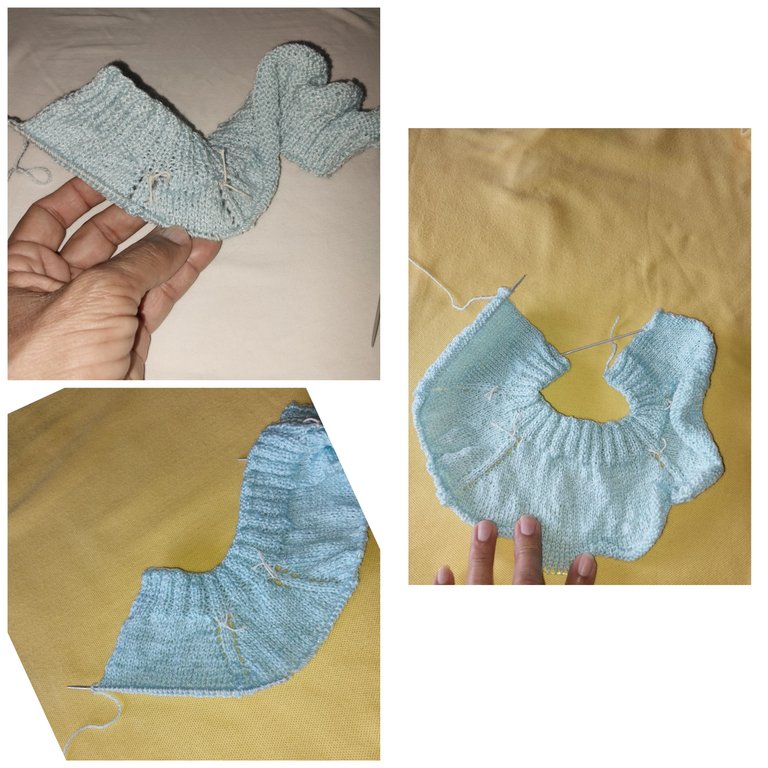
We continue knitting to make the sleeves, which in each round is increasing, with a loop, two simple one loop And so we knit the whole sleeve, in the other round they are all pulled out to the right and we continue knitting again with the loop two simple one loop Yes and we continue knitting until we get the desired size of the sleeve of this baby sweater.
Paso 4
seguimos Tejiendo para ir realizando Las mangas, que en cada vuelta va aumentando, con una lazada, dos sencillo una lazada Y así vamos Tejiendo todo la manga, en la otra vuelta se sacan todos al derecho y seguimos tejiendo otra vez con la lazada dos sencillos una lazada Si y seguimos Tejiendo hasta obtener el tamaño deseado de la manguita de este chalequito para bebés.
step 5
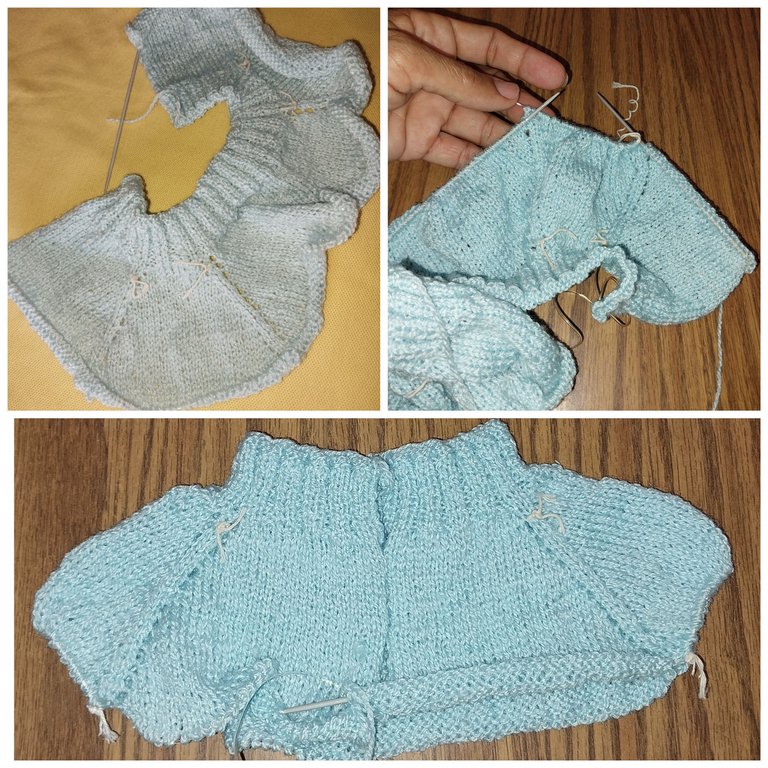
Once we have finished the size of the sleeve we separate them with a needle and a strand of thread, first one sleeve and then we take the other one and we do the same procedure, to continue knitting down the little body of the sweater.
Paso 5
ya culminado el tamaño de la manga las separamos con una aguja y una hebra de hilo, primero una manguita y luego tomamos la otra y le hacemos el mismo procedimiento, para seguir Tejiendo hacia abajo el cuerpecito del chalequito.
Step 6
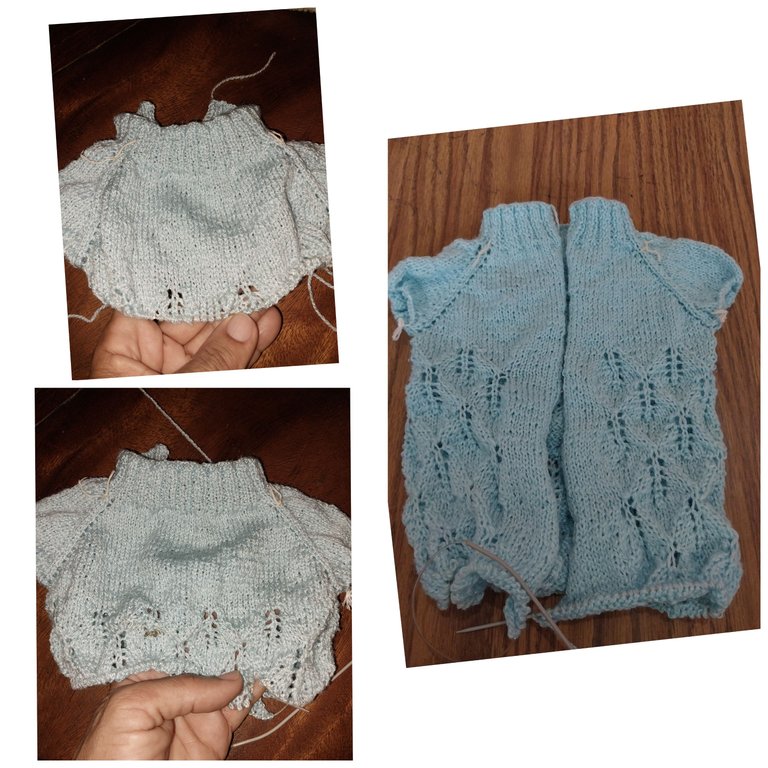
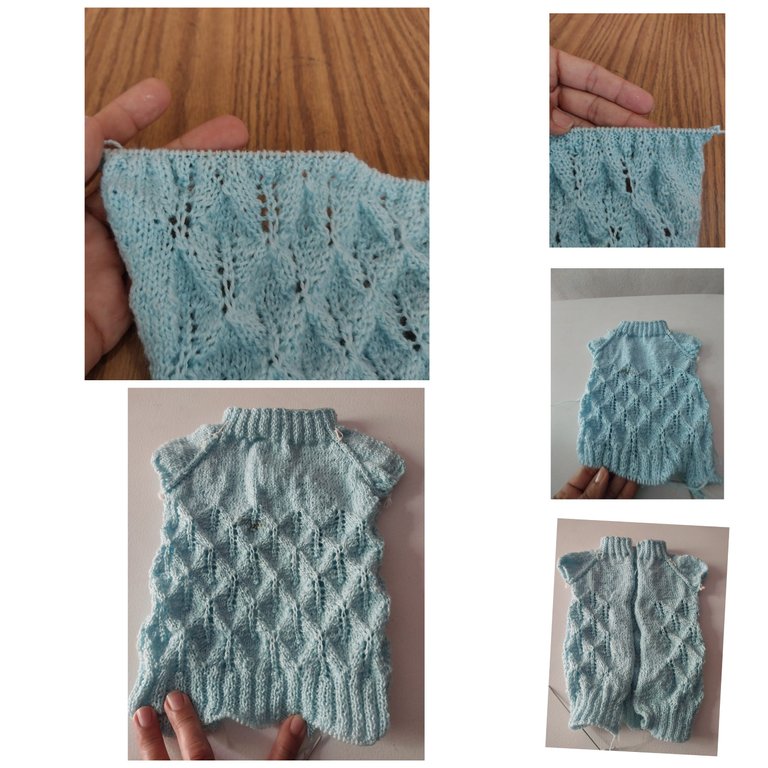
We begin to knit the body of the sweater with a stitch that we identify as candlelight, and each drawing has ten laps always taking out each lap all to the right and repeats the drawing as many times as necessary to obtain the desired size of the body of the sweater, in this case we repeat the drawing three times because it is for a baby that is about to be born.
Paso 6
comenzamos a tejer el cuerpecito del chalequito con un punto que lo identificamos como luz de vela, y cada dibujo tiene diez vueltas siempre sacando cada vuelta todos al derecho y se repite el dibujo las veces que sean necesarias para obtener el tamaño deseado del cuerpecito del chalequito, en este caso repetimos el dibujo tres veces porque es para un bebé que está por nacer.
Step 7
already culminated with the length of the vest or coat as we want to call it, we begin to make the elastic thread to give the length that is required, are made with two rights, two backwards, two right, two backwards and so on until the size, which I usually do as the measure of two fingers of my hand.
Paso 7
ya culminado con el largo del chaleco o abriguito como la querramos llamar, comenzamos a realizar el hilo elástico para darle el largo que se requiera, se hacen con dos derechos, dos revés, dos derecho, dos reves y así sucesivamente hasta obtener el tamaño, que por lo general yo le hago como la medida de dos dedos de mi mano.
Step 8
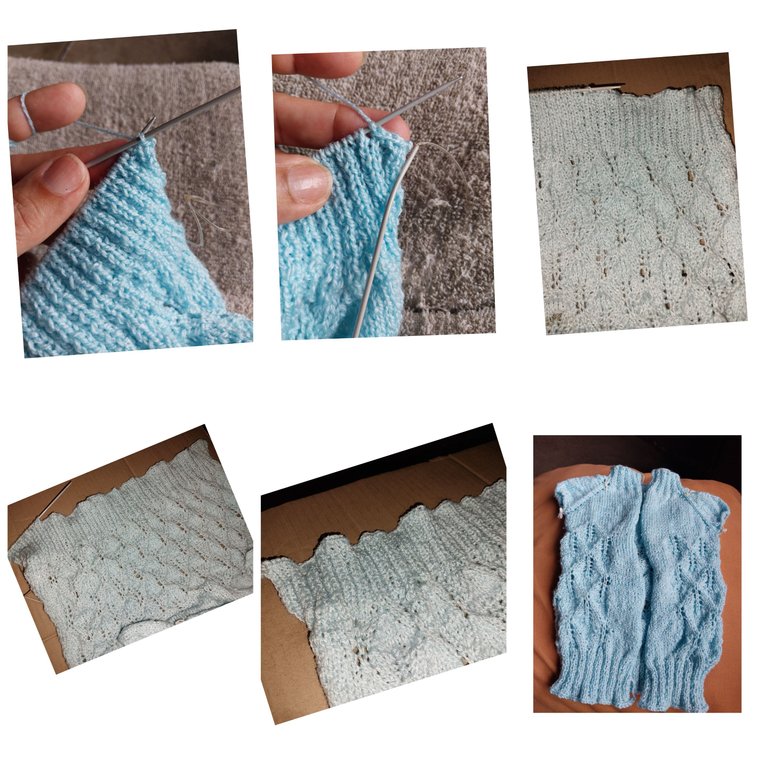
we begin to close the jacket by knitting a single crochet and we return it to the previous needle and we take it again with another stitch that we call it a double crochet and we return it again to the needle And so we continue knitting until we close the whole jacket.
Paso 8
comenzamos a cerrar el chalequito tejiendo un sencillo y lo devolvemos a la aguja anterior y lo volvemos a tomar con otro punto que lo llamamos un doble y los regresamos otra vez a la aguja Y así seguimos Tejiendo hasta cerrar toda la chaquetita.
Step 9
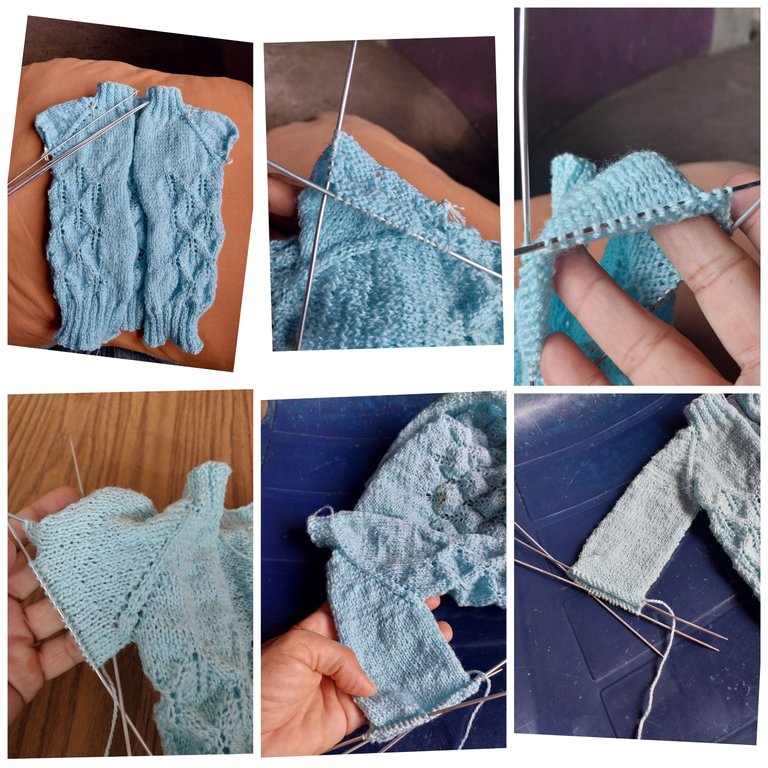
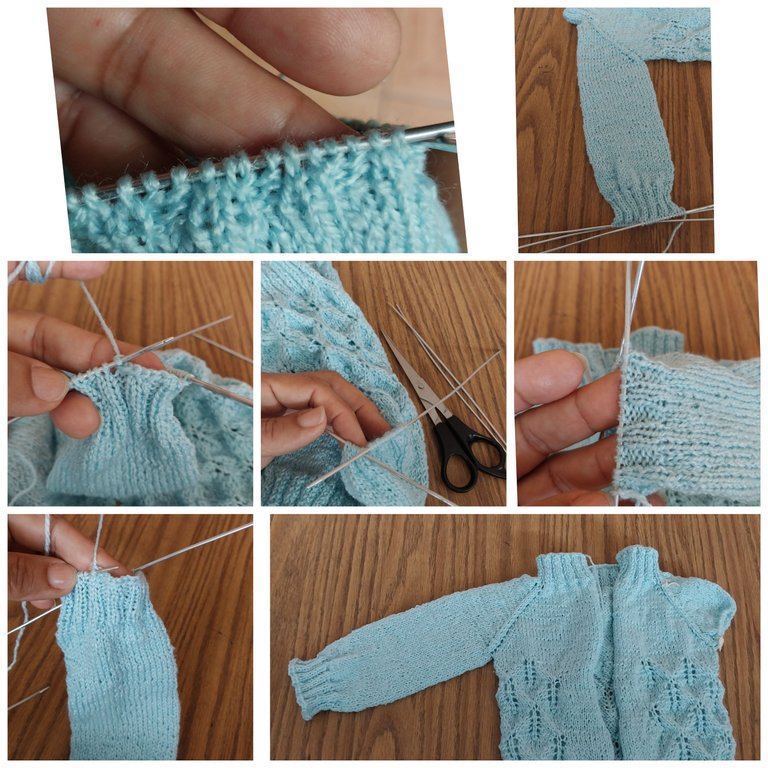
Now that the little body is ready, we are going to start knitting the sleeves with the four needles, we place each needle with the same amount of stitches, we tie the yarn and start knitting, just singles until we get the length of the cuff, and then we start knitting the sleeve with two rights and two backstitches to get the size of the cuff. Then we close, knitting a single and return them to the other needle and continue knitting a double and return it again to take another double and so we continue successively until we finish with the last stitch that we secure it with a knot, so we have finished the first sleeve.
Paso 9
ya listo el cuerpecito, vamos a comenzar a tejer Las mangas con las cuatro agujas, las colocamos cada aguja con la misma cantidad de puntos, empatamos el estambre y comenzamos a tejer, solo sencillos hasta obtener el largo de la manguita, para luego comenzar a realizar el punto de la manga con dos derechos y dos revés para obtener el tamaño del puñito. Luego cerramos, Tejiendo un sencillo y los regresamos a la otra aguja y seguimos Tejiendo un doble y lo regresamos nuevamente para tomar otro doble Y así seguimos sucesivamente hasta terminar con el último punto que lo aseguramos con un nudito, así hemos terminado la primera manguita.
Step 10
Once the first sleeve is finished, we do the same procedure with the other sleeve to complete the two sleeves of this beautiful vest of this awaited baby that is about to be born.
Paso 10
ya culminado la primera manguita realizamos el mismo procedimiento con la otra manguita para darle culminación a las dos mangas de este hermoso chaleco de este esperado bebé que está por nacer.
Step 11
after having finished with the sleeves, we mount the stitches on the needles with a case to finish the front part where we place the little buttons, first on one side and then on the other to finish putting the little buttons and we finish our beautiful and delicate vest for this beautiful baby.
Paso 11
luego de haber culminado ya con las mangas montamos con un estuche los puntos en las agujas para darle culminación a la parte del frente donde le colocamos los botoncitos, primero de un lado y luego del otro para así terminar poniéndole los botoncitos y culminamos nuestro hermoso y delicado chaleco para este hermoso bebé.
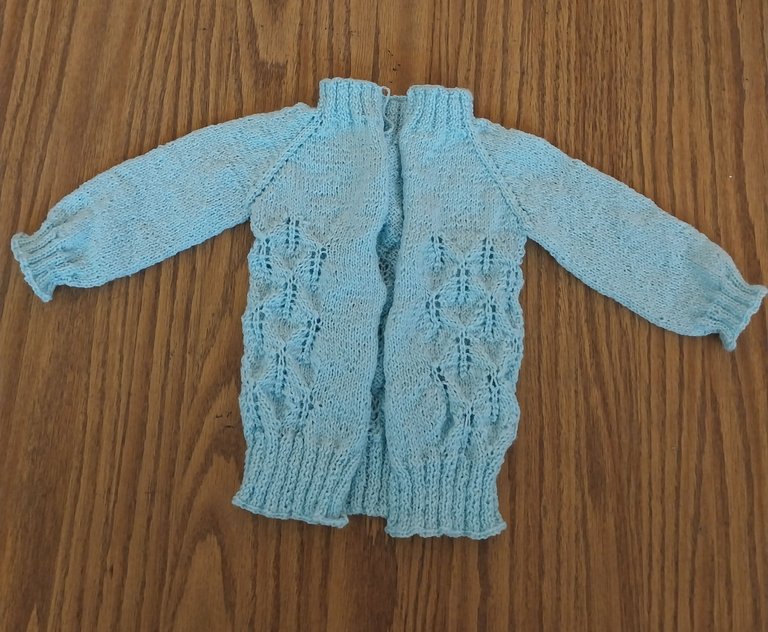
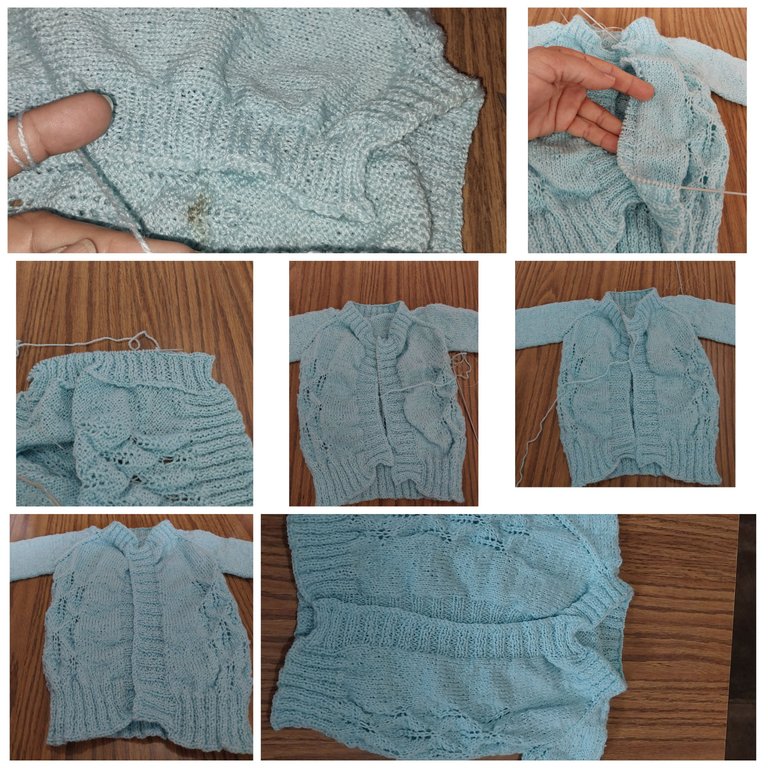
This time I was knitting for fifteen days to make this beautiful vest made with love and dedication, for the new member of the family. I hope you like it.
Thank you for visiting my Blog.
Greetings and blessings.
En esta oportunidad estuve Tejiendo quince días para realizar este hermoso chaleco hecho con amor y dedicación, para el nuevo integrante de la familia. Espero sea de su agrado.
Gracias por visitar mi Blog.
Saludos y bendiones.
Hermosimo trabajo mi linda! El color del hilo que utilizo es muy tierno!
Gracias amiga. Saludos.
Thank you for sharing this amazing post on HIVE!
Your content got selected by our fellow curator @rezoanulvibes & you just received a little thank you via an upvote from our non-profit curation initiative!
You will be featured in one of our recurring curation compilations and on our pinterest boards! Both are aiming to offer you a stage to widen your audience within and outside of the DIY scene of hive.
Join the official DIYHub community on HIVE and show us more of your amazing work and feel free to connect with us and other DIYers via our discord server: https://discord.gg/mY5uCfQ !
If you want to support our goal to motivate other DIY/art/music/homesteading/... creators just delegate to us and earn 100% of your curation rewards!
Stay creative & hive on!
Graciassss.
Welcome back @rosalbaced. I’m glad to see you’re feeling better and back to knitting again. 😉
What a cute little vest. I’m sure it will look lovely on your great niece. I like that color too.
Thanks for sharing this project with us ~
I am very happy that you like my work. Thank you friend, virtual greetings.
You’re very welcome ~ 😉
😘🤗
Me alegra q le guste mi trabajo. Gracias. Un saludo virtual.
You’re welcome ~