Muy buenos días mi querida comunidad de blogs hive, les deseo una lluvia de bendiciones, que este día sea de prosperidad y abundancia para todos.
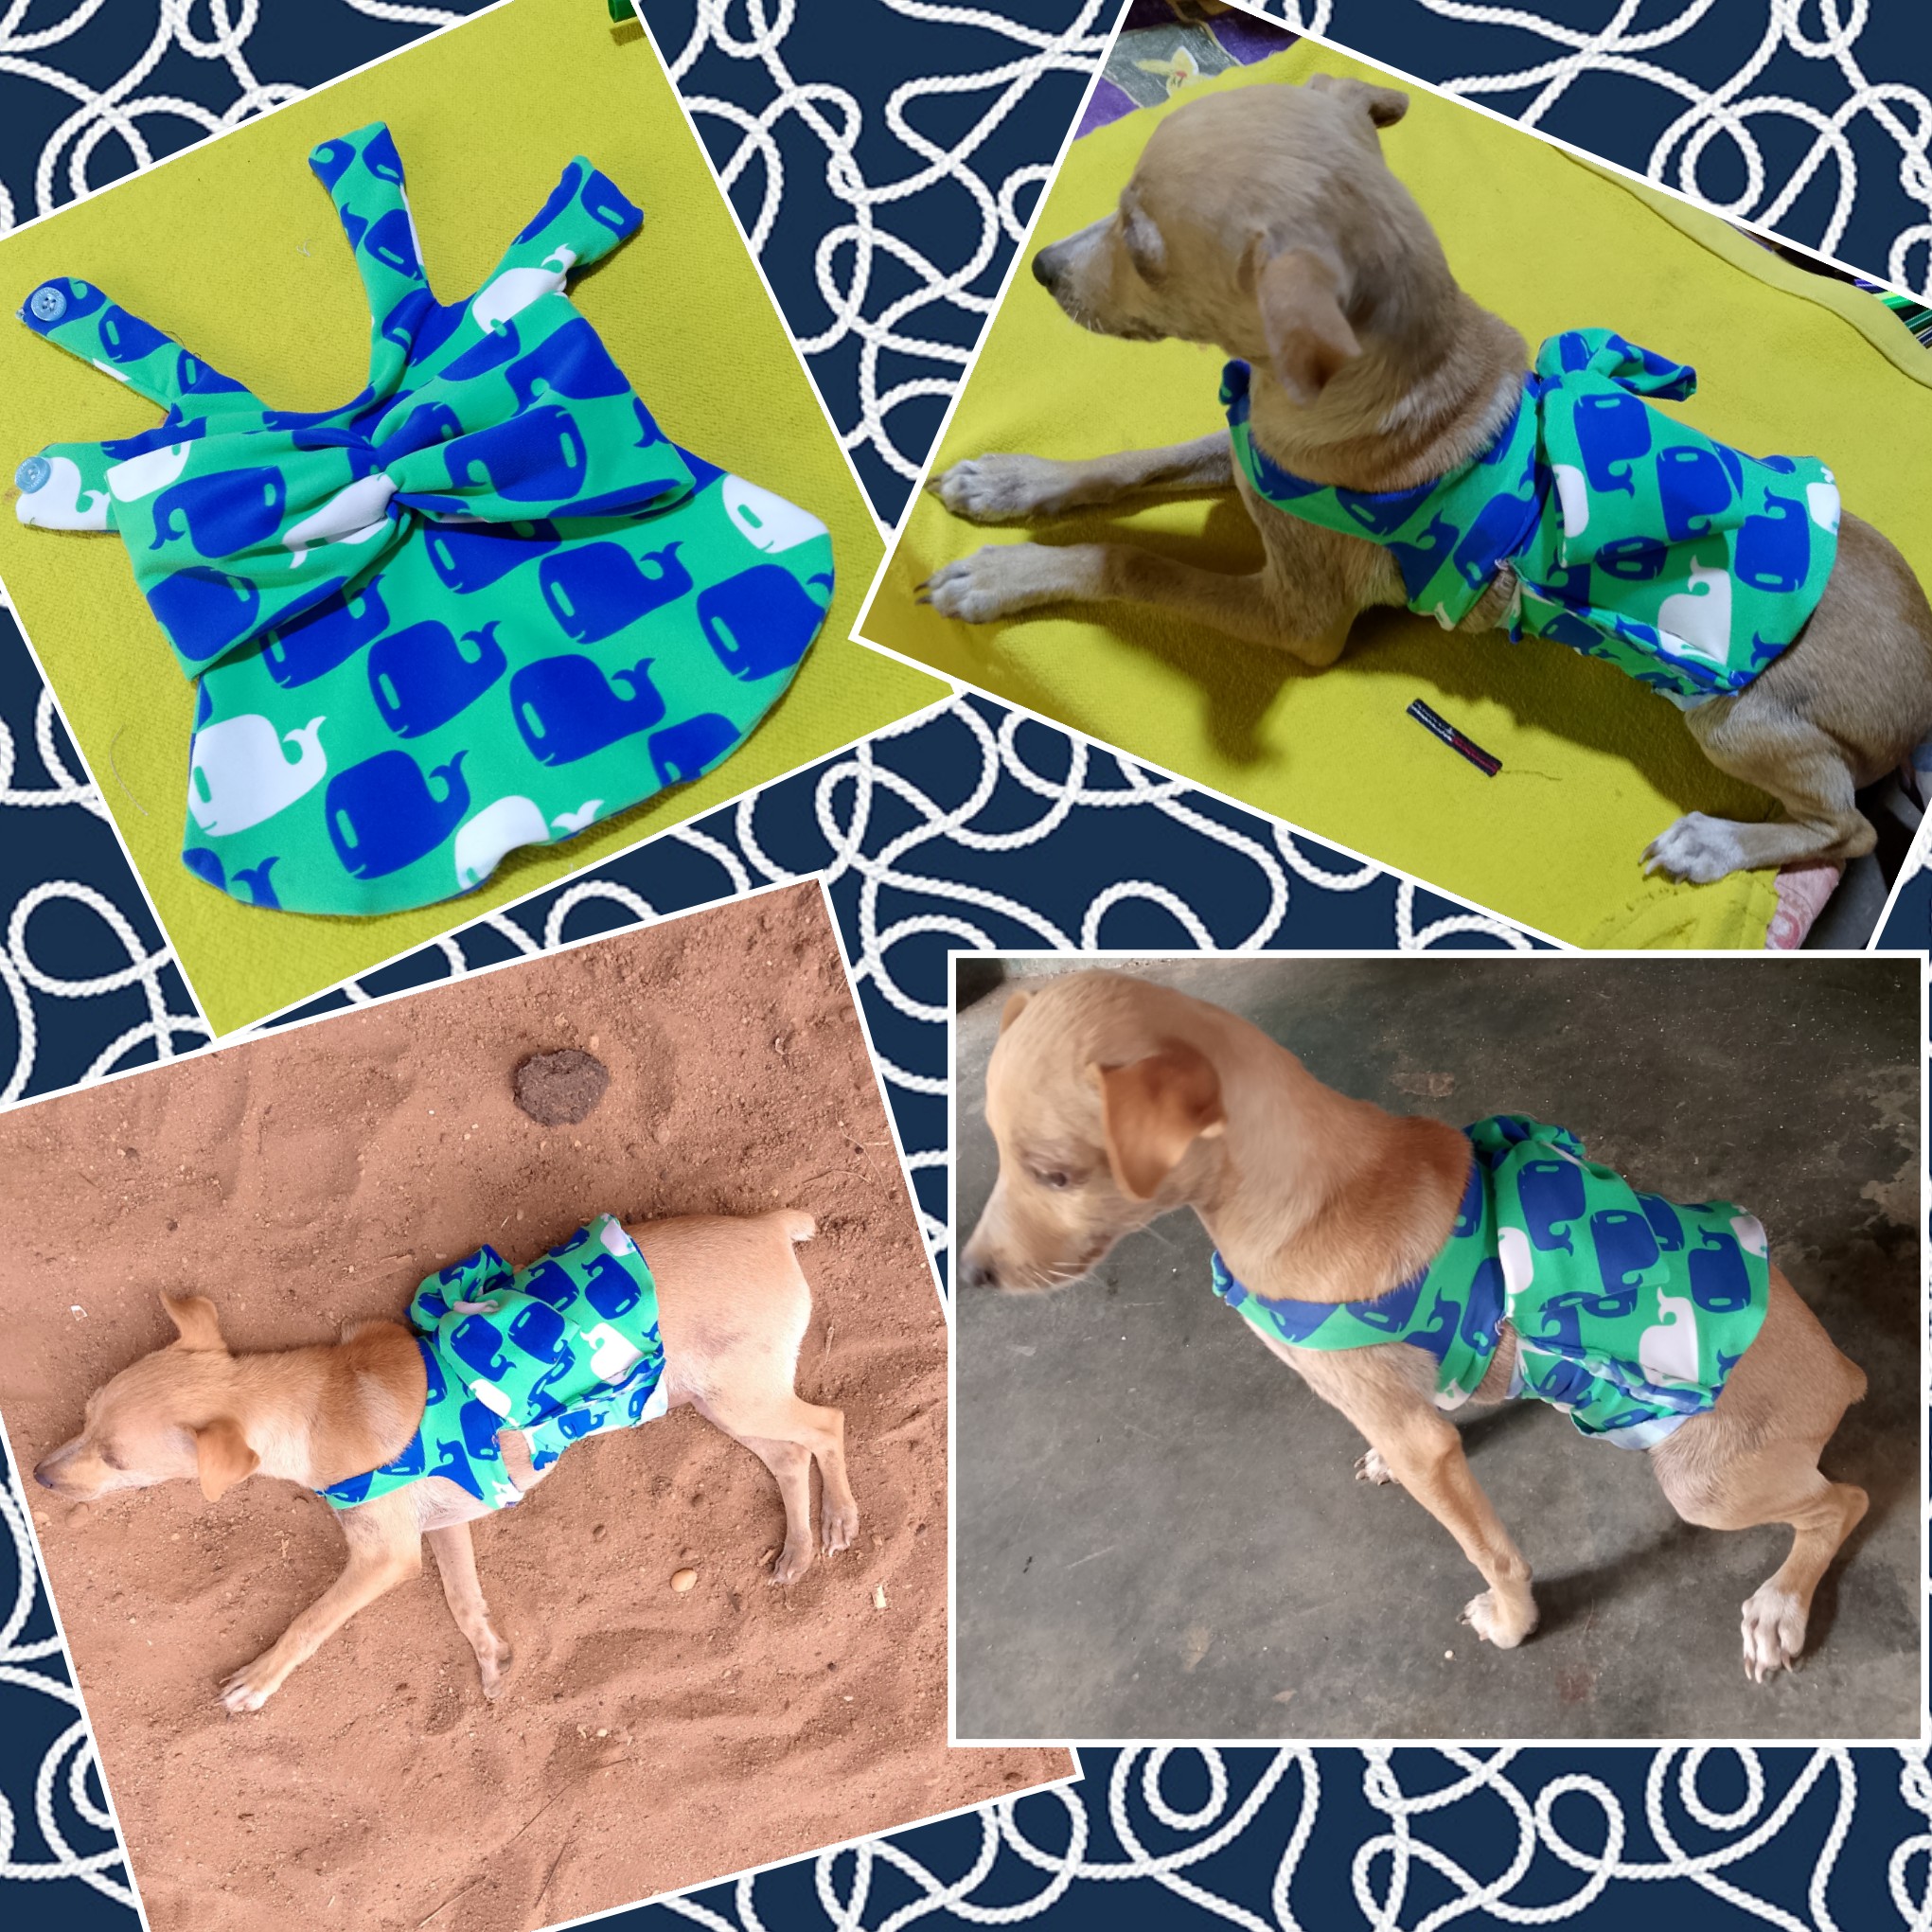
En este nuevo post quería compartir con ustedes mi paso a paso para hacer un lindo y sencillo mini vestido para la pequeña de la casa, mi querida mascota Luna Montserrat. Les cuento que en mi casa tenemos varias mascotas a las que queremos y cuidamos mucho. Entre ellos se encuentran: 2 perros Bamban y Luna, también tenemos 3 lindos gatitos Kishi, Knight y Princess.
Como les había comentado en mis publicaciones anteriores me llamó mucho la atención el hermoso arte de la costura y también les comenté que estaba aprendiendo a coser, pues tomé la iniciativa de hacerle un vestido a mi lunita, como cariñosamente le digo a mi mascota. jeje. Bueno, es el primer vestido que hago para mascotas y me hizo mucha ilusión cuando lo hice aunque todavía no soy tan experta como me gustaría pero sigo intentándolo, sigo aprendiendo y sigo practicando cada día un poquito más. aquí les muestro el proceso espero les guste el resultado.
Very good morning my dear hive blog community, I wish you a shower of blessings, may this day be one of prosperity and abundance for everyone.
In this new post I wanted to share with you my step by step of making a cute and simple mini dress for the darling of the house, my beloved pet Luna Montserrat. I tell you that in my house we have several pets that we love and take great care of. Among them are: 2 dogs Bamban and Luna, we also have 3 cute kittens Kishi, Knight and Princess.
As I had mentioned in my previous publications, the beautiful art of sewing caught my attention and I also told them that I was learning to sew, well, I took the initiative to make a dress for my little moon, as I affectionately tell my pet hehe. Well, it is the first dress I have made for pets and I was very excited when I made it although I am still not as expert as I would like but I keep trying, I keep learning and I keep practicing a little more every day, here I show you the process I hope you like the result.
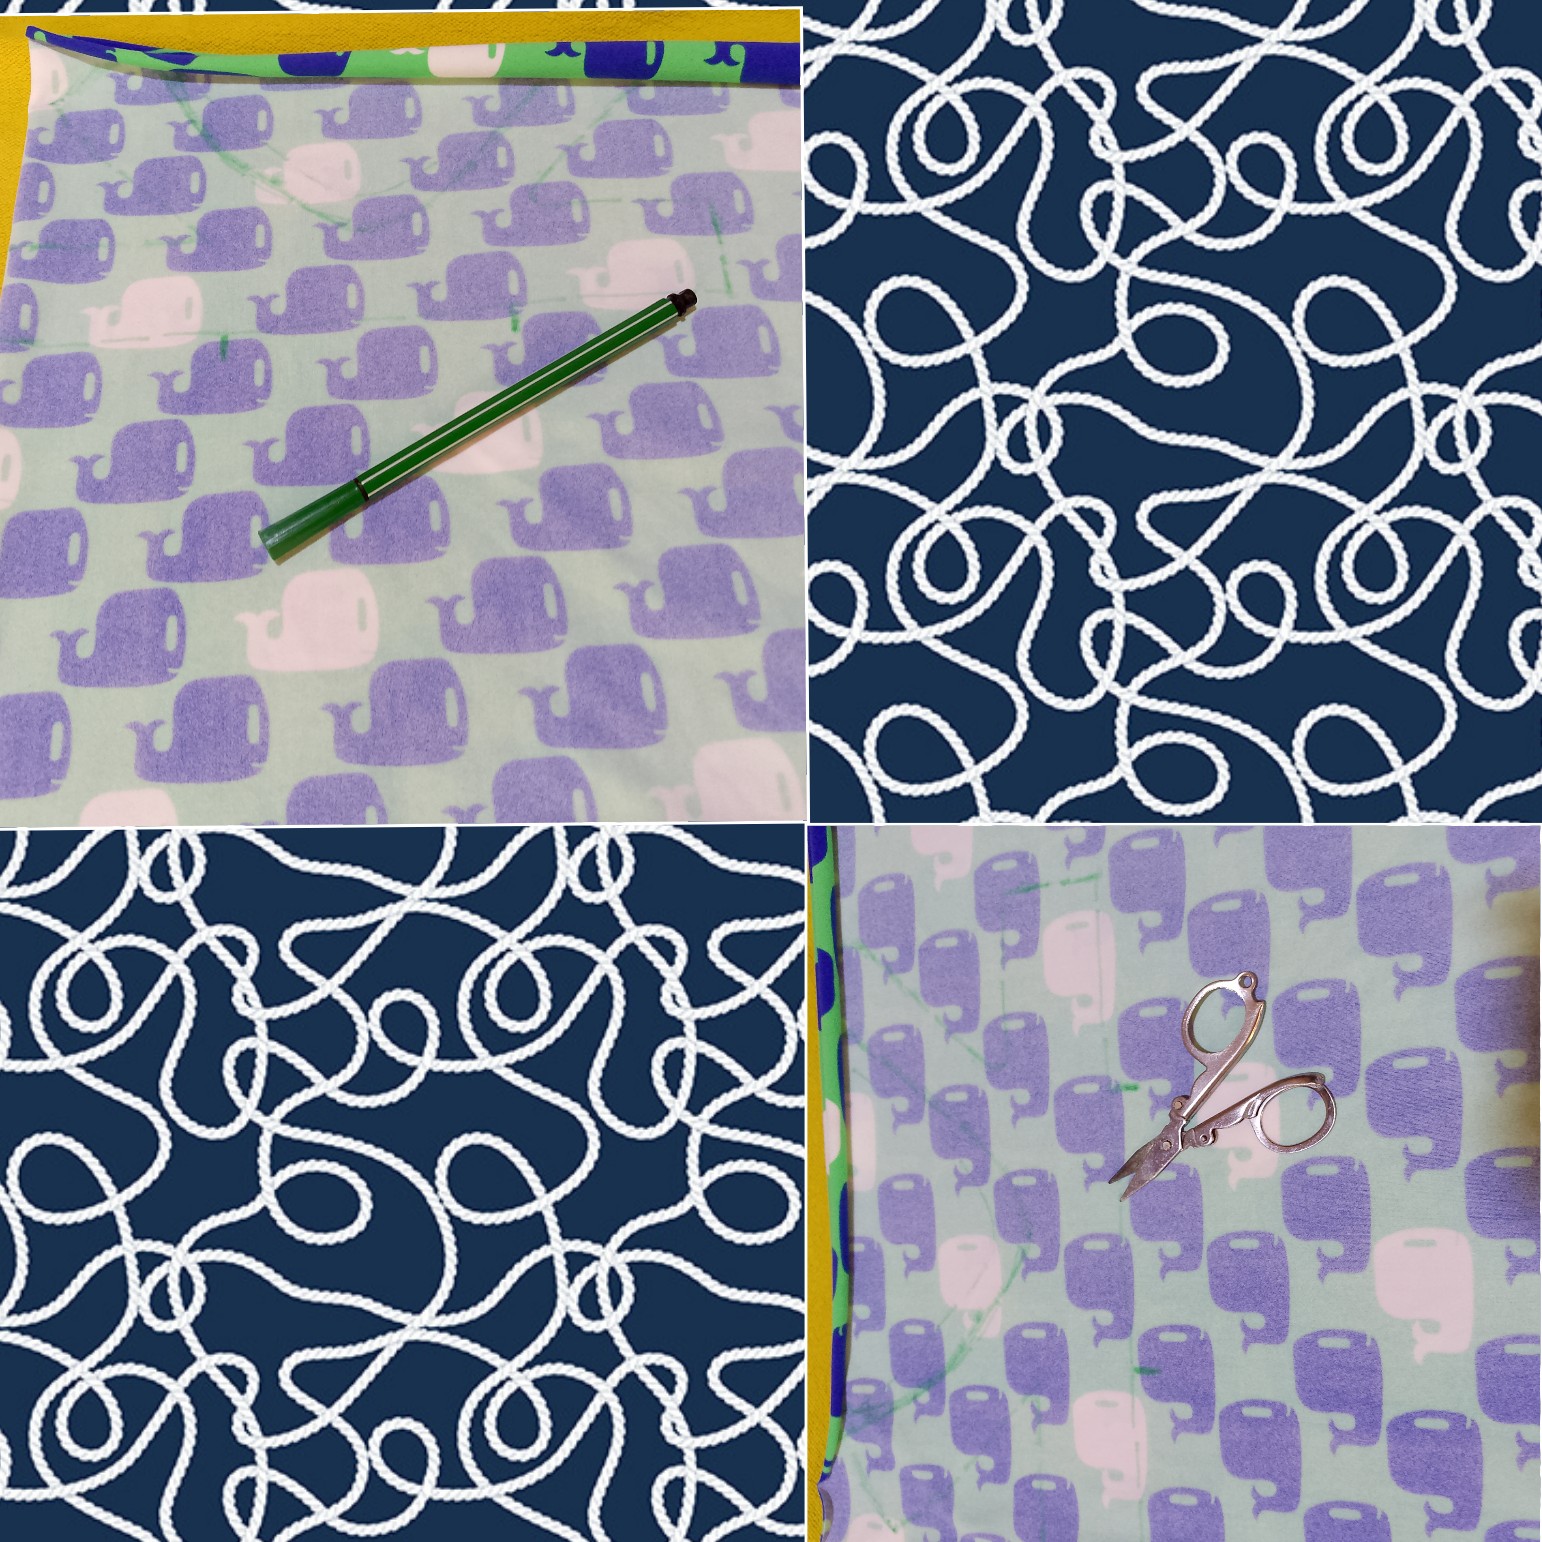
Para ello necesitarás los materiales que te mencionaré a continuación:
- Tela del diseño y color de tu preferencia.
- Marcador.
- Tijeras.
- Aguja e hilo.
- Máquina de coser (No te preocupes si no tienes una puedes coser a mano).
To do this you will need the materials that I will mention below:
- Fabric of the design and color of your preference.
- Marker.
- Scissors.
- Needle and thread.
- Sewing machine (Don't worry if you don't have one you can sew by hand).

Lo primero que harán será doblar la tela para que quede del lado contrario, es decir, del revés, para así marcar el diseño del vestido que más te guste. Luego, procede al corte. Cabe destacar que debes dejar un borde de aproximadamente un centímetro de ancho. Esto facilitará el proceso al coser.
The first thing they will do is fold the fabric so that it is on the opposite side, that is, on the upside down side, in order to mark the design of the dress that you like the most. Then, proceed to cutting. It should be noted that you should leave an edge approximately one centimeter wide. This will make the process easier when sewing.
Después de cortar el diseño quedará así. luego procede a coser dejando un pequeño espacio entre la costura.
After cutting the design it will look like this. then proceed to sew leaving a small space between the seam.
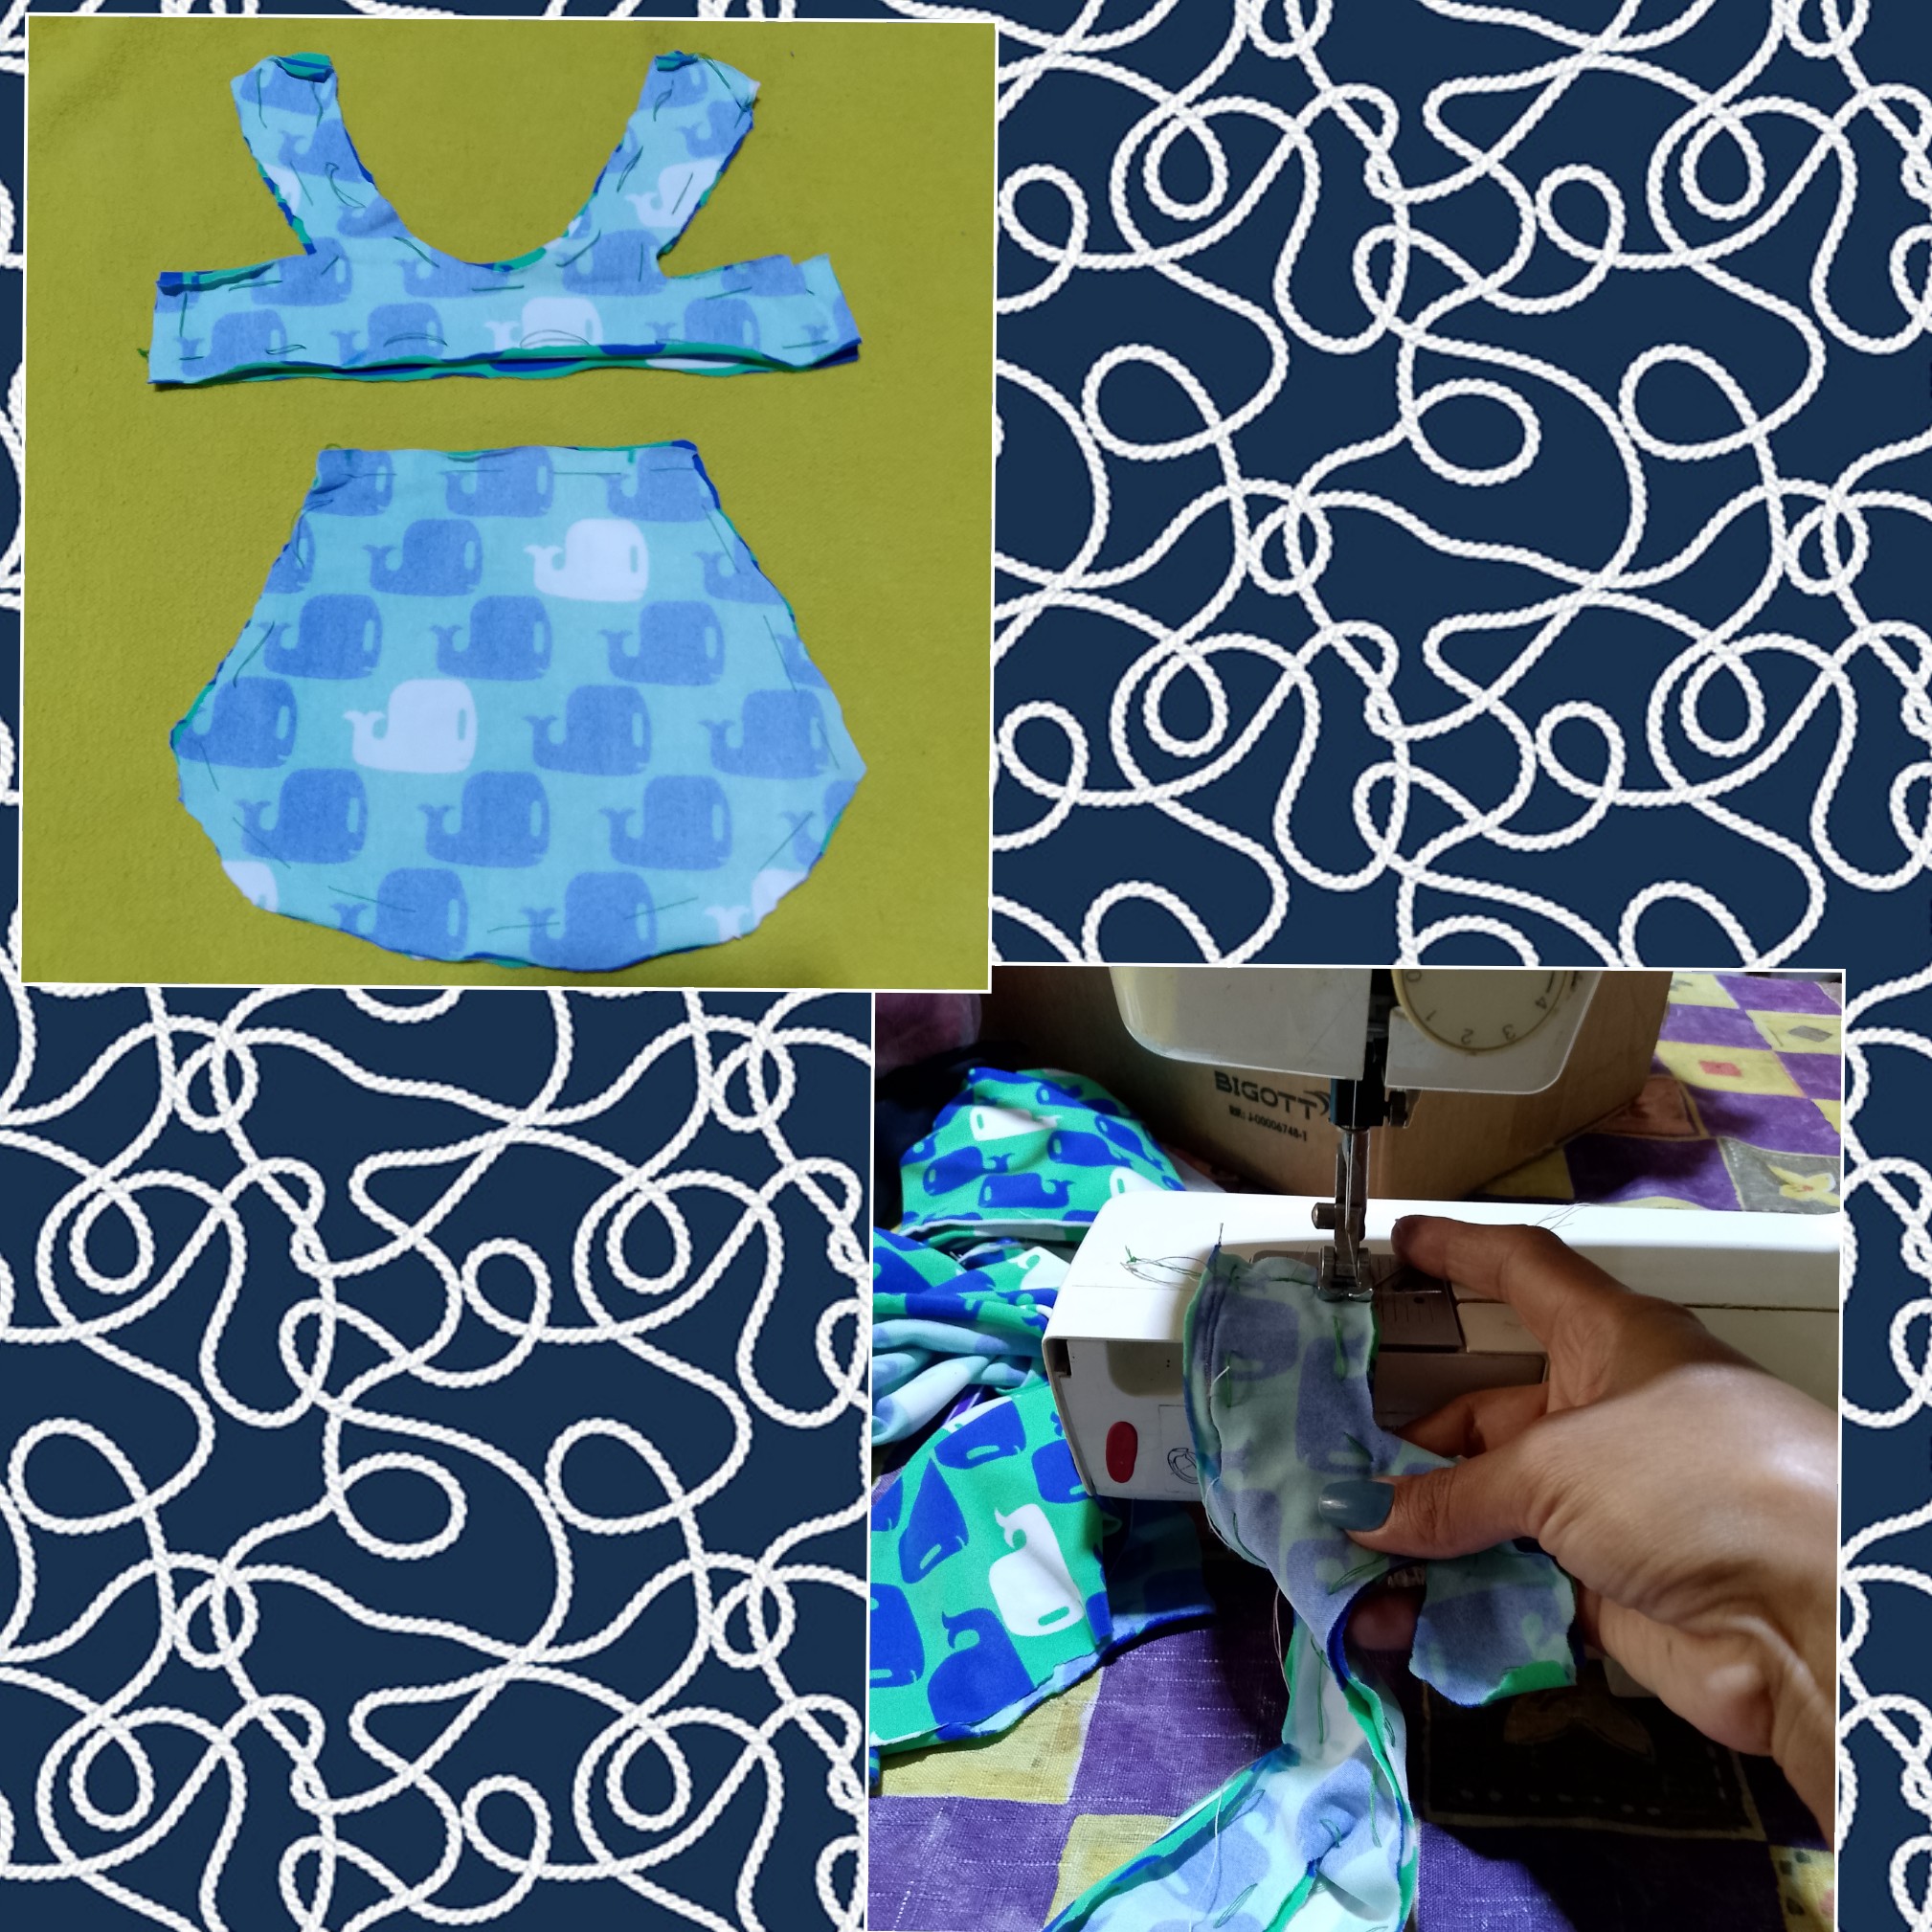
El espacio que mencioné dejar en el paso anterior es para poder doblar la tela fácilmente y así quedará la costura. Ahora procede a coser ambas piezas.
The space that I mentioned leaving in the previous step is to be able to fold the fabric easily and this is how the seam will look. Now proceed to sew both pieces.

Como puedes ver en las imágenes quedaron cuatro extremos en dos de los extremos, puedes colocar un trozo de cierre mágico. En este caso utiliza un botón ya que no tenía cierre mágico y en los dos extremos restantes procede a hacer los ojales para poder abrochar el botón.
As you can see in the images, there were four ends left on two of the ends, you can place a piece of magic closure. In this case, use a button since it did not have a magic closure and on the two remaining ends proceed to make the buttonholes so you can fasten the button.
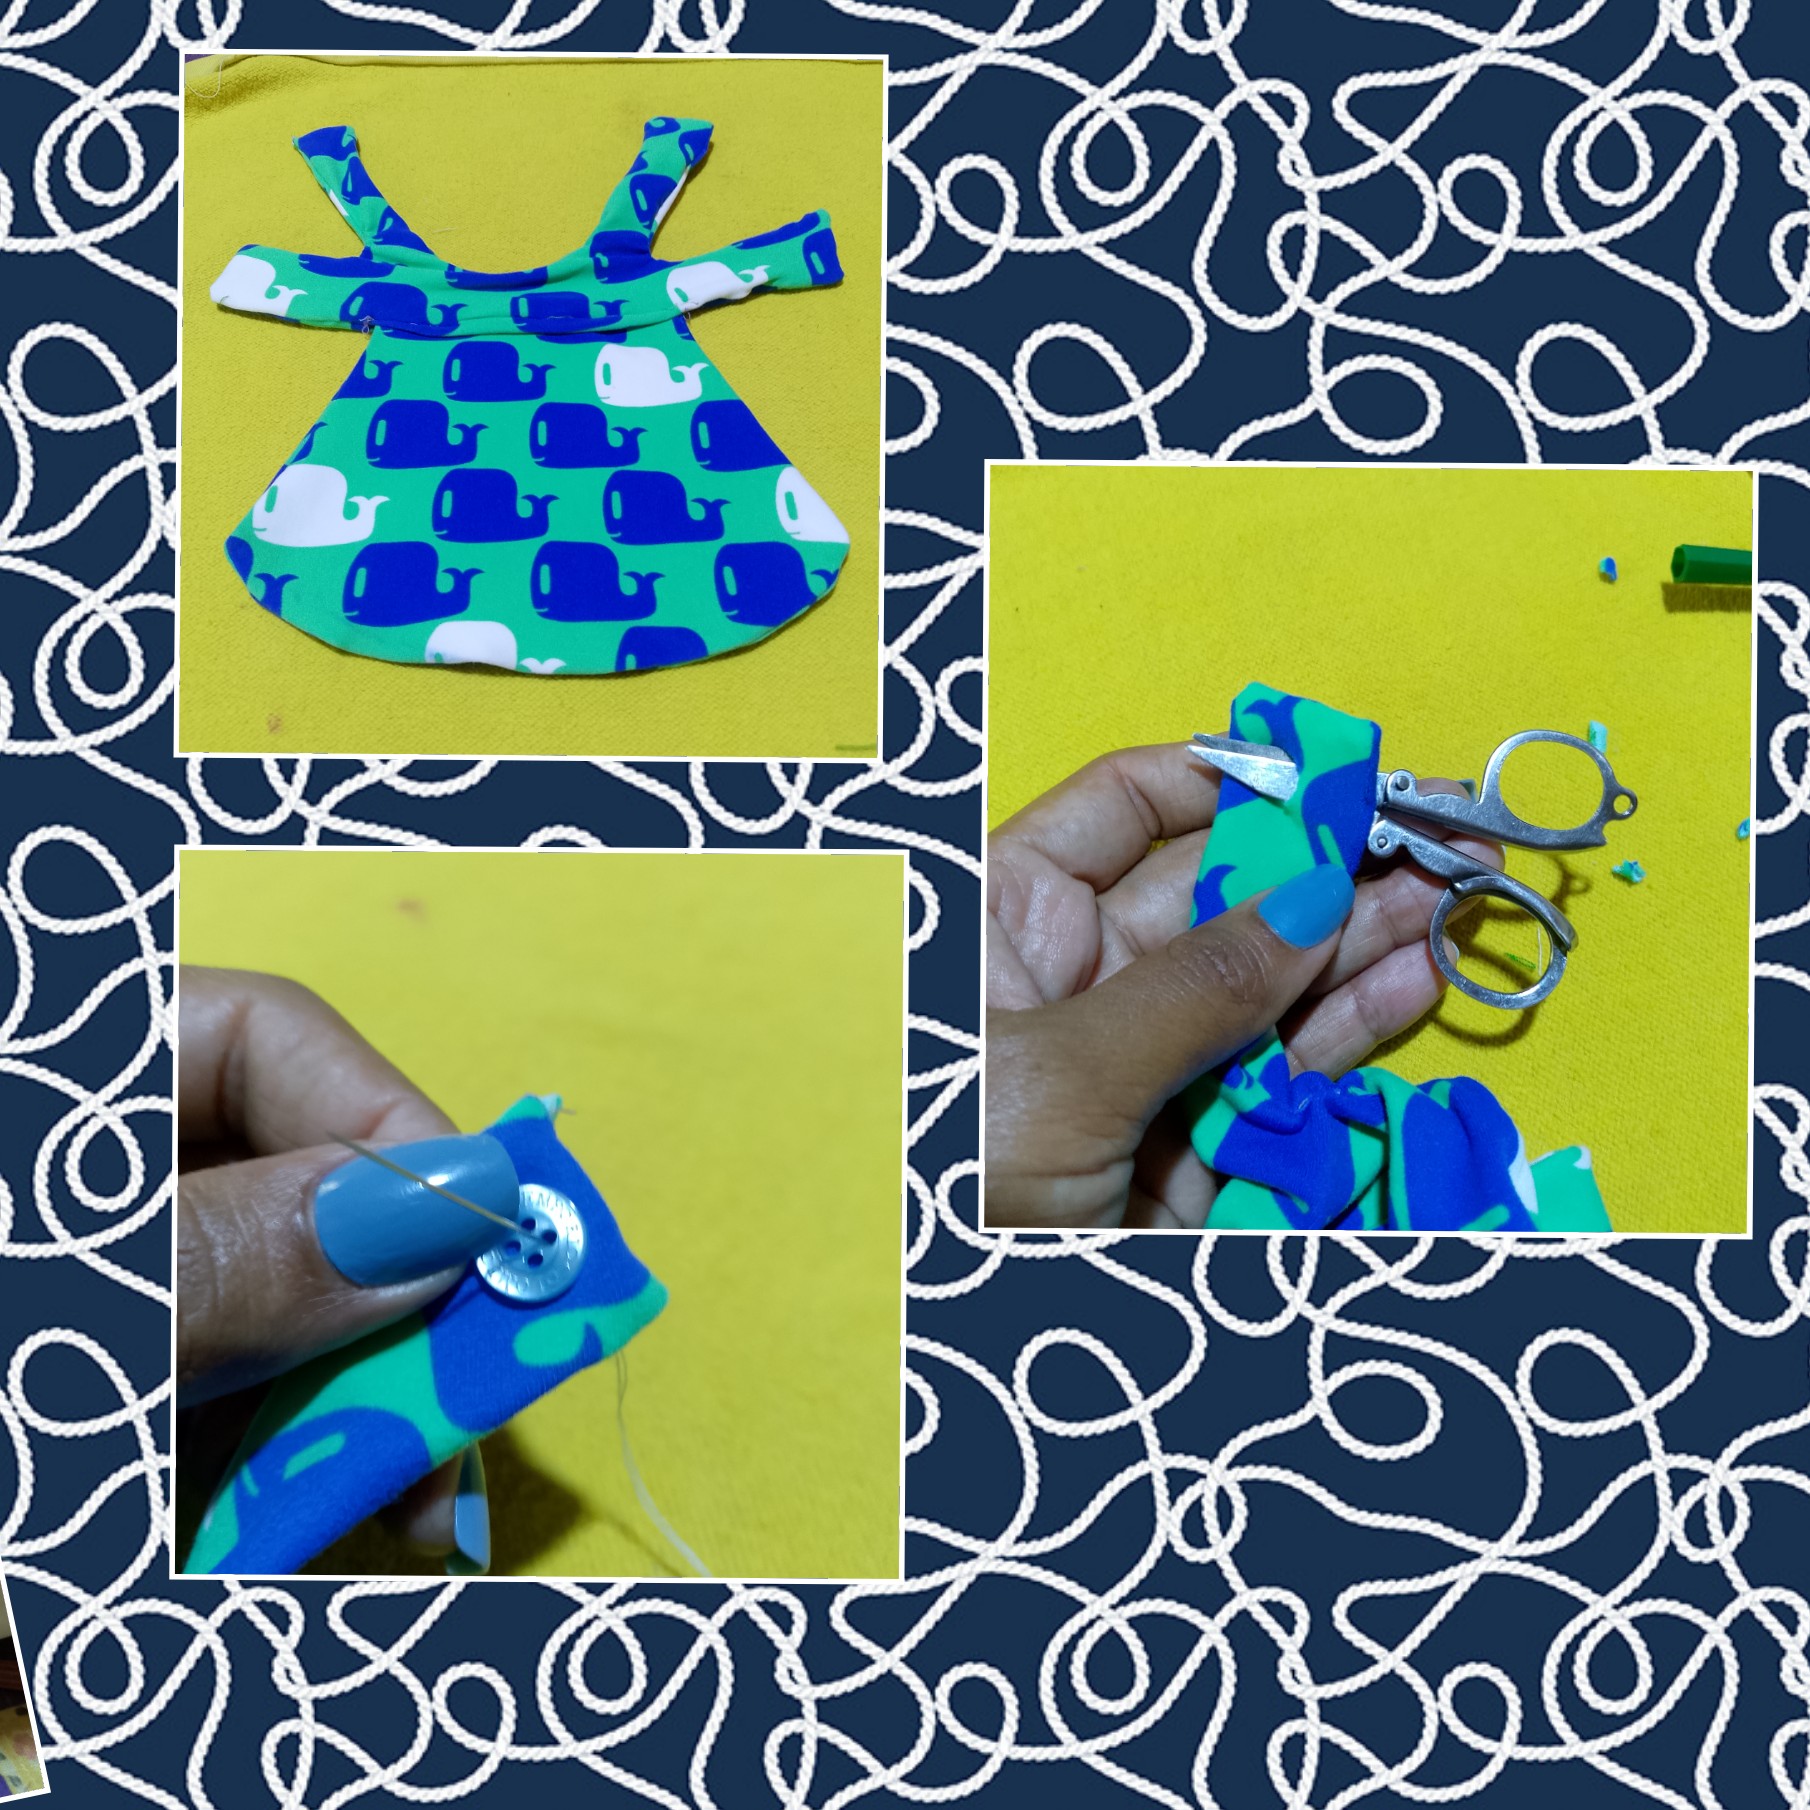
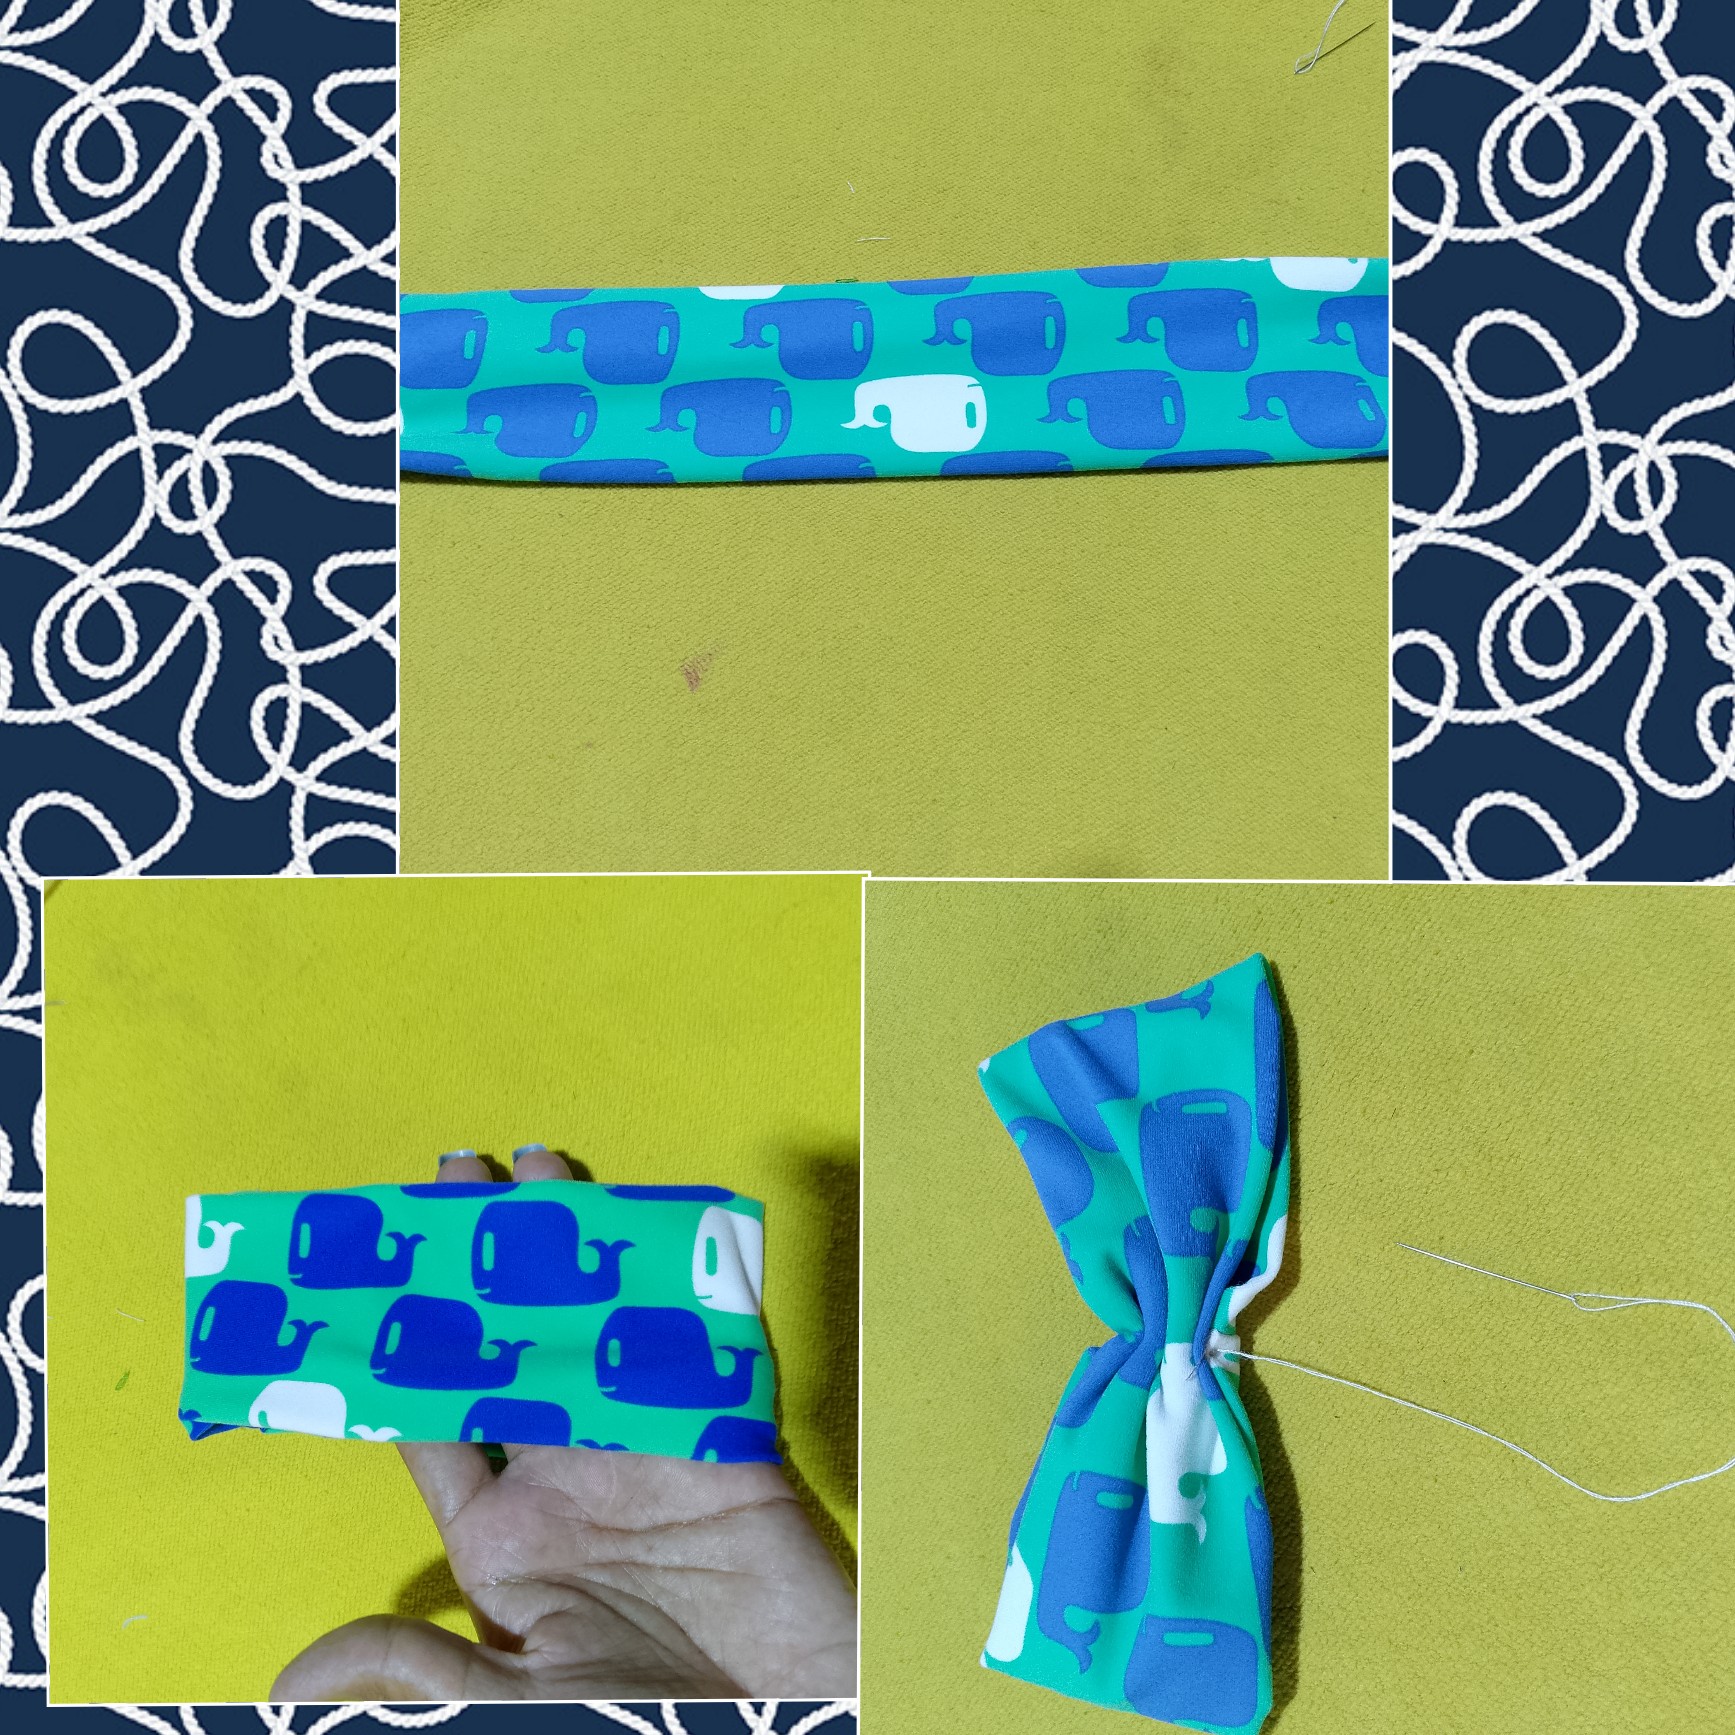
Finalmente, toma un trozo de tela y corta una tira un poco gruesa, luego comienza a coser por el revés, luego dobla la tela, une ambos extremos y haz una costura en el centro para darle forma al lazo. Este será un bonito detalle para decorar el vestido.
Finally, take a piece of the fabric and cut a slightly thick strip, then start sewing on the wrong side, then fold the fabric, join both ends and make a seam in the center to shape the bow. This will be a nice detail to decorate the dress. .
Muchas gracias por leer mi post hasta el final, nos vemos la proxima vez donde les mostrare un nuevo trabajo.
NOTA: Las fotos fueron editadas por el programa creador de collage de fotos.
Thank you very much for reading my post until the end, see you next time where I will show you a new work.
NOTE: Photos were edited by photo collage maker program.
Realmente te ha quedado muy lindo este traje para la mascota. Te felicito. Muchas gracias por compartir tu proyecto en la comunidad. Saludos!
Me alegro que te guste amiga , gracias
It looks pretty cool. Good to see each step of making this. Love it. Thank you for sharing this.
Gracias a ustedes por su apoyo, yo feliz de poder compartir mis trabajos con esta gran colmena 🤗
Congratulations @sergimarmartinez! You have completed the following achievement on the Hive blockchain And have been rewarded with New badge(s)
Your next target is to reach 200 comments.
You can view your badges on your board and compare yourself to others in the Ranking
If you no longer want to receive notifications, reply to this comment with the word
STOPCheck out our last posts:
Ay, qué lindo, hace tiempo no hago un trajecito para una mascota, el color del estampado de la tela, le va muy bien con su color de pelaje.💙🐕
Gracias amiga , me alegro mucho que te guste
🤗❤️
Wow, that dress fits to the cute dog. I love the color because it's my favorite. I hope you will upload more next time. I like it very much.
she is very cute! her new dress suits her very well!