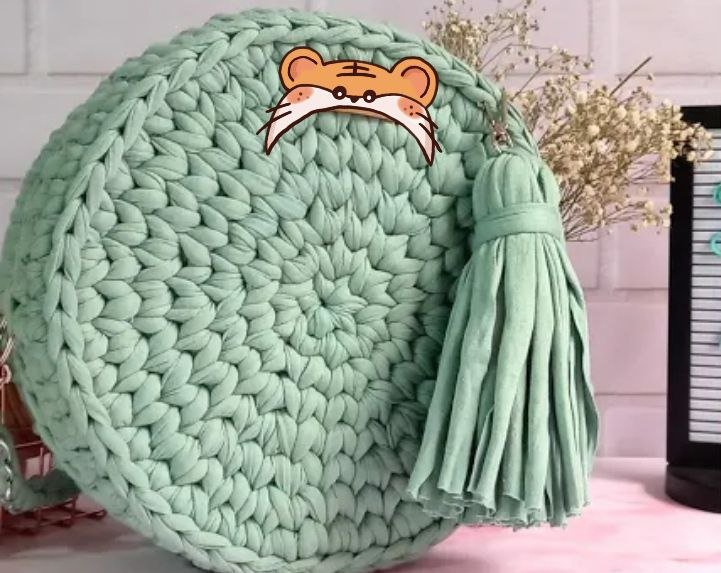
Les cuento un poco sobre el proyecto que voy a desempolvar, es una cartera o bolsa realizada con trapillo, es un material específico de trapillo y a la persona que se lo compre ya no lo vende por ende mi reto está en buscar alguien más que lo venda, buscar la misma tonalidad y ponerme manos a la obra, acá les comparto una fotografía de referencia de cómo debe quedar la bolsa o cartera.
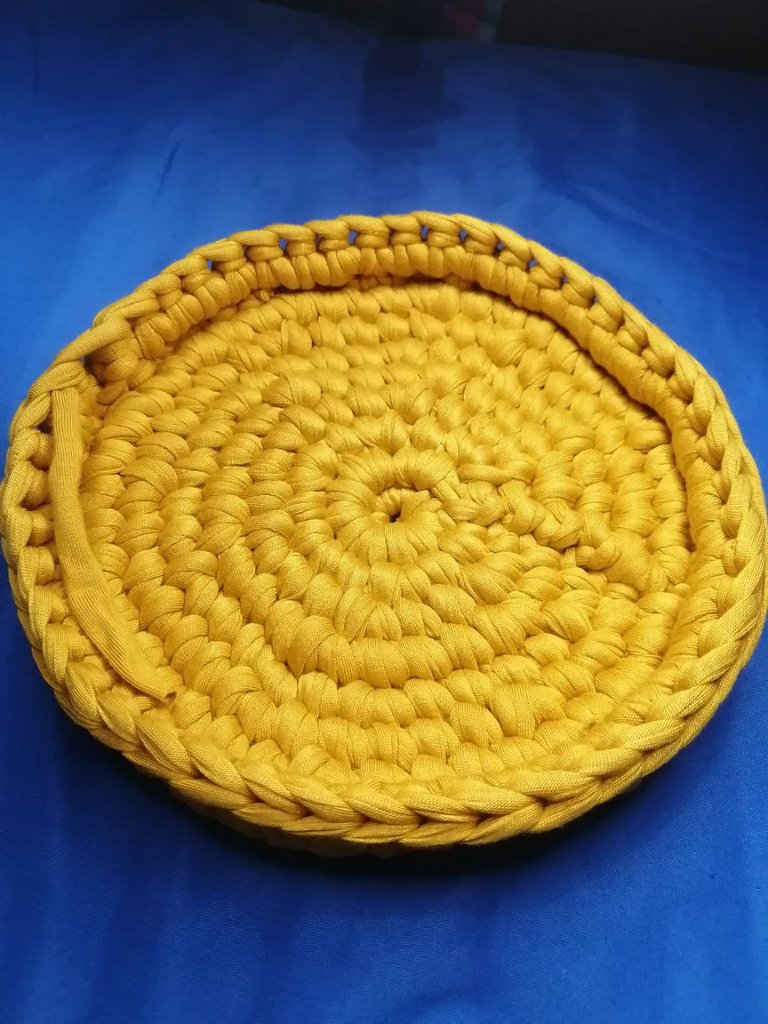
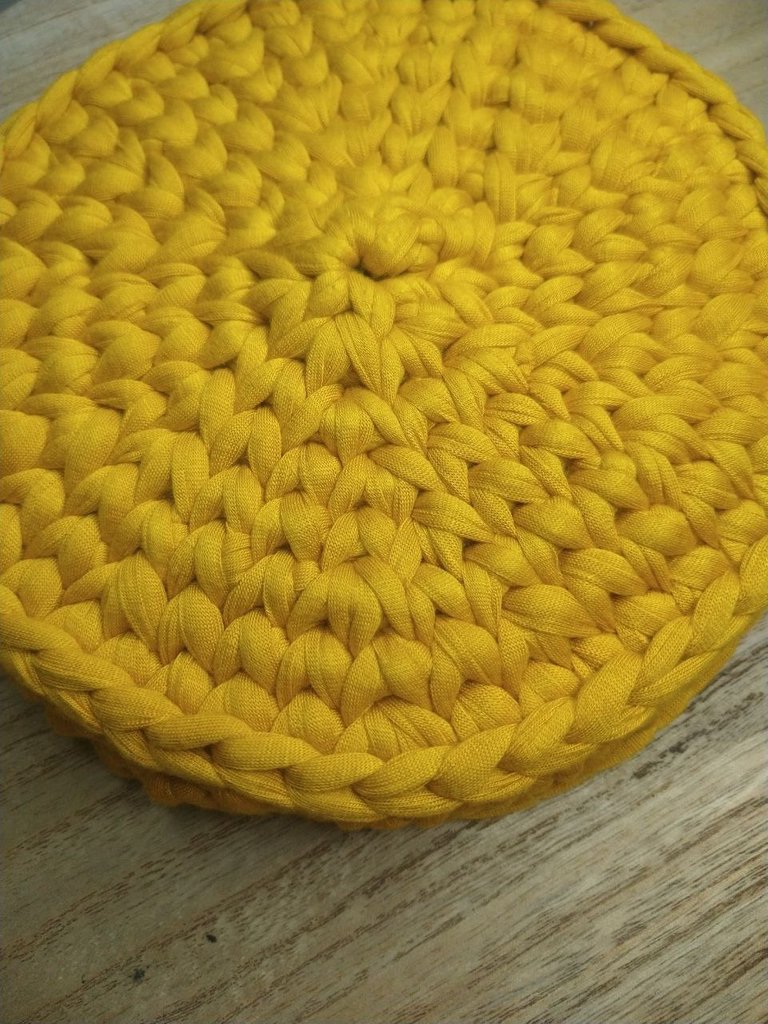
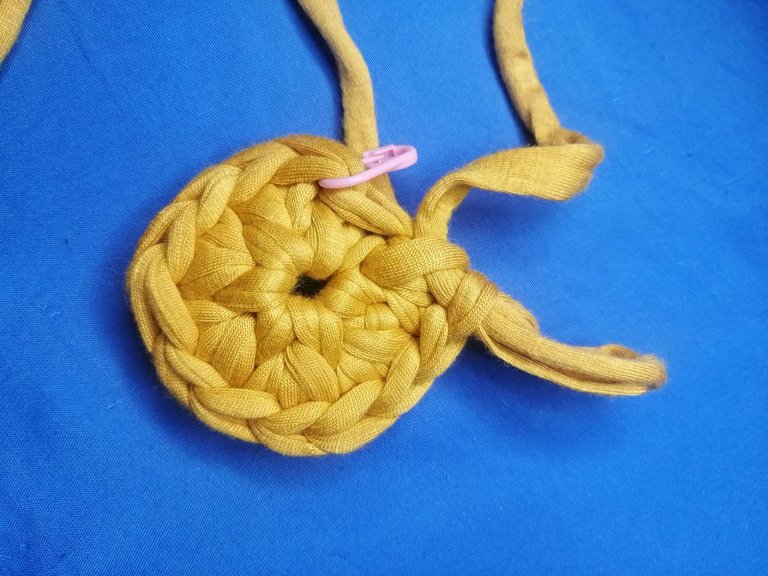
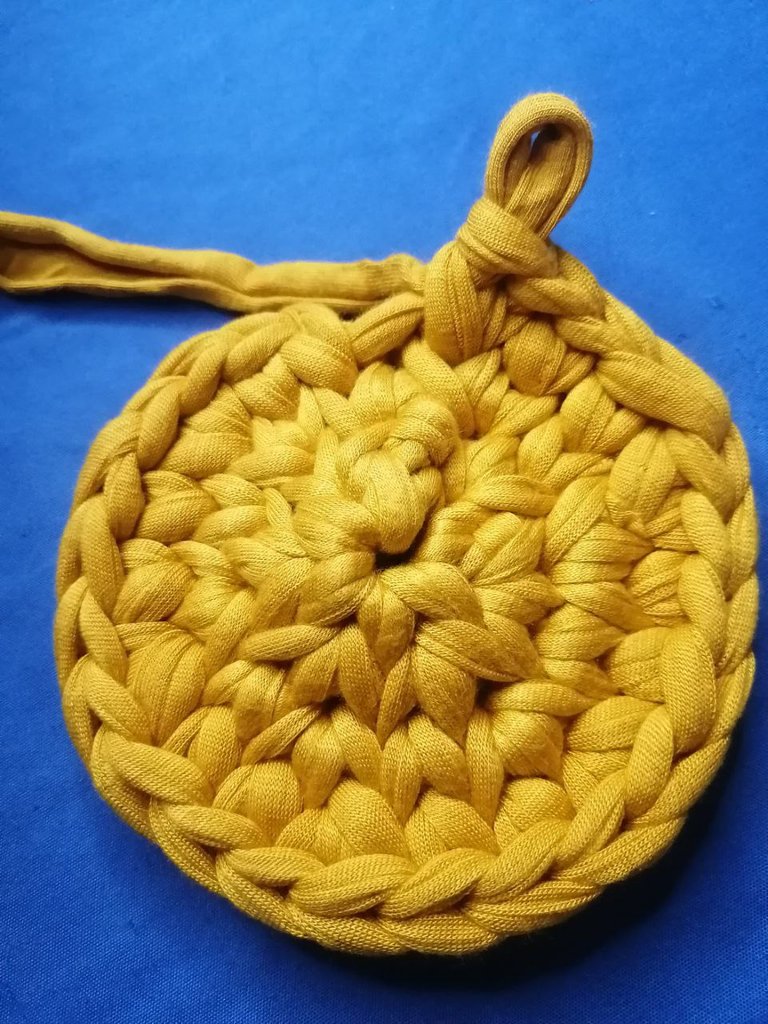
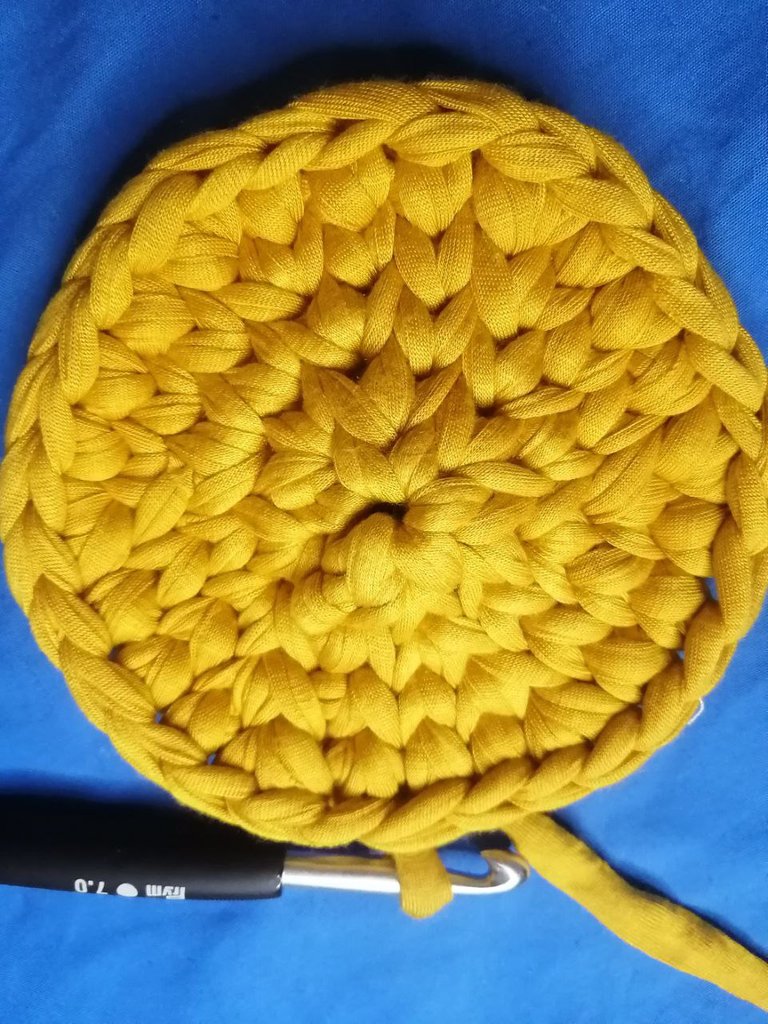
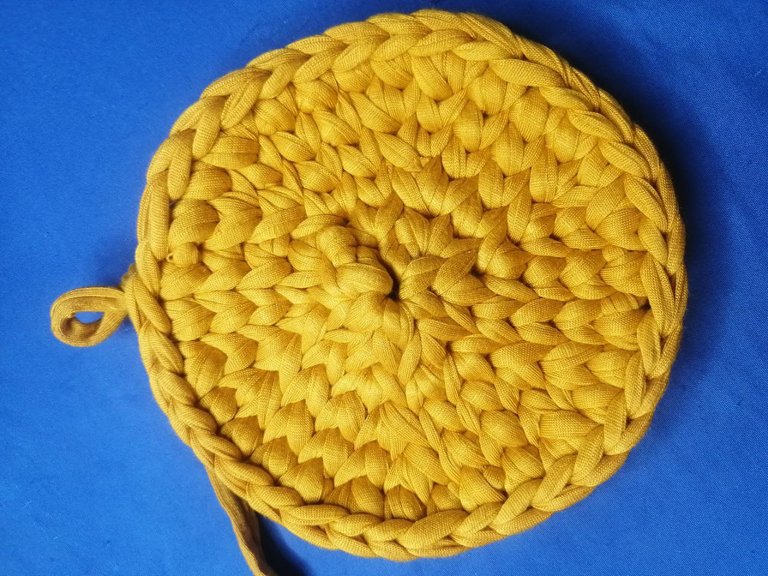
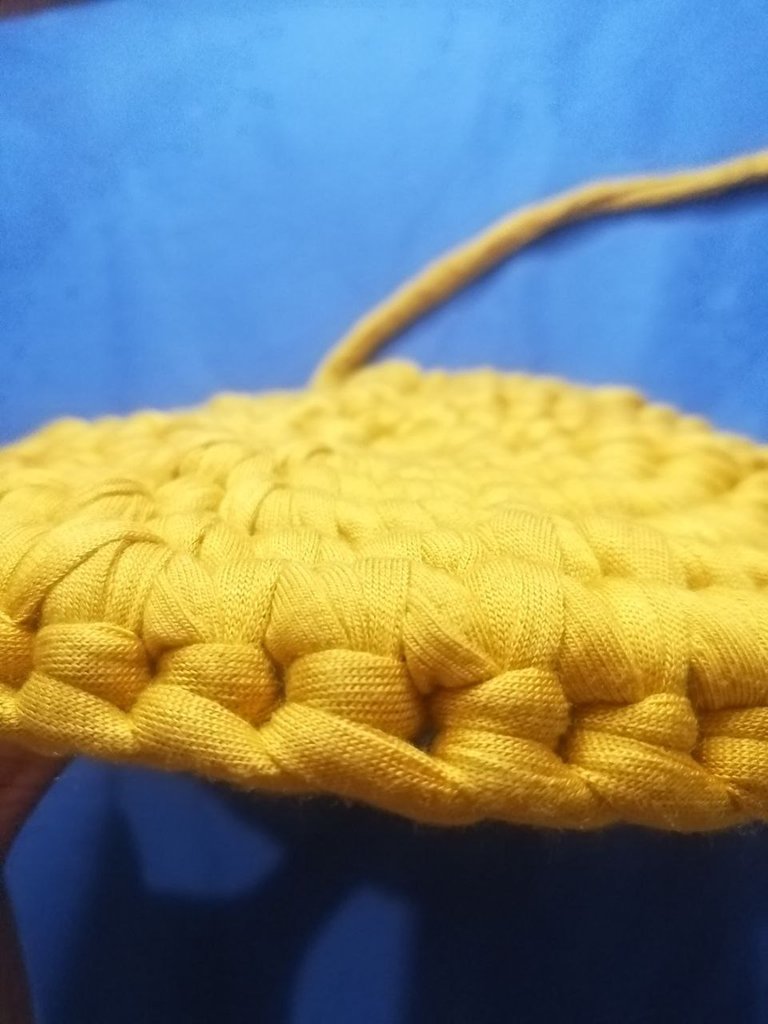
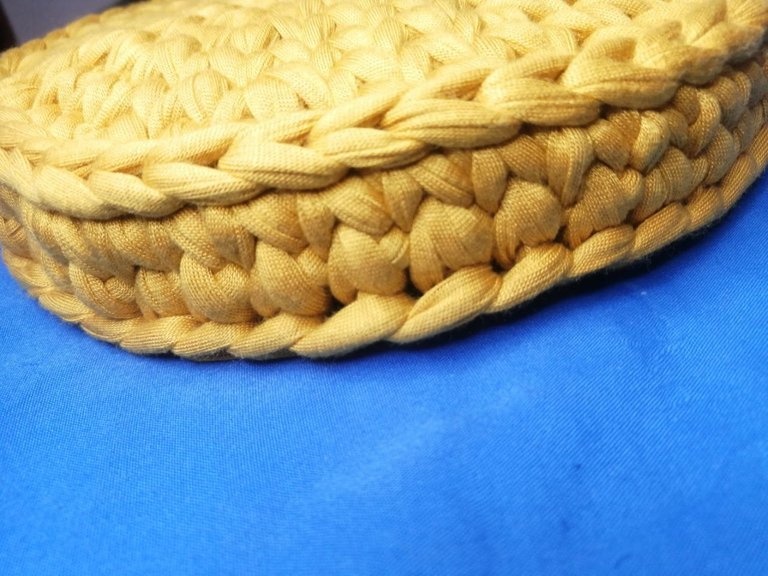
Viendo la referencia les comparto la fotografía de como quedo mi proyecto, hasta donde logre realizarlo.
 |  |  |
|---|
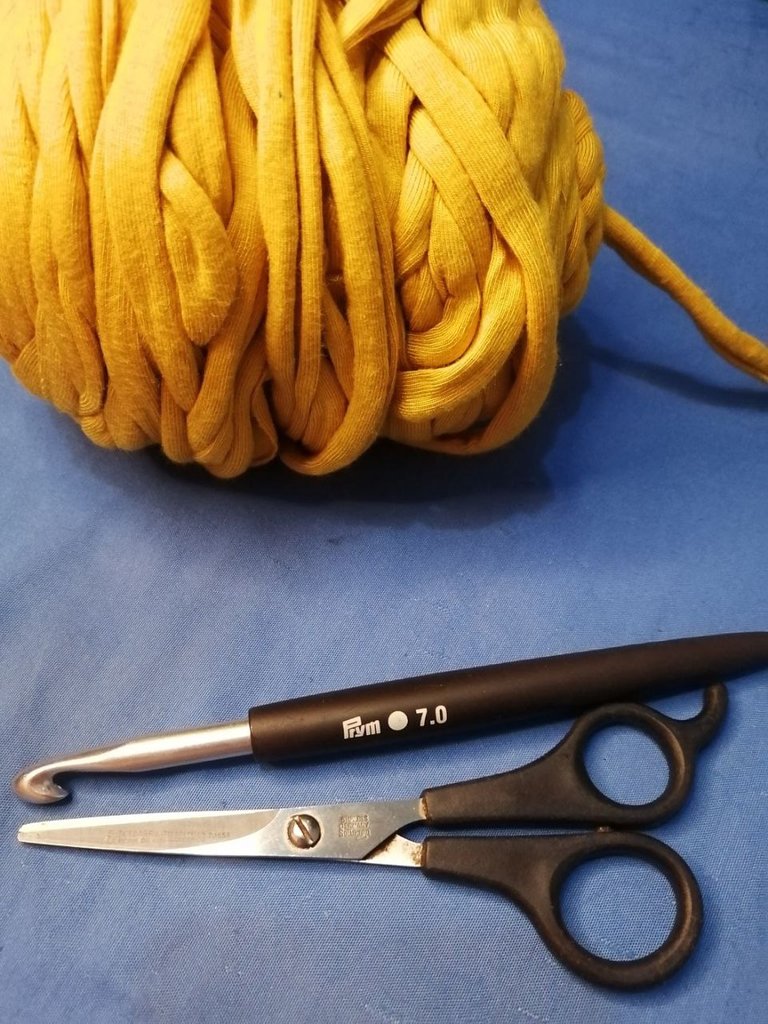
*Los materiales utilizados fueron los siguientes:
Tijeras
Trapillo color mostaza
Ganchillo número 7
Espero poder encontrar el material e irles mostrando el avance de este lindo proyecto, ya lleva paralizado un aproximado de 5 meses, ya que se me dificulto encontrar el material y por ende al llegar otros pedidos lo fui descuidando, les comparto el paso a paso para llegar hasta aquí.
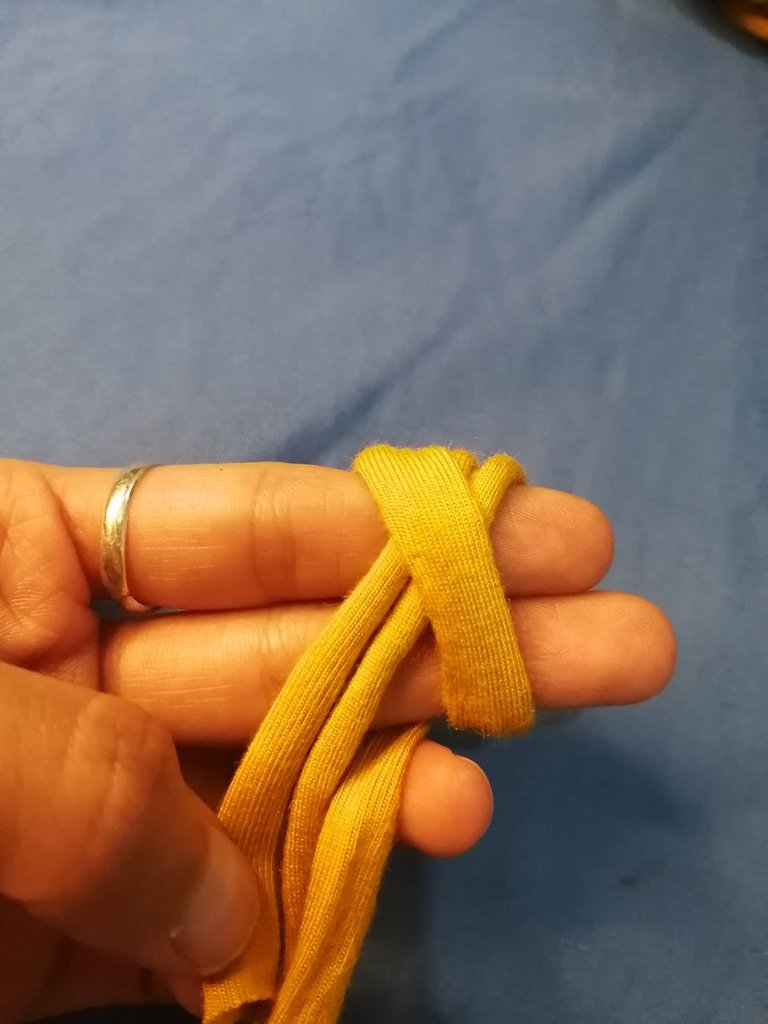
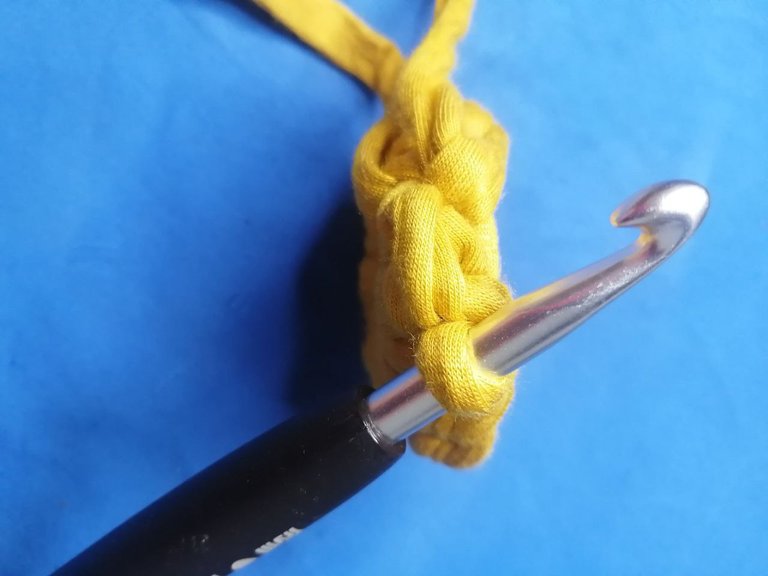
PASO#1 Iniciamos realizando un anillo mágico, tejeremos seis puntos bajos en ese mismo anillo.
 |  |
|---|
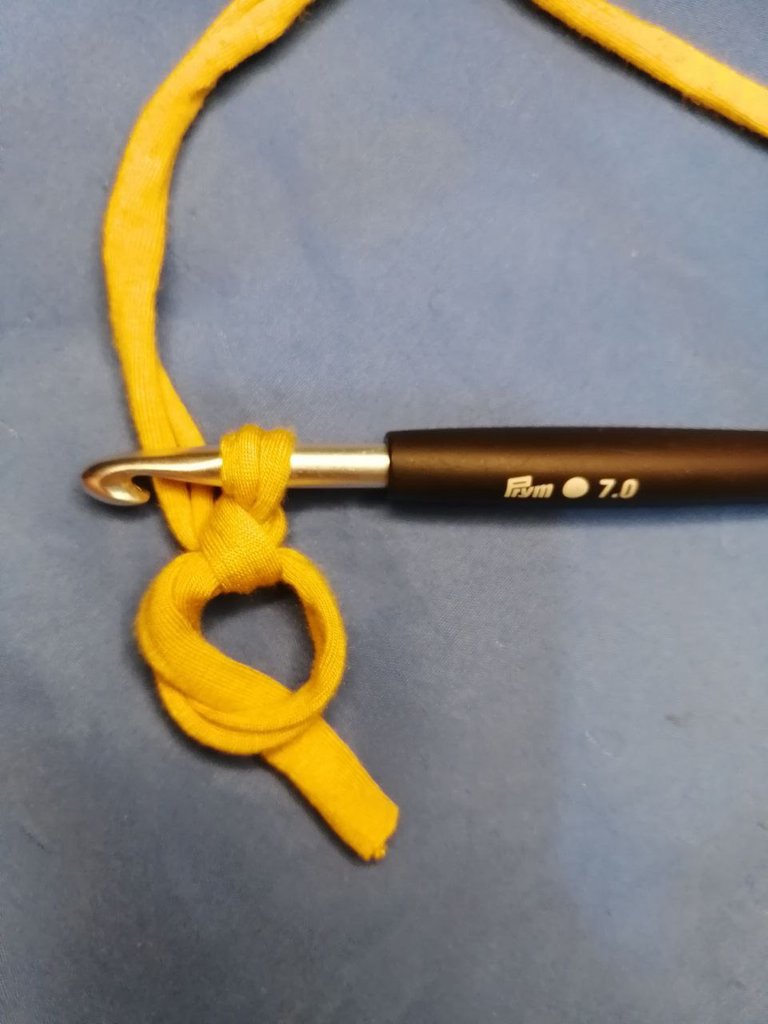
PASO #2 Posteriormente cierro mi anillo mágico con la cuerda sobrante del mismo halandola un poco, vamos a cerrar esta vuelta, buscando el primer punto con el que se inició, introducimos el ganchillo por esa cadena, tomamos lazada y hacemos un punto deslizado.
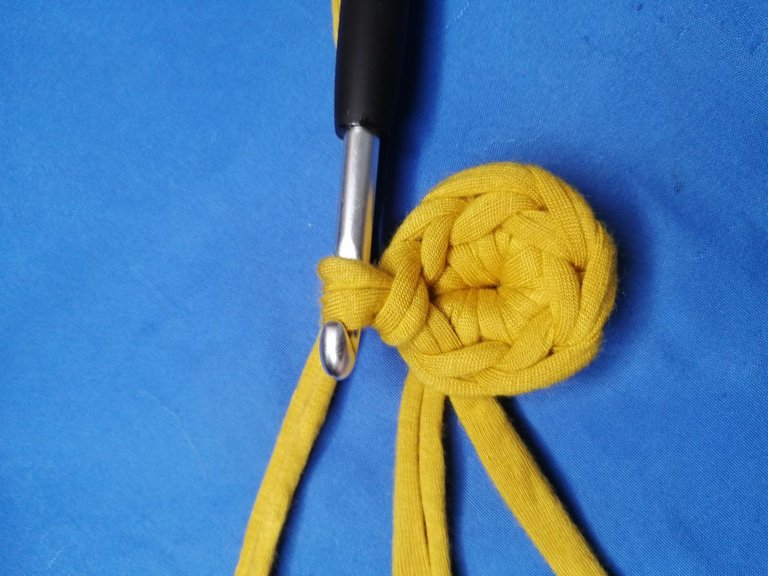
PASO #3 Luego de tener ya el anillo mágico cerrado vamos a realizar la vuelta tres que consta de puntos bajos centrados,observamos la vuelta inicial, sabiendo que los puntos bajos se identifican como una (V), vamos a abrir un poco el tejido y buscamos esa (V) que se formó en la vuelta anterior, vamos a insertar el ganchillo en medio de esa (v) y realizar puntos bajos. Otra forma de identificar si nuestro punto está bien elaborado es voltear el tejido y observar que existen dos palitos, nuestro ganchillo debe pasar el medio. Esta vuelta es de aumentos en ese espacio vamos a realizar dos puntos bajos en el mismo punto, hasta finalizar, terminando con 12 puntos.
 |  |  |
|---|
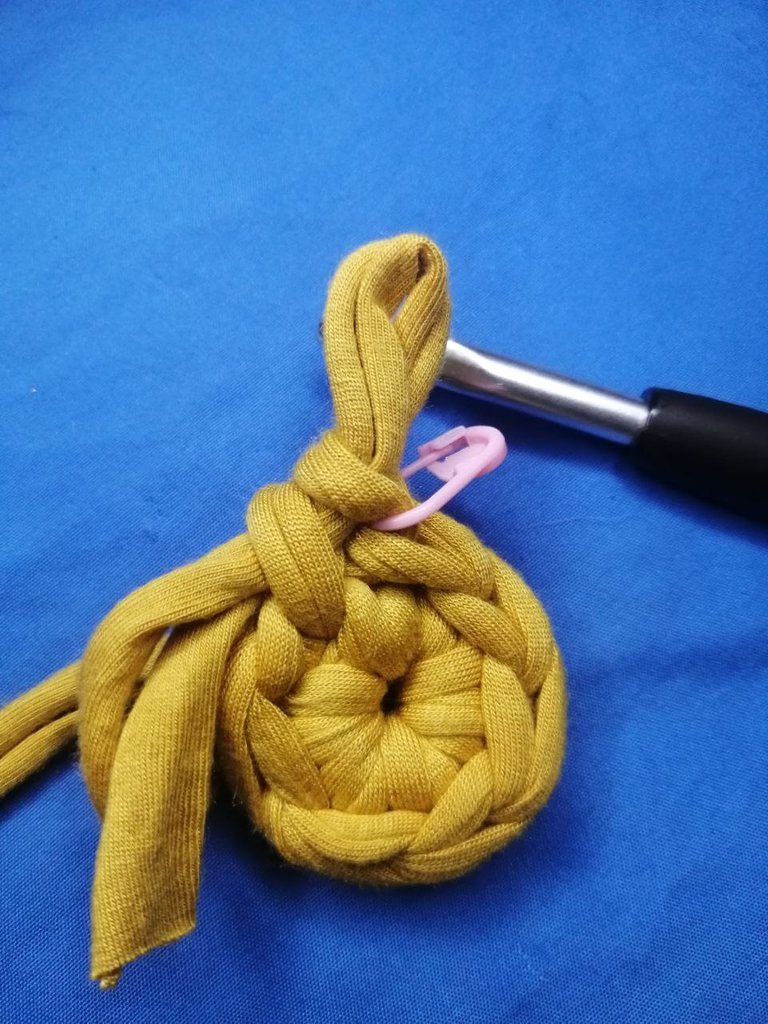
PASO#4 Vamos a cerrar las vueltas con un cierre invisible, para que no se vea donde cerramos ni donde abrimos las vueltas. Sacamos el ganchillo, estiramos un poco con los dedos esa orejita que queda de ese último punto para que no se pierda, contamos tres puntos, en esa tercera cadena colocamos el ganchillo por detrás, de atrás hacia adelante, tomamos con la mano la orejita del punto que soltamos, lo introducimos en el ganchillo, la vamos a halar hasta sacarla por detrás, cojemos el trapillo tomamos una lazada y elaboramos un punto deslizado que quede flojo halando hacia arriba un poco, ya tenemos la vuelta cerrada.
 |  |  |
|---|
PASO #5 Para abril la siguiente vuelta lo primero es identificar donde está el primer punto que realizamos en la vuelta anterior, este va a quedar justo debajo de la orejita de nuestro último punto realizado, sacamos el ganchillo, lo introducimos en medio de esa (V) que forma el punto anterior, tomamos lazada y llevamos formando una orejita debajo de la otra, cojemos la de adelante la que acabamos de sacar y tomamos la de atrás quedando ambas dentro del ganchillo, sin tomar lazada pasamos la de trás por la de adelante(a modo de punto deslizado) y ya tenemos el primer punto bajo de la siguiente vuelta.
PASO #6 En esta nueva vuelta realizamos un punto bajo y un aumento (dos puntos bajos en el mismo punto), tenemos que terminar con un aumento en el último punto, finalizando con 18 puntos.
 |  |
|---|
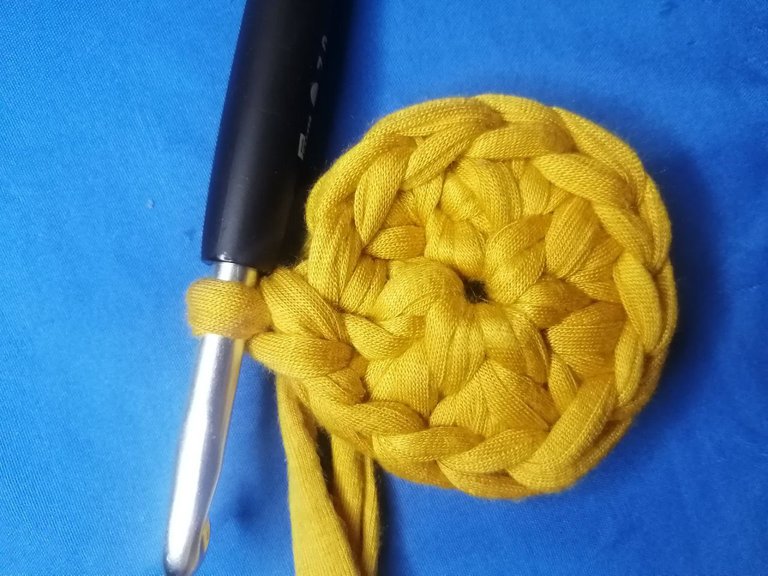
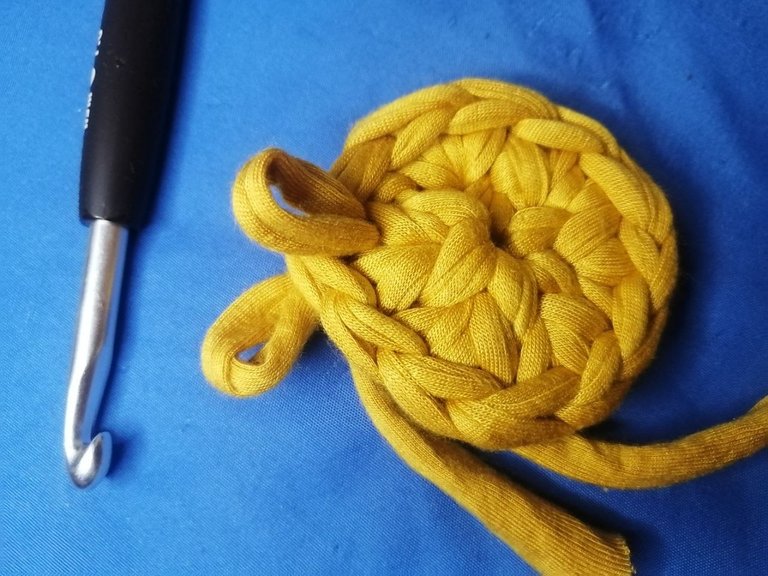
PASO #7 En la siguiente vuelta tendremos la secuencia de dos puntos bajos normales y un aumento, así sucesivamente en cada vuelta, serían tres puntos bajos y un aumento, la siguiente cuatro puntos bajos y un aumento, hasta llegar al tamaño deseado yo realice un total de ocho vueltas para que no quede tan pesada la bolsa o cartera.
 |  |  |  |
|---|
Nota en la vuelta de cuatro puntos bajos y un aumento (solo en vueltas que sean en número par 4,6,8) vamos a iniciar con dos puntos bajos y un aumento, luego vamos con cuatro puntos bajos y un aumento, para al terminar esa vuelta tener dos puntos bajos, esto es para que los aumentos no queden todos en forma lineal y se mantenga la forma circular.
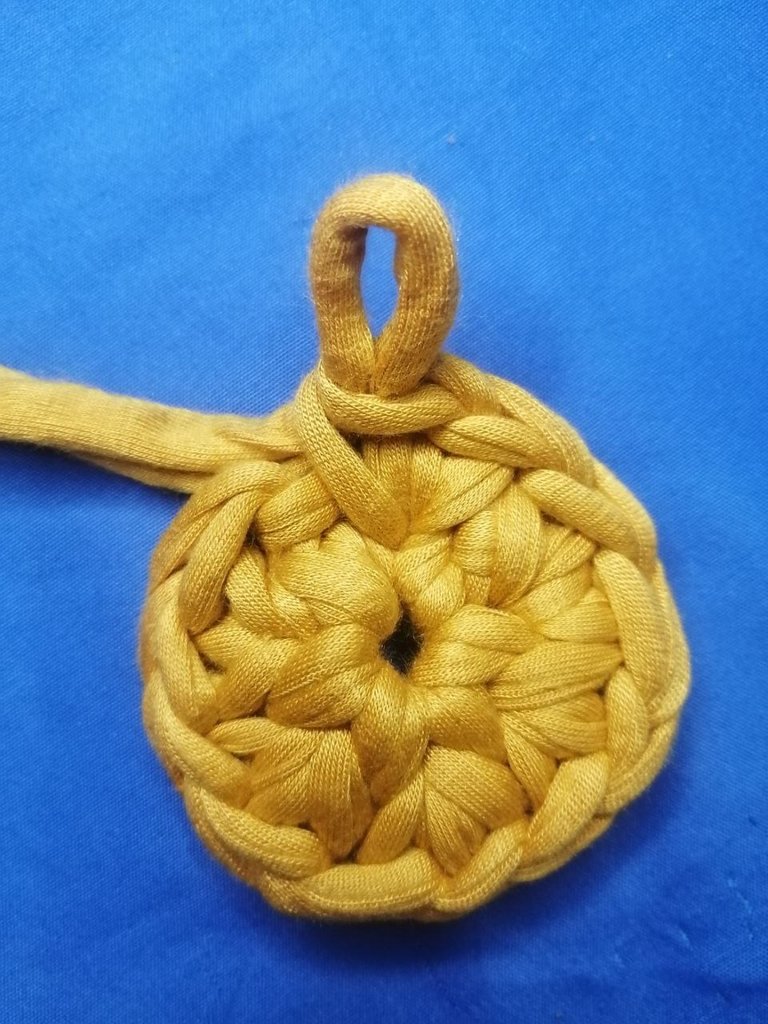
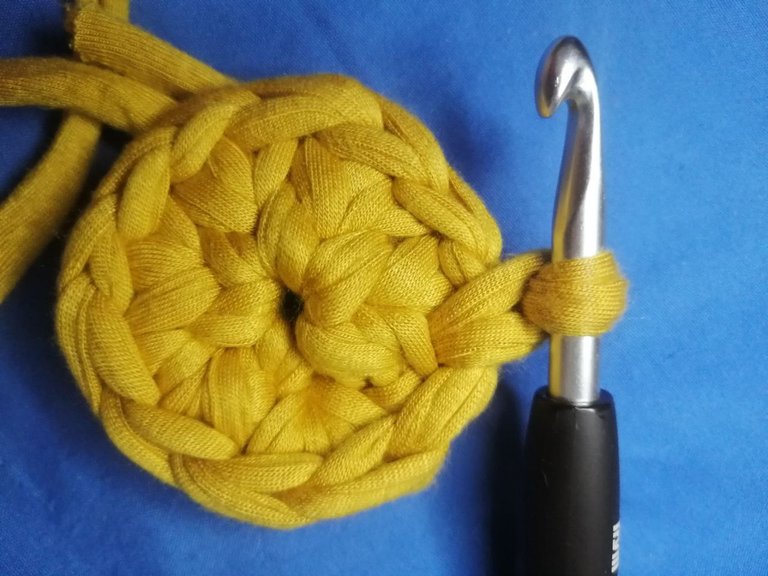
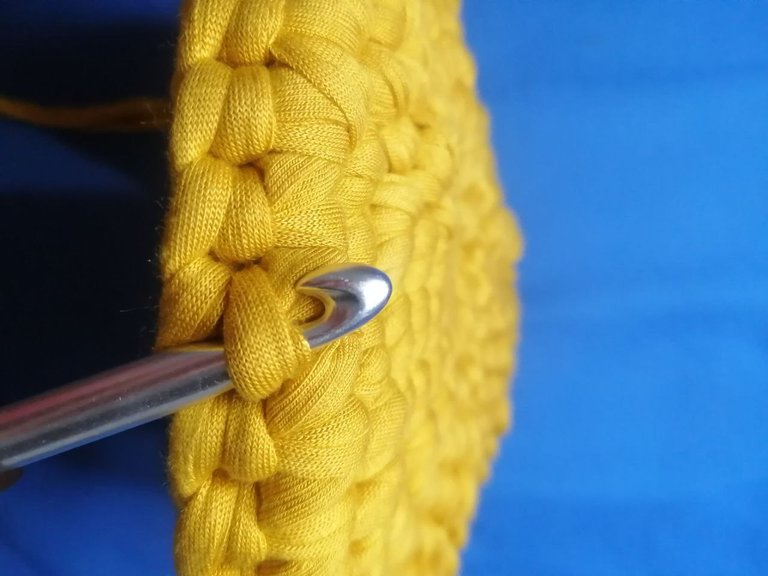
PASO #8 Para realizar la parte del ancho del bolso vamos a tomarlo de modo que quede hacia afuera la parte del revés de adentro, lo que no se va a ver, observamos la parte de atrás de las cadenas del borde de nuestra tapa, vamos a ingresar el ganchillo en la hebra que está sobre la cadena, esa hebra que queda más pegada a esa parte del revés, vamos observar que se ve perfectamente la cadena de bode tomado dicha hebra, envolvemos el trapillo en la aguja, cojemos una lazada elaborando el punto bajo, tomaremos todas esas hebras que se ven detrás de la cadena y hacemos un punto bajo, finalizamos cerrando como en el círculo, sacamos el ganchillo halamos un poco esa orejita para que no se pierda, pasamos el ganchillo por esa primera cadena de atrás hacia adelante, tomamos la orejita que teníamos al final y la deslizamos hacia atrás, tomamos lazada haciendo un punto deslizado.
 |  |  |
|---|---|---|
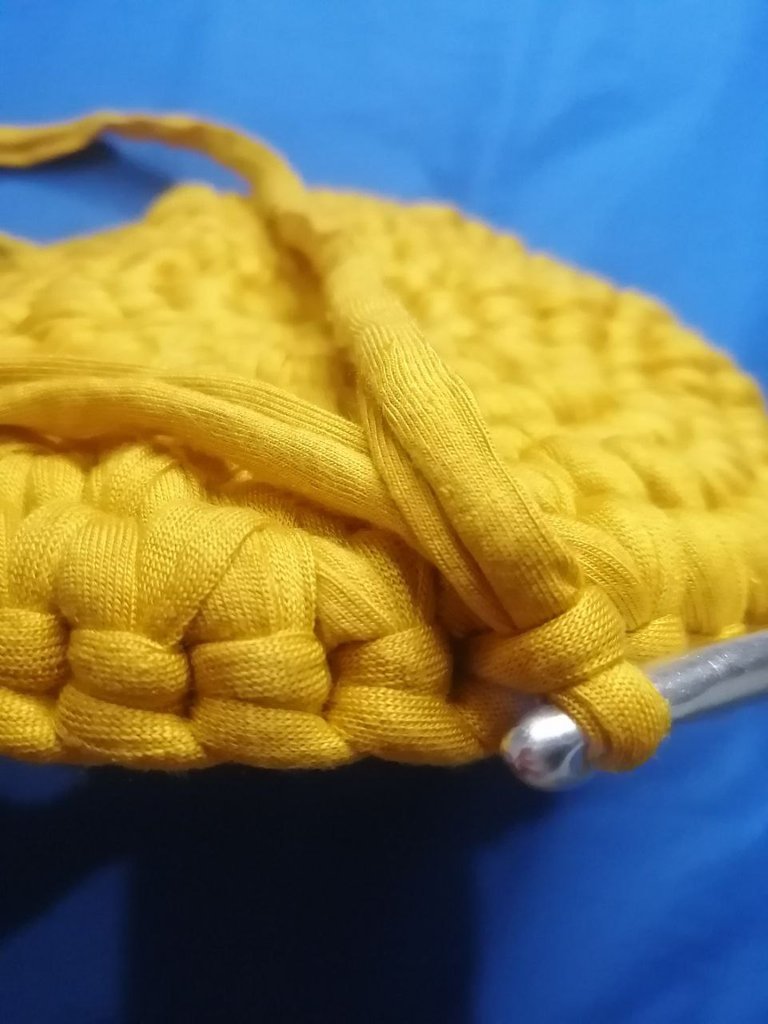 |  | 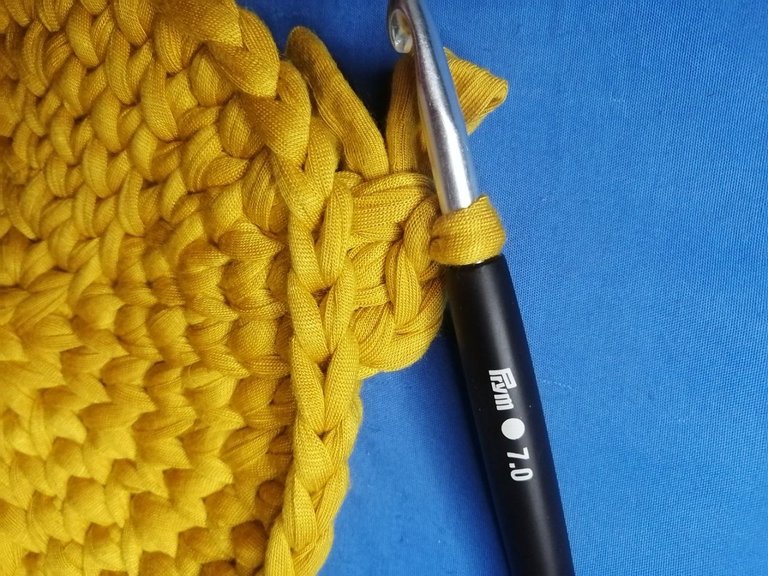 |
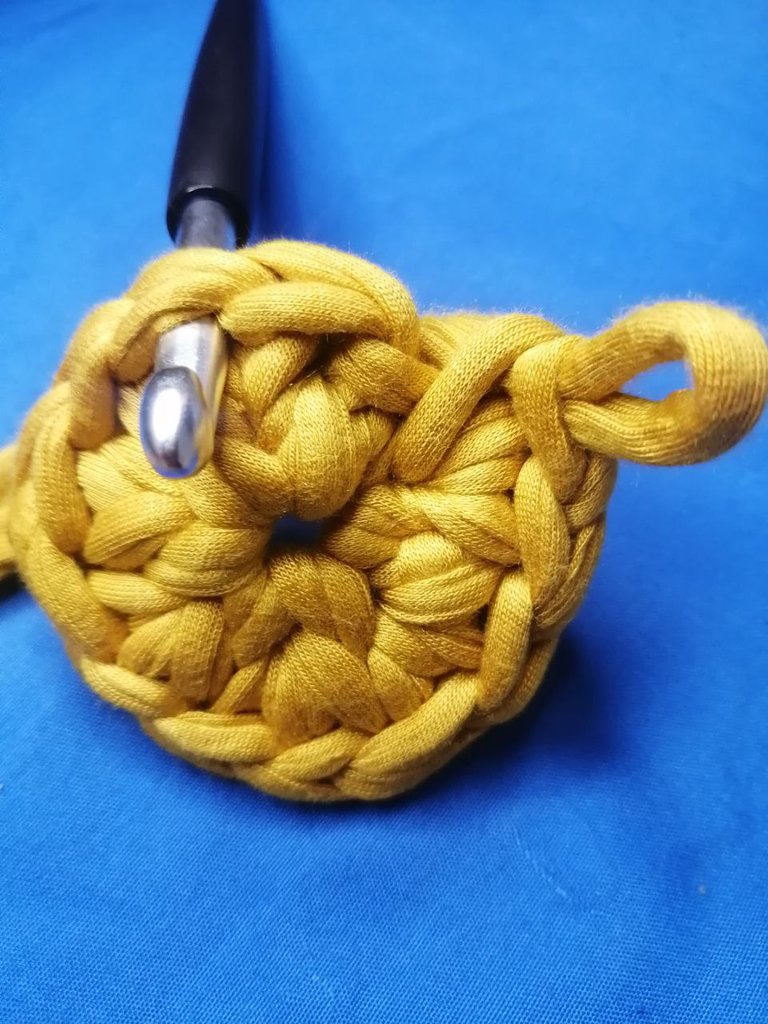
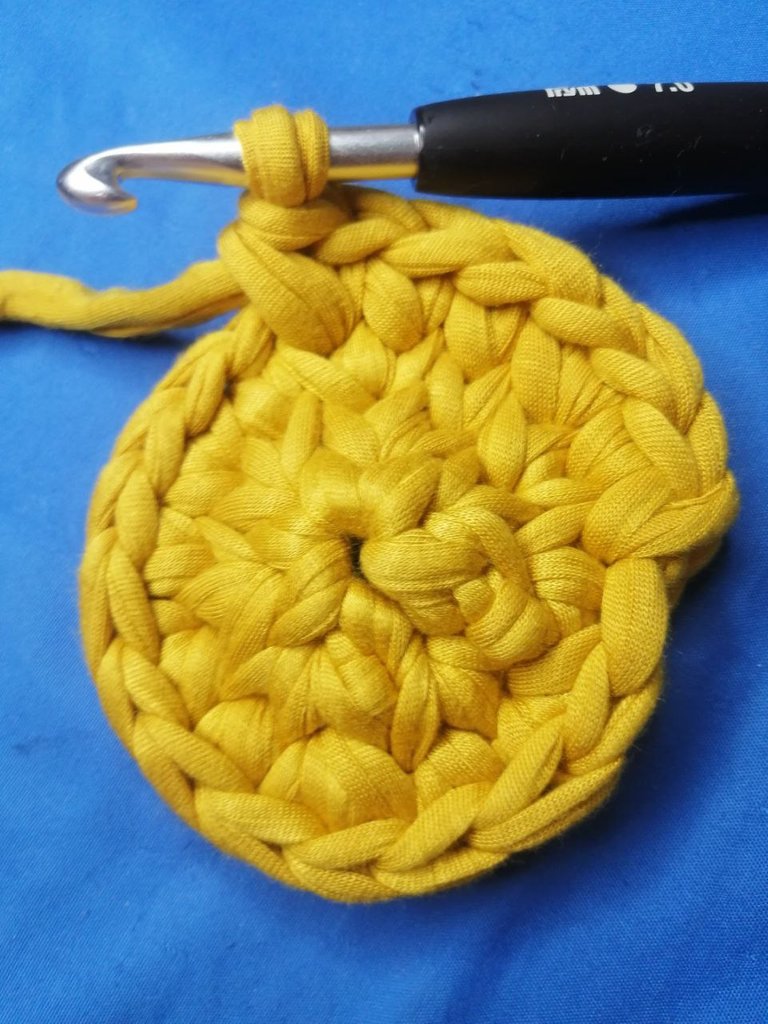
PASO #9 Iniciamos la siguiente vuelta buscando debajo de la orejita formada en el tejida anterior la primera (V) que se forma, ingresamos el ganchillo, tomamos lazada sacamos una orejita que queda una adelante y otra atrás, tomamos la de adelante y pasamos en ganchillo por la de atrás y la deslizamos hacia adelante formando el primer punto bajo centrado, vamos realizar así toda vuelta sin aumentos, yo subí con dos filas de puntos bajos, ya eso va a depender del grosor que desees en tu bolsa o cartera.
Espero sea de su agrado este proyecto, al tener el material les comparto como quedo y como lo finalice.

Hi everyone, I'm Barbie, today I'm very excited to participate in the initiative of this beautiful community, this challenge is very inspiring, as it is about dusting off these projects that we have and we have not continued, so I am very, very grateful to NeedleWorkMonday's WIP Challenge.
I'll tell you a little about the project I'm going to dust off, it is a purse or bag made with rag, it is a specific material of rag and the person who bought it no longer sells it so my challenge is to find someone else who sells it, look for the same shade and get down to work, here I share a reference picture of how the bag or purse should look like.
Seeing the reference I share with you the picture of how my project turned out, as far as I was able to do it.
| | |
|---|
*The materials used were as follows:
Scissors
Mustard-colored rag
Crochet hook number 7
I hope to find the material and show you the progress of this beautiful project, it has been paralyzed for about 5 months, since it was difficult to find the material and therefore when other orders arrived I was neglecting it, I share with you the step by step to get here.
STEP#1 We start by making a magic ring, we will knit six single crochet stitches in that same ring.
| |
|---|
STEP #2 Afterwards, I close my magic ring with the excess string, we are going to close this row, looking for the first stitch with which it started, we introduce the crochet hook through that chain, we take a loop and we make a slipped stitch.
STEP #3 After having the magic ring closed, we are going to make the third row which consists of centered single crochet stitches, we observe the initial row, knowing that the single crochet stitches are identified as a (V), we are going to open the fabric a little bit and look for that (V) that was formed in the previous row, we are going to insert the crochet hook in the middle of that (v) and make single crochet stitches. Another way to identify if our stitch is well elaborated is to turn the fabric over and observe that there are two sticks, our crochet hook must go through the middle. This round is for increases in that space we are going to make two single crochet stitches in the same stitch, until the end, finishing with 12 stitches.
| | |
|---|
STEP #4 We are going to close the loops with an invisible fastener, so that you can't see where we close or where we open the loops. We take out the crochet hook, we stretch a little with our fingers that little ear that remains of that last stitch so that it does not get lost, we count three stitches, in that third chain we place the crochet hook behind, from back to front, we take with our hand the little ear of the stitch that we let go, we introduce it into the crochet hook, we are going to pull it until we take it out from behind, we take the rag, we take a loop and we make a slipped stitch that is loose pulling it up a little, we already have the closed loop.
| | |
|---|
STEP #5 For April the next round the first thing to do is to identify where is the first stitch that we made in the previous round, this will be just below the ear of our last stitch, we take out the crochet hook, we introduce it in the middle of that (V) that forms the previous stitch, we take the loop and we take it forming a little ear under the other one, we take the front one we just took out and we take the back one remaining both inside the crochet hook, without taking the loop we pass the back one through the front one (as a slipped stitch) and we already have the first single crochet of the next round.
STEP #6 In this new row we make a single crochet and an increase (two single crochets in the same stitch), we have to finish with an increase in the last stitch, ending with 18 stitches.
| |
|---|
STEP #7 In the next row we will have the sequence of two normal single crochet stitches and one increase, and so on in each row, there will be three single crochets and one increase, the next one four single crochets and one increase, until we reach the desired size I made a total of eight rows so that the bag or purse is not so heavy.
| | | |
|---|
Note in the row of four single crochets and one increase (only in even numbered rows 4,6,8) we start with two single crochets and one increase, then we go with four single crochets and one increase, to finish this row with two single crochets, this is so that the increases are not all linear and the circular shape is maintained.
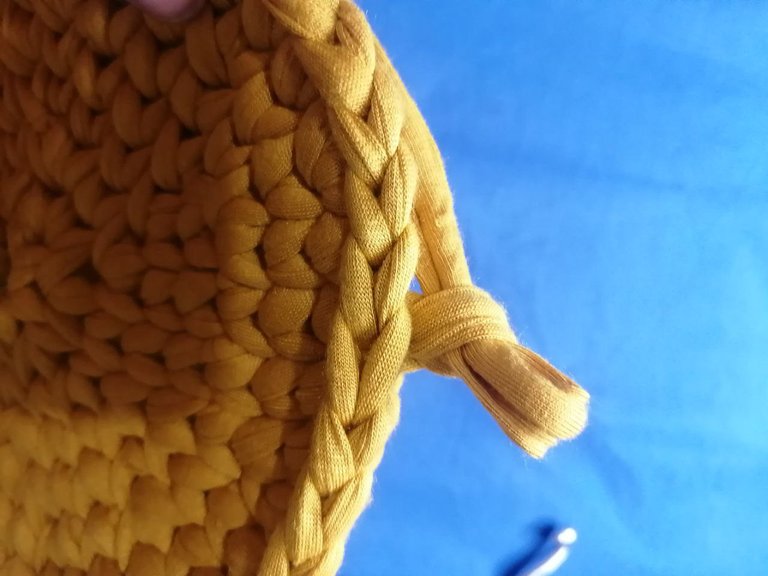
STEP #8 To make the width part of the bag we are going to take it so that the inside of the back of the bag is facing out, what is not going to be seen, we observe the back of the chains of the edge of our top, we are going to enter the crochet hook in the strand that is on the chain, that strand that is more attached to that part of the back, we will observe that the chain of bode is perfectly seen taken that strand, we wrap the rag in the needle, we take a loop making the low stitch, we will take all those strands that are seen behind the chain and we make a low stitch, we finish closing as in the circle, we take out the crochet hook we pull a little that little ear so that it does not get lost, we pass the crochet hook through that first chain from back to front, we take the little ear that we had at the end and we slide it back, we take the loop making a slipped stitch.
| | |
|---|---|---|
| | |
STEP #9 We start the next round looking under the ear formed in the previous knitting the first (V) that is formed, we enter the crochet hook, we take a loop we take out a little ear that is one in front and one behind, we take the front one and pass the crochet hook through the back one and slide it forward forming the first low centered stitch, we will make the whole round without increases, I went up with two rows of low stitches, and that will depend on the thickness you want in your bag or purse.
I hope you like this project, when I have the material I will share with you how it turned out and how I finished it.
- Fotografías tomadas desde mi equipo celular, imagen de referencia tomada desde redes gratuitas.
El trapillo es un material con el que siempre he querido trabajar, sin embargo, no es tan fácil de conseguir, otra desventaja es que se necesitan varios ovillos para poder completar un proyecto. Espero que pronto puedas conseguir el resto de material que te falta para tu cartera.
Saludos!
Hola reina, si así es, el resultado queda muy lindo, acá se consiguen ovillos de 1 kilogramo que son los que más rinden, espero poder encontrar la misma tonalidad, muchas gracias por tu comentario.
Congratulations @soybarbie! You have completed the following achievement on the Hive blockchain and have been rewarded with new badge(s):
Your next target is to reach 1750 upvotes.
You can view your badges on your board and compare yourself to others in the Ranking
If you no longer want to receive notifications, reply to this comment with the word
STOPCheck out the last post from @hivebuzz:
Support the HiveBuzz project. Vote for our proposal!
Wow this is so beautiful thanks for sharing @soybarbie
thank you very much for your comment, it really encourages us to continue. :)
Me encanta como va quedando tu trabajo y el color es super lindo 😍
Muchas gracias hermosa, espero poder culminarlo y mostrar el resultado final.
Thanks for joining the challenge! It will be a very beautiful bag!
thank you very much, yes it looks very nice, I hope to show the final result soon, thanks for your comment.
You’re very welcome ~ 😊
I really hope you will be able to finish this bag to you liking!! it looks great so far:) really like the material you are using!! did you cut the cor out of a rag yourself or did you buy it like that?
Thank you very much, I hope to be able to finish it and show the final result. I bought it already cut.