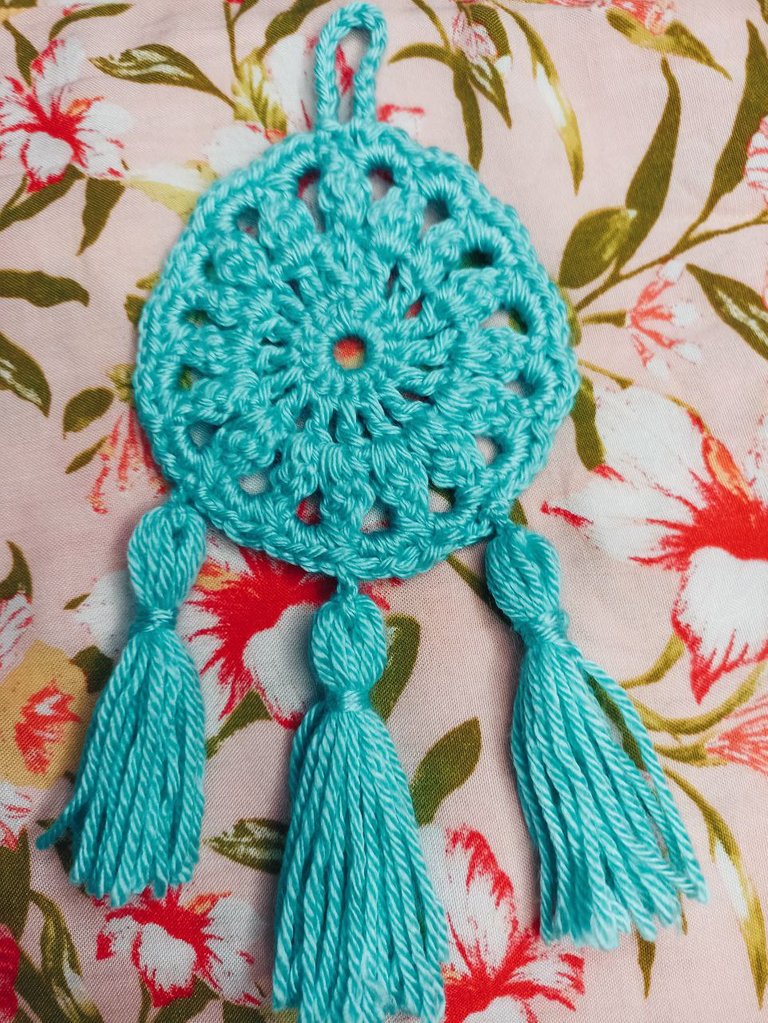
Hola a todos, tejer es un arte que realmente me aleja de pensamientos negativos, que me centra me relaja y me ayuda mucho a bajar los niveles de ansiedad, estaba buscando algún detalle bonito que realizar para lograr despejar la mente, y encontré este lindo proyecto, el cual es un atrapa sueños, se dice que su función es canalizar los sueños de las personas y alejar las pesadillas o esos sueños que traen angustia y tristeza o cualquier sentimiento negativo, realice uno color celeste o verde agua, algo muy lindo de los tejidos es que el creador le imprime su intensión al elaborarlo, a mis trabajos tratos de colocarles todas las energías lindas y positivas. Escogí en color celeste o verde agua en mi atrapasueños, ya que es un color que me encanta, me genera paz, me recuerda la belleza del mar con arena blanca, me otorga pureza, lo asocio con la buena salud, y la belleza natural y espiritual.
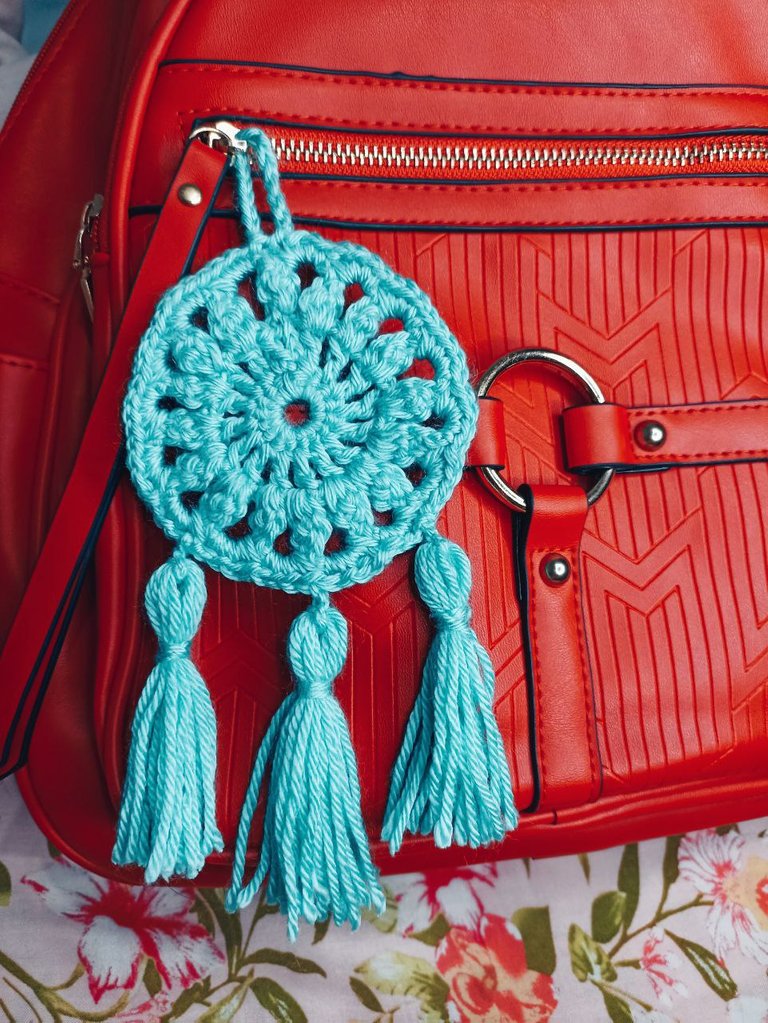
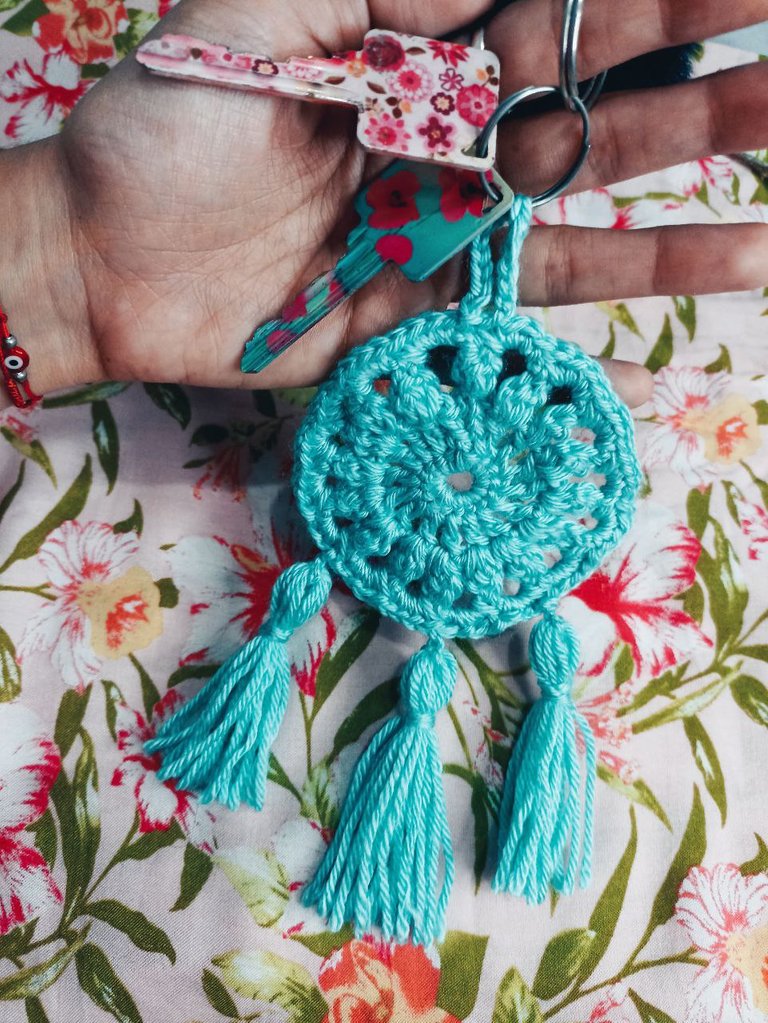
Este hermoso atrapa sueños, tiene un tamaño practico y cómodo para utilizar como llavero, así como también puede ser utilizado como adorno o accesorio de tu mochila para darte un estilo único y diferente. Otra utilidad podría ser decorar espacios, como dormitorios, donde es recomendado para que cuide tus sueños y aleje energías negativas del espacio sagrado y de descanso.
Se explicarán los materiales que necesitas para realizarlo, así mismo como la realización y paso a paso de este hermoso proyecto.
Materiales:
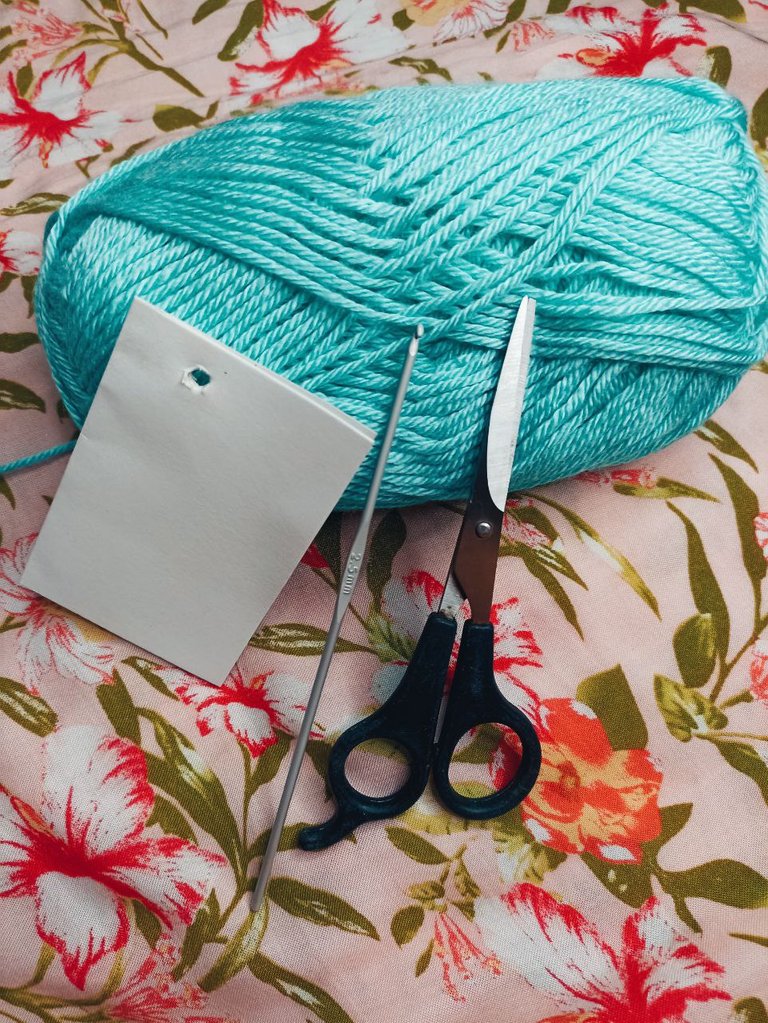
Hilo o lana de tu preferencia, yo utilice hilo antialérgico 100% mercerizado
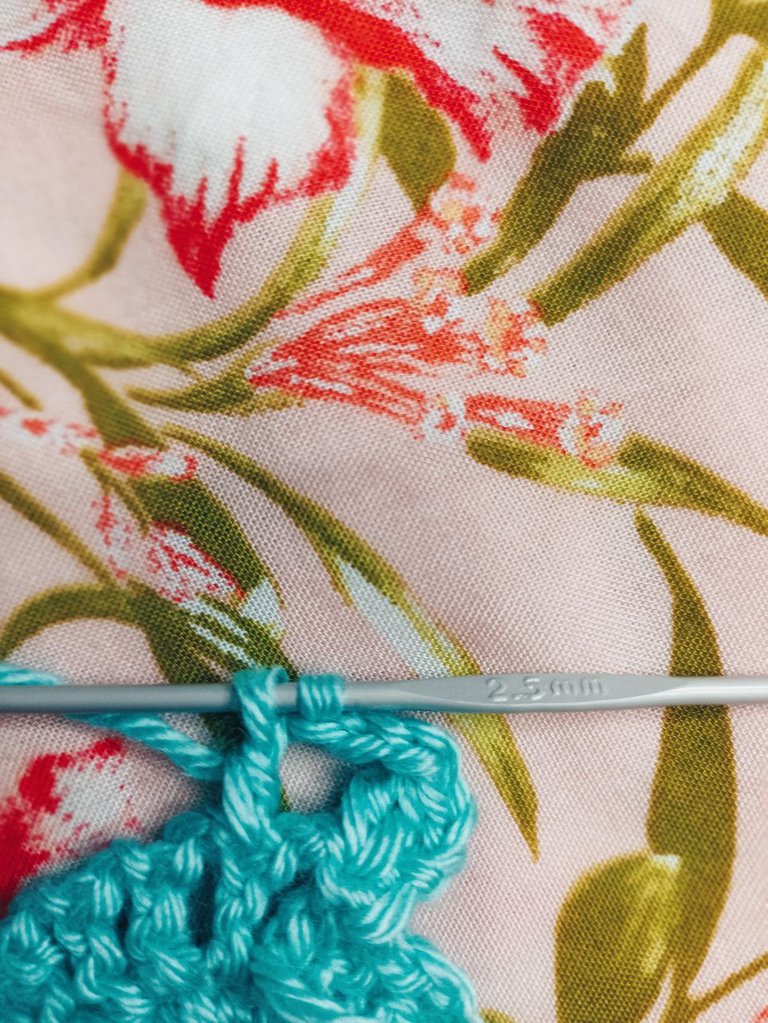
Ganchillo de 2.5mm
Tijeras.
¡Manos a la obra!
Hello everyone, knitting is an art that really takes me away from negative thoughts, that focuses me relaxes me and helps me a lot to lower anxiety levels, I was looking for a nice detail to make to achieve clear the mind, and I found this nice project, which is a dream catcher, It is said that its function is to channel the dreams of people and keep away the nightmares or those dreams that bring anguish and sadness or any negative feeling, make one light blue or aqua green, something very nice about the fabrics is that the creator prints his intention to elaborate it, to my work I try to put all the nice and positive energies. I chose light blue or aqua green for my dream catcher, because it is a color that I love, it generates peace, it reminds me of the beauty of the sea with white sand, it gives me purity, I associate it with good health, and natural and spiritual beauty.
This beautiful dream catcher, has a practical and comfortable size to use as a keychain, and can also be used as an ornament or accessory for your backpack to give you a unique and different style. Another use could be to decorate spaces, such as bedrooms, where it is recommended to take care of your dreams and keep negative energies away from the sacred and resting space.
The materials you need to make it will be explained, as well as the realization and step by step of this beautiful project.
Materials:
Yarn or wool of your choice, I used 100% mercerized anti-allergic yarn.
Crochet hook of 2.5mm
Scissors.
Let's get to work!
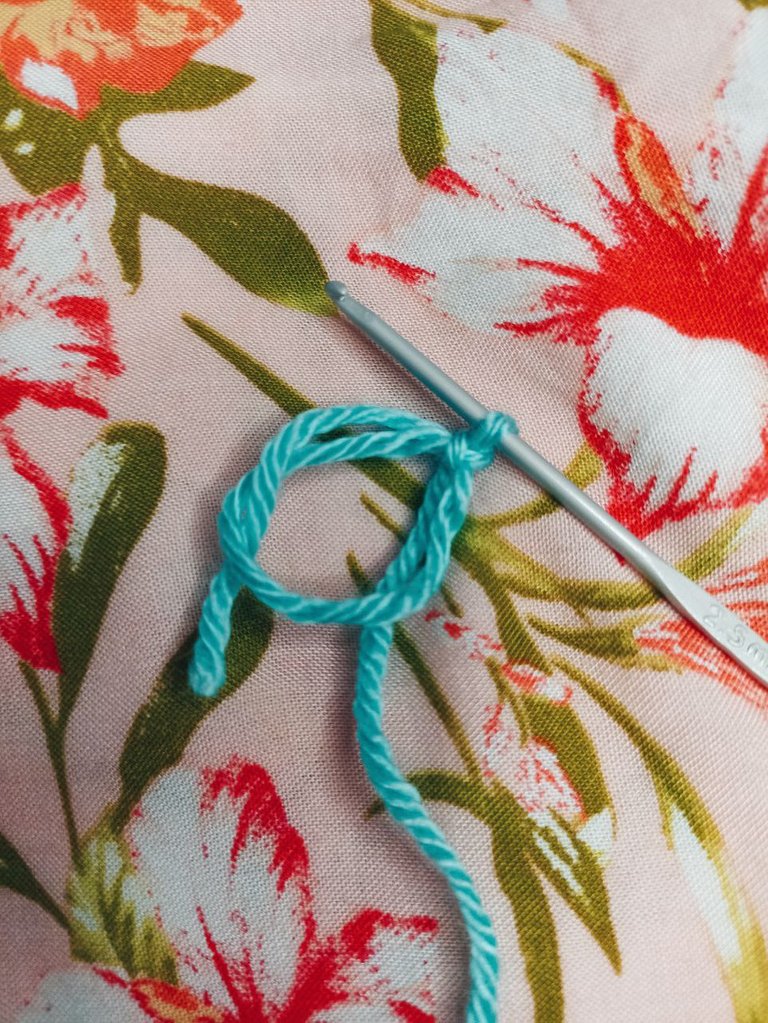
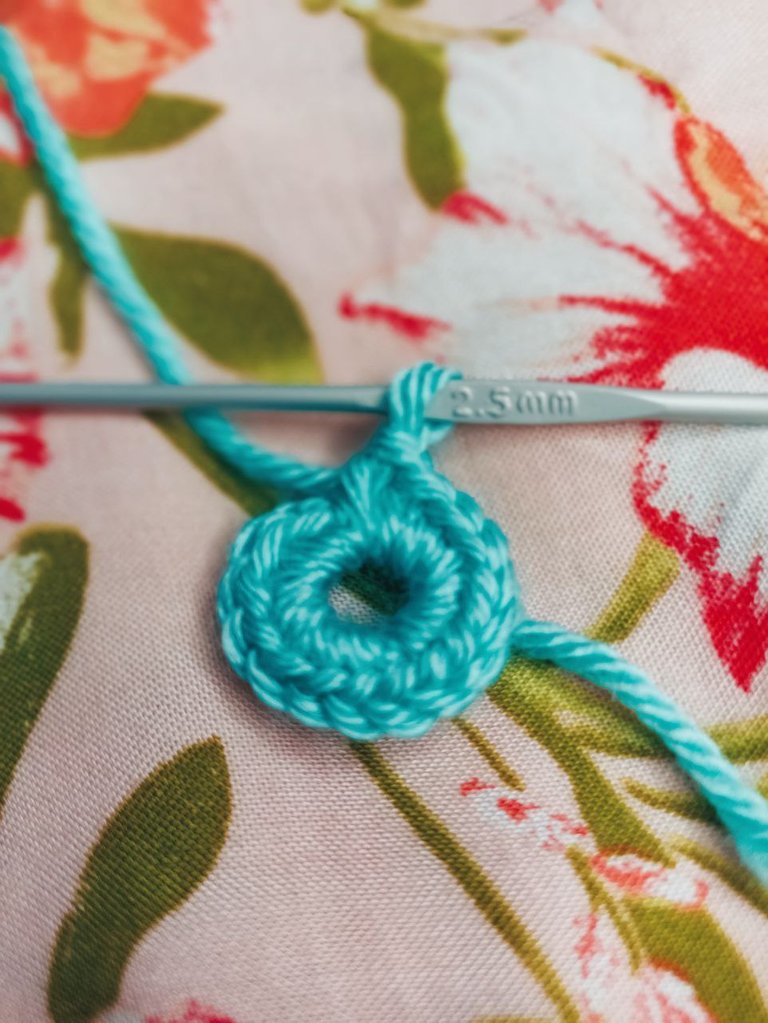
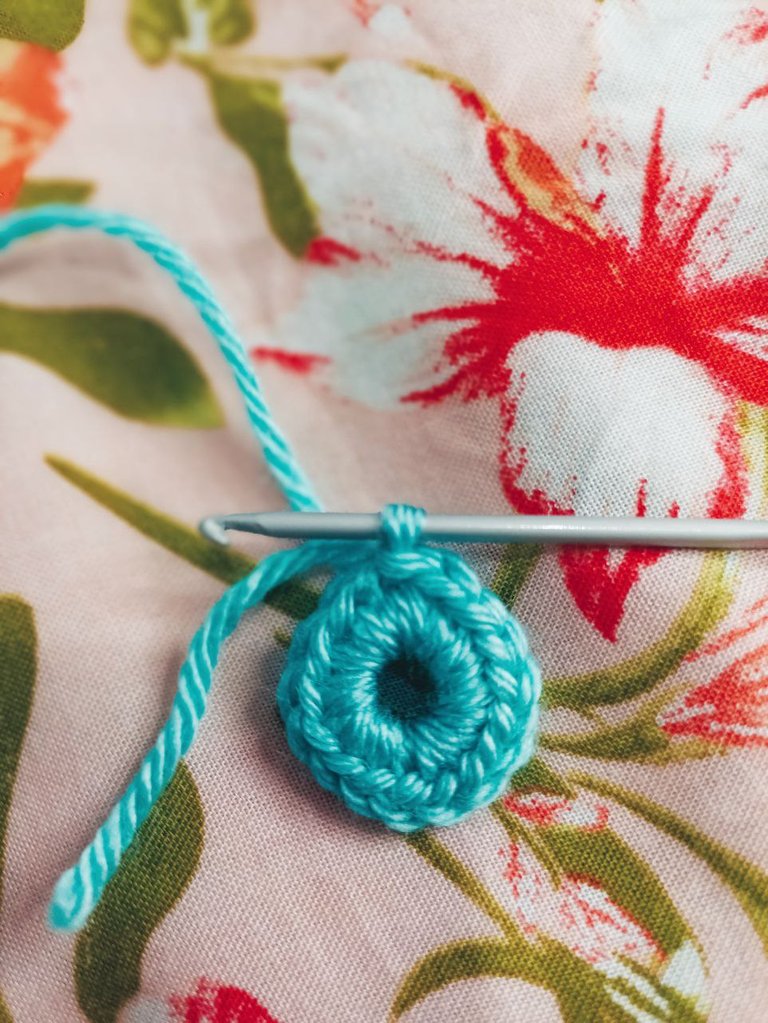
Paso#1: iniciamos tomando el hilo y elaborando un anillo mágico, dentro de este anillo mágico realizaremos 16 puntos bajos, al terminar de realizar los puntos bajos procedemos a deslizar ese hilo sobrante para que quede mas ajustado nuestro circulo, en medio quedará un pequeño circulo.
Step #1: we start by taking the yarn and making a magic ring, inside this magic ring we will make 16 low stitches, when we finish making the low stitches we proceed to slide the excess yarn to make our circle tighter, in the middle there will be a small circle.
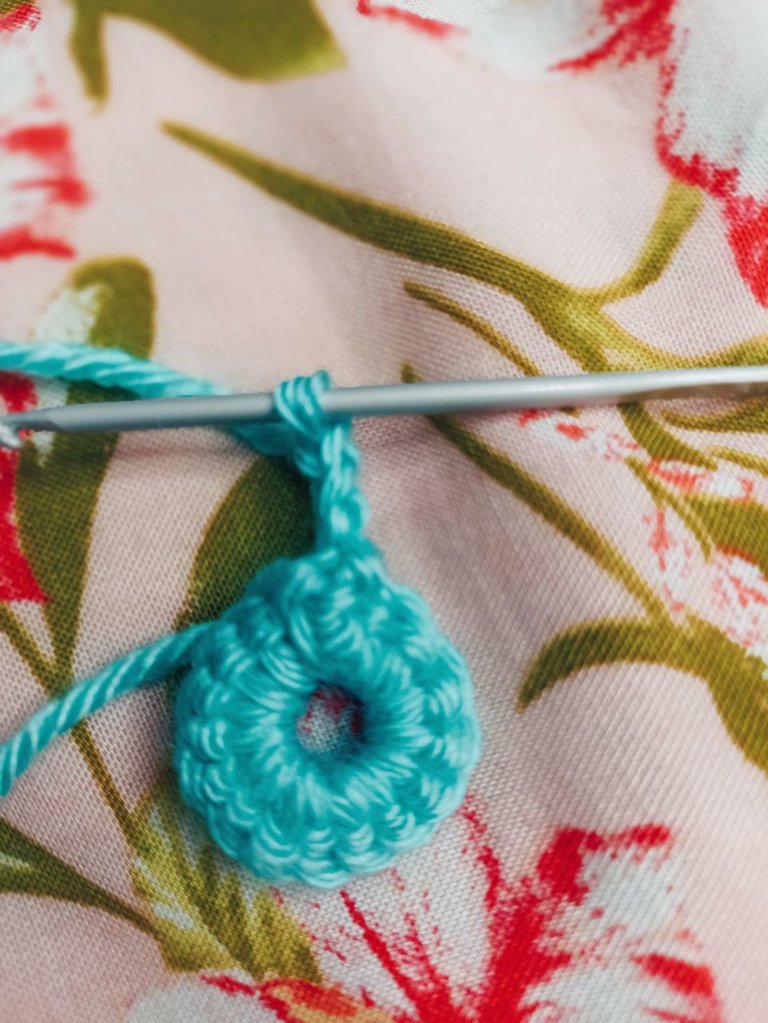
Paso #2: En la segunda vuelta vamos a tomar ese primer punto bajo, introducimos el ganchillo y realizamos un punto deslizado, subimos con 3 cadenas y giramos la labor.
Step #2: In the second round we will take that first low stitch, introduce the crochet hook and make a slip stitch, go up with 3 chains and turn the work.
Paso #3: Realizaremos para esta vuelta 16 puntos altos separados de dos cadenas, como ya subimos con 3 cadenas, ese va a ser nuestro primer punto alto, continuamos tejiendo dos cadenas más, que serán las de separación, en el siguiente punto bajo que me encuentro voy a realizar un punto alto, y la secuencia seria un punto alto, dos cadenas y otro punto alto, así hasta obtener 16 puntos altos.
Step #3: For this round, we will knit 16 double crochet stitches separated by two chains, as we already have 3 chains, this will be our first double crochet, we continue knitting two more chains, which will be the separation chains, in the next low stitch I will knit a double crochet, and the sequence will be a double crochet, two chains and another double crochet, so on until we get 16 double crochet stitches.
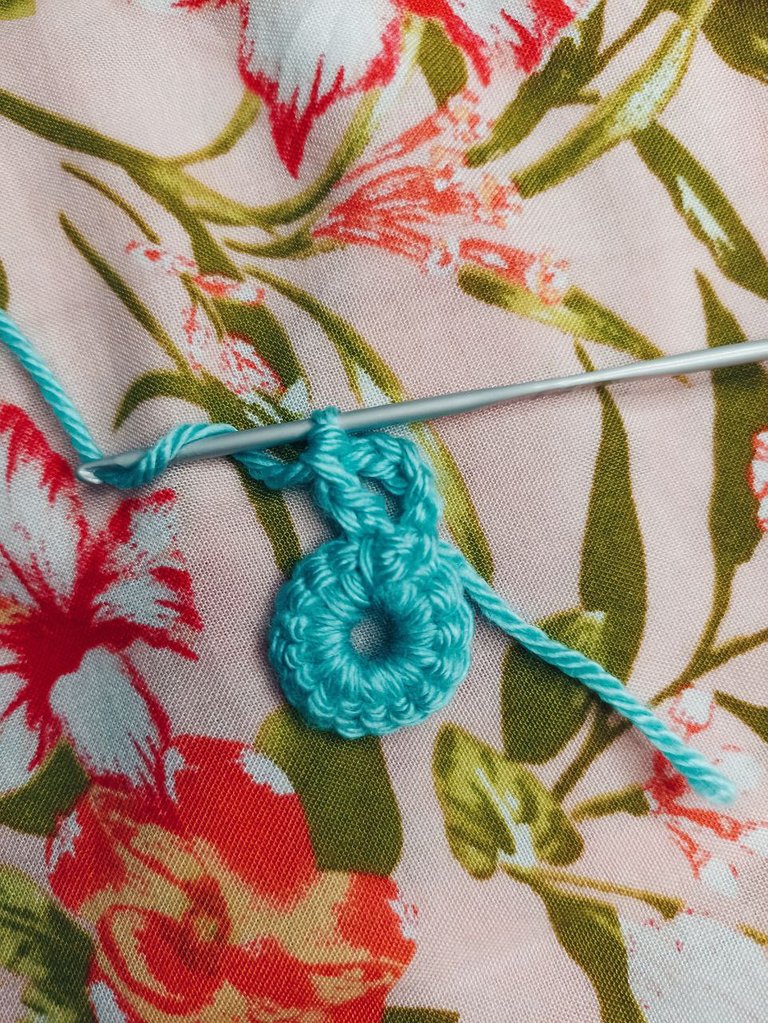

Paso# 4: Cuando estamos tejiendo el punto alto número 16, realizo dos cadenas más y posteriormente me ubico en el tercer punto de la cadeneta para enganchar y así tejer un punto deslizado, subo con 3 cadenas para la siguiente vuelta.
Step # 4: When we are knitting the high stitch number 16, I knit two more chains and then I place myself on the third chain stitch to hook and knit a slip stitch, I go up with 3 chains for the next round.
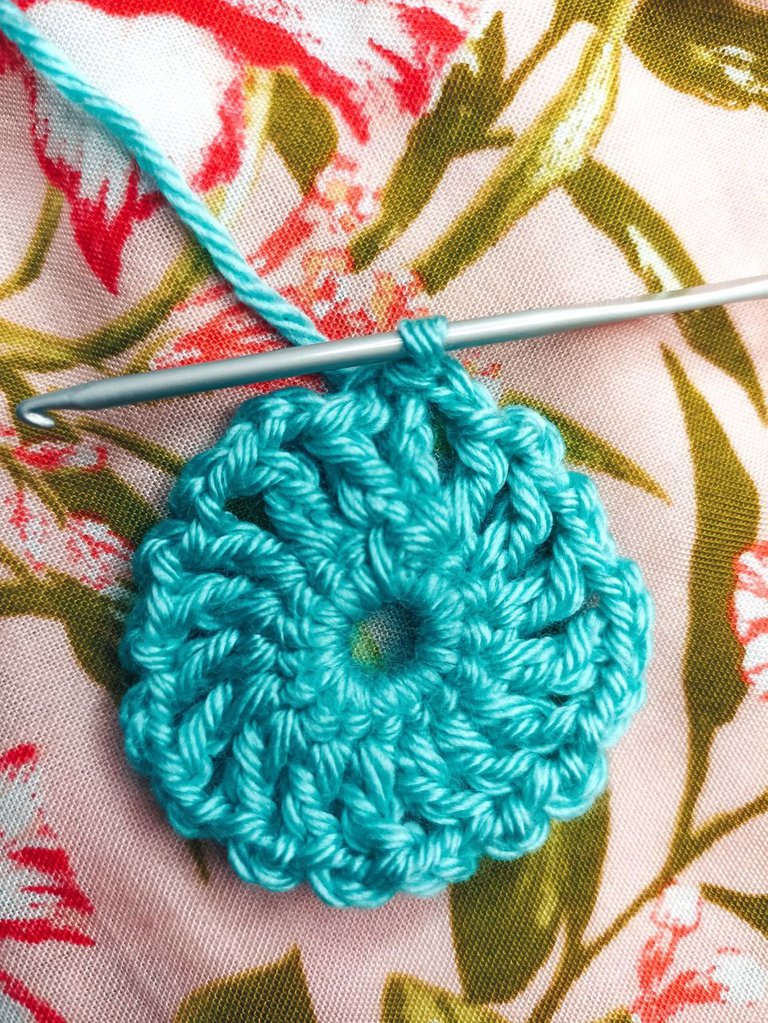
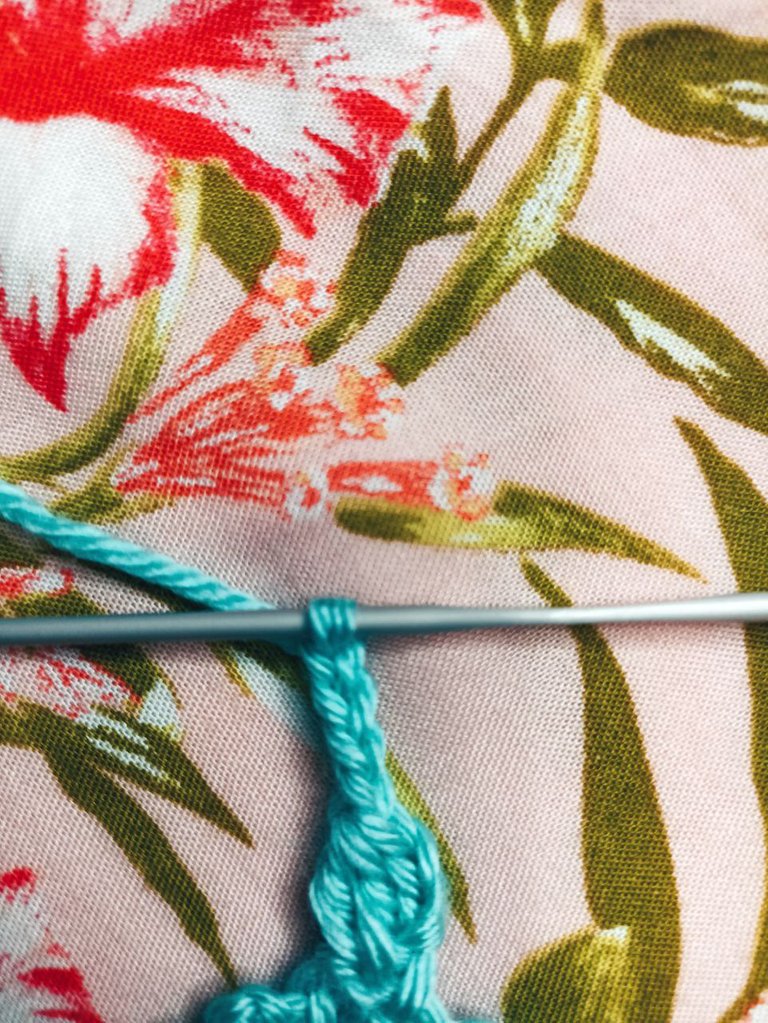
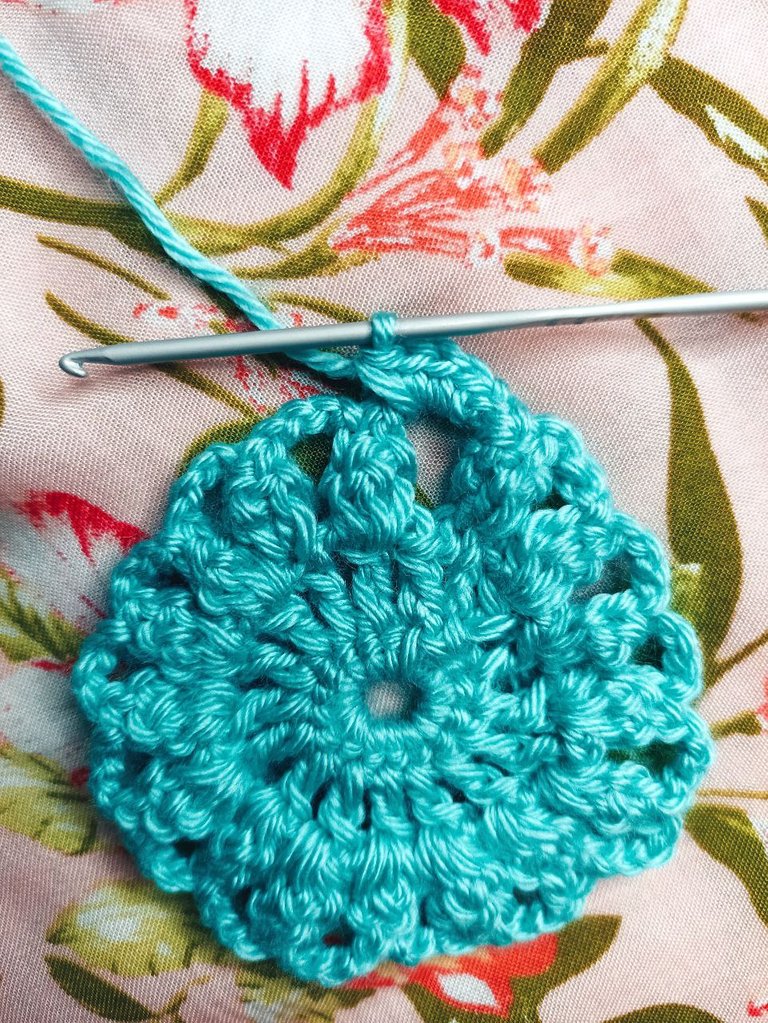
Paso #5: Realizaremos grupos de tes puntos altos cerrados juntos, iniciamos tomando lazada, enganchamos debajo del punto anterior, donde se divisa el punto alto de la fila pasada, ahí vamos a realizar un punto alto pasamos por dos y no lo terminamos aun, tomamos lazada y realizamos otro punto algo pasamos por dos y dejamos sin terminar, así realizaremos un tercer punto alto sin terminar, en el ganchillo quedaran 3 aros, luego tomo lazada y paso por esos 3 aros que me quedaron a la vez.
Step #5: We will make groups of three high stitches closed together, we start by taking a loop, we hook under the previous stitch, where the high stitch of the last row is visible, there we will make a high stitch, we pass through two and we do not finish it yet, we take a loop and make another stitch, we pass through two and we leave without finishing, so we will make a third high stitch without finishing, in the crochet will be 3 hoops, then I take a loop and pass through those 3 hoops that I had left at the same time.
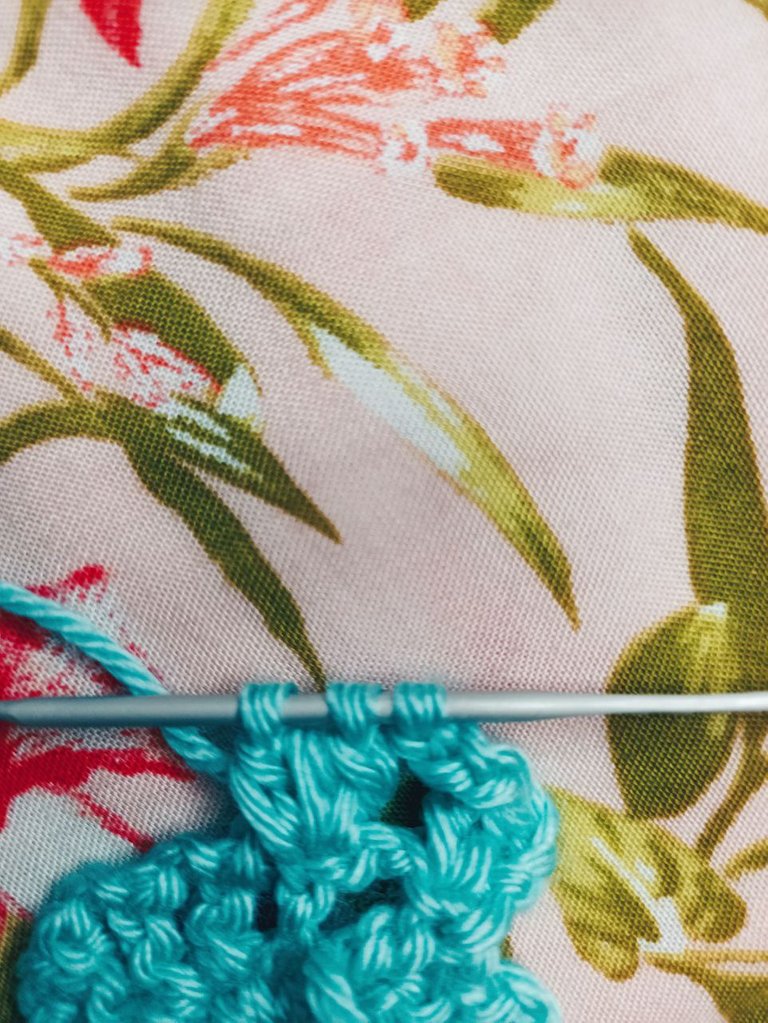
Paso #6: Al tener nuestros puntos altos agrupados vamos a realizar cuatro cadenas que serán las de separación, y así será la secuencia, agrupación de 3 puntos altos y separación de cuatro cadenas, al finalizar realizamos cuatro cadenas, buscamos la cadena número tres con la que iniciamos el primer punto alto enganchamos y se finaliza esta fila con un punto deslizado.
Step #6: When we have our high stitches grouped we will make four chains that will be the separation chains, and this will be the sequence, grouping of 3 high stitches and separation of four chains, at the end we make four chains, we look for the chain number three with which we started the first high stitch, we hook and end this row with a slipped stitch.
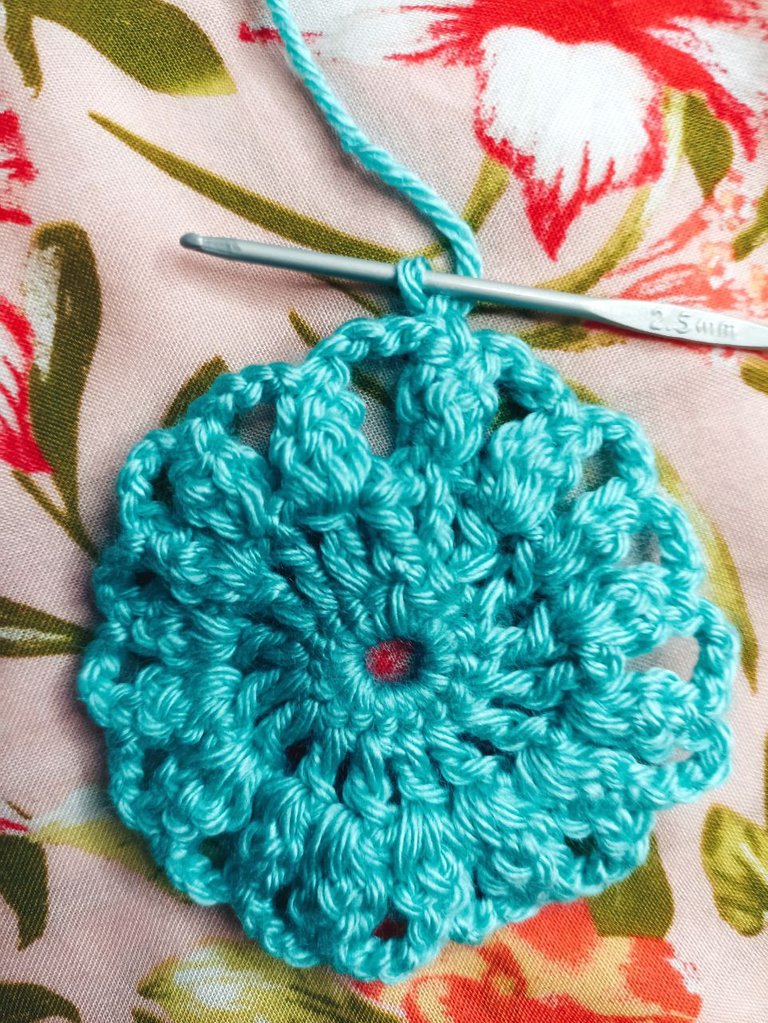
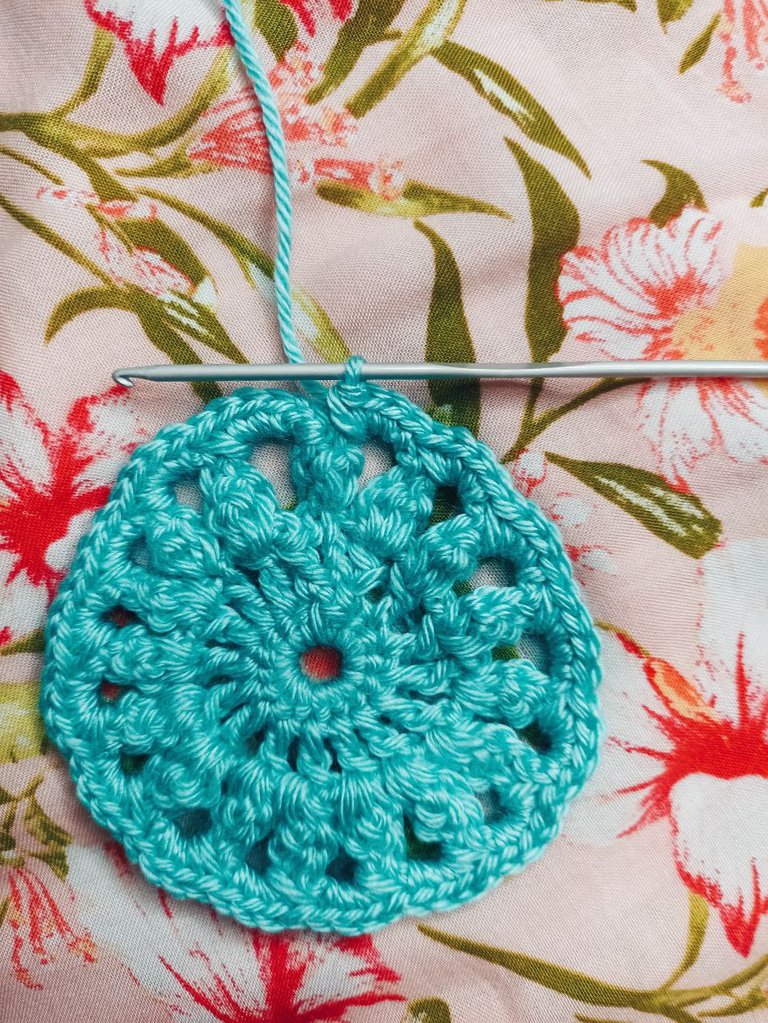
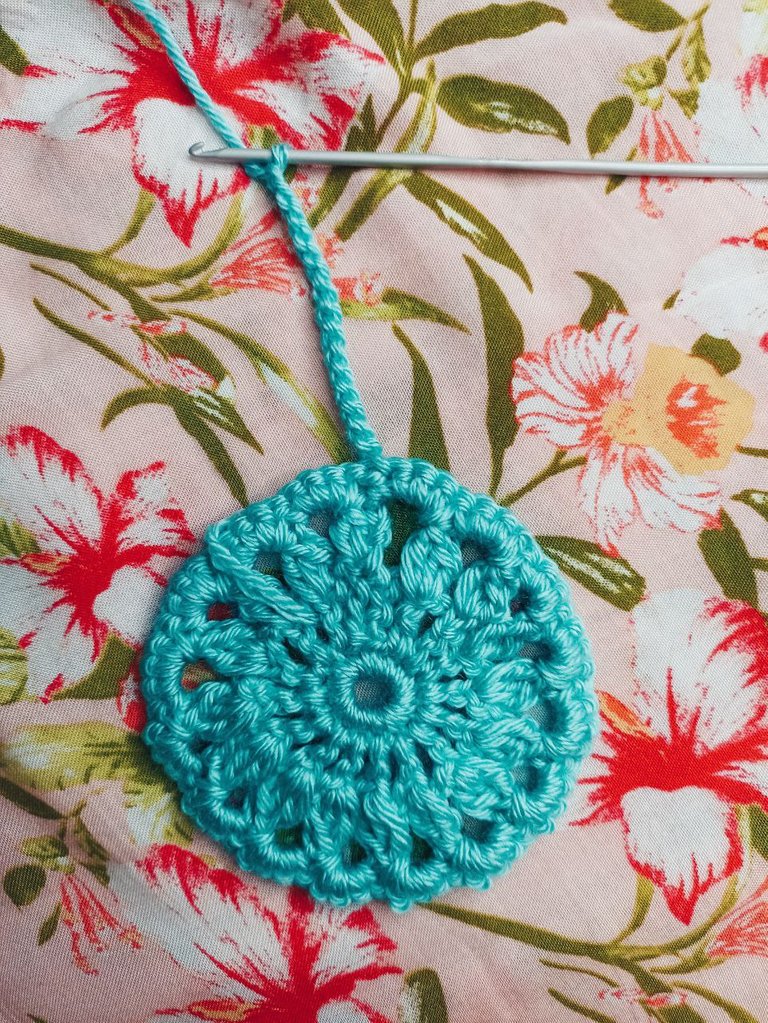
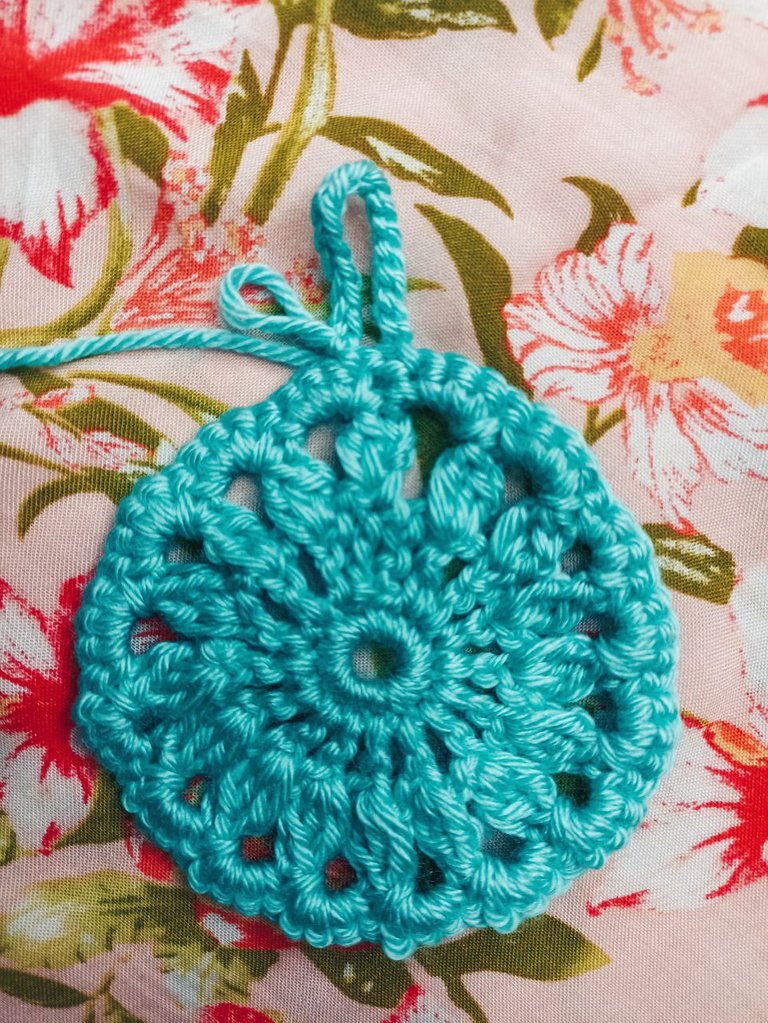
Paso #7: Esta última vuelta la iniciamos realizando una cadena giro la labor y voy a hacer cuatro puntos bajos en cada arco donde hicimos los cuatro puntos cadenas, cuando llegamos a donde estaba el punto alto lo omitimos vamos al siguiente arco y realizamos cuatro puntos bajos, continuamos esta secuencia hasta el final, cuando culminemos los últimos cuatro puntos bajos, buscamos en primer punto bajo que se elaboró y procedemos a tejer un punto deslizado, posteriormente realizamos la cantidad de cadenas que desees según el uso que, le darán al atrapa sueños, es decir de donde lo colgaran, en mi caso elaboré 15 cadenas, se le da vuelta a la labor y en el punto bajo que esta al lado de nuestro punto deslizado realizamos otro punto deslizado formando un aro.
Step #7: This last round we start it by making a chain turn the work and I will make four low stitches in each arc where we made the four chain stitches, when we get to where the high stitch was we omit it we go to the next arc and make four low stitches, we continue this sequence until the end, when we culminate the last four low stitches, we look for the first low stitch that was elaborated and we proceed to knit a slipped stitch, then we make the amount of chains that you want according to the use that you will give to the dream catcher, that is to say where you will hang it, in my case I made 15 chains, we turn the work and in the low stitch that is next to our slipped stitch we make another slipped stitch forming a ring.
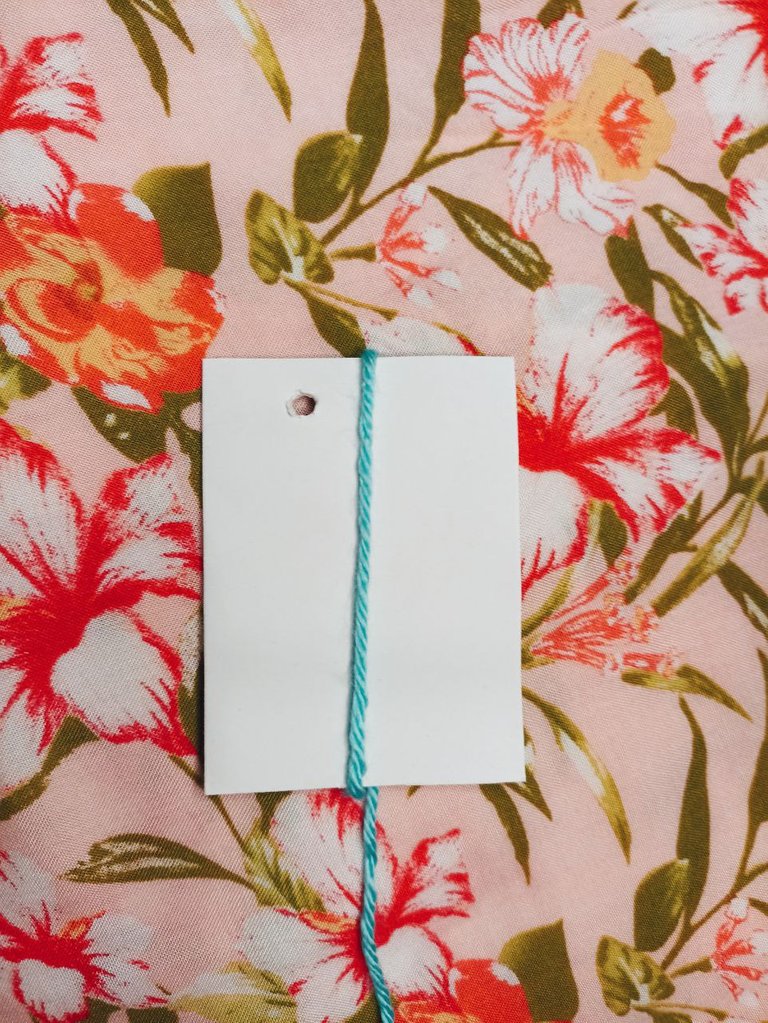
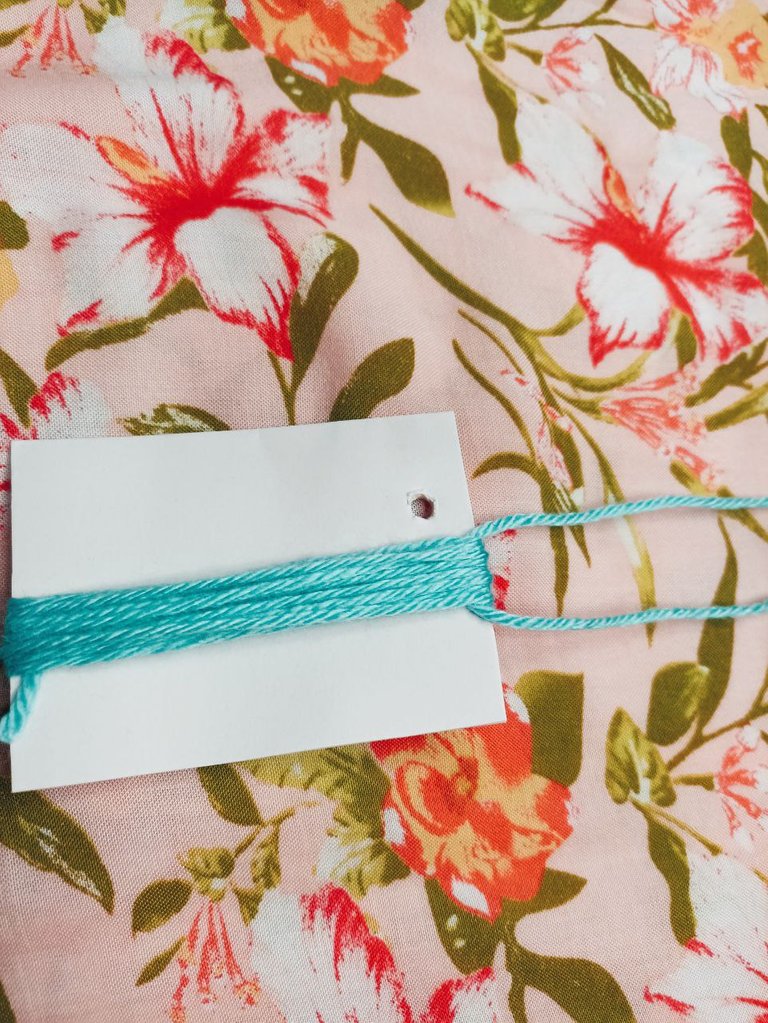
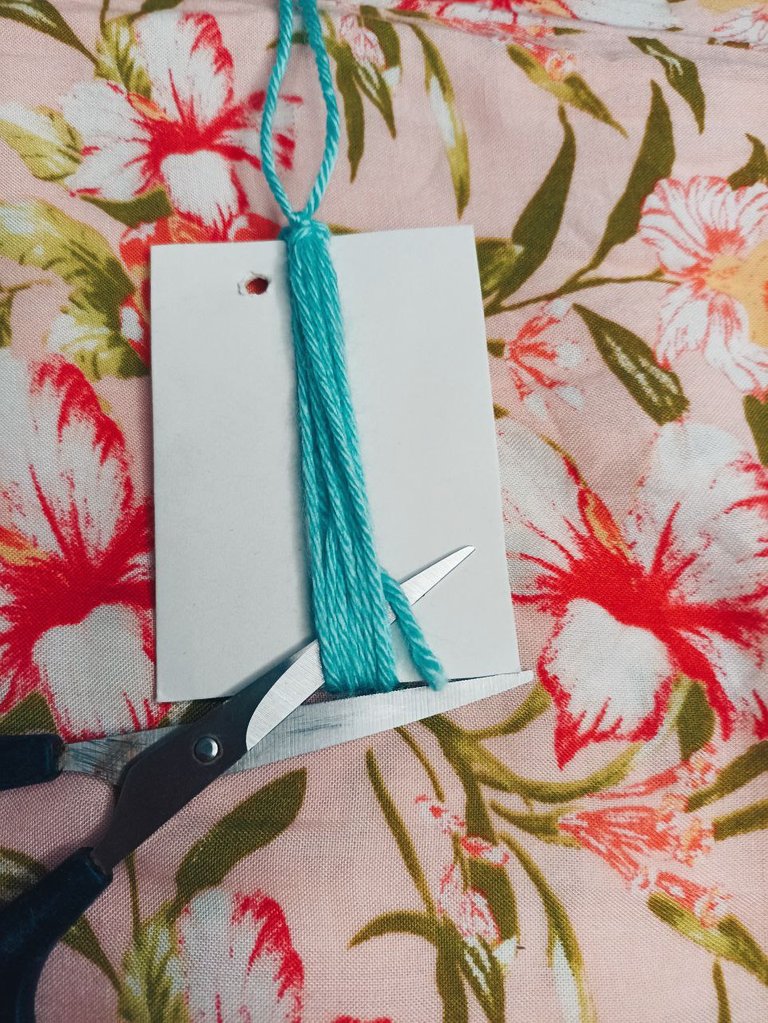
Paso #8: Realización de la borla o tomas un cartón que tenga en largo que desees, tomamos hilo y damos el numero de vueltas que sería el grosor que tendrá la borla, yo coloque 10 vueltas.
Step #8: Making the tassel or take a cardboard that has the length you want, take thread and give the number of turns that would be the thickness that will have the tassel, I put 10 turns.
Paso #9: Tomamos un trozo de hilo aproximadamente de 10 centímetros lo pasamos debajo de todas las cuerdas y anudamos, pasamos a cortar con una tijera el extremo para separar los hilos.
Step #9: We take a piece of thread approximately 10 centimeters long, we pass it under all the strings and knot it, then we cut the end with scissors to separate the threads.
Paso #10: Peinamos bien el hilo, cortamos un hilo de 8 centímetros de largo aproximadamente, dejamos dos centímetros entre el inicio del nudo principal y pasamos a anudar, luego esos hilos restantes los emparejamos y cortamos si es necesario para que tengan la misma medida.
Step #10: Comb the thread well, cut a thread of approximately 8 centimeters long, leave two centimeters between the beginning of the main knot and knotting, then those remaining threads are paired and cut if necessary so that they have the same size.
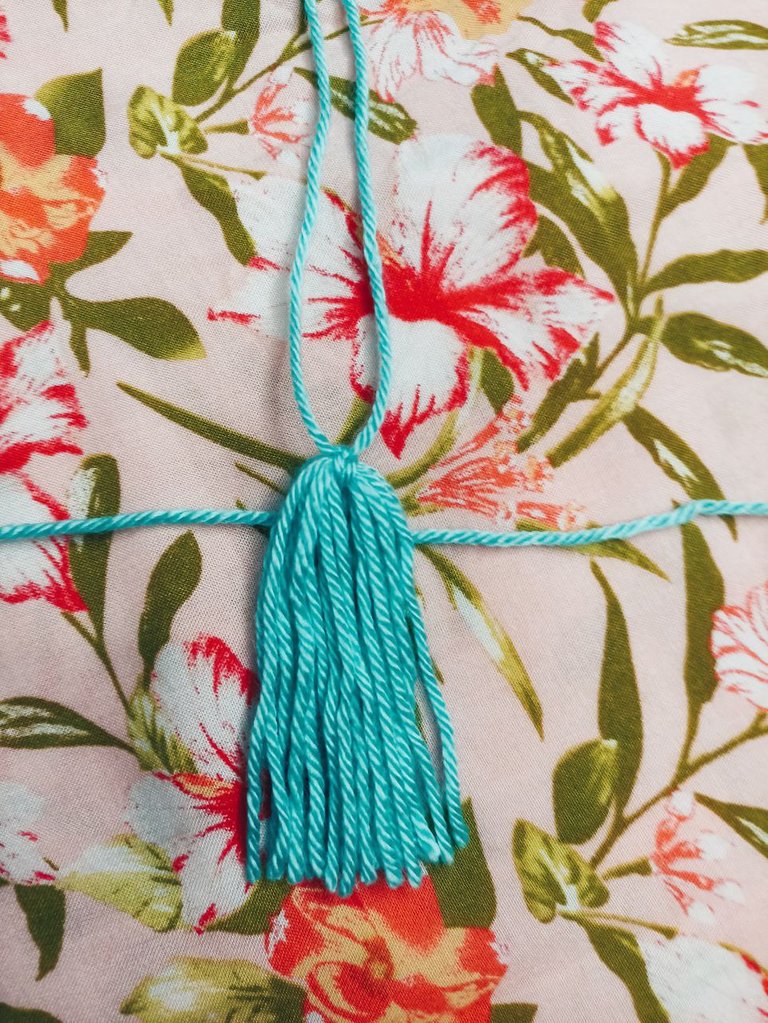


Paso #11: Finalizamos pasando el hilo superior por las ultimas cadenas que realizamos y los posicionamos a nuestro gusto finalizamos anudando muy bien y cortando el hilo sobrante.
Step #11: We finish passing the upper thread through the last chains that we made and we position them as we like, we finish by knotting very well and cutting the excess thread.
Espero se animen a elaborar este hermoso proyecto es bastante sencillo y necesita muy poco material.
- Fotografías tomadas desde mi equipo celular
Que bonito tu trabajo, se ve que te tomaste el tiempo para hacer la fotografía. el color esta genial, siempre he querido hacer uno pero me gustaría en color veis.
Hola hermosa muchas gracias, si trate de que en las fotografías se mostrara al máximo cada paso, anímate a realizarlo esta bastante sencillo y no lleva mucho material. Muchas gracias por tu comentario.
This pretty amazing job thank for sharing
Thank you very much for appreciating the work and for your comment.
Que hermosura, me encanta, gran trabajo, gracias por compartir.
Muchas gracias corazón por comentar eso realmente llena de mucho animo.
PIZZA Holders sent $PIZZA tips in this post's comments:
@hiq.redaktion(5/5) tipped @soybarbie (x1)
Join us in Discord!
Has sido votado por
PROYECTO ENLACE
'Conectando Ideas y Comunidades'
PROYECTO ENLACE es un proyecto de curación de habla hispana enfocado en recompensar contenido de calidad y apoyar autores en su proceso de crecimiento en HIVE.
Creemos y apostamos por el futuro de esta gran plataforma, y estamos muy emocionados de poder hacerla crecer junto a esta comunidad. Así que te invitamos a usar nuestra etiqueta ENLACE y estar atento a todas las actividades que tenemos preparadas y que estaremos publicando en breve.
¿QUIERES AUTOMATIZAR TUS GANANCIAS DE CURACIÓN? SE PARTE DEL PROYECTO ENLACE APOYANDO A NUESTRO TRAIL EN HIVE.VOTE INGRESA AQUÍ PARA CONOCER LOS DETALLES.
¿QUIERES INVERTIR ENLACE? DESCUBRE COMO HACERLO Y GENERAR INGRESOS DE FORMA SEMANAL MEDIANTE TU DELEGACIÓN DE HP AQUÍ TE EXPLICAMOS COMO.
Te invitamos a participar en nuestro servidor de Discord: https://discord.gg/3S9y7BbWfS
Atentamente
EQUIPO ENLACE 2021
Congratulations @soybarbie! You have completed the following achievement on the Hive blockchain and have been rewarded with new badge(s):
Your next target is to reach 600 upvotes.
You can view your badges on your board and compare yourself to others in the Ranking
If you no longer want to receive notifications, reply to this comment with the word
STOPCheck out the last post from @hivebuzz:
Support the HiveBuzz project. Vote for our proposal!
Muy bello accesorio para darle ese toque diferente a nuestras carteras. Me encantó esta idea. Felicidades
[@themyscira] This has turned out really beautifully, we decided to support this great work.
If you want to go from hivian to hivestyler, check out @hiq.magazine. True to the motto: Smart, stylish and sexy 😄
If you have any further questions, please feel free to contact @hiq.magazine via comment or contact us on Discord. Whether we answer is probably in the chain 😉
Have fun and a Highfhive from the HiQ Team
(and a !PIZZA too)
The color is so lovely. And I love the design. These could be made into beautiful earrings too! Maybe a smaller version or the size would do.
Hello, thank you very much, if you can make small starting with fewer stitches, a thinner thread and a crochet according to the thread, they look beautiful earrings, thanks for the idea.
¡Que bonito tejes! Me encantó ese atrapasueños. Voya probar hacer uno.
Muchas gracias corazón, si es bastante sencillo y se hace rapidito.
Hermoso, me gusta ésta creación. Se ve bien preciso el tejido, yo tal vez lo lograría con quince años de práctica y peligrando de que me quede chueco el círculo 😅😅😅
Éxitos amiga 🌹
Hola hermosa, noo para nada una vez das el acabado final de puntos bajos te va quedando redondito es bien sencillo de realizar, muchas gracias por el comentario.