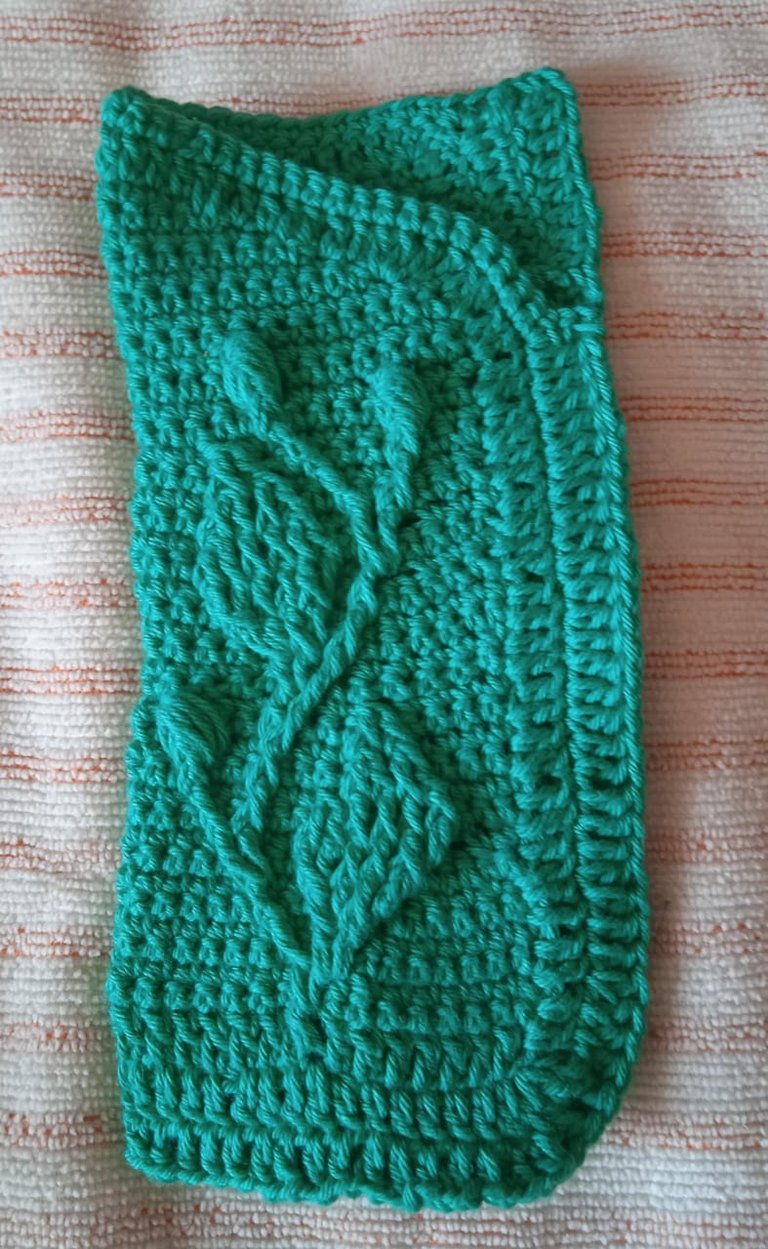
Buenos días a todos los hive amigos. Emocionada y animada me propuse realizar varios proyectos a crochet de utilidad. Para esta ocasión he seleccionado un porta gafas tejido a ganchillo, con hilo de algodón suave y unicolor. Este portagafas es muy práctico porque puede llevarse en la cartera o morral y las gafas están protegidas contra rayones o roturas en la montura. En mi familia casi todos usamos gafas. Por ese motivo me animé a hacer un motivo unisex y bonito que se adaptara a todos.
Good morning to all hive friends. I'm excited and excited and I've decided to make some useful crochet projects. For this occasion I have selected a crochet glasses holder, crocheted with soft cotton yarn and unicoloured. This glasses holder is very practical because it can be carried in a purse or bag and the glasses are protected against scratches or breakages in the frame. In my family almost all of us wear glasses. That's why I decided to make a nice unisex motif that would suit everyone.
Materiales.
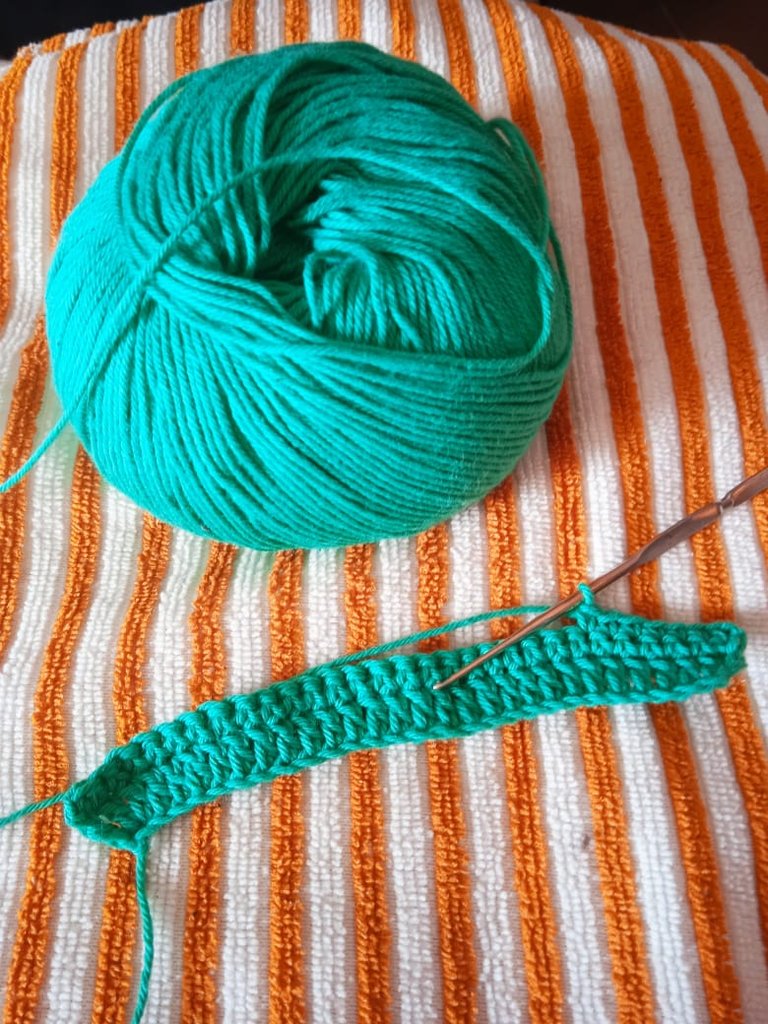
Para realizarlo he escogido 1 ovillo de hilo de algodón color verde medio, el ganchillo 2,5 mm acorde con el ancho del hilo, una aguja lanera para hacer la unión de los lados y tijera.
En cuanto a los puntos utilizados, inicio con cadenetas, luego con media vareta o medio punto para todas las rondas o vueltas, punto alto, punto alto doble y punto triple tejidos al relieve por delante del tejido para hacer la figura de flores, punto deslizado o ciego para culminar las rondas y punto popcorn para formar los botones de la flor en el motivo.
To make it I chose 1 ball of medium green cotton thread, a 2.5 mm crochet hook according to the width of the thread, a wool needle to join the sides and scissors.
As for the stitches used, I started with chain stitches, then with a half stitch or stockinette stitch for all the rounds, double crochet, double crochet and triple crochet knitted in relief in front of the fabric to make the flower pattern, slip stitch to finish the rounds and popcorn stitch to form the flower buttons in the motif.
Inicio del proyecto.
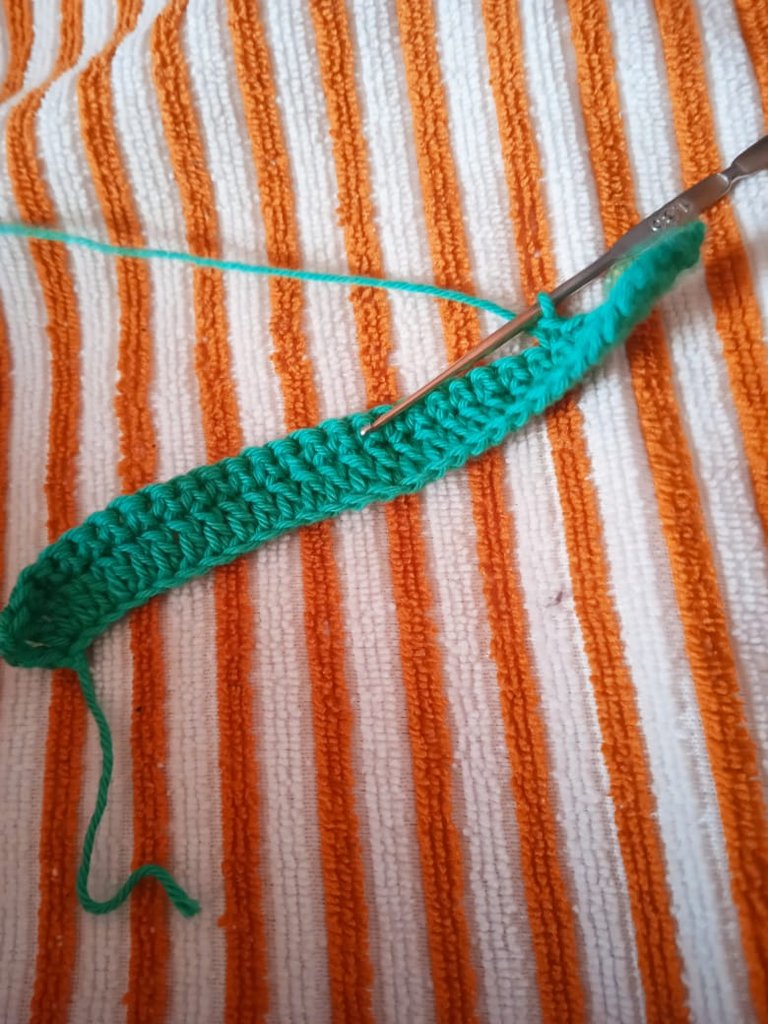
Comienzo realizando la base con 30 cadenetas más 3 cadenetas para subir a la segunda ronda formada por 30 puntos altos, uno en cada cadeneta anterior, los cuales dan un estilo al borde inferior del porta gafas. La tercera ronda consta de una serie de puntos medios y una vareta insertada en la ronda dos, introduciendo la aguja por delante del punto alto para dar inicio al motivo de flores que quedará en relieve.
I start by making the base with 30 chain stitches plus 3 chain stitches to go up to the second round formed by 30 high stitches, one in each previous chain stitch, which give a style to the lower edge of the glasses holder. The third round consists of a series of medium stitches and a slip stitch inserted in round two, introducing the needle in front of the double crochet to start the flower motif that will be in relief.
Desarrollo.
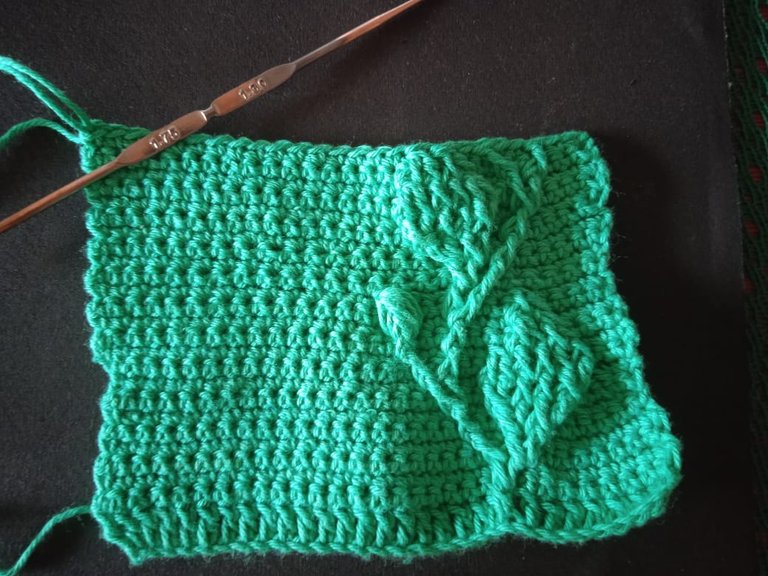
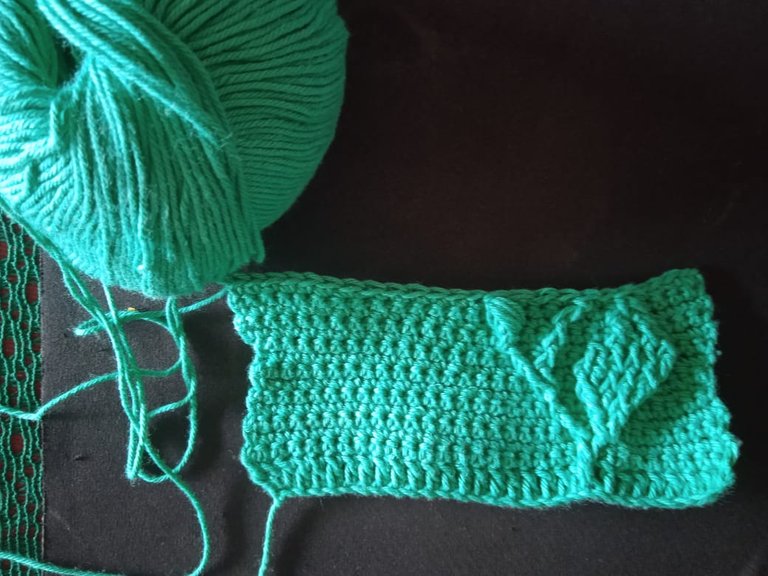
Las rondas siguientes estarán formadas por vueltas de media vareta y en cada vuelta se realiza el motivo con puntos altos en relieve para darle forma al motivo. En este caso, realizo 16 rondas formando la figura de flores y hojas. En cada ronda se inserta el punto relieve pueden ser dos o tres, dependiendo del motivo que se quiera obtener al final. Igualmente se utiliza el punto en relieve para hacer las ramas y hojas y darle un aspecto maravilloso a nuestro proyecto tejeril.
Luego en la última ronda del motivo, en las puntas, se realiza el punto popcorn sobre las varetas en relieve, lo que se visualiza como los botones de una flor. Continúo las siguientes 5 rondas solo con punto medio o media vareta para darle mayor altura al portagafas.
Hago reducción de puntos en la parte superior delantera obteniendo así una abertura para visualizar las gafas y que se vea bonito. Tejo alrededor del proyecto una ronda de puntos altos para darle más amplitud y altura a la bolsa portagafas. Hago un doblez a la mitad y con aguja lanera e hilo de algodón verde, coso los bordes laterales e inferior dando forma de bolsa.
Ya está casi listo, solo falta realizar una ronda de media vareta alrededor del borde superior, que figura como adorno del proyecto y lo hace más llamativo a la vista. Ya está listo el porta gafas.
The following rounds will be made up of rounds of half purl, and in each round the motif will be made with raised high stitches to give shape to the motif. In this case, I make 16 rounds forming the figure of flowers and leaves. In each round, the relief stitch is inserted, there can be two or three, depending on the motif you want to obtain at the end. The relief stitch is also used to make the branches and leaves and give a wonderful look to our knitting project.
Then in the last round of the motif, on the ends, you knit the popcorn stitch over the raised rods, which looks like the buds of a flower. I continue the next 5 rounds only with a stockinette stitch to give more height to the spectacle holder.
I reduce the stitches on the upper front part to obtain an opening to show the glasses and make it look nice. I knit around the project a round of high stitches to give more width and height to the glasses bag. I make a fold in the middle and with a wool needle and green cotton thread, I sew the side and bottom edges giving the shape of the bag.
Now it's almost ready, all that's left is to make a half round of half a loop around the top edge, which is a decorative feature of the project and makes it more eye-catching to the eye. The glasses holder is now ready.
Detalle del punto en relieve.
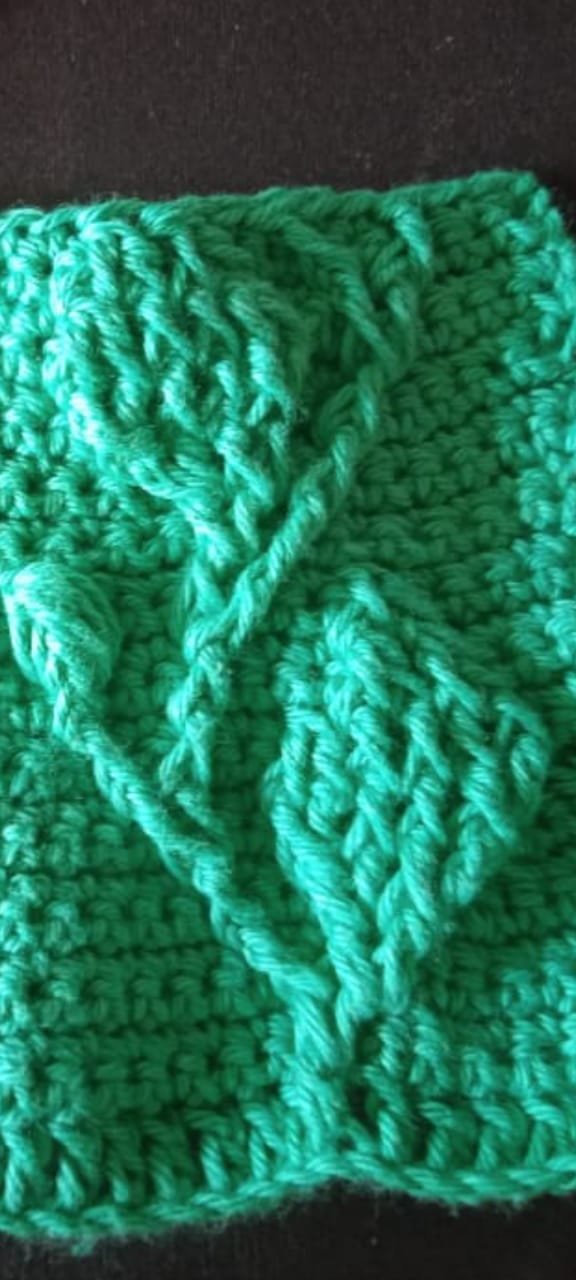
Se puede observar aquí el punto alto insertado por delante del punto medio de la vuelta anterior, formando así el punto en relieve, lo que le dará la figura de adorno del porta gafas.
Realizar proyectos al ganchillo o crochet siempre es reconfortante, mientras tejes liberas el estrés, ocupas el tiempo libre en algo productivo y tienes la satisfacción de haber hecho una figura que quizá le guste a alguien o la necesite. Y lo más agradable es que a partir de un ovillo de hilo de cualquier material ( lana, estambre, algodón, seda) o color se puede hacer infinidad de proyectos como peluches, mantas, blusas, medias, trajes de baño, vestidos, gorros, guantes, amigurumis y mas.
Here, you can see the high stitch inserted in front of the middle stitch of the previous round, thus forming the relief stitch, which will give the glasses holder its decorative shape.
Making crochet projects is always comforting, while knitting you release stress, you occupy your free time with something productive and you have the satisfaction of having made a figure that maybe someone likes or needs. And the nicest thing is that from a ball of yarn of any material (wool, worsted, cotton, silk) or colour you can make an infinite number of projects such as stuffed animals, blankets, blouses, socks, swimsuits, dresses, hats, gloves, amigurumis and more.

El portagafas me llevó dos días realizarlo. Espero que les guste tanto como me gusta a mí hacerlo. Más adelante seguiré mostrando otros proyectos en mente que tengo pendientes. Si tienen alguna sugerencia positiva o comentario estaré atenta. Gracias por ver mi trabajo tejeril. Hasta la próxima y que la sigan pasando bonito.
The glasses holder took me two days to make. I hope you like it as much as I like making it. Later on I will continue showing you other projects I have in mind. If you have any positive suggestions or comments I will be attentive. Thanks for watching my knitting work. See you next time and have a nice time.
Las fotos se tomaron con mi cámara.
Traducido al inglés por DeepL
The photos were taken with my camera.
Translated by DeepL
¡Que lindo!. Los puntos en relieve llaman mi atención. Espero ver tus próximos tejidos. Abrazos.
Gracias por tu comentario. Un abrazo 🤗