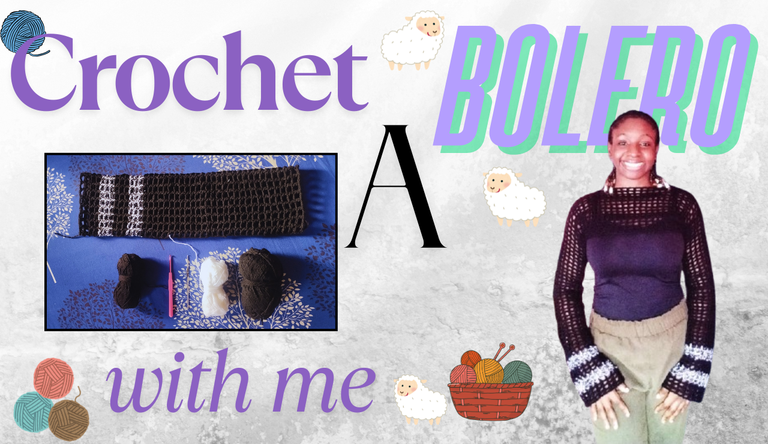
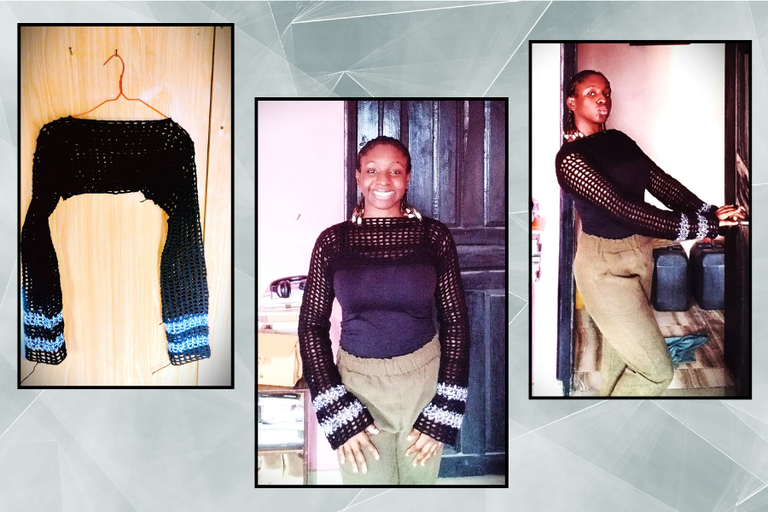
It's bolero time!!!
While on one of my usual Pinterest searches for inspiration on my next crochet project, I came across one piece of item that I think it's not talked about well enough. And that is a shrug, also known as a bolero.
It is basically a sleeve attached to a small bodice that hangs from the neck and falls just above the chest area. It caught my eye because of the endless ways of styling it.
Designed my Image using Canva
It's so easy and adaptable to any outfit. You could pair it with a sleeveless dress or a sleeveless top. Now that I think about it, you could pair it with anything sleeveless, and it would fit perfectly.
And one good thing about it is, it's simple to make. An experienced crocheter could take one look at it and figure out how to make it, even when it's their first time making it.
I have to warn you, it does involve a lot of repetitive stitches, but which crochet project doesn't?
So enough dilly-dallying, and let's get right into it.
Tools Needed
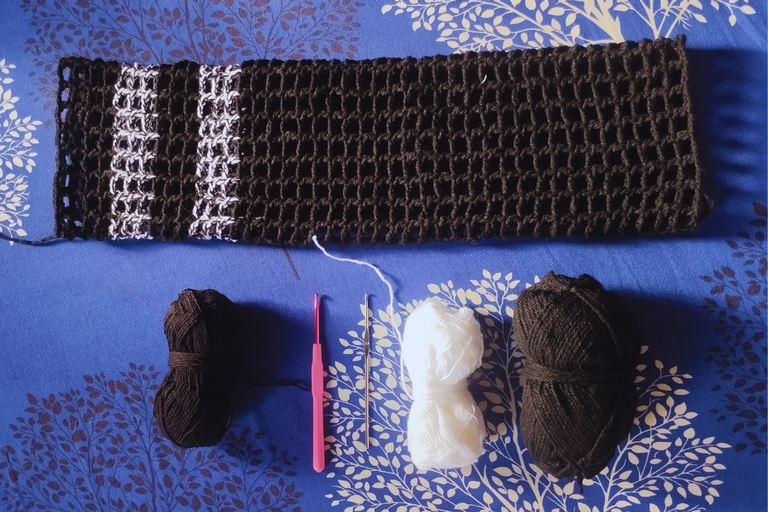
Any yarn of your choice
Scissors
Crochet pin
Procedure
Disclaimer: this was my first time making it, so I started with the sleeves; however, if I were to do it all over again, I would start with the bodice instead.
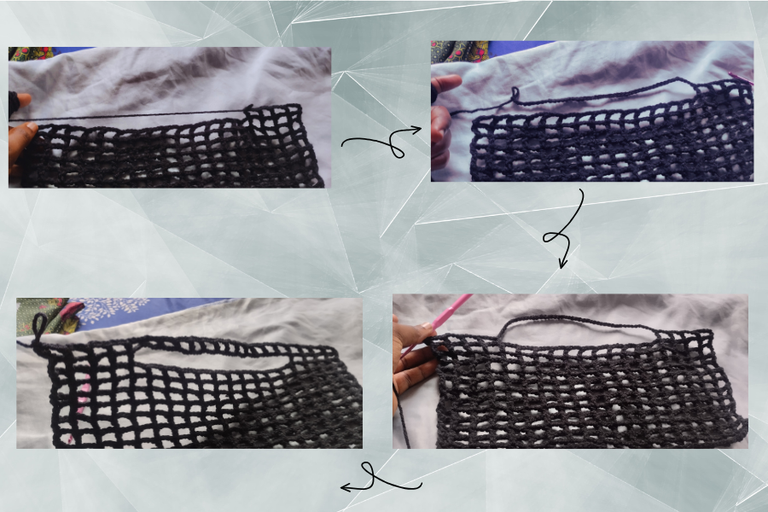
Sleeves
I started with a slipknot, and then I made 72 chains in total. I chose 72 after measuring it by placing it around my elbow with an outstretched arm. My elbow has the largest circumference in my hand, hence the decision to use its measurement.

After making the chains, I connected the end to the beginning using a slip stitch. After this, I made four single chains, then made one double crochet into the fourth chain on the ring, skipping three chains in between.
After this, I made three single chains, then one double crochet into the fourth chain on the ring. I repeated this till I got to the end of the ring. Then I slip stitched the last three single chains into the first set of single chains I made in the first round.

I then repeated the sequence of stitches in the second round and the third round and the fourth round and on and on and on, until the sleeve was long enough to cover the entire length of my arm, from shoulder to just below my wrist.
At some point I changed colors and introduced a mix of black and white.
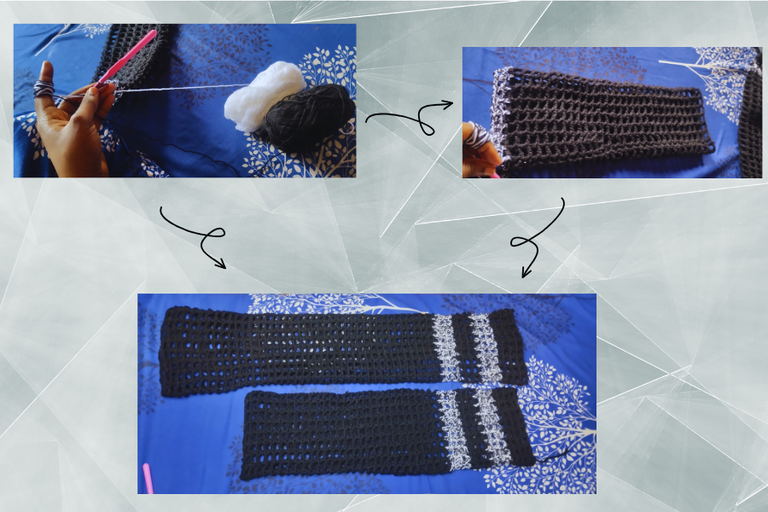
I noticed that the width was not wide enough to accommodate my shoulder, so as I crocheted, I increased the number of single chains from three to four. That had a widening effect on the shoulder area.
Bodice
When I was done with the sleeves, I moved onto the bodice. I started by making single chains long enough to stretch from the middle point of my shoulder to the other shoulder.
Then I made six extra stitches and inserted my pin into the fourth chain of the single chains I'd made. I did one double crochet, then three single chains and one double crochet into the fourth chain.
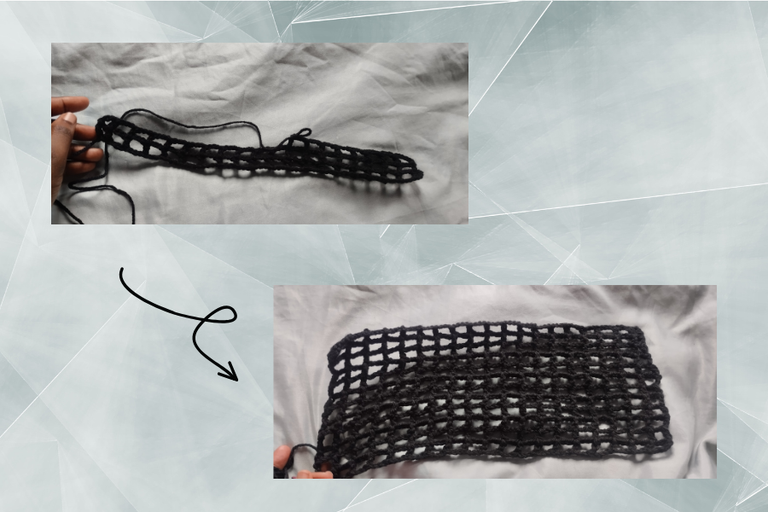
I did this till the end of the stitch, then I made six single chains and inserted one double crochet on top of the previously done double crochet on the lower level.
Then I repeated the one double crochet, three single chains, and one double crochet into the fourth chain sequence till the end of the row, and then all over again to make a new row.
I did this until I had 12 rows, which I was satisfied with. It was time to make the neck hole. I continued the sequence for four rows, then I proceeded to make 36 single chains, which would serve as the neck hole.
After this, I inserted a double crochet into the fourth chain double crochet from the other end. Then three chains, one double crochet in the fourth chain, and so on till the end of that row.
Then moving onto the next rows, I crocheted the normal sequence, but when I got to the chains for the neck hole, I continued the sequence, ensuring that I followed the same pattern till the end.

After I was done, I crocheted another 12 rows for the back, and then I was done.
Attaching Bodice to Sleeves.
Along the lower end of the bodice, I made nine single chains on the last stitch of the front and attached it to the last stitch on the back. Then I made three single chains and inserted them into the stitch on the upper level.
I made a double crochet, three single chains, and then one double crochet into the fourth chain on the single chains I made earlier. Then three single chains and one double crochet on the fourth chain till the end of the nice stitches, after which I attached the last stitch into the bodice.
Then I proceeded to make a double crochet + a single chain + a double crochet on top of the double crochet on the lower level. I did this pattern all around the shoulder ring. I made two rows of this and did the same on the other side.
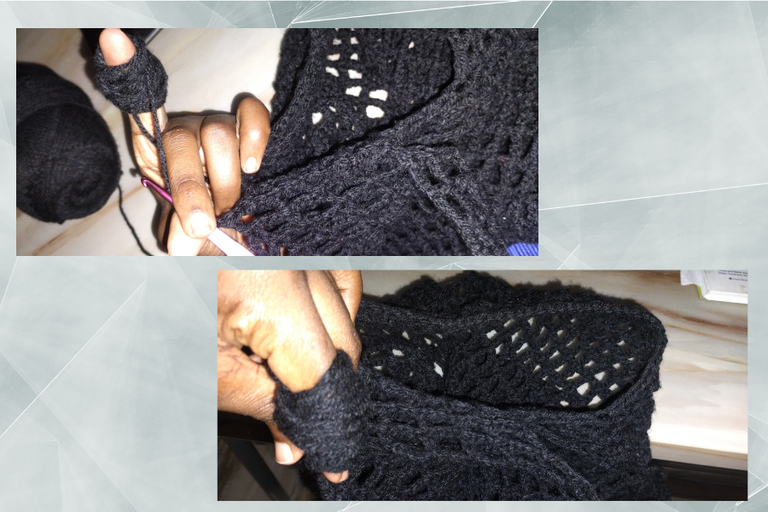
Then I attached the sleeves by inserting a slip stitch onto one of the spaces on the sleeves and making three single chains, then one double crochet into a space on the shoulder rim of the bodice, then three single chains and one double crochet into the next space on the sleeve
So three chains + one double crochet onto the bodice + three chains + one double crochet on the sleeves. I repeated this pattern all around until the sleeve was fully attached to the bodice.
Then I did the same for the other hand.

And just like that, I had made a crochet shrug, perfect for the chilly seasons. Thank you if you reached this part of the tutorial. I'm not oblivious to the fact that this might have been a little confusing, but kindly give it a little patience.
All images used are mine..
the bolero looks amazing!. Perfect for adding a stylish touch to any outfit. Great job.
I loved your knitting pattern, I love how it looks combined with the blouse, I would like one for myself 🤭, you did a nice job, greetings 🥰
Thank you so much🤗
Hopefully you could follow the pattern and make one for yourself, is not difficult at all.
Thanks for stopping by.