Hello, dear readers
It’s woodworking time!
Buen día, estimados lectores.
¡Es hora de trabajar!
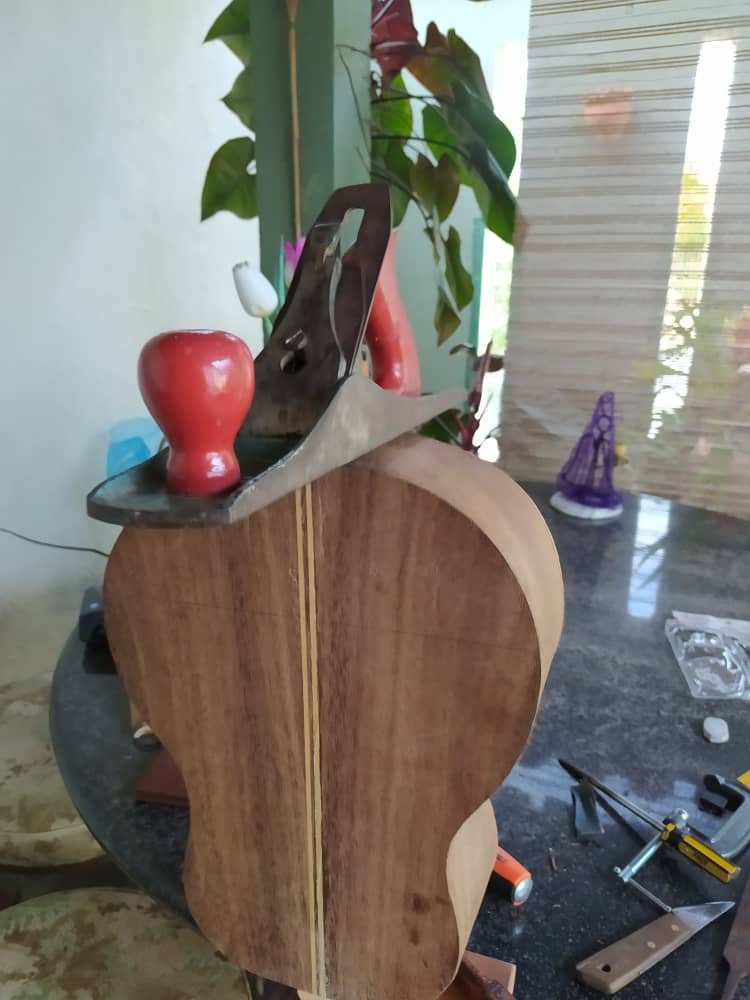
So, what comes next after the cuatro is closed? Easy, it's time to work on it's ornaments, bridge, saddle and nut. Let's tackle the former first as these are pieces that in the structure of the cuatro. Also, let me show you what a week of investing in the workshop looks like. I had the chance to get some tools last week. It's just a little bit, but you don't build an instrument from tree trunk. You need pieces.
¿Qué sigue después de cerrar el cuatro? ¡Eso es fácil! Es hora que trabajar en los adornos, puente, cejilla y cejuela. Vamos con lo primero. Después de todo, estas piezas son parte de la estructura del instrumento. Además, dejen que les muestre la inversión de la semana. Tuve la oportunidad de comprar herramientas para el taller. Son un puñado de cosas, pero un instrumento no se arma de un tronco. Primero se necesitan piezas.
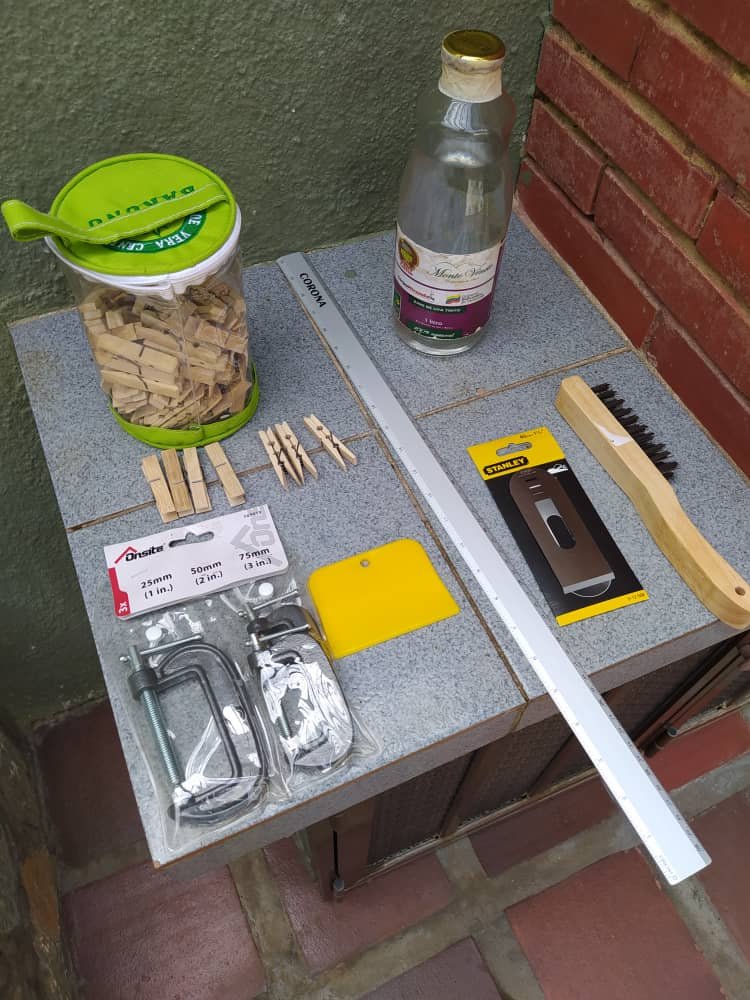
[A plane's blade, clamps, wooden pegs, a metal brush, a metal ruler, and a spatula. New additions to the toolshed]
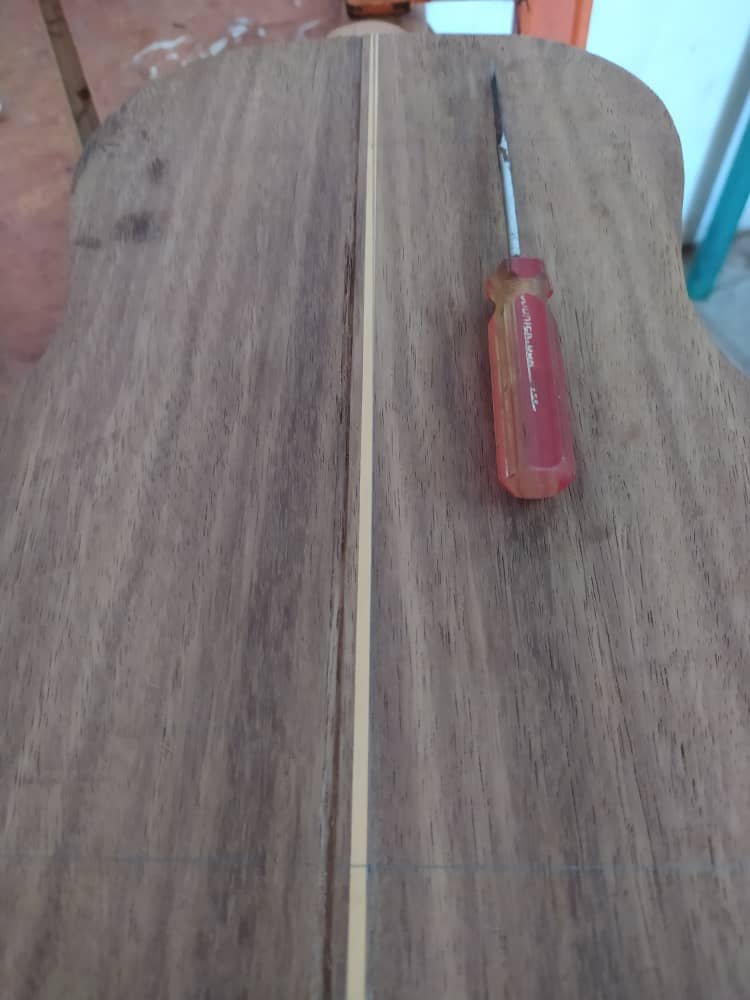

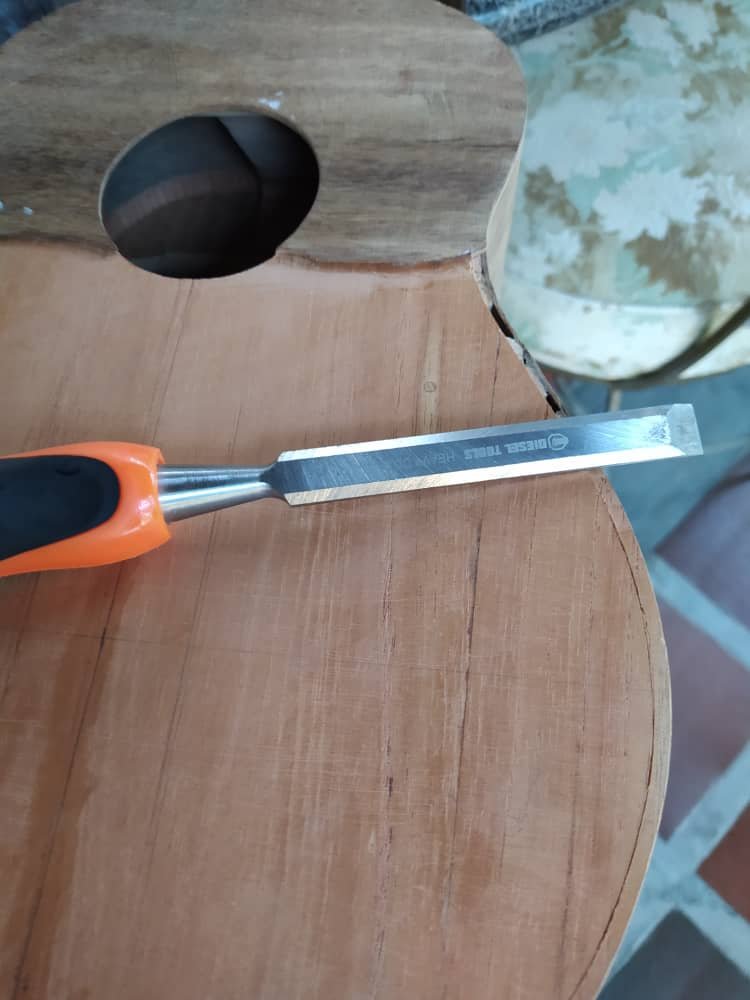
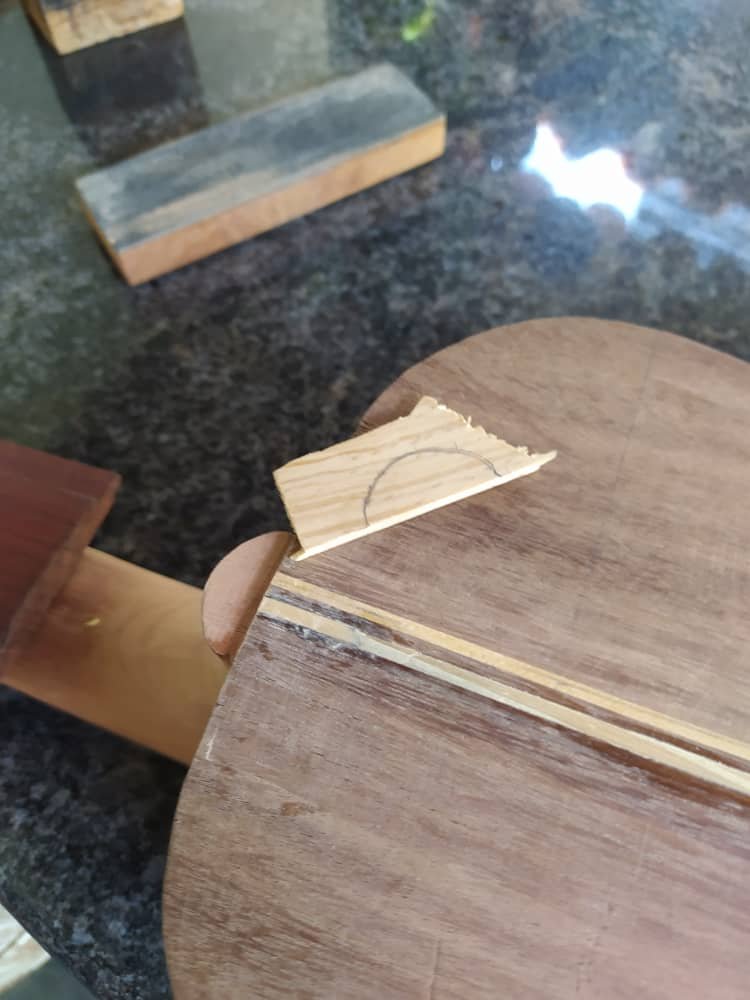
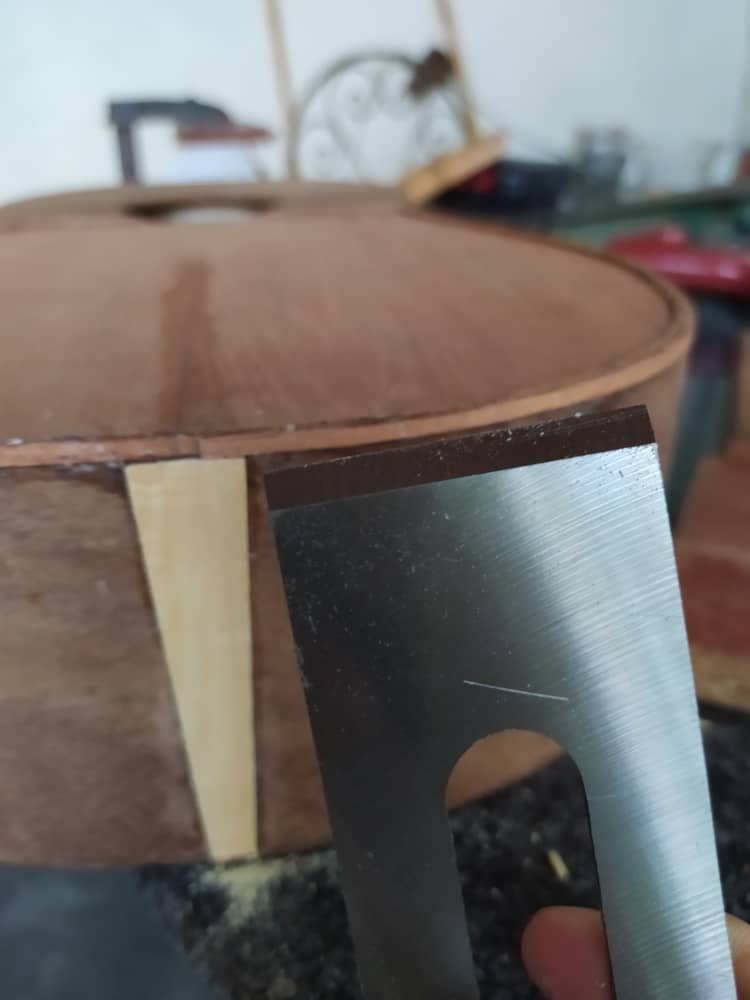
Back in the workshop again to show the progress to the teacher, we decided to get some inlays in the cuatro: another strip of wood on the back and profiles of the soundboard. You can see the start of the process. First, you need to mark down the path of the pieces; then with a chisel and a steady hand remove the material carefully. We don't want to break something in this stage.
De regreso en el taller para mostrar el progreso a mi profesor, decidimos colocar unos adornos en el cuatro: otra tira de madera en el fondo y los perfiles de la tapa armónica. Aquí se puede apreciar el comienzo de este proceso. Primero, se marcan los espacios que van a ocupar estas piezas; luego, con un formón y buen pulso se remueve el material con cuidado. No queremos romper algo en esta etapa.
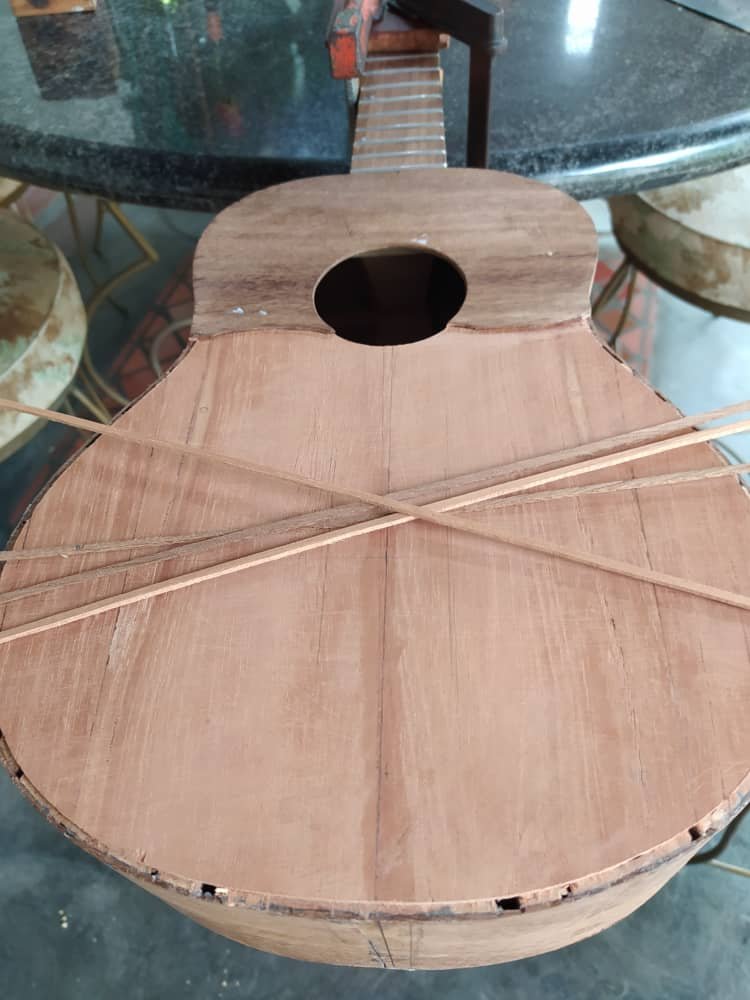
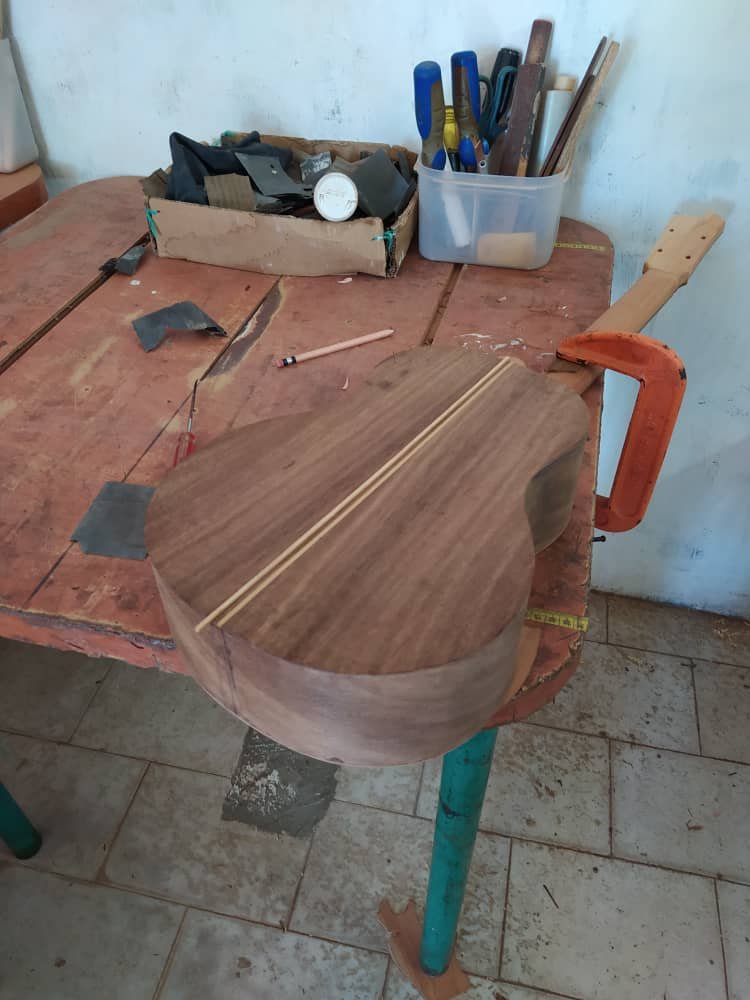
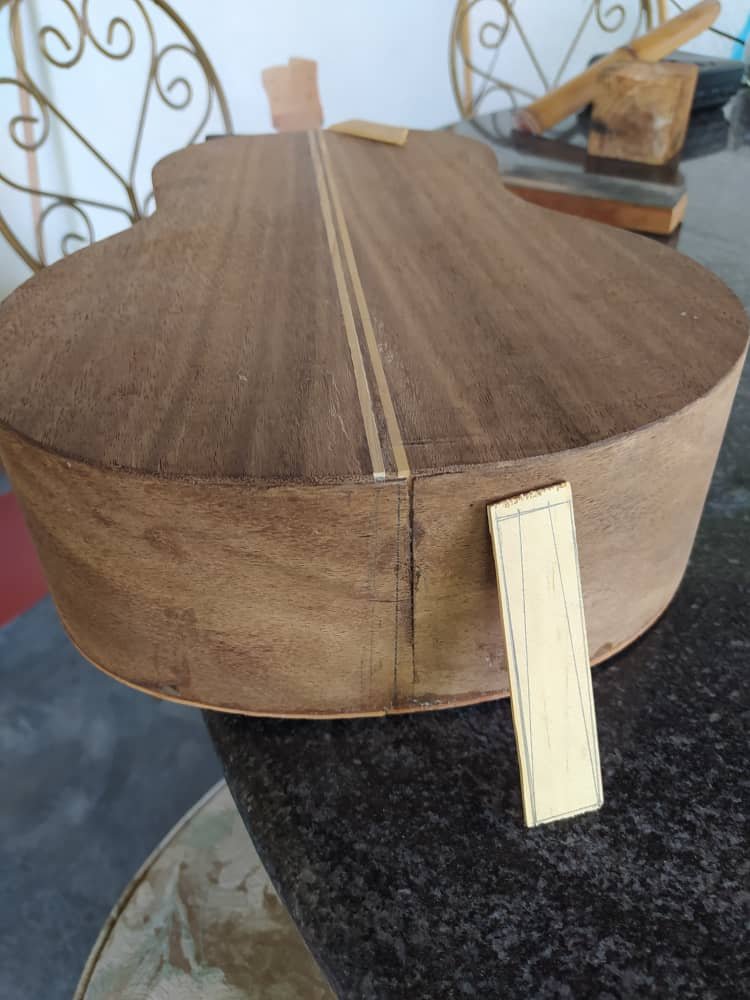
Back at home, we finish the process by gluing the strip on the back and removing the material from the sound board.
De regreso en casa, terminamos este proceso pegando la tira decorativa en el fondo y removiendo el resto del material de la tapa armónica.
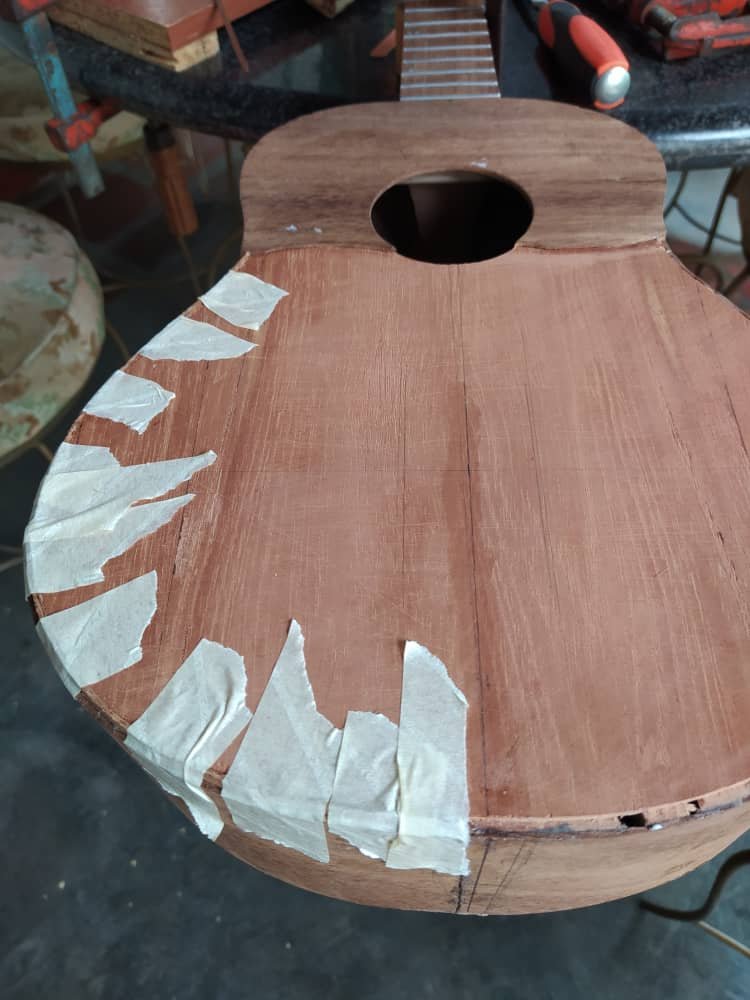
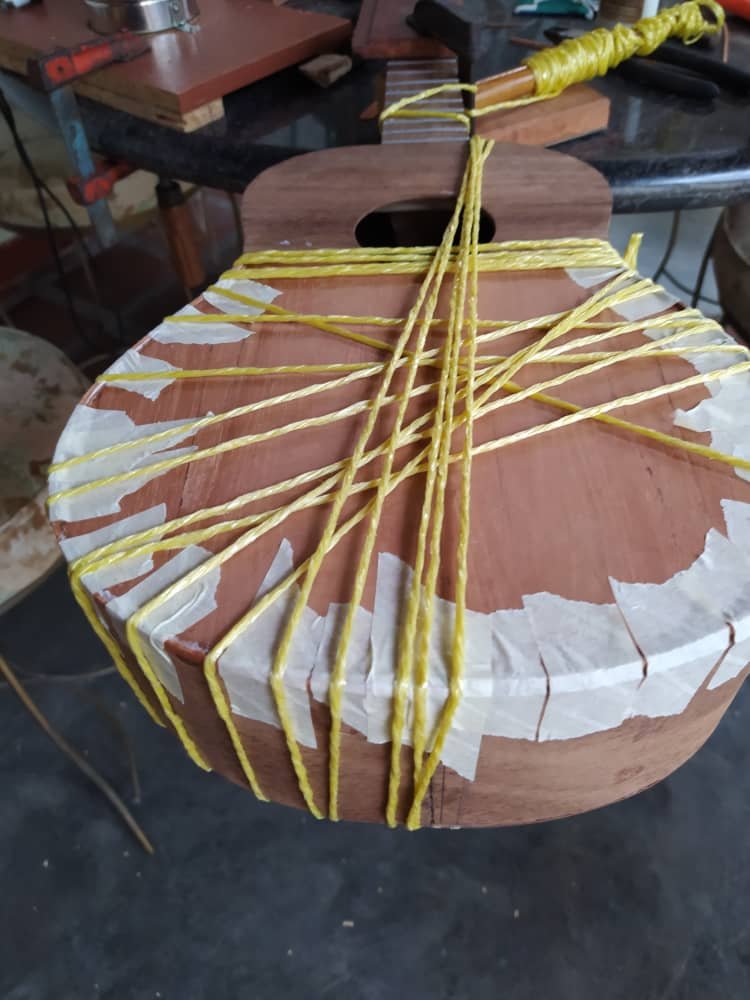
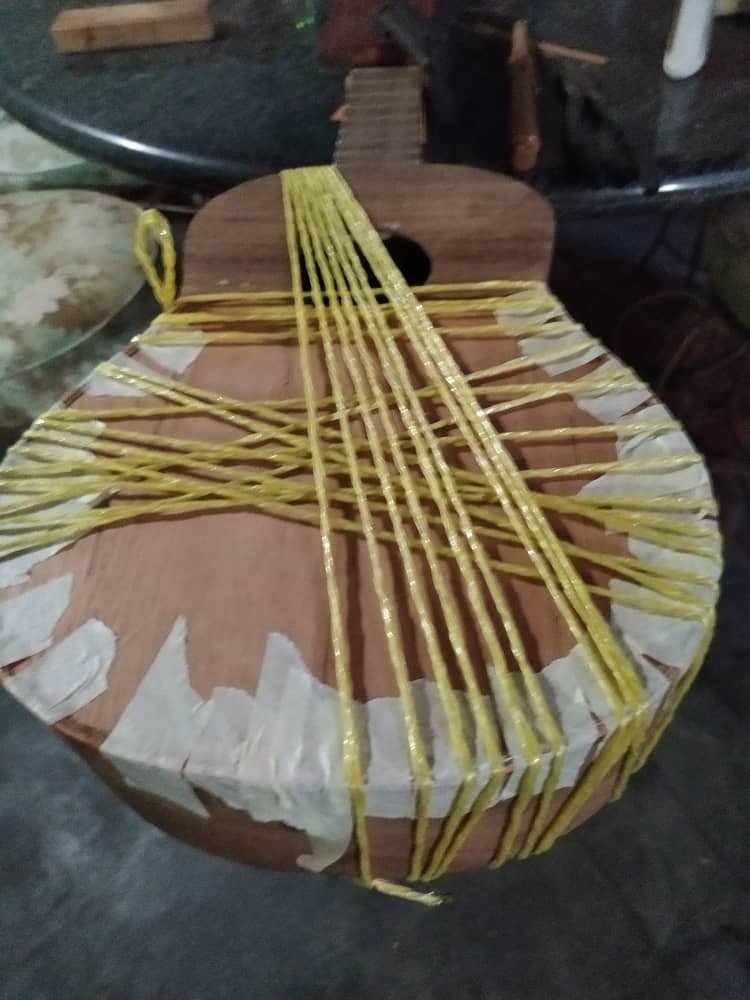
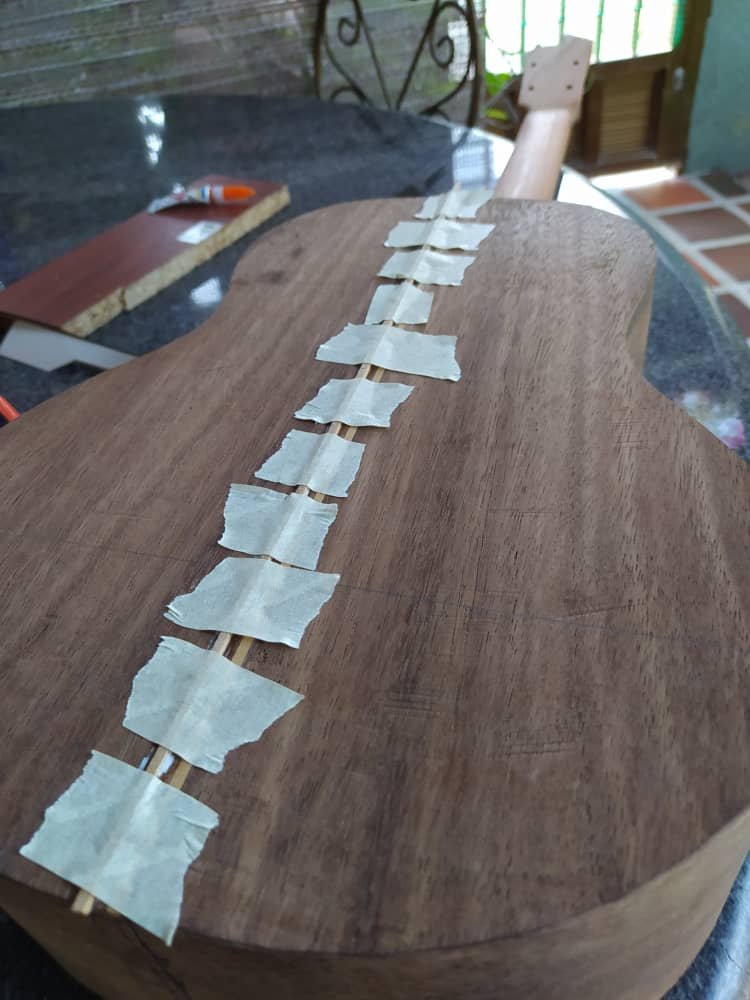
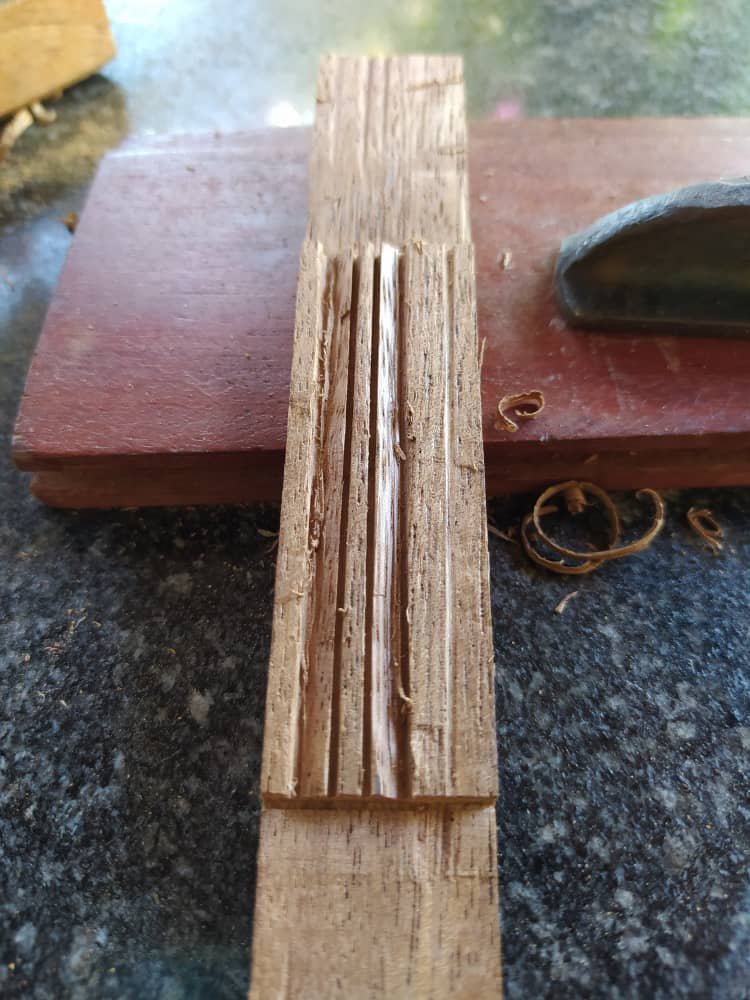
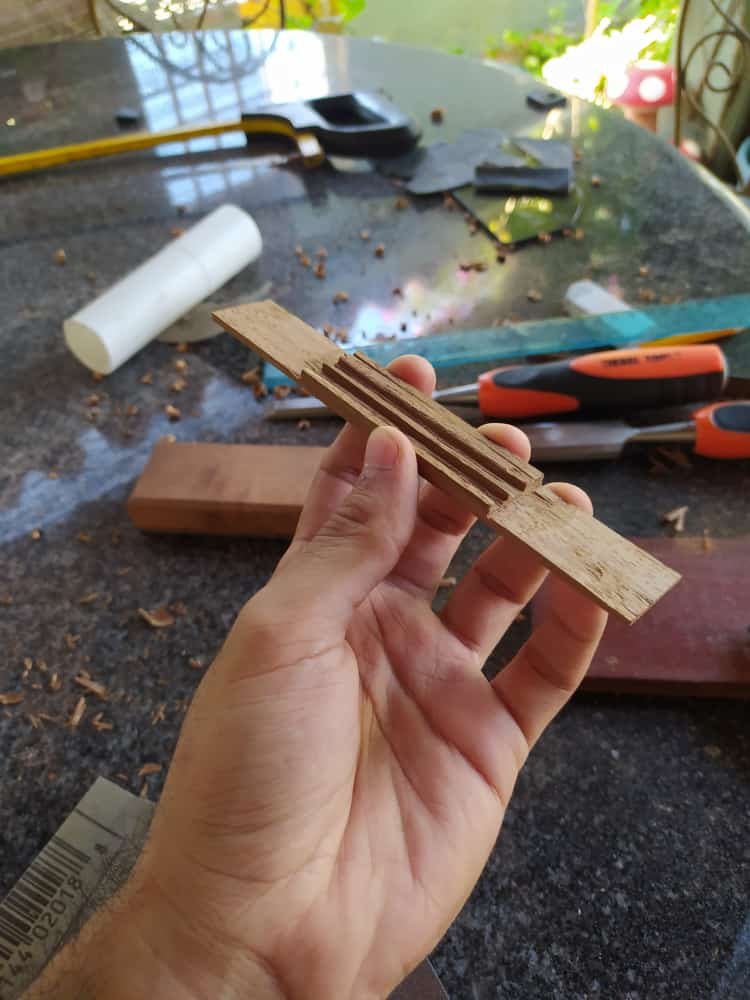
Gluing profiles is stressful. Imagine bending a piece of wood so thin it almost breaks in every turn. This is what tends to happen in this process. Also you need some help or some extra limbs to do this on your own -not really, this was my first time doing this-. There are different techniques for this task. You can glue all the profiles at the same time, but this requires skills. High skills. Those I lack -for the moment-. I decided to go one strip at a time and fix them in place with tape and then with cord. As you can see, the results were good.
Pegar los pefiles es un estrés. Imagínense doblar una pieza de madera tan fina que se rompe en cada vuelta. Esto es lo que pasa en este proceso. Además, se necesita ayuda o brazos extra para hacer esto -no realmente, pero esta fue mi primera vez. Hay varias técnicas para cumplir con esta labor. Se puede pegar todos los perfiles al mismo tiempo, esto requiere habilidad. Habilidades impecables. Esas que no tengo -todavía. Decidí hacerlo uno a la vez y fijarlos con cinta y luego con conderl. Como puede ver los resultados fueron buenos.
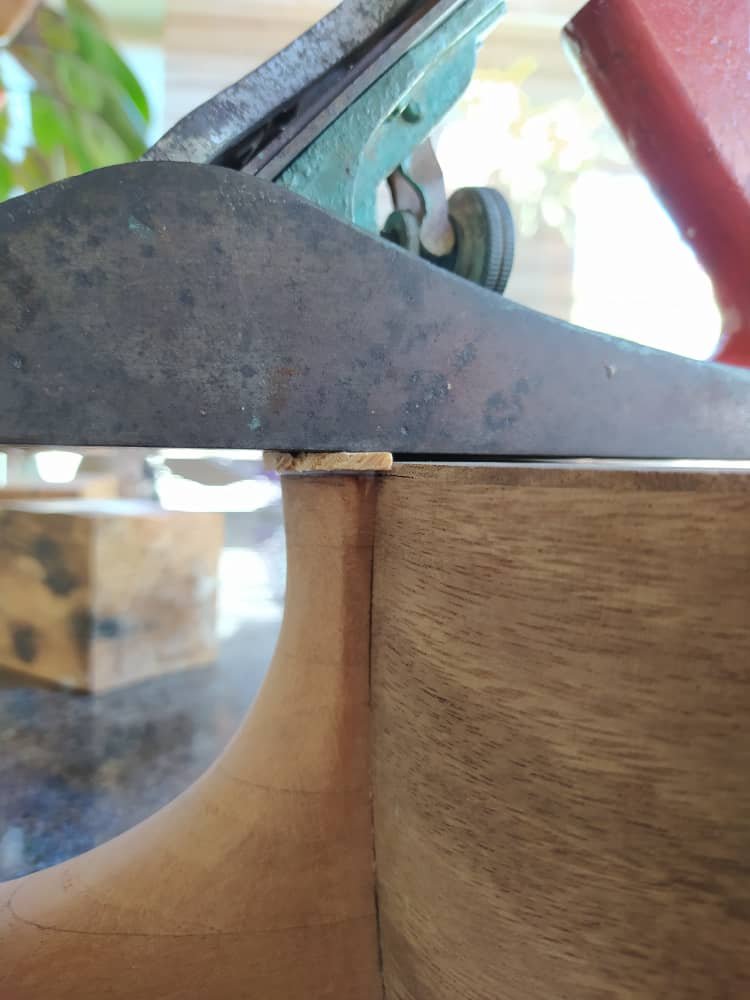
These are other ornaments that are less of a hassle. You can see they are decorations for the heels. And they are pretty simple to make. The lower one requires carving a part of the sides just in the union of these pieces. Besides that, there's not much trouble in doing this.
Estos adornos son más simples. Como pueden ver son adornos para los tacones. Son fácil de hacer. El inferior requiere tallar la sección donde se une los aros. Dejando eso de lado, no hay inconvenientes mayores para hacer esto.
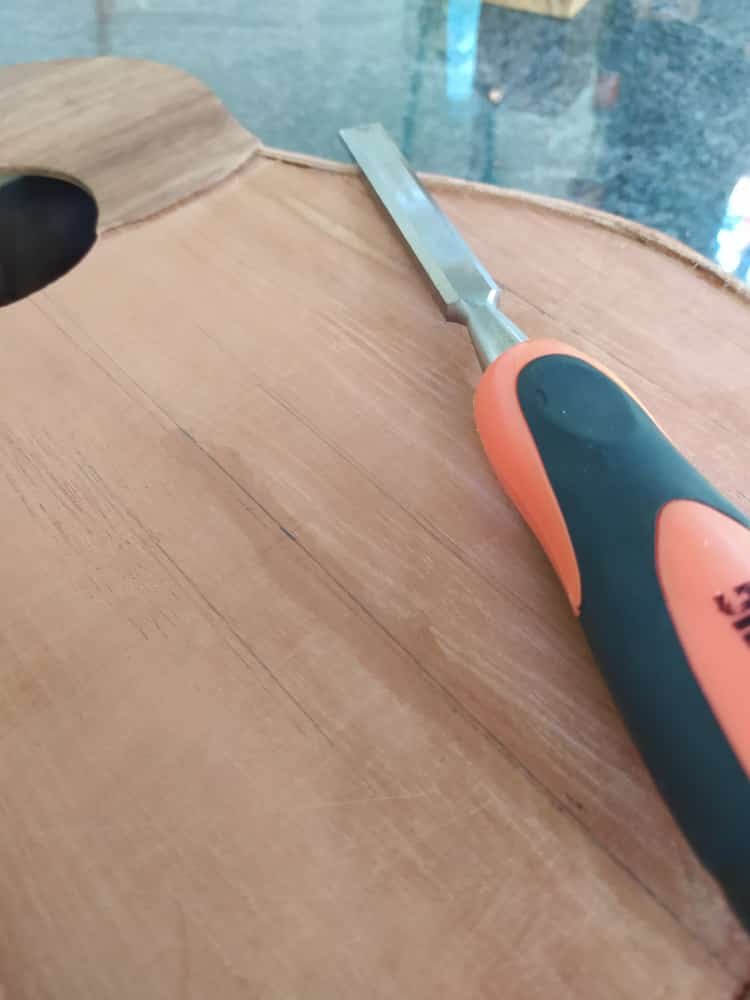
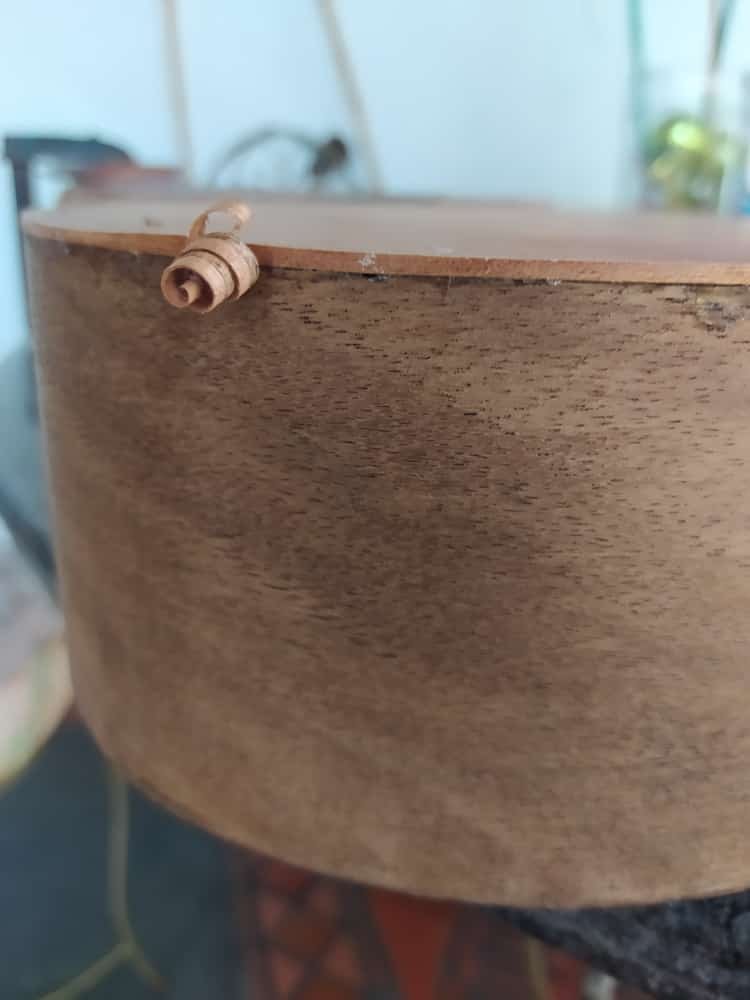

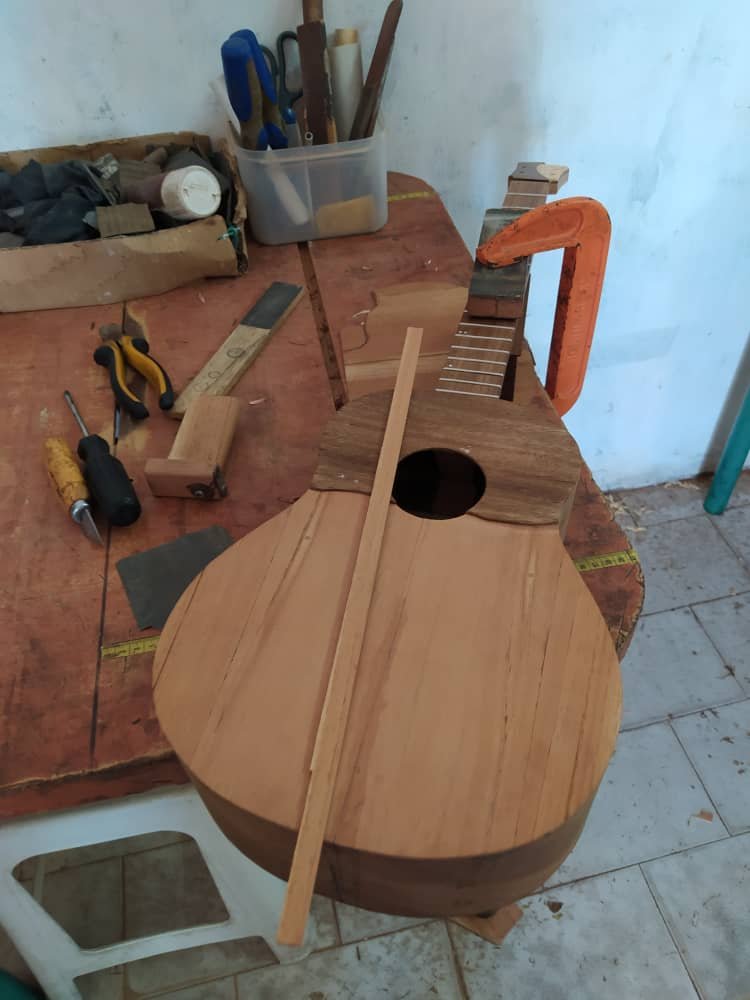
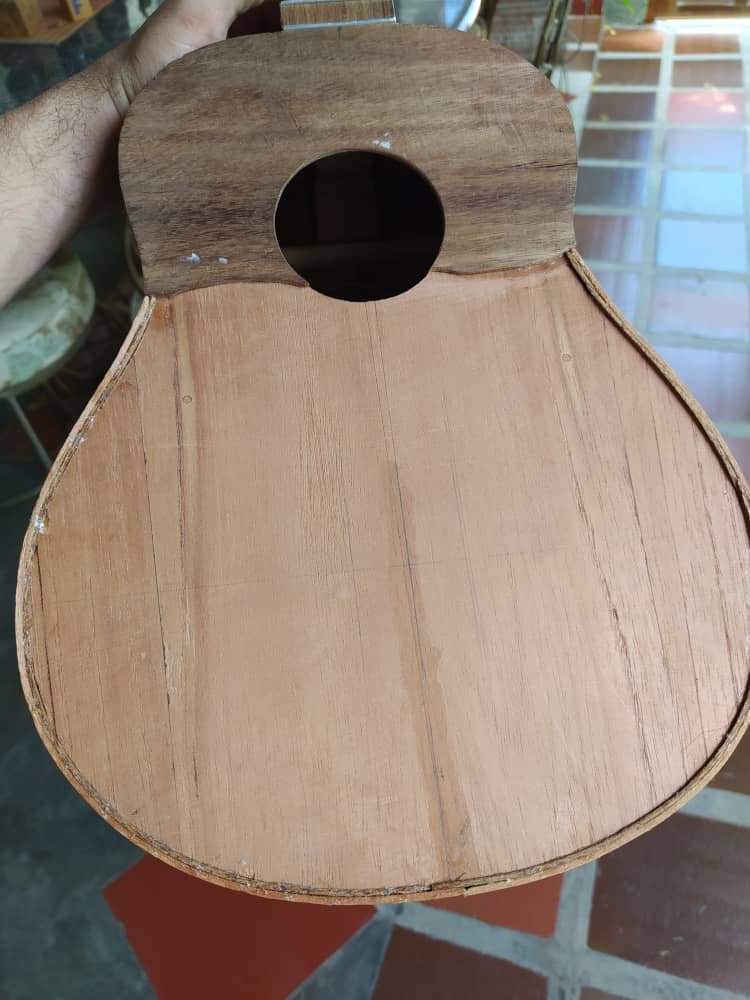
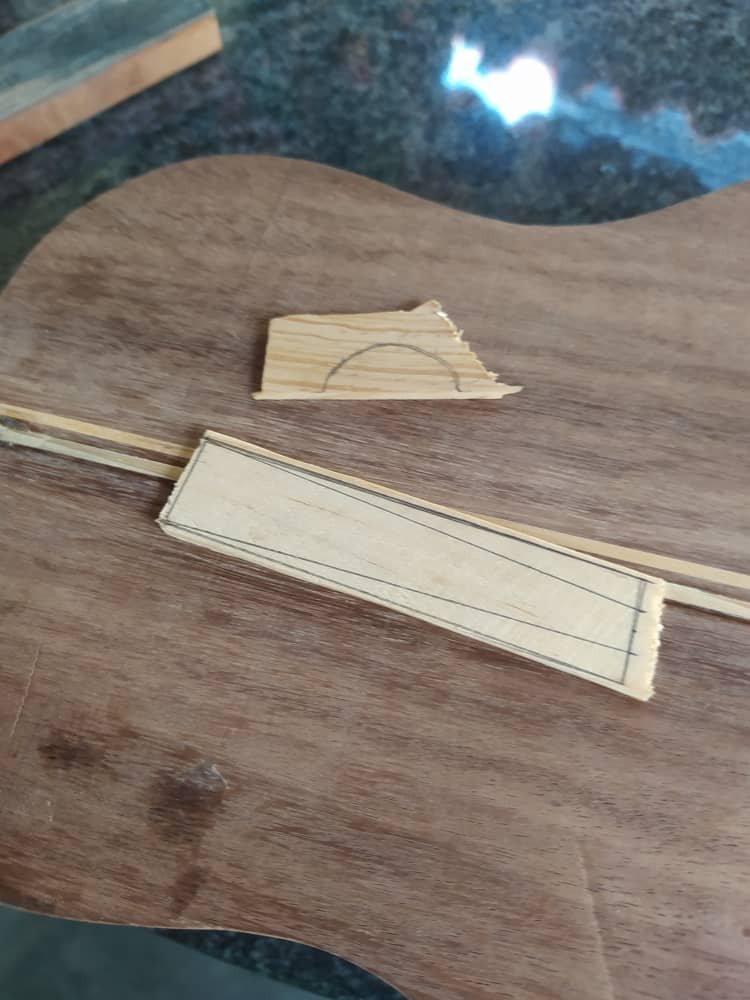
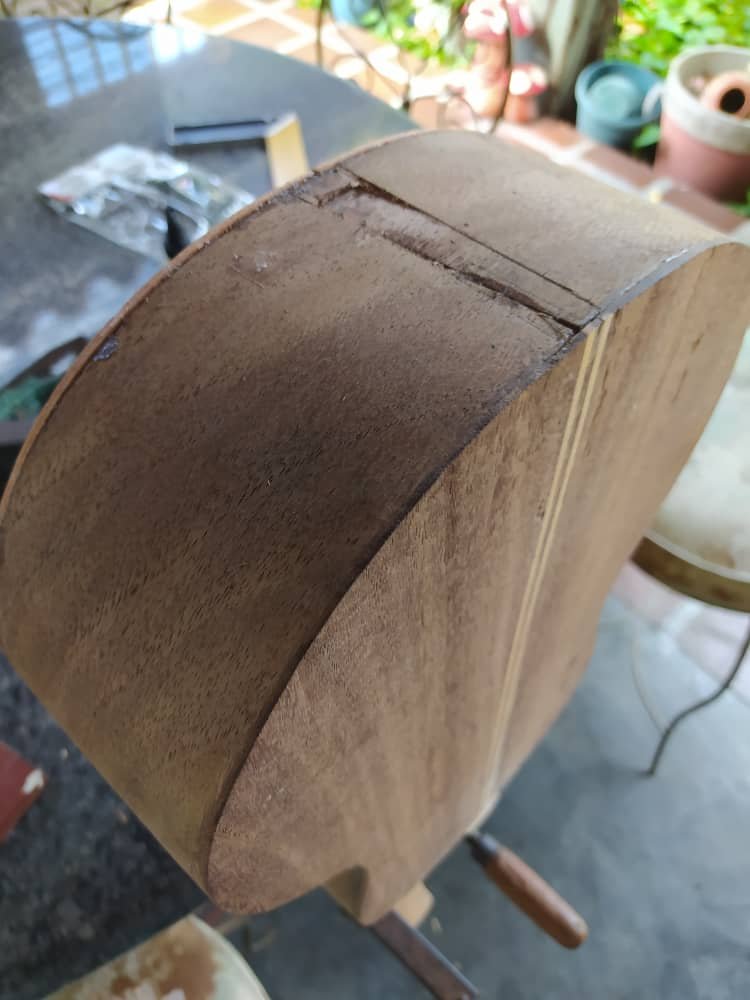
This final part is about carving. When the profiles are in place, it's time to get a chisel and carefully remove the excess material. Once that is done, you can see how good they look. Then the other important piece to carve is the bridge. It's on this piece where the strings will rest and this piece is in charge of sending the vibrations down into the sound board. Carving it by hand with not many tools was a challenge.
Esta última sección es de taller. Cuando los perfiles están en su lugar, hay que retirar el material de sobra. Una vez listo esto, se puede apreciar cómo se ven realmente. Lo otro es tallar el puente. Esta pieza sirve de apoyo a las cuerdas y es la encargada de pasar las vibraciones a la tapa armónica. Hacer esto a mano sin muchas herramientas a disposición fue un reto.
That is all for this entry. Thanks a lot for reading. See you in the next chapter.
Eso es todo por esta ocasión. Gracias por leer. Nos vemos en el próximo post.
All the pictures used in these post were taken with my phone.
Todas las fotos en este post fueron tomadas con mi teléfono.
aunque faltó la foto del trabajo terminado, imagino quedó hermoso... excelente construcción. Saludos.
Todavía no hay foto de eso porque no he terminado el cuatro. Cuando esté listo, se verá por acá.
sii , la espero, pero sin duda segura estoy será un cuatro hermoso. SAludos y Bendiciones
Es la idea. Gracias por el apoyo. Saludos 😄
Thanks a lot for your support!
Thank you for sharing this amazing post on HIVE!
non-profit curation initiative!Your content got selected by our fellow curator @stevenson7 & you just received a little thank you via an upvote from our
You will be featured in one of our recurring curation compilations and on our pinterest boards! Both are aiming to offer you a stage to widen your audience within and outside of the DIY scene of hive.
Join the official DIYHub community on HIVE and show us more of your amazing work and feel free to connect with us and other DIYers via our discord server: https://discord.gg/mY5uCfQ !
If you want to support our goal to motivate other DIY/art/music/homesteading/... creators just delegate to us and earn 100% of your curation rewards!
Stay creative & hive on!
Thanks a lot for your support! I delegated some HP to show my support to the community. I hope I can delegate more in the future. 😄
Congratulations @bertrayo! You have completed the following achievement on the Hive blockchain and have been rewarded with new badge(s) :
Your next target is to reach 19000 upvotes.
You can view your badges on your board and compare yourself to others in the Ranking
If you no longer want to receive notifications, reply to this comment with the word
STOPCheck out the last post from @hivebuzz:
Nuestras coordenadas: